1.7 Making and Using Compost - Center for Agroecology ... Organic Farming/1.7_Compost.pdf · Making...
40
1.7 Making and Using Compost Introduction 3 Instructor’s Lecture Outline 5 Detailed Lecture Outline for Students 9 Demonstration 1: Garden-Scale Compost Production 17 Instructor’s Demonstration Outline 18 Students’ Step-by-Step Instructions 21 Hands-On Exercise 25 Demonstration 2: Field-Scale Compost Production 27 Assessment Questions and Key 29 Resources 34 Appendices 1. Compost Food Web 36 2. Compost Materials and Temperature Chart 37 3. C:N Ratio of Common Compost Materials 39 4. Calculating C:N Ratios for Compost—A Rough Guide 40
Transcript of 1.7 Making and Using Compost - Center for Agroecology ... Organic Farming/1.7_Compost.pdf · Making...

1.7 Making and Using Compost Introduction 3
Instructor’s Lecture Outline 5
Detailed Lecture Outline for Students 9
Demonstration 1: Garden-Scale Compost Production 17
Instructor’s Demonstration Outline 18
Students’ Step-by-Step Instructions 21
Hands-On Exercise 25
Demonstration 2: Field-Scale Compost Production 27
Assessment Questions and Key 29
Resources 34
Appendices
1. Compost Food Web 36
2. Compost Materials and Temperature Chart 37
3. C:N Ratio of Common Compost Materials 39
4. Calculating C:N Ratios for Compost—A Rough Guide 40

Making and Using Compost2 | Unit 1.7

Making and Using Compost Unit 1.7 | 3
Introduction
Introduction: Making and Using Compost
unit Overview
High-quality compost is one of the essential organic matter inputs used to manage soil fertility in organic farming and gardening systems. In this unit students will learn the fundamental concepts and practices used to produce quality compost with aerobic high-temperature composting techniques. The lecture introduces the biology of the composting process and the critical elements involved in successful compost production. The demonstrations provide instructions on the materials, suggested content, and activities for teaching students the basic skills and knowledge needed to produce high-quality compost on both field and garden scales. Using step-by-step instructions and a suggested hands-on exercise, students will build and track the progress of a garden-scale compost pile.
MOdes Of instructiOn
> LECTURE (1 LECTURE, 1–1.5 HOURS)
The class lecture outline reviews the benefits of composting and the biology of the composting process, emphasizing the key factors required for quality compost production.
> DEMONSTRATION 1: GARDEN-SCALE COMPOST PRODUCTION (1–1.5 HOURS)
The garden-scale compost demonstration details how to construct, troubleshoot, and assess aerobic hot compost piles, including a step-by-step outline for students to follow.
> HANDS-ON ExERCISE FOR STUDENTS (3 HOURS INITIALLy; MONITORING OvER 6 MONTHS)
This exercise takes students through the process of building and monitoring a garden-scale compost pile over several months.
> DEMONSTRATION 2: FIELD-SCALE COMPOST PRODUCTION (1 HOUR)
The demonstration outline details how field-scale compost windrows are made and monitored.
> ASSESSMENT QUESTIONS (1–2 HOURS)
Assessment questions reinforce key unit concepts and skills.
Learning Objectives
CONCEPTS
•Thebenefitsofaerobichotcompostingandthebenefitsof compost in soil
•Thedifferentstagesofthebiologicalcompostingprocessand the key composting organisms responsible at different stages
•Thekeyfactorsforaerobichotcompostingincludingcarbon-to-nitrogen ratio, moisture, aeration, and volume
SKILLS
•Howtoassesscompostmaterials
•Howtobuildacompostpile
•Howtotroubleshoot,turn,andtrackacompostpile
•Howtoassessfinishedcompostforvarioususes

Making and Using Compost4 | Unit 1.7

Making and Using Compost Unit 1.7 | 5
Instructor’s Lecture Outline
Lecture Outline: Making and Using Compost
for the instructor
A. Pre-Assessment Questions 1. What is compost?
2. What are some types of composting and how do they differ?
3. Why is aerobic, hot composting favored for agricultural/horticultural purposes?
4. What are advantages of composting over letting materials rot on surface or turning in raw materials (e.g., crop residues, raw manure, sawdust)?
B. Benefits of Composting 1. Advantages of the aerobic, high temperature composting process a) Stabilizes nitrogen b) Kills most pathogens and weed seeds c) Introduces wide population of microbes to the organic matter d) Reduces volume of wastes e) Allows for use of raw materials not appropriate for direct use f) Degrades many contaminants g) Recycles organic matter on site
2. Benefits of compost in the soil a) Improves soil structure, resulting in improved drainage, gas exchange, workability b) Increases moisture retention c) Releases nutrients slowly, increases Cation Exchange Capacity (CEC) d) Increases number and diversity of microorganisms in soil e) BufferspH f) Suppresses disease g) Plays a key role in organic management of soil fertility
3. Discuss potential disadvantages of composting a) Cost and time—labor, special equipment b) Space needed—taking production area c) Odor or other impacts on neighbors d) Regulations (larger producers)
C. Biology of the Composting Process 1. Compost ecosystem overview a) What makes composting happen? Wide range of decomposers b) Decomposer organisms play different roles (refer to appendix 1, Compost Food Web)
2. Key compost organisms and stages of composting a) Bacteria i. Aerobic bacteria key to first stages—feed on simple carbons like plant saps first ii. Multiply quickly iii. Carbon for energy, nitrogen for building bodies and reproduction iv.HeatofpileiscreatedasbacteriabreakdownorganicmatterandrespireCO2
Making and Using Compost6 | Unit 1.7
Instructor’s Lecture Outline
b) Compost temperature curve and bacteria (refer to appendix 2, Compost Materials and Temperature Chart)
i. 50˚–113˚F: Mesophilic (mid-temperature-loving) bacteria in first 24–48 hours ii. 113˚–150˚F: Thermophilic (heat-loving) bacteria iii. 150˚F and above: May be too hot for thermophilic organisms to survive;
temperatures optimally should remain at 150˚ or below iv. 120˚F and below: Mesophilic bacteria repopulate, but fungi, actinomycetes,
yeasts, and molds dominate this stage of composting c) Actinomycetes i. A type of bacteria, though grow as hyphae (strands) like fungi ii. Produce greyish, cobwebby growths that gives compost earthy smell iii. Decompose complex carbon like chitin and cellulose iv. Responsible for some disease suppression d) Fungi i. Decompose complex carbon compounds like chitin and cellulose ii. Improve soil structure by physically binding soil particles into aggregates iii. Suppress disease e) Macroorganisms: Earthworms and other later immigrants i. Though not always present in finished compost, macroorganisms feed on the
pile’s earlier inhabitants ii. Discuss examples from Compost Food Web: Nematodes, mold mites, springtails,
wolf spiders, centipedes, sow bugs, earthworms, ground beetles
D. Overview of Key Environmental Conditions for Aerobic, Hot Composting Briefly list the key factors, explaining that each will be discussed in detail in E–I, below
• Carbon-to-nitrogen(C:N)ratioofmaterials
• Moisturecontentofmaterials
• Air(airspacewithincompostpile)
• Surfaceareaofcompostmaterials
• Volumeofcompostpile
• Turningandtrouble-shooting
E. Compost Materials: Key Considerations 1. Carbon-to-nitrogen (C:N) ratio a) Define carbon-to-nitrogen ratio (the proportion of carbon to nitrogen by weight in
any organic matter). Give examples. Refer to appendix 3, C:N Ratio for Common Compost Materials.
b) Factors affecting C:N ratio of a material c) Optimum C:N level for biological activity is between 25:1 and 30:1. Finished
compost will be 14:1 to 17:1.
2. Nitrogenous materials a) Low C:N materials are called nitrogenous, sometimes “greens” b) Look at examples of nitrogenous materials on the C:N chart, appendix 3 c) C:N ratio of a material can change. Examples: i. A growing plant ages and stores more carbon (e.g., young, green grass growing
into tall brownish-greenish stalks)
Making and Using Compost Unit 1.7 | 7
Instructor’s Lecture Outline
d) Factors to consider when estimating C:N ratio of different materials i. Stage of growth/age of material ii. Storage/treatment iii. Where grown, how fertilized iv. With manures, grain-fed animals will have higher N manure e) Conserve nitrogen in storage by letting material dry and dessicate
3. Carbon materials a) HighC:Nratiocalledcarbonaceous,sometimes“browns.”Discussexamplesonchart. b) Carbon materials can be more or less complex c) Highcarbonmaterialscanbestoredforextendedtimeperiods d) Carbon materials can provide aeration e) Highcarbonmaterials,ifdry,canbedifficulttomoisten
4. Animal manures a) Manure C:N ratio depending on type of animal manure, feed source, bedding, and age b) See C:N chart (appendix 3) for examples c) In general, manures are more biologically active d) Raw manures can carry weed seeds, pathogens, pesticide residues, and antibiotics,
so should be composted properly to destroy
5. Balancing C:N range for composting (see appendix 4: need title) a) Assess C:N ratio of materials and plan quantities (give examples) b) Estimating proportions when layering by hand c) Estimating proportions with machine-turned composting d) Record-keeping and trouble-shooting trials
6. Other components some advocate adding to compost a) Clay soil (Luebke method) b) Rock phosphate c) Innoculants d) Wood ash e) Other rock minerals
7. What not to compost a) Feces of carnivores/omnivores, though possible if done carefully b) Pernicious weeds (resistant to decay) c) Some diseased plants d) Meat/dairy may attract pests e) Fats, oils in large quantities f) Walnut, eucalyptus leaves in large quantities
8. Particle size considerations a) Chopping materials will speed composting b) The greater the surface area-to-volume ratio, the faster the decomposition c) Compaction can occur if particle size is too small d) Layering can be adjusted to avoid compaction and maintain aeration e) Waxy coated leaves decay very slowly because of coated surface f) Municipal compost tub grinders reduce materials to 1 inch or less. A sharp spade
can be used to chop materials by hand.

Making and Using Compost8 | Unit 1.7
Instructor’s Lecture Outline
F. Moisture 1. Moisture needs of decomposers
2. Moisture content in compost pile should be 50%–60% (moist as a wrung-out sponge) a) First consider the moisture of the materials to be composted b) Add water as pile is built. More water should be put on layers in top half of pile. c) Excess moisture will cause compaction, loss of air d) Insufficient moisture will cause a pile to decompose slowly or stop decomposing e) If going to turn pile frequently, can add more water to begin with f) Turning pile, trouble-shooting—add water if too dry, aerate and add dry material if too wet g) Seasonal moisture considerations (e.g., tarping in winter, shade in summer)
G. Aeration 1. Aerobic bacteria require oxygen, respire CO2
2. Anaerobic bacteria (problem: end product may be antagonistic to germination and seedling growth)
3. Oxygen is often the limiting factor when compost temperature goes down after first weeks
4. At 10%–12% CO2, need to turn
5. Turning pile reintroduces oxygen, stimulating aerobic bacteria population
H. Volume and Temperature 1. 5 feet x 5 feet x 5 feet is minimum pile size for benefits of hot compost
2. 130˚–150˚F is optimal temperature range (10 days to 2 weeks); NOP rules require pile to reach 131ºF for 21 days, with 5 turnings
3. Turn at 150˚F or can kill microbes
4. Maximum height and width = 6 feet
5. Compost fabric, soil cap as option to retain heat
I. Maturation and Turning 1. 6 months minimum for windrows if not turned
2. Advantages of turning
3. Disadvantages of turning
4. Recommendations on when and how much to turn (if once, at 3 weeks)
J. Assessing Compost Maturity and Stability 1. Parent material largely unrecognizable, crumbly texture
2. Cool temperature (ambient temperature)
3. Signs of macroorganisms (may not be present in large-scale operations)
4. Dark-brown to blackish-brown
5. “Earthy” sweet smell (no ammonium or anaerobic odors)
6. Paste-like texture
7. Maturity vs. stability
K. Applying Compost 1. Timing
2. Application rates
3. Placement

Making and Using Compost Unit 1.7 | 9
Students’ Lecture Outline
Detailed Lecture Outline: Making and Using Compost
for students
a. Pre-assessment Questions 1. What is compost?
2. What are some types of composting and how do they differ?
3. Why is aerobic high-temperature composting favored for agricultural /horticultural purposes?
4. What are advantages of composting over letting materials rot on surface or turning in raw materials (e.g., crop residues, raw manure, sawdust)?
b. benefits of aerobic Hot composting 1. Advantages of aerobic hot composting process
a) Stabilizes volatile nitrogen. Composted organic matter contains nitrogen in a more stable form (nitrate) that is more usable by plants.
b) Kills most pathogens and weed seeds (if piles are above 131˚F for 15 days).
c) Introduces a wider population of microbes than found in the raw ingredients
d) Reduces volume of wastes (by approximately 50%)
e) Allows for use of raw materials that shouldn’t be put directly in soil (e.g., sawdust, raw manure)
f ) Degrades many contaminants since most pesticides are petroleum- (carbon)-based and thus digestible. The weed killer Clopyralid is an important exception (see css.wsu.edu/compost for details). Although not a solution to soil contamination, organic matter also has a high capacity to bind heavy metals.
g) Recycles organic matter on farm and reduces off-farm inputs
2. Benefits of compost in the soil
a) Improves soil structure and soil aggregate stability resulting in better drainage, aeration/gas exchange, erosion resistance, workability (tilth). Microbes secrete glue-like compounds that help bind soil particles together.
b) Increases moisture retention (100 pounds of humus can hold 195 pounds of water)
c) Slow release of nutrients and increased availability of others. Cation Exchange Capacity (CEC) is increased thus increasing availability of Ca, Mg, and K. Also, humic acids help dissolve minerals in the soil, making more minerals available to plants.
d) Increases the population and diversity of microbes in soil that continually make nutrients available to plants. Provides food for microbes.
e) Helps buffer soil pH. Compost pH is optimally 6.5–7.
f ) Promotes disease suppression (different microbes suppress fusarium, pythium, phytopthora, rhizoctonia)
g) Plays key role in soil fertility management in organic systems

Making and Using Compost10 | Unit 1.7
Students’ Lecture Outline
3. Potential disadvantages of composting
a) Cost and time: Many farmers and gardeners don’t make their own compost because of equipment needs and labor expenses
b) Space needed for composting can take up available production land
c) Odor or other impacts on neighbors can create challenges in urban/suburban areas
d) Regulations: Regulations on leachate and testing if commercial composter or certified organic grower (see California Integrated Waste Management Board, www.ciwmb.ca.gov, and the National Organic Program, www.ams.usda.gov/nop, for composting regulations)
c. biology of the composting Process 1. Compost ecosystem overview
a) What makes composting happen? A wide range of decomposers that are naturally present in most soils and on organic matter. Microbial decomposers can account for 60%–80% of total soil metabolism.
b) Decomposer organisms play different roles in a complex compost food web (see appendix 1, Compost Food Web). Microscopic organisms such as bacteria, fungi, actinomycetes, and yeasts are mostly primary consumers of compost materials, Macroscopic organisms such as mold mites, nematodes, springtails, centipedes, beetles, earthworms feed on the primary and secondary consumers.
2. Key compost organisms and stages of composting
a) Bacteria are responsible for first stages of hot compost process
i. Aerobic bacteria are the primary decomposers in the first stages of decomposition, feeding first on the most readily available food sources like plant sugars. Their role is to do most of the primary consumption of simple carbon compounds. Aerobic bacteria are the best for creating quality compost. Anaerobic bacteria produce gases, alcohols, and acids that can thwart plant growth (sulfides and methane, which inhibit root growth). Compost made in anaerobic digesters is usually finished aerobically.
ii. Bacteria reproduce quickly—under the right conditions, bacteria can double their population every hour
iii. Organic matter provides bacteria with carbon as a source of energy, nitrogen for protein to build their bodies, and nucleic acid for reproduction
iv. Heat is created as microorganisms respire in the process of breaking down organic matter. Certain thermophilic (heat-loving) bacteria are responsible for the high temperatures in pile.
b) Compost temperature curve and bacteria
i. 50˚–113˚F: Mesophilic (mid-temperature loving) bacteria and other organisms populate the pile in the first 24–48 hours, multiplying quickly and causing temperatures to rise with increased metabolism. As internal pile temperatures rise above 113˚F, mesophilic organisms start dying out and thermophilic bacteria populations rise.
ii. 113˚–150˚F: Thermophilic (heat-loving) bacteria, which are present as dormant spores at lower temperatures, multiply quickly in the heating compost pile. Temperatures can be sustained at 130˚–150˚F for two weeks or more. Turning the pile can help sustain high temperatures by reducing density of material and reintroducing oxygen for aerobic bacteria.
iii. 150˚F and above: May be too hot for thermophilic organisms to survive and biological activity may slow as a result. Temperatures optimally should remain at 150˚F or below.

Making and Using Compost Unit 1.7 | 11
Students’ Lecture Outline
iv. 120˚F and below: After the first month, a compost pile will cool to the point where mesophilic organisms will populate the pile. Mesophilic bacteria repopulate, but fungi, actinomycetes, yeasts, and molds dominate this stage of composting.
c) Actinomycetes
i. Now considered a type of bacteria, though grow as hyphae (strands) like fungi
ii. Actinomycetes produce grayish, cobwebby growths that gives compost earthy smell
iii. Can decompose complex carbon like chitin and cellulose
iv. Responsible for some disease suppression (produce enzymatic compounds and antibiotics)
d) Fungi
i. Fungi decompose complex carbon compounds like chitin and cellulose
ii. Fungi improve soil structure by physically binding soil particles into aggregates
iii. Suppress disease
e) Macroorganisms: Earthworm and other later immigrants
i. Though not always present in finished compost, macroorganisms feed on the pile’s earlier inhabitants
ii. Examples: Nematodes, mold mites, springtails, wolf spiders, centipedes, sow bugs, earthworms, ground beetles (for more information, see Unit 2.3, Soil Biology and Ecology)
d. Overview of Key environmental conditions for aerobic, Hot composting Successful composting requires creating the right environmental conditions for
decomposers to function optimally. Key conditions include:
• Carbon-to-nitrogen(C:N)ratioofmaterials
• Moisture
• Aeration
• Surfaceareaofcompostmaterials
• Volumeofcompostpile
• Turningandtrouble-shooting
e. compost Materials: Key considerations 1. Carbon-to-nitrogen (C:N) ratio
a) The carbon-to-nitrogen ratio refers to the proportion of carbon to nitrogen by weight in any organic matter. Different types of organic matter have different carbon-to-nitrogen or C:N ratios. For example, wood, which is very high in carbon, has a C:N ratio of 500:1 while grass clippings have a C:N ratio of 17:1. (See appendix 3 for examples.)
b) C:N ratio of a material can change due to many factors: Plant growth, storage, how fertilized, what an animal was fed. Numbers on a chart are approximations.
c) The optimum C:N ratio for biological activity is between 25:1 and 30:1. Compost piles should ideally start with an overall C:N ratio in this range. Finished compost will be 14:1 to 17:1. Much of the carbon in the pile is released as CO
2 as decomposers metabolize
organic matter.
2. Nitrogenous materials
a) Compost materials with low C:N ratios are often called nitrogenous, sometimes “greens”
b) There is a range of nitrogenous materials as demonstrated on the C:N ratio charts (see appendix 3)
c) C:N ratio of a material can change. Examples:
i. As a growing plant ages it stores more carbon (e.g., young green grass growing into tall brownish-greenish stalks)

Making and Using Compost12 | Unit 1.7
Students’ Lecture Outline
d) Factors to consider when estimating C:N ratio of different materials
i. Stage of growth/age of material
ii. Storage/treatment
iii. Where grown, how fertilized
iv. With manures, grain-fed animals will have higher N manure
e) Conserve nitrogen by letting materials dry and desiccate. Most of the material stays in an organic or NO
3- form, neither of which will volatilize. Tarping greens may actually have
the opposite effect; by holding in moisture, tarping may stimulate decomposition of low C:N materials, which release N gas.
3. Carbon materials
a) Compost materials with high C:N ratio are called carbonaceous, sometimes “browns”
b) Carbon materials can be more or less complex as shown on C:N chart (e.g., wood chips can have C:N ratio of 400:1, straw 70:1, brown leaves 40:1; see appendix 3)
c) High carbon materials can be stored easily to use later (e.g., store brown leaves or straw stubble from fall to mix with the abundance of greens in the spring)
d) Carbon materials can be bulkier and thus can provide aeration in a pile
e) High carbon materials often are dry and can be difficult to properly moisten (can be spread out and soaked or left out in rain)
4. Animal manures
a) Manures are usually considered nitrogenous, but can have a wide range of C:N ratios depending on type of animal manure, feed source, bedding material, and age
b) See C:N chart (appendix 3) for examples
i. Poultry manure (approximately 6–12:1 C:N ratio) is high in nitrogen
ii. Horse manure (approximately 20:1 C:N ratio) mixed with bedding can vary widely in its overall C:N ratio due to type and quantity of bedding material (e.g., is the “horse manure” pile mostly wood shavings? Think high carbon. Straw is a good bedding source: less extreme C:N ratio, absorbs urine well).
c) In general, manures are more biologically active than plant residues due to having passed through an animal’s digestive system
d) Raw manures can carry weed seeds, pathogens, pesticide residues, and antibiotics, so should be composted properly
5. Balancing the carbon and nitrogen in a pile (see appendix 4)
a) Consider approximate C:N ratio of each ingredient as a reference in deciding on quantity. Formulas are not necessary for composting on a small scale. Larger compost operations may test the C:N ratio of each ingredient and come up with formulas for quantities (see Resources section—web site offers equations for calculating C:N formulas for compost piles).
b) For hand-built piles, layering is a good way to estimate proportions and “homogenize” the pile. Thin layers are recommended to put the diversity of ingredients in closer proximity. Examples of proportions, by volume:
• 3inchesoffreshhorsemanure
• 3inchesofloosesucculentgreens
• 1/2inchoflooseoatstraw
c) For machine composting, materials are often laid out along windrow to gauge proportions and then turned with compost turner.
d) Trial and error: make observations and keep records about what works, what doesn’t (see appendix 2)

Making and Using Compost Unit 1.7 | 13
Students’ Lecture Outline
6. Other components some advocate adding to compost
a) Clay soil: Those who use the Luebke method of compost think it’s beneficial to use 10% clay soil in pile because it reduces N losses, makes end-product more stable
b) Rock phosphate can increase usable phosphorus by making P more available to crops
and help reduce volatilization of NH3
c) Innoculants (purchased biological “activators”): May be useful for dealing with some problems, e.g., high oil content plant residues, but considered unnecessary by most because compost organisms are present in manures, soils, and on plant materials. Some use aged compost as an innoculant if composting area is new or on concrete.
d) Wood ash: Using small amounts of wood ash in compost eliminates possible negative effects of high pH of ash when added directly to soil, doesn’t compromise potassium (K) availability to crop
e) Rock minerals (to help speed their availability through chemical breakdown)
7. What not to compost
a) Though often discouraged, composting waste of humans and other carnivorous or omnivorous animals (dogs, cats, pigs) is possible but you must be very careful about pathogens (see EPA and World Health Organization guidelines, and www.jenkinspublishing.com/humanure.html)
b) Perennial weeds that are resistant to decay such as Bermuda grass, mint, bindweed
c) Some diseased plants (examples)
d) Meat and dairy (if worried about attracting pests). Small amounts okay in center of pile.
e) Large quantities of fats and oils can’t readily be broken down by compost organisms
f ) Leaves of eucalyptus, walnut, and other trees with tannins or known allelochemicals; conifers (acidic, slow). Small amounts of these materials are okay.
8. Particle size of materials
a) Shredding or chopping materials, especially large, woody stalks, will speed the composting
b) The greater the surface area to volume ratio, the faster the rate of potential decomposition. Decomposers work on surfaces, so the more surface exposed, the more decomposers can work.
c) Compaction can occur if particle size is too small, and material is wet and nitrogenous (e.g., all lawn clippings), leading to loss of aeration and anaerobic conditions
d) Layering sequence and thickness can be adjusted to avoid compaction and maintain aeration
e) Waxy coated leaves decay very slowly because of coated surface
f ) Municipal compost tub grinders reduce materials to 1 inch or less. A sharp spade can be used to chop materials by hand.
f. Moisture 1. Moisture needs of decomposers
a) All decomposers involved in composting need H20
b) Aerobic microbes, similar to marine mammals, need H20 around them all the time, but
also need 02 to survive. They live and move around on a film of water.
2. Moisture content in compost pile should be 50%–60% (moist as a wrung-out sponge)
a) First consider the moisture of the materials to be composted
b) Add water as pile is built, watering dry layers especially. More water should be put on layers in top half of pile, as much will trickle down (approximately two-thirds in top half, one-third in bottom half ).
c) Excess moisture will cause compaction, loss of air (you shouldn’t be able to squeeze water out of compost)

Making and Using Compost14 | Unit 1.7
Students’ Lecture Outline
d) Insufficient moisture will cause a pile to decompose slowly
e) If you’re going to turn pile frequently, can add more water as you build and add water as you turn
f ) Turn pile, trouble shoot—add water if too dry, aerate and add dry material if too wet
g) Seasonal moisture considerations: Tarp piles in winter to keep rain off; use compost covers, tarps or straw cap to conserve moisture in summer
g. aeration 1. Aerobic bacteria, which make hot composting happen, require oxygen and respire CO
2
2. Anaerobic bacteria populate portions of the pile where oxygen is low. They create methane gas and sulfur compounds (the rotten eggs smell) and can be harmful to soil life (commercial compost made in anaerobic digesters are often finished aerobically in windrows).
3. Oxygen is often the limiting factor when compost temperature goes down after first weeks
4. C02 can be monitored with special equipment—at 10–12% C0
2 need to turn if possible
5. Turning pile reintroduces oxygen, stimulating new growth of aerobic bacteria. Can also break up anaerobic pockets of pile as you turn.
H. volume and temperature 1. Minimum pile size recommended is 5 feet x 5 feet x 5 feet to achieve the benefits of the hot
composting process
2. At this volume pile is self-insulating and can reach 130–150˚F for 10 days to 3 weeks
3. 131˚–145˚F = optimal temperature range. Turn if reaches 150˚F. EPA and NOP standard (set for killing E. coli in sludge) is 131˚F for 21 days with 5 turnings within that time period.
4. Maximum height and width should be 6 feet so as not to limit aeration or increase compaction of pile
5. Compost fabric, straw cap, or soil cap can help retain some heat
i. Maturation and turning 1. Most windrow piles take about 6 months minimum (spring into fall) to mature if not
turned; longer in winter depending on climate
2. Advantages of turning include:
a) Speeds composting process by aerating the pile
b) Achieves more thorough composting by moving outer materials to pile center
c) Allows for trouble shooting and adjustments to pile (great learning opportunity)
d) Additional mixing of ingredients
e) Physical (mechanical) breakdown of particle size of materials
3. Disadvantages of turning include:
a) Time, energy, expense
b) Loss of nitrogen as pile is turned
c) Additional space needed unless turning out and back
4. Turn at least once (more speeds process but is labor intensive by hand)
a) If you turn compost only once, ideally do so at 3 weeks or when temperature curve has clearly started back down. After turning at this stage, temperature curve will go up again. (At this point oxygen is the limiting factor—turning reintroduces oxygen for aerobic organisms to continue using as they digest the still relatively fresh materials.)
b) If you turn the pile twice, ideally turn at about 3 weeks and 6 weeks, again referring to heat curve for information

Making and Using Compost Unit 1.7 | 15
Students’ Lecture Outline
j. assessing compost Maturity and stability 1. Parent material should be largely indistinguishable, texture should be crumbly
2. Temperature has cooled down to ambient temperature
3. Signs of macro life (e.g., redworms, sowbugs, springtails), though may not be present in large-scale operations
4. Dark brown to blackish-brown color
5. Earthy smell (no ammonium or anaerobic odor)
6. Feels “greasy” or slick when squeezed between fingers
7. Maturity vs. stability: A set of 7 quantitative indicators are used to define the maturity and stability of compost
• pH:6.5to8.0
• Sulfides:zerotoonlytrace
• Ammonia=<0.05ppm
• Ammonium:0.2to3.0ppm
• Nitrites:<1.0ppm
• Nitrates:<300ppm
• CO2:<1%
Quantitative indicators adapted from “Quality Guidelines for Compost Chart,” compiled by Jon Nilsson (East Coast Compost) and Autrusa Compost Consulting criteria (George Leidig, Blue Bell, PA)
K. applying compost 1. Timing
a) Spring, prior to planting
b) Mid season, as “side dress”
c) Fall, with a planting of cover crops
2. Application rates
a) Application rates vary with intensiveness of cropping system and use of cover crops
b) Field scale: ~4–7 tons/acre on an annual basis
c) Garden scale: ~10–20 tons/acre on an annual basis (1–2 lbs/square foot for soil development, 0.5–1 lb/square foot for maintenance)
3. Placement
a) Field-scale: Top 8–12 inches of soil
i. Side dress: In the root zone of the crop
b) Garden-scale
i. Initial stages of soil development: 12–24 inches in depth (see appendix 3 in Unit 1.2, Garden and Field Tillage and Cultivation)
ii. Soil fertility maintenance: Top 4–8 inches

Making and Using Compost16 | Unit 1.7

Making and Using Compost Unit 1.7 | 17
Demonstration 1
Demonstration 1: Garden-Scale Compost Production
for the instructor
instructOr Overview
Key to the process of building quality compost is the ability to assess the materials that will make up the pile. Before starting the pile-building demonstration, spend time discussing the materials you’ve gathered for the pile’s construction. Providing a range of compost materials for discussion will enhance students’ understanding of and skills in assessing carbon-to-nitrogen ratios, moisture content, and other variables of compostable materials. Variety also brings a wider range of nutrients and different feedstock for different types of microorganisms.
Useful comparisons for discussion include:
• greenyoungweeds/grassclippingsvs.older carbonaceous plants (same plant, different life stage)
• freshmanurevs.agedmanure(horse,cow, chicken, other examples if possible)
• horsemanurewithstrawbeddingvs.horse manure with wood chips or shavings
• foodscrapsvs.cropresidues
Spend time assessing various materials at the beginning of the demonstration and then review each as they are layered on the pile. Let students know that there is no one recipe for compost; each pile will differ based on the materials available, time of year, and the composter’s own experience.
PreParatiOn and MateriaLs
1. At the compost site mark a 5 feet x 5 feet to 6 feet x 6 feet or longer area as the desired base of the pile.
2. Gather compost materials such as straw, greens (cover crops, crop residues, weeds), fresh horse manure, food scraps, chicken manure, brown leaves, older dried-out weeds or crop residues, etc. Make sure to have materials in sufficient quantities to complete at least a 5 x 5 x 5 pile. Keep each material in its own distinct pile (for comparison).
3. Gather tools, materials, and handouts: hose with sprayer, wheelbarrows, manure forks, spades, compost thermometer, compost materials and temperature record sheet(seeappendix2)andassignmentsheet(seeHands-On Exercise, page 27).
4. Assess existing compost piles for examples of various stages of decomposition, piles built with different techniques or materials, and piles that may be too wet, too dry, etc. As an option, bring in some different compost samples. Include good examples of finished compost. Plan which to visit at end of demonstration.
PreParatiOn tiMe
1–2 hours
deMOnstratiOn tiMe
1–1.5 hours

Making and Using Compost18 | Unit 1.7
deMOnstratiOn Outine
A. Plan the Pile with Students 1. Compost materials assessment
Ask students to assess each compost material in terms of: a) Carbon-to-nitrogen ratio b) Moisture content c) Particle size d) Aeration
2. Pile location, size, shape
Discuss considerations for: a) Location b) Size c) Shape of pile
3. Considerations for layering
Plan how the pile will be built by discussing: a) Thickness of layers (as per material) b) Order of layers c) Amount of water to add to which layers (with more added in top layers than bottom)
B. Demonstrate Pile Building 1. Demonstrate proper tool techniques for safety and efficiency a) Discuss which tools are used and why b) Demonstrate proper use of each tool
2. Pile base a) Mark area for base size and discuss size parameters b) Demonstrate and discuss loosening soil within area c) Make first layer with manure or greens
3. Demonstrate layering (ask for 2–3 students to help)
Map out layering sequence and for each layer: a) Review considerations for each material to make appropriate thickness b) Show how to judge layer thickness, uniformity c) Demonstrate how to “scratch” top layer slightly into layer below d) Show how to keep pile square (mind corners and edges) e) Demonstrate how to add water as needed
4. Review layers and sequencing as pile progresses a) Ask students to build a several-layer sequence and explain their process b) Are there new considerations as pile progresses or as materials available change? c) Assess pile shape and size
5. Demonstrate finishing a pile a) 5 feet high = maximum b) Finish with a carbon layer (e.g., straw cap) c) Show use of tarp or compost cloth d) Show how to label pile with date, materials used, other information
Instructor’s Demonstration 1 Outline

Making and Using Compost Unit 1.7 | 19
C. Monitoring the Composting Process 1. Why monitor and why keep records
2. Demonstrate/discuss compost thermometer (and other monitoring devices if available)
3. Demonstrate how to use materials and temperature record sheet (appendix 2); show examples of record sheets from past, including timing of turning/aeration with temperature dip
D. Demonstrate Turning a Pile 1. Review the pros and cons of turning
2. Review when to turn, how often to turn
3.Howtoturn—outsidematerialstoinside
4. Trouble-shooting as you turn
E. Assess Existing Piles or Compost Samples 1. Examine piles at different stages of decomposition looking for: a) Heat,temperaturecurveexamples(recordbook) b) Odor, color, texture c) Moisture d) Recognizable parent materials e) Different materials or techniques used f) Show examples in continuum from coarse to finished g) Examples of good, finished compost
2. Look for examples of problems to have students troubleshoot
F. Give students their compost-building and monitoring assignment (see Step-by-Step Instructions and Hands-On Exercise)
Instructor’s Demonstration 1 Outline

Making and Using Compost20 | Unit 1.7
Making and Using Compost Unit 1.7 | 21
Students’ Step-by-Step Instructions
Demonstration 1: Garden-Scale Compost Production
step-by-step instructions for students
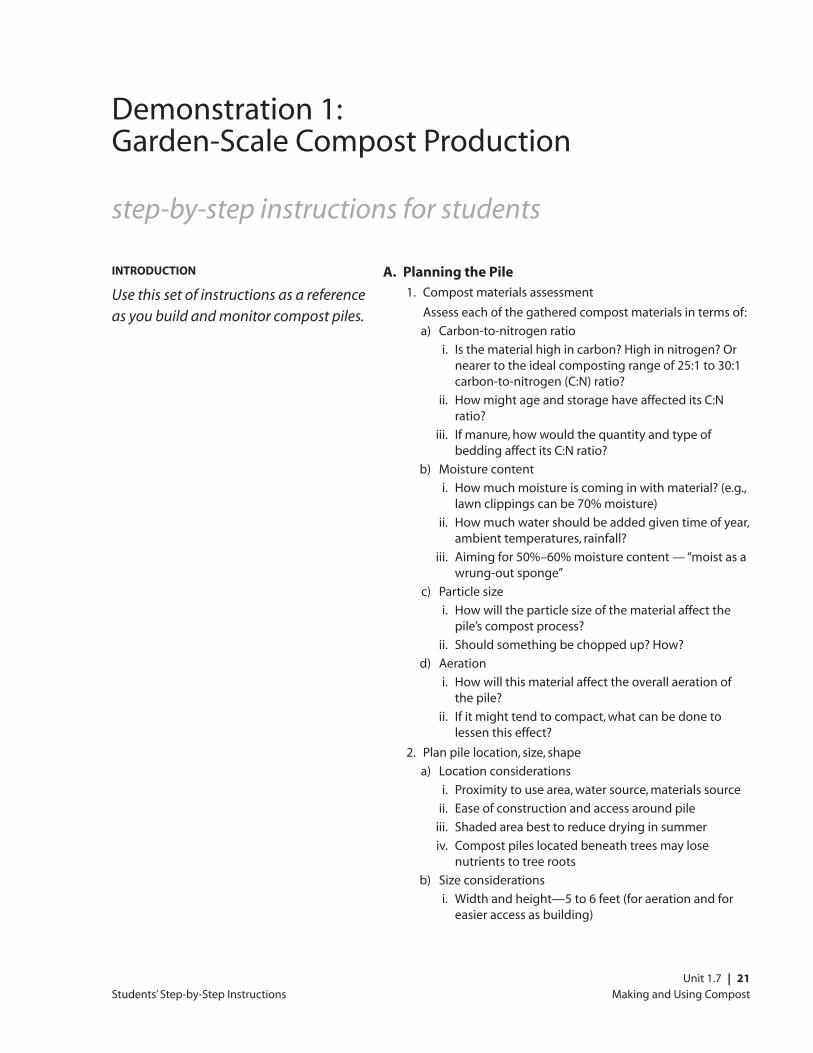
intrOductiOn
Use this set of instructions as a reference as you build and monitor compost piles.
a. Planning the Pile 1. Compost materials assessment
Assess each of the gathered compost materials in terms of:
a) Carbon-to-nitrogen ratio
i. Is the material high in carbon? High in nitrogen? Or nearer to the ideal composting range of 25:1 to 30:1 carbon-to-nitrogen (C:N) ratio?
ii. How might age and storage have affected its C:N ratio?
iii. If manure, how would the quantity and type of bedding affect its C:N ratio?
b) Moisture content
i. How much moisture is coming in with material? (e.g., lawn clippings can be 70% moisture)
ii. How much water should be added given time of year, ambient temperatures, rainfall?
iii. Aiming for 50%–60% moisture content — “moist as a wrung-out sponge”
c) Particle size
i. How will the particle size of the material affect the pile’s compost process?
ii. Should something be chopped up? How?
d) Aeration
i. How will this material affect the overall aeration of the pile?
ii. If it might tend to compact, what can be done to lessen this effect?
2. Plan pile location, size, shape
a) Location considerations
i. Proximity to use area, water source, materials source
ii. Ease of construction and access around pile
iii. Shaded area best to reduce drying in summer
iv. Compost piles located beneath trees may lose nutrients to tree roots
b) Size considerations
i. Width and height—5 to 6 feet (for aeration and for easier access as building)

Making and Using Compost22 | Unit 1.7
Students’ Step-by-Step Instructions
ii. Length: 5 feet (minimum) to any length
iii. Assess quantity and quality of usable material. How long a pile can you plan to make?
c) Shape of pile
i. Aim for vertical sides to maximize volume of pile
ii. To retain moisture through summer, build pile with a flat top and a thick “cap” of straw
iii. Piles built to overwinter should have a more rounded top to shed rain (with straw cap)
3. Considerations for layering
a) Thickness of layers (as per materials)
Use thin layers for materials at either extreme of the C:N ratio range. Examples:
i. Approximately 1- to 3-inch layers for things that are high C (straw)
ii. Approximately 1- to 3-inch layers for things that are high N (fresh horse manure)
iii. Approximately 4- to 6-inch layers for mid-range C:N materials (mixed weeds/ crop residues)
iv. Use thin layers if particle size and/or moisture content make compaction likely
b) Order of layers
i. Some say you can speed decomposition by putting the manure layer (with its high population of microorganisms) on top of the green layer (with the most readily available food source in the form of plant saps)
ii. Mixing or scratching layers slightly together helps homogenize pile, avoid compaction
c) Amount of water to add (to which layers; top vs. bottom)
i. Consider the material of each layer—moisture, particle size
ii. Water each layer that needs additional moisture
iii. Add more water to layers in top half of pile (some will trickle down to lower layers)
b. building the Pile 1. Review proper tool techniques for safety and efficiency
2. Establish the pile base
a) Mark off area for base size (5 feet x 5 feet or longer)
b) Loosen soil in area with a spading fork to enhance aeration and migration of organisms
c) Make first layer with manure or greens (enhance migration of soil organisms to higher N food source)
d) Pile will be most compacted and thus least aerated at bottom. Bulky materials in base can aid in aeration but may make pile harder to turn.
3. Building layers
As each layer is made
a) Review key considerations for each material to make appropriate thickness (relative C:N, particle size, moisture, aeration)
b) Make layer uniformly thick
c) Scratch (mix) each layer slightly into the next using spading fork or manure fork
d) Keep pile square by pulling/adding material to corners and edges and tamping walls with fork
e) Use hose sprayer to add water to layers that need it, paying attention to the corners and edges. Some materials (straw, dry manure) should be scratched with forks as watered to allow more even distribution of water.

Making and Using Compost Unit 1.7 | 23
4. Review key considerations as pile progresses
a) Build a several-layer sequence and review key considerations as you go
b) Assess new considerations as the pile progresses or as materials change (e.g., the weed pile first had fresh green weeds on the top, but now it’s just older, brownish weeds)
c) Assess the pile shape and size as you progress
5. Finishing a pile
a) 5 feet high = maximum for access/ease of building and for aeration
b) Finish with a carbon layer (if pile is not to be finished that day, end with carbon)
c) Use a tarp or compost cloth as protection from rain and from drying. Compost cloth “breathes”; tarps can limit aeration so some just use for rain.
d) Label pile with date, materials used, other information
c. Monitoring and recording the composting Process 1. Monitor temperature with compost thermometer
a) Take temperature daily for first month and after turning; then weekly
b) Temperature should be taken at several points in the pile and averaged
c) Thermometer should be inserted 18 inches to 2 feet into pile
d) Hold thermometer by probe while inserting and removing
2. Record temperature and observations on record-keeping sheet (see appendix 2)
a) Track pile through decomposition process, creating heat curve graph as you go
b) Use heat curve graph to assess pile performance, indicate when to turn
d. turning a Pile 1. Review the pros and cons of turning
2. Turn at least once (more often speeds process but is labor intensive by hand)
a) If only turning once, ideally do so at 3 weeks or when temperature curve has clearly started back down. At this point oxygen is the limiting factor—turning reintroduces oxygen for aerobic organisms to continue using as they digest the still relatively fresh materials.
b) If turning twice, ideally turn at about 3 weeks and 6 weeks, again referring to heat curve for information (e.g., dip in temperature)
3. Turn outside materials to inside and inside to outside
a) Pull outside materials off pile (outer foot of material will be drier, less decomposed). Set aside.
b) Water outer layer of materials
c) Spread a base layer of inner materials in space next to original pile
d) Mix outer materials into center of new pile as you rebuild with inner materials (don’t try to recreate original layers)
4. Trouble-shoot any problems as you turn the pile
a) Break up dry pockets or compacted clumps
b) Water if too dry
c) Leave overly-wet materials spread out to dry.
d) Add nitrogenous materials if pile has not heated up and moisture is fine
e) Low heat piles will still compost with time if you can’t “fix” problem
f ) “Failed” piles can be used as material for a new pile
Students’ Step-by-Step Instructions

Making and Using Compost24 | Unit 1.7
e. assessing Piles and documenting Observations 1. Examine piles at different stages of decomposition for:
a) Heat, temperature curve
b) Odor
c) Moisture
d) Recognizable parent materials
e) Different materials or techniques used
f ) Examples of good, finished compost
2. Look for trouble signs
a) Too wet (can squeeze water out)
b) Too dry (usually doesn’t heat up properly, may have dry pockets)
c) Anaerobic conditions (smells like sulfur, usually wet and compacted)
d) Didn’t heat up (could be lack of moisture, improper C:N ratio)
3. Make written recommendations for achieving desired rate of decomposition and implement them
Students’ Step-by-Step Instructions

Making and using CompostUnit 1.7 | 25
Hands-on Exercise
Hands-On Exercise: Build and Monitor a Compost Pile
suMMary
In groups of 2 to 3, you will build a group com-post pile, and monitor its progress over the next 6 months. The step-by-step outline (pages 21–24) can serve as a guideline as you build the pile and later as you turn it. Use the Compost Materials and Temperature Chart (appendix 2) to list materials and the sequence of layers, and to record tem-peratures, observations, and other data.
Group responsibilities include:
•Assessingtheavailablecompostmaterials
•Planningcompostlayering
•Buildingthepile
•Keepingrecordsonthepile(seerecordsheetin appendices) including labeling (name of pile, ingredients, date); record observations; daily temperature readings for first month; weekly temperature readings for subsequent months
•Turningthepileatleastonce(at3weeksorso)
•Trouble-shootinganyproblems
•Answeringthequestionsbelowafter1–2months
QuestiOns abOut yOur PiLe
1. How hot did your pile get and how long did it sustain this heat?
2. How does the heat curve on your pile compare to others you have seen? What assumptions can you make based on this heat curve?
3. When you turned your pile, what was your assessment of it? What if any trouble shooting did you need to do?
4. When you dig into your pile now, what recognizable materials remain? How does the pile smell, feel, look?
5. What other observations have you made about your pile?

Making and Using Compost26 | Unit 1.7

Making and Using Compost Unit 1.7 | 27
Instructor’s Demonstration 2 Outline
Demonstration 2: Field-Scale Compost Production
for the instructor
Overview
This demonstration introduces the considerations, techniques, and mechanical equipment used in on-farm production of compost for use on a multi-acre scale. Students will first review the characteristics of compost feedstock, the importance of adequate moisture during the composting process, and be provided with examples of the temperature changes occurring in previously built compost piles. The instructor should also discuss optimal and necessary temperature ranges for organic certification, materials and techniques used to maintain optimal conditions for aerobic decomposition, and the various indicators used to determine compost maturity. In the second part of the demonstration, the instructor presents the specific techniques and equipment used in combining materials, monitoring and turning large compost piles, and factors to consider in applying finished compost.
PreParatiOn and MateriaLs
Ideally, materials for this demonstration would include mature compost, immature compost, an active compost pile, sample feedstock, and compost turning and application equipment, as well as temperature, turning, and feedstock records from recent compost piles. A laboratory nutrient analysis of compost should also be available.
deMOnstratiOn resOurces
• Magdoff,Fred,andHaroldVanEs.2000.Building Soils for Better Crops, Second Edition. HandbookSeriesBook4,Sustainable Agriculture Network. Chapter 12: Making and Using Composts. Available from www.sare.org.
• Field Guide to On-Farm Composting. 1999. Available from Natural Resource, Agriculture, and Engineering Service (NRAES)CooperativeExtension,152Riley-RobbHall,Ithaca, New York 14853-5701, www.nraes.org.
PreParatiOn tiMe
1 hour
deMOnstratiOn tiMe
1 hour

Making and Using Compost28 | Unit 1.7
deMOnstratiOn OutLine
A. Field-Scale Compost Making 1. Review compost-making process a) Examine feedstocks b) Discuss C:N ratios of various feedstocks c) Discuss importance of supplying adequate moisture during the composting process
2. Review temperature curves from past piles
3. Discuss National Organic Program definition of compost and requirements for compost production and use
4. Discuss importance of monitoring CO2 levels as a guide for turning
5. Discuss optimum and required temperatures
6. Examine breathable tarp used for covering pile
7. Review and disucss nutrient profile of laboratory analysis of finished compost
8. Discuss indicators of compost quality and maturity (see J on page 15 of Lecture Outline)
B. Equipment and Techniques for Windrowing, Turning, and Field Application of Compost
1. Explain and demonstrate how feedstock is layered for initial mixing
2. Explain and demonstrate how water is applied as necessary during the mixing process
3. Explain and demonstrate how feedstock is run through spreader to form windrow
4. Explain and demonstrate how compost pile is turned
5. Demonstrate and discuss techniques used in field application of compost
Instructor’s Demonstration 2 Outline

Making and Using Compost Unit 1.7 | 29
Assessment Questions
Assessment Questions
1) List four benefits of aerobic, high temperature composting.
2) List four improvements to soil quality that would result from regular incorporation of compost into the soil.
3) Name the key decomposer organisms and describe their role at the various composting stages/temperatures.
4) What temperature range is considered best for composting and why? What is too hot?
5) List the key conditions necessary for aerobic, high temperature composting.

Making and Using Compost30 | Unit 1.7
Assessment Questions
6) Why consider the Carbon-to-Nitrogen ratio of the various compost materials? What is considered the ideal C:N range for composting and why?
7) What factors can influence the C:N ratio of a material?
8) What may happen if too much water is added to a compost pile? What may happen if the materials are too dry?
9) Why is aeration important in a compost pile?
10) What are some advantages and disadvantages to turning a compost pile? When and how often should compost piles be turned? (Please explain.)
11) Describe five qualitative indicators of compost maturity. What are some quantitative ways of assessing compost maturity and stability?

Making and Using Compost Unit 1.7 | 31
Assessment Questions
12) Imagine that you have an unlimited amount of each of the following materials for composting: straw, chicken manure, horse manure, food scraps, greenish-brownish crop residues and weeds, and sawdust. How would you make a pile using these materials? Draw a diagram of the pile you would create. Discuss your layering, including thickness of each layer, order, water added or not. Add a short description of your suggested management plan (turning, monitoring).

Making and Using Compost32 | Unit 1.7
Assessment Questions Key
Assessment Questions Key
1) List four benefits of aerobic, high temperature composting.
• Stabilizesvolatilenitrogen.Compostedorganic matter contains nitrogen in a more stable form that is more usable by plants.
• Killsmostpathogensandweedseeds(ifpilesare above 131˚F for 15 days)
• Introducesawiderpopulationofmicrobesthan found in the raw ingredients
• Reducesvolumeofwastes(byapproximately50%)
• Allowsforuseofrawmaterialsthatshouldn’tbeputdirectlyinsoil(e.g.,sawdust, raw manure)
• Degradescontaminantssincemostpesticidesarepetroleum-(carbon-)basedandthusdigestible. Organic matter also has a high capacity to bind heavy metals.
• Guaranteesthatmostoftheendproductwillbe humus and slowly-decomposing material that will become humus in the soil
• Recyclesorganicmatteronthefarmandreduces off-farm inputs
2) List four improvements to soil quality that might result from regular incorporation of compost into the soil.
• Improvessoilstructureandsoilaggregatestability resulting in better drainage, aeration/gas exchange, erosion resistance, workability (tilth).Microbessecreteglue-likecompoundsthat help bind soil particles together.
• Increasesmoistureretention(100lbs.ofhumus can hold 195 lbs. of water)
• Slowreleaseofnutrientsandincreasedavailability of others. Cation Exchange Capacity(CEC)isincreasedthusincreasingavailabilityofCa,Mg,andK.(Alsohumicacids help dissolve minerals in the soil, making more minerals available to plants.)
• Increasesthepopulationanddiversityofmicrobes in soil that continually make nutrients available to plants. Provides food for microbes.
• HelpsbuffersoilpH(compostpHisoptimally 6.5–8)
• Promotesdiseasesuppression(differentmicrobes suppress Fusarium, Pythium, Phytopthora,Rhizoctonia)
• Playskeyroleinsoilfertilitymanagementinorganicsystems.Alongwithsoilorganicmatter and cover crops, compost is a major source of plant available N, P, and K.
3) Name the key decomposer organisms and describe their role at the various composting stages/temperatures.
• Bacteria:Aerobicbacteriaaretheprimary decomposers in the first stages of decomposition, feeding first on the most readily-available food sources like plant sugars. Their role is to do most of the primary consumption of simple carbon compounds, resulting in the liberation of heat and the warming of the compost pile and creating the environmental conditions for the subsequentcolonizationofmicroorganisms(below).
• Fungi:Fungidecomposecomplexcarboncompounds like chitin and cellulose
• Actinomycetes:Actinomycetesdecomposecomplex carbon, like chitin and cellulose
• Macroorganisms:Earthwormsandotherlaterimmigrants such as nematodes, mold mites, springtails, wolf spiders, centipedes, sow bugs, earthworms, ground beetles continue to break down organic matter after the pile has cooled
4) What temperature range is considered best for composting and why? What is too hot?
• Between131°–150°Fforaminimumof15–21 days. This should kill potential pathogenic organisms and weed seeds andpreventthevolatilizationofnitrogencontainingcompounds(e.g.,ammonia)athigher temperatures.
• Maximumtemperaturesofthecompostpileshouldnotexceed150°F

Making and using CompostUnit 1.7 | 33
Assessment Questions Key
5) List the key conditions necessary for aerobic, high temperature composting.
• Propercarbontonitrogenratioofmaterials:25:1–40:1
• Moisture:50%–60%byweightor“moistasa wrung-out sponge”
• Aeration:Periodicre-aerationthroughturning
• Surfaceareaofcompostmaterials:Smallparticlesizewillresultinmorerapiddecomposition
• Volumeofcompostpile:Aminimumof5x 5x 5 is recommended
• Turningandtrouble-shooting:Compostpilesshould be turned when temperatures exceed 150°Fandwhenthetemperatureofthepile has began to decline. National organic standards require 5 turnings within a 15-day period with a sustained temperature of 131°–170°F.
6) Why consider the Carbon-to-Nitrogen ratio of the various compost materials? What is considered the ideal C:N range for composting and why?
• C:Nratioaffectstherateofdecomposition.AlowC:Nratio(below25:1)mayresultin too rapid decomposition and the loss of nitrogenintheformofammonia.AC:Nratio that is too high may result in a too long a decomposition process and a low quality end product.
• IdealC:Nratiorangeis25:1–40:1
7) What factors can influence the C:N ratio of a material?
• C:Nratioofamaterialcanchangeduetomanyfactors:plantgrowth,storage,howfertilized,andwhatananimalwasfed
8) What happens when a pile is too wet or too dry?
• Ifacompostpileistoowetitmaynotheatup, turn anaerobic, forming compounds that may be offensive smelling and detrimental to plant growth if not aerated prior to application
• Ifacompostpileistoodryitmaynotheat up or not sustain heat long enough to degrade the organic materials into a finished and useable product. Will often require reassembling the materials and moistening.
9) Why is aeration important in a pile?
• Toassureadequateamountsofoxygenforaerobic decomposition
10) What are some advantages and disadvantages to turning a pile? When and how often should piles be turned? (Explain)
• Compostpilesshouldbeturnedwhentemperaturesexceed150°Forwhenthe temperature of the pile has peaked, plateaued, and begun to decline. National organic standards require 5 turnings within a 15-day period with a sustained temperature of131°–170°F.Thegreaterthenumberofturnings, the faster the material will break down.
11) Describe five qualitative indicators of compost maturity.
• “Parentmaterial”shouldbelargelyindistinguishable
• Textureshouldbecrumbly
• Verysmallparticlesize
• Temperaturehascooleddowntoambienttemperature
• Signsofmacrolife(e.g.,redworms,sowbugs,springtails)
• Darkbrowntoblackish-brownincolor
• Earthysmell(noammoniumoranaerobicodor)
• Feels“greasy”orslickwhensqueezedbetween fingers
What are some additional ways of assessing compost maturity and stability?
• Compostmaturityandstabilitymayalsobe determined through measurements of carbon dioxide and ammonium levels. This is commonly done in large-scale and commercial composting operations.

Making and Using Compost34 | Unit 1.7
Resources
Resources
Print resOurces
BOOKS
Gershuny, Grace. 1993. Start with the Soil. Em-maus, PA: Rodale Press.
Includes an introduction to the tools and techniques of home- and garden-scale composting.
Smillie, Joe, and Grace Gershuny. 1999. The Soul ofSoil:ASoil-BuildingGuideforMasterGarden-ers and Farmers.WhiteRiverJunction,VT:ChelseaGreen Publications.
Contains a brief section on farm-scale composting.
Jeavons, John. 2002. HowToGrowMoreVegeta-bles, Fruits, Nuts, Berries, Grains, and Other Crops Than You Ever Thought Possible on Less Land Than You Can Imagine, Sixth Edition. Berkeley, CA: Ten Speed Press.
Contains an introduction to the tools and techniques of home- and garden-scale composting.
Martin, Deborah, and Grace Gershuny, eds. 1992. TheRodaleBookofComposting. Emmaus, PA: Rodale Press.
Acomprehensiveintroductiontohome-andgarden-scale composting, including a chapter on large-scale composting.
Stell, Elizabeth P. 1998. Secrets to Great Soil. North Adams, MA: Storey Publications.
Contains an introduction to the tools and techniques of home- and garden-scale composting.
VanHorn,Mark.1995.Compost Production and Utilization:AGrowersGuide. Publication 21514. Oakland, CA: University of California Division of Agriculture and Natural Resources.
Includes sample calculations for achieving optimalC:Nratios,suggestionsoncompostmanagement, nutrient profiles, and nutrient release patterns of composts.
PERIODICALS
BioCycle. JG Press, Inc., 419 State Ave, Emmaus. PA 18049
Offers business-oriented information on composting, anaerobic digestion, and biofuels processing.
web resOurces
Biocycle Magazine
www.environmental-expert.com/magazine/bio-cycle/
BioCyclemagazineonline.
California Agriculture Teachers Association (CATA) Sustainable Agriculture Curriculum and PowerPoint Resources
www.ccagcans.com/cansdefault.html (see “Course Curriculum”)
TheCATASustainableAgricultureCurriculumand PowerPoint site contains 5 courses (includingcoursedescriptions,outlines,andresourcelistings)andover40PowerPointtitles.Developedbyleadingagriculturalprofessionals, these resources address various aspects of sustainable food systems and organic agricultural production practices.
California Integrated Waste Management Board
www.ciwmb.ca.gov
Provides health and safety information for composting.
Cornell University
www.cfe.cornell.edu/wmi/Composting.html
Provides access to a variety of composting educational materials and programs developed at Cornell University.
EPM, Inc.
www.wormwigwam.com
Procedures for composting using earthworms, and a worm-composting system offered for sale.

Making and Using Compost Unit 1.7 | 35
Resources
Exploring Sustainability in Agriculture: An Online Sustainable Agriculture Instructional Resource, Cen-ter for Agroecology and Sustainable Food Systems (CASFS)
zzyx.ucsc.edu/casfs/instruction/esa/index.html
This online resource from the Center for AgroecologyandSustainableFoodSystemsincludes a catalogue description and outline for a comprehensive course on sustainable agriculture, appropriate for the community college, state college, or university level. The outline and annotated resources address topics in social and environmental sciences; plant, soil, crop, and animal sciences; pest management; natural resource management; the adoption of sustainable agriculture; and the growth and development of sustainable agriculture and the organic food industry.
Klickit County, Washington Solid Waste
www.klickitatcounty.org/solidwaste
ResourcesforcalculatingtheC:Nratioofcompost piles.
National Organic Program
www.ams.usa.gov/nop
Provides regulations and standards for meeting composting requirements for organic certification.
Washington State University
css.wsu.edu/compost/
WSU’s compost research and education program provides useful information on large- and small-scale composting, use of composts, regulations, and the issue of Clopyralid contamination.
Worm Digest
www.wormdigest.org
Information, networking, and resources on all aspects of vermicomposting.
videO
DotheRotThing:TheSimpleArtofHomeCom-posting. 1998. Alameda, CA: Alameda County Waste Management Authority and Recycling Board (20 minutes).
Covers all the basics of home-scale composting.

Making and Using Compost36 | Unit 1.7
Appendix 1
Appendix 1: Compost Food WebEn
ergy flo
ws in
the d
irection
of th
e arro
ws
From the RodaleBookofComposting. Used by permission.

Making and Using Compost Unit 1.7 | 37
Appendix 2
Appendix 2: Compost Materials & Temperature Chart
NAME OF PILE: BUILT By:
DATE:
raw MateriaLs (NAME AND DESCRIPTION)
cOnstructiOn (SEQUENCE AND THICKNESS OF LAyERS) DRAW yOUR PILE HERE:
APPROxIMATE FINISHED SIzE:
recOrd
DATE TEMP °F OBSERvATIONS + ACTIONS

Making and Using Compost38 | Unit 1.7
0º
20º
40º
60º
80º
100º
120º
140º
160º
180º
36
912
1518
2124
2730
3336
3942
4548
5154
5760
0
compost Pile temperature (ºf)
days fro
m start o
f Pile
Appendix 2 (cont’d): Compost Materials & Temperature Chart
Appendix 2

Making and Using Compost Unit 1.7 | 39
Appendix 3: C:N Ratio of Common Compost Materials
Fresh chicken manure (laying) 6:1
Tomato processing waste 11:1
Vegetablewaste 12:1
Alfalfa hay 13:1
Fresh chicken manure (broiler) 14:1
Sheep manure 16:1
Fresh turkey manure 16:1
Grass clippings 17:1
Seaweed 19:1
Fresh cattle manure 19:1
Rotted manure 20:1
Apple pomace 21:1
Fresh horse manure 22:1
Grape pomace 28:1
Legume shells 30:1
Cereal hay 32:1
Dry leaves 40–80:1
Corn stalks 50:1
Oat straw 74:1
Grain chaff and hulls (e.g., rice hulls) 80–120:1
Straw 80:1
Timothy hay 80:1
Paper 170:1
Newsprint, cardboard 400:1
Sawdust 400:1
Wood chips, shavings 500+:1
MATERIAL C:N RATIO
Appendix 3
From Start with the Soil, by Grace Gershuny. Used by permission of Chelsea Green Publishing Co.
Optimum C:N range

Making and Using Compost40 | Unit 1.7
Appendix 4: Calculating C:N Ratios for Compost – A Rough Guide
you have 5 pounds of grass clippings (C:N ratio = 20:1). you have 5 pounds of leaves (C:N ratio = 40:1).
you have a total of 10 lbs. of material: 1/2 (50%) are grass, 1/2 (50%) are leaves.
Multiply the % of grass by the C:N ratio of grass, add the multiplication of the % of leaves by the C:N ratio of leaves: (50% X 20/1) + (50% X 40/1) = 10 + 20 = 30 ---> which in fraction notation is 30/1 or 30:1.
The C:N ratio is 30:1. (*Optimal C:N Ratio is 25–30:1)
Adapted from “Calculation of Carbon-to-Nitrogen Ratio (C:N)” by Master Composter, available online at www.mastercomposter.com. See also: http://compost.css.cornell/edu/calc/cn_ratio.html
Appendix 4