16.2 Scratch disk tutorial
2
16.2 – Scratch Disk Tutorial Firstly once you open final cut pro go to System Settings shown in (screenshot1) after you have selected this option where an information box will pop up. You then select the first set button this is shown in (screenshot2)where we will create a new folder (shown in screenshot 3) so all our work can go to the same place. , you then do the same for the Waveform cache , Thumbail and Autosave. This is to save time and to make sure that no work is lost. Make sure you call your folder something easy so you don’t forget it. Once you do this you make sure all buttons are set to go to your folder. (Waveform cache etc) – which is shown in screenshot 4. The last step is to save your project , to do this you need to go to “File , Save Project as and save to the same folder shown in screenshot 5 This should also be done for any files that you want to import. You are then ready to import & edit ! Screenshot 1 Screenshot 2
-
Upload
jarekpierre -
Category
Technology
-
view
353 -
download
0
Transcript of 16.2 Scratch disk tutorial
16.2 – Scratch Disk Tutorial
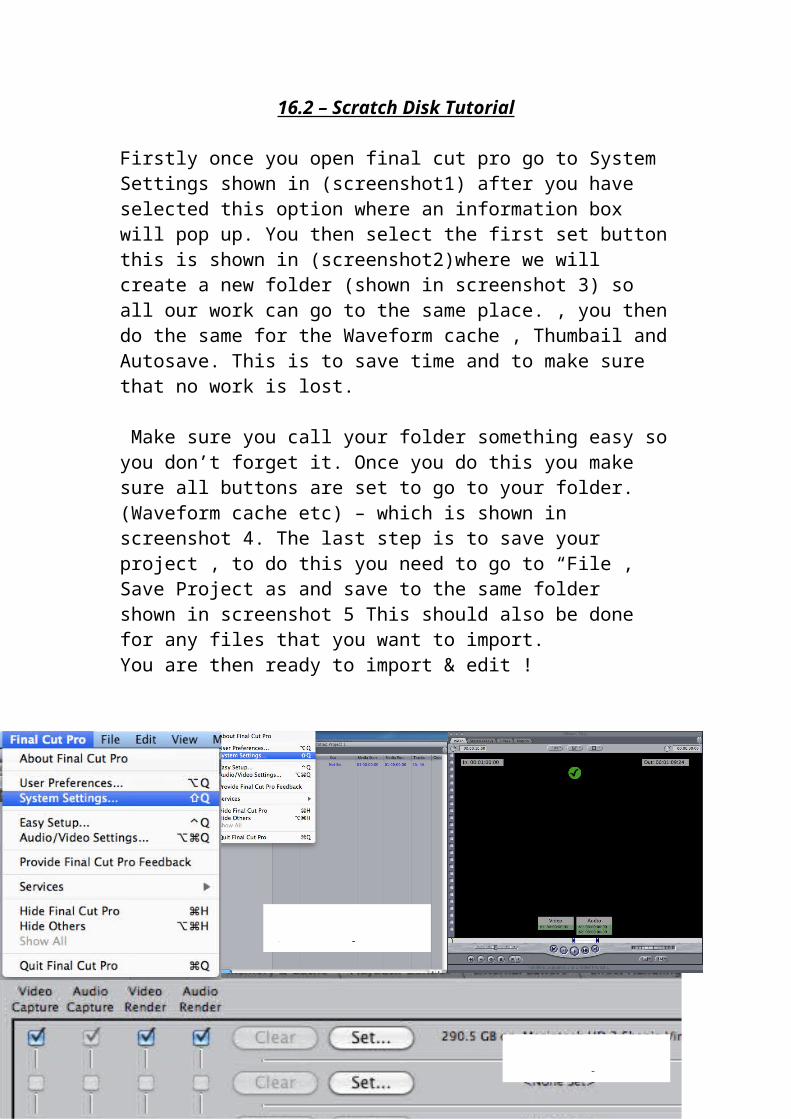
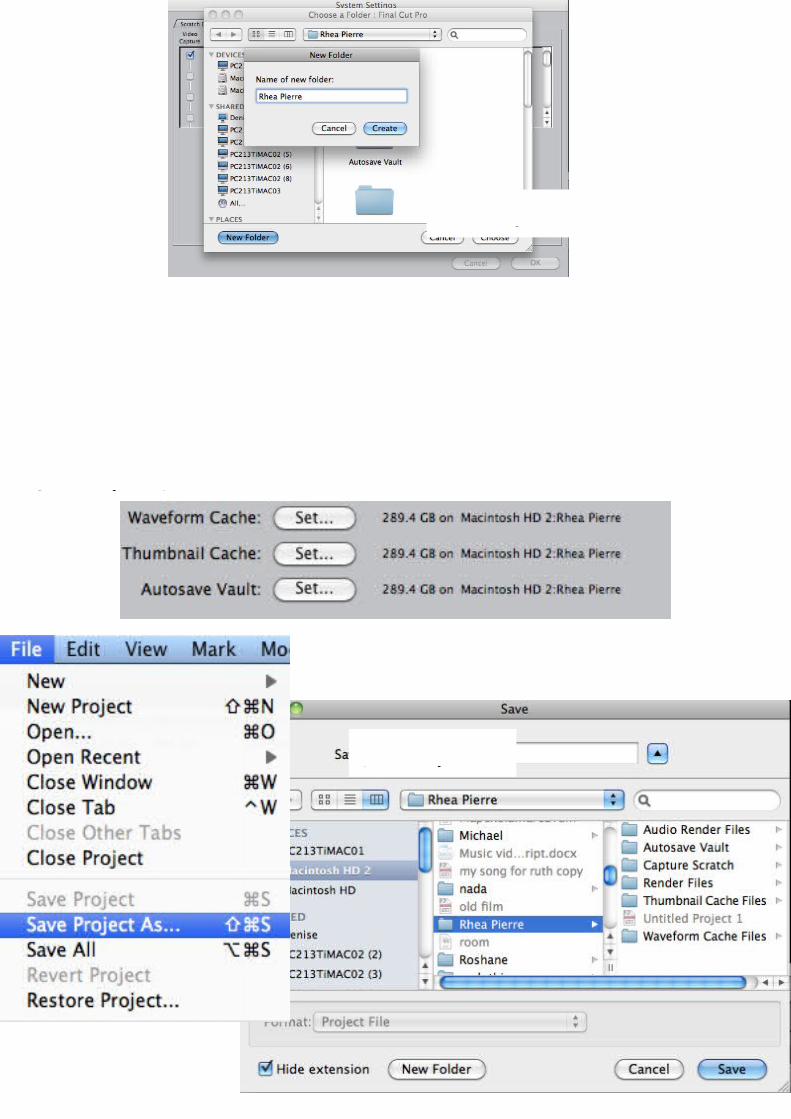
Firstly once you open final cut pro go to System Settings shown in (screenshot1) after you have selected this option where an information box will pop up. You then select the first set button this is shown in (screenshot2)where we will create a new folder (shown in screenshot 3) so all our work can go to the same place. , you then do the same for the Waveform cache , Thumbail and Autosave. This is to save time and to make sure that no work is lost.
Make sure you call your folder something easy so you don’t forget it. Once you do this you make sure all buttons are set to go to your folder. (Waveform cache etc) – which is shown in screenshot 4. The last step is to save your project , to do this you need to go to “File , Save Project as and save to the same folder shown in screenshot 5 This should also be done for any files that you want to import. You are then ready to import & edit !
Screenshot 1
Screenshot 2
Screenshot 3
Screenshot 4
Screenshot 5