
Contents · SlideShowPro 1.2.9 User Guide 2 Contents ... Introducing the Component Inspector ......
64
Transcript of Contents · SlideShowPro 1.2.9 User Guide 2 Contents ... Introducing the Component Inspector ......


2SlideShowPro 1.2.9 User Guide
Contents
Introduction ....................................................................................................................................3
Interface ...........................................................................................................................................4
Installation ......................................................................................................................................6
Your First Slide Show .....................................................................................................................7
Introducing the Component Inspector ..................................................................................... 10
Core Functionality - Layout ....................................................................................................... 11
Core Functionality - Playback .................................................................................................... 14
Style - Interface ............................................................................................................................. 16
Style - Type .................................................................................................................................... 18
Enhancements - Audio ................................................................................................................21
Enhancements - Custom Navigation ........................................................................................23
Enhancements - Image Captions ...............................................................................................25
Enhancements - Image Hyperlinks ...........................................................................................27
Enhancements - Keyboard Control ...........................................................................................29
Enhancements - Localization .....................................................................................................30
Enhancements - Permalinks ...................................................................................................... 31
Enhancements - Preloading ........................................................................................................34
Enhancements - Sound Effects ...................................................................................................36
Enhancements - Thumbnails (Images) .....................................................................................38
Enhancements - Thumbnails (Albums) ....................................................................................40
Enhancements - Watermarks .....................................................................................................42
Enhancements - XML Modifications ........................................................................................44
Enhancements - XML Overrides ...............................................................................................45
Loading images from Flickr .......................................................................................................46
ActionScript ..................................................................................................................................48
Event Listeners ..............................................................................................................................50
Tips and Tricks .............................................................................................................................55
Updating Previous Versions .......................................................................................................57
iPhoto Plugin ................................................................................................................................58
Troubleshooting ...........................................................................................................................61

3SlideShowPro 1.2.9 User Guide
Introduction
SlideShowPro is a component for Macromedia Flash MX 2004 and Flash 8 that helps you share your pictures online. With over 60 customizable options, SlideShowPro works how you want it to, and can easily be styled to match your existing site design — all with a simple point and click interface.
This user guide was written as complete reference for SlideShowPro. It includes an over-view of the interface, instructions on how to install the component, a tutorial on creating your first slide show, a thorough explanation of the component’s core functionality, and numerous walkthroughs exploring the many customizable options.
You will also find instructions on how to use the SlideShowPro iPhoto plugin, tips and tricks, how to load images from Flickr, how to update older versions of the component, as well as general troubleshooting.
Feel free to print it out for easy reference while you are working with SlideShowPro.
Let’s get started!

4SlideShowPro 1.2.9 User Guide
Interface
SlideShowPro’s minimal, yet intuitive interface places emphasis where it belongs — your photos.
main interface
photo caption
navigation bar
open/closegallery
previous imagegroup
previous image next image
caption header caption text
autoplay/pause
next imagegroup
image numbers

5SlideShowPro 1.2.9 User Guide
SlideShowPro’s gallery is where all your albums are stored. You may use either the main interface or the gallery interface as the starting point for your slide show.
gallery interface
gallery interface
photo album
album preview
album title / description
screen navigation
audio indicator

6SlideShowPro 1.2.9 User Guide
Installation
SlideShowPro is distributed as a Macromedia Extension file (MXP) and is installed through Macromedia Extension Manager. To install SlideShowPro, quit the Flash authoring application (if it is currently running). Unzip the ZIP file you received after purchasing the component, and open the folder it created.
Inside will be a file with a “.mxp” extension. Double-click on the MXP file.
If you have Extension Manager installed, the application will launch and walk you through the installation process. If your computer returns an error, stating that it doesn’t know what to do with the file, visit http://www.macromedia.com/exchange/em _ download/ to download the latest version of Extension Manager. Install Extension Manager, then retry installing the MXP file.
When Extension Manager completes, you should see “SlideShowPro” listed in the Man-ager interface (as shown in Figure 1 below). You have successfully installed SlideShowPro, and may now quit Extension Manager.
Figure 1: Extension Manager with SlideShowPro installed
Note: if you already have SlideShowPro installed and are looking for information on how to upgrade, refer to the “Updating Previous Versions” section of this User Guide.

7SlideShowPro 1.2.9 User Guide
Your First Slide Show
To get you up to speed quickly with how SlideShowPro works, this walkthrough will demonstrate how to create a simple slide show.
Note: If you plan to use the SlideShowPro iPhoto plug-in, stop here and read the “iPhoto Plugin” section of this User Guide. Once your images are exported from iPhoto, return to this walkthrough and start with “Create a Flash document.”
create a project folder
First, create a new folder named “slideshow” anywhere on your computer. This will be the project directory for all your files.
Open “slideshow” and create a new folder named “gal-lery.” Once created, open “gallery” and create a new folder named “album1.” This folder will hold all the images for your first album. Finally, open “album1” and create a new folder named “large.” Your directory structure should now resemble Figure 2.
Gather together the photos you wish to display. The images must be saved as non-progressive, baseline JPEGs (which they most likely are, unless you used this option when originally saving them). Place your photos in the “large” folder.
create an xml document
XML is the glue between SlideShowPro and your images. Without an XML file, SlideShowPro won’t know what to load or how to build your gallery.
Using your favorite text editor (Dreamweaver, BBEdit, or even Notepad is fine), create a new document and enter the following:
<?xml version="1.0" encoding="UTF-8"?><gallery> <album title="" description="" lgPath=""> <img src="" /> </album></gallery>
This is the basic template of your XML document. Save the XML file to the “slideshow” directory (so that it is alongside the “gallery” folder) and name it “images.xml.”
Now we’re going to fill the template with our gallery data. In the album element, add a title and description, then add to the “lgPath” attribute the relative path to the “large”
Figure 2: Initial directory structure

8SlideShowPro 1.2.9 User Guide
folder you created earlier, which in this case would be “gallery/album1/large/”.
Now for your images — edit the src attribute in the img element with the file name of the first image you’d like to show. If your image were named “tree.jpg”, the element would be <img src=“tree.jpg” />.
For every additional image you wish to show, create another img element and fill it with the file name. Your XML file should now resemble the following:
<?xml version="1.0" encoding="UTF-8"?><gallery> <album title="Nature" description="Images of trees, lakes and flowers"
lgPath="gallery/album1/large/"> <img src="tree.jpg" /> <img src="flower.jpg" /> <img src="lake.jpg" /> </album></gallery>
When you have one img element for every image in the “large” folder, save and close the XML document.
Note: The XML example above will be seen again numerous times throughout this User Guide. It will serve as the basis for all available enhancements you may add to your slide show.
create a flash document
Launch Flash, select “File > New” from the application menu, and click “OK” to create a Flash document. Save the document to the “slideshow” directory (so that it is alongside the “gallery” folder) and name it “slideshow.fla”. Your “slideshow” directory should resemble Figure 3.
Select Window > Properties in the application menu to open the Properties panel. Increase the frame rate of your movie. The default frame rate of 12fps is too low for opti-mum playback. Change this number to 31fps.
add slideshowpro
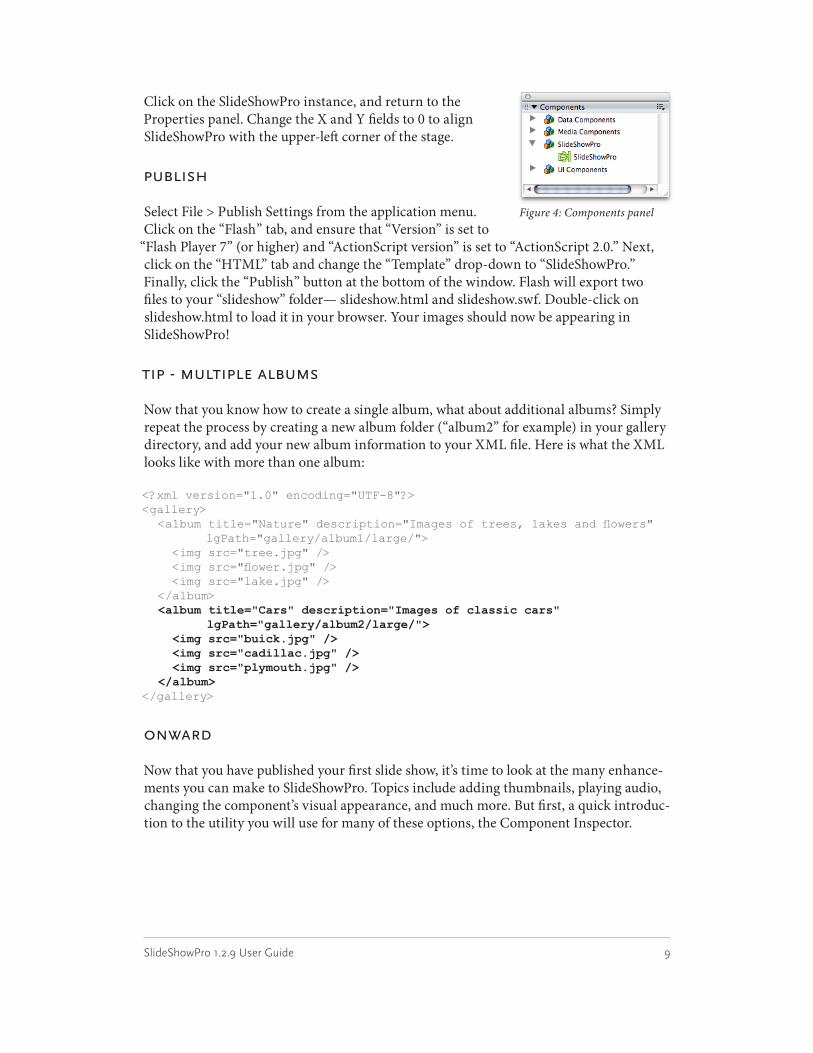
Select Window > Development Panels > Components in the application menu to open the Components panel (Figure 4, next page). Inside is a folder named “SlideShowPro.” Toggle the folder open and the SlideShowPro component will be inside. Click on the com-ponent, hold the mouse button down, and drag it to the stage (the large white area). An instance of SlideShowPro will appear using default settings for width, height, and color.
Figure 3: Updated directory structure
9SlideShowPro 1.2.9 User Guide
Click on the SlideShowPro instance, and return to the Properties panel. Change the X and Y fields to 0 to align SlideShowPro with the upper-left corner of the stage.
publish
Select File > Publish Settings from the application menu. Click on the “Flash” tab, and ensure that “Version” is set to
“Flash Player 7” (or higher) and “ActionScript version” is set to “ActionScript 2.0.” Next, click on the “HTML” tab and change the “Template” drop-down to “SlideShowPro.” Finally, click the “Publish” button at the bottom of the window. Flash will export two files to your “slideshow” folder— slideshow.html and slideshow.swf. Double-click on slideshow.html to load it in your browser. Your images should now be appearing in SlideShowPro!
tip - multiple albums
Now that you know how to create a single album, what about additional albums? Simply repeat the process by creating a new album folder (“album2” for example) in your gallery directory, and add your new album information to your XML file. Here is what the XML looks like with more than one album:
<?xml version="1.0" encoding="UTF-8"?><gallery> <album title="Nature" description="Images of trees, lakes and flowers"
lgPath="gallery/album1/large/"> <img src="tree.jpg" /> <img src="flower.jpg" /> <img src="lake.jpg" /> </album> <album title="Cars" description="Images of classic cars"
lgPath="gallery/album2/large/"> <img src="buick.jpg" /> <img src="cadillac.jpg" /> <img src="plymouth.jpg" /> </album></gallery>
onward
Now that you have published your first slide show, it’s time to look at the many enhance-ments you can make to SlideShowPro. Topics include adding thumbnails, playing audio, changing the component’s visual appearance, and much more. But first, a quick introduc-tion to the utility you will use for many of these options, the Component Inspector.
Figure 4: Components panel
10SlideShowPro 1.2.9 User Guide
Introducing the Component Inspector
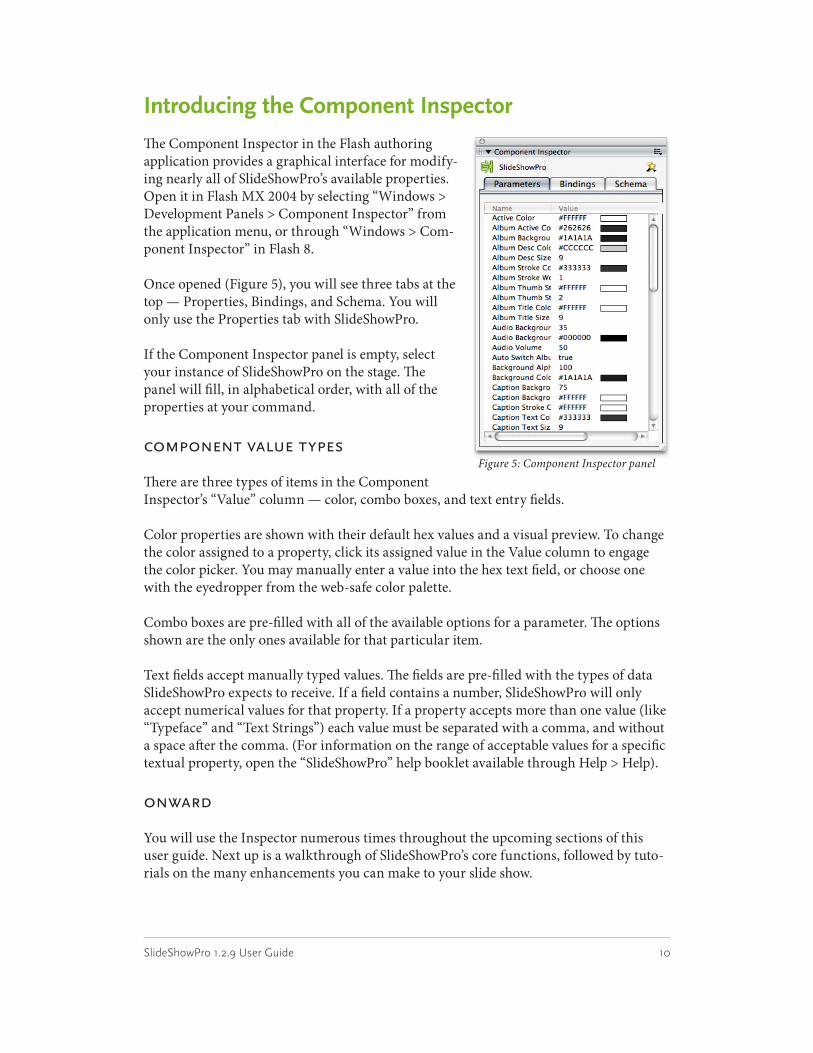
The Component Inspector in the Flash authoring application provides a graphical interface for modify-ing nearly all of SlideShowPro’s available properties. Open it in Flash MX 2004 by selecting “Windows > Development Panels > Component Inspector” from the application menu, or through “Windows > Com-ponent Inspector” in Flash 8.
Once opened (Figure 5), you will see three tabs at the top — Properties, Bindings, and Schema. You will only use the Properties tab with SlideShowPro.
If the Component Inspector panel is empty, select your instance of SlideShowPro on the stage. The panel will fill, in alphabetical order, with all of the properties at your command.
component value types
There are three types of items in the Component Inspector’s “Value” column — color, combo boxes, and text entry fields.
Color properties are shown with their default hex values and a visual preview. To change the color assigned to a property, click its assigned value in the Value column to engage the color picker. You may manually enter a value into the hex text field, or choose one with the eyedropper from the web-safe color palette.
Combo boxes are pre-filled with all of the available options for a parameter. The options shown are the only ones available for that particular item.
Text fields accept manually typed values. The fields are pre-filled with the types of data SlideShowPro expects to receive. If a field contains a number, SlideShowPro will only accept numerical values for that property. If a property accepts more than one value (like “Typeface” and “Text Strings”) each value must be separated with a comma, and without a space after the comma. (For information on the range of acceptable values for a specific textual property, open the “SlideShowPro” help booklet available through Help > Help).
onward
You will use the Inspector numerous times throughout the upcoming sections of this user guide. Next up is a walkthrough of SlideShowPro’s core functions, followed by tuto-rials on the many enhancements you can make to your slide show.
Figure 5: Component Inspector panel

11SlideShowPro 1.2.9 User Guide
Core Functionality - Layout
SlideShowPro was made to be flexible. You may change its width and/or height, and the component will automatically reformat itself to fit your chosen size. You may also change the position and size of albums in the gallery, and toggle the visibility of all the interface elements in the component.
resizing
Resizing SlideShowPro is handy when you want to place a slide show into an existing template, or when you need to frame photos of a specific dimension.
To resize SlideShowPro, select the instance of the com-ponent on the stage and select Modify > Transform > Scale from the application menu. As depicted in Figure 6, little black boxes will appear around the perimeter of the component. Click and hold a corner block, and drag to proportionally scale SlideShowPro.
For more precise control, select the instance of component on the stage, and bring the Properties panel to the front (Window > Properties). Modify the W: and H: values to the size you want.
When manually resizing SlideShowPro, there are a few points to watch out for:
• Don’t use the Distort or Free Transform tools. SlideShowPro will not function if you twist or skew the shape of the component.
• You may use Rotate, but only if you turn off image captions and the navigation. This is because Flash cannot write dynamic text to a text field that has been rotated.
• Round your width and height to whole numbers, and do not use decimals.
movie size
An important point to remember when publishing your slide show is that its published size is not based on the size of the com-ponent, but on the dimensions of your Flash movie. The width and height of your movie is reflected in the size of the Stage un-derneath SlideShowPro. If you are aiming for a particular width and height, first change the size of the Stage by clicking on the “Size:” button in the Properties panel. Once changed, modify the width and height of SlideShowPro to match your movie.
Figure 6: Ready to scale
Figure 7: Movie sizebutton

12SlideShowPro 1.2.9 User Guide
image scaling
The size of SlideShowPro plays an important role in how it displays images; specifically, how it behaves when a photo is of a different width and/or height than itself.
By default, SlideShowPro will automatically center (both horizontally and vertically) an image if its width and/or height is less than the viewable area of the component. If an image’s width and/or height is greater than the viewable area, SlideShowPro will display as much of the image as its boundaries allow.
Alternatively, you may force your images into fitting the dimensions of SlideShowPro by setting the “Image Scaling” property in the Component Inspector to “True.” This will cause all images that are smaller than the width and/or height of the viewable area to proportionally upscale their size to fit the viewable area. If an image is larger, it will be proportionally downscaled.
image alignment
If the automatic centering of images isn’t your taste, you may change it with the “Image Align” in the Component Inspector. Additional options include “Top Left,” “Top Cen-ter,” “Top Right,” “Center Right,” “Bottom Right,” “Center Bottom,” “Bottom Left,” and “Center Left.”
gallery layout
The gallery interface is where all your albums are stored. Like an HTML table, the gallery creates a series of rows and columns and fills the cells with your albums.
The size and layout of the gallery is directly related to the overall width and height of SlideShowPro. By default, the gallery is created with three columns and four rows. If you reduce the size of SlideShowPro, and the gallery can no longer support its default settings, SlideShowPro will automatically reduce the number of gallery columns and/or rows, as well as adjust the width and height of each cell to proportionally fit your new dimensions.
You may also manually modify the number of columns and rows. Simply change the numerical value of “Gallery Rows” and “Gallery Columns” in the Component Inspector and SlideShowPro will automatically update its preview. If you enter a number that’s too high for the size of SlideShowPro to support, it will be ignored and the maximum value available will be used instead.
When ordering your albums in the gallery, SlideShowPro always starts with the first row and column, and (by default) moves from left-to-right filling cells until reaching the end of a row, at which time it moves to the first cell in the second row and continues. If you’d rather have your albums placed in a top-to-bottom progression, you may change this in the Component Inspector by modifying the “Gallery Order” property.

13SlideShowPro 1.2.9 User Guide
If you fill all available rows and columns in the gallery interface, SlideShowPro automati-cally divides your content into “screens,” which allow the user to quickly flip back and forth between album collections like turning pages in a book.
startup
If you would prefer to start SlideShowPro with the gallery interface open, so a user may choose which album they want to load, set the “Show Gallery” parameter to “Startup.”
turn on/off interface elements
Though SlideShowPro was purposely designed to have the most minimal interface possi-ble, you have the option of turning off elements you’d rather not have in your slide show. Simply open the Component Inspector and set “Show Navigation,” “Show Audio Player,” “Show Captions,” and/or “Show Caption Header” to “False”, as well as “Show Gallery” to “Never” to remove the elements from your slide show.

14SlideShowPro 1.2.9 User Guide
Core Functionality - Playback
SlideShowPro offers a variety of playback options for your photos. Like an audio player, you can shuffle, repeat, stop, start, and loop. This walkthrough will describe the custom-izable playback properties available to you.
playback properties
By default, SlideShowPro auto plays your content in sequential order. It loads the first image from the first album in your gallery, and after a configurable amount of time loads the second, then the third, and so-on. When SlideShowPro reaches the last image, and there is another album available after the current one, it will automatically switch albums and load the first image of the next album in que. If there is only one album, it will stop.
You may modify this default behavior by changing the values of any of the following properties in the Component Inspector:
Display Mode: This controls the automatic playback of your presentation when first loaded by a user. By default, it is set to “Auto,” which means SlideShowPro will automati-cally load the next image in que after the “Image Pause” timer (see below) has expired. Changing this to “Manual” will instruct SlideShowPro to load the first image, but not set a timer. It will simply stop and await user input.
Image Order: Set to “Sequential” by default, which means your images are loaded in the order in which they appear in your XML document — line by line. Changing this to “Random” will shuffle the order of images in your albums in an order that is unique for every user who loads your slide show.
Auto Finish Mode: This property instructs SlideShowPro how to behave when reaching the final image in an album. This applies only to slide shows in “Auto” Display Mode. There are four options available:
Switch: (Default) The next album is loaded and auto-playback continues. (Note: if there is only one album, SlideShowPro will ignore this value and stop).
Restart: The current album restarts with either the first image in your album, or (if in “Random” Image Order) SlideShowPro will re-shuffle your album’s image sequence and restart with a randomly selected first image.
Stop: Auto-playback stops and Display Mode changes to “Manual.”
Open Gallery: Auto-playback stops and the gallery window is opened so the user may pick another album. Once selected, auto-playback restarts.

15SlideShowPro 1.2.9 User Guide
timer properties
The automatic playback of photos is based on two timer properties:
Image Pause: a number that indicates (in seconds) how long each image “holds” before automatically loading the next image in que.
Image Fade: a number that indicates (in seconds) the duration of the cross-fade effect.
Transition Style: the style of transition applied to images when unloading and loading in the viewer. Choices are “Cross Fade” and “Complete Fade.” “Cross Fade” fades out the current image while fading in the next. “Complete Fade” fades out the current image completely before fading in the next. The default value is “Cross Fade.”
switching between auto and manual display mode
Regardless of how you set SlideShowPro to start, if you allow navigational controls in your slide show a user can change the playback behavior. If SlideShowPro is in Auto mode, and the user clicks on an image number or chooses a new album, SlideShowPro will change to Manual mode. If SlideShowPro is in Manual mode, and the user clicks the play button at the far right of the navigation bar or presses the space bar (if “Keyboard Access” is set to “True”), SlideShowPro will change to Auto mode. To dissalow any user control, set “Show Navigation” to “False.”
auto-start alternative
If you’d rather not auto-load an image at startup, and would prefer to allow users to pick an starting album themselves, set the “Show Gallery” parameter to “Startup.” This will enable the gallery window to automatically open when SlideShowPro loads, and await further instruction from the user.

16SlideShowPro 1.2.9 User Guide
Style - Interface
The default color of nearly every interface element in SlideShowPro can be changed as easily as using the color picker in the Component Inspector. Numerous elements offer alpha transparency control as well, so you can create unique color blends and/or turn the visibility of an item off completely. This walkthrough lists each of the modifiable color properties in SlideShowPro.
Properties with “Color” in their name accept hex values. Properties with “Alpha” accept any number at or between 0 and 100. Setting any alpha value to 0 renders the applicable element invisible.
Active Color: The color of all navigational icons, the rollover color of navigation num-bers, and the stroke color of the gallery screen navigation.
Album Active Color: The color of an album’s background changes to when the user’s mouse rolls-over the item. Album background returns to albumBackgroundColor on roll-out. This value is also used by the “Previous” and “Next” screen buttons in the gal-lery.
Album Background Color: The background color of each album in the gallery.
Album Stroke Color: The color of the outline around each album in the gallery.
Album Stroke Weight: The pixel width of the outer stroke around each album in the gal-lery.
Album Thumb Stroke Color: The color of the outline around each album’s thumbnail in the gallery.
Audio Background Alpha: a number that sets the transparency value of the audio player background.
Audio Background Color: The background color of the audio player.
Background Color: The general background behind everything in SlideShowPro. This color appears underneath all images, navigational elements, captions, and the outer stroke.
Caption Background Alpha: The transparency value of each photo caption background.
Caption Background Color: The background color of each photo caption.
Caption Stroke Color: The background color of each photo outline.
Feedback Scale: A number that indicates the scale of SlideShowPro feedback graphics,

17SlideShowPro 1.2.9 User Guide
including the circular preloader animation and pause/play indicator.
Gallery Background Color: The background color of each gallery screen.
Icon Inactive Alpha: The transparency percentage for icons that are inactive. Icons are automatically turned inactive during playback when they aren’t functional. Setting this to zero effectively makes inactive icons invisible, so only active icons appear in the naviga-tion.
Icon Shadow Alpha: A number containing the amount of shadow overlay applied to each navigational icon. Each icon has a bevel layer on top of itself to provide a sense of visual depth. The bevel is drawn from the top left of the icon to the bottom right, increasing in opacity along the way.
Navigation Background Color: The background color of the navigation bar.
Navigation Numbers Background Alpha: The transparency value used for the back-ground area underneath the navigational image numbers.
Navigation Numbers Background Color: The background color of the area underneath the navigational image numbers.
Preloader Alpha: The transparency percentage for the preloader animation.
Preloader Color: The color of the circular preload animation.
Stroke Color: The color of the outer stroke around SlideShowPro.
Stroke Weight: The pixel width of the outer stroke around SlideShowPro.
Thumbnail Color: The color of the thumbnail preview window

18SlideShowPro 1.2.9 User Guide
Style - Type
There are two types of text fields in SlideShowPro — General, and Headers. General text fields are used for the majority of textual content in SlideShowPro, including the navi-gational image numbers, photo captions, audio player, album descriptions, and gallery navigation. Header text fields include the caption header, album titles, and the gallery screen counter. SlideShowPro also allows you to customize the point size of nearly every typeface in the application.
system and non-system typefaces
By default, SlideShowPro uses what’s known as “system text” for both General and Header text fields. These include typefaces that are nearly universally available on every computer an end-user would use to view your presentation. Like HTML, SlideShowPro will use whichever typeface in the descending, comma-separated list of font names it finds first on a user’s computer.
If you’d rather have a more stylized look, you may assign two non-system typefaces for General and Header text fields. You would chose this option if you wanted to use bitmap fonts, or a unique TrueType / PostScript font that is most likely unavailable on an end-user’s computer.
Note that you cannot mix text field types in SlideShowPro. Both the General and Header font must be either system or embedded, but not both.
import into library
To use a non-system font in your movie, you first must embed the typeface you wish to use. As shown in Figure 8, open the Library panel (Window > Library). Click on the button in the upper right corner of the panel to toggle open the Library menu. Select “New Font”.
select font
A new dialog window named “Font Symbol Properties” will appear (Figure 9). Click the double-arrow button to the right of the “Font:” field in the Font Sym-bol Properties dialog. Select the name of the font. Then, give your font a simple name in the “Name:” field. Leave all the other options alone. Click OK.
Figure 8: New Font selected from menu
Figure 9: Font Symbol Properties window
19SlideShowPro 1.2.9 User Guide
setup linkage
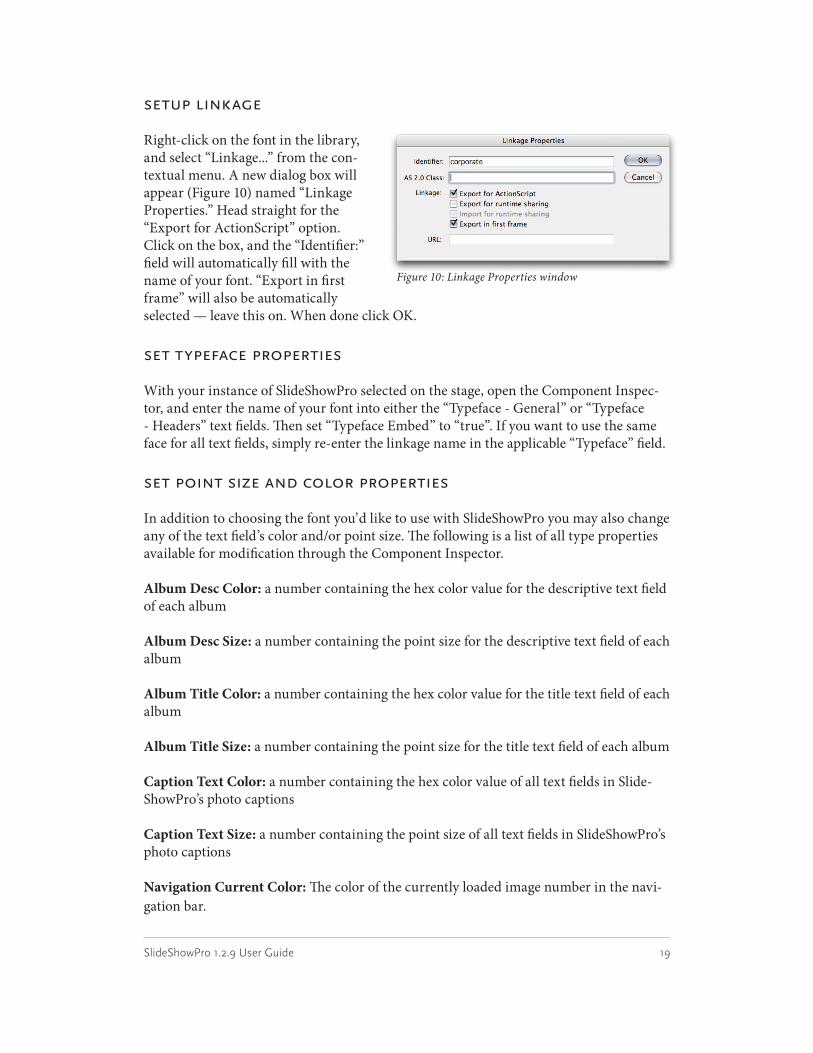
Right-click on the font in the library, and select “Linkage...” from the con-textual menu. A new dialog box will appear (Figure 10) named “Linkage Properties.” Head straight for the “Export for ActionScript” option. Click on the box, and the “Identifier:” field will automatically fill with the name of your font. “Export in first frame” will also be automatically selected — leave this on. When done click OK.
set typeface properties
With your instance of SlideShowPro selected on the stage, open the Component Inspec-tor, and enter the name of your font into either the “Typeface - General” or “Typeface - Headers” text fields. Then set “Typeface Embed” to “true”. If you want to use the same face for all text fields, simply re-enter the linkage name in the applicable “Typeface” field.
set point size and color properties
In addition to choosing the font you’d like to use with SlideShowPro you may also change any of the text field’s color and/or point size. The following is a list of all type properties available for modification through the Component Inspector.
Album Desc Color: a number containing the hex color value for the descriptive text field of each album
Album Desc Size: a number containing the point size for the descriptive text field of each album
Album Title Color: a number containing the hex color value for the title text field of each album
Album Title Size: a number containing the point size for the title text field of each album
Caption Text Color: a number containing the hex color value of all text fields in Slide-ShowPro’s photo captions
Caption Text Size: a number containing the point size of all text fields in SlideShowPro’s photo captions
Navigation Current Color: The color of the currently loaded image number in the navi-gation bar.
Figure 10: Linkage Properties window

20SlideShowPro 1.2.9 User Guide
Navigation Text Color: a number containing the hex color value of the image numbers in SlideShowPro’s navigation bar
Navigation Text Size: a number containing the point size of the image numbers in SlideShowPro’s navigation bar
Text Alignment: a string that aligns all text fields in the component left or right.
Typeface - General: String containing the title of the system typeface(s) or embedded font’s linkage ID. Used for all general / non-header text fields in the component. See be-ginning of this chapter for more detailed information.
Typeface - Header: String containing the title of the system typeface(s) or embedded font’s linkage ID. Used for all header text fields. See beginning of this chapter for more detailed information.
Typeface Embed: Boolean for whether the component should embed the typefaces as-signed to “Typeface - General” and “Typeface - Header”. Should only be set to “true” if you are using non-system / custom typefaces.

21SlideShowPro 1.2.9 User Guide
Enhancements - Audio
Adding audio to your slide show is a great way to provide users with music or narra-tion alongside your photos. You may add one audio track and caption per album, and SlideShowPro will automatically stream your audio and display a small audio player for playback control. This walkthrough will show you how.
create an MP3 file
The first step in adding audio to your slide show is to create an MP3 file. Whether you plan to use an existing file or encode a new one, it’s a good idea to create a new version optimized for web delivery, where file size counts.
The lower the bit rate of your MP3, the smaller the file. Regardless of what bit rate you choose, you must encode it with one of the following supported bit rates (kbps):
8 / 16 / 20 / 24 / 32 / 48 / 56 / 64 / 80 / 112 / 128 / 160
All MP3s must also be encoded with a sample rate of 44.1 khz.
create an audio directory
Navigate to the folder where your slide show files are contained and create a new folder named “mp3” inside the album you want the audio played with. When finished you should have your mp3 folder alongside the “large” folder you created in the basic setup (see Figure 11). Place your MP3 file in the “mp3” directory.
add audio to the xml document
The next step is to open your XML document, add an “au-dio” attribute to the album element you want audio with,
and fill the attribute with the path to your MP3 file. If you placed the MP3 file in the aforementioned directory alongside your “large” folder, your XML would look like this:
<?xml version="1.0" encoding="UTF-8"?><gallery> <album title="Nature" description="Images of trees, lakes and flowers"
lgPath="gallery/album1/large/" audio="gallery/album1/mp3/audio.mp3">
<img src="tree.jpg" /> <img src="flower.jpg" /> <img src="lake.jpg" /> </album></gallery>
Figure 11: MP3 folder added
22SlideShowPro 1.2.9 User Guide
add an audio caption
SlideShowPro’s audio player, which appears in the lower-left-hand corner when an album is selected that contains audio, has a text field that displays information about the song, artist, or anything you want. Simply add an “audioCaption” attribute to the same album edited earlier, and fill it with your text. Your revised XML document would then look like this:
<?xml version="1.0" encoding="UTF-8"?><gallery> <album title="Nature" description="Images of trees, lakes and flowers"
lgPath="gallery/album1/large/" audio="gallery/album1/mp3/audio.mp3" audioCaption="Talking Heads - Nothing but Flowers">
<img src="tree.jpg" /> <img src="flower.jpg" /> <img src="lake.jpg" /> </album></gallery>
set audio looping
By default, SlideShowPro will stop playback of your album’s audio when it reaches the end of the MP3 file. If you would like to change this behavior (so the audio loops back to the beginning every time it finishes), change the “Audio Loop” property in the Compo-nent Inspector to “True.”
You’re done! Now whenever a user loads the “Nature” album the audio player will ap-pear, it will automatically stream the Talking Heads song, and either stop or restart upon completion depending on how you set the “Audio Loop” property.
tips / extra note
- You may mix albums with and without audio. Albums containing audio will display a small icon in their lower-left-hand corner.
- If your audio sounds too fast or slow when played in SlideShowPro, ensure your MP3 file was encoded with one of the bit rates at the beginning of this walkthrough, and is us-ing a sampling rate of 44.1 khz.
- Because audio was intended to be used for auto-playback slide shows, if the user clicks on a navigational item or the pause button the audio will pause as well. Restarting auto-play will restart the audio from where it left off. To keep this from happening, publish a movie with “Show Navigation” set to False.
- If you’d rather not display the audio player, but still play audio, set “Show Audio Player” in the Component Inspector to ‘False.”

23SlideShowPro 1.2.9 User Guide
Enhancements - Custom Navigation
SlideShowPro supports the use of buttons outside of the component to control playback. This allows you to forgo the embedded navigation in SlideShowPro and use your own buttons, icons, or text as a replacement. This walkthrough will show you how.
hide navigation
The first thing you’ll want to do is remove the embedded navigation in SlideShowPro. Select your instance of SlideShowPro on the stage, open the Component Inspector, and set “Show Navigation” to False.
assign instance name
Your instance of SlideShowPro on the stage will need an instance name in order for outside elements to communicate with it. Select SlideShowPro, open the Properties panel, and type “ssp” into the Instance Name box (under the “Component” text field).
create buttons
Create a new movie clip for each control you’d like to replace. Your options include “Pre-vious Image”, “Next Image”, “Toggle Display Mode” (Play/Pause) and “Toggle Gallery” (“Toggle Navigation” is also available, but for now we won’t use it). When finished, place your movie clips anywhere on your stage, and (like we did earlier) give each an instance name through the Properties panel.
For the sake of this walkthrough, I’ve created four movie clips, and assigned them in-stance names of “next_btn”, “prev_btn”, “display_btn”, and “gallery_btn.”
(Note: In case you don’t know, adding “_btn” to each of the instance names isn’t just good organizational form, but it enables button-related code hints in the ActionScript editor).
attach actionscript
Create a new layer in your timeline, and name it “A.” Select the first empty frame, open the ActionScript editor (Window > Development Panels > Actions), and enter the follow-ing:
next_btn.onRelease = function() { ssp.nextImage();}prev_btn.onRelease = function() { ssp.previousImage();}display_btn.onRelease = function() { ssp.toggleDisplayMode();}

24SlideShowPro 1.2.9 User Guide
gallery_btn.onRelease = function() { ssp.toggleGallery();}
You’re done! Publish a new movie and your own buttons will control the main navigation of the component.
include navigation
If you would like to keep the embedded navigation, and toggle its appearance with your own button, you may do so with the “Toggle Navigation” method. Simply create a new movie clip like the others, and attach the following:
nav_bttn.onRelease = function() { ssp.toggleNav();}
demo
To see a working demo of custom navigation in SlideShowPro, visit the URL below.
http://www.slideshowpro.net/demo/demo_customnav.php

25SlideShowPro 1.2.9 User Guide
Enhancements - Image Captions
Image captions are a great way to enhance the user experience by providing textual infor-mation about a photo in your presentation. SlideShowPro supports photo captions, and offers a variety of properties to modify their behavior and appearance. This walkthrough will show how to add captions to your slide show.
edit the xml document
The first step is to add caption attributes to your XML document. For every photo you want a caption for, add a caption attribute to the img element, and fill it with whatever you like. The following example demonstrates this:
<?xml version="1.0" encoding="UTF-8"?><gallery> <album title="Nature" description="Images of trees, lakes and flowers"
lgPath="gallery/album1/large/"> <img src="tree.jpg" caption="A redwood tree from California" /> <img src="flower.jpg" caption="Rose bush outside my house" /> <img src="lake.jpg" caption="A beautiful lake" /> </album>
</gallery>
caption behavior
There are five behavioral values for the “Show Captions” property — “Never,” “Always,” “Always (If Available),” “On Mouse Over,” and “On Mouse Over (If Available)” (default).
Never: Caption area never appears.
Always: Caption area automatically drops down from the top of the component window every time a new image is loaded. Requires no user input.
Always (If Available): Same as “Always,” except SlideShowPro will first test for the ex-istance of a caption. If none exists, caption area will not be displayed.
On Mouse Over: Caption area drops down when the user rolls their mouse pointer over the loaded image, and dissapears when they roll-out.
On Mouse Over (If Available): Same as “On Mouse Over,” except SlideShowPro will first test for the existance of a caption. If none exists, caption area will not be displayed.
caption header type
In addition to all the caption style options noted under “Style-Interface” and “Style-Text” in this User Guide, you may also customize the type of Caption Header to use with the “Caption Header Type” property. Options include “Image Count”, “Image Title”, “Album

26SlideShowPro 1.2.9 User Guide
Title”, and “File Name”.
Image Count: Will display “Image [image number] of [total album images]”. The English words “Image” and “of” are changeable through the “Text String” parameter.
Image Title: The title of an image as assigned in the XML file by adding a “title” attribute to an image element, like so:
<?xml version="1.0" encoding="UTF-8"?><gallery> <album title="Nature" description="Images of trees, lakes and flowers"
lgPath="gallery/album1/large/"> <img src="tree.jpg" title="Tree Title" caption="A redwood tree from
California" /> <img src="flower.jpg" title="Flower Title" caption="Rose bush outside
my house" /> <img src="lake.jpg" title="Lake Title" caption="A beautiful lake" /> </album></gallery>
Album Title: the title of the album from which the current image originates.
File Name: The file name of the image. This is equal to the “src” attribute value in an im-age element in the XML file.
caption header visibility
If you’d rather not show the Caption Header, set “Show Caption Header” to “False.” Oth-erwise the default value is “True.”
publish
Publish a new movie. Your captions will now appear based on the option you chose above.

27SlideShowPro 1.2.9 User Guide
Enhancements - Image Hyperlinks
SlideShowPro allows you to attach hyperlinks to images, with additional control over where the link is loaded — the current browser window, in a new browser window, or in a specific frame. This walkthrough will show you how to add image hyperlinks to your slide show.
edit the xml document
Continuing the XML structure from the basic setup walkthrough, you first add a “link” attribute to any image you want to assign a hyperlink to, and fill it with the URL, like so:
<?xml version="1.0" encoding="UTF-8"?><gallery> <album title="Nature" description="Images of trees, lakes and flowers"
lgPath="gallery/album1/large/"> <img src="tree.jpg" link="http://www.trees.com/" /> <img src="flower.jpg" link="http://www.flowers.com/" /> <img src="lake.jpg" link="http://www.lake.com/" /> </album></gallery>
Your images are now enabled, and their assigned URLs will be loaded in a new browser window when clicked by the user. If you’d like to change this default behavior and load your links in the current browser window, or in specific frame, add a “target” attribute to your image element, like so:
<?xml version="1.0" encoding="UTF-8"?><gallery> <album title="Nature" description="Images of trees, lakes and flowers"
lgPath="gallery/album1/large/"> <img src="tree.jpg" link="http://www.trees.com/" target="_self" /> <img src="flower.jpg" link="http://www.flowers.com/" target="_self" /> <img src="lake.jpg" link="http://www.lake.com/ target="_self" /> </album></gallery>
All three images will now load in the current browser window. You may assign “_blank” to target if you’d like, but it’s not necessary since that’s the default setting for SlideShowPro.
javascript
If you would prefer to pop-open a new browser window set to a particular width and height, or call a JavaScript method in the HTML document containing SlideShowPro, you may do so by including JavaScript in the link attribute.
For example, the following image (when clicked by the user) will pop open a new browser window set to a width of 300 pixels, a height of 300 pixels, and load Google’s home page:

28SlideShowPro 1.2.9 User Guide
<img src="BS20001.jpg" link="javascript:NewWindow=window.open('http://www.google.com/','myWindow','width=300,height=300');NewWindow.focus(); void(0);" />

29SlideShowPro 1.2.9 User Guide
Enhancements - Keyboard Control
Allowing keyboard control in your slide show can make navigating your presentation faster and easier. To turn this feature on, select the instance of SlideShowPro on the stage of your Flash document, and set the “Keyboard Control” property to “True.” Publish a new SWF to update your movie, which will now accept the following keyboard inputs:
G: Open/close gallery interface
N: Hide/show navigation bar
Left arrow: Load previous image
Up arrow: Skip to next image number group
Right arrow: Load next image
Down arrow: Skip to previous image number group
Space Bar: Pause/Auto-Play SlideShowPro

30SlideShowPro 1.2.9 User Guide
Enhancements - Localization
As part of SlideShowPro’s user interface there are a handful of static text fields (uncon-trolled by XML) that contain English words by default. In the interest of complete inter-national support, their values may be changed to any language.
text strings
The default English values for these static text fields are contained in the “Text Strings” array in the Component Inspector. By default “Text Strings” includes:
0 - “Previous Screen”1 - “Next Screen”2 - “Screen”3 - “Image”4 - “of”5 - “from”
The value of [0] is used for the left button in the gallery screen. The value of [1] is used for the right button in the gallery screen. The value of [2] is used as the screen-count field in the gallery screen. The value of [3] is used at the beginning of the caption header. The value of [4] is used in both the caption header and the screen-count field in the gallery screen. The value of [5] is used in the caption title.
To edit these values, click on the value cell to the right of the “Text Strings” property name. A magnifying glass icon will appear at the far right. Click on the magnifying glass, and a “Values” dialog box will appear, as seen in Figure 12.
Click on any word to edit it, but do not change the order of items. SlideShowPro expects the values to be in this descending order. When finished, click OK. You’re done!
(Figure 12) - Screenshot of the Values box

31SlideShowPro 1.2.9 User Guide
Enhancements - Permalinks
SlideShowPro allows you to automatically publish links to albums and images. These links (or, to borrow a phrase from the weblog world, “permalinks”) produce web-friendly URLs that allow SlideShowPro to behave just like HTML, whereby every image has a hyperlink that can be copied and re-used for direct access.
Adding permalink support requires modifications to your XML and HTML documents, but the changes are straightforward and easy to setup.
modify your xml document
Open your XML file, and add an “id” attribute to each album element. This id will con-tain the unique identifier used in your permalinks. Fill it with a short identifier without spaces or ampersands. Continuing our the XML from our basic setup, your XML would now appear like so:
<?xml version="1.0" encoding="UTF-8"?><gallery> <album id="nature" title="Nature" description="Images of trees, lakes
and flowers" lgPath="gallery/album1/large/"> <img src="tree.jpg" /> <img src="flower.jpg" /> <img src="lake.jpg" /> </album>
</gallery>
Repeat this for each one of the albums in your XML document.
setup slideshowpro
Open your Flash document, and select the instance of SlideShowPro on the stage. Open the Component Inspector, and ensure that the “Permalinks” property is set to “True”. Whenever finished, publish a SWF and upload it to your server.
setup your html document
In order for your permalinks to be created, you need to add some scripts to your HTML document. In the <head> section of your document, insert the following:
<script language="VBScript"> <!-- Sub swfname_FSCommand(ByVal command, ByVal args) select case command case "putHREF" location.href = args case "putTitle" document.title = args end select end sub -->

32SlideShowPro 1.2.9 User Guide
</script>
<script type="text/javascript"> <!-- function flashPutHref(href) { location.href = href; } function flashPutTitle(title) { document.title = title; } --> </script>
This chunk of code will provide a gateway for your Flash movie to communicate with In-ternet Explorer (VBScript) and other browsers (Firefox, Mozilla, Opera, Safari, etc.). You may copy this as-is, but you must replace “swfname” in the VBScript to the name of your Flash movie. This is typically the file name of your SWF, minus the “.swf” extension. This topic will be revisited, so if you’re confused return to this part in a minute.
For embedding Flash content, Geoff Stearns’ FlashObject is the recommended solution. It detects Flash player versions, provides alternate content, is standards-compliant, and makes the embedding of movies a whole lot more straightforward. It’s not absolutely required, but it makes this process much easier. You may download it at: http://blog.deconcept.com/flashobject/
After you’ve downloaded the FlashObject.js script, place it anywhere you like on your server. Next, include the script in the head of your document, like so:
<script type="text/javascript" src="http://www.yourdomain.com/js/flashobject.js"></script>
Next, create a named element anywhere after the BODY element in your HTML that will serve as a container for your Flash content, and fill it (optionally) with content for users without the Flash plugin. The non-Flash content will be overwritten with your SWF.
<div id="flashcontent"> <!-- insert non-Flash content here --></div>
Then embed the SWF in the container by adding the following:
<script type="text/javascript"> // <![CDATA[ var myFlashObject = new FlashObject("slideshowpro.swf", "slideshowpro",
"555", "379", 7, "#666666"); myFlashObject.addVariable("initialURL", escape(document.location)); myFlashObject.write("flashcontent"); // ]]> </script>
Replace the attributes above with the path to your SWF, the name of your movie, its width, height, (leave the ‘7’ alone), and the background color of your movie. Modify the ‘write’ method to include the name of the container element created one step back.
Next up, the VBScript. This is where the name of your Flash movie is important.

33SlideShowPro 1.2.9 User Guide
Copy the name of your movie (the second attribute in ‘new FlashObject()’, which is “slideshowpro” in this example) and replace ‘swfname’ at the beginning of the VBScript noted earlier. For example, “swfname_FSCommand” would now be “slideshowpro_FSCommand”.
done
Your document is now completely setup for permalinks. Whenever a user clicks on an image link, the browser’s document path will automatically update with the applicable album id and image number so you (or anyone) can reference it externally.
extra notes
Test online: It is important that you test permalinks from a web server (http://) and not on your local machine. SlideShowPro will not attempt to update your browser’s docu-ment path unless it originates from http. This is to avoid annoying errors and warnings when working locally.
Source code: If you’d like to see a full working version of this visit the Black Matte demo of SlideShowPro and view source.
Extra modifications: If you view the source of the demo above, you’ll notice that the write() method contains an attribute of “flashcontent”. This is part of an optional feature of FlashObject, whereby you can specify a div in your document to write your SWF into. In doing so, you can fill your div with content for users without the Flash plug-in. If they have the plug-in, the SWF simply overwrites the content. See the FlashObject documenta-tion for more information.
Do you have to use FlashObject?: If you know what you’re doing, no. The most impor-tant part is that your must use JavaScript or something applicable to assign the docu-ment.location property to a variable named “initialURL.”

34SlideShowPro 1.2.9 User Guide
Enhancements - Preloading
“Preloading” is a common feature with Flash movies. It is a process through which a movie’s assets are (invisibly) preloaded into the browser cache before playback begins. This ensures all necessary assets are available to the movie before they are requested. The process is almost always represented with a visual animation to inform the user that content is currently being preloaded.
SlideShowPro preloads all images before they are displayed and indicates progress through an animation that appears in the center of the window. Once an image has fin-ished loading, the animation dissapears and the preloaded image appears.
You may choose between three animation styles, control when you’d like preloading to occur, and even use your own preloading animations. More on that later -- first, let’s go through the options immediately available to you.
Note: Everything in this section relates to the preloading of assets into SlideShowPro, but not the preloading of SlideShowPro itself. To preload SlideShowPro, you’ll need to set up a separate preloader before SlideShowPro in your FLA’s timeline.
preload images
This parameter (in the Component Inspector) toggles the “aggressiveness” of preloading. Options include “none”, “thumbnails” and “all”.
“none” (default)All images (both large and thumbnail) are preloaded upon request only. This ensures that SlideShowPro only loads into the browser cache images a user has requested. This setting is most helpful on servers where bandwidth is a concern, for only content requested by the user is retrieved from the server.
“all”All images (both large and thumbnail) are preloaded at startup. SlideShowPro loads all images from the current album into the browser cache ahead of the user, so when they re-quest an image (that has already been loaded) they don’t have to wait or view a preloading animation. The image loads immediately. This setting is most helpful on servers where bandwidth is not a concern and a faster overall user experience is needed.
Note: thumbnail images are loaded first, then large images.
“thumbnails”Only thumbnail images are preloaded at startup. SlideShowPro loads all thumbnail im-ages from the current album into the browser cache ahead of the user, so when they roll-over an image number in the navigation the thumbnail immediately appears. This setting is a good compromise between “none” and “all”.

35SlideShowPro 1.2.9 User Guide
preloader style
SlideShowPro has three built-in preloading animations to choose from under the “Preloader Style” parameter in the Component Inspector. Options include:
“Pie” (default)A circular animation that displays progress like hands on a clock.
“Bar”A semi-transparent rectangular box that fills with opaque color animating from left to right. The width of the box is automatically calculated to 30% of the overall width of SlideShowPro so that it appears visually balanced regardless of component size.
“Line”Identical to “Bar,” but much more minimal with a height of 1 pixel. A “Preloader Alpha” setting of 100 is recommended for this style for best visibility.
preloader size
If you’d like to change the width/height of the preloading animation, change the “Feed-back Scale” parameter in the Component Inspector. By default this is set to “100”. Raise or lower this number to proportionally scale the animation.
preloader color and alpha
To change the color and opacity of the preloading animation, change the “Preloader Color” and “Preloader Alpha” parameters in the Component Inspector.
custom preloaders
Whenever the preloading animation is used, SlideShowPro broadcasts a pair of events to outside listeners. The first, “preloadStart”, is fired when the preloading animation is engaged, and continually updates with the percent of data loaded for the asset. The “preloadEnd” event fires when the asset has been completely loaded, and the preloading animation is removed.
ActionScript developers may use these events to build their own preloading animations outside of SlideShowPro. SlideShowPro’s preloading animations can be turned off by set-ting “Show Feedback Items” to “false”, and the data will continue to be broadcast.
For more information on how to set up an event listener, see the “Event Listeners” section of this User Guide.

36SlideShowPro 1.2.9 User Guide
Enhancements - Sound Effects
Sound effects enhance interfaces by providing aural confirmation to user interaction. SlideShowPro supports the playback of sound effects, and offers three types of interactive events you may attach sounds clips to.
the three sound effect types
Click: Engaged when a user clicks on an image number, the next/previous image buttons, the open/close gallery button, the auto-play/pause button, or an album in the gallery.
Rollover: Engaged when a user rolls their mouse pointer over an image number, an al-bum in the gallery, or the next/previous screen gallery buttons.
Slide: Engaged when a user clicks on the next image group/previous image group but-tons, or the next/previous screen gallery buttons.
import sound file into library
The first step is to select “File > Import > Import to Library”, and a Finder/Explorer win-dow will open. Navigate to the location of the sound clip (WAV, AIFF, MP3) you wish to use, then click “Import to Library”.
setup linkage
Right-click on your sound clip in the library, select “Linkage...” The Link-age Properties window will open (see Figure 13). Activate “Export for ActionScript”, and give the audio file a short “Identifier” name. Copy this name as the value for the applicable “Sound FX” property in the Compo-nent Inspector.
set audio quality
Be sure to optimize your audio before publishing. You can do this globally (same quality for all sound effects) by selecting “File > Publish Settings”, clicking the “Flash” tab, and choosing quality levels for Audio streams and Audio events.
Or if you’d like to set quality levels for your clips individually, right click on a sound file in the Library, select “Properties,” and change the settings to your liking. You can click “Test” to hear your sound compressed using the new settings.
(Figure 13) - Establishing linkage for an audio file

37SlideShowPro 1.2.9 User Guide
The lower the bit-rate, the smaller your SWF will be. So try to find a good balance be-tween file size and sound quality.
set volume
Once your sound effects are playing you may need to adjust their volume. If so, change the numerical value of the “Audio Volume” property in the Component Inspector to any number between 0 and 100. This value is shared by all sound ef-fects.

38SlideShowPro 1.2.9 User Guide
Enhancements - Thumbnails (Images)
Thumbnails provide users with a small, bandwidth-friendly preview of full size images. They appear in SlideShowPro as pop-up windows when a user moves their mouse pointer over an image number in the navigation.
create a new directory
To add thumbnails to your slide show, first open the “slideshow” folder created in the “Your first slide show” walkthrough. Navigate to the “gallery/album1/” directory. Alongside your “large” folder, create a new folder and name it “thumbs.”
create thumbnail images
Open each of your large images in an image editing appli-cation (like Photoshop), reduce each of their dimensions to a width and height that seems appropriate for a thumb-nail, or crop a particular part of the subject if you’re feel-ing creative. Each thumbnail may be any width or height you want — SlideShowPro will automatically expand the preview window to match its dimensions.
When done, save the thumbnails as non-progressive JPGs — each with the exact same file name as their full size versions — to the “thumbs” directory you just created.
You should now have images with the same file names in both your “large” and “thumbs” directories. See Figure 14 for an example.
edit the xml document
Next, open the “images.xml” document, and add a “tnPath” attribute to each of your al-bums with a relative link to the “thumbs” directory you created earlier. Your XML should now look similar to this:
<?xml version="1.0" encoding="UTF-8"?><gallery> <album title="Nature" description="Images of trees, lakes and flowers"
lgPath="gallery/album1/large/" tnPath="gallery/album1/thumbs/"> <img src="tree.jpg" /> <img src="flower.jpg" /> <img src="lake.jpg" /> </album></gallery>
Figure 14: ‘slideshow’ folder with‘thumbs’ folder added for firstalbum
39SlideShowPro 1.2.9 User Guide
publish
Publish a new movie in Flash, roll-over the numbers in the navigation, and your thumb-nails will appear.
extra tips
- You may mix albums with and without thumbnails in your gallery. SlideShowPro will only display the pop-up preview window if a thumbnail file exists.
- If after creating thumbnails you decide you’d rather not use them, you can quickly turn them off by setting the “Show Thumbnails” parameter in the Component Inspector to “False.”
- If you plan on building a presentation with a lot of images, creating your thumbnails by hand could take a very long time. For those cases, I highly recommend checking out the SlideShowPro plug-in for iPhoto, creating your own Photoshop/ImageReady droplet, or downloading the prebuilt ImageReady droplets from the SlideShowPro web site.
troubleshooting
- If thumbnails don’t appear, check to make sure the tnPath attribute is assigned to the correct folder. Also ensure your thumbnail file names exactly match the larger versions.
- If not all of your thumbnails appear, check to make sure that they are saved as non-pro-gressive JPGs. This is typically the case when a preview box appears, but collapses in size and doesn’t load a thumbnail.

40SlideShowPro 1.2.9 User Guide
Enhancements - Thumbnails (Albums)
Album thumbnails appear to the left of each album’s title and description in the gallery. They may be any size you want, and saved as non-progressive JPGs or SWFs, or GIFs and/or PNGs if you are publishing to Flash Player 8.
To create an album thumbnail, first select an image that is visually representative of the group of images within the album. Then, using a photo editing application (like Photo-shop) either crop a specific area of the photo, or resize the entire image to a width and height that is suitable for the size of the album area. Make it large enough for a user to quickly discern its content, but not so large that it spills out of the album area or squeezes your text to the point of being unreadable. 50px wide by 40px high is a good size.
When your album thumbnail image is ready, save it to the root of the “album1” directory alongside your “large” and “thumbs” directory and name it whatever you like. For this walkthrough we’ll name it “albumThumb.jpg”
edit the xml document
Next, open the “images.xml” document, and add a “tn” attribute to your album with a relative link to the “albumThumb.jpg” you just created. Your XML should now look similar to this:
<?xml version="1.0" encoding="UTF-8"?><gallery> <album title="Nature" description="Images of trees, lakes and flowers"
lgPath="gallery/album1/large/" tnPath="gallery/album1/thumbs/" tn="gallery/album1/albumThumb.jpg"> <img src="tree.jpg" /> <img src="flower.jpg" /> <img src="lake.jpg" /> </album></gallery>
publish
Publish a new movie, and your thumbnail should appear alongside your album descrip-tion and title in the gallery.
styling album thumbnails
By default, SlideShowPro applies a 1 pixel thick white border around album thumbnails, but you may change this by editing the following properties in the Component Inspector:
Album Thumb Stroke Color: The color of an album thumbnail’s border.
Album Thumb Stroke Weight: The pixel width of an album thumbnail’s border. Setting

41SlideShowPro 1.2.9 User Guide
this to 0 removes the border.

42SlideShowPro 1.2.9 User Guide
Enhancements - Watermarks
Watermarks are graphical assets layered on top of photos to deter copying. They are typically semi-transparent and consist of a company logo, a photographer’s name, or a copyright symbol.
As of version 1.2, SlideShowPro supports watermarks by attaching a Movie Clip created by the developer, layering it above each photo, and positioning it in one of five locations. To add a watermark to your slide show, follow these steps.
create a movie clip
In the FLA containing SlideShowPro, create an empty Movie Clip by clicking on the plus (+) symbol at the bottom left of the Library (Window > Library). Name it “water-mark,” make sure that “Movie clip” is the Behavior, and then toggle-on the “Export for ActionScript” option next to “Linkage.” The “Identifier” field should pre-fill with the linkage id “watermark.” When complete click “OK.” Your movie clip will be created, and automatically opened.
create watermark
Fill the Movie Clip with your watermark content. You may create it in Flash using vector shapes and/or type, or for fancier effects, create a semi-transparent bitmap in another software package like Photoshop or Fireworks, export the artwork as a 24-bit transparent PNG, then import it into your Movie Clip.
align watermark
When your watermark content is complete, select all (Edit > Select All), and then open the Align palette (Window > Design Panels > Align). Ensure that the “To stage:” button is depressed, then click both the Align Horizontal (2nd button at top) and Align Verti-cal (5th button at top) buttons. Your artwork should now be centered both vertically and horizontally inside your Movie Clip. Aligning your artwork in this manner is required in order for SlideShowPro to accurately position the Movie Clip on top of your images.
assign watermark to slideshowpro
Select your instance of SlideShowPro on the stage, and open the Component Inspector. Scroll to the bottom until you see the “Watermark” parameter. In the empty value field, enter the linkage id for your Movie Clip, which in this case would be “watermark.” Next, select where you’d like it positioned -- Center, Top-Left, Top-Right, Bottom-Right, or Bottom Left.

43SlideShowPro 1.2.9 User Guide
publish
Publish a new SWF, and your watermark should be appearing on top of your loaded im-ages in the position you chose. The position of the watermark will automatically change each time a new image is loaded so that it always covers your photos (regardless of dimension).t
additional resources
An excellent Photoshop tutorial on creating the most popular style of watermark (bev-elled, transparent):http://www.ephotozine.com/techniques/viewtechnique.cfm?recid=339

44SlideShowPro 1.2.9 User Guide
Enhancements - XML Modifications
This page contain allowed modifications to SlideShowPro’s XML format.
absolute image and thumbnail links
As detailed in the “Your First Slide Show” and “Enhancements: Thumbnails” sections of this User Guide, SlideShowPro uses a two-part system to load images. For large images, it takes the directory path stipulated in the “lgPath” album attribute, and then appends a file name from an image element to load content. Thumbnails are loaded the same way, but with the “tnPath” attribute pointing to a thumbnail directory.
The two-part system cuts down the XML’s file size and is faster for the Flash Player to load, but it’s also inflexible for users who’ve already created large and thumbnail images before acquiring SlideShowPro, or those who simply prefer to have their thumbnail im-ages named differently than their larger ones.
So as of version 1.2, the “lgPath” and “tnPath” album attributes may be removed, and in their place, absolute links to large and thumbnail versions of an image may be added to an image element. For example:
<?xml version="1.0" encoding="UTF-8"?><gallery> <album title="Nature" description="Images of trees, lakes and flowers"> <img src="http://www.yourdomain.com/img/tree.jpg" tn="http://www.
yourdomain.com/img/tree_tn.jpg" /> </album></gallery>
You may employ this modification for each album in your XML, or a subset. SlideShowPro will automatically switch between the two-part loading system and the absolute version when needed.

45SlideShowPro 1.2.9 User Guide
Enhancements - XML Overrides
XML overrides are special attributes you can add to your XML document to alter the properties or behavior of SlideShowPro at runtime.
starthere
By default, SlideShowPro starts with the first album in the XML document (unless the “Start Mode” property is set to “Open,” whereby the user picks which album they want first.) You may override this behavior by adding a “startHere” attribute to your album element, and assigning it a value of “true,” like so:
<?xml version="1.0" encoding="UTF-8"?><gallery> <album title="Nature" description="Images of trees, lakes and flowers"
lgPath="gallery/album1/large/"> <img src="tree.jpg" /> <img src="flower.jpg" /> <img src="lake.jpg" /> </album> <album title="Cars" description="Images of classic cars"
lgPath="gallery/album2/large/" startHere="true"> <img src="buick.jpg" /> <img src="cadillac.jpg" /> <img src="plymouth.jpg" /> </album></gallery>
With the addition of startHere to the “Cars” album, SlideShowPro will start playback with Cars instead of the first album “Nature.” Note that if you only have one album in your XML document, you don’t need a startHere attribute. It should only be used in slide shows with more than one album.
pause
When in “Auto” Display Mode, SlideShowPro displays each photo for the same amount of time. This is configurable with the “Image Pause (Seconds)” parameter in the Component Inspector. But if you would like to apply custom display times for one or more of your photos, you may override this value by adding a “pause” attribute to an image element in the XML file, like so:
<img src="tree.jpg" pause="10" />
SlideShowPro will now stop for 10 seconds after loading the tree photo.

46SlideShowPro 1.2.9 User Guide
Loading images from Flickr
SlideShowPro can load images, thumbnails, captions and hyperlinks from Flickr, the popular online photo management service. Each user and group at Flickr has their own RSS 2.0 feed, which is automatically generated whenever new content is added to an author’s account. By using Flickr’s RSS feeds instead of SlideShowPro’s XML format, you can not only load images from your own Flickr account, but from anyone else hosting their photos on Flickr as well.
step one: create an opml document
OPML stands for “Outline Processsor Markup Language” and is a standard way of shar-ing one or more RSS URL feeds between applications. It’s essentially an XML file that acts as a container for all your RSS paths.
Create a new document in your favorite text editor, and enter the following:
<?xml version="1.0"?><opml version="1.1"> <head> <title>My list of RSS feeds</title> </head> <body> <outline xmlUrl="insert rss path here" /> </body></opml>
The “xmlURL” attribute is the most important part — this is where you insert the abso-lute path to the Flickr RSS feed. Where are Flickr’s RSS feeds? Visit any Flickr group or user page at their web site and there will be a “RSS 2.0” link at the bottom. Right-click on the link, copy it, and paste the path into this attribute. To include more RSS feeds, simply create another <outline> element with an xmlURL attribute and paste in another RSS feed — one on each line.
step three: set-up slideshowpro for opml
In the Flash application, select your instance of SlideShowPro on the stage and open the Component Inspector panel. Change the xmlFilePath and xmlFileType properties to the name of your OPML file and “OPML” respectively.
step four: publish
If your API Key has been approved, you should now be able to load all your Flickr RSS content. An album will be automatically generated from each feed and added to the gal-lery window.
extra tips

47SlideShowPro 1.2.9 User Guide
Load Time and Feedback: The preload time is a little longer for RSS than SlideShowPro XML documents (due to numerous server calls and verbose RSS markup), and are often so small in byte size that the preload animation finishes before showing any progress. This behavior is normal.
Multiple RSS feeds warning: Unfortunately, there is a limit on how many RSS feeds you can load/parse in the Flash Player. SlideShowPro’s XML parser can parse an enormous amount of content, but there’s a ceiling on how much memory/processor the Flash Player can consume when loading data from multiple sources. Try to keep the number of RSS feeds you load to a maximum of 9 feeds — anything more could cause stability problems, not to mention a longer preload for your users.
A final reminder about Flickr: By opening SlideShowPro to the RSS content of a third-party, you are relying upon them for the stability of your presentation. If a server goes down, or the formatting of an RSS feed changes without warning, SlideShowPro may not be able to parse the data and will not load. If anything does change at Flickr, an update to SlideShow will follow soon thereafter and all users will be notified.

48SlideShowPro 1.2.9 User Guide
ActionScript
Though SlideShowPro was designed to be used with the Component Inspector, you may also customize all of SlideShowPro’s properties using ActionScript. Any property value assigned with ActionScript will override the property’s value in the Component Inspec-tor.
Note: This is only recommended for intermediate and advanced Flash developers, and should only be used if you feel comfortable with coding ActionScript.
help documentation
To view all of SlideShowPro’s properties, select Help > Help from Flash MX 2004’s top menu. In the left pane you will see a booklet named “SlideShowPro” (Figure 15). Double-click on the booklet to open, and a list of proper-ties will appear. Select any of the properties for a detailed explanation of the property type, acceptable paramaters, and examples of how to use them.
Figure 15: SlideShowPro help.
setup instance name
When using ActionScript to manipulate SlideShowPro’s properties you must first assign an instance name. Se-lect the copy of SlideShowPro on your stage and open the Properties panel. Assign an instance name by typing a short but memorable title into the text field shown in Figure 16. Appending “_ssp” onto the end of your in-stance name will activate code hints in the Actions panel. For example, typing “my_ssp” and a dot “.” will automatically open all available properties, methods, and events for SlideShowPro in a contextual menu.
actionscript editor
Create a new timeline layer above the one SlideShowPro is in, select the first frame of the new layer, and open Window > Development Panels > Actions. This is where you may hand-code your values. For example, if I wanted to change the background color of SlideShowPro to white, I’d first type my instance name assigned earlier, followed by the property name, and finally the value, like so:
my_ssp.backgroundColor = "0xFFFFFF";
Figure 16: Instance name

49SlideShowPro 1.2.9 User Guide
Publish a new movie, and the background will be white.
advantages of actionscript
Some of you may be thinking, why would I bother hand typing properties with ActionScript when I could do it much faster with the Component Inspector? Which would be true, unless you wanted to assign dynamic values to SlideShowPro at runtime.
For example, say you wanted to run multiple copies of SlideShowPro on your web site, each with unique content, but didn’t want to maintain multiple SWFs. Using a single SWF you could use ActionScript to dynamically assign which XML file SlideShowPro used instead of ‘hard-coding’ a single XML file name into the Component Inspector. (For a full tutorial on how to do this, see http://www.slideshowpro.net/tut_dynamic_xml.php)
With ActionScript the only limitations are your imagination and creativity.

50SlideShowPro 1.2.9 User Guide
Event Listeners
SlideShowPro supports the use of Event Listeners. This enables events that occur within the component to be responded to with outside objects. For example, you could populate a ComboBox with gallery data and use it to navigate between albums. Or, you could set up a text field that automatically displays image captions. There are countless ways you can use events (and the data they return) to customize SlideShowPro.
Note: This section expects you to be comfortable coding ActionScript and to have at least an intermediate understanding of arrays, loops and objects.
data events
onLoadXMLTriggered when SlideShowPro attempts to load an XML file. Event object contains a Bool-ean value (false, true) to indicate whether an XML file was found.
albumDataTriggered when an album is loaded. Event object contains the following properties:id (string; the album ID)description (string; the album’s description)lgpath (string; the album’s lgPath)tnpath (string; the album’s tnPath)title (string; the album’s title) tn (string; the album’s thumbnail) totalImages (the number of images in the album)
imageDataTriggered when an image is loaded. Event object contains the following properties:caption (string; the image’s caption)link (string; the image’s hyperlink)number (number; the image’s numerical ID)pause (number; the image’s pause override value)src (string; the image’s file name)target (string; the link’s browser window target)tn (string; the image’s thumbnail URL)

51SlideShowPro 1.2.9 User Guide
galleryDataTriggered when SlideShowPro successfully parses an XML document. Event object con-tains all albumData and imageData objects segmented into a multidimensional array. The structure of the array is as follows:
playback events
albumEndTriggered when SlideShowPro has displayed the final image in an album and engages “Auto Finish Mode” to decide what to do next. This event triggers with the “Display Mode” parameter set to either “Auto” or “Manual.” Returns no event object.
displayModeChangeTriggered anytime the “Display Mode” parameter changes. Event object contains the strings "Auto" or "Manual".
imageClickTriggered when a mouse clicks on a loaded image. Returns nothing.
imageRollTriggered when a mouse pointer passes in and out of a loaded image’s area. Event object contains the strings "over" when the pointer has rolled-over an image, and "out" when rolled-out.
navButtonDisabledTriggered anytime SlideShowPro disables the forward or back navigation buttons. Event object contains the strings "previous" (the minus button) and/or "next" (the plus but-ton) to indicate which button was disabled.
navButtonEnabledTriggered anytime SlideShowPro enables the forward or back navigation buttons. Event object contains the strings "previous" (the ‘minus’ button) and/or "next" (the ‘plus’ button) to indicate which button was enabled.
preloadStartTriggered anytime SlideShowPro engages its preloading animation. Event object contains the percentage of loaded bytes.
preloadEndTriggered when the preloading of on-demand content ends. Returns nothing.
[[albumData,[imageData]]]
galleryDataalbum array
album object image object
imagesarray

52SlideShowPro 1.2.9 User Guide
how to create an event listener
Event Listeners are created outside of the component in a timeline frame using the ActionScript editor. They are simple objects whose sole purpose is to sit quietly and listen to what’s going on inside a component, and respond if called by name.
First, you need to create a listener object:
var myListener = new Object();
Then, using the supported events listed above, create a object property with a name ex-actly the same as the event you want to listen to, like so:
myListener.onLoadXML = function(eventObject):Void {}
Finally, register the object as a listener for your instance of SlideShowPro:
my_ssp.addEventListener("onLoadXML", myListener);
Now when the onLoadXML event is triggered inside SlideShowPro, the listener property with the same name will be automatically called. This is the basic model for all event listeners.
If you want to create two listeners, you can re-use the same listener object by adding another property, like so:
myListener.albumEnd = function(eventObject):Void {}my_ssp.addEventListener("albumEnd", myListener);
event objects
Whenever an event is triggered, it automatically passes an event object to your listener object. Each event object has properties that contain information about the event. Using these properties, you may write ActionScript to use the data any way you like.
For example, in the case of onLoadXML, the listener object receives a boolean value to indicate whether an XML file was found. This is how you retrieve that value:
myListener.onLoadXML = function(eventObject):Void { trace(eventObject.data);}
Either “true” or “false” will be written to your output window. You could also use this

53SlideShowPro 1.2.9 User Guide
data to set up a conditional:
myListener.onLoadXML = function(eventObject):Void { if (eventObject.data==true) { // show success alert } else { // show error alert }}
In addition to Boolean values, event objects can also contain complex arrays or objects (yes, an object inside an object!) as we’ll see in the next two examples.
event objects: gallerydata
The galleryData event broadcasts an event object (eventObject) containing a multi-dimensional array with all your gallery data. The array is filled with album arrays, each with two ‘slots’ -- the first (albumData) containing your album’s data, and the second containing an array filled with the album’s image data (imageData). (See beginning of this section for a diagram).
For example, if you wanted to return the album title of the third album, you’d retrieve it like so:
myListener.galleryData = function(eventObject):Void { trace(eventObject.data[2][0].title);}slideshowproinstance.addEventListener("galleryData", myListener);
Or, if you wanted to return the “src” value of the third image in the third album, you’d retrive it like so:
myListener.galleryData = function(eventObject):Void { trace(eventObject.data[2][1][2].src);}
event objects: imagedata
A subset of the same data broadcasted in galleryData, imageData broadcasts data only for the current image loaded in SlideShowPro, and is triggered each time an image loads (as opposed to once at the beginning like galleryData).
To retrieve the data for the currently loaded image, you’d first create a listener object:
myListener.imageData = function(eventObject):Void {}my_ssp.addEventListener("imageData", myListener);

54SlideShowPro 1.2.9 User Guide
The event object received contains an image object with properties named exactly the same as the “img” elements in your XML file. So if you wanted to retrieve the caption for the current image, you’d do it like this:
myListener.imageData = function(eventObject):Void { trace(eventObject.data.caption);}
event objects: albumdata
albumData is also a subset of galleryData, broadcasts data for the current album loaded in SlideShowPro, and is trigerred each time an album loads.
To retrieve the data for the current album, follow the exact same walkthrough as imageData above, but subsitute the data property with the album property you need. In other words, eventObject.data.totalImages.
additional help
For more information about Event Listeners, see “Using event listeners” in Flash MX 2004’s ActionScript help documentation.
Also check the SlideShowPro web site under “Support > Tutorials” for a walkthrough on how to use a ComboBox in conjunction with SlideShowPro.

55SlideShowPro 1.2.9 User Guide
Tips and Tricks
transparent background
For a completely transparent experience, where all you see is photos, open the Compo-nent Inspector and set “Background Alpha” to 0, “Stroke Weight” to 0, and “Show Navi-gation” to “False.” Your photos will appear to float over the Stage.
endless playback
To run SlideShowPro in a kiosk-style presentation mode, whereby one or more albums are loaded and looped endlessly, set “Display Mode” to “Auto” and “Auto Finish Mode” to “Switch.” For extra variety, set “Image Order” to “Random” and all your images will load in true random order (never see the same image twice until all other images in an album have been shown).
load swfs instead of jpegs
You aren’t limited to loading just JPEGs in SlideShowPro. SWFs may also be loaded for your large images, your image thumbnails, and/or your album preview thumbnail. Experiment with animated previews in your Gallery that show multiple images from the album instead of a static JPEG, or anything else that comes to mind!
Note: If your loaded SWF has buttons in it requiring user interaction, make sure you remove the “link” and “caption” attributes from the image element linking the SWF in your XML.
html formatting in text fields
The album description, album title, and image caption text fields all accept rudimentary HTML formatting. Supported tags include <br>, <b>, <i>, <img>, <u> and <li>. If you include these tags in your XML document, they must be encoded as numerical character entities to avoid XML errors when the document is parsed. For example, if you wanted to italicize a word in your album description, you’d write it like so:
caption="SlideShowPro is <i>fun!</i>"
< is the numerical entity for “<” and > is the entity for “>”. When parsed, the entities would be converted to brackets, and the treated as <i> and </i> respectively.
For more information about character entities, this is a good online reference:
http://www.fjordaan.uklinux.net/entities/entities_support.html

56SlideShowPro 1.2.9 User Guide
album cover
To create a book-like introduction to your album, try creating a splash image with your album title, a collection of images, dates, photographer names, or anything else you can think of and using it as the first image in your gallery.
frame it, layer it
Get creative with the outer-edge of your movie by adding a picture frame or other objects to make it truly unique. An example of this can be seen here: http://www.slideshowpro.net/demo/demo_frame.html. Or, layer items on top of the component to give it a unique shape.
57SlideShowPro 1.2.9 User Guide
Updating Previous Versions
Follow these instructions to update an older copy of SlideShowPro, as well as any movie containing an older copy of the component.
download and install
The first step is to download the latest version. If you haven’t done so, login to your user account at http://www.slideshowpro.net/users/ssp_login.php. You will be redirected to the download page.
Second, un-zip the download. This will appear pretty much the same as the first down-load you received. If the Flash authoring application is currently running, quit it. Then double click on the *.mxp” file contained inside. Extension Manager will launch, and ask if you want to update the older copy. Click “yes to all”. Once complete both the Help panel documentation and component will be updated. Quit Extension Manager, and launch Flash.
update existing content
SlideShowPro has been now been updated in Flash, and any new movie you create with it will contain the latest version. But what about older movies with a previous version of SlideShowPro? Follow these steps to update them: 1 - Open any FLA created with the older version of SlideShowPro.
2 - Open the Components panel, and toggle open the “SlideShowPro” directory.
3 - Drag and drop a new copy of SlideShowPro onto the stage.
4 - A dialog box will appear asking if you want to replace the copy of the component that’s currently in your Library. Click okay. (If you don’t see a dialog box, it means the copy of SlideShowPro in your FLA is the same version as the one you are dragging in).
5 - A second copy of SlideShowPro will appear on the stage. Select it, and press delete.
6 - Your original instance of SlideShowPro is now updated to the most recent version. Publish a new SWF, and replace your older SWF with the new one. You’re done!
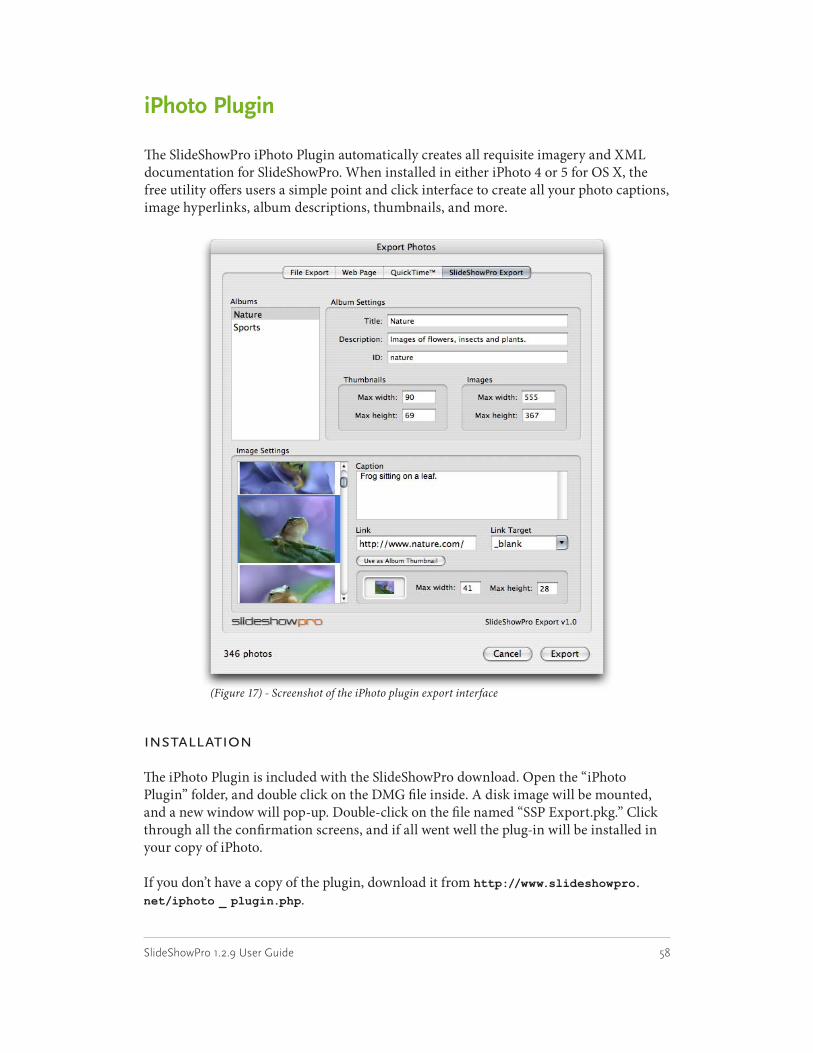
58SlideShowPro 1.2.9 User Guide
iPhoto Plugin
The SlideShowPro iPhoto Plugin automatically creates all requisite imagery and XML documentation for SlideShowPro. When installed in either iPhoto 4 or 5 for OS X, the free utility offers users a simple point and click interface to create all your photo captions, image hyperlinks, album descriptions, thumbnails, and more.
(Figure 17) - Screenshot of the iPhoto plugin export interface
installation
The iPhoto Plugin is included with the SlideShowPro download. Open the “iPhoto Plugin” folder, and double click on the DMG file inside. A disk image will be mounted, and a new window will pop-up. Double-click on the file named “SSP Export.pkg.” Click through all the confirmation screens, and if all went well the plug-in will be installed in your copy of iPhoto.
If you don’t have a copy of the plugin, download it from http://www.slideshowpro.net/iphoto _ plugin.php.

59SlideShowPro 1.2.9 User Guide
plugin instructions
The first step is to create one or more albums in iPhoto with the content you wish to export. If you already have albums, you may skip this and go on to the next paragraph. Otherwise, click the ‘+’ button at the bottom of the “Source” panel to create a new album. Drag and drop images from your Library into your new album. If you want more than one album, create them now.
When ready, select the album(s) you created (hold down Shift key to select multiples -- see Figure 18), and if using iPhoto 4 select “Export” from the File menu. In iPhoto 5, select “Export” from the Share menu. The Export dialog window will appear. Click on the “SlideShowPro Export” tab.
You will now be at the interface for the plug-in. The albums you are exporting are available in the top left panel, while the images within each album are below under “Image Settings.”
At the top of the export window is “Album Settings.” Change the Title of your album if you wish, and give it a quick description. Both of these fields will appear alongside your album’s thumbnail in the SlideShowPro gallery. The “ID” field is for creating permalinks. Unless you are setting up your presentation to support direct links, most people can just leave this as-is. (For more information, see the “Enhancements - Permalinks” section of this user guide).
Next are the “Thumbnails” and “Images” boxes. These settings apply to every image within the currently selected album. If an image from your Library is larger than these settings, it will be proportionally downscaled. If smaller, its size will not be modified.
At the bottom of the window is the “Image Settings” area. Simply select a photo in the left scroll window, and (if you want them) add a caption and hyperlink that will be launched if a user clicks on that photo in SlideShowPro. If you’d like to use the selected image as your album’s thumbnail in the gallery, click the “Use as Album Thumbnail” button and optionally change the default width and height.
You’re now ready to export your albums! Click the Export button. Navigate to where you’d like to export all your content (desktop is a good place). Click “New Folder” if you don’t already have an empty directory set up. When complete, click OK.
When finished, your images will be exported and an XML document named “images.xml” will be created in the root of the folder you previously selected.
create your flash movie
You are now ready to load your content into SlideShowPro. Create a new FLA in Flash MX 2004, and save it to the same directory created earlier (alongside your XML file).
(Figure 18) - Multiple albums selected

60SlideShowPro 1.2.9 User Guide
Create a new instance of the SlideShowPro component on the stage. SlideShowPro’s “XML File Path” parameter defaults to “images.xml”. If you changed the name of the XML created by iPhoto, change it in the Component Inspector. Otherwise, simply pub-lish a SWF, and your content will load.
You may now make any style changes to the component you wish. Once you like it’s style and size, simply place the directory on your web server, and you’re done!

61SlideShowPro 1.2.9 User Guide
Troubleshooting
• Extension won’t install in Extension ManagerFirst, make sure you have the very latest version of Macromedia Extension Manager in-stalled. If you have the current version, and it still won’t install, quit Extension Manager, launch Flash, and select “Manage Extensions” from the Help menu. Extension Manager will launch and should recognize Flash. Re-try installing the extension.
• Images aren’t displayingFirst, check the Output panel in the Flash application -- if a common error occured, you will see a message indicating where the trouble is. If there isn’t a message, chances are your JPGs were saved as “progressive” instead of “baseline” images. Flash Player 7 cannot dynamically load progressive JPGs. You must use a separate application to convert your JPGs.
Second, double-check the structure of your XML document. Make sure that each element in the XML is on its own line (not compacted) and that there is a space between each at-tribute.
Third, check to see if your textual content (“caption,” “title,” “description”) contain any non-ASCII characters. These can cause your XML to cause an error when loaded. If you do have international characters, HTML formatting, or special characters, convert them to numerical character entities. A good chart for these may be found here: http://www.fjordaan.uklinux.net/entities/entities_support.html
• Images load fine in my SWF, but not in my HTML documentThis is most likely a path issue. Here’s what happens -- when you view a SWF in the standalone Flash Player (or when selecting “Test Movie” in Flash), all links are relative to the directory location of the published SWF. If you load the same SWF into an HTML document, all links then become relative to the directory location of the HTML docu-ment. So if your HTML is in a different directory than your SWF, your HTML document won’t load your content.
The solution is one of three methods:
1) Move your HTML file into the same directory as your SWF.2) Change your relative links to absolute URLs (http://mysite.com/images/large)3) Add a “BASE” attribute to your object/embed code to change the default behavior and make all links relative to the directory location of the SWF, not the HTML document. For more information, see the Macromedia technote “Using relative URLs with the ge-tURL action” at http://www.macromedia.com/cfusion/knowledgebase/index.cfm?id=tn_04157
• When I load a SWF containing SlideShowPro into another Flash movie, nothing ap-pears.Open “Publish Settings” from the File menu in your parent Flash movie, click on the
62SlideShowPro 1.2.9 User Guide
“Flash” tab, and make sure “Version” is set to “Flash Player 7” (or higher) and that “ActionScript Version” is set to “ActionScript 2.0.” SlideShowPro requires these settings in order to function.
• I’m getting “undefined” in the output window when it tries to load an imageThis is likely a character encoding issue with your XML file. First, try removing all whitespace between elements in the XML (simply backspace one element up against an-other) and then hit return to put each element back on its own line. This should clear out any funky (invisible) stuff that can appear (especially when copying and pasting) in your whitespace. When that’s done, try loading the file again. Also check to make sure your text editor isn’t saving the file using a file encoding other than “UTF8”.
• Only part of my gallery appearsThis is likely a parsing issue with the XML file. Check the image elements in the affected gallery and look for malformed characters. A common mistake is to include punctuation inside of an attribute, i.e., caption=”This is a photo of “Lucky” my dog” should be encod-ed with character entities: caption=”This is a photo of "Lucky" my dog”.
• Photos don’t crossfade as quickly and/or smoothly as the demoCheck the frame rate of the Flash document you placed the component in. By default, 12fps is what each new document is set to, which (IMO) is too low. Open the Properties panel, and change the frame rate of your movie to at least 21fps or higher.
• I see two preloaders when loading SlideShowPro in my browserThe first preload you see is for your XML file. The second is the first image in your start-ing album. The first preload only appears if your XML file is large enough in size to require a visual preloader.
• A preload circle ‘sticks’ when I view my gallery locallyThis was a bug in versions 1.0 and 1.0.1. It was fixed in 1.0.2.
• Outer-stroke only appears on the left and top sidesThis is an issue when you set the dimensions of your Flash movie to the same width and height as the component. Solution: either decrease both the width and height of the com-ponent 1 pixel, or increase the stage size by the same amount. The stroke will now appear on all four sides.
• My published SWF flashes uncontrollablyCheck your timeline -- chances are you have an empty keframe before or after the frame containing SlideShowPro and your movie is looping. Either remove the empty frames or place a stop() action in the frame containing SlideShowPro.
• Typefaces aren’t embeddingIf your typeface doesn’t appear to be embedding, try quitting Flash, re-opening it, and publish your SWF again — sometimes fonts activated while Flash was open don’t “catch” unless you do this. If you are using a font management utility, make sure the typeface you are using is “Permanently” activated. This can often be an issue in Extensis Suitcase

63SlideShowPro 1.2.9 User Guide
where “Temporary” activated fonts don’t properly embed.
• Bitmap fonts / navigational icons are blurryFirst, check the x/y coordinates of the SlideShowPro component on the stage. These numbers must be set to whole pixel coordinates (no decimals). And while you’re in there, make sure the width and height of the component is also set to whole pixels.
Second, check the character size settings in SlideShowPro’s Component Parameters panel. Set the type size to the recommended point size of your bitmap font (most type foundries include this). If neither of these solutions work, chances are your bitmap font wasn’t designed to be used with dynamic text fields in Flash. You can find plenty of great Flash-friendly bitmap fonts at Fonts for Flash, Mean Tangerine, Atomic Media, The Pixel Plant, and Miniml.
• Changing the background color doesn’t appear to do anything when previewing SlideShowPro on the stageBy default, SlideShowPro’s preview mode starts with the navigation and gallery win-dow open -- hence, they cover the general background area. To preview SlideShowPro’s background color, temporarily set the “Show Navigation” property to “false”. The gallery window will automatically move out of the way so you can see the general background. Change “Show Navigation” back to “true” afterward.
• Text disappears in the Flash application when I set “Typeface Embed” to trueThis unfortunately is an issue without an answer. From what I have been able to figure out, the Flash application cannot apply an embedded typeface to a text field while in “live preview” mode. If you test your movie however, your text set in the embedded typeface will appear as expected. To get around this, I recommend setting your type point size and color before applying an embedded typeface for easier previewing. Hopefully a fu-ture update to Flash will allow this.

64SlideShowPro 1.2.9 User Guide
All images © Dominey Design, all rights reserved. SlideShowPro and the SlideShowPro logo are trademarks of Dominey Design. Any other trademarks and/or logos used on this site are the trademarks, service marks or logos of their respective owners.