12. Layers Panel - d2e2oszluhwxlw.cloudfront.net · Cricut Design Space User Manual Page | 1 12....
7
Cricut Design Space User Manual Page | 1 12. Layers Panel M. Arranging image order During the design process, you may need to adjust the order of layers from front to back. Arranging allows you to change how images or layers appear on the design screen by moving images and layers forward and backward. Imagine a deck of cards. Think of your image layers or project as individual cards. You can easily move the bottom card to the middle or top of the deck, and the top card to the middle or bottom of the deck. This is what you can do with your images and layers with the Arrange tool. Use the Layers Panel as a guide to see the order of your layers. Images in the Layers Panel appear stacked in the order they appear on the design screen. The bottom layer of the panel is also the bottom layer of the project; the top layer of the panel is the top layer of your project. Only one grouped image or layer can be arranged at a time. Tip When using the Arrange feature, grouped images will move altogether as a unit. If you want to change the order of one layer of an image, the image will need to be ungrouped. Ungrouping an image will bring all layers to the top of the project. Move images or layers using the following actions: Move To Back – Send the selected image or layer to the back of the stacking order. Move Backward – Move the selected image or layer one layer backward in the stacking order. Move Forward – Move the selected image or layer one layer forward in the stacking order. Move To Front – Bring the selected image or layer to the front of the stacking order. Option 1 Move To back Step 1 Select the image you wish to Arrange.
Transcript of 12. Layers Panel - d2e2oszluhwxlw.cloudfront.net · Cricut Design Space User Manual Page | 1 12....
Cricut Design Space User Manual
Page | 1
12. Layers Panel
M. Arranging image order
During the design process, you may need to adjust the order of layers from front to back. Arranging
allows you to change how images or layers appear on the design screen by moving images and layers
forward and backward.
Imagine a deck of cards. Think of your image layers or project as individual cards. You can easily move
the bottom card to the middle or top of the deck, and the top card to the middle or bottom of the deck.
This is what you can do with your images and layers with the Arrange tool.
Use the Layers Panel as a guide to see the order of your layers. Images in the Layers Panel appear
stacked in the order they appear on the design screen. The bottom layer of the panel is also the bottom
layer of the project; the top layer of the panel is the top layer of your project. Only one grouped image
or layer can be arranged at a time.
Tip When using the Arrange feature, grouped images will move altogether as a unit. If you want to
change the order of one layer of an image, the image will need to be ungrouped. Ungrouping an image
will bring all layers to the top of the project.
Move images or layers using the following actions: Move To Back – Send the selected image or layer to the back of the stacking order.
Move Backward – Move the selected image or layer one layer backward in the stacking order.
Move Forward – Move the selected image or layer one layer forward in the stacking order.
Move To Front – Bring the selected image or layer to the front of the stacking order.
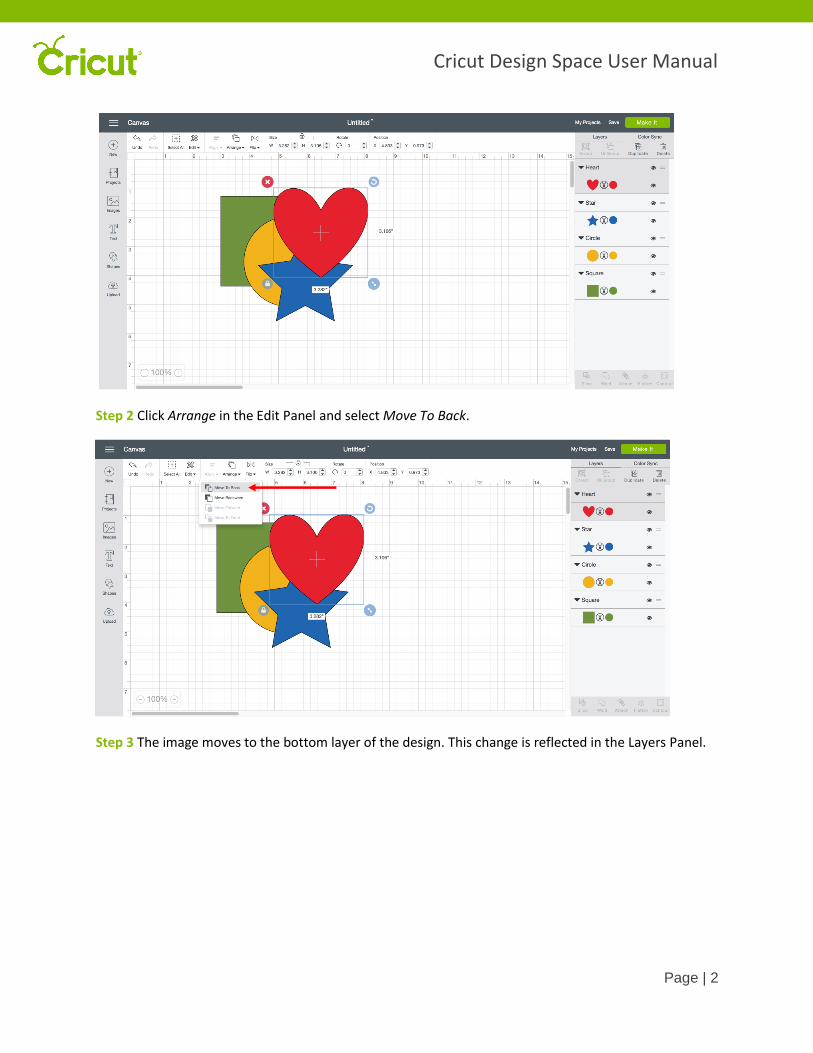
Option 1 Move To back Step 1 Select the image you wish to Arrange.
Cricut Design Space User Manual
Page | 2
Step 2 Click Arrange in the Edit Panel and select Move To Back.
Step 3 The image moves to the bottom layer of the design. This change is reflected in the Layers Panel.
Cricut Design Space User Manual
Page | 3
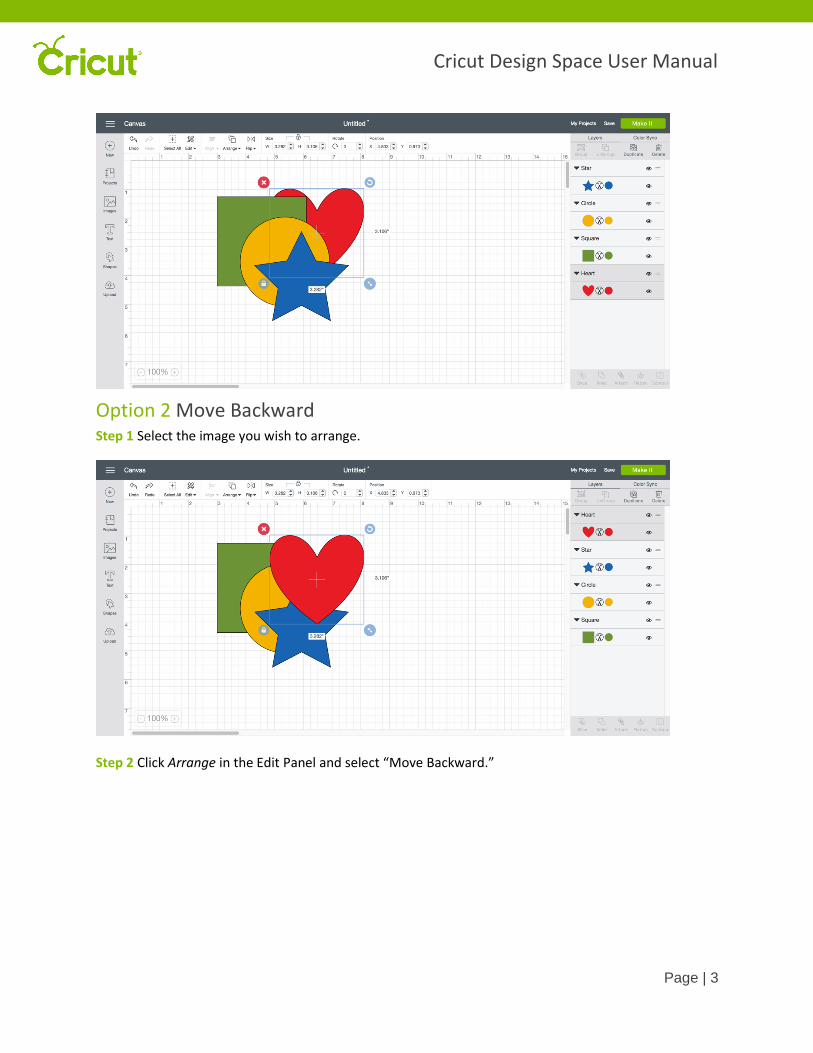
Option 2 Move Backward Step 1 Select the image you wish to arrange.
Step 2 Click Arrange in the Edit Panel and select “Move Backward.”
Cricut Design Space User Manual
Page | 4
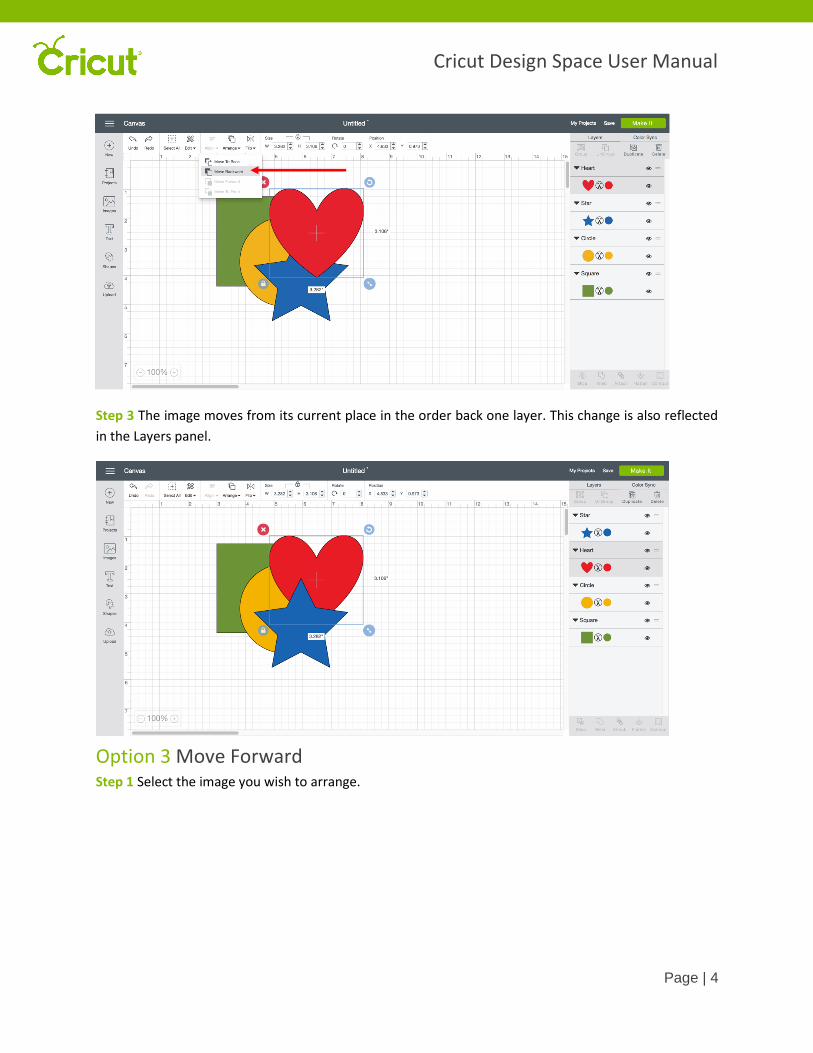
Step 3 The image moves from its current place in the order back one layer. This change is also reflected
in the Layers panel.
Option 3 Move Forward Step 1 Select the image you wish to arrange.

Cricut Design Space User Manual
Page | 5
Step 2 Click Arrange in the Edit Panel and select “Move Forward.”
Step 3 The image moves from its current place in the order forward one layer. This change is also reflected
in the Layers panel.

Cricut Design Space User Manual
Page | 6
Option 4 Move to Front Step 1 Select the image you wish to arrange.
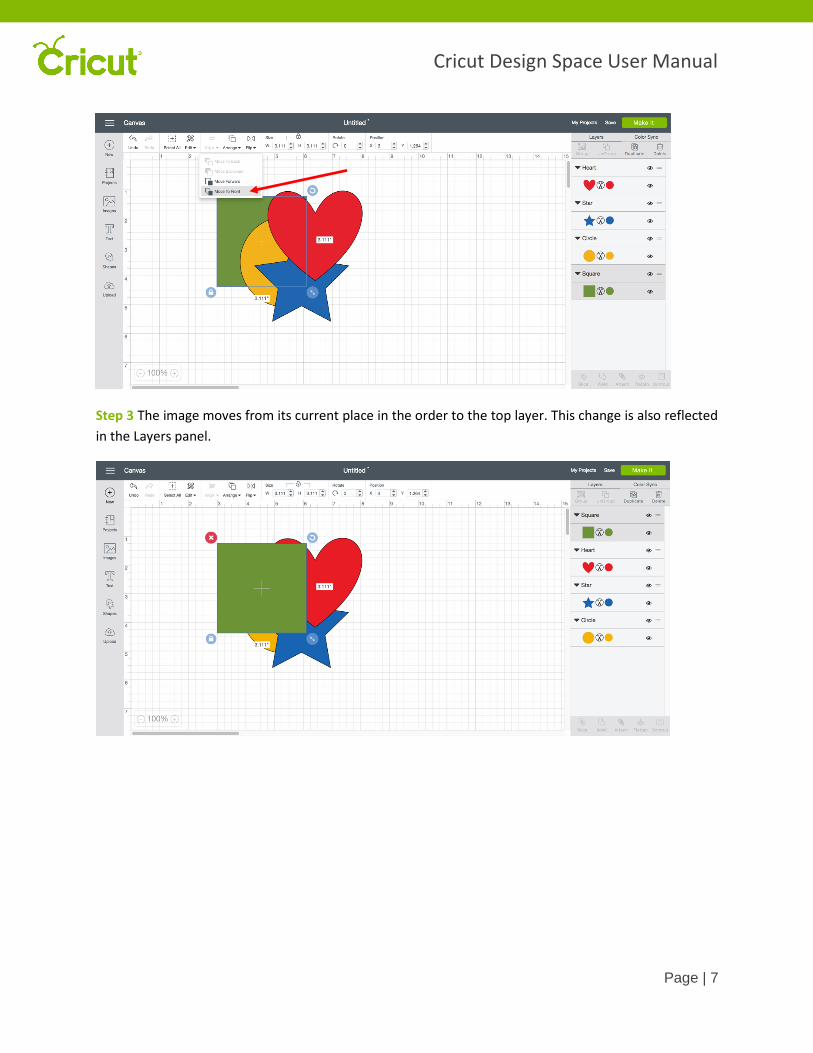
Step 2 Click Arrange in the Edit Panel and select “Move to Front.”
Cricut Design Space User Manual
Page | 7
Step 3 The image moves from its current place in the order to the top layer. This change is also reflected
in the Layers panel.