1 Shock Mod I 2013 ECRN CE Condell Medical Center EMS System Site Code: 107200E-1213 Prepared by:...
110
1 Shock Mod I 2013 ECRN CE Condell Medical Center EMS System Site Code: 107200E-1213 Prepared by: Sharon Hopkins, RN, BSN, EMT-P
-
Upload
mary-cooper -
Category
Documents
-
view
214 -
download
0
Transcript of 1 Shock Mod I 2013 ECRN CE Condell Medical Center EMS System Site Code: 107200E-1213 Prepared by:...
1
Shock
Mod I 2013 ECRN CE
Condell Medical CenterEMS System
Site Code: 107200E-1213
Prepared by: Sharon Hopkins, RN, BSN, EMT-P

2
Objectives
Upon successful completion of the program the ECRN will be able to:
1. Review the circulatory system. 2. Describe the pathophysiology, signs and symptoms of different mechanisms of shock. 3. Describe the stages of shock and the signs and symptoms of the stages as the patient progresses from compensated shock through decompensated shock to irreversible shock.

3
Objectives cont’d
4. Describe unique elements of shock in special populations (i.e.: pregnancy, elderly, children). 5. Discuss appropriate interventions and treatment of the various mechanisms of shock. 6. Review case scenarios presented. 7. Identify the pre-tibial and humeral sites and insertion of an IO needle. 8. Review process of removing an IO needle 9. Review process of removing the King airway 10.Successfully complete the post quiz with a score of 80% or better.

4
Circulatory System
Closed system for transport of oxygen and nutrients dissolved in blood and for the removal of waste material
Comprised of 3 components The pump = heart The fluid = blood The container = blood vessels
Any one of these functioning poorly will affect the whole system

5
The Pump
The heart is the pump Functions under 2 systems
High power system Arterial side
Lower power system Venous side
Body’s function dependent on an adequate stroke volume Amount of blood pumped with each
contraction Approximately 70 ml for the average adult

6
Influences on Stroke Volume
Preload Amount of blood returning to the heart Dependent on venous return
Venous system functions as a storage container
Cardiac contractile force The greater the stretch (i.e.: volume) the greater
the recoil the better the strength of contraction Influenced by circulating catecholamine's
Epinephrine and norepinephrine Controlled by sympathetic nervous system

7
Stroke Volume cont’d
Afterload Resistance against which ventricles have to
contract Determined by degree of peripheral vascular
resistance met Dictated by degree of vasoconstriction
present The greater the resistance (degree of
vasoconstriction) the smaller the volume of blood (i.e.: stroke volume) able to be pumped out of the heart due to higher pressures met in the vascular system

8
Cardiac Output
Amount of blood pumped out of the heart in one minute is the cardiac output
Calculated on a formula
Stroke volume x heart rate = cardiac output
Ex: 70ml x 80 bpm = 5600 ml blood/minute
A change (reduction or increase) in stroke volume and/or heart rate will impact cardiac output

9
Blood Pressure
Dependent on cardiac output and degree of vascular resistance
Calculation of B/P: B/P = cardiac output (CO) x peripheral vascular
resistance (PVR)
To increase B/P cardiac output or peripheral vascular resistance
To decrease B/P cardiac output or peripheral vascular resistance

10
Perfusion
All body cells require constant supply oxygen and nutrients
Waste products must be removed Build-up is harmful to the functioning of the
body Multi-system coordination needed to supply
oxygen & nutrients and remove waste Circulatory system Respiratory system Gastrointestinal system

11
Hypoperfusion
This is shock! Inadequate delivery of oxygen and
essential nutrients to all tissues Inadequate removal of wastes from tissue
Most critical tissues in the bodyBrainHeart Kidneys

12
Pathophysiology of Hypoperfusion
Usually a result of inadequate cardiac output Factors that could affect cardiac output
Inadequate pumping preload cardiac contractile strength heart rate Excessive afterload (high resistance in arterial
system decreasing stroke volume that gets pumped out) Inadequate fluid level Inadequate container
Dilated vessels (poor systemic vascular resistance) Leaking vessels

13
Pathophysiology of Shock
A very complex process Causes can vary Signs and symptoms can vary
BUT… Basic definition holds across the span
Shock = inadequate tissue perfusion!
Ultimate outcome = impaired cellular metabolism

14
Pathophysiology - Impaired Cellular Metabolism All cells dependent on adequate supplies of
oxygen and glucose to function In any type of shock, there is a disconnect in
the use of oxygen and glucose Aerobic metabolism changes to anaerobic In the absence of oxygen, breakdown of
glucose hindered Primary source of energy, glucose, not available
to the cell Glucose does not provide energy until it is
broken down inside the cell
15
Impaired Use of Oxygen
Harmful by-products produced Lactic acid & other metabolic acids accumulate
Acidic condition of blood not favorable to normal bodily function
Hemoglobin not able to bind with and carry oxygen
Cellular stores of ATP used up and not replaced
Energy production, essential for metabolism of cells, decreases
Sludging of blood develops Slowed blood flow due to pumping of heart
and vasodilation of vessels

16
Impaired Use of Glucose
Glucose must be transported into the cell Step necessary for a process where glucose
produces energy Glucose remaining in blood results in
hyperglycemia Alternative sources used to produce energy
Breakdown of fats (lipolysis) Amino acids from protein
Depletion of proteins in the system leads to organ failure

17
Classifications of Shock
Generally classified based on cause Cardiogenic
Impaired pumping of heart Hypovolemic
Decrease in blood volume Obstructive
Obstruction interferes with return of blood to heart (i.e.: tension pneumothorax, tamponade)
Distributive Abnormal distribution and return of blood

18
Semantics of Shock
Alternative classifications of shock Cardiogenic – pump problem Hypovolemic – volume problem Neurogenic – container/tank problem
(distributive) Anaphylactic - container/tank problem
(distributive) Septic - container/tank problem
(distributive)

19
Identification of Shock
Need to identify the underlying cause of shock Correcting the cause is key element in
providing the right intervention for reversing the process
Many interventions can be universally applied to a variety of shock conditions
Some interventions have limited applications Ex: fluid challenges given aggressively in
hypovolemic shock could be harmful in the setting of cardiogenic shock

20
Stages of Shock
3 stages Based on ability of body to compensate at
that point in time Based on signs & symptoms present
Reflect what is happening internally Stages are progressive and become more
serious Compensated Decompensated Irreversible

21
Stages of Shock - Compensation
Initial stage of shock; body compensating Activated when a need triggered (i.e.: threat to
cardiac output) Patient can still maintain their blood pressure!!!
Sympathetic nervous systemSecretes epinephrine & norepinephrine
heart rate (1st indicator to notice!) cardiac contractility Vasoconstriction (seen as paleness)

22
Stages of Shock - Compensation
Renin-angiotensin systemKidneys release renin
Triggers production of angiotensin II – a strong vasoconstrictor
Angiotensin II stimulates production of aldosterone
Kidneys reabsorb sodium and therefore water Noticed as a decrease in urine output

23
Stages of Shock - Compensation
Antidiuretic hormone (ADH) secreted Kidneys triggered to reabsorb more water
Spleen Expels extra blood volume being stored
Approximately 200 ml of blood can be added to existing blood volume
Passive activity Fluid shifts from interstitial spaces into the
capillaries Skin feels drier

24
Stages of Shock - Decompensation
Conditions causing shock are too serious or too rapidly progressing and compensatory measures
can no longer maintain preload Perfusion inadequate
Heart weakens Cardiac output falls even more
Reduced blood flow to the brain and vital function stimulation ceases
Appropriate interventions may still correct condition if applied early enough and body can respond
KEY: Blood pressure cannot be maintained and begins to fall

25
Stages of Shock - Irreversible
Blood becomes even more acidic and hypoxic Systemic acidosis develops
Further deterioration of cells & tissues
Sludging of blood occurs in capillaries Minute blood clots formed
Capillaries leak fluid into interstitial space Correction of the condition is no longer
possible; cells beginning to die

26
Evaluating Signs and Symptoms
“Classic” shock Altered mental status
1st change to be noted Anxiousness moving to lethargic
Skin pale, cool, clammy Pulse moving from normal to increasingly
faster and then slowing and disappearing Cardiac dysrhythmias develop and deteriorate
into asystole Blood pressure maintained until it finally falls
When B/P falls, compensation is over!

27
Neurogenic/Distributive Shock
Injury to brain or spinal cord Loss of sympathetic tone Relative hypovolemia due to dilation of
arteries Warm, red, dry skin (vasodilation) Low B/P and pulse (no catecholamine
stimulation)
Key: hypotension, bradycardia, warm/dry skin

28
Anaphylactic/Distributive Shock
Response of immune system to foreign substance
Usually the faster the reaction the more severe the case
Skin flushed, itchy, hives, swelling Respiratory distress
Coughing, wheezing, stridor Vasodilation, heart rate, B/P Nausea/vomiting, cramping Altered mental status

29
Septic/Distributive Shock
Infection of bloodstream Signs and symptoms progressive Toxins cause vasodilation High fever
Often absent in elderly and very young Skin flushed to pale to cyanotic May have altered level of consciousness May have respiratory distress and abnormal
breath sounds

30
Elderly Population & Shock
Some body system changes over time can increase risk factors for the elderly who are traumatically injured
Influence on changes Vulnerability increased for injury Body response to injury not as effective or
dramatic Less tolerant of interventions received Increased time of recovery of health status

31
Elderly System Changes
Altered mental status common Poor historian
Hypertension common What looks like a “normal” B/P may be hypotension
in the person with hypertension
Atherosclerosis and arteriosclerosis more prevalent Stiffer blood vessels less able to respond with
adequate degree of vasoconstriction
Impaired swallowing increases risk for aspiration

32
Elderly Changes cont’d
Bones more brittle Cough reflex diminished
Increased risk for aspiration Less air and gas exchange in lungs General decline in efficiency of renal system Less ability to fight infection via immune
system Perspires less Skin tears more easily; heals slower

33
Physiological Changes of Pregnancy
Respiratory system oxygen demand & consumption
Cardiovascular system Cardiac output increases Maternal blood volume increased
Due to changes patient has a relative anemia May lose 30-35% of volume before signs &
symptoms of shock are evident Maternal heart rate by 10 - 15 beats per
minute Maternal B/P til end of 3rd trimester

34
Supine Hypotensive Syndrome Usually occurs in 3rd trimester Large weight of uterus compresses inferior
vena cava when patient supine Reduces return of blood flow to the heart
Goal – avoid decrease in return of blood to the heart Transport patient tilted or turned to side
Preferably left side (Remember: “lay left”) Especially important after 5th month
If patient must remain flat (i.e.: CPR), then manually displace uterus to side

35
Pediatric Population & Shock
Body systems less developed Decreased capacities compared to the adult Dehydration most common cause of
hypovolemia Pale, cool skin Diminished peripheral pulses Delayed capillary refill Change in mental status Decreased urination (i.e.: dry diapers, dark urine)

36
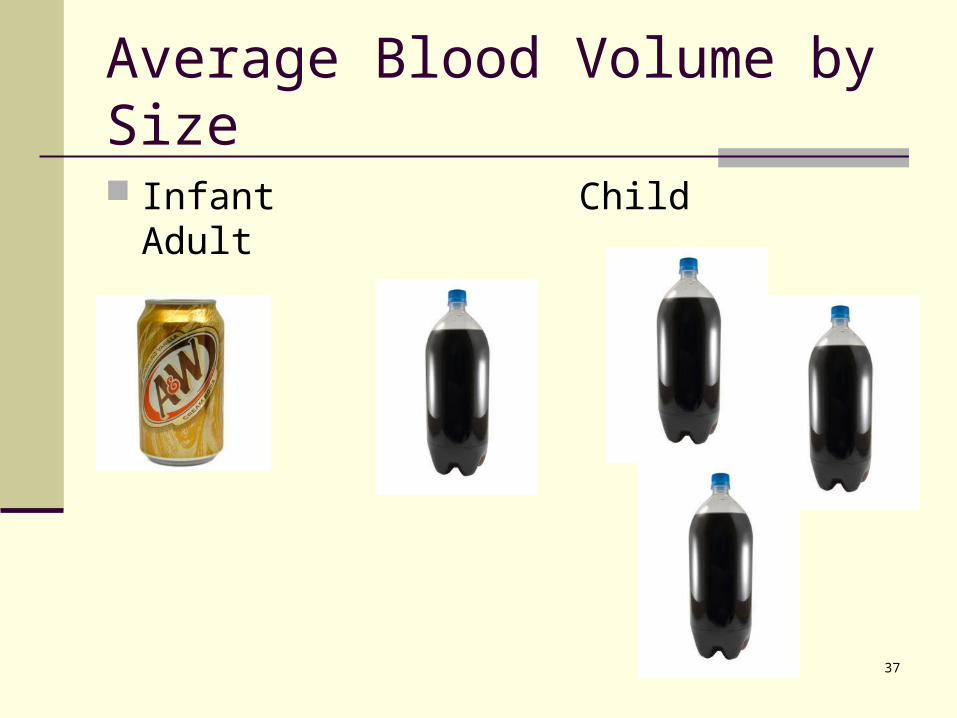
Pediatric Population
Average blood volume is by body size Typical infant 80 ml/kg
Typical adult male 75 ml/kg
Typical adult female 65 ml/kg
By formula then: Infant = 300 ml total blood volume 200# adult male = 6,800 ml total blood volume 160# adult female = 4700 ml total blood volume
37
Average Blood Volume by Size
Infant Child Adult

38
Field Interventions for Shock
Frequent reassessments watching for changes/trends Every 5 minutes (or sooner) for unstable
patient If not documented, then not done
Follow ABC’s (CAB’s if arrested) Assess airway Assess quality of breathing Assess circulation / pulses / perfusion Assess neurological function

39
Field Interventions for Shock
EMS to begin transport as soon as possible EMS alerts receiving hospital as soon as
possible EMS rapid trauma assessment
Identification of immediate, obvious life threats A quick head to toe examination Vital signs and history obtained Interventions begun as soon as possible
Transport should not be delayed to initiate additional interventions
IV/O2/monitor enroute in critical situation Fluid challenge is at 200 ml increments

40
Field Interventions for Shock
Management of life threats in the field (usually same process in the ED) Interventions performed if situation found
Airway opened Ventilations supported
Via BVM – 1 breath every 5 – 6 seconds Via ETT or King airway – 1 breath every
6 – 8 seconds MUCH slower than usually practiced!!!
Needle decompression if tension pneumothorax Sucking chest wound sealed Major bleeding controlled

41
Field Interventions for Shock
If failure to secure peripheral IV access, IO is the backup
If failure to place an endotracheal tube, King airway is the backup
These are urgent skills and each paramedic must be capable of using these tools without delay if necessary

42
IO Access
Available when other alternatives are not Sites provide non-collapsible space when
peripheral veins have collapsed in shock Sites can be rapidly accessed Fluids and medications are rapidly absorbed
into the bloodstream Large amounts of fluid can be delivered
quickly (i.e.: 125 ml/min) Bony cortex provides stable base when
securing inserted IO needle

43
Region SOP – IO Insertion Skill
Indications Shock, arrest, impending arrest Unconscious/unresponsive or conscious
critical patient without IV access 2 unsuccessful IV attempts or 90 second
duration or no visible sites

44
IO Insertion Skill cont’d
Contraindication Insertion into extremity with a fracture Infection at insertion site Previous orthopedic procedure (knee
replacement, previous IO within 480) Pre-existing medical condition (tumor near
site, peripheral vascular disease) Inability to locate landmarks (significant
edema)
45
Primary Complication IO Insertion
Extravasation into soft tissue from infiltrated site Could cause compartment syndrome
Reference June 2012 CE for review of compartment syndrome
Bone fracture during insertion – rare Could occur with excessive force applied
Osteomyelitis – uncommon Generally from poor technique Leaving IO needle in >24 hours Multiple attempts at same site

46
Equipment for IO Insertion
IV start pak Pre-filled syringe
10 ml 0.9 NS for adult insertion 5 ml 0.9 NS for pediatric insertion
IO kit Needle Primed EZ connect tubing Wristband
Drill Cleansing material
Chloraprep ampule; alcohol wipe Primed IV tubing inserted into IV bag Pressure bag

47
IO Needle SizingNote: Gauge same for all sizes (15 G)
Pink for 3 – 39 kg (up to 88 pounds) 15 mm; 15 G
Blue for >40 kg (>88 pounds) 25 mm; 15 G
Yellow for excessive tissue over site & humeral head site 45 mm; 15G

48
IO Needle Sizing Hint/Tip
Need to evaluate the site to determine the size needle to use
If you feel bone immediately under the site palpated, use the pink 15 mm needle Ex: palpate over wrist at base of thumb
If you palpate tissue over the site and not bone, use the blue 25 mm needle
If there is excessive tissue over the site or use of the humeral site, use the 45 mm needle

49
Proximal Tibial IO Landmarks Need to identify the tibial tuberosity – a rounded
projection below knee cap Sits approximately 2 finger widths below the patella

50
IO Site Identification – Proximal Tibia
Site must be viewed AND palpated Locate tibial tuberosity - bump over shin 2 fingers
below patella 1 finger width
medial (towards big toe)
In the very young, may not have a prominent tibial tuberosity

51
Proximal Tibia Preferred site of choice 2 fingers BELOW
patella (kneecap) at tibial tuberosity MUST avoid epiphyseal plate of developing
child - could interfere with growth of that limb

52
IO Site Identification – Humeral Head
Site must be viewed AND palpated Site avoided if surgical scars evident – hardware
may have been placed

53
Greater Tubercle IO Site
Start palpating the mid-humeral shaft Work upwards toward the proximal aspect or
humeral head You will notice a protrusion
This is base of greater tubercle insertion site Move 1 cm (1/2 inch) above this point for insertion
Can place fingers on either side of humeral head to help identify the midline

54
Humeral Site
Palpate 2 finger widths below acromium Find the most prominent spot of the humeral
head / greater tubercle YOU MUST BE ANTERIOR TO MIDLINE!!!
Could also palpate to the end of the clavicle Move 2 finger widths
toward the elbow

55
Humeral Site Hints
Arm must be flexed with elbow tucked back
Site is anterior to midline
Site feels like a golf ball

56
IO Access
Prep the identified site Chloraprep or alcohol wipe from IV start kit
Insert needle into site WITHOUT drilling Needle very sharp and will insert easily The needle stops when it touches bone
LOOK You must be able to see the
5mm mark to verify appropriateness of length of needle
5mm mark

57
Visualizing 5 mm Marking Is the 5 mm mark visible? If yes, begin to drill
If no, the needle length is too short Move up to the next length needle and reinsert

58
Angle of Insertion Tibial Site
Can insert needle at 900 angle Can insert needle at 10-150 angle toward the
foot – avoids growth plate (epiphyseal plate) Growth plate active while child still growing

59
Using the IO Drill
You are drilling into a bone; not drywall!!! Insert needle until needle stops at bone Verify 5 mm mark Begin to drill Stop when you feel lack of resistance or “pop” Remove stylet Attach EZ connect tubing & confirm placement Connect primed IV tubing & secure tubing Confirm placement of pressure bag over IV bag Apply wrist band to same-side wrist

60
Drilling Into Humeral Site
Humeral head NOT a weight bearing bone Bone density is softer than tibial area Needle may not be as secure in this site Hold needle in place as you remove the drill Immobilize the arm (i.e.: cot straps will work) to prevent
movement of arm & inadvertent dislodgment of needle Patient cannot be allowed to raise arm up DO NOT ALLOW PATIENT TO RAISE ARM
OVERHEAD!!! Use 45 mm yellow needle for humeral head site

61
Confirming Insertion
One of the biggest complications of IO is extravasation due to faulty placement
All insertions MUST be confirmed After removal of stylet, aspirate with primed
10 ml syringe You may or may not see bone marrow
Regardless of what is aspirated, inject the saline
Observe for infiltration while feeling for any resistance to the injection

62
Faulty IO Insertions Always confirm site and continue to monitor
placement Bilateral IO in infant; through and through
insertion Most likely palpate infiltration in calf area

63
How Would You “Catch” This Faulty Placement???
Was correct length needle chosen for the site?
Did drilling stop when operator felt the “pop” or lack of resistance?
Was the calf area evaluated for signs of infiltration?
Does the IV fluid infuse well? Remember: Need to place pressure bag over
IV bag in order to obtain a flow
64
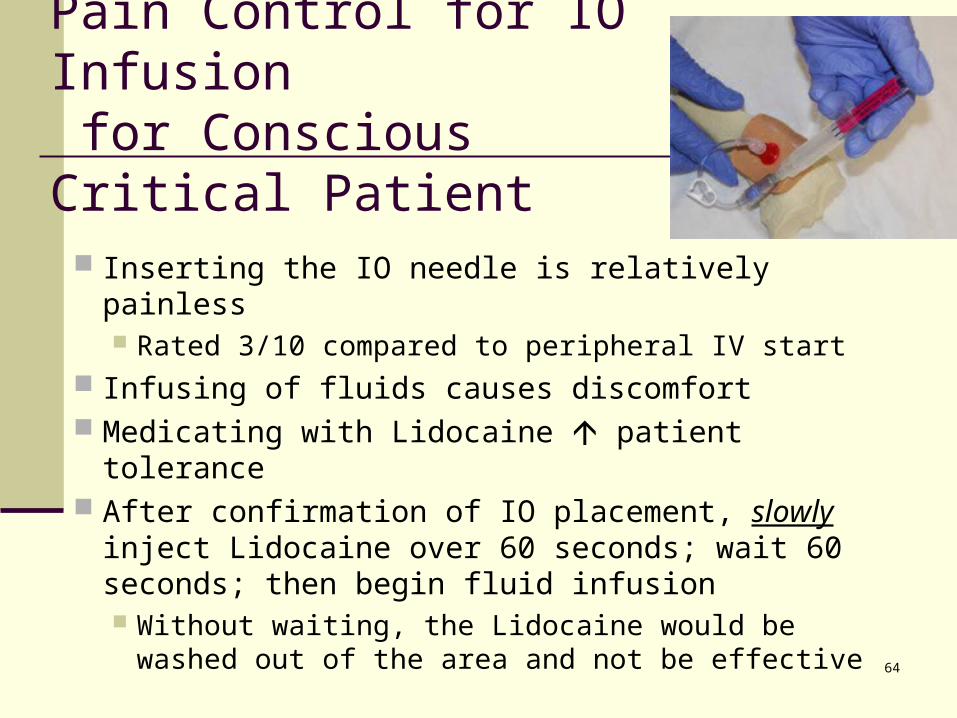
Pain Control for IO Infusion for Conscious Critical Patient
Inserting the IO needle is relatively painless Rated 3/10 compared to peripheral IV start
Infusing of fluids causes discomfort Medicating with Lidocaine patient tolerance After confirmation of IO placement, slowly
inject Lidocaine over 60 seconds; wait 60 seconds; then begin fluid infusion Without waiting, the Lidocaine would be
washed out of the area and not be effective

65
IO Infusion Reminder
Fluids and medication given via the IO site has rapid absorption into central circulation Comparable to IVP route
66
EZ IO Pearls
Pressure bag is required for flow to overcome pressure in marrow cavity Will improve infusion rate
DO NOT apply pressure to the drill Let the drill do the drilling Putting pressure on the needle may cause
the needle to bend

67
Removing IO Needle
Stop infusion Remove EZ IO extension tubing from hub of IO Attach any size syringe to the IO needle hub
Try 53 or 5 ml syringe; this will give you a “handle” to hold while removing the needle
Turn syringe clockwise to unscrew needle from bone Gently pull on the needle as you twist the syringe
Upon removal of needle, place band aid over site There is very little blood flow from site

68
Removing IO Needle
Keep twisting, turning and pulling Needle goes in quickly but takes quite a few
turns to remove from the tibial area IO in humeral site not as secure and is removed
quicker

69
Securing the Airway
A generic term that indicates the patient is being ventilated Ventilating = breathing
Positioning is simplest maneuver and most often overlooked
Measurement and placement of oropharyngeal or nasopharyngeal airways can help
Advanced airways for Region X include endotracheal tubes and King airways

70
King Airway Access
Indications
Cardiac or respiratory arrest Unresponsive medical or trauma patient
without gag reflex Inability to place an endotracheal tube

71
King Airway Contraindications
Height less than 4 feet Presence of gag reflex Ingestion of caustic substance Known esophageal disease

72
BVM O2 source
King airway Size 3 (yellow) for patients 4 – 5 feet tall Size 4 (red) for patients 5 – 6 feet tall Size 5 (purple) for patients over 6 feet tall
Water soluble lubricant Large sized syringe Method to secure airway (i.e.: tape,
commercial holder)
King Airway Equipment

73
King Airway Insertion
Distal tip back side of tube lubricated Avoid placing lubricant over
port holes Patient placed in supine position Non-dominate hand used to perform chin lift
holding mouth open Might want to grab tongue with gauze
Airway inserted with dominant hand Tip inserted starting at corner of
patient’s mouth Blue line on tube always kept
toward patient; away from inserter

74
King Airway Insertion cont’d
Tube tip advanced to base of tongue and then rotated to midline Blue line still facing chin of patient
Without excessive force, tube advanced until base of colored connector even with teeth or gums
Pilot balloon inflated Size 3 = 50 ml air Size 4 = 70 ml air Size 5 = 80 ml air

75
King Airway Insertion cont’d
BVM attached and ventilations begun Should meet with resistance
While ventilating, tube gently withdrawn until ventilations become easy and without resistance
Cuff inflation adjusted as needed Seal obtained at peak of ventilatory pressure
Placement confirmed Bilateral chest rise and fall Bilateral breath sounds No sounds over epigastric area

76
King Airway Positioning
Airway in position Air passes into trachea from point between the
two cuffs

77
ETT vs King Airway
ETT a superior piece of equipment in securing the airway More expertise to place,
though
King an acceptable backup Blind insertion
technique

78
Removal of King Airway
Usually King replaced in the ED with ETT prior to hospital admission King is acceptable for short term use King does not protect the airway as efficiently as
ETT Have suction available Use large syringe and remove air from cuff until
no more can be removed Remember: King airways can hold 50 – 80 ml air
in cuff Compared to ETT which holds average of 10 ml

79
Removal of King cont’d
Remove King airway in steady extubation motion
Prepare to ventilate patient via BVM After patient assessment, place appropriate
airway device/support as needed ETT BVM support Supplemental oxygen if patient breathing on
their own

80
Scenario Discussion
Review the following case studies Determine your general impression Determine what field treatment would be
appropriate Determine your rationale for your choice
Know why you chose the intervention you did

81
Scenario #1
27 year-old patient involved in a MVC Restrained driver involved in T-bone on driver’s
side A & O x3; cooperative; looks uncomfortable C/o left sided abdominal pain Has bilateral lower leg closed fractures VS: B/P 126/82; P – 88; R – 18; SpO2 98% Abdomen firm; no bruising noted
What care would EMS provide?

82
Scenario #1
Care to initiate Extrication with attention to spinal
immobilization Rapid head to toe assessment looking for life
threats Decision made regarding transport urgency Obtaining history and vital signs IV access considered – at scene vs enroute O2– no resp distress, SpO2 98%; consider on
case-by-case basis if O2 indicated Cardiac monitor appropriate

83
Scenario #1
Reassessment Increased agitation Paler; slightly diaphoretic VS: B/P 102/78; P – 104; R – 24; SpO2 95%
What do these changes indicate? Early signs of shock
Changing level of consciousness (agitation) Becoming tachycardic B/P holding (watch for decrease) Watch for narrowing pulse pressure Pale & clammy

84
Scenario #1 – Narrowing Pulse Pressure
Difference between systolic & diastolic B/P Normal = 40 (i.e.: 120/80 = 120 – 80 = 40) < 40 = poor heart function
Most common cause is drop in left ventricular stroke volume
In presence of trauma, suggests blood loss with insufficient pre-load (blood volume returning to the heart) and therefore creating a decrease in cardiac output
Note: Helpful detail to monitor in serial vital signs

85
Scenario #1
What injuries might be considered? Spleen injury on left
Injury to a solid organ could cause heavy bleeding
Rib fractures causing pulmonary issues How was this patient initially categorized?
Category II trauma patient Need to provide condition update to receiving
hospital May need to re-categorize as a Category I
with deteriorating vital signs

86
Scenario #1
What type of shock would this patient be experiencing? Hypovolemic
What compensatory mechanisms were in place? Maintaining peripheral vasculature resistance -
to maintain B/P and circulation Increased pulse rate – to maintain blood flow
and perfusion Sometimes confused with response to pain,
excitement, flight-or-fight response
87
Scenario #1
EMS is unable to establish a peripheral IV They are preparing to establish IO access Can the tibial site be used in this case?
No, bilateral fractures present What would be an alternate site?
Humeral head How do you identify the humeral site?
Identify your own humeral site

88
Scenario #1 – Humeral Site ID
Elbow MUST be resting posteriorly in tucked back position (i.e.: resting on the backboard)
Hand rests over navel Palpate “golf ball”
sized target over humeral head
Insert needle at 900 angle Document placement,
confirmation, and placement of wrist band

89
Scenario #2 Roll over – 1 victim

90
Scenario #2
EMS responded to a call for a 56 year-old male involved in a rollover
Patient was ejected; found on side of road Patient moaning, thrashing about (GCS 9) Obvious deformities noted right upper and
lower extremities In respiratory distress; uneven movement of
chest wall; crepitation palpated on left What category trauma is this patient?
Category I

91
Scenario #2
Care is initiated in field and enroute What are field options if EMS is unable to
establish peripheral IV access? If IV access necessary, IO is inserted
What could be contraindications to an IO site? Injuries/fractures to the same side Evidence of infection at site

92
Scenario #2
How do you know the IO is successful? Feel “pop” entering bone Needle stands up by self Able to aspirate bone marrow Able to flush without resistance Fluid flows effortlessly (using pressure bag)
What is the formula for an adult fluid challenge? Calculate 20 ml / kg Administer in 200 ml increments with frequent
reassessments

93
Scenario #2
Evaluate this IO placement Is it okay??? NO!
Where is the proper insertion site???
Palpate your tibial site Review slides
49-51
x

94
Scenario #2
Needle appearance when removed in ED
Excess pressure during insertion may bend/break the needle

95
Scenario #3 74 y/o patient presented with severe chest
pain 9/10 for past 4 hours Pain radiates toward back and down left arm VS: B/P 142/92; P – 84; R – 22 SpO2 98%
Rhythm strip as below; what’s rhythm?
NSR

96
Scenario #3- Is There ST Elevation?
V1 – V5

97
Scenario #3
The patient proceeds to arrest and go into VF What is the first action after confirming VF?
Defibrillate Immediately begin CPR after defibrillation IV access established Airway secured
What medications are used for VF for EMS? Epinephrine 1:10,000 1 mg IVP/IO every 3-5 min Alternated with Amiodarone 300 mg IVP/IO
Repeated in 5 minutes with 150 mg IVP/IO

98
Scenario #3
If patient cannot be intubated, what are EMS options? BVM (30:2 during CPR) King airway
One breath every 6 seconds via advanced airway
How does EMS decide on the size of the King? By patient height:
Size 3 (yellow) for 4-5 foot tall Size 4 (red) for 5-6 foot tall Size 5 (purple) for over 6 foot tall

99
Scenario #3
A King airway is placed EMS is unable to bag the patient via the King Trouble shoot – what do you think the
problem is? Has the King airway been backed out far
enough? Airway should be repositioned until
bagging is easy and chest rise and fall is observed

100
Scenario #4
EMS has 27 year-old male who was stabbed multiple times
Blood is evident on patient’s clothing No wounds are spurting blood
Patient is awake, agitated, pale, diaphoretic VS: B/P 110/70; P – 102; R – 24; SpO2 96%
Breath sounds diminished throughout but EMS feels they are present

101
Scenario #4
Stab wounds evident upper R arm 2 sites noted upper anterior chest wall 1 site noted rib margin lower chest wall
What injuries should care providers be suspicious of? Pulmonary Cardiac Abdominal Soft tissue/orthopedic

102
Scenario #4 Immediate care?
Open chest wounds covered immediately Need baseline vital signs at some point
Evaluating level of consciousness and radial pulses can provide helpful information on status of perfusion
Level of consciousness 1st thing to change when perfusion starts dropping
B/P last change when compensation no longer possible
To palpate a radial pulse one needs adequate cardiac output to a peripheral site which indicates level of blood pressure

103
Scenario #4
Wounds are covered Appropriate EMS care provided Receiving hospital notified Transport already underway
Patient’s agitation increasing Becoming more tachycardic Having increased respiratory difficulty
What is the next appropriate action??? Return to evaluation of ABC’s Be suspicious for tension pneumothorax

104
Scenario #4 – Tension Pneumothorax
What is field treatment for tension pneumothorax? Needle decompression
This patient already has chest wounds What would be done if tension pneumothorax
is suspected? Can lift edges of dressings Can insert a needle into the 2nd intercostal
space (ICS) middle of the clavicle, over top of rib
Evaluate all interventions provided

105
Scenario #4 – Needle Decompression
Need to be more lateral than you expect Typically in vertical line with male nipple

106
Verbal Report and Documentation
If a traumatic injury Need detail of mechanism of injury (MOI)
Fall – WHY did patient fall (Trip? Dizziness?)
MVC – what hit patient?/what did patient hit? What damage is there to vehicle? Include the safety components
used/not used (i.e.: seat belts, airbags, etc)

107
Report & Documentation cont’d
Need detail of signs and symptoms If ANY complaint, what did assessment find? NOT good enough to chart “assessment done”
Does not provide details of what was found If a release, NOT helpful if patient later
presents to ED or calls 911 NO comparison data can be done; can’t tell
if there was a change in condition For extremity issue, include description of
injury and distal CMS/PMS/SMV
108
Sample Documentation – What do you think??? 27 y/o M involved in MVC; signed a release
A & O x3; ambulatory. Struck from behind; wearing seatbelt c/o abdominal pain; has abrasion on L knee Denied loss of consciousness Advised of risks by not seeking medical
attention Signed a release
So, what do you think???

109
Sample Documentation Critique
No description of MOI Helpful for anticipation of injuries
No detailed assessment of abdominal pain or knee abrasion If patient were to later call 911 or present to
the ED, no comparison for changes to the abdominal area can be made
No comparison for changes to the extremity can be made without baseline details of the initial evaluation

110
Bibliography
Bledsoe, B., Porter, R., Cherry, R. Paramedic Care Principles & Practices, 4th edition. Brady. 2013.
Region X SOP’s; IDPH Approved January 6, 2012. http://ccn.aacnjournals.org/content/31/2/76.ful emsstaff.buncombecounty.org (EZ IO for Buncombe
County) http://www.youtube.com/watch?v=Wu-KVibUGNM&fe
ature=player_detailpage http://emedicine.medscape.com/article/908610-overvi
ew#aw2aab6b7 http://www.vidacare.com/EZ-IO/Clinical-Applications-
Online-Training.aspx