1. Language setting2011-0127-0533-570287@faq... · 1. Language setting . Step 1: ... then you can...
32
Frequently Ask Questions. 1. Language setting Step 1: Power on NB and you would see the following screen. Please click the language and select one you need as primary language. Step 2: Key in root user and password.
Transcript of 1. Language setting2011-0127-0533-570287@faq... · 1. Language setting . Step 1: ... then you can...

Frequently Ask Questions. 1. Language setting Step 1: Power on NB and you would see the following screen. Please click the language and select one you need as primary language.
Step 2: Key in root user and password.

Step 3: When prompted by message below, you can determine whether to make it as default setting or not.
Step 4: Log in system and enter into control center. Find the language icon and click it.

Step 5: Select the language you prefer then press details button.
Step 6: Check whether the setting is modified or not.

Step 7: Press Accept button to complete the modification.
2. Utilize webcam application Step 1: Press Fn + F6 combination key to turn on webcam
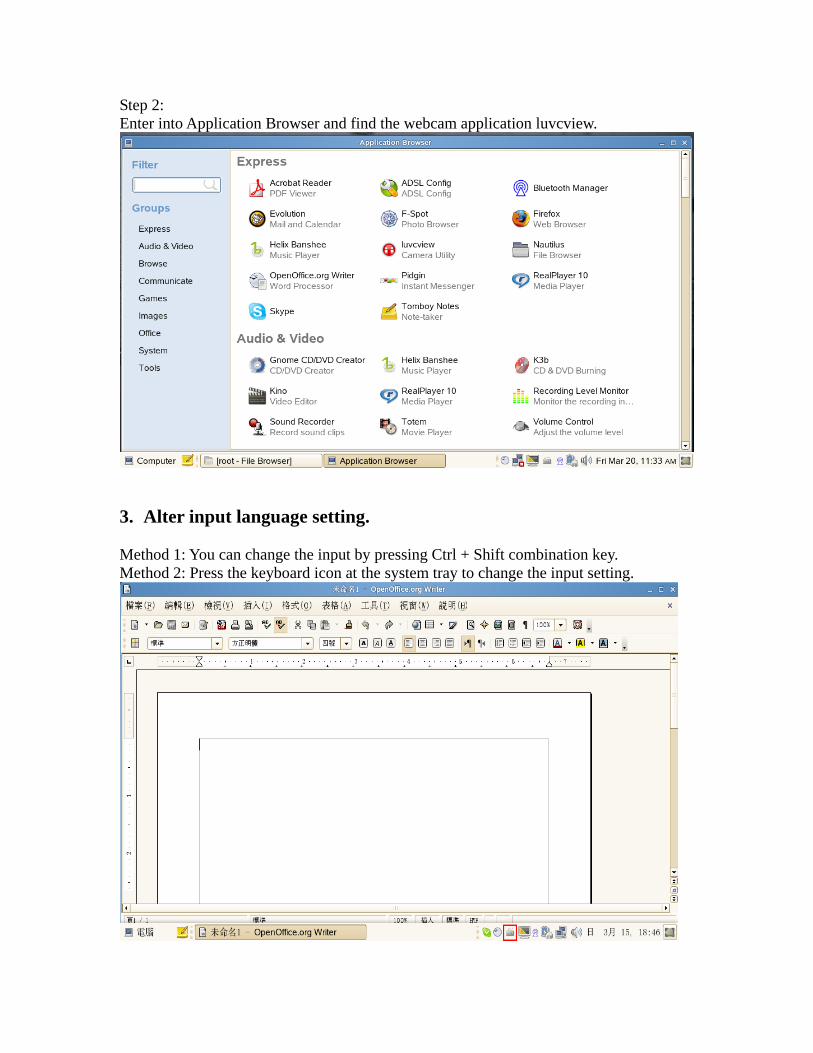
Step 2: Enter into Application Browser and find the webcam application luvcview.
3. Alter input language setting. Method 1: You can change the input by pressing Ctrl + Shift combination key. Method 2: Press the keyboard icon at the system tray to change the input setting.

4. Network setting for ADSL Step 1: Enter into Application Browser and click ADSL Config icon.
Step 2: Add new DSL Device
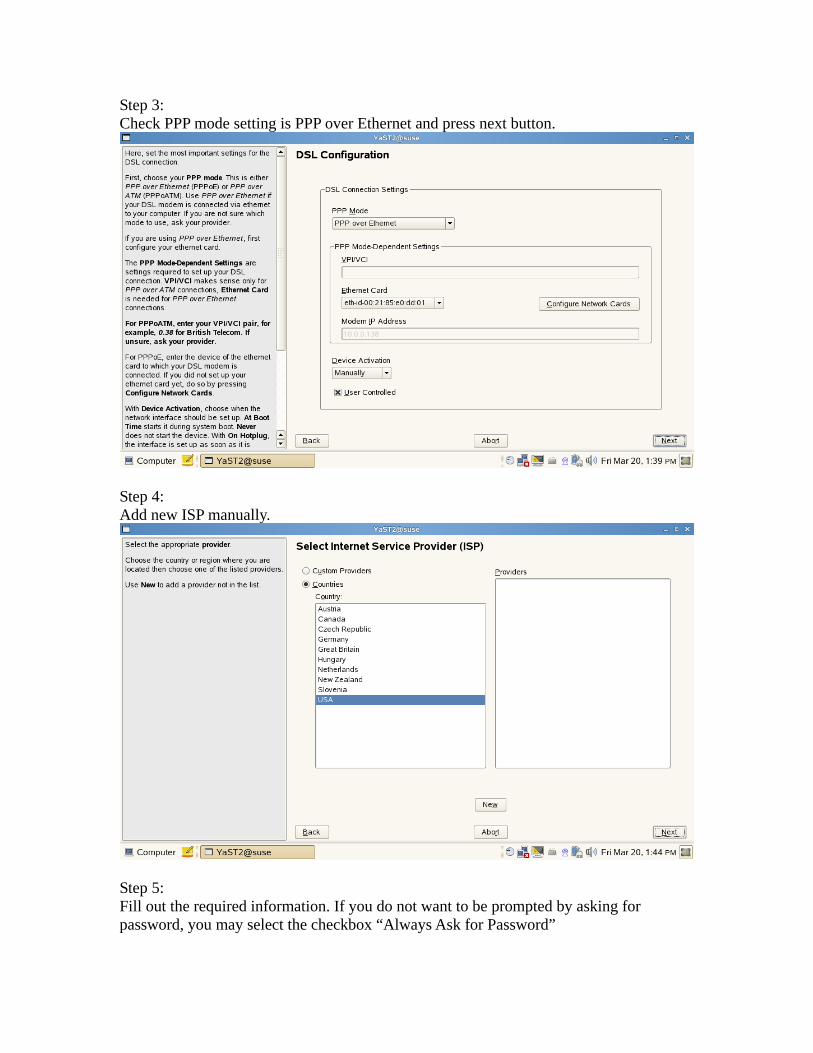
Step 3: Check PPP mode setting is PPP over Ethernet and press next button.
Step 4: Add new ISP manually.
Step 5: Fill out the required information. If you do not want to be prompted by asking for password, you may select the checkbox “Always Ask for Password”

Step 6: Check the connection parameters then press Next button.
Step 7: Press finish button and if you do not want to configure the modem, please press cancel button then finish the ADSL setting.

Step 8: Click the Dial up connections at the system tray then select DSL connection you set.
Step 9:

Then you can utilize the internet browser utility such as Firefox to browse the website.
5. Network setting for DHCP Step 1: Get into YaST Control Center by click Control Center System YaST
Step 2: Click Network cad icon to setup Network.

Step 3: Press next button
Step 4: Edit Realtek network card.

Step 5: Set automatic address setup to get IP address for network card.
Step 6: Press finish button to complete the setting.

Step 7: Now you can use web browser to surf internet.
6. Network setting for static IP Step 1: Get into YaST Control Center by click Control Center System YaST

Step 2: Click Network cad to setup Network.
Step 3: Press next button.

Step 4: Edit Realtek network card.
Step 5: Select static address setup and fill out IP address, Subnet Mask. Enter into Routing Configuration to fill out Default Gateway.

Step 6: Press Hostname and Name Server button then you would be prompted by a message. Please press Modify button to configure Domain Name server. You need to uncheck the checkbox “Update Name Servers and Search List via DHCP” to configure Domain Name Server. Then press ok button to finish DNS setting.
Step 7: Press finish to complete the setting.

Step 8: Now you can use web browser to surf internet.
7. Utilize aMSN Step 1: Enter into Application Browser and click aMSN icon.

Step 2: You can click Language to alter the language setting. You will need to close and open aMSN to make the change work.
Step 3: To use video conference feature, you need to press Fn + F6 combination key to activate webcam first. Then enter into Account tab and click Preferences item.

Step 4: Click the Edit audio and video setting button in Others tab to configure the webcam setting.
Step 5: The embedded webcam should be recognized as default device. Now press Next button.
Step 6: Here are setting allow you to customize the display quality that you require for.
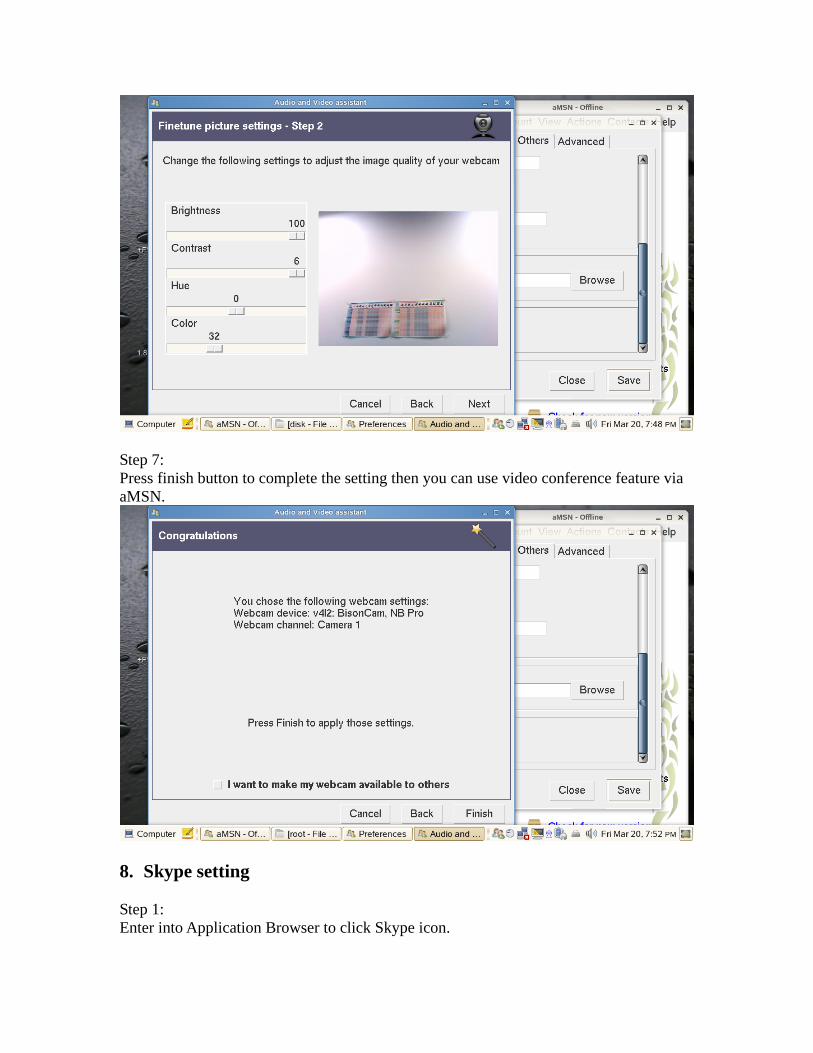
Step 7: Press finish button to complete the setting then you can use video conference feature via aMSN.
8. Skype setting Step 1: Enter into Application Browser to click Skype icon.

Step 2: Accept the EULA to proceed the setting.
Step 3: Key in Skype name and Password to login and you can execute aMSN to configure webcam setting.

Step 4: To utilize video conference, you need to activate webcam by aMSN first. Then Skype can activate webcam function.

9. Linux recovery Step 1: Power on system and select Recovery to Factory Setting when prompted by two options.
Step 2: System will pop up a message, please press OK.

Step 3: Press Yes button to start the recovery process.
Step 4: System will shut down automatically when recovery process is complete.
10. How to remove USB flash stick or flash card safely.

Step 1: Right click the flash cad icon. Please select “Unmount Volume” then unplug flash card.
11. How to remove language input that we do not use it often? Step 1: Right click the keyboard icon on the system tray. Please enter into SCIM Setup
Step 2:

Enter into Global Setup of IMEngine, then you can determine which language should be enabled or disabled by marking the checkbox. You may also click ▽ button to unfold the language input list.
Step 3: If you select the input method, please press ok button to finish the setting. A message window will pop up, press ok button and reboot system again to let the setting take effect.

Hint: You can use combination key Shift + Space to switch the language input. 12. How to use MSN account to login aMSN? Step1: Please download the latest aMSN version from following link. The file would be stored at desktop as default. http://prdownloads.sourceforge.net/amsn/amsn-0.97.2-1.tcl84.x86.package Step2: Please right click at file “amsn-0.97.2-1.tcl84.x86.package” and select “Property”

Step3: Select Permission tab and mark checkbox Execute then close the window.
Step4: Execute package “amsn-0.97.2-1.tcl84.x86.package”.

Step5: Key in Y to continue the installation. Please ensure you can connect to internet.
Step6: Key in password for root user. (If you are root user then you would need to follow step 6 to step8)

Step7: After the installation is complete, please press enter to close the window.
Step8: Enter password for root user.
Step9: Press ok to complete the installation.

Step10: Switch on the webcam (Fn+F6) then execute aMSN. Key in you account and password then you would be prompted by a popping message, please select Linux-x86 then press ok.

Step11: Press ok then the aMSN update is complete.