1 HVACR115 – Mechanical for Gas Cutting and Threading Steel Pipe.
37
1 HVACR115 – Mechanical for Gas Cutting and Threading Steel Pipe
-
Upload
loren-cobb -
Category
Documents
-
view
226 -
download
2
Transcript of 1 HVACR115 – Mechanical for Gas Cutting and Threading Steel Pipe.

1
HVACR115 – Mechanical for Gas
Cutting and Threading Steel PipeCutting and Threading Steel Pipe
2
Work area safetyWork area safety
• Keep your work area clean and well lit - Cluttered areas invite accidents.
• Do not operate tools in explosive atmospheres such as in the presence of flammable liquids, dust or gasses. Tools can create sparks which may ignite the dust or the fumes.
• Keep your work area clean and well lit - Cluttered areas invite accidents.
• Do not operate tools in explosive atmospheres such as in the presence of flammable liquids, dust or gasses. Tools can create sparks which may ignite the dust or the fumes.

3
Work Area SafetyWork Area Safety
• Keep by standers, children and visitors away while operating tools. Distractions can cause accidents and cause you too loose control.
• Do not let visitors operate or touch any tool. People not trained on equipment invite accidents.
• Keep by standers, children and visitors away while operating tools. Distractions can cause accidents and cause you too loose control.
• Do not let visitors operate or touch any tool. People not trained on equipment invite accidents.

4
Electrical SafetyElectrical Safety
• Grounded tools must be plugged into an outlet, properly installed and grounded in accordance with all codes and ordinances. Check with a qualified electrician if you are in doubt.
• Never remove the grounding plug or modify the plug in any way. Do not use adapter plugs.
• Grounded tools must be plugged into an outlet, properly installed and grounded in accordance with all codes and ordinances. Check with a qualified electrician if you are in doubt.
• Never remove the grounding plug or modify the plug in any way. Do not use adapter plugs.

5
Electrical SafetyElectrical Safety
• Avoid body contact with grounded surfaces such as pipes, radiators, ranges and refrigerators.
• Do not expose electrical tools to rain or wet conditions.
• Do not abuse the cord. Never use cord to carry the tools or pull the plug from the outlet.
• Avoid body contact with grounded surfaces such as pipes, radiators, ranges and refrigerators.
• Do not expose electrical tools to rain or wet conditions.
• Do not abuse the cord. Never use cord to carry the tools or pull the plug from the outlet.

6
Electrical SafetyElectrical Safety
• Keep the cord away from heat, oil, sharp edges or moving parts.
• Replace any damaged cords immediately.• When operating a tool outside, use an outdoor
extension cord marked “w-a” or “w”
• Keep the cord away from heat, oil, sharp edges or moving parts.
• Replace any damaged cords immediately.• When operating a tool outside, use an outdoor
extension cord marked “w-a” or “w”

7
Electrical SafetyElectrical Safety
• Connect the tool to an AC power supply that matches the name plate specification.
• Incorrect voltage supply can cause electrical shock or burns.
• Use only three way extension cords which have three prong grounding plugs and three pole receptacles which accept the tools plug.
• Connect the tool to an AC power supply that matches the name plate specification.
• Incorrect voltage supply can cause electrical shock or burns.
• Use only three way extension cords which have three prong grounding plugs and three pole receptacles which accept the tools plug.

8
Electrical SafetyElectrical Safety
• Use proper extension cords. Insufficient conductor size will cause excessive voltage drop, loss of power and overheating.
• Keep all extension cord connections dry, off the ground and out of puddles.
• Use proper extension cords. Insufficient conductor size will cause excessive voltage drop, loss of power and overheating.
• Keep all extension cord connections dry, off the ground and out of puddles.

9
Personal SafetyPersonal Safety
• Stay Alert, watch what you are doing and use common sense when operating a tool.
• Do not use tools when under influence of alcohol or medications.
• Dress properly, no loose clothing.
• Stay Alert, watch what you are doing and use common sense when operating a tool.
• Do not use tools when under influence of alcohol or medications.
• Dress properly, no loose clothing.

10
Personal SafetyPersonal Safety
• Avoid accidental starting. Be sure switch is off before plugging in.
• Do not over-reach. Keep proper footing and balance at all times.
• Use safety equipment. ALWAYS wear eye protection.
• Operate machines from side with the switch.
• Avoid accidental starting. Be sure switch is off before plugging in.
• Do not over-reach. Keep proper footing and balance at all times.
• Use safety equipment. ALWAYS wear eye protection.
• Operate machines from side with the switch.

11
Specific SafetySpecific Safety
• Always consult the tool manufacturers operating manual for specific safety information.
• Injuries from threading machines can be:o Loss of fingers.o Electric Shocko Broken boneso Eye injuries
• Always consult the tool manufacturers operating manual for specific safety information.
• Injuries from threading machines can be:o Loss of fingers.o Electric Shocko Broken boneso Eye injuries
12
Threading machine safetyThreading machine safety
• Machines are made to cut and thread pipe.• Secure machine to bench or stand• Support long heavy pipe with pipe supports• Do not wear loose clothing or loose gloves.
• Machines are made to cut and thread pipe.• Secure machine to bench or stand• Support long heavy pipe with pipe supports• Do not wear loose clothing or loose gloves.

13
Threading machine safetyThreading machine safety
• Do not reach across the machine• Do not use machine if foot switch is broken.• Tighten chuck hand wheel and engage rear
centering device on the pipe before turning on the machine.
• Do not reach across the machine• Do not use machine if foot switch is broken.• Tighten chuck hand wheel and engage rear
centering device on the pipe before turning on the machine.

14
Threading machine safetyThreading machine safety
• Lock foot switch when not in use.• The foot switch is for your safety. It lets you shut off
the motor by removing your foot. If clothing should get caught in machine it will continue to pull you in. Because the machine has a high torque the clothing itself can bind around your arm with enough force to break it.

15
Tools requiredTools required
• A holding deviceo Chain Viseo Yoke Viseo Motorized pipe vise
• The chain and yoke vise are for hand cutting and threading only.
• A holding deviceo Chain Viseo Yoke Viseo Motorized pipe vise
• The chain and yoke vise are for hand cutting and threading only.

16
Tools RequiredTools Required
• The motorized vise is used with mechanical threading. There is a switch with three positions on this vise, Reverse (counter clockwise), OFF, Forward (clockwise).
• The motorized vise is used with mechanical threading. There is a switch with three positions on this vise, Reverse (counter clockwise), OFF, Forward (clockwise).

17
Tools RequiredTools Required
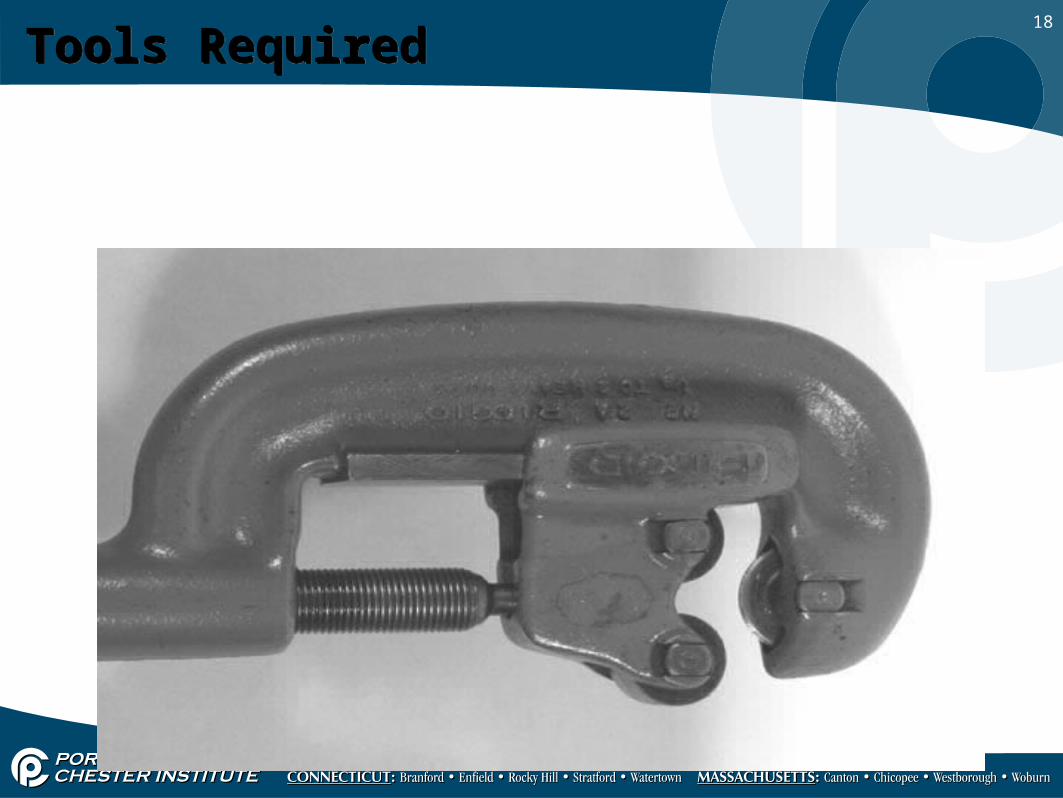
• Pipe Cutter:o Makes a square cut but there must be room to swing the
cutter aroundo Hacksaw: one with 18 to 24 teeth per inch may be used
if proper pipe cutter is not available or unusable.
• Pipe Cutter:o Makes a square cut but there must be room to swing the
cutter aroundo Hacksaw: one with 18 to 24 teeth per inch may be used
if proper pipe cutter is not available or unusable.
18
Tools RequiredTools Required

19
Tools RequiredTools Required
• Pipe reamer:o Removes burrs from the inside of the pipe after it has
been cut.o The burrs must be removed because they restrict the
flow of fluids or gas.
• Pipe reamer:o Removes burrs from the inside of the pipe after it has
been cut.o The burrs must be removed because they restrict the
flow of fluids or gas.

20
Tools RequiredTools Required

21
Tools requiredTools required
• Pipe Threadero Also known as a die.o Most threaders used in the field are fixed die threaderso Can be used to clean up existing threads.
• Pipe Threadero Also known as a die.o Most threaders used in the field are fixed die threaderso Can be used to clean up existing threads.

22
Tools requiredTools required
• Oilero Used to supply cutting oil to the pipe as threads are
being cut.o The oil cools the die which extends the tools life.o The oil cools the pipe which prevents jagged and
malformed threads.o Usually comes with an attached tub to catch
shavings and recycle the oil
• Oilero Used to supply cutting oil to the pipe as threads are
being cut.o The oil cools the die which extends the tools life.o The oil cools the pipe which prevents jagged and
malformed threads.o Usually comes with an attached tub to catch
shavings and recycle the oil

23
Tools RequiredTools Required
• Pipe Stando Used to support long pipe lengths extending out from the
vise
• Pipe Stando Used to support long pipe lengths extending out from the
vise

24
Tools RequiredTools Required
• Pipe Wrencheso Can be used to attach the fittings to the pipe while in the
vise.o Used to assemble piping systems after threading.
• Pipe Wrencheso Can be used to attach the fittings to the pipe while in the
vise.o Used to assemble piping systems after threading.

25
Procedures for cuttingProcedures for cutting
• Measure and mark length of pipe being worked.• Insert pipe into vise
o Insert short pipe through front of machineo Insert long pipe through rear of machineo Use support stand if vise can not support pipe safely
• Measure and mark length of pipe being worked.• Insert pipe into vise
o Insert short pipe through front of machineo Insert long pipe through rear of machineo Use support stand if vise can not support pipe safely
26
Procedures for cuttingProcedures for cutting
• Make certain that pipe is centered in centering device at the read of the machine and tighten.
• Tighten front chuck jaws with a repetitive counter clockwise snap spin of the handwheel. This hammering action tightens the jaws on the pipe. A clockwise rotation snap spin releases the jaws.
• Make certain that pipe is centered in centering device at the read of the machine and tighten.
• Tighten front chuck jaws with a repetitive counter clockwise snap spin of the handwheel. This hammering action tightens the jaws on the pipe. A clockwise rotation snap spin releases the jaws.
27
Procedures for cuttingProcedures for cutting
• Cuttingo Engage pipe cutter with pipe and align cutter wheel
with mark on pipe.o Rest pipe cutter frame on the support bar located
on the switch side of the machine.o Tighten cutter feed screw handle until snug. Do not
over tighten.o With power cord plugged in turn rev/off/on switch to
FOR(forward) position.
28
Procedures for cuttingProcedures for cutting
• Place foot on foot switch to operate the machine.• Continuously tighten the feed screw handle with both hands until
the pipe cutoff is complete.• Release foot switch and turn REV/OFF/ON switch to OFF position.
• Place foot on foot switch to operate the machine.• Continuously tighten the feed screw handle with both hands until
the pipe cutoff is complete.• Release foot switch and turn REV/OFF/ON switch to OFF position.

29
Procedures for ReamingProcedures for Reaming
• Turn REV/OFF/ON switch to FOR position• Insert reamer into the end of the pipe and hold
firmly onto handle and handgrip.• Step on foot switch and push on reamer handgrip
with right hand to ream pipe.
• Turn REV/OFF/ON switch to FOR position• Insert reamer into the end of the pipe and hold
firmly onto handle and handgrip.• Step on foot switch and push on reamer handgrip
with right hand to ream pipe.

30
Procedures for ReamingProcedures for Reaming
• Release foot switch, remove reamer and turn REV/OFF/ON switch to OFF position.
• Release foot switch, remove reamer and turn REV/OFF/ON switch to OFF position.

31
Procedures for ThreadingProcedures for Threading
• Place threader on end of pipe with handle resting on support bar on switch side.
• Place oiler under threader and apply thread cutting oil to pipe end.
• Turn Rev/OFF/ON switch to FOR (Forward position)
• Place threader on end of pipe with handle resting on support bar on switch side.
• Place oiler under threader and apply thread cutting oil to pipe end.
• Turn Rev/OFF/ON switch to FOR (Forward position)

32
Procedures for ThreadingProcedures for Threading

33
Procedures for ThreadingProcedures for Threading
• Step on foot switch and push threader with right hand to engage dies.o Note: Threader is AUTOMATIC once dies are engaged.
Apply plenty of oil until threads are completed.• Release foot switch once threads are completed.• Push back support bar on switch side.
• Step on foot switch and push threader with right hand to engage dies.o Note: Threader is AUTOMATIC once dies are engaged.
Apply plenty of oil until threads are completed.• Release foot switch once threads are completed.• Push back support bar on switch side.

34
Procedures for ThreadingProcedures for Threading
• Reverse threader ratchet knob.• Lower threader handle and pull support bar out.
Threader handle is now against lower side of the support bar.
• Turn REV/OFF/ON switch to Rev (Reverse) position and back off threader by stepping on foot switch.
• Reverse threader ratchet knob.• Lower threader handle and pull support bar out.
Threader handle is now against lower side of the support bar.
• Turn REV/OFF/ON switch to Rev (Reverse) position and back off threader by stepping on foot switch.

35
Procedures for ThreadingProcedures for Threading
• Release foot switch and turn REV/OFF/ON switch to OFF position.
• Inspect threads, look for broken or chipped threads. Use a pipe fitting of same size to check threads.
• Release foot switch and turn REV/OFF/ON switch to OFF position.
• Inspect threads, look for broken or chipped threads. Use a pipe fitting of same size to check threads.

36
Procedures for ThreadingProcedures for Threading

37
Procedures for ThreadingProcedures for Threading