
0470118660
450
description
frozen dessert
Transcript of 0470118660


FROZEN DESSERTS

FROZEN DESSERTS
FRANCISCO J. MIGOYATHE CULINARY INSTITUTE OF AMERICA
JOHN WILEY & SONS, INC.

THE CULINARY INSTITUTE OF AMERICA
PRESIDENT Dr. Tim Ryan C.M.C. ’77
VICE-PRESIDENT, CONTINUING EDUCATION Mark Erickson C.M.C. ’77
DIRECTOR OF INTELLECTUAL PROPERTY Nathalie Fischer
EDITORIAL PROJECT MANAGER Margaret Wheeler ’00
Photography © 2008 Ben Fink
Design by Vertigo Design, NYC
This book is printed on acid-free paper. ∞
Copyright © 2008 by The Culinary Institute of America. All rights reserved
Published by John Wiley & Sons, Inc., Hoboken, New Jersey
Published simultaneously in Canada
No part of this publication may be reproduced, stored in a retrieval system, or transmitted in any form or by any means, electronic,
mechanical, photocopying, recording, scanning, or otherwise, except as permitted under Section 107 or 108 of the 1976 United States
Copyright Act, without either the prior written permission of the Publisher, or authorization through payment of the appropriate per-copy
fee to the Copyright Clearance Center, Inc., 222 Rosewood Drive, Danvers, MA 01923, (978) 750-8400, fax (978) 646-8600, or on the web
at www.copyright.com. Requests to the Publisher for permission should be addressed to the Permissions Department, John Wiley & Sons,
Inc., 111 River Street, Hoboken, NJ 07030, (201) 748-6011, fax (201) 748-6008, or online at http://www.wiley.com/go/permissions.
Limit of Liability/Disclaimer of Warranty: While the publisher and author have used their best efforts in preparing this book, they make
no representations or warranties with respect to the accuracy or completeness of the contents of this book and specifi cally disclaim any
implied warranties of merchantability or fi tness for a particular purpose. No warranty may be created or extended by sales representa-
tives or written sales materials. The advice and strategies contained herein may not be suitable for your situation. You should consult
with a professional where appropriate. Neither the publisher nor author shall be liable for any loss of profi t or any other commercial
damages, including but not limited to special, incidental, consequential, or other damages.
For general information on our other products and services or for technical support, please contact our Customer Care Department
within the United States at (800) 762-2974, outside the United States at (317) 572-3993 or fax (317) 572-4002.
Wiley also publishes its books in a variety of electronic formats. Some content that appears in print may not be available in electronic
books. For more information about Wiley products, visit our web site at www.wiley.com.
LIBRARY OF CONGRESS CATALOGING-IN-PUBLICATION DATA:
Migoya, Francisco.
Frozen desserts / Francisco Migoya.
p. cm.
Includes bibliographical references and index.
ISBN 978-0-470-11866-5 (cloth)
1. Ice cream, ices, etc. 2. Frozen desserts. I. Title.
TX795.M62 2008
641.8’62—dc22
2007035515
PRINTED IN CHINA
10 9 8 7 6 5 4 3 2 1

C
T
Contents
Acknowledgments vi
Introduction vii
CHAPTER 1: A Brief History of Frozen Desserts 1
CHAPTER 2: Ingredients 9
CHAPTER 3: Equipment, Machines, and Tools 31
CHAPTER 4: Dairy-Based Frozen Desserts 51
CHAPTER 5: Non-Dairy Frozen Desserts 69
CHAPTER 6: Aerated Still-Frozen Desserts 87
CHAPTER 7: Finished Items 101
CHAPTER 8: Base Recipes 348
Appendices 410
Average Sugar, Solids, and Acid Content of Fruit 410
Seasonal Availability of Fruit 412
Glossary 420
Bibliography 423
Internet References 424
Resources 425
Index 426

vi ACKNOWLEDGMENTS
There are many people whom I would like to thank for making this book possible. In no particular order, I would like to thank those
who assisted with the production and testing of every single recipe in this book, including Justin Kurtz and especially Lauren Genco and
Noah Carroll, some of the best people I have worked with. Thank you for all your hard work, not only on this book, but in everything
else you do.
I want to thank Maggie Wheeler for her invaluable input, attention to detail, and infi nite patience with my constant rewrites and
endless questioning, and Patrick Decker, for being instrumental in the photographic production and spending long hours in a very small
studio without missing a beat. I would also like to thank Kate McBride for her guidance in making this book the best that it could be.
This book’s photographs are by Ben Fink, who understands the importance of speed when photographing anything frozen. Thank
you, Ben, for making this book beautiful.
I also thank all of those chefs and pastry chefs I have worked for in the past. Donna Meadows, my fi rst pastry chef, taught me how
to work fast and trusted me to temper chocolate. Joseba Encabo, professor at The Culinary Institute of America, taught me the importance
of mise en place. Rick Lakkonnen, an excellent chef whom I worked for at the River Café, took a chance on me. Patrick Coston is one of the
most driven and talented pastry chefs I have ever met; I am eternally grateful for everything he taught me and for getting me my fi rst pastry
chef job. Speaking of my fi rst pastry chef job, I thank Scott Bryan, who gave me that fi rst pastry job after a twenty-minute interview. And
thanks to Thomas Keller, who taught me the importance of fi nesse and that there is life after the French Laundry.
I also thank The Culinary Institute of America for making this project possible, especially Tom Vaccaro, Associate Dean for
Curriculum and Instruction of Baking and Pastry Arts, and Dr. Tim Ryan, C.M.C., A.A.C., President.
And last, but not least, I thank my wife, Kris, for putting up with many late nights and weekends spent working, my parents for
investing wisely in my education, and my daughter, Isabel.
Acknowledgments

During my years as a pastry cook and eventually a pastry chef, I have focused mainly on plated desserts, many of which have a frozen
component included in one way or another, either as the main item or as part of the whole. Frozen desserts play an important role
in any highly regarded establishment because they represent a signifi cant percentage of the actual food that the pastry kitchen puts
out for paying customers. Knowing how to produce the highest-quality product is crucial to any aspiring or established pastry chef.
Many things can go wrong, but having an intimate understanding of the entire production process will result in a fl awless product.
Competition these days is fi erce. There are many pastry chefs who understand the importance of every single item on their menu, and
these are the pastry chefs who are successful. They are the ones who realize that every day there are more and more sophisticated
diners with very high expectations and a low threshold for incompetence. “Good” is just not good enough.
I must admit that at the very beginning of my career I appropriated other pastry chefs’ ideas and recipes left and right. I fi gured
that if someone published a book, we were all entitled to take from it as we pleased. If you write a book, it is to share with others what
you know, plain and simple, but there is only so much of that you can do without thinking about what kind of a pastry chef you are.
Are you a taker or an innovator? Do you create or emulate? I think all pastry chefs are a combination of all of the above; they decide
to present their own personal take on things out of respect to the author, but mostly out of self-respect. I know this because there is
nothing new under the sun. There are innovations, without a doubt, but all of the available ingredients and fl avors have been used
before. I am not going to reinvent ice cream, but I can fi gure out a way to make it better, and I can choose what fl avors to make and
how I will garnish them.
The intention of this book is to give the reader all of the information that he or she needs to produce high-quality frozen desserts
for restaurant or hotel production. This information is geared toward small-batch production, not commercial production. That is a
whole other story. Small-batch-production frozen desserts are meant to be consumed the day they are churned or frozen, not to sit in
a freezer for a long period of time. The difference in quality is signifi cant. Commercially produced items are loaded with chemicals, and
while some of the fi nished ice creams and sorbets are decent, they will never match up to the smooth texture, mouth feel, and intensity
of fl avor that comes from making smaller batches.
The information provided in this book is not limited to recipes. It isn’t enough to just give a recipe. There has to be a complete
immersion in the entire frozen dessert production process. Always remember that if anything can go wrong, it will. Prevention is the
best solution to any problem that may arise further down the line. This means that by controlling every aspect of production, you
diminish the chances for mistakes. Throughout these pages I have included practical advice for real-life situations that will get you to
the point where very little is out of your control.
It is important to have an intimate knowledge of all the different ingredients that are used in frozen desserts, because you have
to understand how to use them appropriately. Otherwise there is a good chance that the product will fail to meet your standards, or,
even worse, your customers’ standards. In the chapter on ingredients (see page 9), not only is each one described in detail, but how
they interact with each other is explained as well. This will help you understand what has happened if something goes wrong with your
recipe. Why is this sorbet rubbery? Why is this ice cream icy? The most common ingredients used in frozen desserts are milk, heavy
cream, eggs, granulated sugar, and fruit purées, but there are others that can improve the fi nal texture and mouth feel of an ice cream
or sorbet. Stabilizers, emulsifi ers, dextrose, atomized glucose, invert sugar, and powdered milk are a few examples of key ingredients
used in modern production that are covered in that chapter.
Tools and equipment also play an important role in the process of making frozen desserts. I have written about the two types of
ice cream machines that are the most widely used for small-batch production. There are a variety of brands available, but these two
types are representative of what is used in the industry. The pros and cons of each one of them are outlined in the equipment chapter
(see page 31). This information is meant to help you make an informed decision about the investment you are going to make. Small
tools used in producing frozen desserts, like the refractometer, are also explained in detail. Technology has made production much
faster, but sometimes it can be diffi cult to understand the ins and outs of complicated tools. This knowledge will be useful in order to
get the most and best out of a machine, tool, or other piece of equipment.
There are many different types of frozen desserts, but only the most widely used varieties made it into this book. Ice cream,
gelato, sherbet, sorbet, granité, ices, and aerated still-frozen desserts such as semifreddo, parfait, bombe, frozen souffl é, and frozen
mousse are the categories of desserts that this book covers. The heart of the book explains the defi nition of each of these desserts
as well as their differences, how they are made, and how they should be stored during service. Ice creams and sorbets can be made
with any given recipe, but there are formulas and new techniques that have improved these products in the past ten years. Traditional
methods of production are not obsolete, but newer methods provide another option for pastry chefs. These techniques, both classic
and modern, the formulas, and the current trends will be covered over the course of several chapters.
As for the fi nished products, I have broken them down into four categories: pre-desserts, plated desserts, entremets, and savory
items. Each section features a variety of recipes that includes all the types of frozen desserts covered in this book. Flavors range from
the traditional, like plain vanilla ice cream and raspberry sorbet, to the more unusual, like verjus sorbet, balsamic vinegar ice cream,
and white chocolate ice cream with caviar. These items are garnished with different components to enhance their fl avor and provide a
different texture. Many mistakes were made to obtain these fi nished products, but that is part of the beauty of working with food. You
never stop learning. You never stop making mistakes, either. With any luck, this book will keep aspiring pastry chefs and working pastry
chefs from making all the mistakes I had to learn from, and perhaps it will help them thrive in their careers sooner rather than later. I
hope you fi nd this book useful.
Introduction
INTRODUCTION vii

vIII

1
IN TODAY’S MODERN PASTRY KITCHEN, you will
probably see, among many machines, a batch freezer or freezers
fi lled with a variety of freshly made ice cream, gelato, sorbet,
and other frozen treats, and perhaps you will think nothing of
it. Why should you? Your customers expect to get a scoop or two
and then be on their way. But there are almost three thousand
years of history behind that scoop of ice cream. It started when
someone had the bright idea to eat fl avored snow, and it has
progressed all the way to the present time, when a machine
as technologically advanced as the Pacojet is commonplace in
today’s kitchens.
chapter one A Brief Historyof Frozen Desserts

2 FROZEN DESSERTS
The following is a timeline of the deciding (and
some merely anecdotal) moments in the history
of frozen desserts. Most of the verifi able infor-
mation is related to their development in the
United States.
•• 3000 B.C.E. (APPROXIMATELY): The Chinese are
credited with making the fi rst frozen dessert,
a fl avored ice (whether it was snow with fruit
juice or milk and sugar churned in a rudimen-
tary machine that employed ice and salt to
freeze it is unknown). It is believed by some
that this knowledge was taught to Arab trad-
ers, who in turn spread it throughout Europe.
However, this would contradict the generally
accepted theory that Marco Polo was respon-
sible for taking this discovery to Europe in the
thirteenth century.
•• 2500 B.C.E. (APPROXIMATELY): Egyptian hiero-
glyphs depict a vessel fi lled with snow next to
another fi lled with fruit juice.
•• FIRST CENTURY A.D. (64 AND 54 A.D. APPROXI-
MATELY): The Roman emperor Nero is credited
with “inventing” fl avored ices. He had runners
bring him mountain snow from the Apennines
through the Appian Way, running almost 400
kilometers to bring him fresh snow, which
would be mixed with honey and wine.
•• FOURTH CENTURY A.D.: The “endothermic
effect,” in which salt lowers the freezing point
of ice and, when mixed, the two turn into a very
cold slush that is below freezing temperature
and that can freeze another liquid through con-
duction, is mentioned in the “Pancatantra.” This
Indian poem mentions in a verse that water can
become very cold only if it contains salt.
•• 1250 A.D. (APPROXIMATELY): An Arab historian,
Ibn Abu Usaybi’a, writes the fi rst known tech-
nical description for making ice, but he in turn
attributes this knowledge to Ibn Bakhtawayhi,
of whom nothing is known.
•• LATE THIRTEENTH CENTURY: Supposedly, Marco
Polo brings his discovery to Italy from China,
but this is unverifi able. Some historians go as far
as saying that Marco Polo didn’t even make it to
China at all, but that’s a different story.
•• 1533: Catherine de Medici arrives in France to
marry the Duke of Orléans, who would become
Henry II of France. She brings her cadre of
Italian chefs, who introduce the frozen delica-
cies of sorbets and ice creams to French nobility
during their month-long wedding celebration,
where legend has it they served a different fl a-
vor every day.
•• 1585: The word sorbet is fi rst recorded in Eng-
lish, derived from French (sorbet) and then Ital-
ian (sorbetto), which is itself derived from the
Turkish word sherbet.
Unfortunately, there is no solid or verifi able evidence as to when or where man began to employ ice or
freezing temperatures or machines to produce frozen desserts. It is generally accepted as folklore, and
therefore not beyond dispute, that the Chinese were the fi rst to have produced a rudimentary ice cream (or
was it fl avored snow . . . or sorbet?) around 3000 B.C.E. Marco Polo is credited with bringing this discovery to
Italy in the thirteenth century. And then it is said that the very young queen Catherine de Medici, along
with her Italian chefs, initiated the French in the pleasures of sorbet, ices, and ice cream in the sixteenth
century. It may be true, but it is certainly not verifi able. Why did these transplanted Italian chefs’ infl uence
and techniques thrive in France? Was it the novelty of their food? The excellence of the chefs’ preparations?
Or perhaps there is some room for folklore that fi lls a void of concrete facts. It is my personal opinion that
the very fi rst frozen dessert had to be fl avored snow. I don’t believe it was discovered by a single group of
people. I think it may have been like harnessing fi re or the invention of the wheel: it was merely accidental
and occurred in many disconnected cultures.

•• 1603: The word sherbet is fi rst recorded in the
English language. It’s derived from the Otto-
man Turkish word sherbet or Persian sharbat,
both going back to the Arabic word sarba,
which means “drink.” The Persian and Turk-
ish words referred to a sweet diluted fruit
juice, which was sometimes cooled with snow.
In Europe, sherbet was known to be a carbon-
ated drink. It wasn’t until 1891 that the word
sherbet was applied to a frozen dessert.
• • 1660s: Water ices begin appearing in Sicily,
Naples, Florence, Paris, and Spain.
•• 1672: The English term ice cream appears in a
document from the court of Charles II in
England.
•• 1674: The fi rst recorded recipe for sorbet
appears in Paris.
•• 1682: The fi rst recipe for ice cream (named
“Snow of Orange Flowers”) is recorded in a
book titled Nouveau Confi turier (The New
Confectioner).
•• 1686: The Procope, the oldest restaurant in
Paris and the fi rst café, opens its doors, serv-
ing, among other items, fl avored ices. The
owner was Francesco Procopio Dei Coltelli.
This café exists to this day, offering a mind-
boggling variety of French and Italian food.
•• 1700: L’Art de Faire des Glaces (The Art of
Making Ices), an anonymous manuscript, is
published in France, containing recipes for
custard-based ice creams.
•• 1744: The fi rst written evidence of ice cream
in America appears when a guest of William
Bladen, the proprietary governor of Maryland,
writes a letter in which he describes an ice
cream that was made of milk and strawberries.
•• 1747: The Art of Cookery Made Easy, by Hannah
Glass, is published in London. It contains a recipe
and detailed instructions for making ice cream.
•• 1768: A similar book with a similar title (The
Art of Making Frozen Desserts) is published
in Paris, in which the act of freezing water is
explained through divine intervention.
•• 1773: Phillip Lenzi, a caterer, advertises in a
New York newspaper (The Rivington New York
Gazetteer) that he has just arrived from Lon-
don and will be selling a variety of confections,
including ice cream.
•• 1776: The fi rst ice cream parlor in the United
States opens in New York City.
•• 1802: Baked Alaska supposedly makes its fi rst
appearance when Thomas Jefferson serves
minister Manasseh Cuttler a dessert that he
describes as “ice cream very good, crust wholly
dried, crumbled into thin fl akes.” Another
story is that in 1866, a master cook for the
Chinese mission in Paris produced a dessert
in which he baked a dough similar to sablée
dough (which is typically used for tarts) over
ice cream for the French chef Balzac of the
Grand Hotel. Baked Alaska is also attributed to
Charles Ranhofer, the chef at Delmonico’s in
New York City in 1869, who created this des-
sert to commemorate the purchase of Alaska
by the United States, but he called it “Alaska,
Florida,” not Baked Alaska. The fi nal version
of Baked Alaska as we know it today is attrib-
uted to Benjamin Thompson of Massachu-
setts, who experimented with the resistance to
heat of egg whites that, when baked, resulted
A BRIEF HISTORY OF FROZEN DESSERTS 3

in a brown topping that eventually became
the crown for what came to be called “Baked
Alaska.” The name fi rst appeared in print in
1905, and was used in the 1909 edition of the
Fannie Farmer cookbook. In France it is known
as Omelette Norvegienne.
•• 1813: Ice cream is served at President James
Madison’s inaugural ball.
•• 1843: Nancy Johnson, a Philadelphia woman,
invents the hand-cranked ice cream freezer, by
which the “endothermic effect” makes freez-
ing ice cream possible. A bucket for the ice
and salt holds another sealed container fi tted
with a blade and a handle. The ice cream base
is placed in the sealed container and the ice
cream is churned by spinning the blade. This
type of machine still exists, and she was smart
enough to patent it.
•• 1851: Commercial production of ice cream
begins in the United States in Maryland,
thanks to Jacob Fussell.
•• 1869: The fi rst recipe for coffee-fl avored parfait
is recorded in France.
•• 1878: Mechanical refrigeration is perfected by
Ferdinand Carré.
•• 1879: The ice cream soda is introduced.
•• 1896: Italo Marchiony begins selling ice cream
in a container from his pushcart in New
York City. He is credited with inventing the
ice cream cone, which he patented in 1903.
Unverifi able sources claim that the ice cream
cone had already fi rst made its appearance in
Paris in 1807.
•• 1899: August Gaulin, a Parisian, invents the
homogenizer, the mechanics of which essen-
tially haven’t changed since its invention.
•• 1904: The banana split is created in Latrobe,
Pennsylvania, by David Strickler.
•• 1905: Ice cream production in the United
States hits fi ve million gallons.
•• 1906: The fi rst dairy show is held in Chicago.
Chicago adopts the fi rst regulations with
regard to pasteurization.
•• 1913: The direct expansion freezer is invented
(freezers as we know them today).
•• 1920s: Many novelty products are invented,
such as the Eskimo Pie, Good Humor bars,
and the Popsicle. This last one is attributed
to Frank Epperson, who created it in 1923
with the original fl avor being lemon. It was
originally named the Epsicle. He patented his
“invention” in 1924.
•• 1926 (APPROXIMATELY): H. H. Miller invents
the fi rst horizontal batch freezer. The fi rst
commercial continuous process freezer, which
made it possible to mass-produce ice cream,
was perfected by Clarence Vogt. This type of
machine is the predecessor of present-day
industrial ice cream machines. Both of these
inventions are crucial to modern-day frozen
dessert production, with regard to churning
and reserving frozen desserts.
•• 1990s: The Pacojet is invented. As far as ice
cream and sorbet manufacture goes, this was
the most notable advancement since 1926,
revolutionizing the traditional churning pro-
cess until . . .
4 FROZEN DESSERTS

•• 2004: Philip Preston invents the anti-griddle
(see sidebar on page 40 in chapter 3 for a
detailed description of how it works).
The Big Leagues (when the big guys got
started):
•• 1940: Dairy Queen
•• 1945: Baskin-Robbins
•• 1947: Borden
•• 1961: Häagen-Dazs (purchased by Pillsbury in
1983)
•• 1978: Ben & Jerry’s
Regardless of whether we like or dislike these
brands, they are largely responsible for making
ice cream and other frozen desserts popular and
accessible to millions of people. This, in a way, is
good for artisan manufacturers as well, because
they can cater to a more specifi c niche that will
pay a higher price for a more specialized product.
A BRIEF HISTORY OF FROZEN DESSERTS 5
Then and NowIt is important to remind ourselves of how good
we have it now. Think of having to hand-crank
six fl avors of ice cream before lunch service, or
making sure that there was enough ice in the
“cooler” to keep the ingredients from spoiling
too quickly. Even the simplest tools such as a
whisk, a ladle, a bowl, or any stainless steel sur-
face weren’t available as we know them now un-
til a few decades ago. Have we become spoiled
or have we become more effi cient? In order to
understand where the modern pastry kitchen is
now, it is important to appreciate everything that
has had to come together through many centu-
ries of trial and error in order for us to make that
one special dessert.
As far as ingredients go, they are essentially
the same as they have been for centuries: milk,
heavy cream, eggs, and sugar for ice cream, and
water, fruit juice or purée, and sugar for sorbets.
If anything, ingredients today are better under-
stood, and the way they interact with each other
to produce a high-quality product has become
a science in itself. Arguably one of the most
signifi cant steps forward is that industrial manu-
facturers and pastry chefs have the option to
add stabilizers and emulsifi ers (see page 18 and
page 22) to prolong the shelf life and control the
texture of their frozen desserts. This in turn has
changed the traditional methods and techniques
used to make ice cream and sorbet bases (see
Methods, page 59), without making their pre-
decessors disappear completely. Ice cream and
sorbet recipes can now be calculated through
formulas (see Formulas, page 61 and 77). A
refractometer (one of many modern equipment
inventions that help in the pastry kitchen) can
help us determine the precise sugar content in
a sorbet or granité base and make the necessary
adjustments to produce a high-quality product.

6 FROZEN DESSERTS
Raw ingredients are more economical now than
they were twenty years ago, but not necessarily
better. Potentially hazardous foods, such as dairy
products, are much safer to consume now since
we have the technology to keep most pathogens
in check, but it is not unusual to hear about a
salmonella or E. coli outbreak more often than
we would like. Just because there is now an abun-
dance of food, it doesn’t mean that it is better.
Prevention is key when it comes to working
in a sanitary environment. We now understand
how food can become contaminated, and we also
have the knowledge to prevent such contamina-
tion. There are many programs that educate food
handlers on food safety, and many establishments
make it obligatory for their employees to get certi-
fi ed by these companies. The real principle behind
being informed is to put this knowledge into
practice every day. Sanitation is not optional, and
having the knowledge and the tools to practice
food safety should be every pastry chef’s obliga-
tion. Ignoring or temporarily dismissing these
practices for convenience is grossly irresponsible.
The awareness of sanitation needs to be second
nature to everyone who handles food.
One of the most important duties for those
of us who are responsible for processing and
selling food is to make sure we know where
our ingredients come from and how to handle
them responsibly. The information is available
if you look for it. That in itself is another part of
the evolution of food; we now have the tools to
obtain any kind of information about our ingredi-
ents in a matter of seconds with the Internet.
What would Marie-Antoine Carême or Auguste Escoffi er have thought of Ferran Adrià’s experimental laboratory? The foams,
caviars, and “chemicals” used to manipulate food? In a way, Carême could easily be compared to Adrià. In his time he was
producing groundbreaking preparations with exuberant presentations and a good dose of shock value. It was embraced and
admired then, just as Adriàs has become legendary in our day. It is exciting to imagine the state of food and technology in fi ve,
ten, or fi fteen years. Both these factors evolve much faster nowa-
days than they did two hundred years ago, because now there are
more people involved in food, there is a constant need for progress
and making our lives better and—why not—more entertaining.
What will be the next espuma or the next Pacojet? As long as there
are chefs who continue to research and experiment, there will be endless possibilities. Will there be new varieties of frozen
desserts? New production techniques? New ingredients that improve the texture and shelf life of ice cream? Yes, yes, and yes.
Batch freezers and Pacojets, incredible machines that produce the highest-quality frozen desserts in a matter of minutes
and will fi t in any corner of a very cramped kitchen, or a blast freezer that can drop its temperature down to −38°C/−36°F
in less than fi ve minutes, are nothing short of a miracle. Technology can be very similar to magic, unless you know how it
works. Even though I understand how the basic mechanisms of most of the machines in my shop work, I can’t for the life
of me explain how in the world a compressor and Freon gas can possibly turn a liquid into ice. In the end I am just a pastry
chef who wants to make the best possible product.
Understanding the past is a humbling experience. Having said that, fully embracing technology, information, and new
equipment can make you better, faster, and more effi cient and can help you produce a higher-quality product. This is an
industry in which it doesn’t make much sense to hold on to the past, no matter how nostalgic you might be about Grandma’s
hand-cranked vanilla ice cream. In the industry, it will not be nearly as good as what a Pacojet is capable of doing with the
same vanilla ice cream base in a fraction of the time. Speed and effi ciency are two determining factors in the success or
failure of your establishment.
The Past in the Present
Hygiene and Sanitation in the Contemporary Kitchen

A BRIEF HISTORY OF FROZEN DESSERTS 7
Rarely will you see a dessert menu without some
kind of frozen dessert on it, and this applies to
even the smallest diners, in remote locations.
The reason for this is quite simple: people love
frozen desserts, mainly ice cream. Frozen des-
serts are an integral part of any dessert menu be-
cause they satisfy on many levels: they are refresh-
ing after a heavy meal, they are cold (obviously),
sweet, smooth, and, in some varieties, rich and
creamy. They also hit a familiar and nostalgic
note, because for many of us ice cream is an
important part of our lives, having enjoyed it
since childhood. Good times are usually
connected to ice cream somehow, and the brain
recognizes that.
Now, this doesn’t mean that you can’t have
a dessert menu without frozen desserts, or in-
dividual desserts without a frozen component.
In fact, it is better if pastry chefs do not saturate
their menus with ice cream or sorbets (or any
other frozen dessert, for that matter), because
as much as they are an integral part of the
pastry kitchen, it takes a skilled professional to
spread out beyond the frozen. Simply put, some
pastry chefs like preparing frozen items for the
wrong reasons. They are relatively easy to store
and prepare in advance, and they just have to
be plunked down on the plate and served with
some berries and sauce. Next!
It is interesting to see that more and more
savory frozen items are showing up in restaurants.
Just because it’s frozen, it doesn’t mean that it has
to be sweet (or too sweet, anyway). What began as
a trend in the mid- to late 1990s is sure to become
a steady fi xture in contemporary gastronomy.
The Role of Frozen Desserts

8

9
MANY OF US HAVE GOTTEN USED TO USING
SOMEONE ELSE’S RECIPES to make our frozen desserts,
and perhaps we’ve made a few adaptations of our own to suit
our personal preferences. There is nothing inherently wrong
with that. But why not come up with our own formulas? This
might seem like a tremendous task, but it can also mean that
your favorite recipe can be reformulated to be even better
tasting, to have a better mouth feel, and to withstand freezing
temperatures for many hours without reducing its quality. Once
the nature of commonly used ingredients is understood, the
recipe formulation process becomes less complicated. Making
something better is always worth any amount of extra work.
While it is not necessary for a pastry chef to have a degree
in chemistry, it is important to understand the way ingredients
work, how and/or when they are to be added to a recipe, as well
as how they interact with other ingredients. Some ingredients
can be very fi ckle and easily ruin the fi nal product if they aren’t
used in the manner for which they are intended.
chapter two Ingredients

10 FROZEN DESSERTS
The fi rst rule when it comes to the ingredients
you will use to manufacture your frozen desserts
is to always use the highest quality possible.
With some ingredients, such as dairy, it is more
important to keep an eye on quality than with
others, like granulated sugar, the quality of which
is about the same everywhere. There are many
different purveyors of dairy products. Some of
the larger dairies will opt for mass-production
techniques, which increase volume and sales but
may result in products lacking in quality, fl avor,
richness, or mouth feel. Smaller farms gener-
ally produce superior dairy products because it
is in their best interest to do so. Why? Because
they can’t necessarily compete with price, but
they can compete with quality. However, you can
expect consistency from mass-production farms,
whereas the medium to small farm may not be
able to guarantee consistency in something such
as the fat content of their heavy cream. If the fat
content is not always the same, your ice cream
won’t always come out the same. This is why
it is important to establish a good relationship
with your dairy provider(s) so you can receive
a consistent product from them. Just because
a product is certifi ed organic and the farmer’s
family has produced dairy product for many
generations doesn’t necessarily mean that it will
always be good.
MILK Unless otherwise specifi ed, the milk
and heavy cream called for in the recipes comes
from cows. They are among the largest com-
ponents for ice cream, sherbet, and gelato.
Depending on the recipe, the milk can be whole,
skim, or nonfat dry. Whole milk contains a cer-
tain amount of solids known as serum solids,
which will be considered in the total amount of
solids that compose an ice cream, sherbet, or
gelato when formulating a recipe (see formulas,
page 61). When the fat is removed from whole
milk, it is called skim milk. The serum solids are
still there, minus the fat. It is from the skimmed
milk serum solids that nonfat milk solids are
obtained. Nonfat dry milk is the most common
source of nonfat milk solids, with less than 1
percent fat. It is composed of 50 percent lactose,
which is the type of sugar found in milk (see
more detailed information on sugars, page 15),
50 percent proteins (specifi cally, whey proteins
and, to a lesser amount, casein), and minerals
(calcium and phosphorus). Even though nonfat
dry milk is dry in appearance, it is 4 percent water.
Nonfat dry milk’s contribution to the fi nal
product includes mouth feel, body, and the abil-
ity to trap a larger amount of air. It helps form
the structure of ice creams and sorbets (yes,
sorbets, which can contain a small percentage
of nonfat dry milk without being considered a
sherbet, because the amount added is minimal
and therefore has no impact on taste, just tex-
ture) without having to add more fat, and can
improve the fi nal products’ quality. Some pastry
chefs opt not to use it because of its distinctive
Once this understanding of their relationship is established, the margin for error is minimal, and the
results will be consistent and will yield a high-quality product. The ingredients covered in this chapter
are those that are most frequently used and are readily available to most culinary professionals. Those that
aren’t available for practical reasons are not included here. For example, if there is a very specifi c fruit that
grows only in a certain area of the country (or the world), chances are that most pastry chefs will not be
able to obtain it and use it in their kitchens. There are perhaps hundreds of fruits that most of us will never
encounter, let alone be able to purchase (or harvest) and turn into a sorbet. Because of this, it is best to focus
on what is easily obtainable.
Dairy Products

taste, which is similar to animal crackers. If used
in excess, the fi nished product can have a salty
aftertaste. Some recipes in this book will use
nonfat dry milk as the choice for serum solids
because it is easily obtainable and economical.
From a nutritional standpoint, though, skim milk
and nonfat dry milk are inferior to whole milk,
because when the fat is removed, so are vita-
mins A and D, which are fat soluble and need fat
to be absorbed by the body.
Milk fat is the lipids of milk and is composed
primarily of triglycerides; in the case of whole
milk, these account for 98 percent of the total
milk fat (by weight). Other milk fats (as a percent-
age of the total milk fat) include diglycerides (.25
to .48 percent), monoglycerides (.02 to .04 per-
cent), phospholipids (.6 to 1.0 percent), cholester-
ol, (.2 to .4 percent), glycolipids (.07 percent), and
free fatty acids (.1 to .4 percent). Always keep in
mind that these percentages depend on the breed
of cow and the cow’s diet (most milk comes from
two breeds: Holstein and Jersey).
Whole milk contains only 3.6 percent fat
by weight. These fats are minuscule globules
suspended in a liquid. The milk proteins (whey
proteins and caseins) found on the surface of
each fat globule act as emulsifi ers to maintain
the fat evenly dispersed in the liquid. In order
to produce an adequate ice cream, sherbet, or
gelato structure, meaning one in which all the
ingredients are evenly dispersed and all the fats
are properly emulsifi ed, the fat globule emulsion
needs to be weakened so the globules can com-
bine into bigger networks. They are weakened
(or destabilized) during the freezing process. As
the batch freezer machine beats the liquid base,
the ice crystallizes and air is incorporated. These
fat globule networks are connected but not com-
pletely combined; in other words, they are not
fused. The more stable the emulsion, however,
the better it will freeze, and this will result in a
better fi nished product. The fat globule networks
can be improved by adding different proteins
such as egg yolks and mono- and diglycerides
(fatty acids), as well as the sorbitan ester poly-
sorbate 80, all of which act as emulsifi ers.
HEAVY CREAM Heavy cream has a
much higher percentage of fat than whole milk.
The most common percentage is 40 percent
(based on total weight); this will be the pre-
ferred percentage for the ice cream and gelato
recipes in this book. Heavy cream is generally
mixed with milk to reduce the fat content in an
ice cream or gelato base, because using only
heavy cream will produce a base that contains
a very high fat content. This extra fat will quickly
congeal while it is in the batch freezer machine
(or Pacojet) and produce a grainy texture in the
fi nished product. However, heavy cream is used
in its entirety when it comes to aerated still-
frozen desserts. It is one of the ingredients that
is “aerated,” meaning that air is incorporated
into it through whipping, and this is directly
responsible for the desserts’ light texture and
smooth mouth feel. The other ingredient that is
aerated, depending on the type of frozen des-
sert, will be the egg (yolk, whites, or both).
Heavy cream is composed of water and fat
molecules that are protected by a membrane
composed of phospholipids that are evenly dis-
persed in the water. Whipped cream is a foam
composed of water and air and is stabilized
by proteins (fat molecules). When the cream
is whipped or churned, fat molecules collide
against one another, causing their protective
membranes to break. These “freed” fat mol-
ecules cling to one another, forming a thin fi lm
of coagulated molecules that trap minuscule air
bubbles, with just enough reinforcement to pre-
vent the foam from collapsing. Basically, as you
whip, the fat globules trap the air bubbles and
strengthen the foam.
Heavy cream needs to be very cold (ideally
4°C / 39°F) to whip properly, otherwise the struc-
ture will not hold. When the cream is warmer,
the fat globules get soft and are not capable of
trapping air. Heavy cream that is 30 percent fat
is ideal for whipping because the ratio of fat to
water produces the most delicate texture, but 35
to 36 percent and 40 percent can be used with
good results; the whipped cream will just be a
little denser because of the higher fat content.
INGREDIENTS 11

BUTTER Butter is a water-in-oil emulsion
made from cream (cream is an oil-in-water
emulsion, so it could be said that butter is the
inside-out version of heavy cream). It must con-
tain at least 80 percent, but not more than 90
percent, milk fat (also called butterfat), no more
than 2 percent dry nonfat milk solids, and no
more than 16 percent water. “Premium” butter
contains 82 percent milk fat, which makes it an
arguably better product because the more fat,
the better fl avor and mouth feel it will have. This
might justify why it is more expensive as well.
Other, less expensive butters may have 80 to 81
percent milk fat, and therefore cannot be labeled
“premium” by law. The difference is so subtle
that many people would be hard-pressed to tell
the difference. The USDA allows butter manu-
facturers to round the butterfat percentage to
the closest whole number, so if a butter contains
81.6 percent or up to 82.5 percent milk fat, on
the label it will appear as 82 percent.
Knowing the fat percentage of all the ingre-
dients is important when formulating a recipe
for ice cream, because it can throw off the deli-
cate balance of ingredients when there is too
much or too little. Remember: all the ingredients
work together, not separately. A fraction of a
percentage won’t have a serious negative effect
while making a gallon of ice cream, but it will if
you decide to make fi fty gallons. Here that is not
our concern, since these recipes are formulated
for small-batch production. Gelato and sherbet
rarely, if ever, contain butter. Butter will be used
sporadically in the recipes contained in this
book, and it is mainly used for fl avor purposes
and not so much for its contribution to the
chemistry of ice cream making.
It is rather easy to make butter. The process
gets complicated when, as a farmer explained to
me once, you have to “squeeze” the water out of
the butter. Yes, some people still do it by hand,
but the butter you fi nd at the store is manufac-
tured by machines known as cream separators,
to ensure that most of that liquid is forced out
and bacteria is kept at bay. While fresh farm but-
ter has an outstanding taste and texture, it has
a very short shelf life and spoils easily, so use it
promptly after it is made. Also, if you have ever
over-whipped heavy cream, you have essentially
made butter. The liquid that separates from
the fat is what we know as buttermilk, which is
another ingredient that is used here for fl avor
purposes only.
EGGS An entire book, and a very large one
at that, could be written about the egg and its
properties, but for practical purposes the focus
here will be on its applications in frozen des-
serts. Eggs typically come from chickens; eggs
from other species are not used in this book.
Although they have their place in cooking, they
don’t necessarily make for a better frozen des-
sert. As an ingredient, eggs are without a doubt
the most versatile of all of them. The following
are the egg’s most notable uses:
•• Binding liquids into a moist, tender solid
•• Leavening through foaming for baked goods
•• Thickening sauces and custards
•• Coating or glazing
•• Delaying crystallization in ice creams due to
their fat content
•• Emulsifying sauces and ice creams
Egg’s nutritional value is considerable,
but the only components that are important to
formulate ice cream and gelato recipes are the
fat, solids, and water present in egg yolks. Egg
whites are not typically used to make ice cream
or gelato.
The quality of the eggs used in any recipe is
signifi cant. Average-quality eggs will give you an
average-quality product. Certifi ed organic eggs
produced by truly free-range chickens will always
be better than mass-produced eggs, where the
hens have little or no space to roam and are fed
low-quality chicken feed. (The USDA requires
that “free-range” animals have access to outdoor
areas, but there is no provision for how long they
must spend or how much room they must have
outside. The USDA’s regulations don’t require
the birds to actually spend time outdoors, only
to have access.) The fl avor and appearance of an
12 FROZEN DESSERTS

egg is the direct result of the hen’s diet and qual-
ity of life. Do not be misguided by the color of
the yolk, though. It is thought that a deep orange
yolk has better fl avor than a bright yellow yolk,
but the coloring depends on what the hen eats.
For example, if she is fed yellow-orange plant
pigments known as xanthophylls, they will be
deposited in the yolk.
Egg yolks are used in certain ice creams and
gelatos, while egg whites are not. The whole egg
is used primarily in some varieties of still-frozen
and aerated frozen desserts, such as frozen
souffl és, parfaits, semifreddos, and some frozen
mousses. For still-frozen and aerated frozen
desserts, the yolks are generally separated from
the whites, and they are seldom used together.
The yolks are used to make the “bombe,” or
base, to which sugar and a fl avor is added, and
the whites are whipped with sugar to add vol-
ume and lightness and are then folded into the
base to produce a light and delicate product.
In this case, the egg whites should be pasteur-
ized to avoid bacterial contamination such as
salmonella. The yolks are usually warmed to a
temperature above 63°C / 145°F, which will kill
any bacteria and begin the coagulation process
(i.e., the cooking of protein). Eggs cook at 63°C /
145°F, bacteria dies at 57°C / 135°F.
There is an Italian frozen dessert called
spuma (“foam”), which consists of adding a
cooked or uncooked meringue to a sorbet or sher-
bet base halfway through the freezing process to
make a very airy and light frozen dessert. It should
be noted that if the meringue is uncooked it must
be made with pasteurized egg whites.
To determine the quality (or lack thereof) of
an egg, observe the following characteristics:
•• The shell should be hard and free of cracks and
foreign matter. All hen eggs, regardless of color
(white, brown, or even the beautiful pastel col-
ors of the Araucana hen; see sidebar on page
15), have the same exact qualities; they differ
only in size and, on some occasions, fl avor.
•• Egg yolks should be bright in color (from yel-
low to orange). Pale-colored yolks are a sign of
an egg beyond its peak of freshness.
•• Raw whites are opalescent. They aren’t truly
white until cooked. Cloudiness in raw whites
indicates the presence of CO2 that hasn’t
escaped from the shell and thus indicates a
very fresh egg.
•• Fresh egg whites tend to thin out as the egg
ages because its protein changes in character.
That’s why fresh eggs sit up tall and fi rm (see
photo) in the pan, while older ones spread out.
•• The air cell, which is a pocket of air formed at
the large end of the egg, is caused by contrac-
tion of the contents during cooling after lay-
ing. It increases in size as the egg ages.
•• The chalazae are the twisted cord-like strands of
egg white that anchor the yolk to the center of
the egg. Prominent chalazae indicate freshness.
Egg quality is determined by grading (AA, A,
and B, where AA is deemed better than A, and A
is better than B), but it is not mandated by law.
There isn’t much you can tell from an egg on the
outside. Most of its defi ning qualities are on the
inside. The fresher the egg (or the more recently
hatched), the better it tastes and the stronger its
properties are. As the egg ages its proteins will
weaken, and proteins are responsible for most
of its useful properties. For example, older egg
INGREDIENTS 13

14 FROZEN DESSERTS
whites won’t be able to trap air bubbles as effi -
ciently when whipped, because the protein is not
as strong and capable of trapping air. Of course, if
a shell is cracked, it is better not to use that egg.
When an egg is laid, it is coated on its way
out by a cuticle produced by the hen, which
protects the egg from bacterial infection. In the
European Union and in many Latin American
countries, this fi lm is left intact, and therefore
the egg can be stored at room temperature. In
the United States, eggs are washed to clean off
this cuticle and any other matter on the egg that
might be considered a health hazard (like hen
droppings), but this leaves the egg porous and
even more prone to bacteria. The washed egg is
coated in mineral oil that is intended to prolong
the shelf life of the egg, but the egg must be kept
refrigerated at or below 4°C / 39°F.
The main function of the egg yolk in an ice
cream is as an emulsifi er (see emulsifi ers, page
22). Yolks contain a large amount of lecithin,
which is a group of phospholipids that act as the
emulsifying agent. The texture of the fi nished
product, and this includes any frozen dessert
containing egg yolk, is vastly determined by the
egg yolk. Egg yolks are also responsible for fl a-
vor, yet excessive use will give an “eggy” taste,
which is not the desired result.
PRODUCT NONFAT SOLIDS (%) WATER (%) FAT (%) SERUM SOLIDS (%)
Whole milk 8.4 88.0 3.6 12.0
Skim milk 9.2 91.0 0.1 9.3
Heavy cream (30% fat) 6.4 63.5 30.0 36.4
Heavy cream (35–36% fat) 6.0 59.0 35.0–36.0 41.0–42.0
Heavy cream (40% fat) 5.5 54.5 40.0 45.5
Butter 2.0 16.0 82.0 84.0
Nonfat dry milk 96.0 4.0 <1.0 (trace amounts) 96.0
Egg yolk 17.0 50.0 33.0 -
Nonfat Solids, Water, Fat, and Serum Solids Content of Dairy Products
The following chart shows the nonfat solids, water, fat, and serum solids percentages of the most commonly used dairy
products. This chart will be of use when calculating the formula(s) for producing ice cream, gelato, and sherbet (see
formulas, page 61). You will notice that if you add the nonfat dairy solids to the fat, you will obtain the total serum sol-
ids, except for the egg yolks, which contain no dairy whatsoever. See the resources on page 425 for a list of farms that
produce high-quality dairy (in New York State).

INGREDIENTS 15
Sometime ago I used eggs from a breed of chicken named Araucana to make vanilla ice cream. Araucana hens are originally
from South America (Chile) but can be easily found throughout the United States. They are considered an heirloom chicken,
almost a purebred that has been around since the sixteenth century. There are many Araucana enthusiasts, and if you do a
quick search online, you will fi nd entire Web sites dedicated to
this particular breed, but for breeding and instructional purposes
only, not cooking. You will be hard-pressed to fi nd any mention of
the outstanding qualities of the eggs they produce. Being a rather
small chicken, they produce small eggs that have shells that come
in a variety of green and blue pastel hues. The fl avor of these eggs is very intense, tasting as an egg should, but without being
too “eggy.” As of this writing, a dozen of these eggs costs around four times as much as commercially produced eggs, which
is considerable but also a worthwhile price increase. Used in my ice cream, they had the same physical emulsifying effect that
regular eggs have on an ice cream base, but the fl avor and color of the base was surreally good; it was as if I had never had ice
cream before. I also decided that as long as I was splurging on Araucana eggs, I would use the freshest handpicked Tahitian
vanilla pods that I had ever come across. These were provided by an obsessive spice monger based out of New York City who
travels the world searching for the best of the best (see resources, page 425). These pods were plump and moist, and their
skins were dusted in minuscule vanillin crystals. My hands smelled like vanilla for two days. It was, in my opinion, the best
vanilla ice cream I had ever had. Ridiculously expensive, but a defi nitive standard of excellence.
The Best Vanilla Ice Cream
While there are many kinds of sugars, only
those that are used for frozen desserts will be
explained here. Sugar-free sweeteners are not
covered. The fi rst and most obvious role of sug-
ars is to sweeten. Consumers expect sweetness
in frozen desserts, unless it is otherwise speci-
fi ed on the menu. The second role, which is just
as important, is to lower the freezing point of
liquids to −10°C / 14°F, which is the ideal serv-
ing temperature for frozen desserts. This creates
a product that doesn’t freeze too hard, which
would render it diffi cult to scoop, and diffi cult
and unpleasant to eat. The sugar keeps a certain
amount of water unfrozen (about 28 percent) by
retaining it, which keeps large ice crystals from
forming or binding to each other. The sugar sits
between the ice crystals, holding them together
but keeping them from touching each other
so they won’t fuse into a larger ice crystal. The
remainder is a concentrated sugar solution. It is
because of this and the air that has been incor-
porated that ice cream, gelato, sherbet, and sor-
bet can be scooped and made palatable. Sugars
account for 12 to 16 percent of the fi nal weight
of an ice cream base, and 25 to 30 percent of a
sorbet base.
The type of sweetener(s) used will greatly
infl uence the outcome. They can improve texture
and mouth feel and enhance fl avors and are
an economical source of total solids used in a
formula. As benefi cial as sweeteners are, if used
improperly (too much, too little, or added at the
wrong time) they can yield very poor results.
The most common sweeteners used to
manufacture frozen desserts are:
•• Granulated or crystalline sugar
•• Powdered or atomized glucose
•• Dextrose
•• Invert sugar or trimoline
•• Honey
•• Lactose (found in nonfat dry and liquid milk)
The sweetening power is always determined
by how it compares in sweetness to granulated
sugar. The level of sweetening in granulated
sugar is 100 percent.
The following chart compares the sweetening
power of other sweeteners to sugar. This chart will
be used to determine the percentage of sweeteners
used to formulate recipes further on in this book.
Sugars

16 FROZEN DESSERTS
GRANULATED SUGAR (a.k.a. Crystalline Sugar) Extracted from the sugar-
cane or sugar beet, this is the most widely used
sweetener in frozen desserts. There is a variety
of crystal sizes available, from regular granulated
to superfi ne. The smaller the crystal, the faster it
dissolves in a liquid.
POWDERED GLUCOSE (or Atomized Glucose) and Dextrose Powder Glucose syrup is obtained from the hy-
drolysis of starch (water plus an acid), most com-
monly cornstarch. Glucose syrup is categorized
according to its Dextrose Equivalent (DE). The DE
stands for how much of the starches have been
broken down into simple sugars. Dextrose is one of
the main components of starch, so the DE of any
given glucose syrup will give us an approximate
number of how many (in percentage) of the bonds
in the starch have been broken down to dextrose.
Pure dextrose has a DE of 100 (or 100 percent),
while the most commonly available glucose syrup
will be close to 42 or 43 percent. The higher the DE
in a sugar, the sweeter it will be and the more it will
depress the freezing point of a liquid.
Glucose powder, or atomized glucose, is
glucose syrup that has had 95 percent of its water
content removed. Dextrose powder is 8 percent
water (see the preceding table) and it is the result
of the complete hydrolysis of water, starch and, in
most cases an acid (sometimes an enzyme).
Both sugars in powdered form are used to
prevent ice creams and sorbets from crystallizing.
They reduce the amount of sugar needed in a
recipe because they can be used as a source
of solids in a sorbet or ice cream base without
adding too much sweetness, as using pure
granulated sugar would. In other words, these
types of sugar contribute more to structure than
sweetness. If too much of them is used, though,
the fi nished product may have a rubbery texture.
Using liquid glucose is not recommended
since it contributes unnecessary water to the
formula. If you are using a liquid sweetener,
trimoline is better because it is not as sweet as
liquid glucose. Although liquid glucose is not the
preferred choice, it is more readily available than
trimoline. Glucose powder is sweet, but in its
solid form it is not necessary to use very much
of it because it contributes to structure more
than it does to sweetness. Also, liquid glucose
adds unnecessary water. We want its solids for
structure and mild sweetness, not its liquids,
which can throw off the balance of a recipe.
Powdered glucose, dextrose, and trimoline
are much more effective than granulated sugar
at lowering the freezing point of frozen desserts
because their molecules weigh much less.
Most recipes for ice cream and sorbet
you fi nd in contemporary books will contain
a combination of granulated sugar, powdered
glucose, and dextrose. As a matter of personal
preference, I use a combination of granulated
sugar and powdered glucose, because I fi nd the
addition of dextrose contributes to too much
sweetness in the fi nished product even though
SWEETENER % SWEETENING POWER % SOLIDS % LIQUID
Granulated sugar 100 100 –
Powdered or atomized glucose
(DE 40)*
45–50 95 5
Dextrose powder 70–75 92 8
Invert sugar (trimoline) 125 78 22
Honey 130 Varies Varies
Lactose 16 100 (in nonfat
dry milk)
5 (in liquid milk)
95 (in liquid milk)
*DE: Dextrose Equivalent (see below)
Sweetening Power

INGREDIENTS 17
the physical effect of the dextrose on the fi nished
product is technically the same; in other words,
there is no tangible negative impact on the fro-
zen product with the absence of dextrose.
Note that glucose and glucose syrup are
not the same thing. These terms are very easily
confused since the word “syrup” is sometimes
dropped from “glucose syrup.” Dextrose is also
known as glucose, and in this book only the term
dextrose will be used, for clarity. Powdered glu-
cose and dextrose cannot be interchanged in a
recipe since they have slightly similar properties
but a very different sweetening power.
INVERT SUGAR (Trimoline) Trimoline has the same properties as dextrose but
is much sweeter. It is widely used for ice creams
and sorbets that have a tendency to freeze too
hard, such as chocolate ice cream. Invert sugar
is made by breaking down sucrose (through
an acid) into its two components, fructose and
dextrose, thereby reducing the size of the sugar
crystals. Because of its fi ne crystal structure, in-
vert sugar produces a smoother product and is
used in making fondant and other syrups. It has a
cloudy appearance. The intention of showing the
trimoline and glucose side by side is to show how
physically different they are, and to emphasize fur-
ther that they cannot be interchanged in a recipe
without a signifi cant impact on the fi nal result.
Trimoline and powdered glucose have the
property, among others, of retaining some, but
not all, of the water throughout the ice cream
base. This retained water is not freezable. The
more water that is retained by these sugars, the
smoother the ice cream, sherbet, or sorbet will be,
because it will harden less at very low tempera-
tures. Yet if an ice cream made with trimoline is
left at room temperature, and another made with
powdered glucose is left at room temperature as
well, the latter will be fi rmer than the former, be-
cause trimoline can retain more water. Powdered
glucose has a higher freezing point than sugar
and trimoline, which means it freezes much faster
and therefore hardens more than products made
with the other sugars. In the chapter on formulas,
you will see that these sugars can be used in com-
bination, because they each have a role to play
toward the end result.
HONEY Honey is rarely used. Because of its
viscosity, it can be used similarly to invert sugar,
but there are two important factors to consider
when using honey: it is sweeter than any other
sugar available, and it has its own fl avor, whereas
other sugars used for frozen desserts do not.
LACTOSE Lactose has a very low sugar
content. If used in excess, it will make the fi nal
product feel sandy. Lactose is generally not used
to sweeten; it happens to be a part of milk, a key
ingredient in ice creams, gelatos, and sherbets.
OTHER SUGARS Some sugars, such
as dark brown, light brown, muscovado, Dem-
erara, and piloncillo, have very distinct fl avors.
Glucose Trimoline

18 FROZEN DESSERTS
These fl avors have to do with the amount of mo-
lasses contained in each one. They are listed in
the previous sentence from the smallest to larg-
est amount of molasses contained in each sugar.
(Light and dark brown sugar are essentially the
same product, except for the color.) Molasses
contains moisture, so this is an important factor
to consider when formulating a recipe with one
of these ingredients.
StabilizersA stabilizer is an ingredient that contributes
to the uniformity and consistency of a product
throughout its different processing stages, from
manufacture through its frozen storage. Stabi-
lizers aren’t chemicals at all; they are extracted
from natural sources.
Stabilizers promote air incorporation and
even air bubble distribution throughout the
frozen product as well as prevent the collapse
of such air bubbles, which are responsible for
some of the product’s texture and mouth feel.
They prolong the shelf life of ice creams, sher-
bets, and sorbets at very low temperatures by
absorbing and gelling the water portion of the
previous items. This property will prevent the
jellifi ed water from forming large ice crystals
during the freezing process, which can decrease
the product’s smoothness. Smaller ice crystals
are mostly undetectable. Consider that any
given recipe will contain anywhere from 55 to 70
percent water, which in even the most ideal con-
ditions can develop large ice crystals, thus com-
promising the general quality of the product. The
effect of stabilizers is similar to what a sponge
would do with water or most any liquid: absorb
it, but not only that, immobilize it. Stabilizers
contribute to the product’s texture by slowing ice
crystal growth. This capacity for absorbing and
gelling water depends on the type of stabilizer
used. Stabilizers are often used in combination
with each other.
The stabilizers that a large ice cream manu-
facturer uses are the same ones that would be
used in a small operation. The difference resides
in the amount that is added to a recipe. A small
batch of ice cream should spend no more than
18 to 20 hours in a freezer once churned, for
quality purposes. The recommended amount of
stabilizers to add is the equivalent of a maximum
of 1 percent of the total weight. Large manufac-
turers need to keep their frozen product soft
enough to scoop for months on end. The aver-
age percentage of stabilizers they use is close to
3 percent. In all fairness, not all ice cream manu-
facturers use stabilizers, but stabilizer-free ice
creams that will spend a good amount of time
in a freezer in the supermarket or your home are
usually loaded with air to reduce ice crystalliza-
tion in order to help keep the product smooth.
Air is what the customer ends up paying for.
There are confl icting opinions on the use
of stabilizers. Some pastry chefs will argue that
using them is cheating, that a good pastry chef
doesn’t use or need “chemicals” to make a high-
quality product. Others say that it makes the
product gummy and unpalatable. Pro-stabilizer
pastry chefs will say that stabilizers help keep their
ice cream at a consistent texture during an entire
service, that the ice cream doesn’t melt as quickly
(they will have a more uniform meltdown), and
that they help deliver fl avor more intensely.
When a freezer is opened and closed as
often as it is in a busy restaurant, the freezer will
have a hard time recuperating its temperature
quickly enough to bring all of its contents back
to the intended temperature (−10°C / 14°F).
Most kitchens run very hot, even during the
winter. Very few restaurants can afford to equip
their pastry station with temperature and humid-
ity control. It is because of this that many pastry
chefs will opt to use stabilizers. Another effect
that stabilizers have on an ice cream, sherbet,
and sorbet is that they delay the product from
melting at higher-than-ideal temperatures,
meaning anything above −1°C / 30°F. The ideal
holding temperature is −4°C / 24°F, and it can
fl uctuate a little above or below without signifi -
cant change. A stabilized ice cream will resist

INGREDIENTS 19
environmental changes (also known as “heat
shock”) much better than an unstabilized one.
The following are the most commonly used
stabilizers for frozen dessert production, in no
particular order.
AGAR-AGAR It is extracted from red
seaweed of the genera Gracilaria and Gelidum.
It remains in a gel consistency up to 80°C /
176°F, breaking down at higher temperatures.
It comes in a solid form and in a powder form.
The powder form is recommended because it
dissolves more readily in liquids, but it is not
recommended for thick purées or liquids with
a high fat content. It absorbs large amounts of
water. It is activated by heat and its gelling effect
is quick, because it gels as it cools down below
80°C / 176°F. It isn’t used in ice creams as much
because its gel tends to be harder than desired.
A variation on agar, called “chelated agar” pro-
duces smoother gels. Agar-agar is recommend-
ed for sorbets and sherbets.
GUAR GUM It is harvested from the en-
dosperm of the seeds from the guar bush, grown
in India and also Texas. It is often used in com-
bination with locust bean gum and carrageenan,
because if used alone it is not as quick to react
to changes in the environment (heat shock). It is
widely used because it is a relatively inexpensive
stabilizer, it dissolves well in water and moderate
fat concentrations, and it contributes to the body
of the product. The amount used ranges from .07
to .2 percent of the total weight of the formula.
Some pastry chefs do not like the bean-like fl avor
it can give. Guar gum is recommended for ice
creams, sorbets, and sherbets.
LOCUST BEAN GUM (a.k.a. Carob Bean Gum) It is derived from the endo-
sperm of seeds of trees that grow in Africa. It is not
used so much for its gelling properties but rather
for its capacity to enhance aeration and for protect-
ing the frozen product from frequent heat shock
by insulating ice crystals. It is activated in liquids at
76°C / 170°F, in which it will fully hydrate during the
pasteurization process (see pasteurization, page
48). If used alone it won’t absorb as much whey
from a dairy product, and some of it might sepa-
rate. This is called “whey-off.” That separated whey
will freeze into large ice crystals. For this reason, it
is used in combination with kappa-carrageenan,
which corrects the problem. The amount used is
the same as for guar gum. Carob bean gum is rec-
ommended for ice creams, sorbets, and sherbets.
GELLAN GUM It is obtained from fer-
mented bacteria. Gellan gum is characterized by
high gel strength, ease of use, clarity, fl exibility,
reliable supply, and ability to be used in a variety
of combinations. It can be used as a stabilizer
in ice cream, yogurt, custards, and sour cream,
while its moisture retention abilities can enhance
baked products. It needs to be heated to 85°C /
185°F to fully hydrate, and must be allowed to
cool in order to gel properly. Highly saline liquids
break the gel. Gellan gum is recommended for
ice creams, sorbets, and sherbets.
XANTHAN GUM A by-product of the
fermentation of cornstarch and Xanthomonas
campestris, a bacterium found in cabbage, xan-
than gum is classifi ed as a polysaccharide gum.
It has great thickening power (it can thicken
alcohol). It is hot- and cold-soluble and dissolves
almost immediately as it comes into contact
with a liquid. To activate it, it is necessary to mix
it slowly with the desired liquid and leave it to
hydrate for at least two minutes. It will not lose
its thickening power if moderate heat is applied.
Different stabilizers will gel liquids to different consistencies, making them pliable like carrageenan (left) or crumbly like agar-agar (right).

20 FROZEN DESSERTS
It is one of the best emulsion stabilizers because
it has the capacity to keep emulsions dispersed,
thanks to its suspending properties.
If you add xanthan gum to an oil-and-vin-
egar solution and mix them together with a
handheld blender, it will make an immediate
and permanent emulsion. If you add xanthan
gum to a carbonated beverage and mix them to-
gether with a handheld blender, it will retain the
thousands of bubbles produced by the blender’s
mixing and then suspend them for an extended
period of time. Both of these examples help
explain what xanthan gum does in an ice cream,
sherbet, or sorbet. It will stabilize the emulsion
very quickly and keep the air bubbles suspended
evenly and permanently during the churning
process.
Xanthum gum is highly resistant to freezing
and melting. Use it in combination with other
similar stabilizers, such as locust bean gum
and guar gum, which can be added to the mix
together and are activated similarly. If used in
excess or by itself, it can make the frozen prod-
uct chewy. The amount used is between .02 and
.04 percent of the total weight of the formula. It
is rather expensive, but again, the quantity used
is minimal. It is recommended for ice creams
because of its excellent fat-molecule-stabilizing
properties.
All gums require that they be hydrated in or-
der to work. Failure to hydrate gums properly is
the leading cause of problems in foods contain-
ing gums because the gums remain in a clump
and do not work effectively.
CARRAGEENAN Carrageenan is ex-
tracted from Irish moss and other species of red
algae. This stabilizer gets its name from where it
was originally harvested, a small town in Ireland
known as Carragheen. Nowadays it is mostly
harvested in the Philippines and South America.
There are three commonly used types of
carrageenan: kappa, iota, and lambda. A kappa-
iota carrageenan mix is frequently used in low-fat
frozen desserts for its high gelling capacity. Each
one alone forms a crumbly gel; together they are
softer. Lambda carrageenan is preferred in regu-
lar-fat frozen desserts, where the fat content helps
to stabilize the product without gelling. What this
means is that lambda is a weaker gelling agent
than kappa and iota. The amount of carrageenan
used in a recipe varies from .01 percent to .04
percent of the total weight of the formula, de-
pending on the type of frozen dessert.
Liquids, such as root beer, will not trap air and can-not maintain body when conforming to a container.
Incorporating a stabilizer such as xanthan gum into the liquid will cause it to gel and retain body.
The stabilized liquid now has body and will trap air upon agitation.

INGREDIENTS 21
All carrageenans require heat for hydration:
80°C / 176°F. They are mixed into a cold liquid
and then brought up to a boil. Gelling is almost
immediate and can withstand temperatures of
up to 60°C / 140°F. Carrageenan does not gel
acidic liquids well. It is better suited for aqueous,
dairy, or fruit products. Kappa and iota mixes
are recommended for sherbets and sorbets, and
lambda is mostly recommended for ice creams.
SODIUM ALGINATE Extracted from
sea algae, it is considered a highly effective sta-
bilizer because of the texture and body it adds to
ice creams and sherbets, and because it can bind
calcium better than other stabilizers. It is not rec-
ommended for sorbets for this reason. As much as
it is a good stabilizer, it is also very expensive, but
when you consider that only .18 to .25 percent of it
is used in a formula’s total weight, it doesn’t affect
small-batch production considerably.
CARBOXYMETHYL CELLULOSE (CMC) Extracted from
vegetable cellulose, it gels with heat. It must fi rst
be mixed into a cold liquid by stirring vigorously,
and then allowed to rest under refrigeration so it
can hydrate and reach 4°C / 39°F, where its gell-
ing properties are activated. CMC helps to reduce
ice crystal growth and will never give the product
a gummy texture, which occurs with some sta-
bilizers when used in excess. It also makes the
product highly heat shock resistant by promoting
smaller air bubble formations, which also pro-
duces a highly desired smooth mouth feel. The
amount used is between .30 to .45 percent of the
total weight of the formula. It is recommended for
sorbets and sherbets because it dissolves more
readily in low-fat to nonfat liquids.
GELATIN Extracted from animals (pig-
skin), it was the original stabilizer. It is still used
and produces excellent results, even when used
alone. It melts between 26°C / 80°F and 32°C /
90°F and is easily incorporated into recipes, but
it needs to be hydrated (bloomed) in very cold
liquid fi rst. It is recommended for ice creams,
sorbets, and sherbets because it dissolves in
both nonfat liquids and high-fat liquids.
PECTIN It is extracted mostly from apples
and some citrus fruits and used in a powdered
form. Not widely used in frozen dessert produc-
tion because there are other stabilizers that have
a better effect on the frozen product, it still pro-
duces good results. It requires heat to hydrate,
and it gels as it cools down. Pectin is recom-
mended for sorbets because it dissolves better
in nonfat liquids.
READY-MADE STABILIZER MIXES There are different varieties of ready-
made stabilizers available to pastry chefs. They
are essentially a mixture of different stabilizers
that interact with one another, each contributing
its own characteristic stabilizing action. Being
that we use only about 1 percent of the mixes in
the total weight of the product, their development
takes away the trouble of weighing out such small
quantities and sourcing all the different stabiliz-
ers, which often come in large amounts. They
produce excellent, consistent results. It is possible
to make your own mix, but a very accurate scale is
required for optimal results. Attention should be
paid to each stabilizer’s properties, such as hydra-
tion, gelling power, and percentage by weight that
is recommended to add into the mix (amount of
each per formula).
The following stabilizer recipes were devel-
oped specifi cally for this book by paying close
attention to how they are activated (tempera-
ture), how they are hydrated, and which medium
they work best for, but also, most important,
how they can produce optimal results. In other
words, a stabilizer mix for ice creams will be dif-
ferent than one for sorbets, but stabilizer mixes
for sorbets can be used for sherbets and low-fat
ice creams because of their low milk fat content.
Fat can have a negative effect on some stabiliz-
ers because it prevents them from fully hydrating
and dispersing evenly in the liquid.
The same quantity of commercially ob-
tainable mixes can be substituted with similar
results. They come in powdered form and are
readily available through different purveyors.

22 FROZEN DESSERTS
Ice Cream Stabilizer Mix
Xanthan gum 200 g 7.05 oz
Locust bean gum 250 g 8.82 oz
Guar gum 250 g 8.82 oz
Monoglycerides (emulsifi er) 100 g 3.53 oz
Diglycerides (emulsifi er) 100 g 3.53 oz
Sorbet Stabilizer Mix
Gelatin powder 275 g 9.7 oz
CMC (carboxymethyl cellulose) 175 g 6.17 oz
Locust bean gum 250 g 8.82 oz
Guar gum 250 g 8.82 oz
Emulsifi ersEmulsifi ers are used to prevent the separation of
fat-in-water emulsions. They are sometimes seen
as stabilizers because they stabilize emulsions.
Emulsifi ers are molecules that are composed
of a hydrophilic (water-loving) part and a lipo-
philic (fat-loving) part. When these molecules
combine, they make it possible for water and fat
droplets to become fi nely dispersed in each oth-
er, creating a stable emulsion. This is what gives
ice cream a smooth texture, slower meltdown,
and better freeze-thaw stability.
Emulsifi ers are added to modify ice cream
during churning by, ironically, destabilizing the
original fat emulsion found in the milk and/or
heavy cream used in a recipe. The fat globules
begin to destabilize as the ice cream machine
churns. The air bubbles that are being beaten into
the mix are stabilized by this partially destabilized
fat emulsion. If emulsifi ers were not present, the
fat globules would resist this binding caused by
the milk proteins being absorbed into the fat glob-
ule, the minuscule air bubbles would not be prop-
erly dispersed and “trapped,” and the ice cream’s
texture would suffer. It is the same thing that hap-
pens while whipping heavy cream (see page 91),
and this is why ice cream is not only considered
an emulsion, but also a foam (see page 92).
The most frequently used emulsifi ers are
extracted from palm oil, rapeseed oil, soybean oil,
sunfl ower oil, lard, and egg yolks. Since they have a
direct effect on fats, they are used exclusively for ice
creams. It is one fat emulsion working on another
fat emulsion. Sorbets contain no fat and sherbets
contain minimal fat, therefore they do not require
emulsifi ers. The amount of emulsifi ers added to a
formula is .2 to .3 percent of the total weight.
MONOGLYCERIDES AND DIGLYCERIDES Also known as E 471,
these are derived from the partial decomposition
of animal or vegetable oils or fats by reaction
with water (hydrolysis). Their scientifi c defi ni-
tions are as follows:
•• A monoglyceride is a glyceride consisting of
one fatty acid chain covalently bonded to a glyc-
erol molecule through an ester linkage.
•• A diglyceride is a glyceride consisting of two
fatty acid chains covalently bonded to a glycerol
molecule through ester linkages.

INGREDIENTS 23
Monoglycerides and diglycerides are always
used in combination. Used alone, they lack
emulsifying strength. These are the emulsifi ers
used in this book because of the qualities they
contribute to the fi nal product. Their emulsifying
properties contribute to a uniform base that will
churn or freeze evenly and result in a high-qual-
ity product. They can be found through specialty
pastry ingredient providers.
POLYSORBATE 80 Commercially
known as Tween 80, it is an amber-colored vis-
cous liquid derived from sorbitol, which is a sugar
alcohol the body metabolizes slowly. It is obtained
by the hydrogenation of glucose and is often used
in ice cream to prevent milk proteins from com-
pletely coating the fat droplets. This allows them
to join together in chains and nets, to hold air in
the mixture, and to provide a fi rmer texture, hold-
ing the ice cream’s shape as it melts.
EGG YOLKS The particular emulsifi er
here is the lecithin (protein) found in egg yolks;
this was the original emulsifi er. It is still used as
such, but it is not as strong as the previously dis-
cussed emulsifi ers. The fl avor they deliver has a
more cherished quality (see Caramel Ice Cream,
page 375; the amount of egg yolks is large, yet it
can be reduced by adding other emulsifi ers if a
lower-fat ice cream is wanted).
As with stabilizers, emulsifi er mixes are
commercially available, and most are of depend-
able quality. So it is not necessarily convenient
to make one’s own emulsifi er mix because the
commercial mixes are easily available and some-
what economical, and they contribute the same
results as a homemade mix.
Fruits and VegetablesFRUIT There seem to be many confl icting
arguments as to what makes a fruit a fruit. The
following is the defi nition of fruit according to
Encyclopaedia Britannica:
In its strict botanical sense, the fl eshy or dry
ripened ovary (enlarged portion of the pis-
til) of a fl owering plant, enclosing the seed
or seeds. Apricots, bananas, and grapes, as
well as bean pods, corn grains, tomatoes,
cucumbers, and (in their shells) acorns and
almonds, are all technically fruits. Popularly,
the term is restricted to the ripened ovaries
that are sweet and either succulent or pulpy.
The principal botanical purpose of the fruit
is to protect and spread the seed. There are
two broad categories of fruit: fl eshy and dry.
Fleshy fruits include berries, such as tomatoes,
oranges, and cherries, which consist entirely
of succulent tissue; aggregate fruits, includ-
ing blackberries and strawberries, which form
from a single fl ower with many pistils, each
of which develops into fruitlets; and multiple
fruits, such as pineapples and mulberries,
which develop from the mature ovaries of an
entire infl orescence. Dry fruits include the
legumes, cereal grains, capsules, and nuts.
Fruits are important sources of dietary fi ber
and vitamins (especially vitamin C). They
can be eaten fresh; processed into juices, jams,
and jellies; or preserved by dehydration, can-
ning, fermentation, and pickling.
Hopefully, this defi nition will clear the confu-
sion. Yet, what about certain fruits that would nor-
mally contain seeds but do not, such as bananas,
navel oranges, limes, seedless watermelons, and
grapes? Their plants are called parthenocarpic,
which means they can develop fruit without fertil-
ization by the addition of growth hormones or ex-
cessive temperatures during the plants’ fl owering.
Fruit should be eaten preferably when the
seeds have matured, meaning that the fruit has
ripened. Once the fruit has reached its ripening

24 FROZEN DESSERTS
peak it begins to decay and will eventually die.
Enzymes are directly responsible for ripening
the fruit by breaking down complex molecules
into simpler ones. Some fruits, however, contain
ethylene, a gas that functions as a hormone in
plants. It stimulates the ripening of fruit, the
opening of fl owers, and the shedding of leaves.
Ethylene expelled from the fruit can ripen other
ethylene-sensitive fruits. For example, when un-
der-ripe bananas are shipped, they are sprayed
with ethylene gas when they arrive at their
destination to speed up ripening. Bananas are
shipped under-ripe because they are fi rmer that
way and will withstand a long trip better than if
ripened and soft. See the Seasonal Availability
Chart on page 412 for more information on the
seasonality, shelf life, and storage of fruit.
Before fruit reaches the ripening stage, it
goes through three stages. The fi rst is the fer-
tilization of the female ovule by pollen (male),
which leads to the expansion of the ovary wall.
The second stage is when the cells in the ovary
wall multiply, thus enlarging the fruit. The third
stage is an accelerated growth stage, when the
cells continue multiplying at a much quicker
pace. Fruit can ripen on the plant and continue
to ripen even after it is picked, with the notable
exception of the avocado, which will only mature
once it has been picked.
Ripening is visually and physically distin-
guishable. The fruit’s skin will darken and the
fl esh will become soft and sweet. These are the
desired characteristics of any fruit.
There are two very important reasons to use
fruit that is in season:
•• The fruit will be at its best, and it will usually
be shipped from a nearby area. Fruit that has to
travel 3,000 miles to reach your kitchen will be
picked before its prime so it can withstand the
long trip and not decay before it can be sold.
•• It is more economical.
Fruit is the key component of most sorbets
and some sherbets, gelatos, and ice creams.
Although some sorbets contain no fruit at all
(e.g., herb- or spice-infused water), fruit is more
commonly used. Great care must be taken when
handling and storing fruit so that when it is incor-
porated into a recipe it will be at its best. Fruit can
be refrigerated to retard ripening (between 1°C /
34°F and 5°C / 41°F; a temperature of 1°C / 34°F is
ideal for most fruits, with a relative humidity of 90
to 95 percent), but it can be kept at room temper-
ature to speed up the ripening process if it will be
used within 48 hours of receiving, or longer if the
fruit is grossly under-ripe, like green bananas. It is
a good practice to taste the fruit before purchas-
ing, but if this is not possible, it should be tasted
before it is processed into a frozen product.
Organic fruit can be better, but not necessarily.
It is a good idea to support organic foods, if and
when they are better. When using organic fruit, it is
very important to wash the fruit thoroughly before
it is used. Remember, organic foods are pesticide-
free and are sometimes fertilized with manure.
Fruits that oxidize, meaning that they react
to contact with oxygen once the fl esh is exposed,
turn from dark brown to black. This oxidation
can be prevented by combining the fruit with
ascorbic acid powder (vitamin C crystals) in small
amounts. Ascorbic acid is extracted from
citrus fruits. A simple solution of 1 liter of water
and 1 teaspoon of ascorbic acid can be used to

INGREDIENTS 25
submerge the fruit for a few seconds as soon as it
is peeled and then patted dry. This, however, will
only slow down the process. Ideally, if the fruit is
puréed with the ascorbic acid as soon as the skin
is removed, oxidation will be completely stopped.
For every liter of fruit purée, add 1 teaspoon of
ascorbic acid. Bananas, apples, stone fruits, and
avocadoes are a few examples of fruits that oxi-
dize quickly. Be careful not to exceed the recom-
mended amount of ascorbic acid, because the
fruit will end up with a highly acidic taste that will
be unpleasant. Citrus juices (lemon, lime) certain-
ly may be used but are not as effective as ascorbic
acid at preventing oxidation over the long term.
Fresh vs. FactoryFresh fruit will always be the best choice, as long
as it was properly handled from plant to kitchen
and is at its peak. There are many factories that
process fruit purées, but only a handful are of
very high quality, and they are correspondingly
of very high price (for resources, see page 425).
There is one benefi t to factory-made purées and
that is the consistency of the qualities of the
product; the fl avor, texture, sugar content, solids,
and acidity are always the same. The fruit they
use is carefully monitored to be processed at the
right moment to maintain that consistency, liter
after liter. If using factory-made purée, keep in
mind that an average of 10 percent of the total
weight will be sugar, which is added, along with
a few chemicals, to preserve the product. This
will be important to consider when formulating
a recipe.
VEGETABLES While vegetables are rare-
ly used to produce frozen desserts, they are ex-
tensively used in savory preparations (see savory
items, page 108). Most of the vegetables used in
that chapter are technically fruits, such as avoca-
does, tomatoes, and cucumbers, but because of
their lower sugar content are incorrectly known
as vegetables. Besides the sugar content, there
is another characteristic that differentiates fruits
from actual vegetables, and that is that vegeta-
bles do not ripen at all post harvest. Once they
are picked from the plant, they begin to decay.
While fruits can improve, vegetables deteriorate.
FlavorsNot to be confused with “fl avorings,” fl avors are
any ingredients that can be added to a liquid in
a liquid or paste form, or steeped into a liquid
(such as herbs and spices), to contribute their
fl avor to the fi nished product. The liquid is usu-
ally water, milk, or heavy cream, the basis of
most frozen desserts. Artifi cial fl avors are not
recommended because they will never taste as
good as the real thing. Flavorings are added
exclusively for the taste they contribute, and while
herbs and spices fall into this category, they also
fall into the broader category of “fl avors.” Fruits
are considered fl avors as well for obvious rea-
sons, but they are such a large category that it is
necessary to give them a place of their own.
As with all ingredients, the timing and man-
ner in which fl avors are added to a recipe, as well
as their quality, are vital to a high-quality fi nished

26 FROZEN DESSERTS
product. As for pastes, liquids (such as melted
chocolate), and fruits, it is important know the
following in order to have a well-balanced recipe:
fat content, solids content, sugar content, and
water content. Most fruit has no signifi cant fat
content, except for some notable examples such
as coconut and avocado. Refer to the table on
page 410 for solids content and sugar content
as well as acidity for fruits. The water content is
inversely proportionate to the solids content.
The following is a list of the most common-
ly used fl avors:
VANILLA BEANS The ideal form
is in their natural state, in other words, as
pods. Though commonly referred to as vanilla
“beans,” because they do contain beans, they
actually grow as the pod from a type of orchid.
They are originally from the Gulf Coast of Mexi-
co, but are also grown in Tahiti, Madagascar, and
Indonesia, where the quality can be outstanding.
Other, lesser known, vanilla-growing countries
are India, Uganda, Papua New Guinea, and even
the United States (Florida).
There are close to 150 varieties of vanilla
pods that grow in tropical climates around the
world, but Bourbon and Tahitian are the most
widely used.
BourbonWhen grown in Mexico, they are known as
Mexican vanilla beans (pods), but if the same
plant is grown in Madagascar or Indonesia, they
are known as Bourbon vanilla beans (pods).
Some Bourbon pods may develop over time what
the French call givre, which is a frosting of natural
vanillin crystals. This is an indication of very good
quality. Do not confuse these crystals with mildew.
Crystals are sparkling white, mildew is dull green.
TahitianThe original plant is also from Mexico, yet it is
considered its own species. The fl avor of each va-
riety is determined by species, but also by the soil,
climate, and curing process. Plants of the same
species that are planted 10 miles apart will have
subtle fl avor differences. Mexican Tahitian vanilla
pods and Madagascar Tahitian vanilla pods have
a signifi cantly different fl avor. A good vanilla bean
will be plump and have an oily skin and an intense
aroma. Low-quality beans will be dry to the point
of being brittle, and their aroma will be weak.
In order to obtain the most fl avor from a vanilla
pod, it is recommended to split the vanilla pod
in half with a paring knife and scrape the beans
off with the back side of the knife. Beans and pod
should be added to the liquid from the beginning
of the cooking or heating process, when it is still
cold. Heat is the best way to extract the most fl a-
vor from the vanilla pod. The type of vanilla used
in any given recipe is entirely up to the pastry
chefs’ personal preference. In this book, Tahitian
vanilla is the preferred variety.
To store vanilla pods, keep them in an air-
tight container, such as a jar or a tea tin. If ex-
posed to the air for long periods of time, much
of their aroma will dissipate. Since vanilla pods
are expensive, it is in the pastry chef’s best inter-
est to preserve the aroma and taste properly.
Other forms of vanilla are:
ExtractUsing extract is not recommended. Even high-
quality extracts that actually contain or are made
from vanilla pods have a weak and artifi cial

INGREDIENTS 27
fl avor, bordering on “alcoholic.” Extract also
tends to darken liquids.
PowderThis is recommended with reservations, because
the fl avor is not as intense.
PasteVanilla bean paste is recommended for baking
and cooking purposes only, where steeping is
not possible. As with extract, it darkens liquids.
CHOCOLATE This book is not about
chocolate, therefore we will focus only on its role
in frozen desserts. As previously mentioned, it is
important to determine the fat content, sugar con-
tent, solids content, and water content. Chocolate
does not contain water, so we only have to con-
sider the other 3 ingredients. The table below is an
approximate amount for most chocolate brands.
Chocolate is often added at the end of the
heating process, since placing it in a pot over
heat can cause it to burn. For aerated still-frozen
desserts, it is melted over a hot water bath.
STEEPED FLAVORS Steeped fl avors
differ from other fl avors because all they impart
is fl avor and they have little or no signifi cant
impact on texture. To steep, it is necessary to
measure between 2 and 5 percent more of the
total weight of the principal liquid (water, milk,
heavy cream), because once the ingredient is
extracted from the liquid, it will take away with it
some of the liquid, which will affect the balance
of the recipe. It is a good idea to weigh out the
liquid again after the fl avor has been steeped in
order to obtain the right amount. It is better to
take away a small amount of liquid than to add
unfl avored liquid that will dilute the fl avor.
CoffeeFor best fl avor, fi nely and freshly ground strong
coffee beans should be added to a liquid that is
heated to 93°C / 200°F, which is the ideal brew-
ing temperature to make regular drinking coffee.
Hotter liquids will make for an unpleasant taste.
Coffee extract is not a viable replacement for
frozen desserts, because it adds water and has
an unnatural coffee fl avor. Homemade coffee
extracts are recommended for fl avoring aerated
still-frozen desserts, but, for example, in a cof-
fee semifreddo, it is possible to steep the heavy
cream, chill it, and then whip it. Soluble coffee is,
while not the ideal, a decent substitute.
Citrus ZestA rasp is a good tool for extracting a thin layer
of citrus zest. Most of the fl avor is in the oils
contained in the fruit’s skin, and for this reason
some pastry chefs prefer to zest the fruit directly
into the liquid so that all of the fl avor ends up in
it. If the fruit is zested onto one surface and then
CHOCOLATE COCOA (LIQUEUR) % SUGAR % FAT % DRY COCOA %
100 0 54.05 45.95
70 (Bitter chocolate) 30 42.7 27.3
66 34 40.6 25.4
64 35 40.0 24.0
61 39 34.2 26.8
56 (Semisweet chocolate) 44 37.1 18.9
45 (Milk chocolate) 55 30.0 25.0
0 (White couverture) 55 30.5 14.5 milk
Cocoa powder (100% cocoa) 0.0 18.0 82

28 FROZEN DESSERTS
transferred to the liquid, most of the all-impor-
tant fl avor will be lost.
Peeling the fruit with a peeler or knife will
create larger pieces of zest that will not steep as
effectively. Larger pieces are recommended only
for long cooking and steeping times.
SpicesWhole spices perform better than ground spices,
because once they have steeped in the liquid, they
can be completely strained out. Ground spices
are very fi ne powders than can pass through
even the fi nest-mesh strainer and give the frozen
product a gritty texture. This holds true especially
for ground cinnamon, which also has a slight
thickening effect on liquids when hot. Toasting the
spices and then adding them to a hot liquid will
increase the fl avor signifi cantly.
Herbs and TeasHerbs can be added in two ways. They can be
added to a hot (not quite boiling) liquid and left
to steep for no more than 8 to 10 minutes. This is
recommended for sturdy herbs, such as rosemary,
thyme, and bay leaf. For teas, such as Earl Gray or
jasmine, it is especially important to keep an eye
on steeping time and on the temperature of the
liquid. Excessive steeping time and high tempera-
tures will produce an unpleasantly bitter fl avor.
For more delicate herbs, such as basil, mint, and
lemon verbena, steeping time is reduced to 2
minutes in a liquid that is no hotter than 77°C /
170°F. Any hotter and the fl avor will turn bitter.
An herb can be used as an actual ingredient
and not just a fl avor, though it is advised to do so
only with water-based frozen desserts and with
more delicate herbs. First, they must be blanched
in boiling water for 10 to 15 seconds, then
shocked in an ice bath and puréed in cold water
that has been taken from the measured amount
for the recipe. This herb water must be strained
through a fi ne chinois, then added to the rest of
the measured water, and fi nally weighed out again
to obtain the necessary amount.
NutsHot toasted nuts added to a hot liquid will give
the most intensity of fl avor. Toasted nuts that
have cooled off before being added to a hot liq-
uid will not give off as much fl avor. Covering the
liquid with plastic wrap will keep the product hot
and therefore improve the steeping by concen-
trating the heat. Nuts can be left in the liquid for
up to 24 hours for best results.

INGREDIENTS 29
Nut PastesThese should be considered in the percent-
age of solids that will be a part of the recipe.
Some praline pastes will combine into a recipe
completely, but almond paste will not, leav-
ing a small amount of solids behind once the
base is strained. They also contain a consider-
able amount of fat, which will contribute to the
smoothness of the fi nished frozen product.
ALCOHOLIC BEVERAGES Liquors should always be used in moderation for
two reasons: they can give an excessive alcoholic
taste, and liquors with a high alcohol percentage
can affect freezing, since alcohol doesn’t freeze.
It is recommended to cook off the alcohol before
adding the liquor to a recipe. This will maintain
the fl avor and eliminate the alcohol. For lower-
alcohol-content ingredients, such as wine and
beer, a reduction is recommended. The excep-
tion would be for items in which the beer or wine
is the main ingredient in a sorbet, ice pop, or
granité. The percentage of alcohol is low enough
that the fl avor will not be offensive and the freez-
ing point will not be signifi cantly affected.
POWDERED FLAVORS This refers
to ingredients that dissolve into liquids regardless
of their fat content, such as malt powder. Even
though they are dissolved, they should be consid-
ered in the percentage of solids in a recipe.
VARIEGATED OR SWIRLED GARNISHES This refers to fl uid garnishes,
such as jams or caramel. While they are not mixed
into the base directly, they are gently folded into
the frozen product as soon as it comes out of the
batch freezer. The liquid garnish can be alternately
layered with the frozen product so that when it is
scooped, there are distinguishable layers of items
such as vanilla ice cream and strawberry jam. This
procedure is also possible with a Pacojet, but the
fl uid garnish must be added as soon as the prod-
uct has been pacotized, when the product is still
rather smooth and the fl uid garnish will not sink to
the bottom and can be swirled evenly throughout
the frozen product.
SOLID FLAVORS This means any solid
garnish that will not be dissolved into the base,
such as nuts, chocolate chips, or caramelized
fruit. These cannot be added into the base in its
liquid from, because they will sink to the bottom.
They must be added when the product is close to
being extracted from the batch freezer so that they
will be evenly distributed. The ideal temperature
of the churned base for this is −5°C / 22°F, where
it has enough density to withstand the weight of
the garnish. For pacotized items, fold the garnish
in as soon as the item has been pacotized, when
the product is smooth enough to stir the garnish
in, but not so smooth that the garnish will sink to
the bottom.
WaterSome say that New York City tap water is among
the best-tasting in the country. Granted, they
haven’t tasted the tap water in every single city in
the United States, but New York water has a very
clean, crisp, and fresh taste that is suitable for sor-
bets, ice pops, and granités. Having said that, it is
important to know what is in the water that comes
out of the tap in your area. Hard waters have a
very unpleasant taste, not to mention a number of
minerals that will affect the texture of your fi nished
product. If you are unsure of the water’s quality, it
is best to use inexpensive bottled water, just to be
on the safe side. This will also ensure a consistent
product that you can count on.
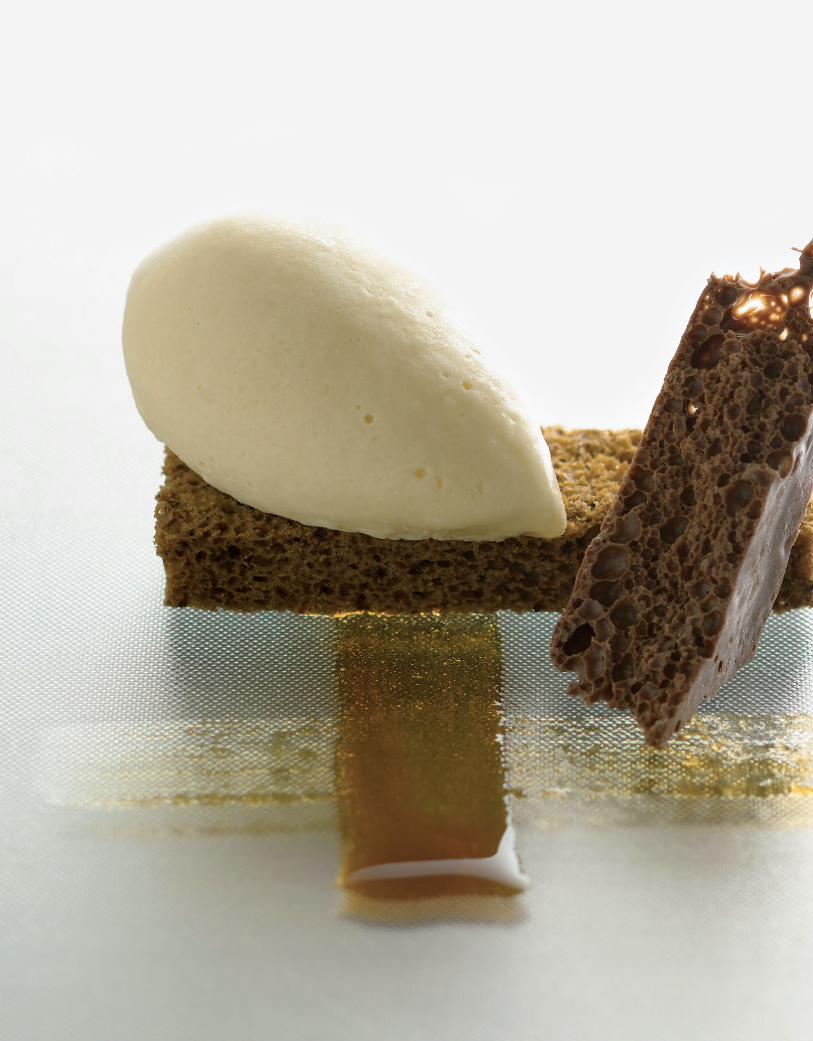
30
31
INVESTING IN THE RIGHT MACHINES, TOOLS,
AND EQUIPMENT TO MAKE FROZEN DESSERTS IS
CRUCIAL ON MANY LEVELS. Not having enough products
and having too many are the extremes that we want to avoid.
Not having the right setup can have a signifi cant impact on
your workplace, since the needs of a 200-seat restaurant are not
the same as the needs of an ice cream parlor, even though both
establishments will produce basically the same product. There
are machines that are indispensable for any establishment,
however, such as a freezer in which to store desserts and
deciding which one is best for you is what this chapter is all
about. A Pacojet may not be the best idea for the 200-seat
restaurant, because it can process only small amounts at a time,
but it would be the right machine for a 50-seat restaurant, since
it takes up less space and works very quickly.
chapter three Equipment, Machines, and Tools

32 FROZEN DESSERTS
It goes without saying that any kind of production re-
quires the correct mise en place. The mise en place
is not limited to ingredients. It also encompasses
knowledge of method and production equipment.
Without the right tools, effi ciency is limited and the
risk of making mistakes is increased. The following
is a list of the most commonly used tools for frozen
dessert production, along with a brief description.
SCALES Digital scales are more accurate
than springform scales and balance-beam scales
as long as they are properly calibrated. Spring-
form and balance-beam scales should be avoided
when precision is required, but they are accept-
able for larger amounts, for example, 50 pounds
of sugar as opposed to .2 grams of xanthan gum.
For ingredients such as stabilizers, precision
scales (see photo) are required because of the
small amounts that are used, which most com-
mon digital scales will not be able to weigh. These
are incredibly sensitive scales that, depending
on the model, can weigh almost anything, from
tenths of a gram to hundred-thousandths of a
gram. A precision scale that can weight tenths of
a gram is suffi cient for our purposes.
It isn’t enough to have the technical knowledge of frozen dessert manufacture; there is always the bottom line to
think about. There isn’t anything wrong with keeping an eye on the money, since ultimately that is what a successful
establishment needs in order to stay in business. There is a fi ne balance between producing high-quality frozen
desserts and being smart about where your money goes. This chapter will help you make the right decisions.
Having the appropriate equipment, machines, and tools to produce frozen desserts is just as important as
having the right ingredients. Understanding how they work and what they are meant to do will result in an
effi cient working environment that will produce a superior product.
Production Equipment
Comparative Chart, For Scales
TYPE OF SCALE PROS CONS
Balance-beam scale Good for measuring large amounts
Inexpensive
Not good for small amounts (not very precise)
Springform scale Good for measuring large amounts
Inexpensive
Not good for small amounts (not very precise)
Digital scale (widely recommended)
Gives accurate reading Can be expensive
If not properly calibrated, will not scale properly
Precision scale (widely recommended)
Gives accurate reading of very small amounts
Can be expensive
Usually has a very small weight capacity

POTS AND PANS Choosing the right
pots or pans is part of the equation for obtaining
successful results. Using low-quality equipment
makes as little sense as using low-quality ingre-
dients. While they may produce positive results
for short periods of time, eventually they wear out
and might have a negative effect on your fi nished
product, which can range from physical poisoning
(metal particles) to chemical poisoning (met-
als reacting to other metals) to developing “hot
spots” where your mix can overcook. In that way,
cheap equipment can become expensive. It is bet-
ter to make an investment in a good pot that will
last fi ve to ten years rather than to buy one that
needs to be replaced every two years.
While copper is by far the best heat con-
ductor, it can produce chemical reactions with
other metals (such as the stainless steel found
in whisks) that will create a health hazard. Stain-
less steel pots that are coated with copper on
the outside are the next best choice, yet in many
cases they can be prohibitively expensive. A
sound alternative is stainless steel, specifi cally
18/10 stainless steel pots and pans. Stainless
steel is available in two qualities: 18/0 and 18/10.
The “18” is the percentage of chromium that
is added to the steel, which makes it stainless,
enabling the steel to form an invisible layer of
oxide that protects against corrosion. If this layer
is damaged, a new one will form immediately
due to the oxygen present in air. The “10” refers
to the percentage of nickel that is added, which
makes it shiny, increases resistance to corrosion,
makes it harder, and gives it a high resistance
to temperature. A magnet will not stick to 18/10
steel but it will to 18/0 steel.
Most 18/10 pots and pans have what is
called a tri-ply encapsulated bottom, which pro-
vides high heat conductivity for quick, even cook-
ing, eliminating both cold and hot spots. Ideally,
a layer of aluminum or copper will be sandwiched
between two layers of stainless steel, thus improv-
ing the heat conductivity. They can be used with
gas, electric, and induction burners.
Pots and pans will only be used for frozen
desserts that require heat, such as the Cajeta Ice
Cream on page 375. Their size (capacity) is ex-
pressed in liquid volume (2 quart, 4 quart, etc.) and
will depend on the amount of product that is to be
made.
WHISKS It is recommended that whisks
have strong stainless steel wires with a sealed
and watertight handle. Otherwise, if any liquid
seeps into the handles, it is very diffi cult to clean
them properly and as a result they will become
a major source for bacteria that can cause food-
borne illnesses.
There are three kinds of whisks: piano
whisks, balloon whisks, and French whisks (a.k.a.
rigid whisks). French whisks have the thickest
wire, which makes for awkward stirring. The thin
yet strong wires found in piano whisks and bal-
loon whisks facilitate the mixing of ingredients
thanks to their partial fl exibility. Piano whisks and
balloon whisks can also be used for whipping
eggs, egg yolks, egg whites, and heavy cream.
Balloon whisks tend to be rounder (hence the
name) than piano whisks and facilitate the
incorporation of air to a greater extent since
their wires are farther apart than those in piano
whisks. French whisks can be used as well to
whip ingredients, but the process takes longer
because the thicker wire makes for uncomfort-
able and awkward whisking and whipping.
All three types of whisks can be found in
most cookware shops, and the price difference
between them is not signifi cant. In other words,
performance is the deciding factor, not price.
EQUIPMENT, MACHINES, AND TOOLS 33

RUBBER SPATULAS Rubber spatulas
should be heat resistant, with a notched blade
for effective scraping and cleanup. The rubber
tends to deteriorate and crack over time. At the
fi rst sign of this, the spatula must be discarded.
Bacteria can grow in the cracked rubber, and
pieces of the rubber can get mixed into ready-to-
consume foods.
THERMOMETERS Digital probe
thermometers are a wise investment, since
they can be used in every type of production,
not only frozen desserts. They are battery op-
erated and water resistant (some models are
waterproof). The probe connects to the body of
the thermometer, where an accurate reading is
displayed after a few seconds of immersing the
probe. Instant-read thermometers are ideal. They
have highly sensitive probes that give real-time
readings, as opposed to having to wait to get
an accurate reading. During those few seconds,
temperatures can escalate and compromise the
fi nal product. The only downside is that they can
be expensive, but accuracy is well worth the extra
money.
Pocket thermometers are not recommended
because they lack accuracy, and a few degrees
over or under can make a signifi cant impact on
the fi nished product. Laser thermometers (or
infrared thermometers) aren’t recommended for
actual cooking because they only measure surface
temperatures, which are always colder than inter-
nal temperatures, especially those that are closer
to the bottom of the pot. Laser thermometers
function by pointing the beam toward the desired
surface and then bouncing the temperature back
through the beam, where the temperature is reg-
istered and displayed. These types of thermom-
eters are ideal for taking surface temperatures of
frozen desserts while they are being churned. For
example, when making an ice cream that will have
a solid garnish added, such as chocolate chips,
the recommended temperature at which to add
the garnish is -5°C / 22°F. A probe thermometer
would get caught in the spinning blade, unless
the machine is stopped, but a laser thermometer
will work perfectly as the ice cream churns. The
ice cream’s surface temperature will be the same
as its internal temperature. Thermometers are
not only for hot products; they can reach tem-
peratures well below freezing, depending on the
capacity of the thermometer.
When taking a liquid’s temperature, it is
important to place the probe at the center of the
liquid while stirring, so as to distribute the tem-
perature evenly around the thermometer. This
gives you a more accurate reading. As you can
imagine, it is hard to whisk around the probe
without it getting tangled in the whisk. A con-
venient solution to this dilemma is a whisk that
also includes a thermometer (see photo on page
58). The temperature display is at the base of
the whisk’s handle and the sensor is one of the
whisk’s wires. This is an inexpensive alternative
to other kinds of thermometers, but be sure to
purchase a high-quality thermowhisk.
34 FROZEN DESSERTS
The probe thermometer on the left gives a more accurate reading because it takes the internal temperature of the mixture rather than the surface temperature.

BAUMÉ HYDROMETERS (a.k.a Saccarometers or Sugar Densimeters)AND BRIX HYDROMETERS (a.k.a. Refractometers) The Baumé hydrom-
eter is used to measure the density of sugar in a
liquid, and the Brix hydrometer (refractometer)
is used to measure the percentage of sugar in
a liquid. This liquid should ideally be at 20°C /
68°F; higher temperatures will not produce an
accurate reading since the hydrometers are
sensitive to temperature. They are used for wine
making, beer making, and for syrups used to
make sorbet bases. Hydrometers are an inexpen-
sive substitute for a refractomer, but are not as
accurate or clear to read.
The Baumé hydrometer must be carefully
placed in the liquid to be measured, since agita-
tion will produce bubbles in its interior that will
not give a correct reading. Hydrometers contain
a graduated scale and mercury and work similar-
ly to a thermometer, in which the mercury rises
and drops depending on the liquid’s density.
They measure from 0° to 50° degrees Baumé,
notated variously as: degrees Baume, degrees
Baumé, B°, Be°, Bé°, and Baume, where 0 has no
density and 50 has the highest possible density.
A refractometer is used to measure refraction.
In other words, it can measure the density of a
particular liquid by how the light refracts through
it. When a straw is placed into a glass of water, the
straw appears bent. If the same straw is placed
into a glass of water containing dissolved sugar,
the straw appears even more bent because sugar
“thickens” water (it makes it denser) and therefore
has a magnifying effect. This is known as the prin-
ciple of light refraction. Refractometers measure
this refraction of light and are based on the princi-
ple that as the density of a substance increases, its
refractive index (how much the straw appears to
be bent) rises proportionately. If the liquid is thin,
the angle of refraction is large. If the liquid is thick,
the angle of refraction is small. The refractometer
measures in the Brix (0° up to 32°) scale.
There are many different kinds of refrac-
tometers, ranging from economical to very ex-
pensive, and each one has a particular use and
range. For frozen dessert purposes we will use
only the refractometer for sorbets and granités,
which is to say, it measures from 0° up to 32°
Brix. Any sorbet base higher than 32° Brix will be
too sweet. On the other hand, refractometers
can also be used for candy making, where Brix
measurements tend to be higher, so it is a good
idea to have a refractometer that can read up to
90° Brix, and will therefore have more than one
use in the pastry kitchen. (For availability, see the
resources list on page 425.)
Brix is more straightforward than Baumé.
Each degree Brix is equivalent to 1 percent of
sugar in a liquid, so if the hydrometer measures
16 degrees, it means that the liquid contains
16 percent sugar. Baumé degrees are based on
EQUIPMENT, MACHINES, AND TOOLS 35
Baumé hydrometer Brix hydrometer (refractometer)

36 FROZEN DESSERTS
the specifi c gravity of a substance, where each
degree Baumé represents approximately 1.75
percent sugar in the liquid.
There is no accurate formula for conversion
between the two measures, since Baumé is a
unit of relative density and Brix is a unit of pro-
portion. However, you may fi nd recipes that call
for a Baumé measure and you might only have
a refractometer, or vice versa. You can use the
following formula to get fairly good conversion
approximation:
Brix degrees / 1.8 = Baumé degrees
or
Baumé degrees × 1.8 = Brix degrees
EXAMPLE: 22° Brix / 1.8 = 12.22.
The true value of 22° Brix is 12.2° Baumé.
The result will be slightly off by fractions
of the correct amount, which won’t be as detri-
mental for sorbet or granité production but can
have a devastating effect in wine or beer making.
Most sorbets range from 30° to 32° Brix (16.6° to
17.7° Baumé). Granités range from 16° to 19° Brix
(8.8° to 10.5° Baumé). These measures apply
only to nondairy frozen desserts. Dairy contains
proteins that throw off Brix and Baumé mea-
sures, simply by the effect they have on liquids.
STRAINERS An 18/10 stainless steel re-
inforced fi ne-mesh strainer or bouillon strainer
with a fi ne mesh will produce the best results.
The strained liquid will have no undesired large
solids left in it, making it an evenly smooth (or
clear, depending on what is being strained) prod-
uct. A conical strainer (see photo) will be more
effi cient than round fi ne-mesh strainers, since
gravity forces the liquid to the base of the cone,
which makes it easier for it to pass through the
fi ne mesh.
Medium-mesh or perforated strainers will
not give the same results, since they will let
larger solids through. These strainers are better
suited for sifting dry ingredients, such as fl our.
ICE BATHS When a frozen dessert base
requires heat for it to be made (a.k.a. heat transfer),
it is necessary to cool it down to a temperature
that is considered food safe (below 5°C / 41°F)
before freezing. Dairy-based products will be
more sensitive to bacteria growth than those
without, because bacteria love protein. The
quicker a dairy-based mix is cooled down, the
better, because this will reduce the propagation
of bacteria. All heated liquids need to be cooled
before storing and before churning or freezing.
It is not a good idea to pour a hot liquid into a
batch freezer to cool it down, because this will
overwork the machine and, while this will not
have immediate consequences, the machine will
quickly deteriorate.
A granité base, which is mostly protein-free
but might have been heated in order to infuse
a liquid, should not be placed directly in the
freezer to begin its crystallization. The steam
it gives off will result in condensation that will
harden inside the freezer. Its heat will also raise
the interior temperature of the freezer, which will
overwork the compressor and raise the tempera-
ture of other items in the freezer.
The equipment used to cool down the base
depends on the amount made, but the principle
is the same regardless. The liquid is poured into
a container (preferably thin stainless steel) large
enough to have the most amount of exposed
surface possible without going to extremes

EQUIPMENT, MACHINES, AND TOOLS 37
(such as using a sheet pan, which has the most
exposed surface area, but the liquid inside it will
easily spill with any movement). The more the
liquid is spread out, the more room the heat has
to escape. This container is then placed in an ice
bath. The ice bath should be part of the mise en
place that has to be done before any cooking oc-
curs, so that when the mix is ready to come out
of the pot, it has a place to go so that the cook-
ing process is stopped immediately and bacteria
growth is prevented.
Ice alone will not get the job done. A proper
ice bath should have equal amounts of ice and
water. If there is too much water, the ice will melt
quickly, and if there is too much ice, the product
will take longer to cool down, since the container
won’t be surrounded completely by chilled water.
Think of how much surface an ice cube has. This
minuscule surface will be in contact with the hot
container’s surface. Logic would dictate that the
ice would melt, but the process isn’t as quick as
you’d think. By the time the ice melts enough to
become chilled water, a considerable amount of
time will have gone by. The ice bath should be big
enough to fi t the container with the hot liquid and
have room left around its border. Care must be
taken when deciding the amount of ice and water.
It is best when the ice and water mix come up to
the same level as the liquid inside the container.
When the level of ice and water is lower, there is
an amount of hot liquid that is not being cooled
down. It is also important to make sure that the
ice and water mix does not come in direct contact
with the hot liquid, for no other reason than it
will become diluted and affect the fi nal result. For
very large amounts of base, it is recommended
to have more than one ice bath ready. Smaller
amounts cool down faster than large ones.
It isn’t enough to leave the hot liquid in the
water bath to cool down. Constant whisking or
stirring will distribute the cooler liquid that is
closer to the stainless steel pan surface (because
its exterior is in direct contact with the ice water)
throughout the rest of the hot liquid.
This section refers to machines used to freeze
all varieties of machine-churned frozen desserts
for small-batch production. These include ice
cream, gelato, sherbet, and sorbet. Small-batch
production should not be confused with what
one would make at home for personal consump-
tion, either in the amount produced or the ma-
chines used. Home ice cream machines are not
recommended for restaurant or hotel production
because they are slow and inconvenient and of-
ten yield poor results.
The amount that is needed in a 50-seat
restaurant will be different than that needed in
a 300-seat restaurant or a hotel, but both cases
are still considered small-batch production if a
batch freezer is used and the human element
plays a big part in its production. If a 5000-room
hotel in Las Vegas makes its own ice cream,
is it still small-batch production? It can be. In
small-batch production, there is an actual per-
son involved in most of the process (weighing
out ingredients, making the base, loading the
machine, storing the frozen product, and cleaning
the machine). There are batch freezers that can
churn up to 41 liters (11 gallons approximately)
per batch, and 190 liters (50 gallons) per hour. It
all comes down to the type of machine used.
There are many brands of machines, but we
will focus on the two types of machines available
for small-batch production. Each type operates
in its own distinct way.
PACOJET Pacojet machines work by pour-
ing the ice cream, sorbet, sherbet, or gelato base
into special beakers that are placed in a freezer
set to −20°C / −4°F for 24 hours. The time is
considerably reduced if using a blast freezer that
can drop to −38°C / −36°F. Once the product is
completely frozen, the beaker is then attached
to the Pacojet, which is fi tted with a spiral blade
that literally “shaves” the frozen base into very
thin sheets about 2 microns thick at a speed of
2000 rpm. When the beaker is attached and the
machine is turned on, the blade will drill down
Machines

38 FROZEN DESSERTS
into the frozen base and then come back up.
Each portion or scoop takes around 20 seconds
to make. An entire beaker takes 4 minutes to
process. It can be programmed to produce
however many portions are needed at a time,
up to 12 per beaker. The fi nal temperature of the
frozen base is −12°C / 10°F to −15°C / 5°F. At
this point it is reserved, frozen, for service. The
company makes only one type of machine, but
there are a total of four variations on it. All four
machines are the same; the only difference is the
kind of voltage required to use them. A machine
that works in the United States will not work in
Europe, and vice versa.
According to the president of Pacojet AG,
the motor, though rated at 1,000-watt power,
has the capacity to output over 1600 watts, after
which it cuts out. This is what enables the Paco-
jet to pacotize virtually anything that is deep-fro-
zen, at a constant rpm and downward penetra-
tion speed, regardless of hardness. The primary
reason for the quality in consistency and texture
is a combination of constant rpm, constant shaft
progression, and blade geometry. If one of the
three were out of synch or faulty, the end result
would be compromised.
PROS
•• Cuts the churning time to a fraction of what a
regular machine takes to freeze a quart of prod-
uct (20 seconds for one portion, 4 minutes for a
whole beaker). Keep in mind, however, that this
machine doesn’t “churn,” it “shaves.”
•• Finished item has a very smooth consistency,
is easy to scoop, and has an excellent texture
and mouth feel.
•• Because of the way it shaves the frozen product,
it is not necessary to use any kind of stabilizer or
emulsifi er to obtain a smoother, more freezer-
resistant product. In other words, its ice crystals
remain small and are not prone to increase in
size. This will have a direct effect on maintaining
a consistent texture for hours at a time.
•• The amount of sugar in a sorbet can be sig-
nifi cantly reduced and the result will still be
smooth. In other machines, if there is not
enough sugar in a sorbet base it will be icy,
and if there is too much sugar it will be too
soft. It is possible to use the same amount of
sugar and still obtain positive results. This
machine is ideal for savory ice creams and sor-
bets, because sugar content will not determine
the size of the ice crystals; only the machine’s
thorough blending will determine that.
•• It is reasonably priced compared to other
small-batch ice cream machines.
•• The beakers can be fi lled and kept frozen for
long periods of time, and processed when
needed.
•• You decide how many portions to “shave” by
pressing a button. You can process one portion
or up to the entire beaker.
•• It takes up very little space. Its dimensions are
20 cm / 8 inches wide by 36 cm / 15 inches
deep by 50 cm / 20 inches tall, and it weighs
only 14 kg / 30 lb.
•• The cleaning process is just as fast as the paco-
tizing process.
•• It is not used exclusively for frozen desserts. It
can also be used for pâtés, terrines, mousses,
and for grinding spices, nuts, etc., through its
blending action.
The blade and beaker of a Pacoject

EQUIPMENT, MACHINES, AND TOOLS 39
CONS
•• If the machine should break down, there
aren’t many technicians who repair Pacojets.
If the machine has to be sent away for repair,
it often requires at least a month to get back.
For this reason it is a good idea to have a
second Pacojet as backup. One of the main
reasons a machine will need repair is because
of improper handling and misuse. It needs
to be cleaned properly on a consistent basis.
The “drill” needs to be thoroughly cleaned at
least once a day for sanitary purposes, as well
as to prevent any product from accumulating
on it that will prevent it from drilling properly
through the rock-hard product.
•• Should there be any product that has already
been shaved left in the beaker, it can be frozen
to −20°C / −4°F to shave again, but the fi nal
result is not very good. The second shaving
incorporates too much air into the product,
which makes it hard to scoop, and in turn
makes the scoops not look very good. The orig-
inal optimal consistency is not there anymore.
•• There are many small components that tend to
get lost very easily.
•• The spiral blade needs to be sharpened at least
once a year.
•• The Pacojet does not pasteurize the base,
which is a key step in frozen dessert produc-
tion. For products that will be pacotized, pas-
teurization should take place during the cook-
ing process.
•• It is mostly convenient for small restaurants
and hotels because of the quantities that can be
made at one time. I would discourage the use
of a Pacojet for operations with more than 120
seats because the amount of beakers that have
to be frozen and pacotized ahead of time would
take up too much freezer space. In many estab-
lishments, space is a luxury.
In this book, all ice creams, sorbets, and
sherbets that do not contain any stabilizers
and/or emulsifi ers, as well as all savory items,
will be processed using a Pacojet machine. They
can also be churned in a batch freezer, but the
Pacojet will produce frozen desserts with better
texture and mouth feel. Although gelatos can
be put through the Pacojet, it is better to churn
them in a batch ice cream maker, in which it is
easier to control the amount of air that is incor-
porated into the product (see gelato on page 53
and overrun on page 63).
BATCH FREEZER MACHINES Batch freezer machines oper-
ate much differently than the Pacojet. In these
types of freezers, the ice cream, gelato, sorbet,
or sherbet base has to be simultaneously frozen
and whipped. The base is poured into a barrel
surrounded by pipes containing water and Freon
R-12 or R-22 gas, which freeze the barrel from
the outside. The interior of the barrel should be
constructed of stainless steel or equally corro-
sion-resistant metal.
When the machine is turned on, a blade spins
inside the barrel at a constant speed. This whips
the mixture, which introduces air bubbles into the
Batch freezer blade
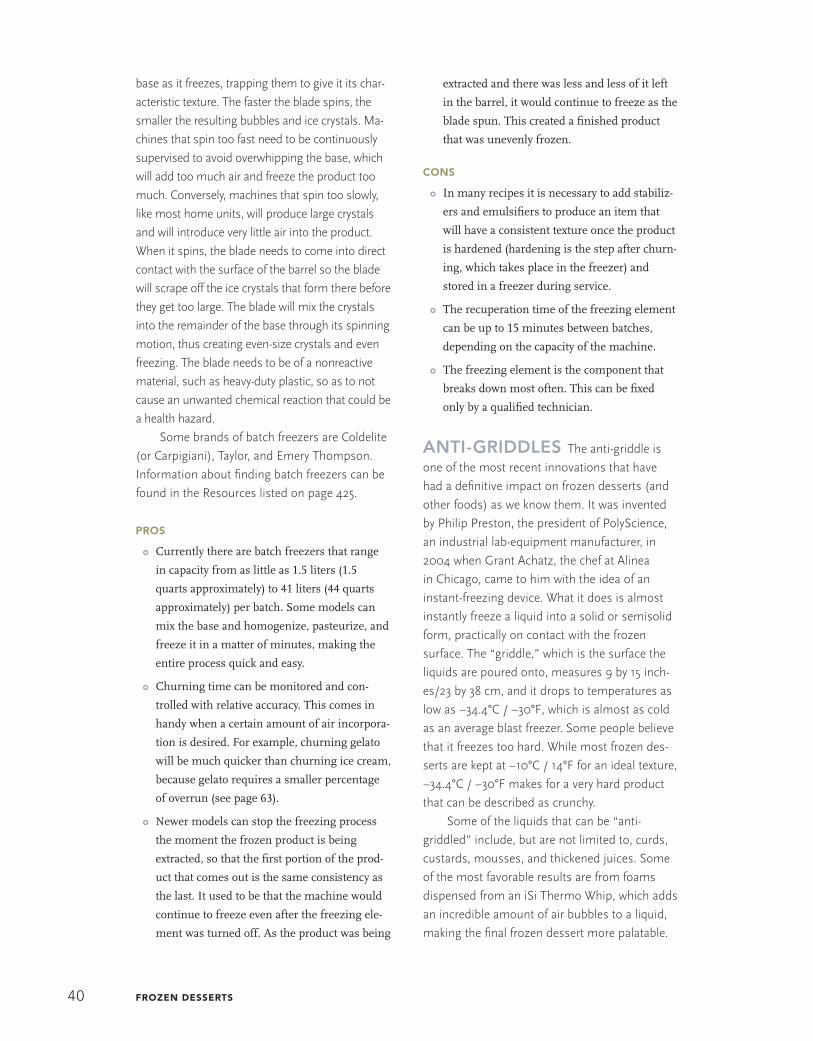
40 FROZEN DESSERTS
base as it freezes, trapping them to give it its char-
acteristic texture. The faster the blade spins, the
smaller the resulting bubbles and ice crystals. Ma-
chines that spin too fast need to be continuously
supervised to avoid overwhipping the base, which
will add too much air and freeze the product too
much. Conversely, machines that spin too slowly,
like most home units, will produce large crystals
and will introduce very little air into the product.
When it spins, the blade needs to come into direct
contact with the surface of the barrel so the blade
will scrape off the ice crystals that form there before
they get too large. The blade will mix the crystals
into the remainder of the base through its spinning
motion, thus creating even-size crystals and even
freezing. The blade needs to be of a nonreactive
material, such as heavy-duty plastic, so as to not
cause an unwanted chemical reaction that could be
a health hazard.
Some brands of batch freezers are Coldelite
(or Carpigiani), Taylor, and Emery Thompson.
Information about fi nding batch freezers can be
found in the Resources listed on page 425.
PROS
•• Currently there are batch freezers that range
in capacity from as little as 1.5 liters (1.5
quarts approximately) to 41 liters (44 quarts
approximately) per batch. Some models can
mix the base and homogenize, pasteurize, and
freeze it in a matter of minutes, making the
entire process quick and easy.
•• Churning time can be monitored and con-
trolled with relative accuracy. This comes in
handy when a certain amount of air incorpora-
tion is desired. For example, churning gelato
will be much quicker than churning ice cream,
because gelato requires a smaller percentage
of overrun (see page 63).
•• Newer models can stop the freezing process
the moment the frozen product is being
extracted, so that the fi rst portion of the prod-
uct that comes out is the same consistency as
the last. It used to be that the machine would
continue to freeze even after the freezing ele-
ment was turned off. As the product was being
extracted and there was less and less of it left
in the barrel, it would continue to freeze as the
blade spun. This created a fi nished product
that was unevenly frozen.
CONS
•• In many recipes it is necessary to add stabiliz-
ers and emulsifi ers to produce an item that
will have a consistent texture once the product
is hardened (hardening is the step after churn-
ing, which takes place in the freezer) and
stored in a freezer during service.
•• The recuperation time of the freezing element
can be up to 15 minutes between batches,
depending on the capacity of the machine.
•• The freezing element is the component that
breaks down most often. This can be fi xed
only by a qualifi ed technician.
ANTI-GRIDDLES The anti-griddle is
one of the most recent innovations that have
had a defi nitive impact on frozen desserts (and
other foods) as we know them. It was invented
by Philip Preston, the president of PolyScience,
an industrial lab-equipment manufacturer, in
2004 when Grant Achatz, the chef at Alinea
in Chicago, came to him with the idea of an
instant-freezing device. What it does is almost
instantly freeze a liquid into a solid or semisolid
form, practically on contact with the frozen
surface. The “griddle,” which is the surface the
liquids are poured onto, measures 9 by 15 inch-
es/23 by 38 cm, and it drops to temperatures as
low as −34.4°C / −30°F, which is almost as cold
as an average blast freezer. Some people believe
that it freezes too hard. While most frozen des-
serts are kept at −10°C / 14°F for an ideal texture,
−34.4°C / −30°F makes for a very hard product
that can be described as crunchy.
Some of the liquids that can be “anti-
griddled” include, but are not limited to, curds,
custards, mousses, and thickened juices. Some
of the most favorable results are from foams
dispensed from an iSi Thermo Whip, which adds
an incredible amount of air bubbles to a liquid,
making the fi nal frozen dessert more palatable.

EQUIPMENT, MACHINES, AND TOOLS 41
An anti-griddle can give a whole new mean-
ing to what a semifreddo is, since it is possible
to freeze only one side of the liquid (the one in
contact with the griddle), leaving most of the
exposed surface in its liquid form. The idea is
that the longer you leave a liquid on the griddle,
the harder it will freeze and the greater the
amount of it will freeze. It is also possible to fl ip
the freezing liquid over once the surface that is
in contact with the griddle hardens, and obtain a
liquid that is frozen on the outside but still liquid
in the middle if the freezing is timed correctly.
Many users recommend spraying the griddle’s
surface with vegetable oil spray to ensure that
the frozen item comes off easily.
Instant freezing used to only be possible with
liquid nitrogen, which is a technique that some
restaurants use to make instant sorbet. While it
is entertaining to see instant sorbet made right
before your eyes, with the dramatic effect of the
cloud that emanates from the nitrogen, it is cer-
tainly dangerous to handle and store liquid nitro-
gen, and the results are wildly inconsistent.
Storage UnitsThe ideal holding temperature for frozen des-
serts is −10°C / 14°F. A freezer’s ability to freeze
at that temperature or lower isn’t the only re-
quirement demanded from it. During a busy
service, the freezer door will be opened and shut
many times, trapping the outside temperature
with it. The compressor should be powerful
enough to restore the temperature to −10°C /
14°F quickly so as to not affect the frozen prod-
uct. Stabilizers cannot do the work alone to pre-
vent heat shock. Proper air circulation is another
contributing factor to the quality of the freezer.
The better the air fl ow, the more consistent the
temperature will be, even with constant opening
and closing of the freezer door.
Meticulous care and maintenance of your
freezer will help to extend the life of your invest-
ment. Freezers will accumulate condensation that
will eventually freeze into “snowy” ice chunks if
they aren’t scraped and cleaned on a regular ba-
sis. These ice chunks tend to accumulate on the
rim between the door and the inside of the freez-
er, and as they get larger they interfere with the
seal that keeps the door tightly shut. Cleaning will
also contribute to a freezer that is in superior con-
dition. More often than not, there will be residue
left on surfaces during scooping and extracting
that will only re-freeze and create an unsanitary
environment for your product. It is a good habit
to defrost freezers once a week after service to let
all the accumulated ice thaw, and perform a deep
cleaning early the next day. It is not a good idea
to scrape the ice off and call it a day. It is possible
to puncture the interior surface if using a sharp
object to scrape off the ice. This will damage the
interior machinery of the freezer, causing it to
eventually malfunction. It is never a good time to
have your freezer break down right before service.
There are a variety of freezers available. The
following are the most widely used in restau-
rants and hotels; the size and capacity required
depend on the needs of the establishment.
BLAST FREEZERS Depending on the
model, blast freezers can drop down to −38°C /
−36°F. This type of freezer is not recommended
for storing ice cream, gelato, sherbet, or sorbet,
because at such low temperatures even the airi-
est product will harden too much. However, they
are ideal for ices. Making a granité (see page
70) in a regular freezer can be time-consuming
(close to 4 hours from beginning to end). In a
blast freezer, though, the base will go from liquid
to ice very quickly (30 to 40 minutes), but scrap-
ing has to be done more frequently to prevent
large ice crystals from forming. They are also
ideal for ice pops and other types of ices that do
not require the addition of air.
PROS
•• Outstanding freezing speed.

42 FROZEN DESSERTS
CONS
•• It takes up a lot of room. Most kitchens, let
alone pastry shops, do not have the luxury of
the space required for a blast freezer.
•• They are very loud. A compressor as power-
ful as this one is bound to make its presence
known.
•• They are expensive. Models range in price but
can run into the tens of thousands of dollars.
DRAWER FREEZERS Perhaps the most convenient freezer for service,
a drawer freezer is able to hold the same-size
pans that rest on the drawer’s rails. The drawer
slides open and closed, which makes the frozen
product easily accessible. How many pans the
freezer can hold and their size depend on the
freezer. How much product is stored in them
depends of the needs of the establishment and
the extent of the pastry chef’s menu. It is recom-
mended that these pans be made of stainless
steel and be covered with a lid, preferably a see-
through Lexan plastic lid so that the product they
contain is visible. Metal retains temperature bet-
ter than other food-safe storage, like plastic, and
is highly recommended for all machine-churned
frozen desserts and ices. Pacojet beakers are
small enough that they can be placed inside
most pans and held there for service.
PROS
•• Outstanding freezing speed.
CONS
•• This freezer will only properly hold a product
that is in a pan that is meant for its dimen-
sions. Items cannot be stacked or stored in
anything else. This is inconvenient when
space is an issue. It could be said that this is
not an all-purpose freezer.
•• Not recommended for aerated still-frozen
desserts, unless they can be placed in a pan in
a single layer, because stacking can damage
their integrity. However, this situation would
use up a lot of space.
ALL-PURPOSE/STANDING FREEZERS Standing freezers differ from
drawer freezers in that they can be considered all-
purpose freezers. This is convenient because they
can be used for more than just frozen desserts,
but if not consistently cared for, cleaned, and or-
ganized, they can turn into a mess.
The interior of a blast freezer
Drawer freezer with ice creams tightly wrapped before service

EQUIPMENT, MACHINES, AND TOOLS 43
Ideally, standing freezers will have proper
shelving and suffi cient space between shelves to
store machine-churned frozen desserts and ices
in adequate pans. Keep these pans on a sheet
pan that can be slid in and out of the freezer to
access every pan easily. Aerated frozen desserts
should be placed on a parchment paper–lined
sheet pan in a single layer. Pacojet beakers
should be placed on sheet pans as well. It is rec-
ommended to label all Pacojet beakers and pans
on the front before they are frozen or fi lled with
an ice cream, gelato, sherbet, sorbet, or ice. This
is to easily and quickly identify their contents,
but also because labeling a frozen container is
impossible because nothing will stick to it.
Standing freezers should not be confused
with chest freezers. Standing freezers open from
side to side (horizontally) and their door(s)
close easily, while chest freezers open from bot-
tom to top (vertically). Chest freezers are an
inconvenience because of the way in which the
frozen products are accessed. They usually have
a large see-through lid (or door) that needs to be
kept open with one hand (or leaning on a wall)
while the frozen product is taken out with the
other hand. Ideally all the pans will be placed in
a single layer and not stacked, but if this is the
case the depth of the freezer negates easy ac-
cess, as there is a lot of bending over involved.
Since most people in a busy service need two
or maybe three frozen products at one time to
fulfi ll an order, the door is often left open for a
longer period of time than ideal so that the con-
tents can be taken out quickly and with the least
amount of effort. Who has time to worry about a
door falling on your head when you have a din-
ing room full of people waiting for dessert?
Roll-top freezers are built similarly to chest
freezers, but have sliding doors that solve the
problem of the lid door but do not remedy the
diffi culty of accessing single-layered pans. How-
ever, they are very reasonably priced freezers.
PROS
•• The biggest benefi t chest freezers have is that
they are usually the most economical option of
all freezers.
•• Stand freezers are valuable for their versatility.
CONS
•• An all-purpose freezer can result in an over-
crowded space where products aren’t easily
accessible. Organization is key with these
types of freezers.
DISPLAY FREEZERS As the name
indicates, display freezers are intended for prod-
uct display in a retail operation. Frozen items
are placed in pans and are accessible through a
sliding door or a hinged door. The display area
should be made of glass and not plastic. The
biggest concern with these types of freezers is
condensation. The door is opened and closed
many times, and this can easily form condensa-
tion in the front display. Good display freezers
are built to prevent condensation by proper air
circulation and compressors that will quickly
compensate for any temperature changes.
PROS
•• Product can be displayed and stored in the
same place, therefore saving space and the
expense of another freezer for only storage.
CONS
•• Cleanliness must be the top priority because
it is the image of the establishment that is at
stake if the freezer is not clean. Customers will
see any kind of spot or fogging of the glass as
a negative sign, and rightfully so. If they can’t
see the product, why are they going to want
it, let alone pay for it? This is not to say that
cleanliness is not as important in the back of
the house. It is equally important, but mostly
for sanitary reasons, not visual impressions.

44 FROZEN DESSERTS
Once the product is ready for service, it is nec-
essary to have the right tools to serve it. The
following tools are described along with a few
helpful tips.
SPOONS Spoons are used to scoop
quenelles. Scooping fl awless quenelles takes a
lot of practice and patience and is the product
of an experienced hand. Many pastry cooks and
chefs opt for a two-spoon quenelle, where two
spoons are used to shape it. While this method
is certainly easier, it never looks as clean as a
single-spoon quenelle, which gives the frozen
product a smooth, seamless egg-like shape.
The size of the spoon depends on the desired
amount that will be served, but the shape of the
spoon is rather important. It should be deep
enough to scoop a nicely oval-shaped quenelle.
Flat spoons will not produce a pronounced oval
shape. Most ice creams, gelatos, sherbets, and
sorbets in this book are scooped into a quenelle
shape. Quenelles just look better because they
are more refi ned than a scooped ball and are
a display of the pastry cook’s and pastry chef’s
fi nesse and skill. They show an attention to de-
tail and care for your products, the pastry shop,
and customers.
To scoop a quenelle, dip the spoon in clean
hot water. Tap it dry and scoop from the farthest
end of the container toward you in a single mo-
tion. When the quenelle comes up to the side
of the container, gently lift it up and away from
the container. The spoon at this point will have
gotten cold and will not release the quenelle
smoothly. Rub the back of the spoon on the
palm of your hand to warm it up. Immediately
release it from the spoon in a gentle downward
motion onto the plate. It should slide right off.
Begin forming the quenelle by scooping from the farthest end of the container toward you in a single motion.
Rub the back of the spoon on the palm of your hand to warm it up and release the quenelle.
Deposit the quenelle onto a base, such as these cocoa nibs, to anchor it.
Serving Equipment
The shape of the bowl of a quenelle spoon

EQUIPMENT, MACHINES, AND TOOLS 45
Note: Whenever dipping a spoon or scoop
into hot water, make sure the water is clean and
hot (above 62°C / 145°F) and that it is circulating.
Spoons are also used for scooping granités,
but a quenelle shape is not a practical shape for
granités. Since the spoon needs to be warmed
up, it can melt the delicate ice crystals that form
the granité. A cold, clean spoon will do the job.
SCOOPS Scoops are a more practical op-
tion for scooping frozen desserts. Scoops come
in a variety of shapes, like square, pyramid,
heart, etc. There are oval scoops that look like
quenelles, but that’s cheating! There are several
different kinds of scoops:
Sweep-blade scoopSweep-blade mechanisms with a spring return in
the handle are perhaps the most common type of
scoop. They are made of stainless steel and come
in different sizes. The number that specifi es the
size of the scoop indicates the number of scoops
that can be made from a liter of product.
Spring-loaded thumb-release scoopThe ice cream is “pushed” out of the scoop by
pressing a spring-release lever that is located on
the handle and is connected to a mechanism
at the center of the scoop. The fi nished scoops
look slightly smoother than those produced by
the sweep-blade mechanism scoop.
Single-piece scoopIf used correctly, they can produce seamless spheres
or ovals. Although it takes practice to get to that
point, the results are much more refi ned than the
previous two scoops.
Ice cream spade or gelato scoopIt looks like a wide offset spatula and is used to
pack frozen desserts into cones or “to go” con-
tainers. Not recommended for plating. Its design
permits fi tting more product into a container
than a scoop, because scoops will leave empty
spaces between spheres.
PLATES AND VESSELS This refers
to any surface onto which a frozen dessert will
be placed to be served. It can be any surface, as
long as the following is considered:
•• It has to be cold enough to not melt the prod-
uct on its way from the kitchen to the table.
It should not be kept refrigerated or frozen,
because this will cause an unsightly condensa-
tion on the plate. If the vessel is deep-frozen in
a blast freezer, condensation will take longer
to occur, but timing is of the essence. The con-
sumer must be informed of this, because a wet
fi nger or hand will stick to its surface. (Be care-
ful, cold plate . . . very cold plate.)
•• It must be food safe, meaning that it won’t be
a health hazard; for example, aluminum bowls
or copper plates should not be used.
•• It should contain the frozen product. Desserts
are usually eaten with one utensil (spoon or
fork). Either the vessel should have a concave
surface or the product should be served with
other items that will keep the consumer from
chasing his or her ice cream around the plate.
The surface can be fl at, but the frozen dessert
has to stay in place or be easy enough to spoon
off the plate with little or no work. Desserts
should be a pleasure, not a chore.
LEFT: Sweep-blade scoop; RIGHT: Single-piece scoop

46 FROZEN DESSERTS
Frozen desserts can be formed into almost any
shape, but we will focus on entremets and their
internal components, known as “inserts.” En-
tremets are also known as cakes, and they are
meant to serve more than one person. Individual
versions of entremets are also possible and make
for a stunning dessert for which the pastry chefs
can put their technique and experience to the test.
The shape of the entremets is only limited
by the pastry chef’s imagination, but we will
focus on the basics.
•• Materials for molds include stainless steel,
fl eximolds, and heavy-duty plastic. Stainless
steel is the ideal material, since it retains tem-
peratures for longer periods of time. For best
results, stainless steel molds should be kept
frozen before the frozen product is poured
into them.
•• Shapes range from simple frames and domes
to more elaborate designs. Choosing the ideal
shape comes down to how cleanly the product
will come out of the mold, since air pockets
are a common problem. These air pockets are
caused by crevices, usually found in some of
the more intricate molds, where it is diffi cult to
evenly fi ll the mold.
Assembling a frozen entremet takes much
more skill and precision than assembling regu-
lar entremets. Time is of the essence because
meltdown is one of the biggest problems. Being
prepared is the only way to ensure a successful
result. For more technical information on mak-
ing, assembling, unmolding, fi nishing, holding,
storing, and serving entremets, see chapter 7,
page 101.
Molding Equipment
SanitationOne of the pastry chef’s responsibilities is to
ensure that not only is the food safe for the con-
sumer, but also that all the tools, equipment,
and machinery used to prepare food are clean
and sanitary. If you have ever experienced any
kind of food poisoning, you know how unpleas-
ant it can be.
The following information, if used properly,
will prevent any kind of food poisoning from
occurring:
•• Clean food-contact surfaces. This applies to
tools, equipment, work surfaces, and machin-
ery (see next page for cleaning batch freezers):
1. Rinse and remove excessive soil from the
surface with hot water.
2. Wash and scrub the surface with a scrub
brush, using detergent (or soap) with hot
water (at 43.3°C / 110°F or higher). The
ratio of detergent or soap to water depends
on the manufacturer. Follow instructions
carefully.
3. Rinse the surface with clean hot water (at
43.3 C°/110°F or hotter).
4. Sanitize the surface. Flood the surface with
a sanitizer solution that is 23.9°C / 75°F to
37.8°C / 100°F.
•• Sanitizer solutions should be made fresh daily,
otherwise their sanitizing effect will weaken
with time.
•• Sanitized items should be left to air-dry.
•• Tools, Pacojet components, and batch freezer
removable parts can be submerged in the sani-
tizer solution and then left to air-dry.
•• Detergents should never be combined with
sanitizers, because sanitizers will decrease the
cleaning effects of detergents and on some
occasions can produce toxic gases.
The following is a chart for the different kinds of
sanitizing solution concentrations available:

EQUIPMENT, MACHINES, AND TOOLS 47
When preparing sanitizing solution, the wa-
ter temperature must be more than 23.9°C / 75°F
and less than 48.9°C / 120°F. Commercial bleach
used for preparing chlorine solutions should
not be more than 6 months old. All sanitizing
solutions must be carefully measured. Excessive
amounts can be a health hazard.
The procedure for cleaning batch freezers is
as follows:
1. Pour hot water (43.3 C°/110°F) through the
machine’s intake. Turn the machine on without
turning on the compressor. Let it run for two
minutes, stop the machine, and drain the water
out. Repeat this operation until the water comes
out clear.
2. Pour a detergent solution through the machine’s
intake. Turn the machine on without turning on
the compressor. Let it run for two minutes, stop
the machine, and drain the water out.
3. Rinse with hot water until the water comes out
free of suds.
4. Pour a sanitizing solution through the
machine’s intake. Turn the machine on with-
out turning on the compressor. Let it run for
two minutes. Drain the liquid out. Take all of
the removable parts off (rubber seals, blade,
door, etc.) and clean as you would all tools and
equipment (see page 46). Let the interior of the
machine and its components air-dry, then reas-
semble the machine.
This procedure should be performed after
all frozen desserts have been churned for the
day. It is not necessary to do so every time a
base is churned unless there will be a signifi cant
time lapse between churnings (over four hours,
because the machine is presumably at room
temperature—the danger zone that is between
5°C / 41°F and 60°C / 140°F—and bacteria will
multiply dramatically during this period of time).
SANITIZER
USAGE: SANITIZER IMMERSION
(75°F); (1 MINUTE); PPM*
USAGE:
SURFACE PPM
USAGE:
MAXIMUM PPM
Chlorine 50 (or 1 tsp bleach per gallon
of water)
50 50
Iodine 12.5 12.5 12.5
Quaternary ammonium
compounds (a.k.a. quats)
200 to 400 200–400 200–4,000
*ppm: parts per million
Sanitizing Solution Concentrations

48 FROZEN DESSERTS
This process was developed by Louis Pasteur, who observed that wine and beer spoilage could be prevented by heating them
for a few minutes to 50°C / 122°F to 60°C / 140°F. This procedure can be done with a variety of foods, from dairy products
to fruit juices. Dairy products represent the most widespread use of this method, where the presence of Rickettsia Coxiella
burnetii, a pathogen that is highly resistant to heat, is inactivated.
The main purpose of pasteurizing is twofold: microorganism de-
struction that will result in an extended shelf life.
There are many methods for pasteurizing, but they all focus on
time and temperature. A pasteurizer is a rare sight in many res-
taurants and hotels due to its relatively high cost. Pasteurizers range in shape and size (for small-batch production, they
range from 8 liters up to 130 liters), but mostly they look like a stainless steel cube with a lid where the base is poured in and
a spout where the base is poured out once it has been pasteurized. Inside the machine is a barrel and a blade or a paddle.
The barrel is surrounded by a heating element (and in some machines, a cooling element to bring the base down to food-safe
temperatures). They have a temperature control and a timer, which can be set as desired. Always make sure to observe the
“time and temperature,” otherwise the base will not be properly pasteurized: underpasteurized bases will still contain patho-
genic bacteria, and overpasteurizing will mean that the base got too hot, to the point where it might be overcooked (proteins
will coagulate). The heating element will destroy the bacteria as the blades spin. Some machines can pasteurize up to 1 liter
/ 1.04 qt in 2 minutes, which is quite fast.
The pasteurizer will also homogenize the base, but only after it has been pasteurized and there are no live pathogens
present. Pasteurizing and homogenizing can be done by hand. It is a little more work and it takes more time, but it is cer-
tainly more economical. Pasteurizers are more commonly used for very high volume production, but if you can afford one
you will reduce production time signifi cantly.
There are batch freezers for small-batch production that can do most of the work for you, from mixing the base to
pasteurizing, homogenizing, and churning (see batch freezers, page 39). This is all well and good, but one of the most im-
portant steps in quality ice cream making is the ageing process (4 to 24 hours after the base has been made, pasteurized, and
homogenized), which this type of machine encourages you to bypass completely, since the homogenizer is located directly
above the batch freezer intake. You’d have to pour your base out, age it under refrigeration, and then pour it back into the
batch freezer if you were inclined to do the right thing (which you should!) and not take the easy shortcut.
See Chapter 4 for more on the pasteurization of dairy-based frozen desserts.
Pasteurization

EQUIPMENT, MACHINES, AND TOOLS 49
BACTERIA, VIRUSES, AND PARASITES AND FOOD-BORNE ILLNESSES Salmonella is by
far the most common bacteria found in frozen
desserts, particularly egg-based ice creams and
gelatos in which the eggs were mishandled at
some point during production (cross contamina-
tion, or they were not heated above the danger
zone during cooking).
The following is a list of bacteria, viruses,
and parasites (and their most common sources
found in ingredients used to make frozen des-
serts) that can live and thrive in frozen desserts
in their liquid state and can remain alive even
through freezing. Sanitary environments and
practices will prevent their reproduction, propa-
gation, and food contamination.
Remember: sanitation is not optional.
BACTERIUM FOOD-BORNE ILLNESS
COMMON SOURCES THAT CAN BE
FOUND IN DIFFERENT VARIETIES OF
FROZEN DESSERTS
Salmonella spp. Salmonellosis Eggs
Shigella Shigellosis Milk and dairy products
Staphylococcus aureus Staphylococcal gastroenteritis Milk and dairy products
Bacillus cereus Bacillus cereus gastroenteritis Milk and dairy products
Campylobacter jejuni Campylobacteriosis Nonchlorinated water
Shiga toxin producing E. coli Hemorrhagic colitis Contaminated water
Yersinia enterocolitica Yersiniosis Contaminated pasteurized milk;
nonchlorinated water
VIRUS
Hepatovirus or hepatitis A virus Hepatitis A Fruit and fruit juices; milk and milk
products; vegetables
Norovirus Norovirus gastroenteritis Contaminated raspberries; contaminated
well water
Rotavirus Rotavirus gastroenteritis Fruit; contaminated water
PARASITE
Giardia duodenalis Giardiasis Fruits and vegetables washed with
contaminated water
Toxoplasmosis gondii Toxoplasmosis Contaminated water
Cryptosporidium parvum Intestinal cryptosporodiosis Water; milk
Cyclospora cayetanensis Cyclosporiasis Water
Common Bacteria, Viruses, and Parasites

50
51
IT IS IMPORTANT TO UNDERSTAND THAT AN
ICE CREAM MADE IN A FACTORY that manufactures
thousands of gallons a day is not the same product as that of
a small operation. It is similar in nature and ingredients, but
there are differences that make small-batch-production ice
cream unique, and ultimately better, but with a signifi cantly
shorter freezer shelf life. While the USDA loosely regulates
industrial manufacture by providing guidelines as to what
constitutes a certain product (minimum and maximum fat
content, overrun, etc.), there is no government regulation for
small-batch production. In this chapter, all of the categories
for dairy-based frozen desserts are defi ned and explained, as
well as the different methods and machines that can be used to
manufacture them.
chapter four Dairy-Based Frozen Desserts Machine-Churned or Pacotized

52 FROZEN DESSERTS
Let’s begin with what the USDA considers
frozen desserts so that you can understand how
different their interpretation is from the one pro-
vided in this book, since the USDA defi nitions
apply mostly to commercial production. Their
defi nitions are very loose and are focused on
dairy-based products. As you will see in the next
chapter, non-dairy frozen desserts aren’t even cat-
egorized or defi ned by the USDA. The following
are the different USDA categories of frozen des-
serts, along with a brief description of each:
•• Ice Cream: Ice cream is made from cream,
milk, sweeteners, fl avorings, stabilizers, and
emulsifi ers such as egg yolks. It must contain
at least 10 percent milk fat and 20 percent milk
solids by weight.
•• Frozen Custard (French Ice Cream): Frozen
custard, also called French ice cream or New
York ice cream, has more egg yolks added to
the base than in ice cream. In either case, the
machinery employed works essentially the
same way as small-batch freezers, but is much
larger, and generally these machines do 99
percent of the work, from making the base to
packaging.
•• Low-Fat Ice Cream: Low-fat ice cream, or ice
milk, is made from milk, stabilizers, sweeten-
ers, and fl avorings, and contains no more than
3 grams of fat per 4-ounce serving (1 percent
of the total weight). Other fat-controlled cat-
egories are “reduced fat,” which should have at
least 25 percent less fat than regular ice cream,
or 2 percent of the total weight; “light,” with at
least 50 percent less fat than regular ice cream;
and “fat-free,” with less than one-half gram of
fat per serving.
•• Sherbet: Sherbet, made from milk, fruit or
fruit juice, stabilizers, and sweeteners, has
about twice as much sweetener as ice cream
in order to provide the proper texture. Since
fat is in part responsible for smoothness and
a pleasant texture, sugar is added to make up
for its absence or reduced quantities. Sherbet
must have 1 to 2 percent milk fat and 2 to 5
percent milk solids.
•• Frozen Yogurt: Frozen yogurts, containing
yogurt, sweeteners, and sometimes fl avorings,
are available in regular and low-fat varieties.
These cannot be categorized with low-fat ice
cream because of their solids content that relate
to the fat percentages listed above. There are no
specifi c standards for frozen yogurt.
Note: The USDA defi nes frozen desserts
not only by the ingredients they should contain,
but also by the amount of air that is incorpo-
rated. One gallon of frozen (churned) product
must weigh at least 4–5 pounds; in other words,
that one gallon of fi nished product can contain a
maximum overrun of 53.92 percent (the percent-
age of air it can contain per gallon maximum).
That’s it. No more. These defi nitions could
seem somewhat ambiguous. For example, ac-
cording to the USDA, ice cream can contain egg
yolks as an emulsifi er. So, technically, how is this
product different from a “frozen custard”? Also,
how can it be that there is no standard for frozen
According to the USDA, the total production of all types of frozen desserts (according to their defi nition
of what a frozen dessert is) at publication time was about 1.6 billion gallons a year, or roughly 21.5 quarts per
person, assuming that all of the ice cream produced was consumed. The United States is the largest consumer
of frozen desserts in the world. Close to 94 percent of all households consumed ice cream or other frozen
desserts during 2004, with vanilla ice cream being the most popular item (29 percent) and chocolate ice cream
coming in a distant second (8.9 percent). This amount refl ects commercially produced frozen desserts, meaning
it does not include small-batch production in restaurants and hotels. Still, these astounding numbers refl ect
the predilection that this country has for frozen desserts.
yogurt production? This lack of a standard opens
the door for a variety of manufacturing differ-
ences among frozen yogurts. And where would
the semifreddi, frozen souffl és, frozen parfaits,
and frozen mousses in Chapter 7 fi t in? In the
following text and the subsequent chapters, you
will fi nd thorough defi nitions and the correct cat-
egorization of frozen desserts that will pertain to
small-batch production. It is important to have
clear and distinct categories and to respect the
terminology so that your customers know exactly
what they are getting. If you order an espresso
granité, you expect to get what you understand
to be a granité and not the chef’s interpretation
of it. If the chef is interpreting, a name change
or at least an indication of interpretation is due
(e.g., espresso “granité”) so that it is understood
that the customer will be getting something
other than granité.
DAIRY-BASED FROZEN DESSERTS 53
ICE CREAM (a.k.a. “Standard” or “Philadelphia Style”) The term ice cream is
commonly used to refer to almost any dairy-based
frozen dessert, yet technically it is its own catego-
ry. Simply put, an ice cream is an emulsion and
then, after churning, is a foam in which the air
bubbles are stabilized by freezing a large amount
of the liquid around them. How much of the liq-
uid is frozen depends on the sugar content of the
base (see sugars, page 15).
In order to be called ice cream, the ice
cream base should contain no egg yolks (or it
would be a custard-base ice cream), and for this
reason it requires the addition of an emulsifi er
(see emulsifi ers, page 22) for optimal results.
Remember that emulsifi ers have a determin-
ing effect on the even dispersion of fat globules
throughout the ice cream base in order to pro-
duce a smooth product. Without an emulsifi er,
the texture might be grainy and icy. Ice creams
can be made from milk or a combination of milk
and heavy cream. Heavy cream is used in small-
er amounts than milk (use 2 parts milk to 1 part
cream as a rule of thumb). The addition of heavy
cream will obviously add fat, which in turn will
produce a richer texture, but not necessarily a
better one. Heavy cream is not recommended to
use alone in ice cream bases because its high fat
content will seize and harden while processing
in a batch freezer or Pacojet. The result will be a
grainy fi nished product, and that grainy texture is
congealed fat (butter).
This type of ice cream is more prevalent in
industrial ice cream production, because eggs
can raise the cost of production signifi cantly.
Custard-base ice creams are more common in
small-batch production.
CUSTARD-BASE ICE CREAM Though similar to ice cream, custard-base ice
creams contain egg yolks, which act primarily as
an emulsifi er but also add fl avor. This is the basic
distinction between custard-base and eggless
ice creams. A custard-base ice cream will have a
distinct fl avor thanks to the addition of eggs. It is
also more stable in the freezer, where it tends to
not get as icy and hard as regular ice cream be-
cause of the effect that the eggs have on the base.
GELATO The USDA has no standards for
gelato. Anyone can make an ice cream and call
it gelato. Opinions as to what makes a gelato
unique will differ. If you ask an Italian pastry
chef what gelato means, he will simply reply “ice
cream.” If you ask a pastry chef in the United
States what it means, you will have many differ-
ent opinions. Some will say that gelato should
contain no heavy cream or egg yolks, some will
say it should, and they would both be right. In
Italy, they make gelato with milk alone; milk and
heavy cream; and milk, heavy cream, and eggs.
Despite the different opinions, there is one qual-
ity that makes it unique and different from ice
cream and custard-base ice cream, and that is
its “overrun” (see defi nition on page 63). While
most ice creams and custard-base ice creams
have an overrun between 40 and 60 percent, the
overrun for gelato is 20 percent, which makes
Varieties and Defi nitions

it a denser, more compact product. If you in-
corporate any more air, it becomes ice cream
or custard-base ice cream. Some argue that
gelato has signifi cantly less fat. There is little to
no truth to that assertion and even if that were
true, a spoonful of gelato with 20 percent over-
run would have signifi cantly more or the same
fat as an ice cream with 45 percent overrun,
since there is more product in the spoonful of
gelato than there is in the spoonful of ice cream.
If there is less air by volume it means that there
is more product by volume and therefore more
fat. The production of gelato is the same; it is
the churning time that varies. With gelato it is
shorter and therefore the fi nished product will
have less air incorporated. The fl avor is the same
but the texture is vastly different.
SHERBET The term sherbet has many
interpretations as well. The USDA’s defi nition is
accurate to a point. Sherbets can be made with
milk, fruit or fruit juice, stabilizers, and sweeten-
ers. However, the simplest and most accurate
defi nition is that sherbet is an ice containing less
than 50 percent dairy in the total liquid, which
can be water, fruit purée, or fruit juice, or a com-
bination of these three items. For example, you
can make a mascarpone sherbet, as well as a
buttermilk sherbet. Sherbet should contain 1 to
2 percent milk fat and 2 to 5 percent milk solids,
so the dairy content is very small compared to
the remainder of the liquid. It also has about
twice the amount of sugar as whole-fat ice cream
so that it can form small ice crystals.
In France sherbet simply does not exist,
at least not in the way we know it here in the
United States. Sherbet seems to be unique to
the United States, where often the word sherbet
is freely and incorrectly interchanged with sorbet.
Although sherbet is not necessarily the most
popular frozen dessert in the United States,
some view it as a “healthy” alternative to ice
cream. This viewpoint may be somewhat fl awed
as well; sherbet has less fat but more sugar than
regular ice cream.
A NOTE ON FROZEN YOGURT While frozen yogurt is a com-
mon item dispensed from soft-serve machines,
it is not widely used in the restaurant and hotel
industry. A yogurt sherbet would be its ideal
replacement because it will have a better consis-
tency and fl avor than soft-serve frozen yogurt,
which is loaded with air.
54 FROZEN DESSERTS
The physical structure of ice cream is complex,
and even food chemists will agree that it is not
fully comprehended. The overall goal is to incor-
porate different insoluble materials (fat globules,
ice crystals, and air bubbles) into a liquid (milk,
for example) at the smallest possible sizes and
in the largest numbers possible. However, the
ingredients and methods needed to achieve
such structure need to be understood. In order
to make a high-quality product, the key principle
is to develop a recipe that will result in a frozen
product that has a balanced structure of ice
crystals, air bubbles, and unfrozen solids. All of
these elements contribute to not only a palatable
product but also one that is stable in a frozen
environment.
There are two phases in ice cream: con-
tinuous and dispersed. The continuous phase
refers to its unfrozen (or liquid) form, which is
an emulsion in which there is a suspension of
solids in a liquid. This is also referred to as the
base. Sugar, water, stabilizers, and milk proteins
make up the unfrozen (or liquid) solution. The
insoluble solids (fat globules) are evenly sus-
pended in the liquid. This liquid forms an emul-
sion with dispersed fat molecules.
The dispersed phase is a foam that occurs
while churning (freezing) the base. It is made up
of air bubbles evenly dispersed in the base. Each
air bubble is surrounded by a thin layer of milk
proteins embedded with fat globules. This milk
protein-fat interface between the air bubble and
the water is called the lamella. The lamella deter-
Structure

mines the size and stability of the air bubble. If
the air bubbles are smaller and there is a higher
lamella-surface-area-to-air-bubble ratio, then the
air bubbles are more stable. Fat molecules will
enhance the structure of the air bubbles as well
because they strengthen the lamella through
their emulsifi ed and tightly knit networks.
During the churning process, most of the
water freezes out of the liquid contained in the
base in the form of ice crystals. This will bring
down the freezing temperature of the remain-
ing liquid with the help of the presence of sugar.
Remember that one of sugar’s properties is to
depress freezing temperatures, keeping some
amounts of water from completely freezing.
Because of this, even in below-freezing tem-
peratures, some water will remain in a liquid
state, which will prevent the overall base from
becoming a block of solid ice. Type and tempera-
ture of the freezer both play a crucial role in the
fi nal texture of the ice cream. The faster a base
churns, the smaller the ice crystals will be.
A high-quality ice cream is one that has a
smooth mouth feel. This is determined by the
size, amount, and distribution of ice crystals.
This all comes down to structure. Small ice crys-
tals contribute to proper mouth feel, while large
crystals produce an unpleasant “iciness.” Proper
structure will have a signifi cant impact on melt-
down. When a frozen ice cream is put in an en-
vironment where the temperature is higher than
–10°C / 14°F, two things occur: the ice crystals will
begin to melt and, as a result, the fat-stabilized
foam structure will collapse. The ice crystals that
trap the air bubbles will melt and the trapped
air will escape. The warmer it is, the faster the
meltdown will be. The speed at which meltdown
happens is signifi cantly reduced when emulsifi ers
are added to the ice cream base, especially poly-
sorbate 80 (see emulsifi ers, page 22). Be assured
that even slight temperature increases will melt
the frozen product. It may not be visible, but it is
happening. Multiply those small meltdowns by
100 (assuming the frozen product is taken out of
the freezer 100 times during service, for example)
and you have a signifi cant amount of melted
product, which will become visible at this point.
The melted portion can re-freeze when returned
to the freezer, but it will freeze into larger ice crys-
tals than it originally had, giving it an icy texture.
DAIRY-BASED FROZEN DESSERTS 55
ManufactureThere are six major steps involved in the manu-
facture of dairy-based frozen desserts. These
steps hold true regardless of the size of produc-
tion. All of the items in this chapter will have to
go through all of these steps in order to produce
a quality product.
1. MAKING THE BASE: The desired ingredients
are scaled out based on formulation, and the
base is made according to the appropriate
method (see Production Techniques, page 56).
2. PASTEURIZATION: In this step, the liquid is
heated to a certain temperature for a certain
amount of time, which will destroy all patho-
genic bacteria. The preferred method for small-
batch production is known as HTST (high
temperature, short time). The base is heated to
85°C / 185°F, taken off the heat, and then stirred
for 2 minutes. This stirring accomplishes three
things: it ensures that the base is evenly pas-
teurized, that the ingredients are homogenized
(see page 56) and that certain ingredients,
such as stabilizers and proteins, are hydrated.
Another form of pasteurizing is performed
in batch pasteurizers, which have the same
purpose of killing bacteria, but the process is
slower since the liquid doesn’t get as hot as with
the HTST method. In vat pasteurization, the
mixture maintains a 65°C / 149°F temperature
for 30 minutes. This process is more conve-
nient for industrial production, where larger
amounts of liquid will take longer to bring
down to safe temperatures and the base spends
less time in the danger zone. It is also used
for bases with ingredients that are sensitive to
higher temperatures (see chapter 3, Pasteuriz-
ing, page 48).

56 FROZEN DESSERTS
3. HOMOGENIZATION: A fat emulsion is formed
through constant agitation (or stirring) of the
mix at pasteurization temperatures, because
the fat globules break up more readily and do
not tend to clump at that point. Clumps of
fat will cause a thick base, and thinner bases
incorporate air better and form smaller, more
uniform air bubbles. This in turn will make for
a smoother, more stable, and more heat-shock-
resistant product.
4. AGEING: After the product has been homog-
enized, strained, and cooled down over an
ice bath to 4°C / 39°F, it needs time to “age.”
During this time the proteins and stabilizers
get fully hydrated and the fat cools down and
crystallizes. Protein and emulsifi er networks
are developed during this time. Ageing or
“maturing” will improve the whipping proper-
ties of the base, which in turn will make for a
smooth frozen product with a high tolerance to
heat shock. Ageing time ranges from 4 hours
minimum to 24 hours maximum. If there is a
fl avor being steeped, this time will also allow it
to infuse a stronger fl avor into the base.
5. CHURNING OR FREEZING: This is the process
in which the base’s water is partially frozen
and air is whipped into the mix. This particular
process takes place in a batch freezer. With the
Pacojet, the base is frozen solid, then shaved in
the machine, where minuscule air bubbles are
formed.
6. HARDENING: When, for example, an ice cream
is extracted from a batch freezer, it is frozen,
but not frozen enough to serve. The consistency
is too soft to be scooped, since it is around
−4°C / 25°F. It needs to reach −10°C / 14°F or
a maximum of −12°C / 10.4°F to make it hard
enough to scoop easily, but still have it retain a
smooth texture. The time it takes for a frozen
product to reach this ideal temperature depends
on the freezer. A good compressor equals quick
hardening. A blast freezer set to −30°C / −22°F
will harden 2 liters (2 quarts approximately) of
fi nished product in 5 minutes. A conventional
freezer can take up to 2 hours. Do not set the
blast freezer any lower than −30°C / −22°F,
because no matter how well you made your
base and no mater what sort of stabilizers and
emulsifi ers you have added to it, it will become
too hard to scoop.
Production Techniques (Methods)There are two categories of methods used to
make dairy-based frozen desserts that will be
machined churned or pacotized. Each technique
within the categories has its purpose and place
in the pastry kitchen. The methods that are em-
ployed depend on the balance of ingredients in
a recipe, which will then determine the best ma-
chine to use. Not every establishment will have
the luxury of having a batch freezer and a Pacojet,
therefore it is important to understand the meth-
ods thoroughly before deciding on the most con-
venient one that suits a particular operation.
Note: Always use the right size equipment.
You want to have enough room in your saucepot,
bowl, and cooling-off container to work comfort-
ably and allow for the ingredients to fl ow freely.
CLASSIC METHODS There are two
classic methods that can be used to make ice
cream, custard-base ice cream, gelato, and sher-
bet. However, before deciding which one to use,
you need to determine both whether the recipe
is suited to a classic method and your personal
preferences. The biggest determining factor is
whether the base contains stabilizers and/or non-
egg/powdered emulsifi ers and whether you want
to use these ingredients. Do you like or dislike
the effect that stabilizers and non-egg/powdered
emulsifi ers have on a fi nished product? The clas-
sic methods are not recommended for bases
that contain them because the methods do not
hydrate powdered stabilizers and non-egg/pow-
dered emulsifi ers as thoroughly as the Modern
Method (see page 59) does, and therefore they do
not work to their full potential.

DAIRY-BASED FROZEN DESSERTS 57
It is highly recommended that the bases
produced with the classic methods be pacotized
for best results (see Pacojet, page 37, for detailed
information). Bases that do not contain stabiliz-
ers and non-egg/powdered emulsifi ers are prone
to have more defects than those that do. These
defects or weaknesses in the base can be cor-
rected and eliminated through pacotizing because
of the way the machine works. A batch freezer can
also be used for products made with this method
with good results, but they need to be cared for
thoroughly during service because they are more
susceptible to suffering in quality and to melting
because of the lack of stabilizers and emulsifi ers.
Don’t forget that when you pacotize items made
with this method, you should do so soon before
and throughout service to maintain an ideal
smooth texture; you must avoid pacotizing all of
your product before service because it defeats
the purpose of pacotizing. Ultimately, what will
determine which classic method to use is simply
whether the recipe has eggs or not.
Eggless Method 1. To begin the eggless method, combine all of the
ingredients in a saucepot or other adequately
sized cooking vessel.
2. Place the saucepot over high heat and whisk
continuously until the mixture reaches 85°C /
185°F. Turn the heat down to medium-low.
3. Continue whisking the base for 2 more min-
utes in order to homogenize it. It is not neces-
sary to bring the base up to a boil because the
purpose of this method is to combine all the
ingredients properly and to dissolve all of the
solids, which consist mainly of sugar. Since
these bases lack eggs, nonfat dry milk is often
added to bind the excess liquid in the mixture
in order to prevent the formation of large ice
crystals.
4. It is a good practice to strain the base through
a fi ne-mesh strainer after it reaches 85°C /
185°F to fi lter out any unwanted solids (such as
infused fl avors, like vanilla pods).
5. Immediately after straining, place the base over
an ice bath to cool down (see ice baths, page 36).
Note: Although there are only custard-based rec-
ipes in this book, it is important to understand
how to produce all types of ice cream.
Custard MethodThis method is solely used for recipes that con-
tain eggs and no stabilizers or non-egg/powdered
emulsifi ers. Don’t forget that egg yolks are the
simplest and most common form of emulsifi er.
They have been used for many years and yield
excellent results, but care must be taken not to
overcook the base, which will result in over-coagu-
lated eggs (chunky-coarse texture), but also not to
undercook the base, since eggs can be a poten-
tially hazardous food if undercooked.
1. Place milk or milk and heavy cream mixture in
a saucepot along with half the sugar. If there
are any fl avors that need to be steeped, such as
vanilla pods, this is when they are added. (For
specifi c instructions on how to incorporate
other fl avors, see “Flavors,” page 25).
2. Place the saucepot over high heat and stir for
1 minute to dissolve some, but not all, of the
sugar. The undissolved sugar will settle to the
bottom of the saucepot to prevent the milk and
heavy cream from scorching.
3. While this mix comes to a boil, place the egg
yolks and the remainder of the sugar in a bowl.
Whisk until it becomes a uniform mass.
4. Once the liquid comes to a boil, slowly pour
half of it into the egg yolk–sugar mix while
whisking constantly. This process is called tem-
pering. If you added the eggs right into the boil-
ing liquid, the high heat would coagulate them
instantly and you would have scrambled eggs.
Tempering allows a slow and steady tempera-
ture increase in the eggs.
5. Once half of the liquid has been tempered with
the egg yolk–sugar mix, pour the contents of
the bowl back into the pot while whisking con-
stantly and turn the heat down to medium or
medium low.

58 FROZEN DESSERTS
6. Stir constantly with the whisk until the mix-
ture reaches 77°C / 170°F. This will carry over
to 85°C / 185°F, which is the temperature for
pasteurization. At this temperature the mixture
reaches a consistency called nappe, or “coat.”
The proper nappe consistency occurs when
the egg proteins have coagulated enough to be
suffi ciently thick to coat the back of a wooden
spoon. A thermometer is a wiser gauge,
though, because it is an almost immediate indi-
cator that the nappe stage has been reached.
If you take the time to check if your spoon is
coated, you will have to put the whisk down,
grab a wooden spoon, dip it, check the nappe,
and assess, and in the meantime the base, even
though you may have turned the heat off, is
getting hotter from the residual heat in the pot.
This could very well overcook the base that is in
direct contact with the bottom of the pot.
7. Turn the heat off and strain the base through
a fi ne-mesh strainer into an appropriate con-
tainer and place over an ice bath (see ice baths,
page 36).
That said . . .
Is the process of tempering eggs really neces-
sary? The answer is no, not in this case. The eggs
can be added along with all other basic ingredi-
ents (sugar and dairy) from the beginning, when
the dairy is cold, and then the liquid is brought up
to the nappe stage while stirring constantly. The
same principle applies to all egg-based custards.
For many years, tempering eggs was thought to
be the only way to produce egg-based custards.
The reason why this method had its place in the
kitchen was because there was a time when the
quality of cream and milk was inconsistent, and
when heat was applied to them, curdling was a
recurring problem. This is yet another step that
pastry chefs can let go of . . . really . . . it’s okay. How-
ever, the only downside is that this process can
take longer than tempering the eggs into the base.
Temper the egg base by slowly adding the heated dairy to it while whisking constantly.
Cook the egg and dairy mixture until it reaches 77°C / 170°F.
The dairy and egg mixture has reached nappe when it has thickened enough to coat the back of a wooden spoon.

DAIRY-BASED FROZEN DESSERTS 59
MODERN METHOD This method
is used for recipes that contain stabilizers and
emulsifi ers. The temperature of the liquid as well
as the way in which the ingredients are added
is crucial in order to obtain a successful prod-
uct, as you will see below. The resulting base is
recommended for batch freezer churning (see
batch freezers, page 39), but can also be paco-
tized. Batch freezers are better suited for this
method because the stabilizers and emulsifi ers
will keep the product at an almost ideal consis-
tency throughout service. Remember that with
this method you can churn all of your products
early in the morning and they will last you all
day in the freezer without a signifi cant effect on
quality, while with pacotizing you can churn the
product at separate times during service. For the
same fl avor, you can do it right before service
and, depending on how much you sell or how
big your establishment is, you pacotize some
more beakers when you see that the fi rst beaker
you pacotized is close to being fi nished.
1. Scale all of the ingredients accurately.
2. Mix 10 percent of the sugar with the stabilizer
(which can be combined with the emulsifi er
or emulsifi ers). The emulsifi ers and stabiliz-
ers should not be added to the liquid without
mixing them with the sugar, since adding them
alone will cause them to clump. These clumps
are impossible to break down, and will render
the stabilizer / emulsifi er properties at the least
weaker than they would be in a soluble powder
form, if not useless.
3. Place the milk in a pot over high heat.
4. At 25°C / 77°F, add the nonfat dry milk and
fl avoring. From this point on, whisking should
be constant to prevent any of the ingredients
from settling to the bottom of the pot.
5. At 35°C / 95°F, pour in and mix all of the
remaining sugars until dissolved. This refers to
any type of sugar, either in solid (granulated) or
liquid form (trimoline, for example). Some reci-
pes might contain egg yolks. If so, they should
be whisked in at this temperature (see photo on
page 58). (See? It is okay to not temper the eggs
after all.)
6. At 45°C / 113°F, add the heavy cream, if using.
7. Before the mixture reaches 50°C / 122°F, add
the stabilizer–sugar mix in a slow pouring
motion while whisking constantly.
8. Bring the mixture up to 85°C / 185°F, then
remove from the heat and cook for 2 more min-
utes while whisking constantly to pasteurize
and homogenize the mixture.
9. Pass the mixture through a fi ne-mesh strainer
and chill down to 4°C / 39°F as quickly as pos-
sible using an ice bath (see photo on page 22).
If steeping fl avors, chill over an ice bath but
do not pass through a strainer until just before
churning.
10. Let the mixture mature for at least 4 hours, or
ideally for 12 hours.
11. Before churning, give the base a good stir.
12. Churn to –4°C / 25°F (see photo on page xxx).
13. Place the churned product in a –10°C / 14°F
freezer.
14. Reserve for service.

60 FROZEN DESSERTS
If using eggs, add them to the dairy base once the sugar has been incorporated and the mixture has reached 35°C / 95°F.
After mixing some of the sugar with the stabilizer, add it slowly to the heated dairy base while whisking constantly.
Pass the cooked mixture through a fi ne-mesh strainer to remove any impurities or coagulated proteins that would otherwise be noticed in the fi nished product.
After allowing the base to mature, churn it using the desired machine.
If churning in a batch freezer, the mixture should register at around –4°C / 24°F.
Extrude the fi nished product from the freezer, if needed, and hold it at –10°C / 14°F.

DAIRY-BASED FROZEN DESSERTS 61
MATHEMATICAL FORMULA-TION METHOD Using formulas is
instrumental in the creation of recipes. Once you
are familiar with how the formulas work, you will
understand the basic principles behind recipe
development. When starting out with a recipe
for the fi rst time, you must draw from experience
or at least from having an understanding of the
chemistry of all of the different ingredients that
are used and how they interact with each other.
The use of these formulas applies to the modern
method only.
There are maximum and minimum percent-
ages for each ingredient that will help start the
formulation process. These percentages are
based on weight, not volume. They are shown in
the following table.
Maximum and Minimum Ingredient Percentages for Dairy-Based Frozen Desserts Using the Modern Method
ICE CREAM CUSTARD-BASE ICE CREAM
SHERBET
INGREDIENT MIN MAX MIN MAX MIN MAX
Fat (from milk, heavy cream, butter,
egg yolks, and other dairy products)
7% 11% 2% 11% 1% 2%
Stabilizers 0.3% 1% 0.3% 1% 0.3% 1%
Emulsifi ers 0.2% 0.3% 0.2% 0.3% 0.2% 0.3%
Nonfat solids: Include all solids, even those
found in dairy, minus the fat. Remember,
solids can be found in egg yolks (50% of the yolk
is considered nonfat solids), sweeteners,
garnishes, etc. Note: Nonfat solids are used for
formulation
only; they aren’t an individual component of a
recipe.
24% 30% 15% 30% 3% 9–10%
Total solids: Includes the above plus all fats,
which can be found in all forms of dairy and
added ingredients (for example, the fat content
in milk chocolate)
31% 41% 25% 41% 20% 23%
Liquid: Refers to any and all ingredients minus
all solids, including fats
100%
minus
solid %
100%
minus
solid %
100%
minus
solid %
100%
minus
solid %
100%
minus
solid %
100%
minus
solid %
Sugar (sweetening strength, is the addition of
all sugars, solid and liquid): Remember that a
variety of sugars can be used in combination.
16% 23% 16% 23% 16% 23%
Egg yolks N/A N/A 7% 9% N/A N / A
Flavors 2% 10% 2% 10% 2% 10%

62 FROZEN DESSERTS
Through the following example, it will be easier to
understand the formulas and the process itself.
MATHEMATICAL FORMULATION
1. Determine the desired yield for the product base.
2. Calculate the amounts for each percentage from the
chart on page 61.
3. Calculate the amount of nonfat dry milk needed.
4. Determine the total weight of nonfat solids and milk.
5. Calculate the weight of the liquid.
6. Calculate the weight of the milk.
7. Calculate the dairy amount distribution.
8. Finalize amounts in the recipe.
To obtain 8000 grams of custard ice cream base,
we will start off with a desired percentage, based on
the numbers in the chart on page 61. Remember, this
is only a mathematical exercise, not a recipe per se.
Total fat: 9% of 8000 g = 720 g
Nonfat solids: 8% of 8000 g = 640 g
Sugars: 17% of 8000 g = 1360 g
Egg yolks: 5% of 8000 g = 400 g
Stabilizer: .4% of 8000 g = 32 g
Total: 39.4% of 8000 g = 3152 g
The next step is to calculate how much milk
powder the recipe requires. We fi rst need to deter-
mine the total weight of nonfat solids and milk.
720 g (total fat) + 1360 g (sugars) + 400 g
(egg yolk) + 32 g (stabilizer) = 2512 g (weight
of total solids)
8000 g of total base – 2512 g of total solids =
5488 g of the liquid or “serum”
Then use the following formula in order to calcu-
late the amount of milk powder needed for a formula:
(Required weight of nonfat solids in
kilograms) – (weight of the liquid in kilograms
x .092**) / (Weight of nonfat solids in 1 kg.
skimmed milk powder***) – .092**
** The .092 factor represents the amount of non-fat dairy
solids in liquid skim milk (9.2%); the water content is 91%
and the fat content is 0.1%.
***The weight of nonfat solids in 1 kg. of skimmed milk
powder is always 970 gr. (or .970 kg).
Based on the formula and our numbers, we
have the following:
.640 – (5.488 X .092**) =
.640 – .504 =
.136 =
.155 kg .970*** – .092** .878 .878
Therefore, the required amount of powdered
milk to add is 155 gr.
Next, calculate the amount of milk required.
1360 g (sugars) + 400 g (egg yolk) + 32 g (sta-
bilizer) + 155 g (powdered milk) = 1947 g
8000 g of total base – 1947 = 6053 g of milk
The recipe so far:
6053 g milk
155 g powdered milk
160 g vanilla beans
1360 g sugars
32 g stabilizer
400 g egg yolks
8000 g without vanilla pods
At this point, the recipe is not quite fi nished.
The amount of fat in the milk and yolks is not
enough to obtain a total of 9%. For this we need
to reduce the amount of milk and add an amount
of heavy cream. This is the formula:
x = g of milk
y = g of heavy cream
Part a) x + y = 6053
Milk contains 3.6% fat and that heavy cream
contains 40% fat. Convert these percentages into
decimal numbers and continue with the formula
this way:
Part b) 0.036x + 0.40y = 588 (this is the
amount of fat you need to obtain the
total desired amount of 720 g).
y = 6053 – x
Now perform the substitution on Part b)
.036X + .40(6053 – X) = 588 (You have substi-
tuted the value from Part a for the “y” in Part b)
.036x + 2421.2 – .40x = 588 (Now we need to
combine like terms)

DAIRY-BASED FROZEN DESSERTS 63
.036X – .40X = 588 – 2421.2
–.364X = -1833.2 G
–.364X = –1833.2
–.364 –.364
(Divide the –.364x by –.364 to leave only the
x value)
x = –1833.2
–.364
x = 5036.26 g This is the amount of milk
the recipe will require.
Therefore:
y = 6053 – x , or, 6053 – 5036 (rounded out)
= 1017 g.
Final recipe:
5036 g milk
1017 g heavy cream
155 g powdered milk
160 g vanilla beans
1360 g sugars
32 g stabilizer
400 g egg yolks
8000 g without vanilla pods
TROUBLESHOOTING YOUR RECIPE Let’s say that you aren’t 100 percent
satisfi ed with the fi nal result. First you must identify
what it is that you do not like about it. See page 65
for possible ice cream defects. If any of the defects
are present in your fi nished product and are due
to an ingredient and not a mistake in the manufac-
turing process (making the base, pasteurization,
homogenization, ageing, churning, or freezing and
hardening), then the recipe can be adjusted. Once
you have identifi ed the culprit (too much fat, not
enough stabilizer, not enough water, etc.), make
adjustments with sensible percentage increases
or decreases. For example, if the problem is the
amount of stabilizer, make percentage adjustments
in decimals (e.g., .3% to .5% or .1%), and do not
exceed the recommended percentages (see table,
page 80). Remember that you might not get the
recipe right on the fi rst try. Trial and error are an
integral part of making dairy-based frozen desserts.
Consider it a learning experience.
OVERRUN Overrun is the percentage
increase in volume from the liquid base of an ice
cream, custard-base ice cream, gelato, sherbet,
or sorbet that is a direct result of churning and
pacotizing. For example, if you started with 2 liters
of raspberry sorbet base and obtained 3 liters
after churning, the volume has increased by 50
percent. This number represents the overrun. The
50% increase in volume means that the product
now contains 33% air.
Overrun can also be calculated with garnished
bases, such as chocolate chips. The formulas on
page 61 can be used to determine overrun in a
variety of situations, assuming that the equipment
used to freeze the product performs consistently.
These two containers started with the same amount of base
but were spun for different lengths of time, trapping different
amounts of air in each one and leading to variances in overrun.
The top base was spun for less time than the bottom base,
resulting in less overrun.

64 FROZEN DESSERTS
•• Determining overrun in a frozen ice cream,
custard-base ice cream, gelato, sherbet, or sor-
bet with no garnish:
(volume of frozen product – volume of
base) / volume of base x 100% = % overrun
EXAMPLE: 1 liter plain ice cream base yields
1.75 liters of frozen ice cream
(1.75 liter – 1 liter) / 1 liter x 100% = 75%
overrun
•• Determining overrun in a frozen ice cream,
custard-base ice cream, gelato, sherbet, or sor-
bet with garnish:
Large solid particles will not be able to incor-
porate air, therefore they are not considered
in the formula. This is best explained with an
example:
4 liters plain ice cream base + 1 liter toasted
almonds results in 7 liters of frozen ice
cream
7 liters frozen ice cream – 1 liter toasted al-
monds = 6 liters of actual frozen ice cream
Then we proceed with the previous formula:
(volume of frozen product – volume of
base) / volume of base x 100% = % overrun
(6 liters – 4 liters) / 4 liters x 100% = 50%
overrun
•• If the ice cream base has a liquid fl avor added,
such as praline paste, it would dissolve into
the base (before it is churned) and air can be
incorporated into it. To determine the overrun,
use the following formula:
(volume of frozen product – (volume of base
+ volume of liquid fl avor) / (volume of base +
volume of liquid fl avor) x 100% = % overrun
EXAMPLE: 5 liters plain ice cream base + 1
liter praline paste results in 8 liters of fro-
zen ice cream
(8 liters – (5 liters +1 liter)) / (5 liters +1
liter) x 100% = 33% overrun
It is very important to calculate the overrun
on your products in order to establish consis-
tency in the fi nished product and in yield. The
longer the base churns in the batch freezer, the
more air will be incorporated. When testing a
recipe, it might take a few tries before obtaining
the desired overrun, which will depend on the
desired consistency. Once the desired overrun
is established, however, it will be suffi cient to
record the time it took from its liquid stage to
its frozen stage at the desired overrun rather
than to calculate the overrun each time that you
churn a batch of ice cream. When the product is
churned subsequently, all you need to do is set
the timer on the machine so it stops freezing
at the precise moment you’ve determined. Re-
member, though, that this only applies to items
churned in the batch freezer.
Determining overrun in a Pacojet is rela-
tively easy and is based on the same principle
and formulas as those for the batch freezer.
Pacotizing time will always be the same as long
as the machine is working correctly. If your bases
are similar in nature and the ingredients used
are more or less the same, your overrun will be
consistent in most of your frozen product. You
should, however, test the overrun at least once
for each new frozen dessert, so that you know
how much air is being incorporated into your
product. Also, if you test different recipes and
methods than you are used to, make sure you
test the overrun on the fi nished product.

DAIRY-BASED FROZEN DESSERTS 65
Potential Dairy-Based Aerated Frozen Dessert Defects
Mistakes can and will happen. Once they are made, though, it is not possible to correct them; you are better off starting over.
Don’t forget that precision, the understanding of ingredients, and knowledge and execution of method are all determining fac-
tors in the fi nished product. Defects will occur if one of the links in the chain is broken, and this can range from not scaling out
the ingredients properly to not making the base correctly to not churning it properly to not storing it in an adequate environ-
ment to not taking care of it during service. The following is a list of things that can go wrong and why they happen.
DEFECT INDICATOR CAUSES
Chunky Visual and textural: coarse texture produced by coagulated eggs
Base may have been heated too high
Grainy Visual and textural: seized fat
Visual and textural: solid powdered ingredients have clumped
Over-churning
Ingredients were not dissolved all the way or were incorporated improperly
Gummy Visual and textural Too much stabilizer
Excessive overrun
Sandy Visual and textural Product melted slightly and was then refrozen
Fluffy Visual and textural Very high overrun
Low amount of total solids
Insuffi cient stabilizer
Crumbly Visual and textural High overrun
Insuffi cient emulsifi ers or stabilizers
Low total amount of solids
Melts too quickly Visual and textural Freezer is malfunctioning
Room temperature is too high
Low total amount of solids
Insuffi cient stabilizer
Icy Visual and textural Melted to a degree after freezing and was then returned to ideal temperature
Low total amount of solids
Low protein
Insuffi cient ageing (see page 56)
Insuffi cient homogenizing
Slow freezing
Slow hardening
Inconsistent freezer temperature (temperature fl uctuations)

66 FROZEN DESSERTS
Even when you have taken all the precautions to
ensure that the fi nished product is defect-free, it
still has to sit in a freezer during service, where
the door will be opened and shut many times.
This will result in the product going through heat
shock. This is a situation where the use of stabiliz-
ers will reduce the formation of large ice crystals
due to meltdown and, as a result, the product will
stay foamed, meaning that the air bubbles will
stay in place and the texture will not be compro-
mised. To prevent any unnecessary decrease in
quality, store the fi nished product in small con-
tainers as opposed to one large container. If you
churned four liters of ice cream, divide it into four
1-liter containers instead of a single 4-liter con-
tainer. This will ensure that the product that was
churned early in the morning will have the same
quality throughout the entire day.
With a Pacojet, you have the added conve-
nience of pacotizing one liter at a time. When
you have scooped through half of a beaker dur-
ing service, it is a good idea to pacotize another
liter so that when the fi rst one runs out, you are
ready to keep going.
Other guidelines to keep in mind while go-
ing through service are:
•• Always keep your containers covered while they
are in the freezer.
•• Only open the door to your freezer to take
product out or to put it back. Be quick in
doing so.
•• Always use a clean and hot scoop or spoon.
Make sure that the hot water you use to keep
your scoops and/or spoons is always clean.
Running water is always better and more
sanitary.
SHELF LIFE The ideal holding time for ice
cream, custard-base ice cream, gelato, and sher-
bet in a −10°C / 14°F freezer is no more than 18
hours or the duration of two services (lunch and
dinner). Since some of these products will have
little or no stabilizers or emulsifi ers, they will not
withstand longer periods of time in the freezer
without a signifi cant deterioration in quality. The
products found in the supermarket freezer gener-
ally have higher concentrations of stabilizers or
emulsifi ers and/or air to prolong their shelf life
and maintain their texture and smoothness. Just
for the sake of experimentation, churn any plain
ice cream base and leave it in the freezer for two
weeks, then taste the difference.
Graininess in spun ice cream Iciness in spun ice cream
Reserving and Use During Service

DAIRY-BASED FROZEN DESSERTS 67
To maintain the highest-quality product,
make sure that the freezer did not have major
temperature fl uctuations while the product
was in it. There will have to be necessary open-
ing and closing of the freezer door to get the
product in and out of the freezer, but be careful
to make it quick to reduce the amount of heat
shock that your freezer and its contents will go
through. This is why it is important to invest in
a freezer that has a suffi ciently large compressor
that will be able to compensate for temperature
increases in short periods of time.
It is not recommended to re-churn or re-
pacotize your items to reduce food waste. Some
pastry chefs will diligently let their frozen products
thaw after service so they can be re-churned the
next day. Some with Pacojets will leave the beaker
in the freezer to harden so it can be pacotized
again the next day. While this practice might make
perfect sense to some, it really works against the
quality of the product for the following reasons:
•• While some of the air bubbles will escape after
the product thaws, there will still be some air
present in the base even in its liquid state, so
when it is re-churned, there will be more air
bubbles incorporated into the fi nished product
than you may have anticipated.
•• There may have been some accumulated con-
densation that settled on the product’s surface
while in the freezer. This adds moisture to the
base, which will turn into ice crystals once the
product is re-churned. Since the utensil that is
used to scoop needs to be dipped in hot water
in order to obtain a clean scoop, even if you tap
it on a clean towel before scooping, there will be
some unwanted water going in. This water will
also turn into ice crystals. An increase in ice
crystals will negatively affect the fi nal texture.
A more effi cient way to prevent food waste
is to estimate how many desserts you will sell
based on the expected covers you have for a
given service. How many of each dessert do you
usually sell? Does the item feature a popular
fl avor like vanilla or a not-so-popular fl avor like
mangosteen? Take the time to see how much
each quenelle weighs in its frozen form, melt it,
then weigh it again. Multiply that weight by the
amount you expect to sell of that dessert and
add 10 percent, just in case you sell more than
you expect. This will be the amount of base that
you will churn or pacotize. It is better to lose 10
percent than 20, 30, or 40 percent. An interesting
occurrence in restaurants is that your customers
might order the dessert they see on the table next
to them, because, let’s face it, most of us fall in
love with what we see more than with something
we read about, and they may also assume it is
safe to order since someone else ordered it. This
might decrease sales on the item you thought
would fl y out the kitchen, and sales for the dessert
you thought might not be very popular might sell
out before the end of service. Unfortunately, there
is nothing you can really do about this, except
churn an extra batch during service if you can de-
tect a pattern in your tickets. It might not harden
in time to serve, though, so try to keep it in one
of the colder spots in your freezer to speed up the
hardening process. How much you expect to sell
of each dessert is based on your own experience
and sales history. Some restaurant systems, such
as Micros, can be programmed to itemize the
sales of each dessert per day, week, and month.
Use this technology, if available, to help base your
calculations on this information if you aren’t sure
how much to make.
Consider other factors as well. For example,
it was supposed to be a nice sunny day, but
Mother Nature had other plans and it is pouring
outside. Two things may happen: there might
be some reservations cancelled and/or people
might not be in the mood for coconut sorbet.
This is when you have to work with the front of
the house to push the sale of those desserts
if you see that their sales are dwindling. As for
“no-shows,” there is really nothing you can do
here, except make sundaes for the staff, in which
case it won’t be a complete waste. Experience
and solid numbers are your best friends.

68
69
THE PREVIOUS CHAPTER EXPLAINS THE USDA’S
DEFINITIONS FOR DAIRY-BASED TYPES OF FROZEN
DESSERTS. Unfortunately, there are no USDA defi nitions for
non-dairy-based frozen desserts and they are not government
regulated. These are categorized in this chapter and include
sorbets, frappés, granités (or granitas), and ices.
There are a variety of defi nitions from various sources
for these products, which could leave you more confused than
informed. For example, according to one well-known dictionary,
a sorbet is similar to a frappé, is usually made from fruit juice,
and should have a mushy consistency. “Mushy consistency”
doesn’t do much justice to the consistency of sorbets, and a
frappé is in a completely different category of frozen desserts.
chapter fi ve Non-Dairy Frozen DessertsMachine Churned or Pacotized/ Scraped and Shaved

70 FROZEN DESSERTS
Speaking of granité, the same dictionary de-
fi nes granité as a frozen mixture of water, sugar,
and liquid fl avoring with four parts liquid to one
part sugar, and notes that granités are stirred
frequently during freezing to produce a slightly
granular texture. In this defi nition there is a very
imprecise ratio of sugar-to-liquid, which does not
apply to every type of granité. The ingredients
used for a granité can be as simple as a liquid
with a certain amount of sugar or as complex as
the Almond Milk Granité on page 399.
Another defi nition for granité points out
that it is an Italian sorbet popularized by Tortoni
in Paris in the nineteenth century, and defi nes it
as half-frozen, with a granular texture made of a
lightly sweetened or fl avored syrup. According to
this source, granité differs from sorbet because
it does not contain Italian meringue. Does half-
frozen also mean it’s half-melted? If so, how and
where would this product be kept? Can’t granités
be made from anything else?
All of these defi nitions have some truth to
them, but it is necessary to set the record straight
to prevent any further misunderstanding. The
following are the most accurate defi nitions for
small-batch production. They are divided into two
categories based on their production methods.
The fi rst category requires a batch freezer or Paco-
jet to be processed and includes sorbets and frap-
pés. Their texture is smooth and delicate because
when they are churned or pacotized they form
minuscule ice crystals that trap similarly minus-
cule air bubbles. The second category, granités,
ices and ice pops, need only a freezer. Ice, whether
in small but still visible crystal form or as a single
solid piece, is the desired end result. Their main
differences are in the way they are frozen, the size
of the ice crystal, and their mouth feel.
Another food enthusiast dictionary claims that sorbet is French for “sherbet” but is distinguished by the fact that
it never contains milk and has a softer consistency than sherbet. The same dictionary notes that sorbets are often
served as a palate refresher between courses or as dessert, and that they are sometimes called ices or granités. This
defi nition makes no clear distinction between a sorbet, a sherbet (which, as mentioned in the previous chapter,
must contain dairy in order to receive that designation), an ice, and a granité. Neither of the previous defi nitions
gives a solid, correct defi nition of what a sorbet is, often putting it into different categories all together.
Varieties and Defi nitionsMACHINE-CHURNED OR PACOTIZED NON-DAIRY FROZEN DESSERTS
SorbetA sorbet is an aerated non-dairy frozen product
that is churned in a batch freezer or pacotized in a
Pacojet. Sorbets are made mainly of a fruit or veg-
etable juice, a fruit or vegetable purée, an infused
or fl avored liquid, a wine, or a liqueur. They contain
a percentage of sugar (typically 25 to 32 percent for
dessert preparations; this sugar is the total sugar
that may be found in any of the ingredients, such
as a fruit purée plus the added sweetener) whose
amount is dependent on the desired sweetness
and the sweetness of the main component. In
other words, a sorbet is not necessarily a dessert.
The type of sugar (or sugars) used will depend on
the desired result and fl avor (see sugars, page 15).
An acid (generally in the form of lemon juice) is
sometimes added to intensify fl avor and control
sweetness.
The addition of stabilizers is a common prac-
tice employed to protect the quality of the sorbet
during service, but they are not an indispensable
ingredient. However, without the use of stabilizers,
the sorbet might suffer from heat shock during
service, and from freezer burn as well (see stabiliz-
ers, page 18). If stabilizers are not being used, the
sorbet base should ideally be pacotized. Remem-

ber that a Pacojet can be used during service to
process frozen items as you go and give you a
consistently smooth product, while a batch freezer
is a one-shot deal that might have a negative ef-
fect on the sorbet when it sits in a freezer for an
entire day with the temperature fl uctuating due to
use. If stabilizers are going to be added, a batch
freezer should be used (see batch freezer, page
37). Emulsifi ers are never added to sorbet bases,
since sorbets contain little to no fats that need to
be emulsifi ed.
On average, a dessert sorbet will read
between 25° and 32° Brix in the refractometer
(remember that the percentage of sugar is the
same amount in Brix degrees). A savory sorbet
should read 15° to 25° Brix. The use of a Pacojet
is highly recommended for savory sorbets. Sugar
helps the formation of minuscule ice crystals
that trap minuscule air bubbles, which contrib-
ute to the fi nished product’s smooth texture.
The Pacojet will produce minuscule air bubbles
through “drilling” no matter what the sugar con-
tent is of the sorbet. However, be advised that a
savory sorbet will have a shorter shelf life in the
freezer because, even if you pacotized it, the lack
of sugar will cause those air bubbles to collapse.
The sorbet will slowly defl ate and the product
will eventually harden completely and become
icy within an hour. Pacotize as you go.
There are some general guidelines to use
when formulating sorbet. A sorbet should con-
tain a bare minimum of 30 percent “sweet” fruit
purées (from fruits such as strawberry, mango,
raspberry, or other fruits that can be puréed) or 15
percent acidic fruit such as citrus fruits or passion
fruit. Sweeter fruits tend to contain more pulp
(or thicker body) than acidic fruits, which tend to
have a higher liquid to solid ratio. These percent-
ages are the absolute minimum needed to pro-
duce a good (not excellent) sorbet, and they are
based on the fi nished product’s weight, overrun
included, (meaning that even if you have a larger
amount of volume due to overrun, the weight will
be the same before it is churned or pacotized).
The ideal percentage of “sweet” fruits is 40 to 60
percent, and is 25 to 40 of acidic fruits. The for-
mulation for overrun that appears on page 64 in
Chapter 4 applies to sorbets as well. The param-
eters for testing overrun in ice creams, gelatos,
and sherbets is the same for sorbets.
A variation on sorbet is the spuma, or
“spoom,” which is of Italian origin. It is a sorbet
that has a measured quantity (generally about
5 percent) of Italian meringue added to it. An
Italian meringue is a cooked meringue, meaning
that sugar syrup is cooked to 120°C / 248°F and
then poured into whipping egg whites as they
reach the stiff peak stage. The heat from the sug-
ar pasteurizes the egg whites and coagulates the
albumen protein, which envelopes the incorpo-
rated air, thus making it a stable and permanent
foam. This foam, when added to a sorbet when
it is about to be extracted from a batch freezer,
will produce a very smooth sorbet. However,
as smooth as the meringue makes the spuma,
it tastes somewhat eggy and “un-sorbet-like.”
If you must add egg whites to a sorbet, always
make sure that they are pasteurized.
NON-DAIRY FROZEN DESSERTS 71
INGREDIENT MINIMUM MAXIMUM
Fruit purée (sweet fruit) 40% total weight 60% total weight
Fruit purée or juice (acidic fruit) 25% total weight 40% total weight
Dry extracts (fruit solids plus sugar and powdered glucose) 31% 36%
Stabilizer (if used) 0% 1% total weight
Percentage of sugar (or Brix) 25% (or 25° Brix) 32% (or 32° Brix)
Recommended Minimum and Maximum Percentages of Sorbet Composition

72 FROZEN DESSERTS
FrappéFrappé is the past participle of the French word
frapper, meaning “to strike or to beat.” It is so
named with good reason, because a frappé is a
combination of a fruit sorbet and another liquid
or dairy product that is mixed in a blender until it
obtains a slush-like consistency. The liquid can be
fl avored or infused water, a fruit or vegetable juice,
soy milk, wine, or liqueur. If dairy is being used,
it should be low-fat or fat-free milk or fat-free
yogurt, because if there is a signifi cant amount
of fat present, it will seize as it is processed in
the blender due to the friction of the blade. The
proportion of sorbet to the added liquid or dairy
product is not written in stone, but there should
be a majority of sorbet in the fi nished product.
A frappé should be served as soon as it is
blended; otherwise the liquid tends to separate
from the frozen sorbet. Meltdown occurs quickly
because the liquid’s temperature is much higher
than the sorbet, and since they are in direct con-
tact the sorbet’s temperature will rise as well.
Frappés are classifi ed under non-dairy fro-
zen desserts even though they might have the
addition of a dairy product because their main
component is not dairy-based, and whatever is
to be added to them is entirely up to the pastry
chef. Frappés can be savory (Bloody Mary frap-
pé, anyone?). Frappés should not be confused
with milk shakes, because milk shakes are made
with dairy-based frozen desserts (ice cream,
custard-base ice cream, gelato, and even sher-
bet and frozen yogurt) and the addition of milk
(hence the name).
SCRAPED AND SHAVED FROZEN DESSERTS
GranitésGranité is French for “granite,” and the dessert
is named for the stone because of their similarity
in appearance. It is known as granita in Italian. A
granité is a semisolid mass of small but visible
ice crystals that are formed by occasionally scrap-
ing or stirring a liquid that has been placed in the
freezer. This liquid is scraped or stirred at various
times during the freezing process to prevent the
liquid from freezing into a solid block of ice, and
so it forms small ice crystals instead. Ideally the
liquid is scraped or stirred with a fork every 15 to
30 minutes in a freezer that is set to −18°C / 0°F.
It is important not to let the semi-frozen liquid sit
for too long in the freezer, especially toward the
beginning of the freezing process. The fl avors and
sugar can separate from the remaining ingredi-
ents and then the fl avor and sweetness will not be
evenly distributed throughout the fi nished prod-
uct. Although the granité’s ice crystals should be
very small, they are still visible. This is one of the
big differences between granités and sorbets, in
which ice crystals are minuscule and should not
be visible to the human eye.
Granités are composed mainly of a fruit or
vegetable juice, an infused or fl avored liquid, or
a wine. They should never be made of a thick
purée because it will not crystallize as a liquid
would, and never with a liqueur with an alcohol
content higher than that of wine, because alco-
hol does not freeze. Granités can be made with
an infused or fl avored milk, but, again, it should
be fat-free to guarantee the proper ice crystal
formation, which fat will hinder. No other dairy
product is recommended. Granités require no
stabilizers or emulsifi ers. Ice crystal formation is
crucial, and both stabilizers and emulsifi ers will
prevent that.
Granités are generally sweetened with be-
tween 16 and 19 percent granulated sugar by
weight because it helps with crystal formation;
remember, the less sugar in a base, the larger
the ice crystals that will form. Think of sorbets
that have a higher sugar content (between 25°
and 32° Brix); this results in smaller ice crystals.
Liquid sugars will prevent solid crystal formation
and delay freezing time. Granités can be used
for desserts as well as for savory applications,

where the sugar is reduced signifi cantly, if not
completely. Savory granités should read less
than 15° Brix.
It is recommended to add a small amount
of salt (.3 percent of the total weight) to the
granité base to increase fl avor, as well as to help
in ice crystal formation. Although salt can melt
ice, it can also keep it colder for longer periods
of time if used in the right proportion. This prin-
ciple is exemplifi ed by hand-cranked ice cream
freezers, in which the ice is mixed with salt. This
initially melts the top layer, but it eventually so-
lidifi es that layer, forming a large mass of ice that
could be kept hard for extended periods of time.
Freezing a liquid granité base in a blast freezer
will greatly reduce scraping time, which is very
convenient, but care must be taken not to let the
product freeze too much before all the neces-
sary scraping is done. You will need to scrape
as often as you do with a regular freezer, but the
time that elapses between scrapings is reduced
signifi cantly, to between three and fi ve minutes
when the blast freezer is set to −30°C / −22°F.
Shaved IcesA variation on a granité is the shaved ice, which
is made by simply freezing water (or a fl avored
liquid) and then shaving the resulting ice block
with a fork, ice pick, or ice shaver to obtain
small, pure ice crystals. The shaved ice is placed
in an appropriate vessel (such as a bowl or
glass), and, once it is placed in front of the cus-
tomer, a fl avored liquid can be poured in when
using unfl avored ice. This fl avored liquid can be
anything that can be used to make a granité. In
fact, it is believed that shaved ice was the origi-
nal frozen dessert, created by the Chinese. The
Romans would pour sweet wine on top of snow
(see page 2). In some places, this is incorrectly
called a frappé.
IcesAn ice can have the same ratio of ingredients
and physical attributes as a granité as far as be-
ing water-like, but you can also freeze purée-like
bases into ices, like a raspberry ice pop. The sugar
content is what stays the same, 16 to 19° Brix, yet
it is left to freeze as a solid piece in order to make
the fi nished product. The liquid base for an ice
can also have the same components as a granité,
such as fruit or vegetable juice, an infused or fl a-
vored liquid, or a wine, but ices can also be made
with a fruit purée because purées freeze a lot bet-
ter when they are left as a solid piece.
The shape of the ice is limited only by the
pastry chef’s imagination, but it must be some-
thing that will be easy to eat. That is, it should
be easy to bite, chew, and hold and should not
make a huge mess or be awkward to eat, espe-
cially in a fi ne-dining establishment.
NON-DAIRY FROZEN DESSERTS 73
Production TechniquesThis section will cover the most effective tech-
niques used to produce the aforementioned vari-
eties of frozen desserts. There are other methods,
but they aren’t as precise and the results are just
good, not excellent.
SORBETS Even though sorbets are not as
physically complex as dairy-based frozen desserts,
they do require knowledge of various methods
and precise execution of these methods in order
to produce a high-quality product. Listed below
are three different methods for creating sorbets;
each one will produce excellent results. Choos-
ing the appropriate method will depend on the
desired ingredient, available machinery, work envi-
ronment (How effi cient is the temperature control
in your work area? Is the shop hot or tempered or
cold?), and personal taste.

74 FROZEN DESSERTS
To make sorbet using the classic method, add simple syrup directly to the fl avored base.
This is perhaps the most straightforward and quickest method used to obtain a sorbet in its simplest
form. The sorbet bases that are churned using this method contain no stabilizers, and, for that same
reason, they might not be very freezer stable. They can melt quickly due to heat shock and develop large
ice crystals during a busy service.
The basic concept behind this method is to combine the main liquid (be it a fruit or vegetable pu-
rée, a fruit or vegetable juice, any fl avored or infused liquid, or a wine) with simple syrup. There are two
key points to consider:
Classic Method: Using a Refractometer
• • The ratio of sugar to water in the simple syrup.
Simple syrup is just a mixture of water and sugar
that has been boiled to create a uniform liquid
in which the sugar crystals have dissolved. The
classic ratio of sugar to water in simple syrup for
sorbet production is 65 percent sugar and 35 per-
cent water. This will give a simple syrup at 65°
Brix. However, this ratio is not written in stone: a
50:50 ratio can yield excellent results as well. You
must keep in mind that whichever ingredient
is in the majority will have a direct effect on the
sorbet. For example, if there is too much water in
the syrup, the main fl avor will be watered down,
but if there is too much sugar, the base
will be too thick. It is recommended not to
exceed a 50:50 ratio of water to sugar in the
simple syrup and, in general, the recipes in this
book are formulated using simple syrup at 50°
Brix. Also, always add the simple syrup to the
base after the syrup has cooled down to room
temperature.
• • The fi nal reading of the sorbet base in a refrac-
tometer should be between 25° and 32° Brix,
with 30° to 32° Brix being ideal for dessert
sorbets. The ideal environment in which to
take a Brix reading is one where the tempera-
ture is 20°C / 68°F and where the liquids are
also at the same temperature. If the mixture
is too cold or too hot, the refraction will be
inaccurate. There are refractometers that can
measure no matter what the temperature of
the environment or the liquid is, but they are
prohibitively expensive (in the thousands of
dollars).

NON-DAIRY FROZEN DESSERTS 75
1. Place the liquid purée, or infusion, in a stainless
steel bowl. This main liquid should be free of
solid particles and previously strained through
a fi ne-mesh strainer.
2. If the main liquid was refrigerated, remember to
temper it to 20°C / 68°F. To temper the main
liquid, place the bowl in a larger bowl that is
fi lled halfway with warm water at 40°C / 104°F.
Stir until the main liquid reaches 20°C / 68°F.
3. Pour in some simple syrup (at 20°C / 68°F as
well) and stir with a whisk. The simple syrup
amount should be the equivalent of 20 percent
of the weight of the main liquid.
4. Take a reading with the refractometer. If the
refractometer reads below 25, add more simple
syrup. If you have gone above the desired Brix,
simply add more of the main liquid. Acidic or
bitter liquids will require more simple syrup
than “sweeter” ones, unless a more savory
result is wanted.
5. Once you have reached the desired Brix, the
sorbet base can be refrigerated (up to 3 days in
most cases) or churned.
6. Churn the sorbet base and transfer to a –10°C /
14°F freezer.
7. Let the sorbet harden in the freezer for 2 to 4
hours before serving. Reserve for service.
If using this method, pacotizing the sorbet is
highly recommended. Keep in mind that there
are no stabilizers present and the nature of the
way the Pacojet works will accommodate their
absence. By using a Pacojet, you can pacotize
beakers as you need them, thus ensuring con-
sistent quality in the product throughout service.
A batch freezer will yield good results, but if you
are working in an operation where lunch and
dinner is served, churn one batch in the morning
for lunch service and one around noon for din-
ner service. This will greatly reduce any defects
the sorbet might develop from melting and sit-
ting in a freezer with changing temperatures.
This method has effectively replaced a very
rudimentary practice of using an egg to determine
the sugar density of a sorbet. If you have never
heard of this method, it consists of combining
simple syrup with the main liquid and then, when
it feels about right, “fl oating” an egg in the mix-
ture. If the exposed surface of the egg is about the
size of a quarter (some will say a dime), then your
sorbet is ready. Needless to say, this method is
imprecise, because eggs do not weigh exactly the
same the world over, and risks introducing salmo-
nella bacteria into the base.
Modern Method #1: Using a “Sorbet Mix”
A “sorbet mix” can be used in Method #2 as a
substitute for the simple syrup used in Method
#1. This sorbet mix is a combination of granu-
lated sugar, powdered glucose, stabilizers, and
water that is added to a purchased fruit purée or
juice and, in most cases, a specifi c amount of
water, to produce a smooth and freezer-stable
sorbet. This sorbet mix can be left at room tem-
perature if it is to be used within 2 or 3 days;
otherwise it should be refrigerated. Leaving it at
room temperature for longer than 3 days may
cause the sugars to crystallize.
The recipes that follow are intended for pre-
made fruit purées and juices, which generally
contain a total of 10 percent sugar by weight.
Fresh fruit and vegetable purées, fresh vegetable
and fruit juices, infused or fl avored liquids, and
wine can be sweetened with this mix, but you
should use the refractometer method and not
the formulas provided on page 78, because
sugar content will vary from that which is found
in the pre-made variety. Remember, there is a
reason why there are specifi c amounts of sugar
in a recipe (see sugars, page 15).

76 FROZEN DESSERTS
Sorbet MixYIELD 5 KG / 11 LB .37 OZ
1955 g / 4 lb 4.96 oz water
2102 g / 4 lb 10.14 oz sugar
909 g / 2 lb .06 oz glucose powder
35 g / 1.23 oz Sorbet Stabilizer Mix (see
page 387)
1. Combine 10 percent of the sugar with the sorbet
stabilizer mix. Mix thoroughly.
2. Place the water, remaining sugar, and the glucose
powder in a pot over high heat. Stir constantly
using a whisk.
3. When the mix reaches 40°C / 104°F, slowly pour
in the sorbet stabilizer and sugar mixture as
you stir. If the mixture is poured in too quickly,
the stabilizer will clump up and therefore not
work.
4. Continue stirring until the mixture reaches
85°C / 185°F. At this temperature the stabilizers
will fully hydrate and the sugars will dissolve
completely.
5. Take the pot off the heat and transfer the liquid
mix to an ice bath. Let the mix cool down com-
pletely before you add it to the main ingredient.
6. Once you have combined the sorbet mix with the
main ingredient and water, let the mix “mature”
or age for at least 2 hours and up to 6 hours,
which is ideal. This will give the stabilizers and
sugars time to bind with the main ingredient to
produce a high-quality sorbet.
7. Churn the sorbet base and transfer to a −10°C /
14°F freezer.
8. Let the sorbet harden for 2 to 4 hours before serv-
ing. Reserve for service.
Because there are stabilizers present, the
recommended machine to churn sorbets made
with this method is a batch freezer. A Pacojet will
also produce an excellent product, and there is
the added benefi t of pacotizing as many beakers
as you need before service without having to do
so at different times during the day, because the
stabilizers will maintain the sorbet’s integrity.
Once the correct ratio of ingredients is calculated, the math-ematical formula method will yield a stabilized syrup that can be combined with a fl avored base and processed into sorbet.

NON-DAIRY FROZEN DESSERTS 77
This is perhaps the most complicated and time-
consuming method. However, if the formula is
used correctly, it will ensure that the fi nished
product is of the highest possible quality and will
last throughout lunch and dinner service without
signifi cant deterioration. This is the method that
is highly recommended if a batch freezer is the
only machine available.
This recipe combines water, a main fl avor-
ing ingredient (liquid, purée, solid, or infusion),
stabilizers, and a variety of sugars, each one
of them with a specifi c purpose. The water is
meant to be a vehicle for the dry ingredients in
order to fully hydrate and dissolve them before
the main ingredient is added. The delicate bal-
ance of ingredients and precision during manu-
facture are crucial to obtaining a successful
product. If the formulation is incorrect and/or
the ingredients aren’t handled carefully, the con-
sequences can be disastrous.
Because there are stabilizers present, the
recommended machine to use is a batch freezer.
A Pacojet can also be used to churn sorbet bases
made with this method because the stabilizers
will preserve the quality of the sorbet. You are
also afforded the convenience of pacotizing as
many beakers as you need before service without
having to do so at different times during the day.
A mix of stabilizers can be added slowly to a heated fl avored base as one modern method of sorbet production. Be sure to sprinkle the mixture slowly so it won’t clump.
Modern Method #2: Using a Mathematical Formula
Based on the table of minimum and maxi-
mum recommended percentages on the next
page, begin the formulation process. There is
an example for the formulation of blood orange
sorbet accompanying each step in order to
understand the process better. There is also an
alternate table on page 79 that encapsulates the
mathematical formulation. (Refer to chapter
2 for the required numbers for specifi c fruits,
sugars, and stabilizers with regard to their solids
content, sweetening power, etc. These numbers
will be used for the mathematical formulation.)
Mathematical Formulation

78 FROZEN DESSERTS
Maximum and Minimum Percentages for Sorbets
INGREDIENT MINIMUM MAXIMUM
Fruit purée (sweet fruit) 40% total weight 60% total weight
Fruit purée or juice (acidic fruit) 25% total weight 40% total weight
Dry extracts (fruit solids plus sugar and powdered glucose) 31% 36%
Stabilizer (if used) 0% 1% total weight
Percentage of sugar (or Brix) 25 % (or 25° Brix) 32 % (or 32° Brix)
Standard Solids
TYPE OF SOLID
ACTUAL
PERCENTAGE
ESTIMATED
PERCENTAGE
ESTIMATED
AMOUNT
ACTUAL
AMOUNT
Fruit solids %: (input manually; see fruit chart on page
412 for the list of the most widely used fruits)
10% 175 175
Glucose powder (95% solids): Glucose powder is 95%
solids and 5% water; we are using 5% of the total weight
of the recipe for glucose powder, therefore, 95% of 5% is
4.75%. This amount (237.5 g) is used to calculate these
solids, but the whole amount, in this case 250 g, is needed
to calculate the recipe accurately. This is why we have the
column on the far right.
5.% 4.75% 237.5 250
Sorbet stabilizer (100% solids): For this recipe we will
use .35% of the total recipe as the stabilizer weight;
stabilizers are 100% solids.
.35% .35% 17.5 17.5
Total weight of the above solids in grams: This is the
addition of the three ingredients above. We will use
the column on the far right (highlighted in red) for the
formula.
15.35% 15.1% 430 442.5
1. Determine the desired yield in grams. For this
example, the desired yield is 5000 grams.
2. Determine the percentage of fruit juice to be used.
For this example, we will use 35 percent as the
desired percentage, or 1750 grams. Since the
example uses blood orange juice as the base, the
percentage falls in the acidic fruit juice category
from the above table, and the percentage is cal-
culated in weight in relation to the desired yield.
3. Determine the desired percentage of solids (dry
extracts) based on the above table; 31 percent of
the total yield is 1550 grams.
4. Calculate the following standard solids. These
amounts are solids that are part of the basic
ingredients; they will be used to determine how
much granulated sugar the recipe will need.

NON-DAIRY FROZEN DESSERTS 79
Finished Recipe
The amount required to complete the desired
percentage of solids is derived from subtracting
the standard solid amount from the calculated
desired amount of total solids. This will be the
amount of sugar to add to the formula, not the
recipe.
1550 (desired amount of solids) – 430 (stan-
dard recipe solids) = 1120 g
However, since we have to use the information
from the column on the far right because the
whole weight of the powdered glucose has been
factored into it, the actual amount of sugar we
have to add is as follows:
1550 (desired amount of solids) – 442.5
(standard recipe solids with the glucose
powder water content factored in) = 1107.5
grams of granulated sugar
5. Determine the required water amount.
Desired Yield – all ingredients = water
amount
5000 g total yield
– 1750 g fruit juice
– 237.5 g powdered glucose
– 17.5 g stabilizer
– 1120 g granulated sugar
= 1875 g water
INGREDIENT
AMOUNT (IN
GRAMS)
AMOUNT (IN
POUNDS) PERCENTAGE
Purée or juice: blood orange 1750.0 3.91 35.0
Glucose powder: (Remember that this amount is from the far
right column because we are using the whole 5% of glucose
powder; the 4.75% was to calculate the basic solids in the recipe
in order to determine how much sugar to add.)
250.0 .56 5.0
Sugar 1107.5 2.47 22.15
Stabilizer 17.5 .04 .35
Water 1875.0 4.19 37.5
Total weight 5000.0 11.16 100.0
1. Determine the formula for the sorbet.
2. Scale all of the ingredients accurately.
3. Combine all of the dry ingredients in a bowl.
4. Put the water in a pot over a high fl ame and
bring it up to 40°C / 104°F.
5. Once the liquid reaches 40°C / 104°F, pour in
the dry ingredients carefully but quickly, while
whisking constantly.
6. Bring the mixture up to 85°C / 185°F and main-
tain this temperature for 2 minutes (turn the
heat off if necessary). This will allow the stabiliz-
ers to fully hydrate and all of the dry ingredients
to dissolve. Do not exceed heating time and/or
temperature, in order to prevent excess liquid
evaporation that could alter the formula.
7. Chill mixture down to 4°C / 39°F.
8. Mix in the main juice, purée, or infused liquid.
9. Let the sorbet base mature for at least 2 hours
and up to 6 hours.
10. Churn the sorbet base and transfer to a –10°C /
14°F freezer.
11. Let the sorbet harden for 2 to 4 hours before
serving. Reserve for service.
Procedure for Modern Method #2

80 FROZEN DESSERTS
Pros and Cons Recap of Each Method
METHOD #1 (REFRACTOMETER) METHOD #2 (SORBET MIX) METHOD #3 (FORMULATION)
Pros Quick and easy to make
Flavor and texture can be ideal
Quick and easy to make
Freezer stable
Heat-shock resistant
Produces consistently high-
quality products
Freezer stable
Heat-shock resistant
Cons Due to lack of stabilizers, can develop
multiple defects (see below)
Relies on the use of a refractometer,
which can be expensive
Some pastry chefs do not like
the texture that results from
using stabilizers.
Mathematical formulation
can take a lot of time and
patience.
Erroneous calculations can
have negative results on the
fi nal product (see below).
Possible Sorbet Defects
The following is a list of things that can go wrong and why they happen. Understanding the ingredients, machines,
storage, and use during service are key.
DEFECT INDICATOR CAUSES
Gummy Visual and textural Too much stabilizer
Icy Visual and textural Not enough stabilizer
Under-churned (not enough air bubbles were incorporated)
Low total solids
Slow freezing
Slow hardening
Temperature fl uctuations in the freezer (heat shock)
Not enough sugar
Fluffy Visual and textural Not enough sugar or not enough stabilizers; this usually occurs
when the sorbet is mostly fruit and nothing else.
Crumbly Visual and textural Over-churned
Hard Textural Sorbet is too old (excessive time in the freezer)
Not enough sugar or not enough stabilizers
Freezer is too cold (below −18°C / 0°F)
Low total solids
Sticky or syrupy
(seems to puddle)
Visual and textural Too much sugar. The freezing point becomes excessively depressed
and the sugar separates from the water because there is such a small
amount of water that it can’t retain the large amounts of sugar.
In these cases, whatever remains solid (frozen) is icy.
Shelf LifeSee the Shelf Life section in Chapter 4, page 66,
for additional information; those guidelines ap-
ply to sorbets as well.
The key points are:
1. Hold churned sorbets in a freezer at –10°C / 14°F
for a maximum of 18 hours or two services
(lunch and dinner). If they lack stabilizers they
can deteriorate quickly and require special
attention and care during service. Pacotized

NON-DAIRY FROZEN DESSERTS 81
sorbets should be processed every couple of
hours during the day.
2. Reduce the time the freezer door remains open.
Major temperature fl uctuations will cause the
sorbet to become icy (heat shock).
3. Make sure your freezer is working properly. A
good freezer will have a compressor that is
capable of preserving the ideal temperature
(–10°C / 14°F) throughout a busy service.
4. Do not re-churn or re-pacotize sorbet bases. Even
when they are completely melted, they will still
retain a small amount of air bubbles, which
will increase their overrun (volume) when they
are re-churned or re-pacotized, resulting in a
signifi cant impact on texture. Churn only what
you think you will need based on the item’s
popularity or sales history. Check your sales
reports for a week or 10 days, but also consider
other factors, like the weather, current events,
etc. See page 79 to determine the exact quantity
of sorbet to churn based on solid numbers.
FRAPPÉS While making frappés is not an
exact science, there are a few important points to
consider:
• • The proportion of sorbet to the added ingredi-
ent depends on the desired result, but there
should always be more sorbet. Generally, there
should be at least 2 parts sorbet to 1 part of the
added ingredient. Otherwise the frappé will be
too watered down and the sorbet’s fl avor will
not have enough presence.
• • A high-speed blender is recommended in order
to obtain a smooth frappé. A Pacojet will also
yield ideal results for frappes. All the frappes on
page 174 were processed in a Pacojet.
• • As soon as the frappé is blended it should be
poured and served, otherwise the added ingre-
dient tends to separate from the sorbet. This
creates an unappetizing watery slush in which
the sorbet isn’t uniformly blended with the
added ingredient.
• • If a dairy product is added to the sorbet, make
sure it is either low-fat or fat-free. Higher-fat-
content dairy tends to seize while blending,
creating small clusters of solid fat, because the
friction of the blades will over-whip the fat. It is
similar to what happens when you over-whip
heavy cream. Keep in mind that frappés can
also curdle if you add a dairy product such as
milk or heavy cream to an acidic fruit sorbet.
Method for Frappés 1. Combine the sorbet and the desired added ingre-
dient in a blender.
2. Blend on high speed until you obtain a uniform
mass.
3. Pour and serve immediately. Frappés have a very
short shelf life.
Frappés are usually served in a glass. A straw
is optional, but a demitasse spoon will work as
well. If there is any frappé left in the blender cup,
it is not recommended to refreeze the contents
and blend again when they have re-frozen. The
texture will be less than ideal. Instead, try to blend
only what you need so that there is no waste.
Frappés are a blend of sorbet with another fl avored liquid.

82 FROZEN DESSERTS
GRANITÉ The most important character-
istic of a granité is its texture. In Italy there are
at least three different styles: chunky and grainy,
smooth (almost like a sorbet), and one that is
a combination of both. The fi nal texture is not
written in stone and is more of a personal pref-
erence, but consider the following. In order to
obtain a granité in which the ingredients are uni-
formly dispersed, scraping should be performed
at even intervals of time before the liquid freezes
too much. The more the liquid freezes without
being scraped, the larger the ice crystals will be,
and the fl avors and sugar, which are heavier than
water, tend to settle at the bottom of the pan.
This process creates an insipid layer of ice on
top and a very sweet layer of slushy syrup at the
bottom. In order to obtain a pleasant, even fl a-
vor, it is necessary to scrape often, and this will
result in fi ne, small ice crystals.
1. Place the main ingredient in a stainless steel
bowl. The main ingredient is usually a fruit or
vegetable juice, an infused or fl avored liquid, or
a wine. The infused or fl avored liquid can be a
dairy product, generally milk (preferably low-fat
to fat-free). Heavy cream has too much fat to
produce a proper granité, because the high fat
content prevents proper ice crystal formation.
Even though granités have been classifi ed as
non-dairy frozen desserts in this book, they can
contain dairy, and they can also have savory
applications. However, these two instances are
fairly uncommon.
2. Make sure that the temperature of the main
ingredient is 20°C / 68°F. If not, temper it.
3. Add some 65° Brix simple syrup that has a tem-
perature of 20°C / 68°F. In very general terms,
a good starting point is 1 part simple syrup to 4
parts of the main ingredient.
4. Whisk the mixture thoroughly. Take a read-
ing on the refractometer. It should read 16 to
19° Brix. My personal preference is 17° Brix,
which is not too sweet but sweet enough. For
savory applications, reduce the Brix to 12 to
15° or less if desired. Always taste it to make
sure the fl avor is to your liking. It is good to
trust a refractometer, but you should be able to
trust your taste buds as well.
Stirring a granité during the freezing process prevents the liquid from freezing into a solid block.
The fi nished product should have small yet visible ice crys-tals and a semisolid consistency.

NON-DAIRY FROZEN DESSERTS 83
5. Pour the granité base into a stainless steel hotel
pan. The size will depend on the desired
amount.
6. Place the pan in a –18 C°/0°F freezer.
7. After 45 minutes to 1 hour, take the pan out of
the freezer and scrape the ice crystals that will
have formed around the rim of the pan.
8. Repeat this process every 30 minutes, always
scraping in a circular motion to ensure even
crystal formation.
9. Once all the liquid has frozen, transfer into a
4-inch deep hotel pan and cover. Return to the
freezer and reserve for service.
SERVICE TIPS
• • Divide your fi nished granité into at least two
containers. Take them out of the freezer,
alternating the containers each time. This will
reduce heat shock and meltdown.
• • Make sure the vessel in which you serve the
granité is cold but not chilled. Remember
that chilled plates will develop condensation
on them, and condensation is not a welcome
sight to a diner.
• • When a granité is served, it needs to fl y out of
the kitchen because meltdown is even quicker
than with ice cream and sorbets. Also, the
granité should not be placed directly on the
plate, but rather on another component of the
dessert. If the granité is placed on, for exam-
ple, cold lemon curd, it will last a few seconds
longer than if it sits on the plate.
• • Always remember that the frozen component
is the last thing to go on the plate. Commu-
nicate with the wait staff to be ready for you
when desserts need to be served. Watching
your beautiful dessert melt before your eyes
as it sits, waiting to be picked up, is very, very
sad. You should only scoop when there is a
runner close to the pastry station.
• • Give the granité a quick scrape with a fork
before serving to “fl uff” the ice crystals that
may have clustered during service. This will
break them up and give them an ideal texture
of loose ice crystals.
• • Time is of the essence. Have the sense of
urgency to plate your granité quickly and
make sure the establishment’s servers share
this sense of urgency not only with the savory
side, but with you as well.
• • Granités can last more time in the freezer
than sorbets and ice creams because of their
icy nature, but their small ice crystals tend to
clump up during extended periods of time.
Some pastry chefs will just re-scrape the fro-
zen granité the next day to break up these ice
clusters, and while the consistency might be
passable, it is not ideal. It is recommended to
thaw the leftover granité after service and then
to freeze and scrape the melted granité base
the next day so it will be on point for service.
SHAVED ICE Nothing is easier than
freezing water to make ice. Usually this ice is
made from pure water, but it can also be mildly
fl avored or infused. If it is heavily fl avored,
remember that the fl avors, being heavier than
water, will sink to the bottom of the ice as it
freezes, making the fl avor dispersion uneven.
The block of ice should be large enough to be
shaved comfortably. The smaller the block, the
harder it will be to shave.
1. Once the water has frozen into a solid block of
ice, shave it away from your body using an
ice pick or an ice shaver. Have a container
ready where you can place the shaved ice. This
container should be kept in ice so that as the
shaved ice is placed in it, it won’t melt.
2. Reserve the shaved ice in the freezer at –18°C / 0°F.
SERVICE TIPS
• • As with the granité, which is similar in nature,
have two containers fi lled with the shaved ice
so that you can alternate them during service
to reduce heat shock.
• • Before portioning the shaved ice into the desired
vessel, make sure that the fl avored liquid that
will be poured over it is ready to go. Also make
sure that this liquid is always kept very cold.

84 FROZEN DESSERTS
• • Plate it quickly and send it out quickly. In
many restaurants, the wait staff love to
describe the food that they are serving, and
the diners will pause and listen to them
attentively. This might be a good practice, but
advise the staff to do all their talking as the
liquid is being poured into the ice. The longer
the ice stays solid, the better.
• • After service, don’t save the shaved ice; it’s not
worth it. You can get ahead by placing water
in the freezer after service. This way you will
have a solid block of ice that will be ready to be
shaved the next day.
ICES To make an ice, follow the same pro-
cedure to make granités up to the freezing and
scraping steps.
1. Place the main ingredient in a stainless steel bowl.
The main ingredient is usually a fruit or vegetable
juice, an infused or fl avored liquid, or a wine. The
infused or fl avored liquid can be a dairy product,
generally milk (preferably low-fat or fat-free). Even
though ices have been classifi ed as non-dairy fro-
zen desserts in this book, they can contain dairy,
and they can also have savory applications. How-
ever, these two instances are fairly uncommon.
2. Make sure that the temperature of the main
ingredient is 20°C / 68°F. If not, temper it.
3. Add some 65° Brix simple syrup that has a tem-
perature of 20°C / 68°F. In very general terms,
a good starting point is 1 part simple syrup to 4
parts of the main ingredient.
4. Whisk the mixture thoroughly. Take a reading
on the refractometer. It should read 16 to 19°
Brix. My personal preference is 17° Brix, which
is not too sweet but sweet enough. For savory
applications, reduce the Brix to 12 to 15° or less
if desired. Always taste to make sure the fl avor
is to your liking.
5. Once the ice mix is made, pour into the desired
mold. Don’t forget that an ice should be easy
to eat (not awkward or uncomfortable) and
small enough to bite into without falling apart
or making a mess on the diner’s clothes. Keep
this in mind when deciding on a mold. Using
a lollipop or Popsicle stick is a good idea if the
ice is large enough to be eaten in two or more
bites. Otherwise, the diner will be chasing the
ice around the plate, and a fork or spoon is not
the best utensil for eating a solid piece of ice.
You don’t want to force your customers to use a
knife to cut through the ice, either. Remember
that form always follows function, not the other
Shaved ice is produced by allowing water or a fl avored liquid to freeze solid, then shaving the ice block with a pick or ice shaver.

NON-DAIRY FROZEN DESSERTS 85
way around. Also, remember that during freez-
ing, fl avors and sugars that are heavier than
water will result in an uneven fl avor distribu-
tion, since they tend to settle at the bottom of
the mold. This is yet another reason to keep
your ices small, so that they can be eaten whole
and the fl avors will meld in the mouth.
6. Let the ice freeze at –18°C / 0°F until solid. This
will only take a fraction of the time in a blast
freezer that it takes in a regular freezer.
7. Once the ice has solidifi ed, it can be taken out of
the mold, but it should be done at the very last
minute to prevent freezer burn on your ice. If
you do choose to keep all of your ices out of the
mold, make sure they are properly covered so
that they don’t take on a “freezer taste.” If you
are reserving them for longer periods of time
(more than 18 hours), make sure that they are
kept in the mold in which they are frozen.
9. To unmold, place the ice mold into a warm water
bath and let sit for a few seconds to ensure that
the ice will be released in one piece.
SERVICE TIPS
• • Usually the ice will be very hard when it is fi rst
removed from the freezer. Allow it to sit for 5 to
8 minutes before it is served, so it can soften a
little and therefore be more palatable and easy
to eat. If it’s too cold, a person’s tongue can eas-
ily stick to the ice.
Ices can have a shelf life of 2 or 3 days. If
you choose to keep them for this long, make
sure that they are kept in the mold in which they
were frozen, to prevent freezer burn and unwant-
ed fl avor absorption. This can occur even when
they are tightly wrapped during long periods of
time (over 18 hours or two services).
Ices are produced by freezing fl avored liquids into a solid form, such as the Spiced Merlot used to make this ice pop.

86

87
THE VARIETIES AND DEFINITIONS OF AERATED
STILL-FROZEN DESSERTS TODAY HAVE BEEN
LIBERALLY MISUSED AND CHANGED FROM THEIR
ORIGINAL DEFINITIONS. There is no USDA defi nition
for them, and even in France, where the majority of them
originated, there is no legislation on their defi nitions. In France
they actually fall into a category they call “non-controlled,” but
they are protected by “legal stipulations” and “general custom
within the trade,” which might sound a little contradicting.
What one pastry chef thinks of as a frozen parfait is not
necessarily what another one does, for example. What is known
as a parfait in France may not be known as a parfait in the
United States. For accuracy’s sake, the defi nitions used in this
book were taken from their country of origin.
chapter six Aerated Still-Frozen Desserts

88 FROZEN DESSERTS
All still-frozen desserts have at least one
ingredient that has the capacity to foam. It can
be eggs, egg yolks, egg whites, or heavy cream,
alone or in combination (e.g., whipped heavy
cream and whipped egg whites). The desired
texture of this type of dessert is similar to ice
cream; it must be smooth in a frozen state. This
smoothness is determined by the foam. Techni-
cally, a foam is the dispersion of air (or gas) in
a liquid. This applies to any foam, like the foam
on top of soda pop, the foam in a bubble bath,
or whipped egg whites. During whipping, air or
gas is dispersed into bubbles. These bubbles
may have a very short life span if there are no
proteins present to stabilize them. They will fl oat
to the top while the water that surrounds them
drops to the bottom, and at this point they begin
to defl ate rather quickly. The interface (or surface
of the bubble) is very fragile and can easily pop.
Proteins trap the air bubble by surrounding
it and vary from ingredient to ingredient. Egg
whites contain albumin, egg yolks contain leci-
thin, and heavy cream contains fat molecules.
Milk, which contains whey protein, can also be
foamed, but because the proteins are very sparse
(about 3 percent of the total weight of milk as
opposed to egg whites, which are 10 percent
protein), milk foams have a very short life span.
Milk is foamed usually through steam (think of
coffee drinks like cappuccino), and this steam is
what disperses the air into the milk. Milk foams
should be served as soon as they are foamed so
that they don’t lose signifi cant volume. However,
the addition of a protein, such as powdered soy
lecithin, will make for stable and voluminous
milk foam.
This category of frozen desserts distinguishes itself by two basic factors. The fi rst is that the product is
aerated before it is frozen. Remember that when an ice cream is churned in a batch freezer, it is not only
freezing, but it is also being foamed through the beating of the blade. This results in the incorporation of
minuscule air bubbles that contribute to its texture. Aerated still-frozen desserts have at least one foamed
ingredient (see foaming principles of ingredients, page 91), which can be heavy cream and/or egg whites,
egg yolks, and/or whole eggs, as a major ingredient (to provide a smooth fi nal product) that is folded into
another set of combined ingredients we will refer to as the “fl avor base” (fl avored pâte à bombe, fruit purée or
juice, custard such as crème anglaise, chocolate, etc.). The second distinct characteristic is that the products
are frozen in a freezer, not a batch freezer, hence the name “still-frozen.”

FROZEN PARFAIT In French, parfait
means “perfect.” It is composed of a cooked egg
yolk foam (pâte à bombe, cooled to room tem-
perature) or an Italian meringue, a whipped heavy
cream foam (which will be the dominant foam),
sugar, and a fl avor base, usually a fruit purée or
chocolate, melted but then cooled. In the United
States, a parfait is served in a tall glass and is lay-
ered with fruit and sauces and is not typically fro-
zen. In France parfaits are poured into a mold and
then frozen. It is not written in stone that a parfait
must be served in a glass or mold. It can be
frozen into a desired mold (such as a sheet pan
extender or terrine mold) and cut into the desired
shape. The vessel does not make the parfait, the
ingredients do. Proper foaming is crucial, as is in
all frozen desserts.
BOMBE Bombe is the French word for
“bomb.” It has the same components as a
frozen parfait, but with 50 percent more heavy
cream. The fi nished base is poured into a dome-
shaped mold, which is how it got its name.
Thanks to this term, many desserts that have a
dome shape are called bombes.
AERATED STILL-FROZEN DESSERTS 89
Varieties and Defi nitions
Parfaits are characterized by their airy, porous texture and richness, both a factor of the addition of egg yolk foam.
A bombe, a reference to both a frozen dessert and a shape, contains a high percentage of heavy cream and is molded into a demi-sphere shape.

SEMIFREDDO Semifreddo is the Italian
word for “semi-cold” or “half-cold.” It is a par-
tially frozen dessert that is made from all three
foams—yolks, whites (French meringue), and
whipped heavy cream—plus the addition of fl a-
vor typically added in a liquid form, which makes
it incredibly light. Even though it is frozen, it
gives the impression of not being completely
frozen when you taste it, hence the name. It is
usually frozen and served in a vessel (cup, glass,
bowl), but not necessarily. As with a parfait, it
can be frozen into any mold (such as a sheet
pan extender or terrine mold), then extracted
and portioned into the desired shape and size.
The French equivalent is known as a biscuit
glacé or ice-sponge. In Spanish they are known
as semifríos.
FROZEN SOUFFLÉ The word souffl é
is the past participle of the French verb souffl er,
which means “to blow up” or, more loosely,
“to puff up.” This defi nition is intended for hot
souffl és, which contain an egg white foam that,
when baked, puffs up and is very light in texture.
Frozen souffl és contain an egg white foam and
are made to resemble a hot souffl é. The mixture
is placed in a ramekin or souffl é mold, whose
height is increased by a band of parchment pa-
per or aluminum foil, and then frozen. Once it
is frozen, the band of paper or foil is taken off so
that the souffl é rises above the level of the mold,
looking like a hot souffl é does when it comes out
of the oven.
A frozen souffl é can be made with a combi-
nation of foams, such as whipped heavy cream
and egg whites or egg yolks and egg whites,
but never the three together, and a fl avor base,
usually a fruit purée or chocolate. A souffl é is
distinguished by containing a large proportion of
foamed egg whites (French or Italian meringue)
in relation to its other components, which will
give it a very light texture, even when frozen.
FROZEN MOUSSE Mousse is a French
term that means “foam” or “froth.” A frozen
mousse is composed of two foams: either an egg
yolk foam and whipped heavy cream, or an egg
yolk foam and an egg white foam, plus a fl avor
base (fruit purée or chocolate). Typically a frozen
mousse will contain equal parts of the combined
90 FROZEN DESSERTS
Semifreddos combine all three foams, giving them a light, “half-frozen” feel on the palate.
Work quickly with frozen mousse to minimize the risk of defl ation.

foams and the fl avor base (1:1 ratio), which makes
it the densest aerated frozen dessert.
A recipe for mousse that is intended for
refrigeration should not be frozen. If you have
such a recipe and you want a frozen version of
it, you must adjust your ratio of foam to fl avor
base, as more foam is required for a frozen item
in order for it to give you a smooth consistency.
Also, don’t forget that refrigerated mousses of-
ten contain gelatin, which helps the foam remain
stable in those temperatures. A frozen mousse
does not require gelatin, because once the foam
is frozen, the air bubbles will stay in place.
AERATED STILL-FROZEN DESSERTS 91
Production TechniquesFOAMING PRINCIPLES OF INGREDIENTS
Heavy CreamBesides using the freshest possible heavy cream,
it is crucial to always keep it very cold (at least
4°C / 39°F or colder, without freezing). This
includes the fi nal stage when the heavy cream
is actually whipped, or otherwise it will lose its
volume. Air is incorporated through whipping,
either by hand using a whisk or using a mixer
with the whip attachment. As the air is incorpo-
rated, the fat molecules (protein) latch on to the
interface (or surface) of the bubble. First, the
whipping motion physically destabilizes the fat
molecules by breaking them down. These bro-
ken-down particles either cling to an air bubble’s
surface or to other broken-down fat molecules,
thus creating an even, stable network where the
bubbles will not fl oat to the top. These fat mole-
cules reinforce the bubble’s surface because they
surround it completely, trapping the bubbles.
However, excessive whipping will force the fat
molecules to continue to gather, forming large
clusters of fat that are not capable of clinging to
the air bubbles any further, so they escape and
the mixture loses volume. With continued whip-
ping, the congealed fat clumps will continue to
separate out of the mixture; in a nutshell, this is
how butter is made.
Ideally, for still-frozen desserts that require
whipped heavy cream, it shouldn’t be too stiff.
An adequate consistency would be semifi rm so
that it can be gently folded into another semiliq-
uid ingredient; the ingredients will incorporate
much easier when they are of similar (but not
identical) consistencies (the whipped cream
should be slightly stiffer). When the heavy cream
is too stiff, even if it has not been over-whipped,
it will crumble and break apart instead of mix-
ing uniformly. This will result in loss of volume,
which will have a negative effect on the smooth
consistency of the fi nal product.
It is worth repeating that you must always
keep your heavy cream cold. When whipping
small amounts by hand, it is a good idea to place
the bowl on top of an ice bath while whipping to
Heavy cream’s ability to hold onto air when whipped makes it a great aerator so long as your base remains cold at all times.

92 FROZEN DESSERTS
ensure that it will stay cold. When whipping
larger amounts in a mixer, always whip on medi-
um-high speed so that the time the heavy cream
spends out of refrigeration is reduced to a mini-
mum. Once the heavy cream is whipped, return
it to the refrigerator, or use it in the desired prod-
uct right away to prevent volume loss. When it
sits at room temperature, the fat globules will
begin to soften and will eventually be too weak
to keep the air bubbles trapped.
Note: It is a common practice to use heavy
cream stabilizers, which are available in liquid
and powdered form and are inexpensive. Some
pastry chefs do not use them because they
believe they impart an unpleasant fl avor, or be-
cause they believe that if you are a good enough
pastry chef, you don’t need them. Regardless,
these stabilizers will keep heavy cream foamed
at the desired volume for long periods of time
(as long as the product itself has not started to
turn or spoil). When whipping large amounts
of heavy cream and producing large amounts
of desserts, the stabilizer is a very convenient
product because there will be minimal defl ation
when the foamed heavy cream needs to sit at
room temperature while you are portioning your
base into a mold for a prolonged period of time
(or however long it takes to complete the task).
Make sure you check the ingredients in the sta-
bilizer; if it contains sugar or artifi cial fl avorings,
you may want to alter your recipe or switch to
another brand.
Egg WhitesWhile heavy cream requires cold temperatures
to whip properly, egg whites are best whipped at
room temperature or above (60°C / 140°F maxi-
mum), without reaching coagulation tempera-
ture (62°C / 145°F). The reasoning behind this
principle is that the globulin (a protein found
in egg whites) is more relaxed at warmer tem-
peratures than when it is cold. Cold egg whites
can certainly be foamed to full volume without
a hitch, since the whipping action (friction)
will warm them up rather quickly, but warmer
egg whites will foam much faster. Some chefs
like to use older egg whites because they claim
that they are looser (thinner) and are therefore
easier to whip. All eggs are alkaline, especially
the egg white portion (at a pH of 8 when they
are at peak freshness), and they become more
alkaline as they age, but alkalinity is only good
is for obtaining volume quickly, not for stability.
Increased alkalinity negatively affects the stability
of a foam. A fresh egg white will produce a much
more stable foam, but it will take longer to reach
its maximum volume. When the egg whites are
beaten, the globulin proteins, which are tangled
in their original state, will unfold easily into
strands. These strands group around the inter-
face of the bubble, trapping it. A solid network
of protein strands holds water and air in place,
evenly suspending the bubbles in the liquid.
The ideal vessel for whipping egg whites is
made of copper and silver, because these met-
als react with the sulfur present in egg whites to
form very strong and stable protein bonds very
quickly. The downside of using copper is that it
can be hard to maintain, because it needs to be
specially cleaned after each use. Lemon juice
and salt do a beautiful job of cleaning. The bowl
should be properly washed before applying the
Egg whites can be whipped using a variety of hot or cold methods, yielding a strong, versatile aerator. These egg whites are whipped to stiff peaks.

AERATED STILL-FROZEN DESSERTS 93
lemon juice and salt. Once the lemon juice and
salt have cleaned the bowl, rinse out with cold
water and dry thoroughly. This procedure might
need to be repeated before using the bowl again.
A good substitute for a copper bowl is add-
ing food-grade copper powder;1 gram/.035 oz
per 1,000 grams/2 pounds 3.27 ounces of egg
whites yields excellent results. Stainless steel
bowls are also recommended and are much
more economical. However, the foam will take
longer to form because egg whites do not react
with stainless steel. Never, ever use a plastic
bowl to whip egg whites, because the surface
of plastic is porous and can harbor debris (and
fat), which can hinder foaming signifi cantly (see
below). Whatever material you choose, make
sure that the bowl will be big enough to hold
eight times the volume of the egg whites. If you
are whipping by hand, use a balloon whisk or
a piano whisk, which will incorporate air much
more effi ciently than a stiff French whisk.
Cream of tartar and even lemon juice can be
used to help stabilize egg white foams. They are
both acids that enforce the sulfur and hydrogen
bonds that contribute to effective foaming (in egg
whites only). When they are not used, the sulfur
found in egg whites tends to separate itself from
the hydrogen. Acid keeps these bonds together
throughout the whipping process. Another effect
of acid on proteins is that it promotes coagula-
tion. (Think of what happens when raw fi sh (a
protein) is marinated in lime juice (an acid) to
make seviche. The lime juice “cooks” the fi sh.)
After the protein strands unfold because of the
agitation from whipping, the cream of tartar coag-
ulates the protein that surrounds the air bubble,
trapping it more effectively. Of course, it is a very
small amount that is added to the egg white (15
grams/.53 ounces of cream of tartar per 1,000
grams/2 pounds 3.27 ounces of egg whites),
and it is added at the beginning of the whipping
process. The coagulation effect is minimal, but
is suffi cient for stabilizing purposes. If too much
acid is added, it could fl avor the foam, and then
the amount of acid could over-coagulate the pro-
teins before they have enough time to unfold and
trap air bubbles.
Egg whites are beaten to three different
peaks, each one with its own particular stiffness.
The stages are soft peak, medium peak, and stiff
peak. In order to determine the peak, the whisk or
whip that is being used is taken out of the bowl
and held upward. The meringue that is at the top
of the whisk or whip will show the stage of the
peak. At soft peak, the foam retains some of its
shape but the peak droops down quickly. At me-
dium peak, the meringue peak will slowly droop
down halfway, without drooping all the way down.
At stiff peak, the egg whites have increased in vol-
ume eightfold from their original volume, and the
peak will hold without drooping at all (see photo
at left). When egg whites are over-whipped, the
proteins are over-coagulated, forming bonds that
are too tight, and instead of stabilizing the foam,
they squeeze the water out between the bubbles,
sending the bubbles up to the surface while the
water separates to the bottom of the bowl.
Sometimes egg whites take too long to whip
or do not whip at all. The following factors might
be the culprits:
•• Salt: Salt decreases the foam’s stability and
prolongs whipping time by weakening protein
bonds. Salt needs a place to go too, and lodging
itself between protein bonds is just as good a
place as any other. But salt in small amounts is
necessary for fl avor. It will disperse itself very
well in the foam; in small amounts it does no
harm at all.
•• Fat: Fat molecules, from ingredients like oil
and egg yolks, hinder proper foaming because
they will interfere with egg white proteins
while they are trying to latch on to an air bub-
ble. While it is possible to obtain a good foam
even with a small amount of egg yolk or other
fat present, the whites will take longer to whip
and the foam will not be very stable. It will
quickly defl ate.
•• Water: Some water can actually help produce a
very good foam because it lightens the viscosity
of egg whites, but too much water will dilute
the egg whites to the point where the ratio of
proteins to water is too small for a good foam
(very few proteins to too much water).

94 FROZEN DESSERTS
•• Sugar: Care must be taken to add sugar to egg
whites at the right time. If they are added too
early (before beginning to whip), the sugar
will weigh down the foam and will drastically
slow down the foaming process. For specifi c
instructions on how to add sugar to each type of
meringue, continue reading.
The combination of sugar and egg whites
will result in a meringue, where the typical ratio
of sugar to egg whites is 2:1. There are three
basic types of meringues: French or Common,
Italian, and Swiss. One practice that will create a
more stable foam is to add powdered egg whites
to the foam. The recommended amount to add
is 1 percent of the total weight of the egg whites.
Powdered egg whites contain all the protein and
none of the water of fresh egg whites. The addi-
tion of proteins will create a much more stable
foam because there will be more proteins trap-
ping the air bubbles, therefore reinforcing the
bubble walls further. It will not affect the fl avor
or consistency of the meringue. Be careful not
to confuse powdered egg whites with meringue
powder, which contains large amounts of sugar.
FRENCH OR COMMON MERINGUE
(UNCOOKED) The egg whites must be at
room temperature when beginning the French
meringue. Add cream of tartar and begin whip-
ping at high speed. Once the egg whites have
quadrupled in volume, pour the sugar in slowly
down the side of the mixing bowl. If the sugar
is added all at once, it will defl ate the already
formed foam and the whipping time will be
greatly increased. Some pastry chefs will opt to
pour the sugar in when the egg whites are al-
most done whipping. While this will reduce de-
fl ation and whipping time, it will not dissolve the
sugar, resulting in a grainy foam that is not very
stable. Use a very fi ne granulated sugar (such
as superfi ne or baker’s) so that it can be easily
incorporated and quickly dissolved in the egg
whites. The larger the sugar crystal, the longer it
takes to dissolve.
Check the peak by taking the whip or whisk
out of the bowl and standing it upright. If the
peak does not move, you have obtained maxi-
mum volume. If the peak leans downward, you
have not obtained enough volume. Continue to
whip until you reach maximum volume. If the
foam looks grainy and not smooth, you have
over-whipped your egg whites, and at this point
there is nothing you can do to fi x them. Start
over; egg whites are not that expensive.
This meringue is not considered food safe
unless pasteurized egg whites are used. Pasteur-
ized egg whites usually contain stabilizers, which
make for very good foams, but keep in mind
that they whip much faster because of this, and
over-whipping can easily occur. For the frozen
desserts in this book that contain a French me-
ringue, always use pasteurized egg whites.
A combination of sugars can also be used
to make French meringue. You can make a me-
ringue that is one part egg whites, one part gran-
ulated sugar, and one part confectioners’ sugar.
The confectioners’ sugar needs to be sifted and
should be added once the egg whites have been
whipped with the granulated sugar to stiff peaks,
since granulated sugar takes longer to dissolve
into the egg whites and confectioners’ sugar
will dissolve almost on contact. Confectioners’
sugar is a great stabilizer, but it won’t produce
very good results if this meringue is used for any
other purpose than to make crisp meringues in
the oven. Since 3 percent of the total weight of
the sugar is cornstarch, which is added to keep
the sugar’s very fi ne crystals from absorbing too
much moisture from the environment, French
meringues with confectioners’ sugar will make
the frozen dessert taste mealy because you taste
the uncooked starch.
French meringues are usually added to
another ingredient (e.g., souffl és, French maca-
rons), but they can also be dried in the oven to
obtain a crisp meringue, or even poached or
steamed (e.g. fl oating island).
ITALIAN MERINGUE (COOKED) Italian me-
ringue can be the most complicated of me-
ringues to produce. It consists of cooking sugar
to 121°C / 250°F, or the “soft ball” stage, using
the wet method (combining the sugar in a pot

AERATED STILL-FROZEN DESSERTS 95
with enough water to moisten all the sugar to
obtain the consistency of wet sand). While the
sugar is reaching the soft-ball stage, room-tem-
perature egg whites and cream of tartar need
to be whipped to the stiff-peak stage. When the
sugar is at the right temperature and the egg
whites have reached their maximum volume
(stiff peaks), the sugar syrup is poured down the
side of the bowl as the egg whites continue to
whip. Once all of the sugar is incorporated, the
mixture needs to continue to whip until it has
cooled down to room temperature. This me-
ringue is considered to be pasteurized because
the heat from the sugar will eliminate any bac-
teria. It is also a very stable meringue because
the heat from the sugar coagulates the proteins
in the egg whites, which traps the air bubbles
almost immediately. Remember that coagulated
proteins will keep the air bubbles trapped better
than “soft” proteins.
The tricky part is coordinating the cooking
of the sugar with the whipping of the egg whites.
No matter how experienced you are, it is almost
impossible to do so. But there are ways of con-
trolling both the cooking sugar and the whipping
egg whites. Begin whipping the egg whites on
medium speed at the same time you start cook-
ing your sugar. Have an ice bath ready. It should
be big enough to comfortably fi t the pot in which
you are cooking the sugar. When your sugar has
reached 115°C / 240°F, increase the speed of the
mixer to high. When the sugar reaches 121°C /
250°F, take the pot off the heat and shock it in
the ice bath. This will keep the sugar at a liquid
consistency, but cooking will be stopped. Wait
for your egg whites to reach stiff peaks and im-
mediately pour the sugar down the side of the
bowl and whip until the foam has cooled to
room temperature.
This meringue has many uses, from
straightforward crisp meringues to marshmal-
lows and, more important for us, parfaits. The
only inconvenience when it comes to an Italian
meringue is not really an inconvenience, it is
merely the fact that it is more technically ad-
vanced than other meringues and it takes a few
tries to get it right; for the same reason, it is really
easy to make a mistake. Typically a foam that
has gone wrong is impossible to fi x and you will
need to start over again.
SWISS MERINGUE (COOKED) Swiss meringue
is simply a cooked French meringue. It consists
of combining sugar, egg whites, and cream of
tartar in a mixing bowl, and then placing this
bowl over a hot water bath. The mixture is con-
stantly whisked until it reaches a temperature
between 57°C / 135°F and 60°C / 140°F. Do not
exceed 60°C / 140°F to prevent over-coagulating
the egg whites (remember that egg white pro-
teins cook at 62°C / 145°F), but do not stop at
a temperature lower than 57°C / 135°F, because
bacteria will not die below those temperatures,
and part of the purpose of cooking egg whites
like this is to pasteurize them. Of course, if you
are using pasteurized egg whites you do not
need to worry about bacteria, just overcooking.
If using pasteurized egg whites, heat them to
60°C / 140°F, which will warm up the egg whites
and dissolve the sugar at the same time.
The meringue can be taken off the heat
once the sugar has dissolved and the desired
temperature has been reached. Some pastry
chefs opt to whip the foam directly over the hot
water bath until it reaches stiff peaks. That is a
good idea if you are making very small amounts,
but for larger amounts it is more effi cient to fi n-
ish the whipping process in a mixer. This way
it will whip to stiff peaks and cool down much
faster.
This meringue is food safe, and it can be
added to other ingredients or dried in the oven
to obtain a crisp meringue.
MERINGUE WEEPING Meringue weeping is
characterized by small droplets of water that
accumulate on the surface of the meringue.
Weeping is caused by over- or under-whipping
the egg whites and by the sugar not having been
completely dissolved into the egg whites. This
weeping is seen only when baking plain me-
ringues of any kind (French, Italian, Swiss), and
it can be triggered by high oven temperatures.
For this reason weeping will not be evident in a

96 FROZEN DESSERTS
meringue that will not be baked. Weeping will
also make the meringue crack while it bakes (or
dries) in an oven.
Egg YolksYolks, because of their high fat content, take
longer to whip than whites and will not gain a
signifi cant increase in volume. They might whip
up to four times their original volume, but only
if there is a liquid, such as water, added or if they
are whipped over a hot water bath. It is almost
impossible to over-whip egg yolks, because,
although they have a large amount of proteins,
egg yolks lack the water content that egg whites
have (by about half) and their proteins are very
tightly bound to each other. Whipping alone will
not make enough of the proteins unfold (as hap-
pens when whipping whites) and trap air bub-
bles effi ciently. When a liquid is added, it makes
the proteins lighter and helps untangle them, so
they will trap air bubbles easily. However, if heat
is not applied, this foam will collapse quickly.
Therefore, whip the egg yolks over a hot water
bath, and as the air is trapped in the water by the
yolk’s proteins, the heat will help coagulate these
proteins around the bubbles, creating a stable
foam. When yolks are whipped without the ad-
dition of a liquid and indirect heat (hot water
bath), their volume will increase by only two to
three times their original volume. Be sure to nev-
er stop whisking your egg yolks when they are
cooking over a hot water bath. Otherwise they
will coagulate in large clusters around the rim
of the bowl and will not result in a very smooth
fi nished product. Having one of those chunky
clusters in your mouth is very unpleasant. Think
hard-boiled eggs, which are fi ne when you know
what to expect, but are defi nitely not what you
want when you eat a semifreddo.
Recipes from frozen desserts to sponge
cakes like génoise might call for whipping egg
yolks to the ribbon stage. The ribbon stage oc-
curs when, after whipping egg yolks for a few
minutes on high speed, they take on a pale yel-
low color due to the infl ux of air and are thick
enough to form a strand that resembles a ribbon
when poured (see photo at left). Patience is
necessary, since obtaining a foam from egg yolks
will take much longer than obtaining one from
whites; always whip egg yolks at high speed.
Many frozen desserts call for a pâte à
bombe, which is an egg yolk foam base to which
a fl avor (such as chocolate or a fruit purée)
and another foam (such as egg whites or heavy
cream) are added. When whipping egg yolks
for a pâte à bombe, there will be an amount of
granulated sugar added, either raw or cooked.
If the mixture uses raw sugar, the sugar can be
combined with the egg yolks right before the
whipping begins, because yolks are not as fi nicky
as egg whites. If it uses cooked sugar, the egg
yolks should be whipped on high speed while
the sugar cooks to 115°C / 239°F. Once the yolks
start turning a pale yellow and have tripled in
volume, pour the hot sugar down the side of
the bowl and continue whipping until the egg Egg yolks, whipped to a ribbon stage, aerate still-frozen desserts.

AERATED STILL-FROZEN DESSERTS 97
yolks quadruple in volume and form a ribbon. In
this case, cooking the egg yolks over a hot water
bath is not necessary to obtain more volume
from the foam, since the hot sugar that is being
added will serve the same purpose. The heat
from the sugar will help the egg yolks trap air
and increase their volume, plus it will pasteurize
them. The ratio for pâte à bombe is 40 percent
sugar, 60 percent egg yolks. If this foam is to
be consumed raw (always in combination with
another ingredient), make sure that the egg yolks
are pasteurized. When using pasteurized egg
yolks, make sure you check the ingredients they
contain, because most of the time there will be
sugar added and you will have to modify your
recipe.
Egg white meringues can be eaten as crisp
meringues, where all that is needed is sugar and
egg whites, but a foam made from yolks and
sugar is never eaten on its own. It will always be
combined with other ingredients, and you must
always make sure to cool your cooked egg foam
to room temperature or below. For example, if
you are folding it into whipped heavy cream, it
will soften the fat molecules that are trapping
the air bubbles, resulting in a large decrease in
volume. Foamed egg yolks add a very smooth
consistency to still-frozen desserts not only be-
cause they are foamed, but also because of their
high fat content. Do not confuse what egg yolks
do for aerated frozen desserts with what they do
for custard-base ice creams; they are completely
different applications. In ice cream they act
as emulsifi ers, and in aerated frozen desserts
they act as one of the aerated ingredients that
contribute to the fi nal texture and body of the
fi nished product.
Besides obtaining a proper foam, a crucial
step in the preparation is folding the foam
properly into the fl avor base so that it becomes
a homogenous mass with the least amount of
volume loss. There will necessarily be some
volume loss, but how much depends on how
well you fold the foam into the fl avor base.
Proper folding procedure
1. As soon as the foam has reached the desired
volume, it should be folded into the remaining
ingredients. Do not wait to fold in the foam,
because even though it might be stable enough
for a few minutes, you want to take advantage
of the maximum volume you have obtained.
The longer the foam sits, the more it will
defl ate, even if it doesn’t seem perceptible.
2. Place half of the foam on top of the fl avor base.
Using a rubber spatula or bowl scraper, scrape
down the side of the bowl all the way down
to the bottom and then bring the spatula up
through the center of the bowl as you curve
your hand upward. The motion will resemble
the letter J. At the same time, spin the bowl a
quarter turn toward you with your free hand
every time your other hand performs the J
motion. This will maximize the amount of the
foam that is folded into the fl avor base and will
result in the least amount of defl ation. It is
more effective than if you didn’t turn the bowl.
You have to be well coordinated to perform this
action correctly, but practice helps.
3. Perform the same folding motion with the
remaining foam. The foam is incorporated in
two additions because if you try to fold in all the
foam at once, there will be a more signifi cant
amount of air knocked out by the time all the
ingredients are incorporated. By doing it in two
additions, the base loosens up with the fi rst
addition, and the second addition will incorpo-
rate with greater ease.
4. Finally, portion the fi nished product into the
desired mold(s) and freeze.
Folding

98 FROZEN DESSERTS
Some recipes contain two or three foams,
and many pastry shops are not fortunate enough
to own two, let alone three, mixers. Ideally you
would make all of your foams at the same time
and fold them into each other as soon as they
have reached full volume. If you only have one
mixer (or, perish the thought, none), start by
foaming the most stable foam, which is the
heavy cream foam, and refrigerate it immediately
once you have obtained the desired volume in
order to maintain its volume. Next, whip the egg
yolks and, fi nally, the egg whites. Always fold the
lightest ingredient into the heaviest (egg whites
into egg yolks, then whipped cream into the pre-
vious mix or whipped cream into egg yolks).
NOTE: If the recipe contains chocolate, it must be
melted and then brought down to room tempera-
ture (21°C / 70°F) without getting too cold, be-
cause if the recipe requires folding heavy cream
into chocolate and the chocolate is too cold, it
will harden almost immediately on contact with
the cold heavy cream. The result will be chocolate
chunks throughout your product instead of a
uniform mix.
Possible Defects for Aerated Still-Frozen Desserts
DEFECT INDICATOR CAUSES
Too dense Textural Main foam was under- or over-whipped.
Components were folded in too far, to the point that all the air
was knocked out.
Streaks Visual and textural—looks
like marble
Components were not folded in all the way and there is not a
homogenous mix.
Visible gelatin particles
throughout
Visual and textural Gelatin was not completely melted before combining with other
ingredients.
Gelatin was added to a cold component (such as whipped
cream) very slowly and it set on contact.
Icy Visual and textural Frozen item was left uncovered and condensation accumulated
on the item’s surface, turning into ice—this can also cause the
dessert to have a dried-out look when the ice around it thaws.
Fold the aerated base into the remaining ingredients as soon as it is ready, to take advantage of its maximum volume.

AERATED STILL-FROZEN DESSERTS 99
While aerated still-frozen desserts have a longer
shelf life than machine-churned and pacotized fro-
zen desserts (approximately 72 hours in a −10°C /
14°F freezer), it is important to take the necessary
steps to prevent freezer burn, frost formation, and
“freezer taste.” Keep these items covered at all
times. It’s a good idea to keep them in a parch-
ment paper~lined hotel pan with a Lexan plastic
cover that must be kept on at all times (except, of
course, when it is time to plate them). Depending
on how many covers your establishment serves
every day, break down the fi nished products into
groups of ten, maximum. This way, the remaining
desserts will be kept covered for a longer period
of time, and exposure to higher temperatures,
moisture, and condensation (which will result
in frost formation directly on the dessert) will be
signifi cantly reduced.
Temper the desserts for at least 5 to 7 min-
utes before serving them, so that they will still
be frozen, but easier to eat and cut with a fork or
spoon, and any frost that may have formed on
the surface will melt.
These desserts are almost always fi nished
ahead of time. Compared to machine-churned
or pacotized frozen desserts, which need to be
scooped (or, better, quenelled) à la minute, these
are 95 percent ready to go by the time you are
ready to plate; all you need to add is the garnish
(if desired). And melting is not a tremendous
concern, because aerated still-frozen desserts
will hold their shape for much longer than an ice
cream or sorbet would, even those that contain
stabilizers. They don’t puddle when they thaw,
and they can melt completely and still hold their
shape thanks to their very stable foams. They
may not be frozen, but they will hold their shape.
Notes on aerated still-frozen desserts and
the recipes in this book:
•• They are all manufactured and used within
generally accepted defi nitions and techniques
(based on their original defi nitions).
•• They are determined by their ingredients and
not the vessels in which they are traditionally
frozen. A frozen souffl é may be used as an
insert in an entremet; a parfait may be cut out
of a frame and plated as a “stand-alone” dessert.
•• Whenever the recipe contains egg yolks,
egg whites, or heavy cream, they will always
require foaming. They are never used in their
liquid state.
•• The preferred peak for heavy cream is
medium-stiff. Stiff peaks are not recom-
mended since they may not incorporate
smoothly with other ingredients because they
are too stiff. And because of the excessive
folding required to obtain a homogenous
mass, the foam will defl ate and lose
signifi cant volume.
•• Remember to review the proper foaming
procedures on page 91, as well as the specifi c
foaming methods for each type of ingredi-
ent (egg yolks, egg whites, and heavy cream)
before you proceed with a recipe. Understand
the methods and the reasoning behind what
makes them work (or not work).
•• If a recipe calls for chocolate, it will always be
melted and incorporated with a foam when the
chocolate is at room temperature.
Aerated still-frozen desserts are excellent for
entremets (as the main body or as an insert),
for a few reasons:
•• They do not need to be churned to be piped
into an entremet or insert mold.
•• They are more fl uid than an ice cream or
sorbet, so air pocket formation inside the
entremet mold is easier to control.
•• They stand up better to heat shock.
Reserving and Use During Service

100

101
THIS CHAPTER IS A COLLECTION OF SOME OF MY
FAVORITE RECIPES, not only for frozen desserts, but also
for the other components that are served with them. Mix and
match these components as you see fi t, but don’t forget that
while some fl avors marry well together, others won’t, so use
your better judgment. When in doubt, just ask yourself: “Would
I eat this?” “Will my customers like this?” “Would I pay for
this?” Always stick to what you like and be honest with yourself.
These recipes have been tested and used in restaurant
situations and they work very well. In order for them to work for
you, please make sure to read the recipe and instructions before
you get started. They are meant for real-world scenarios, and
they include all of the information that you will need to produce
these items successfully.
Finally, don’t forget to use the highest-quality ingredients
you can fi nd (and afford); you owe it to your customers.
chapter seven Finished Items

102 FROZEN DESSERTS
Genius, as Thomas A. Edison said, is 1 per-
cent inspiration and 99 percent perspiration. If
the idea is good but the execution is not, there
goes the idea. Here, execution translates to tech-
nique. Knowing how things are done, the ingre-
dients you will use, and the necessary equipment
is key to a successful result. It is at this point
that many pastry chefs and pastry cooks can fail.
The importance of technique and execution can-
not be stressed enough. The simplest things, the
ones we might take for granted, such as whip-
ping heavy cream properly, are just as important
as the most complicated tasks, like making a
properly balanced ice cream. Know what you are
doing before you do it.
As far as taste, my suggestion is to make
what you like to eat, but know how to make
those items you do not like to eat as well, be-
cause you never know. Personal taste is some-
thing that begins at childhood, is acquired
through many years, and never ends. It should
evolve, and you should be open to new fl avors,
techniques, and ideas. Flavor profi les don’t
always have to be traditional, like coffee and
chocolate, but there are some out there that are,
for lack of a better word, unusual. There is a big
difference between innovation and shock value,
and everyone hopes you will be able to tell them
apart before you start serving sea urchin ice
cream on a bed of gummy bears, or calling melt-
ed ice cream “hot ice cream” (it did happen). It
is great what Albert Adrià does for the industry,
but I will let him and his brother Ferran do it.
There are only so many people who can pull that
off, and they are among them. Their restaurant,
El Bulli, works because they were the fi rst with
many innovations that actually worked and did
something to further gastronomy, and I hope
that will continue for a long time. (Note: Albert
Adrià is not the author of the above-mentioned
sea urchin ice cream, nor the hot ice cream.)
There are many imitators of the Adrià broth-
ers. I must admit that I have tried many of their
recipes for fun, such as the “Apple Caviar,” but
trying to replicate that on my own menu would
make it seem like I want to be like them and not
my own pastry chef. Remember that everything
has been done in one way or another, meaning
that everything comes from something or some-
where. But still, as with clothing, you can create
your own style. You know what you like to wear
and what you don’t; it’s the same with food.
The following points are general guidelines
that have worked for me (in no particular order),
though they are by no means written in stone:
• • Flavor fi rst, visual appeal close behind. Keep
texture, temperature, and composition in
mind.
• • Be aware of your environment and commit
to using seasonal ingredients as often as pos-
sible. Try to support local farmers and purvey-
ors as long as their products have high-quality
standards.
• • Know the ingredients and how they interact
with each other.
• • Always use the highest-quality ingredients
possible. Don’t forget that you have a tremen-
dous responsibility to your customers.
• • Understand culinary techniques as well as
pastry techniques. It will give you a broader
understanding of food.
• • Knowledge of technique and execution are
crucial to successful results.
A Few Thoughts on DessertFirst and foremost, with desserts, as with any other food, taste should be the primary concern. However,
visual appeal is a not-too-distant second. First impressions are very important because you see fi rst, then you
taste. If it looks good and it tastes good, you’ve hit a home run. A good dessert is a fi ne balance of fl avor,
texture, temperature, color, and composition, but not always in that order.

• • Bells and whistles don’t make the dessert, they
only distract. Streamline your food.
• • Simple, clean, and polished desserts are hard
to achieve, but are often the best.
• • The less you manipulate ingredients, the bet-
ter. You can always tell when too many fi ngers
have touched your food.
• • Work clean, work fast, and work effi ciently.
Clean as you go. A messy kitchen is the refl ec-
tion of a messy mind.
• • Learn from the masters fi rst, then create your
own style. Imitation is not very well regarded.
• • Dessert is typically served at the end of a meal,
and people are not hungry by the time dessert
comes around. Small is good in this case. Cus-
tomers should leave feeling satisfi ed, not sick.
• • Always be willing to learn. There is always
room for knowledge. I am the fi rst to admit
that I don’t know everything. If I did, why
would I go on?
• • Not all desserts need a frozen component,
though it is always a good idea to offer a vari-
ety of frozen items.
• • Keep in mind that the tongue can identify only
three to four fl avors at a time.
• • Respect your customers. Don’t serve anything
you wouldn’t eat yourself.
There are three recipes in this book for
which I give credit to the chef who inspired them
(Granny Smith Apple and Wasabi Frappé, see
page 175; Coconut Bubbles, see page 275; and
Paprika Bubbles, see page 346). I gave these
items my own interpretation, but out of fairness
I felt obligated to give credit where it was due.
FINISHED ITEMS 103
Small DessertsThese are also referred to as pre-desserts, but
that only applies if there will be an actual des-
sert after it. There is no set weight for small
desserts, except that they should be small, and
this is really up to the chef. They should have
fewer components than a larger portion would
because simplicity is key. Small desserts open
a whole new possibility. People who are serious
about food will want to taste as much as pos-
sible and experience many different items. Small
portions allow for a broader experience, but they
are also challenging since there is very little with
which to work. A talented pastry chef will see this
as an opportunity to show off his technique and
knowledge of fl avor. It is not recommended to
have more than three or four components per
small dessert.
It is a good idea to present these small des-
serts one at a time, but if you choose to do two,
three, or four simultaneously, make sure that
their integrity won’t suffer by the time the cus-
tomer gets to the last one. Talk to your wait staff
about suggesting the order in which the desserts
should be consumed to your customers. For
example, should there be a souffl é in one des-
sert and an ice cream in another, the challenge is
to keep the souffl é from falling or the ice cream
from melting. I would use an ice cream with
stabilizers and suggest that the dessert with the
souffl é be eaten fi rst and the ice cream second,
since there is no way to keep a souffl é from fall-
ing, but you can delay the ice cream from melt-
ing if it has a percentage of stabilizers. Once
again, knowledge of ingredients and the fi nished
product will work in your favor.

Dessert is frequently your customers’ last im-
pression. If it is done well, it will be a memorable
experience. If it isn’t, it can be detrimental to the
entire dining experience, so the responsibility
of the pastry chef is huge. I have often read res-
taurant reviews that said, “everything was going
great until we had dessert.” Now, in all fairness,
not every restaurant has a pastry staff, let alone a
pastry chef, and it is often left to one of the other
cooks to make the desserts, besides having to
work on his own mise en place. Occasionally the
wait staff will be responsible for plating desserts,
which to me is one of the best ways to ensure in-
consistency. I can understand that paying a pas-
try chef’s salary may be cost-prohibitive in some
restaurants, but it is still no excuse to deliver a
poorly made dessert. Again, it all comes down to
respect for yourself and your customers.
The most important factor when construct-
ing a dessert will always be taste/fl avor. You
might be inspired by the beautiful bright green
color of a pistachio, and through experience you
deduce that pistachio goes very well with stone
fruits, such as cherries. So far you have two quite
distinct fl avors that harmonize well. But you also
have two colors that are intense and look good
together. The next factor to consider is texture.
You can get crunch from toasted pistachios and
a smooth consistency from cherries. Can I make
an ice cream from the pistachios and sprinkle
some candied pistachios on it? Then you con-
sider other factors, such as temperature. Could
those cherries be cooked and served warm? Is
there anything else missing here, or could these
ingredients live alone? Or the thought process
can be reversed. You want to have a hot and cold
dessert on the menu, cherries are in season . . .
you get the picture. It comes down to experience
and understanding what makes sense and what
doesn’t, what you like or dislike, and what your
customers prefer. There should be as much
diversity on the menu as possible, and by this I
don’t mean that there should be many compo-
nents, but a variety of textures and temperatures.
Once you understand the possibilities that make
sense in your establishment, the menu develop-
ment thought process becomes second nature.
One of the important considerations is that
the portion size of the desserts should be just
enough, and preferably on the small side. There
is a fi ne line, then, between small desserts and
actual desserts. What qualifi es as too little and
what is too much? Who are you to decide? There
is no predetermined weight or amount that con-
stitutes a small portion or a large portion, but
there is such a thing as common sense. If you
see empty plates coming back from the dining
room consistently, that is a good sign. If not,
there are two possibilities: either your customers
did not like the dessert, or it was too big. It is
good practice to get feedback from your custom-
ers via the wait staff. “They just didn’t like it” just
doesn’t cut it. Try to get as much information
as possible. If there is a signifi cant number of
customers who are making the same comments
(too sweet, too bland, too much), make the
104 FROZEN DESSERTS
Plated Desserts

necessary adjustments quickly. If one person
didn’t like your dessert, remember that you can’t
please everyone all the time, no matter how
good you are. Your best customers are the ones
who tell you what you did wrong in an objective
way (“The ice cream was too icy,” for example,
as opposed to, “I just don’t like bananas”), so
you can fi x it. The worst customer is the one who
identifi ed many fl aws in your food, paid his bill,
and left without telling you a word, leaving you
to make the same mistake over and over again.
But—guess what?—he is a potential customer
who will never return, he will tell other people
about the horrible dessert he had at your res-
taurant, and chances are that the people he tells
won’t be visiting anytime soon.
FINISHED ITEMS 105
EntremetsAn entremet is, simply put, a cake. It is built
from a variety of components, which usually
include a cake portion, the body (which can be
more than one component), a coating, and a
garnish. Entremets differ from plated desserts
in that entremets have all the components as-
sembled in one mold or frame, whereas plated
desserts have separate components that are
gathered on a plate just before serving.
One of the most crucial considerations for en-
tremets is texture. They should not be served right
out of the freezer because they will be too hard to
cut and, most important, too hard to eat. Always
temper them for at least 10 and up to 15 minutes
for ideal texture. Using ice creams, gelatos, or
sorbets with stabilizers to assemble entremets will
preserve a better, smoother texture in the fi nished
product. Entremets made with items produced
through the classic method are highly likely to
become icy and will take too long to temper. The
smooth texture will just not be there. Another good
reason to use bases with stabilizers is that the time
it takes to assemble them alone will be cutting into
the ideal holding time (18 hours or 2 services). By
using stabilizers, you can extend the entremet’s
shelf life to 24 or 36 hours maximum.
Assembly can be challenging, since all of
the components have to be at the right consis-
tency. Inserts (the components that go inside
the entremet) have to be hard enough to hold
their shape when they are being handled. If a
disk of ice cream is too soft, it will lose its shape
when it is being put inside the entremet. In pas-
try competitions, when the judges cut through an
entremet they want to see even, perfect layers. This
denotes knowledge of technique and proper ex-
ecution, which translates into properly made and
handled components, which in turn results in a
pleasant texture and visually appealing entremet.
The surrounding element, or the exterior com-
ponent, must be smooth in order to be poured
or piped into the entremet mold. Judges don’t
want to see air pockets, either. Piping the exterior
component into the mold will help to prevent air
pocket formation. When piping, make sure that
the tip of the piping bag is inside the piped prod-
uct when dispensing it into the mold; this will
prevent the formation of air pockets even further.
A smooth surface and even, streamlined inserts
are two of the main objectives (besides taste and
texture).
ENTREMET GENERAL ASSEMBLY GUIDELINESEntremets are typically assembled upside down,
meaning that the cake portion, which is the base
of the entremet, is the last thing to put on while
assembling the entremets.
The “body” of the entremet is typically the
main fl avor/component, since it will hold all
of the other components together; therefore it
is the fi rst item to be piped into the mold. The
mold, as well as the sheet pan that will be used
hold the entremet mold, should be frozen before
piping anything into them, to prevent melting.
After piping some of the main component
in, other components, called “inserts,” are placed
throughout the body. Special attention should be
paid to prevent air pockets from forming.

106 FROZEN DESSERTS
The cake (or sponge) is the last layer. It
should be pressed down so that it is lined up
with the border of the mold. This sponge is
usually coated with a thin layer of chocolate to
prevent it from sticking to the cake board. At this
point the entremet is hardened in the freezer.
Once it has hardened it is taken out of the
mold by applying heat, either a hot water bath or
a torch. It needs to be re-frozen for a few min-
utes, and then it is coated by a glaze or choco-
late spray.
Finally, it is garnished. Use garnishes that
are resistant to freezing and condensation, such
as chocolate.
Once the entremet is assembled and suf-
fi ciently hardened, it will be necessary to take it
out of its mold. Stainless steel molds are widely
used, and there are various methods for taking
them off. For dome-shaped molds, dip the mold
inside a hot water bath all the way up to the rim
of the dome, without getting any water on the
surface. The trick is to leave it in the water for
just the right amount of time so that it comes
out clean. Then place a cake board at the base
of the cake, turn the dome over, and push one
side of the base of the dome while holding the
opposite side with your other hand on top of the
dome in a circular motion, following the shape
of the dome so it comes out clean and smooth.
If it melts too much, the surface of the dome will
look like wrinkled paper, and when it re-freezes
it will become very icy because the previously
melted exterior has lost its smoothness. With
any other mold that is a frame-type mold (like
a regular cake ring), you need to use a torch to
take the mold off. And here the same trick is to
give it the right amount of heat that will be just
enough to slide the mold right off and avoid
melting it too much. Fleximolds work very well
because they do not require the application of
heat for unmolding; they just peel off. However,
one defect that occurs is that the borders aren’t
very straight (they seem to curve too much), and
so the fi nal look is not very polished. There are
also plastic molds that have very nice designs
but have very short life spans, meaning that they
easily crack or lose their shape when they are
washed with very hot water.
If the entremets are to be coated with a
glaze or sprayed with chocolate, it is not only to
embellish them but also to protect the integrity
of the exterior. If you think about it, a glaze will
Entremets are assembled upside down in layers, starting from the outer layer and working in toward the center and base.
Once completely assembled and fully hardened, re-move the entremet from its mold and keep it frozen until ready for garnish and service.
An entremet’s layered composition presents myriad possibilities for creativity when combining fl avors and textures.

FINISHED ITEMS 107
likely have an ingredient similar to those used
to stabilize frozen desserts, such as gelatin or
pectin, which will keep it smooth even when fro-
zen. These ingredients also set quickly when they
come in contact with cold temperatures, so it is
important to work quickly and to have the glaze
at the right temperature, which depends on the
nature of the glaze and its gelling agent. Some
glazes are ideally poured at 35°C / 95°F, such
as the Shiny Chocolate Glaze on page 200, and
others at cooler temperatures, like the Caramel
Glaze on page 220, which is poured at 19°C /
66°F to 20°C / 68°F. To obtain an even coating,
pour the glaze directly at the center of the cake
and let it puddle naturally onto the cake. Occa-
sionally it will be necessary to pour the glaze in a
spiral motion if the cake has an uneven surface
or if it is concave or too large and the glaze will
stay in a puddle at the center of the cake. A fun-
nel, pitcher, or ladle is ideal for pouring glaze.
When tempering an entremet that has a
coating of chocolate spray, it is important to let
it temper not only for textural considerations
but also because the very visible frost that will
accumulate on its surface is not very attractive.
Tempering resolves this issue.
As far as garnishing, make sure it is a
garnish that can be easily cut through when
portioning. If this entremet is sold at a café or
pastry shop, put one fi nished entremet on dis-
play, and if one is ordered it can be garnished
at the last minute. In a restaurant environment,
it can be garnished minutes before it is served
(ideally while it is tempering). Chocolate tends
to crack (or shatter) easily when cut, but pâte à
glacer (a chocolate product with a higher per-
centage of cocoa butter) cuts much more cleanly
since it has a higher fat content. Always use
edible garnishes or make sure to inform your
customers that the beautiful piece of star anise
and the whole vanilla pod are for visual appeal
only. While I concede that edible garnishes are
ideal, the benefi t of non-edible garnishes is that
they can easily be taken off the entremet before
portioning, and it will therefore be easier to cut
if nothing (such as a chocolate plaque) is in the
way. It is a good idea to put a garnish on the en-
tremet that will refl ect its contents; for example,
if there is coconut ice cream inside, place a thin
stripe of shredded coconut on the entremet. This
will not always be possible, though, since some
garnishing ingredients are not recommended for
freezing, such as fresh fruit or cooked sugar.
An interesting aspect of entremets is the
possibility of combining a variety of frozen des-
serts in one place. Churned or pacotized items
such as ice cream, sorbet, sherbet, and gelato
can be combined with still-frozen items, such as
mousses, parfaits, and semifreddos (see pages
312-321 for entremet recipes). This opens up
many possibilities for the fi nished product, but
try not to use more than three different types of
frozen items in a single entremet because, after
that point, the fl avors won’t be very distinguish-
able. There is always the possibility of making
many different frozen components of a single
fl avor, such as a tangerine ice cream, sorbet,
frozen souffl é, and granité. This would present
the tangerine’s fl avor in a variety of textures and
provide a great dessert experience without being
overkill.
When cutting entremets, use a sharp, thin,
and long slicing knife. Dip it in a hot water bath
that is deep enough to surround the entire blade
with water. Wipe the knife dry with a paper towel
and slowly cut through the entremet. Repeat
these steps before each cut. And make sure the
entremet is tempered, because if it is too hard,
when you cut through it, it will have a crumbled
look, as opposed to a more visually appealing
smooth surface.

108 FROZEN DESSERTS
While some might consider a frozen item in a
savory preparation absurd, this approach has
become increasingly popular on many menus.
There really is no written rule about savory items
with a frozen component, but try to keep the
portion small. It should be an amuse-gueule or
a small course between larger courses, almost
like a palate cleanser but more interesting. 20 g /
.71 oz is the size of scoop or quenelle that is
recommended. The frozen component shouldn’t
overwhelm the other items it is served with, it
should enhance them.
In this book, most of the frozen compo-
nents (ice cream, sorbet, or granité) intended
for savory preparations have had their sugar
percentages considerably dropped so that they
aren’t as sweet as they would be for a dessert.
It is because of this that using a Pacojet is rec-
ommended in order to obtain a very smooth
product. Remember that sugar depresses the
freezing point of frozen items and is responsible
for ice crystal formation (the more sugar, the
smaller the ice crystal; the less sugar, the larger
the ice crystal . . . think of granités). Other savory
items have been kept sweet because it is the na-
ture of that ingredient to be sweet, such as beets
(see recipe on page 383). Be careful; there is a lot
of opportunity here to get wacky.
Savory Items
Important Aspects to Consider During ServiceAlthough the following are mentioned through-
out this book, here is a brief recap on key points.
HOLDING AND STORING:
• • All frozen items should be held at –10°C /
14°F, except for granites and ices, which
should be held at –18°C / 0°F.
• • Keep them covered. If they are still-frozen
items, keep them in an airtight container. If
they are churned or pacotized, keep them cov-
ered with a plastic lid or stainless steel lid.
• • Minimize the time the freezer door stays open
to prevent heat shock on your frozen items.
• • Do not hold ice creams, sorbets, sherbets, and
gelatos for more than 18 hours (2 services) for
optimal quality.
• • Still-frozen desserts, if properly stored, will
hold for 3 to 4 days.
FINISHING (PLATING):
• • Develop a sense of urgency for service.
Urgency doesn’t translate into serving slop for
the sake of expediting quickly.
• • Use a warm scooping utensil to get a clean
scoop or quenelle.
• • Make sure that you hold your scoops in hot
running water (above 62°C / 145°F) for sani-
tary purposes and to obtain clean scoops or
quenelles.
• • Always use cool plates. Refrigerated or frozen
plates will develop condensation on the surface,
which affects the look. It literally looks like what
it is, a plate right out of the refrigerator.
• • Quenelles and scoops typically need to be
anchored down to a plate to keep them from
sliding around. Use a fl avor or ingredient that
makes sense with the fl avor of the quenelle
and the rest of the dessert (like cocoa nibs for
chocolate ice cream).
• • As soon as a quenelle goes onto the plate,
make it fl y out of the kitchen. It should be the
last item to go on the plate, unless there is a
garnish that goes on top of it.
• • Most food tastes better if it’s not too cold.
Consider the items on your dessert that can be
reserved at room temperature during service
without becoming a health hazard.
• • Always temper still-frozen items for 3 to 5
minutes before serving so they will be frozen
but easy to eat. Torch them for 2 to 3 seconds

FINISHED ITEMS 109
to get rid of the frost that might cover the des-
sert (do not torch if the dessert is covered in
chocolate spray, otherwise it will melt). It is
always better to have the customer wait for a
few minutes for the dessert to reach its ideal
consistency than to serve them a rock hard
product.
• • Temper frozen entremets for 10 to 15 minutes
before serving. Test the cakes to see if they
are ready to serve by sliding a long, thin pin
through them. If it slides in easily, it is ready
to serve.
• • Always make sure that your work surfaces are
clean. The visible side of the plate may be clean,
but if the base of the plate is not, it will leave
a smudge on the tablecloth after the plate has
been cleared. It can leave a bad impression on
the customer.
Remember: every single detail counts. As
small as they may be, they all add up. While most
customers can be forgiving of little things here
and there, you do not want to depend on that.
Make sure that there is no room for mistakes.
Most of the items photographed in this book are intentionally not presented on plates. They are presented on a variety of
surfaces such as glass, Lucite, acrylic, marble, stainless steel, slate, and ice. Some of them are plated in a bowl because the
nature of the dessert dictates it. This is so the items can shine on their own with a little help from a surface that might en-
hance their visual appeal, but also because it should be up to the
reader to decide what plate to use. Whatever you decide, keep in
mind that the vessel you use is half of the appeal of the fi nished
product. If you use cheap plates with unappealing colors, this will
certainly refl ect on your dessert.
The possibilities aren’t limited to white china. Use your creativity to come up with alternative surfaces if you can and if
your budget allows. Just keep in mind that the surface should be food-safe, meaning that there will be no chemical reaction
between the food and the material it is plated on. Wood is a nice alternative to metal, porcelain, and glass, but make sure it
is food-safe and nonporous, because it is very hard to clean wood properly and it can become a potential health hazard.
You can also think of variations within the items in this book. Some components in one item might go well with other
components in a different item, and the way they are plated is merely a guideline or suggestion. You should be inspired by
this book, and also to become your own pastry chef by developing your own style. Don’t worry, developing your own style will
take a few years, but you have to start somewhere.
Plating Variations

110 FROZEN DESSERTS
SMALL DESSERTS
Caramelized Banana Ice Cream with Hot Malt Shake YIELD 10 PORTIONS
COMPONENTS
300 g / 10.58 oz HOT MALT SHAKE
300 g / 10.58 oz BANANA ICE CREAM BASE (page 352), churned into a piping bag and reserved frozen
10 g / .35 oz malt powder
ASSEMBLY
1. Fill a 60 ml / 2 fl oz glass halfway with hot malt shake (30 g / 1.06 oz).
2. Pipe 30 g / 1.06 oz of the banana ice cream on top of the hot malt shake.
3. Garnish with a pinch of malt powder (about 1 g / .04 oz).
4. Serve immediately.
Hot Malt Shake YIELD 500 G / 1 LB 1.64 OZ
451 g / 15.91 oz milk
49 g / 1.73 oz malt powder
1. Bring the milk to a boil over medium heat.
2. Whisk in the malt powder and mix until dissolved.
3. Serve immediately or reserve in an insulated thermal container until needed. Depending on the quality of
the container, the liquid will remain hot anywhere from 2 to 6 hours.

FINISHED ITEMS 111
Buttermilk Sherbet and Concord Grape Soup YIELD 10 PORTIONS
COMPONENTS
500 g / 1 lb 1.64 oz CONCORD GRAPE SOUP
300 g / 10.58 oz BUTTERMILK SHERBET (page 396)
ASSEMBLY
1. Portion 50 g / 1.76 oz of chilled soup into a small tourine or glass pitcher.
2. Place a medium quenelle (30 g / 1.06 oz) of the sherbet in the center of a soup bowl. Anchor the sorbet so it
doesn’t slide around the bowl. Crumbled shortbread cookies or sablés work well as an anchor. Use only a very
small amount of crumbs, just enough so that the quenelle will stay in place but they will not be visible. They are
not part of the dessert.
3. Once the bowl is placed in front of the customer, pour the soup into the bowl, making sure to pour down the side
and close to the base of the bowl so as not to splatter.
Concord Grape Soup YIELD 2 KG / 4 LB 6.55 OZ
3 kg / 6 lb 9.82 oz Concord grapes
880 g / 1 lb 15.04 oz simple syrup (50° Brix), or as needed
1. Separate the grapes from the stems.
2. Place the grapes in a pot and add 400 g / 14.11 oz of water; cook over medium-high heat until the grapes
burst and release their juice.
3. Push the grapes through a sieve so as to obtain as much liquid and pulp as possible while removing the
seeds and skin.
4. Measure out 1.12 kg / 2 lb 7.5 oz of juice and add the simple syrup as needed.
5. Reserve under refrigeration until needed for up to 3 days.
NOTE This dessert is an exercise in visual simplicity in which the delicate balance of fl avors (sweet and tart), tempera-
tures (cold and frozen), and textures (smooth and liquid) is showcased, dramatically enhanced by the contrast
of deep purple and white.

112 FROZEN DESSERTS

FINISHED ITEMS 113
Passion Fruit Sorbet with Eve’s Temptation Tea-Infused Tapioca and Basil Jelly YIELD 10 PORTIONS
COMPONENTS
100 g / 3.53 oz BASIL JELLY RECTANGLES
200 g / 7.05 oz EVE’S TEMPTATION TEA-INFUSED TAPIOCA
300 g / 10.58 oz PASSION FRUIT SORBET (page 380)
ASSEMBLY
1. Place a basil jelly rectangle on a plate, making sure it is as straight as possible, with a small offset spatula. Be careful
because they are slippery.
2. Place a 5 cm / 2 in by 7.5 cm / 3 in rectangular mold over the basil jelly, aligning the rectangle with the long side of
the mold. Spoon 20 g / .71 oz of the tapioca into it in a single layer right next to the basil jelly.
3. Scoop a medium quenelle (30 g / 1.06 oz) of the sorbet and place it diagonally on top of the tapioca.
4. Serve immediately.
Basil Jelly YIELD APPROXIMATELY 1 KG / 2 LB 3.27 OZ
BLANCHED BASIL
4 L / 1 gal water
10 g / .35 oz ascorbic acid
200 g / 7.05 oz salt
500 g / 1 lb 1.64 oz basil leaves
BASIL JELLY
195 g / 6.88 oz blanched basil
795 g / 1 lb 12 oz water
5 g / .18 oz ascorbic acid
2 g / .07 oz salt
About 150 g / 5.29 oz sugar
4 g / .14 oz agar-agar
1. FOR THE BLANCHED BASIL: Bring the water, ascorbic acid, and salt to a boil in a saucepan. Blanch the basil for
5 to 8 seconds, or until wilted. Make sure that the basil does not lose its color by letting it blanch too long.
2. Shock the basil in ice water and drain. Squeeze the excess water out of the basil.
3. Line a half sheet pan with a nonstick rubber mat. Place a 25 cm / 10 in by 38 cm / 15 in by 2 cm / 1 in
Plexiglas or stainless steel frame inside the sheet pan.

114 FROZEN DESSERTS
4. FOR THE BASIL JELLY: Purée 195 g / 6.88 oz of the blanched basil, the water, ascorbic acid, and salt in
a blender. Strain. Add sugar as needed; it should be sweet but not too sweet. Stir until the sugar is
dissolved.
5. Bring 250 g / 8.82 oz of the basil mixture and the agar-agar to a boil in a saucepan over medium heat.
Combine this with the rest of liquid off the heat and pour into the frame immediately. If the basil water sits
in the hot pot for too long, it will turn brown.
6. Allow the mixture to set in the refrigerator, about 20 minutes.
7. Cut into rectangles 1 cm / 0.5 in by 7.5 cm / 3 in using a metallic cutter or knife. Slightly separate the jelly
rectangles from one another and reserve covered on the nonstick rubber mat in the refrigerator.
Eve’s Temptation Tea-Infused Tapioca YIELD 700 G / 1 LB 8.69 OZ
250 g / 8.82 oz small pearl tapioca
2 kg / 4 lb 6.55 oz Eve’s Temptation brewed tea (see Note below)
200 g / 7.05 oz sugar
1. Soak the tapioca overnight in 454 g / 1 lb of water (approximately twice the amount of tapioca). Drain the
excess water the next day if necessary.
2. Add the tapioca to a stainless steel pot and cover with cold Eve’s Temptation tea. Bring to a simmer.
Strain and repeat this process 2 more times, covering the tapioca with fresh cold tea each time, or until
the tapioca is cooked through and has a chewy consistency. The tapioca should be completely transparent
with no white in the center.
3. Rinse the tapioca in cold water and soak for 5 minutes in enough cold tea to cover. Rinse and soak again
in enough cold tea to cover. Drain. Adjust the consistency with tea so that the tapioca is a spoonable
consistency. The tapioca pearls tend to stick to each other, which makes them hard to portion and diffi cult
to eat.
4. Add sugar as needed. Remember that it is being served with passion fruit sorbet, which is on the tart side.
5. Refrigerate until ready to use. Adjust the consistency with more tea if necessary. Discard the tapioca after
18 to 24 hrs.
NOTE Remember that even though the recipe calls for 250 g / 8.82 oz of small pearl tapioca, it will yield much more be-
cause of the absorption of liquid, about 500 g / 1 lb 1.64 oz. Make sure to brew a large amount of tea in advance
(about 4 L / 1.04 gal), because the liquid will be changed several times during cooking and soaking. To make the
tea, use 120 g / 4.23 oz of tea for every 1 L / 1.04 qt of water. The amount of sugar added to the tea will depend
on your taste; however, the recommended amount is 100 g / 3.53 oz of sugar to 1 L / 1.04 qt of tea. This pre-
sweetened tea will be used to cook and soak the tapioca. When adjusting the consistency of the tapioca, be sure
not to add too much liquid so that there is no visible excess liquid.

FINISHED ITEMS 115
French Macaron, Cassis Sorbet, and Almond Ice Cream Sandwiches YIELD 10 PORTIONS
COMPONENTS
150 g / 5.29 oz CASSIS SORBET BASE (page 388), churned into a piping bag and reserved frozen
150 g / 5.29 oz ALMOND ICE CREAM BASE (page 371), churned into a piping bag and reserved frozen
20 FRENCH MACARONS
ASSEMBLY
1. Fit a disposable piping bag with a #4 plain piping tip. Put the piping bag inside a container that will hold it standing
up and open up the piping bag.
2. Pipe both frozen items simultaneously into the prepared piping bag so that there will be cassis sorbet on one side of
the bag and almond ice cream on the other. Reserve the piping bag in the freezer for at least 45 minutes.
3. Set 10 macarons on a sheet pan, fl at side up.
4. Pipe 30 g / 1.06 oz of the sorbet and ice cream on each macaron, and top with another macaron to form a sandwich.
Work quickly.
5. Freeze immediately, using a blast freezer, if available; otherwise, place the sheet pan with the macarons directly
underneath the freezer’s fan.
6. Once the frozen items have fi rmed up, transfer them to the middle or bottom of the freezer for service. Reserve in
an airtight container. Temper the sandwiches for 4 to 5 minutes before serving.
NOTES Wrap these sandwiches in colored confection foil and serve them as petits fours, or serve one large one as a special item.
This dessert is a play on traditional ice cream sandwiches. The possibilities are many (see Citrus Sorbet Sand-
wiches on page 129).
French Macarons YIELD ABOUT 44 INDIVIDUAL PIECES (22 FINISHED SANDWICHES)
423 g / 14.92 oz confectioners’ sugar
232 g / 8.18 oz almond fl our
240 g / 8.46 oz egg whites
105 g / 3.7 oz granulated sugar
Water-based purple food coloring, as needed
1. Blend together the confectioners’ sugar and almond fl our in a food processor and sift into a large bowl.
2. Make a French meringue with the egg whites and granulated sugar, making sure to add about 10 percent
of the sugar at the start of whipping. When making the meringue, gradually add the sugar in several
additions, and add the food coloring a little bit at a time as the mixer whips on medium speed. Add
enough coloring to obtain a deep color purple. Whip until just under stiff peak.

116 FROZEN DESSERTS
3. Fold the meringue into the dry ingredients, making sure that the batter has no lumps and is smooth, but
not runny. If under-mixed, the surface of the macaron will be lumpy. If overmixed, the macaron batter will
run too much after piping and will not hold a round shape.
4. Line 2 very fl at sheet pans with silicone paper or a nonstick rubber mat. Using a #5 straight tip, pipe a
circle with a diameter of about 5 cm / 2 in. The batter should run slightly, just enough so that the surface is
smooth.
5. Let the macarons dry, uncovered, for at least 30 minutes. This is what gives them their characteristic look.
While they dry, preheat a deck oven to 225°C / 440°F.
6. Bake the macarons in the back of the deck oven, where it is hottest, for about 6 minutes with the vent
open. Pull to the front of the oven for 1 to 2 minutes longer to keep a close eye on the macarons to make
sure that the structure of the macarons sets. Make sure that the insides of the macarons are not too wet,
otherwise they will fall and lose their volume after being taken out of the oven. They also may be under-
baked to the point where they do not lift off of the silicone paper.
7. Let the macarons cool completely on the sheet pan before removing and fi lling.
8. Reserve in an airtight container or in the freezer for up to 1 month.
NOTE If a smaller or larger macaron is desired, make sure to adjust the baking times accordingly to a shorter or longer
period of time.

FINISHED ITEMS 117

118 FROZEN DESSERTS

FINISHED ITEMS 119
Almond Milk Granités with Manzanilla Sherry Gelée, Bing Cherry Compote, and Toasted Marcona Almonds YIELD 10 PORTIONS
COMPONENTS
10 MANZANILLA SHERRY GELÉE RECTANGLES
200 g / 7.05 oz BING CHERRY COMPOTE
400 g / 14.11 oz ALMOND MILK GRANITÉ (page 399)
10 TOASTED MARCONA ALMONDS
ASSEMBLY
1. Place a manzanilla gelée rectangle to one side of the bottom of a serving bowl.
2. Spoon about 20 g / .71 oz of compote on one side of the bowl.
3. Using a spoon, spoon about 40 g / 1.41 oz of almond milk granité on the other side of the bowl. Try to give it
some height.
4. Place an almond on top of the cherry compote.
5. Serve immediately.
Manzanilla Sherry Gelée YIELD 1 KG / 2 LB 3.27 OZ.
25 g / .88 oz gelatin sheets
975 g / 2 lb 2.39 oz Manzanilla sherry
1. Line a half sheet pan with a nonstick rubber mat and a 25 cm / 10 in by 38 cm / 15 in by 2-mm / .08-in
Plexiglas or stainless steel frame inside the sheet pan. Pipe melted chocolate (of any kind) around the
outside border of the frame and refrigerate. This will keep the gelée from leaking out of the frame.
2. Bloom the gelatin sheets in ice water.
3. Combine 100 g / 3.53 oz of the sherry with the gelatin sheets in a small saucepan. Dissolve the gelatin over
low heat.
4. Combine the gelatin mixture with the remaining sherry and pour into the frame. Refrigerate until set
(about 30 minutes). Once the gelée has set, remove the frame with a paring knife (be careful not to cut
though the nonstick rubber mat).
5. Dip a slicing knife into hot water and dry it with a paper towel. Cut the set gelée into rectangles 1 cm / .5 in
by 5 cm / 2 in. Reserve refrigerated. A clean cut (an even cube) makes the difference between a nice-looking
dessert and a showstopper. It might take a few tries and patience before a perfect rectangle is achieved.
NOTE Manzanilla sherry is a particularly dry sherry with a woody taste that goes well with the other components of this
dessert. Other dry sherries can be substituted.

120 FROZEN DESSERTS
Bing Cherry Compote YIELD 1 KG / 2 LB 3.27 OZ
419 g / 15.78 oz Bing cherries, stemmed and pitted
476 g / 16.79 oz sugar
105 g / 3.7 oz water
3 Tahitian vanilla pods, split
1. Bring all of the ingredients to a boil, then reduce the heat and simmer the mixture for 20 minutes. Skim
when a thick layer of foam forms on the surface.
2. Cool and reserve in the refrigerator until needed. Use within 3 days.
Toasted Marcona Almonds YIELD 50 G / 1.76 OZ
50 g / 1.76 oz blanched Marcona almonds
1. Preheat a convection oven to 163°C / 325°F.
2. Line a sheet pan with parchment paper. Spread the almonds evenly onto the pan in a single layer.
3. Bake until light brown and aromatic, about 5 to 10 minutes.
4. Cool to room temperature. Reserve in an airtight container at room temperature. If properly stored, they
can keep for up to 5 days.
NOTE The best indication of when a nut is toasted is when you can smell the aroma of the nut. Marcona almonds are
Spanish almonds, but any other type of almond may be substituted.

FINISHED ITEMS 121
Burnt Milk Gelato with Mexican Hot Chocolate YIELD 10 PORTIONS
COMPONENTS
500 g / 1 lb 1.64 oz MEXICAN HOT CHOCOLATE
300 g / 10.58 oz BURNT MILK GELATO (page 366)
10 g / .35 oz ground Mexican cinnamon
ASSEMBLY
1. Pour approximately 50 g / 1.76 oz hot chocolate into a 90-ml / 3-oz glass, or until it is two-thirds full.
2. Scoop a medium quenelle (30 g / 1.06 oz) of the gelato on top of the hot chocolate. The quenelle will lose its shape
slightly on account of the heat, but its dome shape will remain.
3. Sprinkle a pinch of ground cinnamon on top.
4. Serve immediately.
Mexican Hot Chocolate YIELD 500 G / 1 LB 1.64 OZ.
219 g / 7.72 oz heavy cream
219 g / 7.72 oz whole milk
62 g / 2.19 oz Mexican chocolate
1. Combine all of the ingredients in a saucepan and bring to a boil while whisking constantly.
2. Serve immediately, or reserve in a thermal container during service. If the latter, shake well before serving.
Depending on the quality of the container, it can remain hot from 2 to 8 hours. Make sure to check the
internal temperature every hour. If it drops below food-safe holding temperatures, it needs to be re-heated
above 62°C / 145°F to prevent bacteria growth. Discard any remaining liquid in the thermal container after
each service.
NOTE The hot chocolate will remain hot for a long period of time when it is covered by the ice cream, since the steam
has nowhere to go. The ice cream will melt at a slower pace than one would think given that it is in contact with
a hot liquid. The layer of gelato that comes into direct contact with the hot chocolate will melt, but it also insu-
lates the remainder of the gelato, keeping it frozen for a substantial amount of time.

122 FROZEN DESSERTS

FINISHED ITEMS 123
Popcorn Sherbet with Caramel Popcorn and Caramel Sauce YIELD 10 PORTIONS
COMPONENTS
100 g / 3.53 oz CARAMEL SAUCE
200 g / 7.05 oz CARAMEL POPCORN
300 g / 10.58 oz POPCORN SHERBET (page 397)
ASSEMBLY
1. Spoon a small amount of caramel sauce (about the size of a dime) on the plate.
2. Anchor 7 or 8 pieces of caramel popcorn to the plate with the caramel. Place 2 or 3 more pieces of caramel popcorn
around the plate (a total of approximately 20 g / .71 oz popcorn per plate).
3. Spoon about 10 g / .35 oz of caramel sauce onto the plate, next to the popcorn.
4. Scoop a large quenelle (90 g / 3.17 oz) of the sherbet on top of the anchored caramel popcorn.
5. Serve immediately.
Caramel Sauce YIELD 500 G / 1 LB 1.64 OZ
270 g / 9.52 oz sugar
140 g / 4.94 oz heavy cream
90 g / 3.17 oz diced salted butter
1. Place the sugar in a medium pot with about one-quarter of its weight in water or enough to obtain a
wet-sand texture. Make sure there are no sugar crystals along the inside of the pot and that all the sugar
has been hydrated.
2. Bring to a boil over high heat. A good tip to further prevent crystallization is to cover the pot with plastic
wrap; the steam that is generated will keep the sides of the pot clean of any sugar crystals.
3. While the sugar cooks, bring the heavy cream to a simmer.
4. Once the sugar reaches a dark amber color (170°C / 338°F), stir in the butter and turn off the heat.
5. Slowly whisk in the hot cream; it is a very violent reaction when the cream hits the sugar, so be careful to
add it slowly and use a long whisk.
6. Pour the caramel into an adequately sized container and let the contents cool before serving. Reserve
at room temperature during service; caramel has a long shelf life, but it can crystallize over prolonged
periods of time. (If refrigerated, it will get too hard to portion.)

124 FROZEN DESSERTS
Caramel Popcorn YIELD 600 G / 1 LB 5.15 OZ
400 g / 14.1 oz popping corn
10 g / .35 oz canola oil
600 g / 1 lb 5.16 oz sugar
2 g / .07 oz salt
10 g / .35 oz lemon juice
1. Line a full-size sheet pan with parchment paper. Place a wire cooling rack over the sheet pan and spray it
with nonstick oil spray. Place the sheet pan near a marble surface. Have 3 pairs of latex gloves available.
2. Pop the corn in a large pot with the canola oil. Once it is all popped, reserve at room temperature.
Continue with the recipe the day it is popped to ensure freshness.
3. In the meantime, place the sugar and the salt in a saucepan with about one-quarter of its weight in water
or enough to obtain a wet-sand texture. Add the lemon juice to prevent crystallization. Make sure there are
no sugar crystals along the inside of the pot and that all the sugar has been hydrated.
4. Cook the sugar over high heat until it reaches 170°C / 338°F. Turn the heat off and gently stir in the popped
corn. Make sure all of the popcorn is coated with sugar, then pour it over the greased wire rack.
5. Put on the 3 pairs of gloves and spray nonstick cooking spray on them. Working very quickly, separate
the popcorn clusters into individual pieces and immediately place them on the marble once they are
separated to cool quickly.
6. Once they have cooled, reserve them in an airtight container at room temperature. As long as they are
kept in a cool, dry place, they will last for up to 10 days.
NOTE Be careful when making this recipe in hot or humid conditions.

FINISHED ITEMS 125
Clotted Cream Ice Cream Sandwiches with Chocolate Shortbread YIELD 10 PORTIONS
COMPONENTS
400 g / 14.1 oz CLOTTED CREAM ICE CREAM BASE (page 352)
20 CHOCOLATE SHORTBREAD COOKIES
ASSEMBLY
1. Line a half sheet pan with a nonstick rubber mat. Place a 25 cm / 10 in by 38 cm / 15 in by 1.75 cm / .68 in frame
inside the sheet pan and place the sheet pan in the freezer.
2. Pacotize 2 beakers of the ice cream. Transfer the ice cream to the prepared frozen frame and spread out evenly using
an offset spatula.
3. Harden in a freezer. Depending on the freezer, it can take as little as 30 minutes, but more time should be allowed if
the freezer has a weak compressor.
4. Line another half sheet pan with a nonstick rubber mat and freeze.
5. Once the ice cream has hardened, fl ip the ice cream onto another nonstick rubber mat, place it back on the
frozen sheet pan, and peel off the top nonstick rubber mat. Cut the ice cream into circles using a 7.5-cm / 3-in
round cutter, dipping the cutter in warm (not hot) water each time to get a clean cut.
6. Once the ice cream is cut, lift each ice cream disk using a small offset spatula and transfer to the second frozen
nonstick rubber mat–lined sheet pan. If the uncut ice cream starts getting too soft, return it to the freezer. The
ice cream is directly exposed to the freezer ventilation, which might cause excessive hardening and ice crystal
formation, so don’t let it sit in this condition for too long.
7. Once all the ice cream is cut and hardening in the freezer, place half the cookies on a sheet pan lined with
parchment paper, with the rough side (the bottoms of the cookies) facing up. Transfer the ice cream disks to the top
of the cookies, then top them with the other half of the cookies, smooth side up.
8. Return to the freezer to harden, then place them in an airtight container rather than on a sheet wrapped in plastic.
This method of storage is more effi cient for service.
9. Temper the cookies for 4 or 5 minutes before serving so they won’t be too hard to eat. Try wrapping the cookies
with colored confection foil to make them even more special. If they are wrapped in different colors, it will be
visually astounding.

126 FROZEN DESSERTS
Chocolate Shortbread YIELD 1 KG / 2 LB 3.27 OZ (ABOUT TWENTY 7.5-CM / 3-IN COOKIES)
361 g / 12.73 oz butter, soft
213 g / 7.5 oz sugar
331 g / 11.69 oz fl our
92 g / 3.25 oz cocoa powder
2 g / .07 oz baking powder
1 g / .04 oz salt
1. Cream the butter and sugar in the bowl of an electric mixer using the paddle attachment until light and
fl uffy, 3 to 4 minutes.
2. Sift the dry ingredients as the butter is being creamed. Add to the creamed butter and mix until just
combined (the mixture will form a ball). Shape into a fl at, round disk, wrap, and refrigerate for 45 minutes.
3. Preheat a convection oven to 160°C / 325°F.
4. Roll out the dough to a thickness of 6 mm / .23 in. Cut into 7.5-cm / 3-in circles with a round cutter, dock
with a fork in 3 separate areas, preferably in a symmetrical pattern, and place the cookies on a sheet pan
lined with parchment paper. Freeze for 10 minutes.
5. Bake for 7 to 8 minutes. It is hard to tell when a dark-colored cookie is fi nished. For this cookie, the best
way to tell is if there are no “wet spots” on its surface, meaning it should look completely dry.
6. Carefully transfer the cookies to a cooling rack.
7. Once cooled, reserve in an airtight container at room temperature for up to 2 days. Longer than that, the
cookies will soften.

FINISHED ITEMS 127
Matcha Sorbet with Toasted Black Sesame Cigars YIELD 10 PORTIONS
COMPONENTS
10 g / .35 oz toasted black sesame seeds
300 g / 10.58 oz MATCHA SORBET (page 378)
10 TOASTED BLACK SESAME CIGARS
ASSEMBLY
1. Place a small amount of toasted sesame seeds on the desired plate to keep the sorbet anchored.
2. Scoop a medium quenelle (30 g / 1.06 oz) of the sorbet directly on top of the sesame seeds.
3. Lean a cigar on the quenelle diagonally.
4. Serve immediately.
NOTE Matcha has a very particular herbal/grassy taste and does not appeal to everyone. It tastes like green tea (which is
what it is made from), but much, much stronger.
Toasted Black Sesame Cigars YIELD 1 KG / 2 LB 3.27 OZ (WITHOUT SESAME SEEDS) (ABOUT 50 CIGARS)
177 g / 6.24 oz butter, soft
354 g / 12.49 oz confectioners’ sugar
267 g / 9.42 oz egg whites (at room temperature)
202 g / 7.13 oz cake fl our
10 g / .35 oz black sesame seeds, or as needed
1. Preheat an oven to 170°C / 338°F.
2. Cream the butter and sugar in a mixer fi tted with the paddle attachment until creamed (light and fl uffy),
about 2 minutes.
3. Add the egg whites slowly and mix until fully incorporated into a homogenous mass.
4. Add the fl our on low speed until just incorporated.
5. Spread about 20 g / .71 oz of batter onto a full sheet pan–sized nonstick rubber mat using a 10-cm / 4-in square
stencil and small offset spatula. Repeat until the nonstick rubber mat is fi lled with squares (about 12 squares per
mat), leaving 2.5 cm / 1 in between each square. Sprinkle sesame seeds evenly on each square’s surface.
6. Bake until golden brown, about 6 minutes. Shape around a tube 2.5 cm / 1 in in diameter while hot. If the
tuiles cool off and become too fi rm to shape around the tube, return the sheet pan with the tuiles to the
oven to soften them. Repeat with the remaining batter until the desired number of tuiles is obtained.
7. Reserve in an airtight container for up to 2 days.
NOTE It is crucial that the butter and egg whites be at room temperature so that the ingredients will mix evenly.
Otherwise, the mixture will break.

128 FROZEN DESSERTS
From top to bottom: lemon, grapefruit, kumquat, blood orange

FINISHED ITEMS 129
Assorted Citrus Sorbet Sandwiches YIELD 12 PORTIONS
COMPONENTS
480 g / 1 lb 1.12 oz BLOOD ORANGE SORBET BASE (page 391)
480 g / 1 lb 1.12 oz KUMQUAT SORBET BASE (page 379)
480 g / 1 lb 1.12 oz LEMON SORBET BASE (page 391)
480 g / 1 lb 1.12 oz GRAPEFRUIT SORBET BASE (page 391)
48 VANILLA SHORTBREAD COOKIES
30 g / 1.06 oz CANDIED BLOOD ORANGE ZEST
30 g / 1.06 oz CANDIED KUMQUAT ZEST
30 g / 1.06 oz CANDIED LEMON ZEST
30 g / 1.06 oz CANDIED GRAPEFRUIT ZEST
ASSEMBLY
1. Before churning each sorbet base, line 1 sheet pan with a nonstick rubber mat and a 40 cm / 15.75 in by 60 cm /
23.62 in by 2.5 cm / 1 in stainless steel or Plexiglas frame and line another sheet pan with a nonstick rubber mat.
Place both sheet pans in the freezer. Make a total of 4 of these set-ups (1 for each sorbet).
2. Churn each sorbet. The frame will hold a little over 2 L / 2 qt of liquid, but don’t forget to take overrun into account.
In this case there should be an overrun of 50 percent.
3. Once the sorbets are churned, pour them into the frozen pans. Using an offset spatula, spread the sorbet evenly
so that it fi ts exactly into the frame, and remove any excess. Work quickly to avoid any melting. Place the sorbets
back in the freezer.
4. Once the sorbets have hardened, use a 5-cm / 2-in square cutter to cut out sorbet squares. Dip the cutter into room
temperature water each time in order to get a clean cut.
5. Place the cut-out squares of sorbet on the other frozen sheet pans. Let them harden again before they are assembled
with the shortbread cookies.
6. Place half of the shortbread cookies on a parchment-lined sheet pan.
7. Place a sorbet square on each of the shortbread cookies, making sure it is centered.
8. Place a second shortbread cookie square on top of the sorbet square and push gently so that all three components
adhere together.
9. Freeze for 30 minutes, then wrap in colored confection foil, leaving one of the sides exposed. Reserve frozen. Store
the ice cream sandwiches in an airtight container rather than on a sheet pan wrapped in plastic. This method of
storage is more effi cient for service.
10. To serve, place one of each fl avor of the sandwiches (4 total per portion) on the desired vessel, with the exposed side
facing up. Carefully place a small amount (approximately 2.5 g / .09 oz) of the candied zest on top of each sandwich.
Make sure the zest corresponds to the sorbet fl avor.
11. These sorbets might be too hard to eat directly from the freezer. Temper them for 4 to 5 minutes before serving.
12. For a dramatic presentation, all of the sandwiches can be placed in a simple silver box with a lid, then set at the
center of the table. When the lid is removed, the sandwiches are revealed. Another presentation idea is to use
a large silver bowl fi lled with crushed ice, into which the sandwiches can be randomly placed. The bowl can be
set at the middle of the table. This will also work for individual portions, where all 4 sandwiches (or any other
amount) can be placed in small bowls fi lled with crushed ice.

130 FROZEN DESSERTS
Vanilla Shortbread YIELD 1 KG / 2 LB 3.27 OZ (ABOUT FIFTY 5 CM / 2 IN SQUARES
148 g / 5.22 oz cake fl our
165 g / 5.82 oz confectioners’ sugar
295 g / 10.41 oz all-purpose fl our
6 g / .21 oz salt
1 vanilla pod, split and scraped
387 g / 13.65 oz butter
1. Sift all of the dry ingredients and place in a 12-qt mixing bowl with the vanilla pod seeds.
2. Place the butter on top of the dry ingredients and insert the paddle attachment.
3. Turn the mixer on to low speed and mix until just combined. It should be a homogenous mass. It is a
good idea to scrape the sides of the bowl and mix for a few more seconds to ensure an even mixture of
ingredients. Be careful not to overmix the dough.
4. Place the shortbread dough onto a parchment-lined sheet pan and shape into a square with your hands.
Cover completely with plastic wrap and refrigerate for at least 2 hours.
5. Preheat a convection oven to 160°C / 325°F.
6. Roll out the dough to 3 mm / .11 in thick. Score the dough with a fork and freeze for 30 minutes.
7. Bake the shortbread as a full sheet until golden brown around the borders, 6 to 8 minutes. Once it is
baked, cut the dough into 5-cm / 2-in squares while it is still warm to get the cleanest cut.
8. Once the squares are cut, let the cookies cool. Transfer to an airtight container. Reserve in a cool, dry place
for up to 48 hours.
Candied Citrus Zest YIELD APPROXIMATELY 50 G / 1.76 OZ
33 g / 1.18 oz citrus peel
67 g / 2.35 oz simple syrup (50° Brix)
1. If the pith on the citrus peel is too thick, cut it off and discard. (For kumquats, cut the bottom part that
held the stem off, then cut them in quarters and remove the seeds.)
2. Stack 5 pieces of citrus peel with the pith facing up and cut into a fi ne chiffonade (except kumquats).
3. Blanch the chiffonade (or quartered kumquats) 3 times in water, changing the water each time. This is to
eliminate the bitter fl avor of the skin. Blanch the grapefruit peel 5 times.
4. Place the blanched zest (or quartered kumquats) in a pot with the simple syrup.
5. Cook over medium-low heat until the zest is translucent.
6. Strain the zest out of the simple syrup and let it cool on a plastic wrap–lined sheet pan, refrigerated. Act
quickly and make sure to refrigerate the zest, otherwise the sugar might crystallize.
7. Once cool, reserve in an airtight container in the refrigerator.

FINISHED ITEMS 131
Mimosa Popsicles, Gewürztraminer-Tamarind,Pinot Grigio, Asti Spumanti, and Apricot Ice Pops YIELD 10 PORTIONS PER TYPE OF POP
COMPONENTS
10 MIMOSA ICE POPS (page 401)
10 GEWÜRZTRAMINER-TAMARIND ICE POPS (page 402)
10 PINOT GRIGIO ICE POPS (page 402)
10 ASTI SPUMANTI AND APRICOT ICE POPS (page 402)
ASSEMBLY
1. Store the pops in an airtight container rather than on a sheet pan wrapped in plastic. This method of storage is
more effi cient for service.
2. Temper the pops for 4 to 5 minutes before serving so they won’t be too hard to eat. If possible, serve the pops in a
standing position. Any vessel with perforations big enough to hold the sticks snugly and securely so they won’t tilt
or move around but also won’t be diffi cult to pick up out of the vessel will make for a beautiful presentation. Silver,
Plexiglas, and even a fi ne wood surface are good materials to use. The pops can also be wrapped in confection foil of
any color, which will enhance the already intriguing dessert. If serving different fl avors of popsicles, wrap each fl avor
in a different color.
From left to right, Pinot Grigio, Gewürztraminer-tamarind, Asti Spumanti and apricot, and mimosa

132 FROZEN DESSERTS

FINISHED ITEMS 133
Lemon Verbena Sorbet with Peach Jam, Lemon Chips, and Mini Savarins Soaked in Lillet Blanc YIELD 10 PORTIONS
COMPONENTS
10 MINI SAVARINS SOAKED IN LILLET BLANC
300 g / 10.58 oz LILLET BLANC SOAKING SYRUP
150 g / 5.29 oz PEACH JAM
300 g / 10.58 g LEMON VERBENA SORBET (page 381)
10 LEMON CHIPS
ASSEMBLY
1. Just as service begins, place the container with the soaked savarins close to a heat source, such as an oven or
fl attop, to keep them warm. Keep a pot with the Lillet Blanc syrup over low heat during service. Keep it covered so
that it doesn’t evaporate and reduce.
2. Spoon a small amount (approximately 15 g / .53 oz) of peach jam on the desired plate.
3. Re-soak one of the soaked savarins in the hot Lillet syrup for 20 seconds. Let any excess syrup drip off, and place it
on the plate.
4. Scoop a medium quenelle (30 g / 1.06 oz) of the sorbet on top of the peach jam.
5. Garnish the soaked savarin with a lemon chip. Serve immediately.
Mini Savarins Soaked in Lillet Blanc YIELD ABOUT 15 SOAKED MINI SAVARINS
LILLET BLANC SOAKING SYRUP
625 g / 1 lb 6.05 oz sugar
375 g / 13.23 oz water
Zest of 1 orange
Zest of 1 lemon
150 g / 5.29 oz Lillet Blanc, or as needed
POACHED BLACK CURRANTS (PART OF THE SAVARIN)
500 g / 1 lb 1.64 oz water
500 g / 1 lb 1.64 oz sugar
Zest of 1 orange
4 cinnamon sticks
3 cloves
200 g / 7.05 oz dried black currants

134 FROZEN DESSERTS
SAVARINS
75 g / 2.65 oz eggs, at room temperature
221 g / 7.8 oz milk, warmed to 21°C / 70°F
291 g / 10.26 oz bread fl our
125 g / 4.41 oz cake fl our
6 g / .21 oz instant dry yeast
42 g / 1.48 oz sugar
8 g / .28 oz salt
150 g / 5.29 oz diced butter, soft
83 g / 2.92 oz poached black currants
1. FOR THE SOAKING SYRUP: Bring the sugar, water, and orange and lemon zest to a boil to dissolve the sugar.
Add Lillet Blanc to taste. Reserve warm if using immediately; otherwise it can be kept at room temperature
in an airtight container.
2. FOR THE POACHED BLACK CURRANTS: Bring the water, sugar, zest, cinnamon, and cloves to a boil. Reduce the
heat and poach the currants to soften them, about 5 minutes. Reserve until needed in the poaching liquid.
3. Spray twenty 60-g/2.11-oz aluminum cups with nonstick cooking spray and place them on a sheet pan.
4. FOR THE SAVARIN DOUGH: Mix the dough using the straight dough method: Place the eggs and milk in the
bowl of an electric mixer fi rst, then all of the dry ingredients (fl ours, yeast, sugar, and salt), and then the
butter on top; mix on medium speed using a dough hook until it has formed a homogenous mass, about
4 minutes. Drain 83 g / 2.92 oz of the poached currants and add to the dough, mixing them in with the
dough hook for fi ve seconds on low speed. The dough will be somewhat loose (almost like a batter); pour
it into a piping bag to portion.
5. Portion the dough into 20 g / .71 oz pieces by piping the dough directly into the cups.
6. Let the savarins proof until they have nearly doubled in size; place the sheet pan with the savarins inside
a large plastic bag to retain moisture and speed up proofi ng time. This will take from 30 to 60 minutes at
room temperature.
7. Preheat a convection oven to 190°C / 375°F.
8. Heat up the soaking syrup to a light simmer (do not boil).
9. Bake the savarins until golden brown, about 10 minutes. Remove from the molds while they are hot and
soak them in the hot soaking syrup until they are soaked through, about 1 minute. Take them out of the
syrup; if they soak too long they will turn to mush.
10. Reserve in an airtight container at room temperature. Savarins should be made fresh every day, because
they go from being a pleasantly moist sponge to a wet soggy one after 12 hours.

FINISHED ITEMS 135
Peach Jam YIELD 1 KG / 2 LB 3.27 OZ
1.75 kg / 3 lb 13.73 oz peaches
500 g / 1 lb 1.64 oz sugar
2.5 g / .09 oz pectin
10 g / .35 oz lemon juice
1. In a large pot, combine the peaches with 475 g / 16.76 oz of sugar. Combine the remaining sugar with the
pectin and set aside.
2. Cook the peaches over medium-high heat until the fl esh is tender and the pits and skin come off easily,
about 45 minutes. Pour in the sugar-pectin mix while stirring constantly, then stir in the lemon juice and
cook for 5 more minutes, or until the jam has visibly thickened.
3. Let the jam cool, then pass it through a drum sieve. Reserve refrigerated for up to 1 month.
NOTE Spices can be added to the peach jam while it is cooking, such as split and scraped vanilla pods and cinnamon.
Lemon Chips YIELD 500 G / 1 LB 1.64 OZ
500 g / 1 lb 1.64 oz lemons
1 kg / 2 lb 3.27 oz simple syrup (50° Brix)
1. Freeze the lemons until hardened.
2. Fill a saucepan two-thirds full with water and bring to a simmer.
3. Bring the simple syrup to a gentle simmer.
4. Slice the lemons very thinly with an electric slicer. Blanch in the hot water until translucent, about 10
minutes. Remove from the pot with a spider and blanch once more in fresh water for ten minutes.
5. Place the slices in a single layer in a hotel pan. Pour the simple syrup over the lemon slices so that they are
generously coated. Let them sit in the syrup for at least 1 hour and up to 1 week.
6. Remove each slice from the syrup, letting any excess drip off of it, and then place them all in a dehydrator
at 57°C / 135°F until dry and crisp. They can also be dried in a convection oven on a nonstick rubber mat at
the same temperature with the vent open.
7. Carefully lift the slices from the nonstick rubber mat with a rubber spatula and let them cool and harden.
8. Store at room temperature in an airtight container. Use silica gel packs to absorb any moisture from their
environment in order to prevent them from softening. In dry conditions, they can last up to 1 month.
NOTE Some lemon slices will not be whole or will have some damage. Discard them and use only the whole ones for
plating.

136 FROZEN DESSERTS

FINISHED ITEMS 137
Mascarpone Ice Cream with Passion Fruit Curd YIELD 10 PORTIONS
COMPONENTS
500 g / 1 lb 1.64 oz MASCARPONE ICE CREAM BASE (page 353)
10 PASSION FRUIT CURD STRIPS (each portion is 50 g / 1.76 oz)
SEEDS OF 5 PASSION FRUITS (about 50 g / 1.76 oz)
ASSEMBLY
1. Place a sheet of fl eximold demi-spheres 3.5 cm / 1.38 in in diameter on a sheet pan in the freezer.
2. Pacotize or churn the ice cream, transfer to a piping bag, and pipe into the demi-sphere molds. Place in the freezer
to harden.
3. Once hardened, put on gloves and fuse 2 demi-spheres to form a sphere, gently rubbing the seam with your fi ngers
until the halves have fused. Cover and reserve frozen. Do not use after 24 hours.
4. Take a passion fruit curd strip out of the freezer and let it warm up slightly at room temperature (enough to twist it
without cracking it), then twist it so it forms a loop. Place on the desired plate.
5. Place a spoonful of the passion fruit seeds on the plate in a straight line about 10 cm / 4 in long across the front of
the curd loop.
6. Place a sphere of ice cream on the plate next to the curd loop. Use a small piece of the gelled curd to anchor down
the sphere. Let it temper for 3 to 4 minutes, and serve.
NOTE If desired, garnish the top of the mascarpone ice cream with 2 strands of mint or basil chiffonade.
Passion Fruit Curd YIELD 1 KG / 2 LB 3.27 OZ
149 g / 5.26 oz passion fruit purée
15 g / .53 oz lemon juice
198 g / 6.98 oz eggs
188 g / 6.63 oz sugar
450 g / 15.87 oz diced butter
20 g / .71 oz gelatin sheets, bloomed in ice cold water
1. Line a half sheet pan with a nonstick rubber mat. Place a 25 cm / 10 in by 38 cm / 15 in by 6-mm / .25-in
frame inside the sheet pan. The frame should be big enough to fi t just inside the sheet pan.
2. Bring the passion fruit purée and lemon juice to a boil. Whisk together the eggs and sugar. Pour the purée
and juice over the eggs and sugar while whisking constantly.

138 FROZEN DESSERTS
3. Cook the mixture over a hot water bath until thickened, stirring with a whisk occasionally. Add the diced
butter and stir until combined. Pass through a fi ne-mesh strainer and add the bloomed gelatin sheets,
stirring until completely dissolved. Pour into the prepared frame, evening out the surface with an offset
spatula so that the curd is at the same level as the top of the frame. Place an acetate sheet on top of the
curd and freeze.
4. Once frozen, remove the acetate sheet and cut into rectangles 1.75 cm / .68 in by 12.5 cm / 5 in using a
thin slicing knife. Reserve frozen.
NOTE If the passion fruit purée is concentrated, use 1 part orange juice to 1 part passion fruit concentrate for the total
amount of required purée.
Passion Fruit Seeds YIELD 50 G / 1.76 OZ
5 passion fruits
1. Cut each passion fruit in half and pour the fruit’s contents into a strainer.
2. Reserve the seeds in the refrigerator for up to 3 days.
3. Reserve the juice in the refrigerator for making sorbet.
NOTE Passion fruit has reached its peak ripeness when the skin is wrinkled.
Pomegranate Sorbet YIELD 10 PORTIONS
COMPONENTS
600 g / 1 lb 5.16 oz POMEGRANATE SORBET (page 393)
200 g / 7.05 oz pomegranate seeds
ASSEMBLY
1. Place two 30-g/1.06-oz scoops of pomegranate sorbet into the desired glass.
2. Sprinkle 20 g / .71 oz pomegranate seeds on top of the sorbet and serve immediately.

FINISHED ITEMS 139
Cava Sorbet with Poached Apricots YIELD 10 PORTIONS
COMPONENTS
25 POACHED APRICOT HALVES
600 g / 1 lb 5.15 oz CAVA SORBET (page 380)
1 sheet gold leaf
ASSEMBLY
1. Cut the apricot halves in half to obtain quarters.
2. Scoop 60 g / 2.11 oz of cava sorbet into the desired glass vessel.
3. Arrange 5 apricot quarters on top of the cava sorbet.
4. Garnish with small pieces of gold leaf.
Poached Apricots YIELD 100 G / 3.53 OZ
120 g / 4.23 oz Sauternes (or cava; if using cava, add 120 g / 4.23 oz sugar)
4 g / .14 oz orange zest
¹⁄³ cinnamon stick
100 g / 3.53 oz dried apricot halves
1. Bring the Sauternes, orange zest, and cinnamon to a simmer. Add the apricots and slowly poach until they
are tender, but not falling apart, about 20 minutes.
2. Leave the apricots in the poaching liquid and reserve them at room temperature for up to 3 days. If
refrigerated, they will keep for 5 days.

140 FROZEN DESSERTS

FINISHED ITEMS 141
Lime Granité with Mint Gelée YIELD 10 PORTIONS
COMPONENTS
10 MINT GELÉE RECTANGLES (each portion is 7 g / .24 oz)
10 g / .35 oz LIME ZEST POWDER
500 g / 1 lb 1.64 oz LIME GRANITÉ (page 399)
10 mint leaves, cut into fi ne chiffonade
ASSEMBLY
1. Place a mint gelée rectangle on the desired plate, using a small offset spatula to move it from the sheet pan to
the plate.
2. Sprinkle 1 g / .04 oz of the lime zest powder in a line on top of the mint jelly and slightly onto the plate.
3. Spoon 50 g / 1.76 oz of the granité carefully behind the jelly.
4. Place 5 to 7 very fi ne strands of mint chiffonade on top of the lime granité and serve immediately.
Mint Gelée YIELD 125 G / 4.41 OZ (ABOUT 17 RECTANGLES)
BLANCHED MINT
500 g / 1 lb 1.64 oz water
1 g / .04 oz ascorbic acid
50 g / 1.76 oz mint leaves
MINT JELLY
24 g / .85 oz blanched mint
98 g / 3.46 oz water
1 g / .04 oz ascorbic acid
Pinch salt
1.5 g / .05 oz sugar, as needed
4 g / .14 oz agar-agar
1. FOR THE BLANCHED MINT: Bring the water and ascorbic acid to a boil. Blanch the mint for 5 to 8 seconds,
until wilted. Make sure that the mint does not lose its color. Shock the mint in ice water and drain.
2. FOR THE MINT JELLY: Purée the blanched mint, water, ascorbic acid, and salt until smooth, and strain. Add
sugar to taste (it should be very mildly sweet) and stir until the sugar is dissolved.
3. Line a half sheet pan with a non-stick rubber mat. Place a 25 cm / 10 in by 38 cm / 15 in by 1 cm / .39 in
Plexiglas or stainless steel plaque inside the sheet pan.
4. Boil 250 g / 8.82 oz of the mint mixture with the agar-agar over medium heat for 10 seconds. Combine the
rest of the mint mixture off the heat and pour the liquid into the frame immediately. If the mint mixture
sits in the hot pot for too long, it will turn brown. Refrigerate until set, about 20 minutes.

142 FROZEN DESSERTS
5. Cut into rectangles .75 cm / .29 in by 2.5 cm / 1 in using a metallic cutter or knife. Each rectangle will weigh
about 7 g / .25 oz. Slightly separate the jelly rectangles from one another and reserve on the nonstick
rubber mat in the refrigerator, covered with plastic wrap.
Lime Zest Powder YIELD 100 G / 3.53 OZ
200 g / 7.05 oz lime zest
1. Microwave the zest in a microwave-safe container (preferably fl at so that the moisture can evaporate
quickly) at 10-second intervals until dry. Be sure to periodically stir the zest so that it dries evenly. When
dry, let cool to room temperature.
2. Grind in a spice grinder.
3. Store at room temperature in an airtight container. If it is completely dry and well covered, it can last up to
1 month.
NOTE Zest the limes using a rasp. If possible, use a porcelain plate for microwaving.
Cabrales Cheese Ice Cream with Sticky Date Pudding YIELD 10 PORTIONS
COMPONENTS
10 STICKY DATE PUDDING RECTANGLES (each portion is 50 g / 1.76 oz)
300 g /10.58 oz CABRALES CHEESE ICE CREAM (page 353)
ASSEMBLY
1. Place 50 g / 1.76 oz of the sticky date pudding at the center of the desired plate.
2. Scoop a medium quenelle (30 g / 1.06 oz) of the ice cream directly on top of the pudding and serve immediately.
These fl avors are so clear and unique that they should be left on their own to be fully appreciated.

FINISHED ITEMS 143
Sticky Date Pudding YIELD 2 KG / 4 LB 6.54 OZ
633 g / 1 lb 6.33 oz water
348 g / 12.27 oz pitted dates
11 g / .39 oz baking soda
363 g / 12.8 oz all-purpose fl our
3 g / .11 oz baking powder
2 g / .07 oz ground ginger
4 g / .14 oz salt
119 g / 4.2 oz butter
280 g / 9.88 oz sugar
237 g / 8.36 oz eggs, at room temperature
1. Preheat a convection oven to 160°C / 325°F. Line a half sheet pan with a nonstick rubber mat and spray
the borders with nonstick cooking spray.
2. Bring the water and dates to a boil. Reduce the heat to a simmer and cook for 5 minutes. Remove from
the heat and whisk in the baking soda (the mixture will foam). Let steep for at least 20 minutes, then
purée with a beurre mixer.
3. Sift together the fl our, baking powder, ginger, and salt.
4. Cream the butter and sugar in a mixer using a paddle attachment until the butter is creamed (light and
fl uffy), about 4 minutes. While the machine is running on low speed, gradually add the eggs, one at a
time. Scrape the sides of the bowl after each addition.
5. While the machine is still on, add the dry ingredients in several additions and then the dates. Make sure to
occasionally scrape down the sides of the bowl.
6. Spread evenly onto the prepared sheet pan.
7. Bake until the cake springs back to the touch at the center of the pan, about 7 minutes.
8. Let cool to room temperature.
9. Once the cake has cooled, freeze it for 2 hours before cutting it. It cuts very cleanly when it is partially frozen.
10. Cut into rectangles 2.5cm / 1 in by 12.5 cm / 5 in by 2.5 cm / 1 in.
11. Reserve in an airtight container at room temperature. Discard after service.

144 FROZEN DESSERTS
Balsamic Vinegar Ice Cream with Goat Cheese Bavarian, Balsamic Croquant, Walnut Cake, and Candied Walnuts YIELD 10 PORTIONS
COMPONENTS
10 WALNUT CAKE RECTANGLES
10 CANDIED WALNUTS
10 GOAT CHEESE BAVARIANS
50 g / 1.76 oz BALSAMIC GLAZE
10 pieces BALSAMIC CROQUANT
300 g / 10.58 oz BALSAMIC VINEGAR ICE CREAM (page 354)
ASSEMBLY
1. Stand the walnut cake up on the desired plate.
2. Place a candied walnut on top of the cake.
3. Place 1 piece of the Bavarian diagonally in front of the cake.
4. Drizzle 5 g / .18 oz of the balsamic glaze in a thin straight line across the top of the Bavarian.
5. Place a balsamic croquant piece behind the Bavarian, next to the walnut cake.
6. Scoop a medium quenelle (30 g / 1.06 oz) of the ice cream on top of the croquant and serve immediately.

FINISHED ITEMS 145
Walnut Cake YIELD 2.5 KG / 5 LB 8.18 OZ (ABOUT 40 PORTIONS PER HALF SHEET PAN)
495 g / 1 lb 1.46 oz cake fl our
15 g / .53 oz baking powder
10 g / .35 oz salt
495 g / 1 lb 1.46 oz eggs
495 g / 1 lb 1.46 oz walnut paste (85% walnuts)
495 g / 1 lb 1.46 oz butter, soft
495 g / 1 lb 1.46 oz sugar
1. Preheat a convection oven to 160°C / 325°F.
2. Grease a half sheet pan and line with parchment paper or a nonstick rubber mat (if using a nonstick
rubber mat, grease only the frame of the sheet pan).
3. Sift the fl our, baking powder, and salt together twice.
4. Warm the eggs to 27°C / 80°F over a hot water bath, whisking constantly. Reserve warm.
5. Combine the walnut paste, butter, and sugar in a 12-qt mixer bowl fi tted with the paddle attachment and
mix on medium speed until creamed, about 7 minutes. Scrape down the sides of the bowl often.
6. Slowly pour in the warm eggs in 4 additions to ensure a proper emulsion. Scrape down the sides of the
bowl after each addition of eggs.
7. Turn the mixer off. Add the dry ingredients all at once and mix on low speed until just combined. Scrape
the sides of the bowl as well the bottom and mix on low speed for a few more seconds.
8. Spread the batter evenly in the prepared sheet pan.
9. Bake until the batter is cooked through, golden brown, and springs back when pressure is applied, about
15 minutes. Always test the center of the pan, where it will take the longest to bake. Let cool to room
temperature.
10. Before cutting the cake, freeze it for 45 minutes to 1 hour. It cuts very cleanly when it is partially frozen.
11. Cut the cake into rectangles 2.5 cm / 1 in by 5 cm / 2 in by 2.5 cm / 1 in.
12. Reserve in an airtight container at room temperature. Discard after service.
Goat Cheese Bavarians YIELD 500 G / 1 LB 1.64 OZ (ABOUT 20 PORTIONS)
GOAT CHEESE ANGLAISE
171 g / 6.03 oz milk
171 g / 6.03 oz soft goat’s milk cheese
86 g / 3.03 oz sugar
72 g / 2.54 oz egg yolks
146 FROZEN DESSERTS
BAVARIAN
247 g / 8.71 oz heavy cream
247 g / 8.71 oz goat cheese anglaise
6 g / .21 oz gelatin sheets, bloomed
1. FOR THE ANGLAISE: Combine all of the ingredients in a saucepan. Over medium heat, bring the mixture up to
80°C / 175°F while whisking constantly. Strain through a fi ne-mesh strainer and cool over an ice bath.
2. FOR THE BAVARIAN: Whip the heavy cream to medium-stiff peaks and reserve refrigerated.
3. Combine 250 g / 8.82 oz of the anglaise with the bloomed gelatin in a small saucepan and melt over
medium-low heat. Combine with the remaining anglaise.
4. Quickly fold the heavy cream into the base in 2 additions. If this is not done quickly, the gelatin will set and
there will be chunks in the product.
5. Portion into a rectangular fl eximold with 12 rectangles, each measuring 3 cm / 1.25 in by 8 cm / 3.25 in by 3
cm / 1.25 in. Place in the freezer to harden.
6. Once hardened, take the Bavarians out of the mold, cut each piece in half, and refrigerate.
Candied Walnuts YIELD 600 G / 1 LB 5.15 OZ
1 kg / 2 lb 3.27 oz sugar
10 g / .35 oz lemon juice
500 g / 1 lb 1.64 oz walnuts
1. Line a full-size sheet pan with parchment paper. Place a wire cooling rack over the sheet pan and spray
it with nonstick cooking spray. Place the sheet pan next to a marble surface. Have 3 pairs of latex gloves
available.
2. Place the sugar in a saucepan with about one-quarter of its weight in water or enough to obtain a wet-sand
texture. Add the lemon juice to prevent crystallization. Make sure there are no sugar crystals along the
inside of the pot and that all the sugar has been hydrated. Begin cooking the sugar over high heat.
3. Meanwhile, toast the nuts until they have a toasted aroma and a light brown color. If the sugar has not
caramelized by this point, keep the nuts hot until it does. If desired, keep them in the oven, but turn it off
and open the oven door slightly. If cold nuts are added to the sugar, it will crystallize.
4. Continue to cook the sugar until it reaches 170°C / 338°F. Turn the heat down to low and stir in the toasted
nuts. Make sure all the nuts are coated in sugar, and continue to stir until you start hearing a popping
sound, after about 2 minutes, then pour the contents of the pot over the greased wire rack.
5. Put on the 3 pairs of gloves and spray nonstick cooking spray on them. Working very quickly, separate the
nuts from each other and immediately place them on the marble to cool quickly.
6. Once they have cooled, reserve them in an airtight container at room temperature. Use silica gel packs to
absorb any moisture in the container. If properly stored, they can keep for up to 1 week.
NOTE Be careful when making this recipe in humid conditions. The sugar-coated walnuts can get tacky.

FINISHED ITEMS 147
Balsamic Glaze YIELD 250 G / 8.82 OZ
1 kg / 2 lb 3.27 oz balsamic vinegar
375 g / 13.22 oz sugar
1. Combine both ingredients in a saucepan.
2. Cook over medium-high heat until the liquid thickens to a glaze consistency, skimming the liquid as it
cooks. The best way to check for doneness is to spoon a small amount onto a plate and let it cool off. Pass
your fi nger through it; if it holds the trace of your fi nger, it is ready to come off the heat.
3. Reserve, covered, at room temperature.
Balsamic Croquant YIELD 550 G / 1 LB 3.4 OZ (ABOUT 50 PIECES)
500 g / 1 lb 1.64 oz isomalt
10 g / .35 oz water
50 g / 1.76 oz balsamic vinegar
1. Cook the isomalt and the water in a small saucepan to 145°C / 293°F. Stir in the balsamic vinegar carefully
to avoid splattering.
2. Pour onto a nonstick rubber mat and place another nonstick rubber mat on top. Roll out as thinly as
possible with a rolling pin. Let the isomalt cool on the nonstick rubber mat, then place it in a warm oven
to make it pliable again. This step will create hundreds of small bubbles in the croquant, which will make it
very visually appealing.
3. Once the sugar is pliable again, start pulling it as thin as you can with your fi ngers. If there are thick
pieces, they will be impossible to eat; they should be as thin as a sheet of paper (or thinner if possible).
4. Place each pulled piece on top of a curved surface, such as a rolling pin or wooden dowel, while it is still
warm and pliable, to give it a curved shape. The croquant will cradle the ice cream. Try to obtain similar-
looking pieces (it will be impossible to make them identical). If it hardens too much, they can be softened
in the oven again for a few seconds.
5. These pieces are very fragile. Reserve in a sturdy airtight container and handle very carefully. Use silica gel
packs to absorb any moisture in the container. If properly stored, they can last indefi nitely.
NOTES Use 2 or 3 pairs of vinyl or latex gloves when you are handling the hot sugar.
If desired, add a solid garnish (such as candied citrus zest, poppy seeds, herbs, or even pieces of the candied
walnuts) once the sugar has been spread and rolled out thinly on the nonstick rubber mat. Sprinkle the garnish
over the sugar and then place in an oven for 30 seconds so that they bind to each other.
This caramel will not crystallize due to the nature of the sugar used. It is also highly resistant to humidity.

148 FROZEN DESSERTS

FINISHED ITEMS 149
Guava Sorbet in Chilled Hibiscus Soup with Crisp Meringue Sticks YIELD 10 PORTIONS
COMPONENTS
300 g / 10.58 oz GUAVA SORBET BASE (page 388)
600 g / 1 lb 5.16 oz CHILLED HIBISCUS SOUP
20 g / .71 oz corn syrup
60 CRISP MERINGUE STICKS
10 CRYSTALLIZED SUGAR HIBISCUS FLOWERS
ASSEMBLY
1. Line 10 PVC tubes 2.5 cm / 1 in diameter by 7.5 cm / 3 in long with acetate. Place on a sheet pan in a standing
position and place them in the freezer.
2. Churn or pacotize the sorbet, pour it into a piping bag, and pipe it into the prepared PVC tubes. When piping, make
sure the tip stays submerged in the sorbet to prevent air pockets inside the tube. Pipe all the way to the top, and
even out the surface with an offset spatula.
3. Place in the freezer to harden.
4. Pour 60 g / 2.12 oz of hibiscus soup into a small carafe.
5. Place a small amount of corn syrup in the desired serving bowl to stabilize the meringue sticks. Line up 3 meringue
sticks on top of the corn syrup.
6. Unmold the guava sorbet from the PVC tube and take the acetate off. Place the sorbet directly on top of the
meringue sticks.
7. Place 1 crystallized sugar hibiscus fl ower on top of the sorbet.
8. Place 3 meringue sticks in a random but balanced pattern inside the bowl next to the sorbet.
9. Let the sorbet temper for 2 more minutes and serve immediately.
10. Once the bowl is placed in front of the customer, pour the soup into the bowl, making sure to pour down the side
and close to the base of the bowl so as not to splatter.
Crisp Meringue Sticks YIELD 501 G / 1 LB 1.67 OZ (ABOUT 50 PORTIONS)
167 g / 5.89 oz egg whites
167 g / 5.89 oz granulated sugar
167 g / 5.89 oz confectioners’ sugar, sifted
1. Preheat a convection oven to 100°C / 212°F.
2. Whip the egg whites to medium peak. Pour in the granulated sugar as the mixer whips and continue
whipping until the meringue has reached a stiff peak.

150 FROZEN DESSERTS
3. Remove the bowl from the mixer and fold in the sifted confectioners’ sugar.
4. Pipe bâtons onto a sheet tray, the length of the tray, using a #2 straight tip.
5. Bake with the vent open for 1 hour, or until the meringue is crisp.
6. Break into 5-cm / 2-in sticks. Reserve in an airtight container at room temperature. Use silica gel packs to
absorb any moisture in the container. If properly kept, they can last for up to 1 week.
Chilled Hibiscus Soup YIELD 750 G / 1 LB 10.44 OZ
250 g / 8.82 oz hibiscus fl owers (dried)
1.25 kg / 2 lb 12.09 oz water
About 750 g / 1 lb 10.45 oz sugar, as needed
1. Combine the hibiscus with the water in a saucepan.
2. Bring to a boil and let the hibiscus steep for 5 minutes.
3. Add sugar to taste, whisking until the sugar has dissolved. Let the liquid cool.
4. Strain through a fi ne-mesh strainer to remove the fl owers. Reserve 20 of the fl owers for crystallizing.
NOTES Hibiscus has a very tart taste, so add sugar accordingly.
Crystallized Sugar Hibiscus Flowers YIELD 20 CRYSTALLIZED FLOWERS
20 poached hibiscus fl owers (from above)
100 g / 3.53 oz pasteurized egg whites
1 kg / 2 lb 3.27 oz sugar
1. Squeeze the excess water from the fl owers using a cloth towel.
2. Brush the fl owers with the egg whites.
3. Toss the fl owers in sugar. Let them sit in the sugar for 48 hours. Make sure they are completely covered
by it.
4. Remove the sugared fl owers from the sugar. Reserve in an airtight container at room temperature. Use
silica gel packs to absorb any moisture in the container. If properly stored, they can last for up to 1 month.
FINISHED ITEMS 151
Peppermint Sorbet Cubes with Whipped Crème Chantilly, Devil’s Food Cake, and Candy Cane Dust YIELD 10 PORTIONS
COMPONENTS
1 kg /2 lb 3.27 oz PEPPERMINT SORBET BASE (page 395)
200 g / 7.05 oz DARK CHOCOLATE SPRAY
10 DEVIL’S FOOD CAKE RECTANGLES
300 g / 10.58 oz WHIPPED CRÈME CHANTILLY
30 g / 1.06 oz crushed candy canes
50 g / 1.76 oz cocoa nibs
ASSEMBLY
1. Place 10 stainless steel rectangular molds 3.75 cm / 1.5 in by 5 cm / 2 in standing up on a half sheet pan in
the freezer.
2. Churn or pacotize the sorbet, pour into a piping bag, and pipe into the frozen molds. Smooth the sorbet even with
the tops of the molds using an offset spatula.
3. Place in the freezer to harden.
4. Torch the molds with the fl ame for a few seconds until they release. Unmold the rectangles and return to the freezer.
5. Set up an area to spray the chocolate.
6. Load the chocolate spray into the spray gun. Make sure the chocolate is between 32°C / 90°F and 38°C / 100°F.
7. Spray the sorbet with the chocolate on one side only. Return the sorbet to the freezer.
8. Place a cake rectangle on the desired plate.
9. Scoop a medium quenelle (30 g / 1.06 oz) of crème chantilly onto the right side of the cake.
10. Sprinkle 3 g / .11 oz crushed candy cane on top of the quenelle.
11. Place a small mound (about 5 g / .18 oz) of cocoa nibs behind the quenelle and the cake.
12. Place the sorbet cube on top of the cocoa nibs. Let it temper for 2 to 3 minutes and serve immediately.
Dark Chocolate Spray YIELD 200 G / 7.05 OZ
100 g / 3.53 oz dark chocolate (64%), fi nely chopped
100 g / 3.53 oz cocoa butter, fi nely chopped
Bring the chocolate and cocoa butter to 38°C / 100°F over medium heat. Reserve warm.

152 FROZEN DESSERTS
Devil’s Food Cake YIELD 2 KG / 2 LB 3.27 OZ (1 HALF SHEET PAN/40 PORTIONS)
539 g / 1 lb 3.01 oz sugar
157 g / 5.54 oz pastry fl our
157 g / 5.54 oz bread fl our
147 g / 5.19 oz cocoa powder
49 g / 1.73 oz baking soda
24 g / .85 oz baking powder
15 g / .53 oz salt
173 g / 6.1 oz eggs
52 g / 1.83 oz egg yolks
317 g / 11.18 oz buttermilk
73 g /2.57 oz coffee
298 g / 10.51 oz butter, melted but cool
1. Preheat a convection oven to 160°C / 325°F.
2. Line a half sheet pan with a nonstick rubber mat. Spray the inside of the sheet pan’s frame with nonstick
cooking spray.
3. Sift all the dry ingredients into a medium bowl.
4. In another medium bowl, combine the eggs, egg yolks, buttermilk, and coffee, then mix in the butter.
5. Combine the wet ingredients with the dry ingredients using a whisk.
6. Pour into the prepared pan and spread out evenly using an offset spatula.
7. Bake until the cake springs back at the center of the sheet pan when gentle pressure is applied, about
15 minutes.
8. Cool at room temperature. Once cool, freeze for 1 hour, then cut. It cuts very cleanly when it is partially
frozen.
9. Cut into rectangles 2.5 cm / 1 in by 7.5 cm / 3 in by 2.5 cm / 1 in.
10. Reserve in an airtight container at room temperature. Discard any leftover pieces after service.
Whipped Crème Chantilly YIELD 250 G / 8.82 OZ
230 g / 8.11 oz heavy cream
20 g / .71 oz confectioners’ sugar
1. Whip the cream and sugar on high speed to a stiff peak.
2. Reserve refrigerated. Keep it in the bowl it was whipped in, because it might be necessary to re-whip it
several times during service.

FINISHED ITEMS 153

154 FROZEN DESSERTS
Spiced Dolcetto Sorbet with Candied Bosc Pears and Phyllo Crisps YIELD 10 PORTIONS
COMPONENTS
40 to 50 g / 1.41 to 1.76 oz SPICED MERLOT REDUCTION
10 slices CANDIED BOSC PEARS
300 g / 10.58 oz SPICED DOLCETTO SORBET (page 392)
10 PHYLLO CRISPS
5 g / .18 oz ground cinnamon
ASSEMBLY
1. Spoon 4 to 5 g / .14 to .18 oz of the merlot reduction on the desired plate. If desired, spoon smaller dots of sauce
over the plate.
2. Place a candied pear slice on top of the sauce.
3. Scoop a medium quenelle (30 g / 1.06 oz) of the sorbet on top of the pear slice.
4. Lean a phyllo crisp on the quenelle.
5. Sprinkle cinnamon across the fi nished plate.
6. Serve immediately.
Spiced Merlot Reduction YIELD 250 G / 8.81 OZ
5 cinnamon sticks
5 cloves
1 nutmeg
1 kg / 2 lb 3.27 oz Merlot
500 g / 1 lb 1.64 oz sugar
1. Toast the spices on a sheet pan in a hot oven or in a sauté pan over medium heat, then crush them. Place
the spices and the wine in a saucepan and stir in the sugar.
2. Cook over medium-low heat until the liquid has reduced to a syrup consistency, about 45 minutes. Skim
the liquid throughout the cooking process.
3. Strain through a fi ne-mesh strainer.
4. Cool over an ice bath. Reserve refrigerated. This will last for up to 1 month since it is a sugar-based syrup.

FINISHED ITEMS 155
Candied Bosc Pears YIELD 575 G / 1 LB 4.28 OZ
1.135 kg / 2 lb 8.02 oz sugar
340 g / 11.99 oz water
26 g / .9 oz lemon juice
500 g / 1 lb 1.64 oz Bosc pears, peeled, cored, and cut into eighths
1. Bring the sugar, water, and lemon juice to a boil. Cook over very high heat until the syrup reaches a
temperature of 160°C / 320°F.
2. Add the pears.
3. Reduce the heat to low. Cook very slowly until the pectin in the fruit has been activated and the fruit is
translucent, about 20 minutes.
4. Remove the pears from the liquid using a slotted spoon and place on silicon paper, a nonstick rubber mat,
or a sheet pan lined with plastic wrap.
5. Cool to room temperature. Reserve covered with plastic wrap at room temperature. Discard after 10 days.
NOTE Use very fi rm, underripe pears. Ripe pears will turn to mush when cooking in the hot sugar.
Phyllo Crisps YIELD 10 CRISPS
200 g / 7.05 oz sugar
15 g / .53 oz ground cinnamon
3 g / .11 oz ground cloves
3 g / .11 oz ground nutmeg
3 sheets phyllo dough (25 cm / 10 in by 38 cm / 15 in)
200 g / 7.05 oz clarifi ed butter, melted but cool
1. Preheat a convection oven to 160°C / 325°F.
2. Grind the sugar, cinnamon, cloves, and nutmeg to a powder in a spice grinder or coffee grinder.
3. Place 1 sheet of phyllo dough on a cutting board. Brush with clarifi ed butter. Sprinkle with one third of
the sugar mixture. Cover with another layer of phyllo dough and repeat the procedure with the remaining
phyllo dough. Cut into strips that are 3.75 cm / 1.5 in by 12.5 cm / 5 in long. Wrap each strip around a ring
that is 7.5 cm / 3 in in diameter. The phyllo should wrap halfway around the ring. Wrap each ring with a
strip of parchment paper and attach both ends with a clip to secure it.
4. Bake until golden brown, about 7 minutes. Allow to cool to room temperature. Once cooled, remove the
baked phyllo from the rings. Reserve in an airtight container at room temperature. Discard after 2 days.

156 FROZEN DESSERTS
Noilly Prat Granité with Crystallized Orange Blossom Petals YIELD 10 PORTIONS
COMPONENTS
750 g / 1 lb 10.46 oz NOILLY PRAT GRANITÉ (page 400)
10 CRYSTALLIZED ORANGE BLOSSOM PETALS
ASSEMBLY
1. Spoon 75 g / 2.65 oz of the granité into the desired vessel, preferably a bowl or a glass, not a fl at surface.
2. Top with 5 orange blossom petals.
3. Serve immediately.
NOTE The fl avor of this granité is very intense, and the crystallized orange blossoms balance out its fl avor and add an-
other texture.
Crystallized Orange Blossom Petals YIELD 50 G / 1.76OZ
25 g / .88 oz orange blossom petals
50 g / 1.76 oz pasteurized egg whites
100 g / 3.53 oz bakers’ sugar
1. Using a smooth artist’s brush, brush the petals with a thin layer of egg whites on both sides, then gently
toss in the sugar. Pick each petal up by the stem end and let it dry at on a sheet pan lined with parchment
paper at room temperature for at least 4 hours before using.
2. Reserve in an airtight container at room temperature. Discard after 4 days.

FINISHED ITEMS 157
Turrón Gelato Cones YIELD 10 PORTIONS
COMPONENTS
200 g / 7.05 oz TURRÓN GELATO BASE (page 366)
10 PLAIN CONES
5 g / .18 oz coarsely chopped toasted pistachios
ASSEMBLY
1. Churn or pacotize the gelato and harden slightly in the freezer.
2. Place 3 cm / 1.25 in demi-sphere fl eximolds in the freezer. The mold will need at least 20 demi-spheres (a full-size
fl eximold sheet of this size of demi-sphere will have between 64 and 72 in most cases).
3. Once slightly hardened, transfer the gelato to a piping bag. Pipe into the demi-sphere molds. Even out the surface
with an offset spatula. Return to the freezer to harden completely.
4. Once hardened, assemble the demi-spheres into spheres by fusing both spheres. Use your gloved hands to gently
rub the demi-spheres where they touch. Place them back on the fl eximold; the mold holds the spheres in place.
Place the molds in the freezer to harden, then cover with plastic wrap.
5. Place the cones on a perforated stand. Stainless steel, Plexiglas, Lucite, or silver are very good materials to use.
6. Place 1 sphere of the gelato onto each cone. Garnish with the pistachios.
7. Since the spheres have hardened in the freezer, it is a good idea to let them temper for 3 to 5 minutes to soften
before serving.
NOTE For Oatmeal Ice Cream Cones, substitute Oatmeal Ice Cream base (page 354) for the Turrón Gelato base. Use
Oatmeal Cones (page 158) instead of Plain Cones and substitute piloncillo sugar for the pistachios.
For Praline Ice Cream Cones, substitute Praline Ice Cream base (page 356) for the Turrón Gelato base. Use
Almond Cones (page 158) instead of Plain Cones and substitute 10 g / .35 oz Candied Grapefruit Zest (page 130)
for the pistachios.

158 FROZEN DESSERTS
Plain Cones YIELD 1 KG / 2 LB 3.27 OZ (ABOUT 50 CONES)
177 g / 6.24 oz butter
354 g / 12.48 oz confectioners’ sugar, sifted
267 g / 9.42 oz egg whites
202 g / 7.13 oz cake fl our, sifted
1. Preheat a convection oven to 160°C / 325°F.
2. Cream the butter and sugar until light and fl uffy, 3 to 4 minutes. Add the egg whites slowly, scraping down
the bowl between additions. Add the fl our on low speed until just incorporated.
3. Spread 20 g / .71 oz of the batter into a 10 cm / 4 in circular stencil on a nonstick rubber mat with a small
offset spatula. Repeat until the nonstick rubber mat is fi lled with circles (about 12 circles per mat), leaving
2.5 cm / 1 in between each circle.
4. Bake until golden brown, about 6 minutes, and shape around a metallic cornet mold 10 cm / 4 in long by
3.75 cm / 1.5 in diameter while hot. If the cones cool off and become too fi rm to shape around the tube,
return the sheet pan with the cones to the oven to soften them. Repeat with the remaining batter.
5. Reserve the fi nished cones in an airtight container at room temperature. Discard after 2 days.
NOTE For Oatmeal Cones, weigh 75 g / 2.64 oz oatmeal. Sprinkle some of the oatmeal evenly across the batter in Step 2.
Repeat with remaining tuiles. Proceed with the recipe as directed.
For Almond Cones, weigh 50 g / 1.76 oz fi nely chopped, toasted almonds. Sprinkle some of the almonds evenly
across the batter in Step 2. Repeat with the remaining tuiles. Proceed with the recipe as directed.

FINISHED ITEMS 159
From left to right, Mascarpone Sherbet Cone (page 162), Praline Ice Cream Cone (page 157), Burnt Sugar Cone (page 160), Turrón Gelato Cone (page 157), and Oatmeal Ice Cream Cone (page 157)

160 FROZEN DESSERTS
Burnt Sugar Ice Cream Cones YIELD 10 PORTIONS
COMPONENTS
200 g / 7.05 oz BURNT SUGAR ICE CREAM BASE (page 355)
10 CHOCOLATE CONES
5 g / .18 oz fl eur de sel
ASSEMBLY
1. Churn or pacotize the ice cream and harden slightly in the freezer.
2. Place 3 cm / 1.25 in demi-sphere fl eximolds in the freezer. The mold will need at least 20 demi-spheres (a full-size
fl eximold sheet of this size of demi-sphere will have between 64 and 72 in most cases).
3. Once slightly hardened, transfer the ice cream to a piping bag. Pipe into the demi-sphere molds. Even out the
surface with an offset spatula. Return to the freezer to harden completely.
4. Once hardened, assemble the demi-spheres into spheres by fusing both spheres. Use your gloved hands to gently
rub the demi-spheres where they touch. Place them back on the fl eximold; the mold holds the spheres in place.
Place in the freezer to harden, then cover with plastic wrap.
5. Place the cones on a perforated stand. Stainless steel, Plexiglas, Lucite, or silver are very good materials to use.
6. Place 1 sphere of the ice cream onto each cone. Garnish with a pinch of the fl eur de sel.
7. Since the spheres have hardened in the freezer, it is a good idea to let them temper for 3 to 5 minutes to soften
before serving.

FINISHED ITEMS 161
Chocolate Cones YIELD 1 KG / 2 LB 3.27 OZ (ABOUT 50 CONES)
200 g / 7.05 oz all-purpose fl our
50 g / 1.76 oz Dutch-process cocoa powder
250 g / 8.82 oz butter, melted but cool
250 g / 8.82 oz confectioners’ sugar, sifted
250 g / 8.82 oz egg whites, at room temperature
1. Preheat a convection oven to 160°C / 325°F.
2. Sift together the fl our and cocoa powder.
3. Pour the butter into the bowl of an electric mixer fi tted with the paddle attachment. Mix in the sugar on
medium speed until thoroughly combined.
4. Add the fl our and cocoa powder mix until thoroughly combined.
5. Add the egg whites slowly. Mix until a homogenous paste is obtained.
6. Refrigerate until fi rm, because it will be easier to spread when cold.
7. Spread 20 g / .71 oz of the batter in a 10 cm / 4 in circular stencil on a nonstick rubber mat with a small
offset spatula. Repeat until the nonstick rubber mat is fi lled with circles (about 12 circles per mat), leaving
2.5 cm / 1 in between each circle.
8. Bake until fi rm, about 6 minutes. Shape around a metallic cornet mold 10 cm / 4 in long by 3.75 cm /
1.5 in diameter while hot. If the cones cool off and become too fi rm to shape around the tube, return the
sheet pan with the cones to the oven to soften them. Repeat with the remaining batter.
9. Reserve the fi nished cones in an airtight container at room temperature. Discard after 2 days.
162 FROZEN DESSERTS
Mascarpone Sherbet Cones YIELD 10 PORTIONS
COMPONENTS
200 g / 7.05 oz LEMON MASCARPONE SHERBET BASE (page 397)
10 PLAIN CONES (page 158)
10 pieces CHOCOLATE-COVERED PUFFED RICE
ASSEMBLY
1. Churn or pacotize the sherbet and harden slightly in the freezer.
2. Place 3-cm / 1.25-in demi-sphere fl eximolds in the freezer. The mold will need to have at least 20 demi-spheres (a
full-size fl eximold sheet of this size of demi-sphere will have between 64 and 72 in most cases).
3. Once slightly hardened, transfer the sherbet to a piping bag. Pipe into the demi-sphere molds. Even out the surface
with an offset spatula. Return to the freezer to harden completely.
4. Once hardened, assemble the demi-spheres into spheres by fusing both spheres. Use your gloved hands to gently
rub the demi-spheres where they touch. Place them back on the fl eximold; the mold holds the spheres in place.
Place in the freezer to harden, then cover with plastic wrap.
5. Place the cones on a perforated stand. Stainless steel, Plexiglas, Lucite, or silver are very good materials to use.
6. Place 1 sphere of the ice cream onto each cone. Garnish with 1 puffed rice cluster.
7. Since the spheres have hardened in the freezer, it is a good idea to let them temper for 3 to 5 minutes to soften
before serving.
Chocolate-Covered Puffed Rice YIELD 225 G / 7.93 OZ (ABOUT 45 CLUSTERS)
100 g / 3.53 oz puffed rice cereal
25 g / .88 oz simple syrup (65° Brix)
100 g / 3.53 oz tempered bitter chocolate (72%)
1. Preheat an oven to 163°C / 325°F.
2. Combine the puffed rice cereal with the simple syrup in a bowl. Toss to coat the puffed rice.
3. Place the syrup-coated rice on a parchment paper–lined sheet pan in a single layer and bake until the
moisture evaporates. The intention is to cover the puffed rice with a coat of sugar that will protect it from
moisture.
4. Once the puffed rice has cooled, place it in a bowl and combine with the tempered chocolate. Adjust the
amount if necessary, using only enough to coat the puffed rice, not to make clusters of it.
5. Using a demitasse spoon, scoop 5 g / .03 oz amounts of the chocolate-covered puffed rice onto a sheet
pan lined with a nonstick rubber mat. Let the chocolate set at room temperature.
6. Reserve in an airtight container at room temperature. This can have a long shelf life if it never comes into
contact with any kind of moisture. Taste daily to ensure freshness.

FINISHED ITEMS 163
Meyer Lemon Granité with Huckleberry Compote and Crisp Meringues YIELD 10 PORTIONS
COMPONENTS
300 g / 10.58 oz HUCKLEBERRY COMPOTE
600 g / 1 lb 5.16 oz MEYER LEMON GRANITÉ (page 400)
30 CRISP MERINGUES
ASSEMBLY
1. Spoon 30 g / 1.06 oz of the compote on the plate.
2. Spoon 60 g / 2.11 oz of the granité on top of the compote.
3. Arrange 3 meringue disks on one side of the granité.
4. Drizzle 5 g / .17 oz of the huckleberry compote liquid on top of the granité.
5. Serve immediately.
Huckleberry Compote YIELD 550 G / 1 LB 3.4 OZ
350 g / 12.34 oz huckleberries
100 g / 3.53 oz sugar
100 g / 3.53 oz water
Pinch salt
1. Combine all of the ingredients in a pot and bring to a slow boil, stirring occasionally. Do not boil too
quickly or stir aggressively in order to keep the integrity of the huckleberries as much as possible (they
burst easily). Turn the heat off.
2. Cool the huckleberry compote over an ice bath. Adjust the sweetness by adding more sugar if necessary.
3. Refrigerate. Reserve for 4 days maximum.
NOTE Huckleberries usually come with a few stems and leaves. Make sure to pick through them before cooking. This
task can be very laborious but is necessary.

164 FROZEN DESSERTS
Crisp Meringues YIELD 501 G / 1 LB 1.67 OZ (ABOUT 50 PORTIONS OR 150 DISKS)
167 g / 5.89 oz egg whites
167 g / 5.89 oz granulated sugar
167 g / 5.89 oz confectioners’ sugar, sifted
1. Preheat a convection oven to 100°C / 212°F.
2. Whip the egg whites to medium peak, pour in the granulated sugar as the mixer whips, and continue
whipping until the meringue has reached stiff peak.
3. Remove the bowl from mixer and fold in the sifted confectioners’ sugar.
4. For the disks, using an offset spatula, spread the meringue over a sheet pan lined with a nonstick rubber
mat lined with a chablon that has rounds 3.75 cm / 1.5 in in diameter and is .3 cm / .13 in thick. Remove
the chablon before baking.
5. Bake with the vent open for 1 hour, or until the meringue is crisp. Reserve in an airtight container until
needed. Keep silica gel packs with the meringues to absorb any excess moisture that might ruin the
meringues. If properly cared for, meringues can have a very long shelf life.
NOTE A chablon is a rubber mat with round perforations; they vary in thickness and diameter.

FINISHED ITEMS 165
Hot Coconut-Rum Colada with Passion Fruit “Shake” YIELD 10 PORTIONS
COMPONENTS
300 g / 10.58 OZ PASSION FRUIT SORBET base (page 380)
300 g / 10.58 oz COCONUT-RUM COLADA
30 g / 1.06 oz PASSION FRUIT SEEDS (page 138)
30 g / 1.06 oz TOASTED SHREDDED COCONUT
ASSEMBLY
1. Churn or pacotize the sorbet. Extrude into a piping bag fi tted with a #4 fl uted piping tip. Freeze.
2. Pour 30 g / 1.06 oz of the hot coconut-rum mix into a 60 ml / 2 fl oz glass.
3. Pipe the sorbet on top of the coconut-rum colada, in a rosette shape, until it sticks out about 2.5 cm / 1 in above the
rim of the glass (approximately 30 g / 1.06 oz).
4. Place 5 to 7 passion fruit seeds on top of the sorbet.
5. Sprinkle a pinch of toasted coconut on top of the seeds.
6. Serve immediately.
NOTE Serve this dessert with a demitasse spoon, not a straw, so that when it is eaten, both items can combine on the
spoon and the hot-cold effect can be enjoyed.
Coconut-Rum Colada YIELD 500 G / 1 LB 1.64 OZ
435 g / 15.34 oz sweetened coconut milk
65 g / 2.29 oz dark rum
Combine both ingredients in a small pot. Bring to a boil and serve immediately or reserve in a thermal
container for service. Discard any liquid from the container after service. If not using immediately, cool the
liquid and reserve refrigerated for up to 4 days.
Toasted Shredded Coconut YIELD 25 G / .88 OZ
30 g / 1.06 oz unsweetened shredded coconut
1. Preheat a convection oven to 325°F/163°C. Line a sheet pan with a nonstick rubber mat (parchment paper
will not stay in place in a convection oven if it is not weighed down properly).
2. Spread the coconut evenly onto the prepared sheet pan.
3. Bake until light brown and aromatic, about 6 minutes.
4. Reserve in an airtight container at room temperature. If properly stored, it will keep for up to 1 month.
166 FROZEN DESSERTS
Grapefruit and Mint Sorbet with Grapefruit Confi t YIELD 10 PORTIONS
COMPONENTS
50 segments GRAPEFRUIT CONFIT
600 g / 1 lb 5.16 oz GRAPEFRUIT AND MINT SORBET (page 393)
30 g / 1.06 oz MINT SYRUP
ASSEMBLY
1. Remove 5 grapefruit segments from the syrup and let the excess drip off. Arrange the segments in a thick glass
bowl.
2. Scoop a 60 g / 2.11 oz quenelle of the sorbet on top of the grapefruit segments.
3. Drizzle about 3 g / .11 oz of the mint syrup on top of the quenelle only and serve immediately.
Grapefruit Confi t YIELD 50 SEGMENTS
50 grapefruit segments (or suprêmes)
500 g / 1 lb 1.64 oz simple syrup (50° Brix)
1. Combine the grapefruit segments with the simple syrup in a pot. Simmer (do not boil) for 5 minutes.
2. Cool the confi t over an ice bath and reserve refrigerated in the liquid. Discard after service.
NOTES Suprêmes are grapefruit (or any other citrus) segments with no skin, pith, or pits. Use a very sharp knife when cut-
ting the suprêmes out of the fruit so as to get a clean look.
Do not bring the syrup to a boil, because the fruit is very delicate and it might lose its shape.
Use various types of grapefruit (ruby and white, for example) in combination for a better fi nished presentation.
If desired, cook the supremes with other fl avors, such as vanilla beans, spices, and so on, to infuse their fl avor.

FINISHED ITEMS 167
Mint Syrup YIELD 250 G / 8.81 OZ
4 kg / 8 lb 13.09 oz water
20 g / .71 oz salt
200 g / 7.05 oz mint leaves
50 g / 1.76 oz glucose syrup, or as needed
1. Bring the water and salt to a rolling boil in a large pot.
2. Blanch the mint leaves for 8 to 10 seconds, stirring them gently so that they get evenly blanched.
3. Shock the leaves in an ice bath, stirring so that they chill quickly.
4. Strain the leaves out of the ice bath. Squeeze the excess water off with your hands and pat dry with paper
towels.
5. Place half of the leaves in a blender with the glucose syrup. The glucose should cover the leaves. Add
more glucose if necessary.
6. Blend on medium speed for about 1 minute, then add the remaining mint and blend for 1 more minute. If
the mint is not blending properly, add a little more glucose.
7. Once a smooth purée is obtained, remove from the blender and let the purée drain through a fi ne-mesh
strainer for 2 hours.
8. Refrigerate the resulting syrup. Discard after 2 days.

168 FROZEN DESSERTS
Strawberry Gelato with Toasted Brioche Croutons and 50-Year-Old Balsamic Vinegar YIELD 10 PORTIONS
COMPONENTS
300 g / 10.58 oz MACERATED STRAWBERRIES
300 g / 10.58 oz STRAWBERRY GELATO (page 367)
100 g / 3.53 oz TOASTED BRIOCHE CROUTONS
50 g / 1.76 oz 50-year-old balsamic vinegar
ASSEMBLY
1. Place a 3.75-cm / 1.5-in ring cutter at the center of the bowl (or desired vessel). Spoon 30 g / 1.06 oz of the
macerated strawberries inside the ring. Pat them down with the spoon into a single layer.
2. Scoop a medium quenelle (30 g / 1.06 oz) of the gelato on top of the strawberries. Remove the ring.
3. Serve immediately.
4. The brioche croutons and the balsamic vinegar will be served tableside. Make sure they are set up and ready before
service. Spoon 1 tablespoon of croutons on top of the quenelle (about 10 g / .35 oz) and 1 teaspoon of balsamic
vinegar (about 5 mL) on top of the quenelle.
NOTE Balsamic vinegar is available aged in a variety of years (3, 5, 10, 12, 15, 18, 25, and so on, up to 100). The older it is,
the more expensive and viscous (thick) it will be.
Macerated Strawberries YIELD 400 G / 14.11 OZ
400 g / 14.11 oz strawberries
95 g / 3.35 oz sugar
5 g / .18 oz balsamic vinegar
1. Wash and de-stem the strawberries. Cut into small dice.
2. Combine with the sugar and balsamic vinegar. Let macerate for 2 hours.
3. Strain the liquid out.
4. Reserve the strawberries refrigerated. Discard after 2 days.

FINISHED ITEMS 169
Toasted Brioche Croutons YIELD 1.16 KG / 2 LB 8.9 OZ
488 g / 1 lb 1.22 oz bread fl our
196 g / 6.9 oz eggs
13 g / .46 oz salt
73 g / 2.56 oz granulated sugar
6 g / .2 oz yeast
113 g / 4 oz milk, at 10°C / 50°F
246 g / 8.66 oz butter, soft
200 g / 7.05 oz confectioners’ sugar
1. Combine the fl our, eggs, salt, granulated sugar, yeast, and milk and mix on low speed with a dough hook
attachment for 4 minutes with 62 g / 2.19 oz of the butter. Mix on high speed for 4 minutes. Start adding
the rest of the butter in 4 stages while the mixer is on, scraping down the sides of the bowl between each
addition. to the dough should achieve full gluten development, 30 to 45 minutes. Cover and place in the
refrigerator overnight.
2. Prepare a 38-cm / 15-in Pullman loaf pan by spraying it with nonstick cooking spray.
3. Shape the dough into a bâtard loaf and place inside of the prepared mold. Place the lid over the mold and
proof at room temperature for about 2 hours, or until doubled in size.
4. Meanwhile, preheat a convection oven to 190°C / 375°F.
5. Bake until the internal temperature of the loaf is 95°C / 200°F (use a probe thermometer to check the
temperature, sliding the lid off the loaf pan just enough to fi t the probe).
6. Once it is baked, remove the lid from the pan and unmold the baked loaf onto a cooling rack (do not let
the brioche cool off in the pan, or it will shrink).
7. When the loaf has cooled, freeze it for 2 hours so that it will be easier to cut.
8. Trim the crust off the loaf and cut into a small dice. Place diced brioche in a bowl and toss with 200 g /
7.05 oz confectioners’ sugar until it has coated the brioche evenly.
9. Spread the diced brioche onto a parchment paper–lined sheet pan in an even layer.
10. Toast in a 300°F/148°C convection oven at until golden brown and crisp. Cool on the sheet pan.
11. Reserve at room temperature in an airtight container. Discard after 4 days.
NOTE To test for full gluten development, do a “window” test. Take a small piece of dough and stretch it between both
hands. The dough should form a very thin layer that is almost transparent and does not rip when stretched out.
If the dough does not do this, mix for another minute and test again.

170 FROZEN DESSERTS

FINISHED ITEMS 171
Black Mission Fig Gelato with Grana Padano Crisps and Roasted Black Mission Figs YIELD 10 PORTIONS
COMPONENTS
200 g / 7.05 oz PORT GLAZE (page 172)
10 ROASTED BLACK MISSION FIGS
300 g / 10.58 oz ROASTED BLACK MISSION FIG GELATO (page 367)
10 GRANA PADANO CRISPS
ASSEMBLY
1. Brush 20 g / .71 oz of port glaze onto the desired plate.
2. Place a roasted fi g on one end of the glaze. Slice a small piece off of another fi g (about 3 mm / .11 in thick) and
place the piece at the opposite end from the whole fi g, directly on the glaze.
3. Scoop a medium quenelle (30 g / 1.06 oz) of the gelato on top of the slice of fi g.
4. Lean a cheese crisp on the quenelle and serve immediately.
Roasted Black Mission Figs YIELD ABOUT 20 FIGS
550 g / 1 lb 3.4 oz Black Mission fi gs
400 g / 14.11 oz sugar
1 kg / 2 lb 3.27 oz port
1. Preheat a convection oven to 160°C / 325°F.
2. Cut off the stem and the bottom end of the fi gs. Cut an X on the top and the bottom of each fi g. Scale the
prepared fi gs to 500 g / 1 lb 1.64 oz.
3. Place each fi g in a standing position in a hotel pan, making sure they do not touch each other. Sprinkle the
sugar evenly over them. Pour the port on top of the fi gs. It should fi ll the pan a quarter of the way.
4. Roast until the fi gs are just tender, about 15 minutes.
5. Cool them in the pan they were roasted in.
6. Reserve the fi gs and roasting liquid at room temperature during service. Discard after 2 days.
NOTES Use very ripe fi gs. It is possible to add spices and other fl avors to the fi gs before roasting (such as cinnamon,
cloves, vanilla beans, orange zest, and so on).
Some of these fi gs can be used to anchor the ice cream; the liquid can be reserved for the glaze.

172 FROZEN DESSERTS
Grana Padano Crisps YIELD 75 G / 6.17 OZ (10 CRISPS)
200 g / 7.05 oz Grana Padano
1. Preheat a convection oven to 160°C / 325°F. Line a sheet pan with a nonstick rubber mat.
2. Slice the cheese as thinly as possible and cut into 7.5-cm / 3-in squares. Place on the sheet pan and bake
until golden brown, about six minutes. Cool to room temperature.
3. Store in an airtight container at room temperature. Discard after service if they are no longer crisp. If they
remain crisp, they can hold for up to 2 days. It is not a good idea to refresh them in the oven once they
have softened, since they will lose much of their fl avor during the process.
Port Glaze YIELD 300 G / 10.58 OZ
1 kg / 2 lb 3.27 oz tawny port
500 g / 1 lb 1.64 oz sugar
1. Cook the port and sugar over medium heat until the liquid has thickened to a sauce consistency, about 45
minutes.
2. Reserve under refrigeration. This liquid can keep up to 1 month.

FINISHED ITEMS 173
Coconut-Lime Frappé YIELD 10 PORTIONS
COMPONENTS
500 g /1 lb 1.64 oz COCONUT-LIME SORBET (page 389)
90 g /3.17 oz coconut milk
10 g / .35 oz white rum
3 g / .11 oz LIME ZEST POWDER (page 142)
ASSEMBLY
1. Combine the sorbet, coconut milk, and rum and blend on high speed until evenly smooth, about 30 seconds. Fill
60 ml / 2 fl oz glasses to the top.
2. Garnish with powdered lime zest. Serve immediately with a cocktail straw.
NOTE Instead of using a blender, the frappés can be pacotized. Place the liquid portion on top of the frozen component
in the Pacojet beaker and pacotize. This method will yield a very smooth frappé that is more stable than those
made in a blender. This was the method used in this book.
Raspberry Frappé YIELD 10 PORTIONS
COMPONENTS
500 g / 1 lb 1.64 oz RASPBERRY SORBET (page 382)
100 g / 3.53 oz sparkling water
10 fresh raspberries
10 crystallized violets
ASSEMBLY
1. Combine the sorbet with the sparkling water and blend on high speed until evenly smooth, about 30 seconds. Fill 60
ml / 2 oz glasses to the top.
2. Garnish each glass with 1 raspberry and 1 crystallized violet. Serve immediately with a cocktail straw.
NOTE Instead of using a blender, the frappés can be pacotized. Place the liquid portion on top of the frozen component
in the Pacojet beaker and pacotize. This method will yield a very smooth frappé that is more stable than those
made in a blender. This is the method used in this book.

174 FROZEN DESSERTS
From left to right, Coconut-Lime Frappé (page 173), Granny Smith Apple and Wasabi Frappé (page 175), and Raspberry Frappé (page 173)

FINISHED ITEMS 175
Granny Smith Apple and Wasabi Frappé YIELD 10 PORTIONS
COMPONENTS
500 g / 1 lb 1.64 oz GRANNY SMITH APPLE AND WASABI SORBET (page 392)
100 g / 3.53 oz reserved Granny Smith apple juice (see Notes)
10 APPLE CHIPS
ASSEMBLY
1. Combine the sorbet with the juice and blend on high speed until evenly smooth, about 30 seconds. Fill 60 ml / 2 oz
glasses to the top.
2. Garnish each glass with an apple chip. Serve immediately with a cocktail straw.
NOTES Instead of using a blender, the frappés can be pacotized. Place the liquid portion on top of the frozen component
in the Pacojet beaker and pacotize. This method will yield a very smooth frappé that is more stable than those
made in a blender. This was the method used in this book.
When making the Granny Smith Apple and Wasabi Sorbet, reserve 100 g / 3.53 oz of the apple juice for the frappé.
Apple Chips YIELD 50 G / 1.76 OZ
50 g / 1.76 oz Granny Smith apples
250 g / 8.81 oz simple syrup (65° Brix)
1. Peel the apples and slice as thinly as possible using a slicer or mandoline. Reserve in a bowl or hotel pan
covered with plastic wrap to delay oxidation.
2. Bring the syrup to a boil and pour over the apple slices. Make sure the apples are submerged in the syrup.
Reserve the apples in the syrup under refrigeration until needed.
3. Preheat an oven to 75°C / 170°F.
4. Line a sheet pan with a nonstick rubber mat and place the apple slices on it in a single layer. Pat them dry
with a paper towel.
5. Bake until the apple slices are fi rm, about 2 hours. Take them off the nonstick rubber mat while they are
hot and let them cool on a marble surface. If they cool off on the rubber mat, it will be nearly impossible to
take them off without breaking them.
6. Reserve in an airtight container at room temperature with silica gel packs. Discard once they begin to
soften (they won’t soften unless they are exposed to moisture, so their shelf life is directly related to this).
NOTES If desired, use a dehydrator instead of an oven.
Be careful when making the apple chips in a hot and/or humid environment. They will get tacky and soft.

176 FROZEN DESSERTS
Yuzu Sorbet with Cotton Candy and Black Sesame Seeds YIELD 10 PORTIONS
COMPONENTS
300 g / 10.58 oz YUZU SORBET (page 378)
10 g / .35 oz cotton candy (pink or white)
10 CRYSTALLIZED PINK ROSE PETALS (see Notes)
3 g / .11 oz toasted black sesame seeds
ASSEMBLY
1. Scoop 30 g / 1.06 oz of the sorbet into the desired vessel.
2. Top with cotton candy. Make sure to spread the cotton candy out to give it height and volume.
3. Place a petal on top of the cotton candy.
4. Sprinkle a pinch of black sesame seeds on top of the petal and serve immediately.
NOTES While it is possible to make your own cotton candy, the cost of the machine is very high, even for a small unit. If
you can fi nd a high-quality cotton candy source, use it for this dessert.
For the crystallized rose petals, see Crystallized Orange Blossom Petals on page 156. Substitute rose petals for
the orange blossom petals.

FINISHED ITEMS 177

178 FROZEN DESSERTS

FINISHED ITEMS 179
Verjus Sorbet in Chilled Peach Soup with Crystallized Black Olives YIELD 10 PORTIONS
COMPONENTS
300 g / 10.58 oz VERJUS SORBET BASE (page 379)
50 g / 1.76 oz verjus
600 g / 1 lb 5.16 oz CHILLED PEACH SOUP BASE
100 g / 3.52 oz sparkling water
50 g / 1.76 oz CRYSTALLIZED BLACK OLIVES
ASSEMBLY
1. Churn or pacotize the sorbet base. Transfer to a piping bag and portion into a 3.75-cm / 1.5-in diameter demi-
sphere fl eximold mat, smoothing out the top with an offset spatula. Make 20 demi-spheres and place in the
freezer to harden.
2. Once hardened, fuse 2 sorbet demi-spheres together by rubbing the edges where they touch with your gloved hands.
3. Return to the freezer. Once hardened, transfer to an airtight container and reserve frozen.
4. Place 5 g / .18 oz of verjus (about 1 tsp) in a bowl and freeze.
5. Once the verjus has hardened, take the bowl out of the freezer and torch the verjus for 1 second to melt it slightly.
6. Place the sorbet sphere on top of the verjus. The sorbet should re-freeze the verjus, anchoring it down to the bowl.
7. Sprinkle about 5 g / .17 oz of the crystallized olives on top of the sorbet. Let sorbet temper for 3 to 5 minutes.
8. Just before serving, combine 60 g / 2.12 oz of the peach soup with 10 g / .35 oz of the sparkling water, preferably
one with large bubbles, and serve. This step is crucial, because if the sparkling water is added too soon, it will lose
its fi zz. Pour the soup into a small carafe.
9. Serve immediately. The soup will be poured tableside. It should be poured down the side of the bowl, away from the
sorbet and close to the base of the bowl to avoid splatter.

180 FROZEN DESSERTS
Chilled Peach Soup YIELD 1 KG / 2 LB 3.27 OZ
1.5 kg / 3 lb 4.91 oz peaches, very ripe
723 g / 1 lb 9.5 oz peach purée
25 g / .88 oz lemon juice
3 g / .11 oz salt
100 g / 3.53 oz Riesling
1. Score the peaches on the top and bottom with an X. Blanch them in boiling water and, once the skins
start to peel off, transfer them to an ice bath.
2. Once cooled completely, remove the skins and pits. Blend with the purée, lemon juice, and salt. Pass
through a fi ne-mesh strainer.
3. Combine 750 g / 1 lb 10.46 oz of the purée with the wine and reserve cold.
NOTE Make sure to use a good-quality wine to achieve the optimal fl avor for this soup.
Crystallized Black Olives YIELD 25 G / .88 OZ
50 g / 1.76 oz black olives, pitted
25 g / .88 oz sugar
1. Coarsely chop the olives and toss them in the sugar.
2. Place in a dehydrator until dry, about 36 hours.
3. Reserve in an airtight container at room temperature. If they are kept in a dry environment, they will last
for up to 2 weeks.

FINISHED ITEMS 181
Campari Granité with Pomelo Confi t YIELD 10 PORTIONS
COMPONENTS
90 segments POMELO CONFIT
600 g / 1 lb 5.16 oz CAMPARI AND ORANGE GRANITÉ (page 400)
ASSEMBLY
1. Take 9 segments out of the syrup they are kept in and gently pat them dry with a paper towel. Place the pomelo
segments at the bottom of a fl at bowl; arrange them in a 3 by 3 layer in an even rectangle with the segments slightly
overlapping.
2. Spoon approximately 60 g / 2.11 oz of granité directly on top of the pomelo segments.
3. Serve immediately.
Pomelo Confi t YIELD 90 TO 100 PIECES
100 pomelo suprêmes
500 g / 1 lb 1.64 oz simple syrup (50° Brix)
1. Combine the pomelo suprêmes with the simple syrup in a pot. Simmer for 5 minutes.
2. Cool the confi t over an ice bath and reserve refrigerated. Discard after service.
NOTES Use a very sharp knife when cutting the segments out of the fruit so as to get a clean look.
Do not bring the syrup to a boil, because the fruit is very delicate and it might lose its shape.
If desired, cook the segments with other items, such as vanilla beans, spices, and so on, to infuse their fl avor.

182 FROZEN DESSERTS
Apple Tatin Ice Cream with Cinnamon Arlettes and Candied Honeycrisp Apples YIELD 10 PORTIONS
COMPONENTS
10 wedges CANDIED HONEYCRISP APPLES
50 g / 1.76 oz crushed puff pastry
300 g / 10.58 oz APPLE TATIN ICE CREAM (page 357)
10 CINNAMON ARLETTES
10 g / .35 oz APPLE PEEL POWDER
ASSEMBLY
1. Place an apple wedge on the plate in a standing position.
2. Place a small amount of the crushed puff pastry next to the candied apple.
3. Scoop a medium quenelle (30 g / 1.06 oz) of the ice cream on top of the crushed puff pastry.
4. Lean an arlette on the side of the quenelle in such a way that it touches the tip of the candied apple.
5. Sprinkle 1 g / .03 oz of the apple powder across the plate in a very straight and thin line.
6. Serve immediately.
Candied Honeycrisp Apples YIELD 500 G / 1 LB 1.64 OZ (20 PORTIONS)
1.135 kg / 2 lb 8.02 oz sugar
340 g / 11.99 oz water
25 g / .88 oz lemon juice
500 g / 1 lb 1.64 oz Honeycrisp apples, peeled (peel reserved), cored, and cut into eighths
1. Prepare the sugar syrup by cooking the sugar, water, and lemon juice on very high heat until it has reached
a temperature of 160°C / 325°F.
2. Add the apples to the syrup and reduce the heat to low. Cook very slowly until the pectin in the fruit has
been activated and the fruit is translucent. Remove the apples from the liquid and place on silicone paper,
a nonstick rubber mat, or a sheet pan lined with plastic wrap.
3. Reserve covered with plastic at room temperature for up to 1 week. They don’t necessarily spoil, but they
shrivel up and dry out, even when covered.
NOTE Use ripe apples. The best kind of apples to use for candying are those that have a high pectin content and low
moisture content. The preferred apple is Honeycrisp, but Granny Smith or Ginger Gold apples can also be used.
Use the leftover apples to make the ice cream.

FINISHED ITEMS 183
Cinnamon Arlettes YIELD 255 G / 9 OZ DOUGH (ABOUT 20 ARLETTES)
200 g / 7.05 oz puff pastry, very cold (almost semi-frozen)
50 g / 1.76 oz confectioners’ sugar
5 g / .18 oz ground cinnamon
1. Roll out the dough to about 2 mm / .08 in. Let the dough relax in the freezer for 30 minutes. Roll it again
to 2 mm / .08 in because it will have relaxed and pulled in. Let it relax in the freezer for 30 minutes.
2. Combine the sugar and cinnamon thoroughly. Reserve.
3. Cut the pastry into rectangles 5 cm / 2 in by 10 cm / 4 in. Relax the dough and freeze until fi rm.
4. Preheat an oven to 200°C / 392°F.
5. Place the puff pastry rectangles on a sheet pan lined with silicone paper, and dust them with the sugar and
cinnamon mixture using a small sifter, giving them a uniform, thin layer. Cover the arlettes with another
sheet of silicone paper, then place an upside-down cooling wire rack on top of the paper.
6. Bake until golden brown, about 12 minutes.
7. There will be some leftover puff pastry from cutting the arlettes. Bake them as you would the arlettes.
Once they are baked and cool, gently crush them. These pieces will be used to anchor down the ice cream.
8. Reserve in an airtight container at room temperature for up to 2 days.
NOTE It is very important to always handle puff pastry only when it is very cold, almost frozen, because it is less suscep-
tible to losing its shape and becoming damaged during handling.
Apple Peel Powder YIELD 50 G / 1.76 OZ
100 g / 3.53 oz reserved peel from the Honeycrisp apples
1. Dry the apple peel in a dehydrator or very low temperature oven (below 100°C / 212°F), about three hours.
2. Once they are dry and cool, grind them in a coffee grinder.
3. Sift through a fi ne-mesh strainer.
4. Reserve in an airtight container at room temperature. If they are properly dehydrated and kept in a dry
environment, they will last up to 1 month.

184 FROZEN DESSERTS
Espresso Semifreddo with Lemon Curd Chiboust and Chocolate Biscotti YIELD 10 PORTIONS
COMPONENTS
450 g / 15.87 oz ESPRESSO SEMIFREDDO BASE (page 405)
450 g / 15.87 oz LEMON CURD CHIBOUST
10 CHOCOLATE BISCOTTI
ASSEMBLY
1. Fill a hotel pan with rice. Place ten 120 ml / 4 fl oz glasses in the rice at a 45-degree angle.
2. Pipe about 45 g / 1.59 oz of semifreddo into each glass. Tap the glasses down (at the same 45-degree angle) so that
the espresso semifreddo evens out to a smooth surface. Return the glasses to the hotel pan at the same angle.
3. Reserve frozen until needed.
4. Take the semifreddo out of the freezer. Pipe 45 g / 1.59 oz of the lemon chiboust into each glass, fi lling it all the way
to the top. The chiboust should be the only thing seen from the top of the glass.
5. Torch the chiboust for a few seconds until the top is golden brown.
6. Place the biscotti directly across the top of the glass.
7. Temper for 4 to 5 minutes and serve.
Lemon Curd Chiboust YIELD 1.04 KG / 2 LB 4.67 OZ
LEMON CURD
125 g / 4.41 oz sugar
125 g / 4.41 oz lemon juice
125 g / 4.41 oz eggs
125 g / 4.41 oz butter, soft
ITALIAN MERINGUE
360 g / 12.7 oz sugar
180 g / 6.35 oz egg whites, at room temperature
1 g / .03 oz cream of tartar
1. FOR THE LEMON CURD: Combine the sugar, lemon juice, and eggs in a bowl and cook over a double boiler,
whisking constantly until the mixture reaches 80°C / 175°F.
2. Take off the heat and transfer to a mixer bowl. Whip on high speed and add the butter in small pieces.
Whip until the curd has cooled to room temperature.
3. Reserve at room temperature if the Italian meringue is to be made immediately after; otherwise, refrigerate
immediately.

FINISHED ITEMS 185
4. FOR THE MERINGUE: Place the sugar in a saucepan with about one-quarter of its weight in water or enough to
obtain a wet-sand texture. Make sure there are no sugar crystals along the inside of the pot and that all the
sugar has been hydrated.
5. Begin whipping the egg whites and cream of tartar on medium speed at the same time that the sugar
begins cooking.
6. Cook the sugar to 121°C / 250°F (also known as the soft ball stage).
7. When the sugar has reached 115°C / 240°F, increase the speed of the mixer to high.
8. When the sugar reaches 121°C / 250°F, take the pot off the heat.
9. Wait for the egg whites to reach stiff peak, and immediately after pour the sugar down the side of the bowl
and whip until the foam has cooled to room temperature.
10. FOR THE LEMON CHIBOUST: Fold the Italian meringue gently into the lemon curd. If the curd was refrigerated,
it needs to be warmed up slightly in order to fold into the meringue smoothly. Pour into a piping bag.
Reserve under refrigeration until needed.
Chocolate Biscotti YIELD 831 G / 1 LB 13.31 OZ
225 g / 7.94 oz eggs
240 g / 8.47 oz sugar
4 g / .14 oz salt
308 g / 10.86 oz bread fl our
50 g / 1.76 oz Dutch-process cocoa powder
4 g / .14 oz baking powder
1. Preheat a convection oven to 160°C / 325°F.
2. Combine the eggs and sugar and whip until light and thick.
3. Blend the dry ingredients together thoroughly.
4. Using a paddle, add the dry ingredients to the egg mixture and mix until incorporated.
5. Divide dough into 2 equal portions.
6. Roll into 2 equal-weight logs the length of a half sheet pan (using only as much fl our as needed). Dust off
any excess fl our on the top and bottom of the log.
7. Bake for 15 to 20 minutes. Remove from the oven and freeze so that it cuts cleanly.
8. Cut the strip on the bias in 6-mm- / .25-in-thick slices.
9. Place the sliced cookies back in the oven and bake for 6 to 8 minutes. Halfway through, fl ip them over,
allowing them to become crisp.
10. Reserve in an airtight container at room temperature. Discard after 1 week.

186 FROZEN DESSERTS

FINISHED ITEMS 187
Kaffi r Lime Leaf Bombe with Bubble Tapioca and Lime Zest Powder YIELD 10 PORTIONS
COMPONENTS
300 g / 10.58 oz BUBBLE TAPIOCA
10 KAFFIR LIME LEAF BOMBE DEMI-SPHERES
5 g / .18 oz LIME ZEST POWDER (page 142)
ASSEMBLY
1. Spoon 30 g / 1.06 oz of tapioca onto the plate.
2. Place a bombe next to the tapioca.
3. Place a pinch of powdered lime zest on top of the bombe.
4. Temper for 4 to 5 minutes and serve.
Bubble Tapioca YIELD 400 G / 14.11 OZ
1.2 kg / 2 lb 10.33 oz water
200 g / 7.05 oz black pearl parcooked bubble tapioca
100 g / 3.53 oz simple syrup (50° Brix)
1. Bring the water up to a rolling boil; add the tapioca pearls and stir to make sure they don’t stick together
or to the bottom of the pot.
2. Lower the heat to medium and continue to cook, covered, for 20 more minutes.
3. Remove from heat and let stand for 25 minutes, or until cooked through (they will be chewy).
4. Rinse the tapioca pearls with cold water and drain thoroughly.
5. Keep tapioca pearls in a container covered with the simple syrup. Reserve refrigerated. Discard after 24 hours.
Kaffi r Lime Leaf Bombe Demi-Spheres YIELD 10 ASSEMBLED BOMBES
500 g / 1 lb 1.64 oz KAFFIR LIME LEAF BOMBE (page 407)
200 g / 7.05 oz WHITE COUVERTURE SPRAY
1. Pipe the bombe into 5-cm / 2-in diameter demi-sphere fl eximolds. Even out the surface with an offset
spatula. Place in the freezer until hardened.

188 FROZEN DESSERTS
2. Once the bombe has hardened, unmold from the fl eximolds. Adhere one dome to the other by placing a
drop of white chocolate between them. Offset them; they should not form a perfect sphere. They should
be offset by at least 1.25 cm / .5 in.
3. Return to the freezer.
4. Place the white chocolate spray in a spray gun and spray the assembled bombes until they are completely
coated.
5. Return to the freezer until needed.
White Couverture Spray YIELD 300 G / 10.58 OZ
200 g / 7.05 oz white couverture
100 g / 3.53 oz cocoa butter
Bring the chocolate and cocoa butter to 38°C / 100°F over medium heat. Reserve warm.
Frozen Basil Souffl és with Crystallized Basil Leaves YIELD 10 PORTIONS
COMPONENTS
10 FROZEN BASIL SOUFFLÉ BÂTONS
50 CRYSTALLIZED BASIL LEAVES
ASSEMBLY
1. Place a bâton on a plate.
2. Place 5 crystallized basil leaves carefully on the souffl é and the plate.
3. Let the souffl é temper for 4 to 5 minutes and serve.

FINISHED ITEMS 189
Frozen Basil Souffl é Bâtons YIELD 500 G / 1 LB 1.64 OZ
500 g / 1 lb 1.64 oz FROZEN BASIL SOUFFLÉ BASE (page 408)
300 g / 10.58 oz WHITE COUVERTURE SPRAY (page 188)
1. Line a half sheet pan with a nonstick rubber mat. Place a 38 cm / 15 in by 25 cm / 10 in wide by 2 cm /
0.75 in Plexiglas frame on the mat and freeze.
2. Pour the souffl é base into the prepared pan and even out the top with an offset spatula so that it is fl ush
with the frame. Place in the freezer until hardened.
3. Once hardened, take the frame off the souffl é (run a paring knife along the inside border, being careful
to not cut the rubber mat). Flip the souffl é over onto an acetate sheet of the same size as the souffl é and
peel the rubber mat off.
4. Cut into rectangles 1.25 cm / .5 in by 12.5 cm / 5 in. Return to the freezer.
5. Set up the spraying area. Place the chocolate spray in a spray gun and spray the souffl és until they are
completely coated.
6. Reserve in an airtight container in the freezer.
NOTE Be gentle when handling the sprayed souffl és, since the coating is easily damaged. Use a small offset spatula to
move them from the freezer to the plate.
Crystallized Basil Leaves YIELD 50 TO 60 LEAVES
50 to 60 basil leaves (the smallest leaves)
50 g / 1.76 oz pasteurized egg whites, or as needed
100 g / 3.52 oz bakers’ sugar, or as needed
1. Using a smooth artist’s brush, brush each basil leaf on both sides with a thin layer of egg whites, then
gently toss in the sugar. Pick the leaves up by the stems and let them dry on a sheet pan lined with
parchment paper at room temperature for at least 4 hours before using.
2. Reserve in an airtight container at room temperature. Discard after 4 days.

190 FROZEN DESSERTS

FINISHED ITEMS 191
Frozen Apricot Mousse with Praline Croquant and Pistachio Financier YIELD 10 PORTIONS
COMPONENTS
420 g / 14.81 oz FROZEN APRICOT MOUSSE BASE (page 408)
10 slices PISTACHIO FINANCIER
10 poached APRICOT HALVES
10 pieces PRALINE CROQUANT
ASSEMBLY
1. Place three 15-cm / 6-in cake rings on a sheet pan lined with a nonstick rubber mat. Line the inside of the ring with
acetate. Line the outside of a 7.5-cm / 3-in ring with acetate and place it inside the larger ring. Make sure that it is
centered. Secure the middle ring by taping it to the larger ring on top once it is centered. Freeze.
2. Pour the apricot mousse base into a piping bag. Pipe it between the larger ring and the smaller ring so that it is 1 cm / .4
in thick. Tap the sheet pan down so that the mousse settles into an even layer. Place the mousse in the freezer to harden.
3. Once the mousse has frozen, take the rings and the acetate off. Cut the mousse in quarters using a knife that has
been dipped in hot water and dried. Transfer to an airtight container and freeze until needed.
4. Place a pistachio fi nancier on the plate.
5. Place 1 apricot mousse quarter inside the groove on the fi nancier, so it sits fi rmly on the plate and leans on the
fi nancier in an upright position.
6. Place a poached apricot half to the left side of the fi nancier.
7. Lean a piece of praline croquant on the mousse.
8. Let the mousse temper for 3 to 4 minutes and serve.
Pistachio Financier YIELD 1 KG / 2 LB 3.27 OZ
123 g / 4.34 oz pistachio fl our
123 g / 4.34 oz all-purpose fl our
286 g / 10.09 oz confectioners’ sugar
263 g / 9.28 oz egg whites
205 g / 7.23 oz brown butter, cooled to room temperature
1. Combine the dry ingredients in the bowl of an electric mixer fi tted with the paddle attachment. Pour in the
egg whites in several additions, scraping down the bowl between each addition. Mix until just combined.
Scrape down the sides of the bowl. Slowly add the butter until just incorporated.
2. Reserve refrigerated until needed. Not only is it easier to work with when cold, but chilling also extends its
shelf life.
3. Preheat a convection oven to 160°C / 325°F.

192 FROZEN DESSERTS
4. Spray a rectangular cake mold 5 cm / 2 in by 38 cm / 15 in by 7.5 cm / 3 in with nonstick cooking spray.
Pipe the fi nancier batter almost all the way up the mold.
5. Bake until fi rm to the touch at the center of the fi nancier, about 10 minutes.
6. Remove from the oven and cool in the mold.
7. Once it has cooled, trim the crown off the fi nancier so the top of the cake is even with the cake mold.
8. Take the fi nancier out of the mold and freeze for 1 hour, then cut into slices 2.5 cm / 1 in by 7.5 cm / 3 in.
Cut a groove (1 cm / .4 in wide by 1.25 cm / .5 in deep) at the right side of each slice.
9. Reserve in an airtight container at room temperature. Discard after service.
Poached Apricots YIELD 10 APRICOT HALVES
10 dried apricot halves (if they are whole, cut them in half lengthwise)
400 g / 14.1 oz Moscato d’Asti
400 g / 14.1 oz simple syrup (50° Brix)
1. Simmer the apricots in the wine and syrup over medium-high heat until tender, about 45 minutes.
2. Reserve in the liquid at room temperature. Discard after 2 days.
Praline Croquant YIELD 310 G / 10.93 OZ
250 g / 8.82 oz isomalt
10 g / .35 oz water
50 g / 1.76 oz praline paste
1. Place a nonstick rubber mat on a marble surface.
2. Cook the isomalt and the water to 155°C / 310°F over high heat. Remove from the heat and stir in the
praline paste. Pour onto the nonstick rubber mat.
3. Put on 3 pairs of latex gloves and start pulling the sugar when it has cooled down (if it is too hot it won’t
pull very well). Pull the sugar so that it is very thin, then cut into pieces that are about 7.5 cm / 3 in long,
using scissors. Keep in mind that thick pieces are unpleasant to eat. It is impossible to get identical
shapes, but try to get them as uniform as possible.
4. If the sugar hardens, place the rubber mat on a sheet pan and warm it up in a hot oven for a few seconds.
Once the thicker pieces have softened slightly, pull them so they are very thin.
5. Reserve in an airtight container with silica gel packets (to prevent the sugar from absorbing moisture) at
room temperature. If they are kept in a very dry environment, they can last indefi nitely.

FINISHED ITEMS 193
Frozen Gingerbread Spice Mousse with Gingerbread, Crystallized Ginger, and Molasses YIELD 10 PORTIONS
COMPONENTS
600 g / 1 lb 5.15 oz FROZEN GINGERBREAD-SPICE MOUSSE BASE (page 409)
10 slices GINGERBREAD
100 g / 3.53 oz molasses
10 g / .35 oz crystallized ginger julienne
ASSEMBLY
1. Line 10 PVC tubes 2.5 cm / 1 in by 7.5 cm / 3 in with acetate. Place them on a sheet pan in a standing position and
place them in the freezer.
2. Pour the mousse base into a piping bag. Pipe the mousse into the PVC tubes. Even out the top with an offset
spatula and place in the freezer to harden.
3. Reserve in the PVC tube, frozen in an airtight container until needed.
4. Place a gingerbread slice on the plate.
5. Drizzle 10 g / .35 oz molasses on top of the cake and spoon a few drops around the plate.
6. Unmold the mousse from the PVC tube, take the acetate off, and place it next to the gingerbread.
7. Place about 1 g / .04 oz of crystallized ginger on top of the mousse in a straight line.
8. Let the mousse temper for 3 to 4 minutes and serve.
Gingerbread YIELD 2 KG / 4 LB 6.54 OZ
880 g / 1 lb 15.04 oz eggs
493 g / 1 lb 1.6 oz dark brown sugar
6 g / .21oz salt
246 g / 8.68 oz bread fl our
246 g / 8.68 oz pastry fl our
12 g / .41 oz ground ginger
6 g / .21 oz ground cinnamon
3 g / .11 oz ground cloves
2 g / .07 oz ground nutmeg
23 g / .82 oz crystallized ginger, fi nely diced
83 g / 2.92 oz butter, melted but cool

194 FROZEN DESSERTS
1. Prepare 2 rectangular cake molds 2.5 cm / 1 in by 38 cm / 15 in by 7.5 cm / 3 in, spraying with nonstick
cooking spray and placing on a full-size sheet pan.
2. Combine the eggs, sugar, and salt in a 20-qt mixer bowl. Place over a hot water bath and bring the
contents of the bowl up to 48°C / 120°F while whisking slowly (don’t whisk too vigorously or else too
much air will be incorporated and it will take too long for the ingredients to warm up).
3. Transfer the bowl to a mixer and whip on high speed for 5 minutes, then turn the speed down to medium
and whip for 15 more minutes.
4. Meanwhile, preheat a convection oven to 350°F (open the vents and turn the fan speed down to low).
5. Sift the bread fl our, pastry fl our, and ground spices together twice.
6. After the eggs have whipped to full volume, take the bowl off the mixer and gently fold in the dry
ingredients.
7. Fold in the butter carefully (so as not to defl ate the sponge) and then quickly fold in the diced ginger.
8. Immediately pour the batter into the prepared molds and spread out evenly with an offset spatula. Bake
until golden brown and the sponge springs back when gentle pressure is applied to it at the center of the
pan.
9. Cool to room temperature.
10. Once it has cooled, trim the crown off the sponge so that it is fl ush with the top of the mold. Take the
molds off.
11. Freeze the gingerbread for 2 hours and cut into slices 7.5 cm / 3 in by 1.25 cm / .5 in.
12. Reserve in an airtight container at room temperature. Discard any leftovers after service.
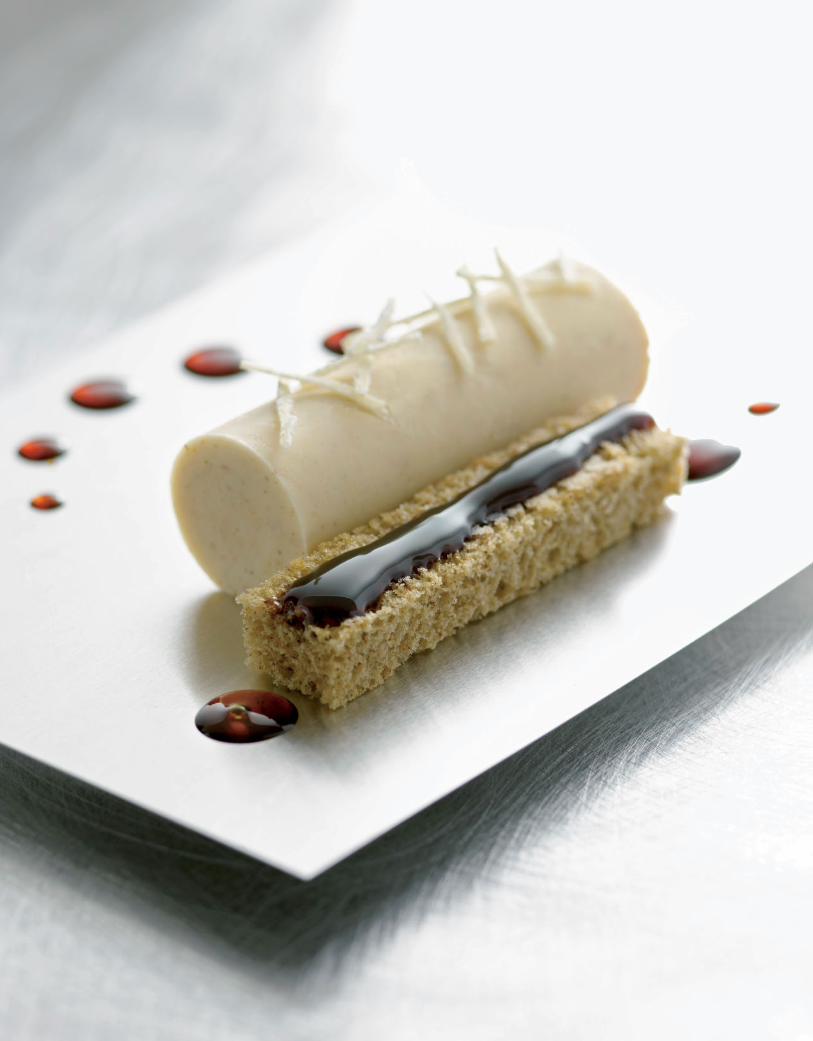
FINISHED ITEMS 195

196 FROZEN DESSERTS
DESSERTS
Milk and Cookies YIELD 10 PORTIONS
COMPONENTS
450 g / 15.87 oz WHOLE MILK ICE (page 400)
10 CHOCOLATE SANDWICH COOKIES
ASSEMBLY
1. Scrape 45 g / 1.59 oz of whole milk ice into a 30 mL / 1 fl oz glass. The ice should come about 2.5 cm / 1 in above
the rim of the glass.
2. Place 1 assembled cookie on the rim of the glass and serve immediately.
Chocolate Sandwich Cookies YIELD 1 KG / 2 LB 3.27 OZ COOKIES; 500 G / 1 LB 1.64 OZ FILLING
COOKIES
361 g / 12.73 oz butter, at room temperature
363 g / 12.8 oz sugar
331 g / 11.68 oz fl our
92 g / 3.25 oz cocoa powder
2 g / .07 oz baking powder
1 g / .03 oz salt
COOKIE FILLING
125 g / 4.4 oz heavy cream
375 g / 13.22 oz white chocolate, pistoles or chopped
1. FOR THE COOKIES: Preheat a convection oven to 160°C / 325°F.
2. Cream the butter with sugar in a mixer using the paddle attachment for 3 minutes or until softened.
3. Meanwhile, sift the dry ingredients. Add them to creamed butter and mix until just combined. The mixture
will form a ball.
4. Shape into a disc, wrap, and refrigerate for 1 hour. Roll out the dough to .3 cm / .13 in thick and freeze.
5. Cut out rectangles 2 cm / .75 in by 8 cm / 3 in, dock with a fork in a symmetrical pattern, and place on a
sheet pan lined with parchment paper. Freeze for 10 minutes.
6. Bake for 7 to 8 minutes, or until the dough has no wet spots. Cool to room temperature and reserve.
7. FOR THE FILLING: Bring the heavy cream to a boil and pour over the chocolate. Stir until a homogenous
mass is obtained.

FINISHED ITEMS 197
8. When the fi lling has set (when it has cooled and is fi rm), pour it into a piping bag and pipe onto half of the
shortbread cookies. Assemble the cookies by topping the fi lling with the remaining cookies.
9. Reserve in an airtight container at room temperature. Discard any leftover assembled cookies after service.

198 FROZEN DESSERTS

FINISHED ITEMS 199
Spice Ice Cream with Gingerbread and Chocolate Mousse Timbale YIELD 10 PORTIONS
COMPONENTS
10 GINGERBREAD AND CHOCOLATE MOUSSE TIMBALES
100 g / 3.53 oz BITTER CHOCOLATE SAUCE
300 g / 10.58 oz SPICE ICE CREAM (page 371)
20 curved CHOCOLATE TRIANGLES
ASSEMBLY
1. Remove the timbales from the refrigerator and temper for 10 to 15 minutes before serving. This will improve the
fl avor and texture of the mousse because it won’t be so cold.
2. Remove the acetate strips from the timbales. They should snap into a perfect straight line right where both ends
meet.
3. Place a timbale on the plate. Do not use your fi ngers; they will leave prints on the chocolate; use an offset spatula
and gloves if you need to touch it.
4. Spoon 10 g / .35 oz of the chocolate sauce onto the plate.
5. Scoop a medium quenelle (30 g / 1.06 oz) of the ice cream on top of the timbale. It should sit on the bottom curve
of the curved chocolate triangles, almost like the garnish is cradling the ice cream.
6. Place 2 curved chocolate triangles on the timbale; they will stick to the glaze. Try to give it as much height as
possible. Serve immediately.
Gingerbread and Chocolate Mousse Timbales YIELD 2 KG / 4 LB 6.55 OZ
GINGERBREAD GÉNOISE
880 g / 1 lb 15.04 oz eggs
493 g / 1 lb 1.38 oz dark brown sugar
6 g / .21 oz salt
246 g / 8.68 oz bread fl our
246 g / 8.68 oz pastry fl our
12 g / .42 oz ground ginger
6 g / .21 oz ground cinnamon
3 g / .11 oz ground clove
2 g / .07 oz ground nutmeg
83 g / 2.93 oz butter, melted but cool
23 g / .81 oz crystallized ginger, fi nely diced

200 FROZEN DESSERTS
BITTER CHOCOLATE MOUSSE
405 g / 14.29 oz eggs
166 g / 5.86 oz sugar
536 g / 1 lb 2.19 oz bitter chocolate (64%)
893 g / 1 lb 15.5 oz heavy cream (40% fat)
SHINY CHOCOLATE GLAZE
41 g / 1.45 oz gelatin sheets
832 g / 1 lb 13.35 oz sugar
441 g / 15.56 oz water
250 g / 8.82 oz Dutch-process cocoa powder
249 g / 8.78 oz crème fraîche
187 g / 6.6 oz 64% chocolate
1 kg / 2 lb 3.27oz bitter chocolate (64%)
1. FOR THE GÉNOISE: Combine the eggs, sugar, and salt in a 20-qt mixer bowl. Place over a hot water bath and
bring the contents of the bowl up to 48°C / 120°F while whisking slowly (don’t whisk too vigorously or else
too much air will be incorporated and it will take too long for the ingredients to warm up).
2. Transfer the bowl to a mixer fi tted with the whip attachment and whip on high speed for 5 minutes, then
turn the speed down to medium and whip for 15 more minutes.
3. Meanwhile, preheat a convection oven to 176°C / 350°F, open the vents, and turn the fan speed down to low.
4. Grease a full-size sheet pan and line it with parchment paper. If desired, line the sheet pan with a nonstick
rubber mat; if so, grease only the border of the pan.
5. Sift the fl ours and ground spices together twice.
6. After the eggs have whipped to full volume, take the bowl off the mixer and gently fold in the dry ingredients.
7. Fold in the butter carefully (so as not to defl ate the génoise) and then quickly fold in the diced crystallized ginger.
8. Immediately pour the batter into the prepared sheet pan and spread out evenly with an offset spatula.
Bake until golden brown and the sponge springs back when gentle pressure is applied to it at the center of
the pan, about 15 minutes.
9. Cool to room temperature. Freeze the génoise for 2 hours and cut with a 2.5-cm / 1-in round cutter. One
round will be used per portion.
10. Reserve in an airtight container in refrigeration.
11. FOR THE MOUSSE: Line 10 stainless steel cylinders or PVC tubes 5 cm / 2 in by 2.5 cm / 1 in diameter with
acetate.
12. Place one of the cutout gingerbread cake rounds inside each of the prepared cylinders.
13. Whip the eggs and sugar over a double boiler until the mixture is slightly thick and has reached 60°C /
140°F. Keep stirring but not whipping. Do not allow the mixture to exceed 63°C / 145°F, because the egg
will start cooking. Let it cool until it reaches room temperature (about 21°C / 70°F). Do not let it get too
cold because the chocolate will be folded in soon, and if this egg mix is cold, the chocolate will set.
14. Melt the chocolate over a double boiler. Let it cool to 37°C / 100°F.
15. Whip the cream to medium-stiff peaks, making sure it’s not over- or under-whipped. Reserve refrigerated
until needed.

FINISHED ITEMS 201
16. Whisk the bitter chocolate into the egg mixture. Fold in the whipped cream in 2 additions. This will help
maintain volume; if the cream is folded in all at once it won’t be as light and airy.
17. Place the mousse in a piping bag and portion immediately into the prepared cylinders.
18. Even out the top with a small offset spatula. Freeze for 1 hour.
19. FOR THE GLAZE: Bloom the gelatin in ice-cold water. In a saucepan, bring the sugar, water, cocoa powder,
and crème fraîche to a boil. Once it boils, add the chocolate and stir until dissolved. Squeeze out the
excess water from the gelatin and add to the mixture. Stir until the gelatin is melted.
20. Strain through a fi ne-mesh strainer. Cool the glaze to 38°C / 100°F before applying or reserve refrigerated.
Use a double boiler to re-warm if necessary.
21. FOR THE TIMBALES: Temper 1 kg / 2 lb 3.27 oz of dark chocolate (64%).
22. Remove the frozen mousse from the cylinders and peel the acetate off.
23. Set 10 acetate strips to wrap the timbales on a sheet of parchment paper. They should be as tall as the
stainless steel ring and long enough to wrap around the unmolded timbales with about 2.5 cm / 1 in
excess to overlap slightly.
24. Pipe the tempered chocolate onto the acetate sheets. Spread into a thin layer using a small offset spatula.
Wrap only 4 or 5 timbales at a time. Otherwise, the chocolate might set on the acetate strip and you won’t
be able to wrap the timbale.
25. Once the chocolate has been spread on the acetate sheet, wrap it around the timbale. Push the fi rst
timbale to the border of the sheet pan it is on, pressing the ends against the frame so the strip won’t open
up. Do the same with the remaining timbales. Refrigerate.
26. Warm the shiny glaze to 38°C / 100°F over a hot water bath. Pour the glaze on top of each timbale. It
should dome on top. If it is too cold, it will ripple and set that way, and if it’s too hot it will look concave. It
is crucial to have the right temperature to obtain the domed look.
27. Reserve refrigerated until needed.
Chocolate Triangles YIELD ABOUT 30 TRIANGLES
100 g / 3.53 oz tempered dark chocolate (64%)
1. Pour the tempered chocolate onto an acetate strip cut to 17.5 cm / 7 in by 30 cm / 12 in and spread to a
thin layer. Pick the acetate up and move it away from where it was to get a clean border.
2. When the chocolate is partially set, use a ruler and the back of a paring knife to cut long, thin triangles,
from the top to the bottom of the acetate. They should be 1.75 cm / .5 in wide at the base. Work quickly,
because once the chocolate sets too much it will crack when it is cut.
3. Place the acetate on a PVC tube 6.25 cm / 2.5 in by 30 cm / 12 in, with the chocolate facing the tube. Tape
the acetate to the tube so that it takes the shape of the tube exactly to form long, thin, curved triangles.
4. Let the chocolate set. Once it is set, leave it on the acetate until it is needed and then remove it from the
PVC tube.
5. Keep the chocolate in a cool, dry place.
NOTE Thin chocolate garnishes require skill, but they are much more refi ned-looking than thick ones.

202 FROZEN DESSERTS
Bitter Chocolate Sauce YIELD 500 G / 1 LB 1.64 OZ
56 g / 1.98 oz milk
111 g / 3.92 oz heavy cream
56 g / 1.98 oz glucose
167 g / 5.89 oz dark chocolate (64%)
111 g / 3.92 oz water
1. Bring the milk, heavy cream, and glucose to a boil over high heat.
2. Pour the mixture over the chocolate and water.
3. Blend with a beurre mixer until smooth.
4. Reserve under refrigeration until needed.
Frozen Blood Orange Parfait with Almond Lace Squares YIELD 10 PORTIONS
COMPONENTS
1 kg / 2 lb 3.27 oz BLOOD ORANGE PARFAIT BASE (page 404)
30 ALMOND LACE SQUARES
10 g / .35 oz CANDIED ORANGE ZEST (page 130)
5 g / .18 oz ORANGE ZEST POWDER
ASSEMBLY
1. For the blood orange parfait squares: Line a half sheet pan with a nonstick rubber mat. Place a 25 cm / 10 in by 38
cm / 15 in by 1.75 cm / .5 in frame inside the sheet pan. Place the sheet pan in the freezer.
2. Pour the parfait base into the prepared frozen frame and spread out evenly using an offset spatula. Harden in
the freezer.
3. Line a half sheet pan with a nonstick rubber mat and freeze.
4. Once the parfait has hardened, fl ip it onto another nonstick rubber mat. Place it back on the frozen sheet pan and
peel off the top rubber mat. This will make the process easier, since the parfait won’t stick to the new rubber mat as
much. Using a 6.25-cm / 2.5-in square cutter, cut the parfait, dipping the cutter in warm (not hot) water each time to
get a clean cut.
5. Once the parfait is cut, lift each square using a small offset spatula and transfer to the second frozen sheet pan lined
with nonstick rubber mat. If the uncut parfait starts getting too soft, return it to the freezer. The parfait is directly
exposed to the freezer ventilation, and this might cause excessive hardening and ice crystal formation, so don’t let it
sit in this condition for too long.
6. Once the parfait has hardened, wrap the sheet pan it is in and reserve frozen until needed.

FINISHED ITEMS 203
7. Stand an almond square vertically on a plate. Stand a parfait square next to the tuile. Repeat with another tuile,
another square, and 1 last tuile. The look is that of a vertical napoleon.
8. Torch the parfait for 1 or 2 seconds to melt any frost that might be on it. Temper the parfait for 4 to 5 minutes before
serving so it won’t be too hard to eat.
9. Spoon 1 g / .035 oz of candied orange zest across the top of the napoleon.
10. Sprinkle .5 g / .017 oz of the powdered zest in a straight, thin diagonal line on the plate and serve immediately.
Almond Lace Squares YIELD 500 G / 1 LB 1.64 OZ
212 g / 7.48 oz sugar
45 g / 1.59 oz all-purpose fl our
99 g / 3.49 oz almond fl our
99 g / 3.49 oz water
45 g / 1.59 oz butter, melted but cool
1. Preheat a convection oven to 163°C / 325°F.
2. Combine all of the dry ingredients in a mixer bowl using a paddle.
3. Slowly pour in the water, then the melted butter.
4. Refrigerate the batter because once it fi rms up it is easier to spread.
5. Spread a thin layer of batter on a nonstick rubber mat, covering the entire surface (minus the borders).
6. Bake until golden brown, about 7 minutes.
7. Remove it from the oven and slide the rubber mat onto a marble surface or a stainless steel table. Wait a
few seconds for it cool down, then cut into rectangles 3.75 cm / 1.5 in by 8.75 cm / 3.5 in. Use a ruler and a
pastry cutter, not a knife, because otherwise the nonstick rubber mat will be cut.
8. If the tuile becomes too hard, return it to the oven to soften. This procedure may need to be repeated a
few times before the amount of tuiles that is needed is obtained.
9. Reserve in an airtight container at room temperature. Reserve for up to 3 days, refreshing each day in a hot
oven for 3 minutes.

204 FROZEN DESSERTS
Orange Zest Powder YIELD: 10 G / .35 OZ
20 g / .71 oz orange zest
1. Microwave the zest in a microwave-safe container (preferably fl at) for 10-second intervals until dry. Be sure
to periodically stir the zest. When dry, let cool.
2. Grind in a spice grinder. Store at room temperature in an airtight container. If kept dry, it will last up to 1
month.
NOTES Zest oranges using a rasp.
If desired, dry the zest in a dehydrator. However, this method takes longer.
Use a porcelain plate for microwaving.
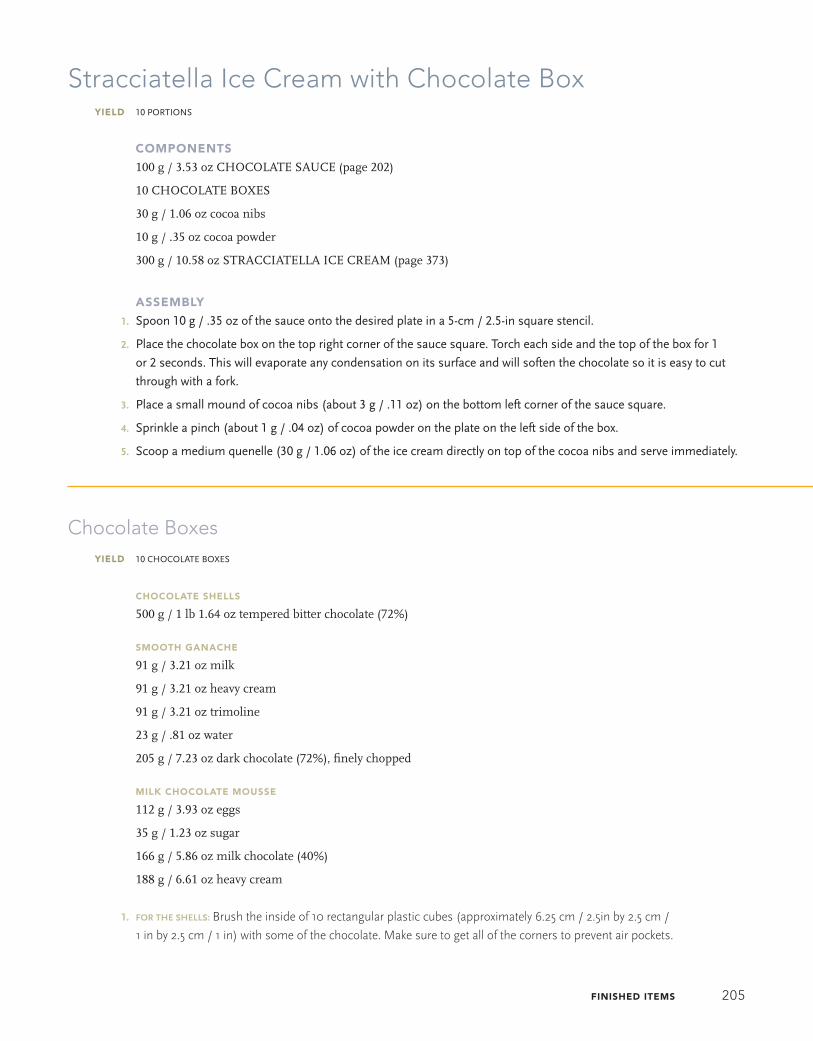
FINISHED ITEMS 205
Stracciatella Ice Cream with Chocolate Box YIELD 10 PORTIONS
COMPONENTS
100 g / 3.53 oz CHOCOLATE SAUCE (page 202)
10 CHOCOLATE BOXES
30 g / 1.06 oz cocoa nibs
10 g / .35 oz cocoa powder
300 g / 10.58 oz STRACCIATELLA ICE CREAM (page 373)
ASSEMBLY
1. Spoon 10 g / .35 oz of the sauce onto the desired plate in a 5-cm / 2.5-in square stencil.
2. Place the chocolate box on the top right corner of the sauce square. Torch each side and the top of the box for 1
or 2 seconds. This will evaporate any condensation on its surface and will soften the chocolate so it is easy to cut
through with a fork.
3. Place a small mound of cocoa nibs (about 3 g / .11 oz) on the bottom left corner of the sauce square.
4. Sprinkle a pinch (about 1 g / .04 oz) of cocoa powder on the plate on the left side of the box.
5. Scoop a medium quenelle (30 g / 1.06 oz) of the ice cream directly on top of the cocoa nibs and serve immediately.
Chocolate Boxes YIELD 10 CHOCOLATE BOXES
CHOCOLATE SHELLS
500 g / 1 lb 1.64 oz tempered bitter chocolate (72%)
SMOOTH GANACHE
91 g / 3.21 oz milk
91 g / 3.21 oz heavy cream
91 g / 3.21 oz trimoline
23 g / .81 oz water
205 g / 7.23 oz dark chocolate (72%), fi nely chopped
MILK CHOCOLATE MOUSSE
112 g / 3.93 oz eggs
35 g / 1.23 oz sugar
166 g / 5.86 oz milk chocolate (40%)
188 g / 6.61 oz heavy cream
1. FOR THE SHELLS: Brush the inside of 10 rectangular plastic cubes (approximately 6.25 cm / 2.5in by 2.5 cm /
1 in by 2.5 cm / 1 in) with some of the chocolate. Make sure to get all of the corners to prevent air pockets.

206 FROZEN DESSERTS
2. Fill the cubes with the remaining chocolate. Tap the cubes vigorously to remove any air pockets. Let the
chocolate sit for 1 minute.
3. Empty the chocolate out of the cubes, tapping any excess out, and place on a wire rack, open side facing
down. It is crucial that the boxes have very thin walls so that they are easy to eat.
4. When the chocolate begins to set, scrape the “feet” off with an offset spatula. Let the chocolate set
completely and extract it from the cubes by gently pulling it out with your fi ngers.
5. Reserve at room temperature.
6. FOR THE GANACHE: Bring the milk, cream, trimoline, and water to a boil. Pour over the chocolate. Mix with a
beurre mixer until smooth, about 1 minute.
7. Pour into a piping bag. If not using right away, reserve in a closed container under refrigeration.
8. FOR THE MILK CHOCOLATE MOUSSE: Whip the eggs and sugar over a double boiler until the mixture is slightly
thick and it reaches 60°C / 140°F. Do not exceed 63°C / 145°F because the eggs will start cooking. Let it
cool until it reaches room temperature. Do not chill or refrigerate; it needs to be mixed with the chocolate,
and if it is too cold the chocolate will set.
9. Melt the chocolate over a double boiler. Let it cool to 37°C / 100°F.
10. Whip the heavy cream to medium-stiff peaks, making sure it’s not over- or under-whipped.
11. Whisk the chocolate into the egg mixture. Fold in the whipped cream in 2 additions. It will help maintain
volume; if the cream is folded in all at once it won’t be as light and airy.
12. Place the mousse in a piping bag and refrigerate. The mousse needs to be made right before it is needed
so that it won’t set. If it sets, it will be diffi cult to portion and it will lose volume in the process.
13. TO FINISH THE BOXES: Pipe the ganache into the shells (about one-quarter full), then pipe the mousse on
top of the ganache (about half full), then ganache again (about three-quarters full), then top off with the
mousse. Smooth the mousse out with a small offset spatula so it is even with the top of the box.
14. Reserve covered and refrigerated until needed. Discard any leftover boxes after 2 days, since they will get
damaged by condensation.

FINISHED ITEMS 207

208 FROZEN DESSERTS
Rice Milk Sherbet with Arroz con Leche and Cinnamon Anglaise YIELD 10 PORTIONS
COMPONENTS
10 g / .35 oz sugar
30 ARROZ CON LECHE CUBES
300 g / 10.58 oz CINNAMON ANGLAISE
300 g / 10.58 oz RICE MILK SHERBET (page 398)
ASSEMBLY
1. Sprinkle some sugar on top of each arroz con leche cube right before serving and torch it gently so that the
sugar caramelizes.
2. Place 3 cubes on the desired plate.
3. Pour 30 g / 1.06 oz of cinnamon anglaise in front of the cubes and drag the sauce with a spoon.
4. Scoop a small quenelle (20 g / .71 oz) of the sherbet on top of each rice cube and serve immediately.
Arroz con Leche (Rice with Milk) Cubes YIELD 1 KG / 2 LB 3.27 OZ
794 g / 28 oz milk
2 cinnamon sticks
5 g / .18 oz lemon zest
88 g / 3.1 oz rice (short grain)
119 g / 4.2 oz sugar
4 gelatin sheets, bloomed
1. Line a fl at sheet pan with a nonstick rubber mat. Place a .5-cm- / .25-in-deep stainless steel frame on the
mat. The frame should fi t just inside the pan.
2. Bring the milk, cinnamon, and lemon zest to a boil in a saucepan over medium-high heat.
3. Add the rice and stir constantly, making sure it doesn’t stick to the bottom of the pot. Turn the heat down
to medium. Do not let the rice boil; it should remain at a simmer.
4. Simmer the rice until it is cooked through, about 20 minutes, add the sugar and bring to a boil again.
5. Add the gelatin sheets and stir until dissolved.
6. Pour the rice into the prepared frame and cover it with a sheet of acetate to prevent any skin from forming.
Allow it to set in the freezer, about 2 hours.
7. Once it has fi rmed up, fl ip the rice over so that the acetate is now on the bottom, and cut into 3.75-cm /
1.5-in squares.
8. Reserve refrigerated until needed. Discard any leftover cubes after service. The rice will become crumbly
and unpleasant to eat.

FINISHED ITEMS 209
Cinnamon Anglaise YIELD 500 G / 1 LB 1.64 OZ
166 g / 5.86 oz milk
166 g / 5.86 oz heavy cream
83 g / 2.93 oz sugar
8 g / .28 oz cinnamon
78 g / 2.75 oz egg yolks
1. Combine all of the ingredients in a saucepan and cook over medium heat until the mixture reaches
80°C / 175°F, stirring constantly.
2. Pass through a fi ne-mesh strainer and cool over an ice bath. Reserve refrigerated until needed. All custard-
based items should be discarded after 3 days.
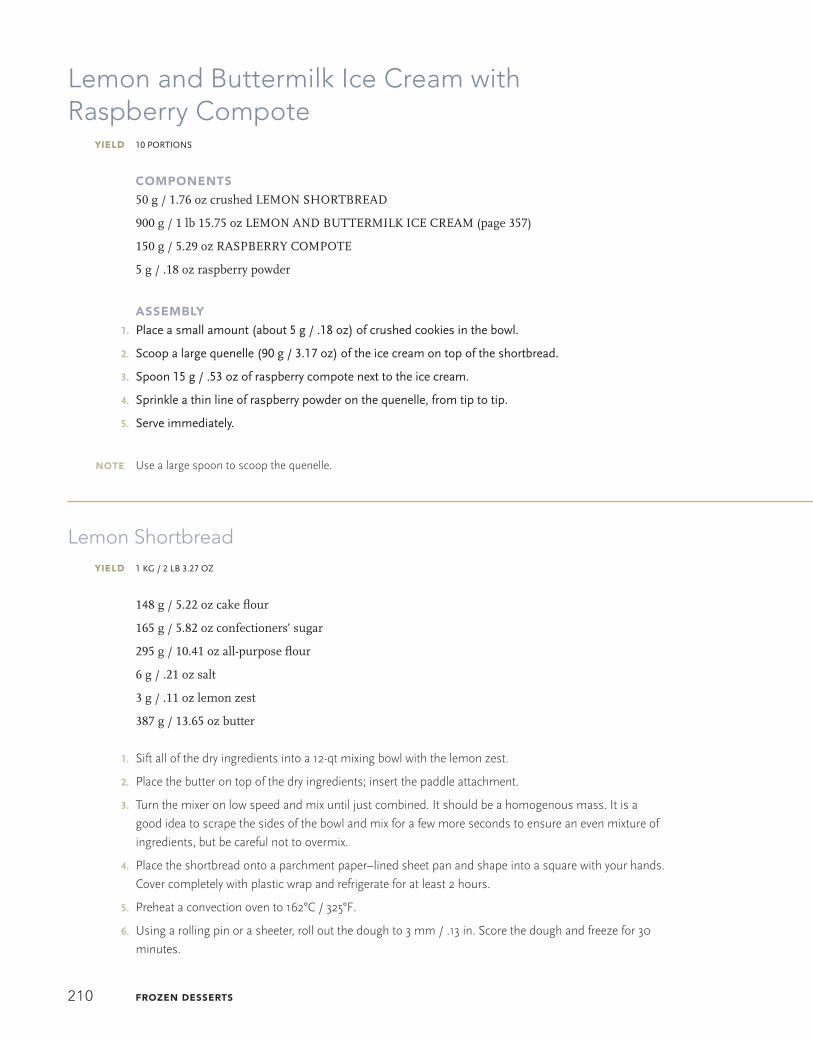
210 FROZEN DESSERTS
Lemon and Buttermilk Ice Cream with Raspberry Compote YIELD 10 PORTIONS
COMPONENTS
50 g / 1.76 oz crushed LEMON SHORTBREAD
900 g / 1 lb 15.75 oz LEMON AND BUTTERMILK ICE CREAM (page 357)
150 g / 5.29 oz RASPBERRY COMPOTE
5 g / .18 oz raspberry powder
ASSEMBLY
1. Place a small amount (about 5 g / .18 oz) of crushed cookies in the bowl.
2. Scoop a large quenelle (90 g / 3.17 oz) of the ice cream on top of the shortbread.
3. Spoon 15 g / .53 oz of raspberry compote next to the ice cream.
4. Sprinkle a thin line of raspberry powder on the quenelle, from tip to tip.
5. Serve immediately.
NOTE Use a large spoon to scoop the quenelle.
Lemon Shortbread YIELD 1 KG / 2 LB 3.27 OZ
148 g / 5.22 oz cake fl our
165 g / 5.82 oz confectioners’ sugar
295 g / 10.41 oz all-purpose fl our
6 g / .21 oz salt
3 g / .11 oz lemon zest
387 g / 13.65 oz butter
1. Sift all of the dry ingredients into a 12-qt mixing bowl with the lemon zest.
2. Place the butter on top of the dry ingredients; insert the paddle attachment.
3. Turn the mixer on low speed and mix until just combined. It should be a homogenous mass. It is a
good idea to scrape the sides of the bowl and mix for a few more seconds to ensure an even mixture of
ingredients, but be careful not to overmix.
4. Place the shortbread onto a parchment paper–lined sheet pan and shape into a square with your hands.
Cover completely with plastic wrap and refrigerate for at least 2 hours.
5. Preheat a convection oven to 162°C / 325°F.
6. Using a rolling pin or a sheeter, roll out the dough to 3 mm / .13 in. Score the dough and freeze for 30
minutes.

FINISHED ITEMS 211
7. Bake the shortbread as a full sheet until golden brown around the borders.
8. Once the shortbread cools, break into small pieces using a rolling pin.
9. Transfer to an airtight container. Reserve in a cool, dry place. The shortbread will keep for 3 days.
Raspberry Compote YIELD 225 G / 7.93 OZ
100 g / 3.53 oz fresh raspberries
50 g / 1.76 oz raspberry purée
75 g / 2.64 oz superfi ne sugar, or as needed
1. Combine all of the ingredients gently so that the fresh raspberries don’t get broken.
2. Check the sweetness and adjust with additional sugar if necessary.
3. Reserve refrigerated. Discard any leftover compote after service.

212 FROZEN DESSERTS
Roasted McIntosh Apple Sherbet with Candied Pecans and Caramel Syrup YIELD 10 PORTIONS
COMPONENTS
80 g / 2.82 oz CANDIED PECANS
900 g / 1 lb 15.75 oz ROASTED MCINTOSH APPLE SHERBET (page 398)
50 g / 1.76 oz CARAMEL SYRUP
ASSEMBLY
1. Place 8 g / .28 oz of candied pecans in the base of the bowl.
2. Scoop a large quenelle (90 g / 3.17 oz) of the sherbet on top of the pecans.
3. Drizzle 5 g / .18 oz (about 1 teaspoon) of caramel syrup on top of the quenelle. Make sure to drizzle only on the
quenelle, not on the bowl.
4. Serve immediately.
Candied Pecans YIELD ABOUT 600 G / 1 LB 5.15 OZ
1 kg / 2 lb 3.27 oz sugar
10 g / .35 oz lemon juice
500 g / 1 lb 1.64 oz pecans
1. Line a full-size sheet pan with parchment paper. Place a wire cooling rack over the sheet pan and spray it with
nonstick cooking spray. Place the sheet pan on a marble surface. Have 3 pairs of latex gloves available.
2. Place the sugar in a saucepan with about one-quarter of its weight in water or enough to obtain a wet-sand
texture. Add the lemon juice to prevent crystallization. Make sure there are no sugar crystals along the
inside of the pot and that all the sugar has been hydrated. Begin cooking the sugar over high heat.
3. Toast the nuts until they have a toasted aroma and a light brown color. If the sugar has not caramelized
by this point, keep the nuts hot until it does. If desired, keep them in the oven, but turn it off and open the
oven door slightly. If cold nuts are added to the sugar, it will crystallize.
4. Continue to cook the sugar over high heat until it reaches 170°C / 338°F. Turn the heat down to low and
stir in the toasted nuts. Make sure all the nuts are coated in sugar and continue to stir until you start
hearing a popping sound, about 1 minute, then pour the contents of the pot over the greased wire rack.
5. Put on the 3 pairs of gloves and spray nonstick cooking spray on them. Working very quickly, separate the
nuts from each other and immediately place them on the marble to cool quickly.
6. Once they have cooled, chop them coarsely.
7. Reserve in an airtight container at room temperature. They can last more than 5 days if they are kept in
dry conditions.
NOTE Be careful when making this recipe in humid conditions. The nuts can easily become tacky.

FINISHED ITEMS 213
Caramel Syrup YIELD 500 G / 1 LB 1.64 OZ
413 g / 14.55 oz sugar
75 g / 2.65 oz water
13 g / .44 oz lemon juice
1. Combine all of the ingredients in a saucepan. Cook over high heat without stirring until it reaches
182°C / 360°F. Cool the mixture over an ice bath.
2. Adjust the consistency with more water if necessary. Add water if it is too thick (hard); if it is too thin, it
needs to cook longer. A thick syrup consistency is ideal.
3. Reserve refrigerated to prevent crystallization. If it does not come in contact with a foreign contaminant
(grease, for example, which can recrystallize the sugar) and is kept covered, it will last up to 1 month.

214 FROZEN DESSERTS
Brown Butter Ice Cream with Caramelized Bananas, Banana Chips, and Brown Butter YIELD 10 PORTIONS
COMPONENTS
300 g / 10.58 oz BROWN BUTTER
30 CARAMELIZED BANANA DISKS
300 g / 10.58 oz BROWN BUTTER ICE CREAM (page 358)
10 BANANA CHIPS
ASSEMBLY
1. Pour 30 g / 1.06 oz brown butter into a saucier and reserve warm.
2. Place 3 caramelized bananas on the plate.
3. Scoop a medium quenelle (30 g / 1.06 oz) of the ice cream on top of the bananas.
4. Lean a banana chip on the quenelle.
5. Serve immediately. The brown butter will be poured tableside. Avoid pouring the brown butter directly on top of the
ice cream because it will congeal. Spoon it into the base of the bowl.
Brown Butter YIELD 340 G / 11.99 OZ
454 g / 1 lb butter, diced
1. Cook the butter in a saucepan over high heat until the milk proteins brown, about 10 minutes. As soon as
they brown, transfer the butter to a room-temperature pan to stop the proteins from getting any darker.
2. Reserve warm during service.
3. To serve, stir the butter just before spooning onto the plate.
NOTE Always use in small amounts.
Caramelized Banana Disks YIELD ABOUT 350 G / 12.34 OZ
250 g / 8.82 oz bananas
750 g / 1 lb 10.46 oz sugar
188 g / 6.63 oz water
13 g / .46 oz lemon juice
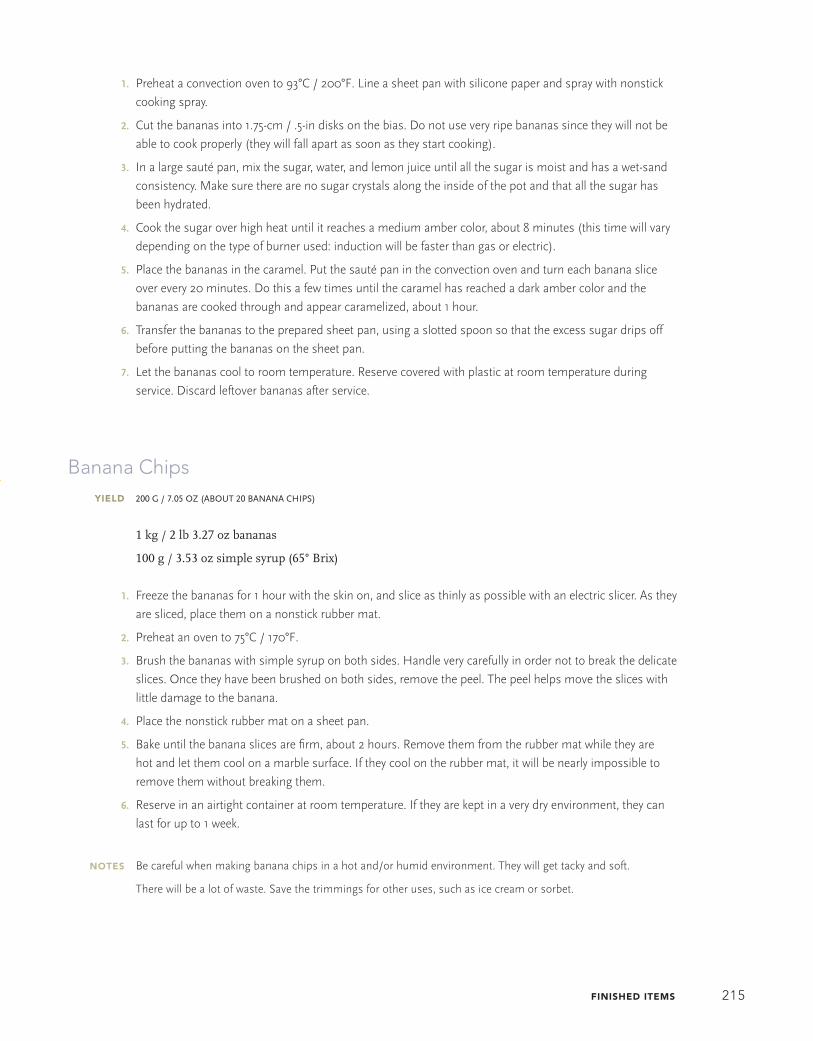
FINISHED ITEMS 215
1. Preheat a convection oven to 93°C / 200°F. Line a sheet pan with silicone paper and spray with nonstick
cooking spray.
2. Cut the bananas into 1.75-cm / .5-in disks on the bias. Do not use very ripe bananas since they will not be
able to cook properly (they will fall apart as soon as they start cooking).
3. In a large sauté pan, mix the sugar, water, and lemon juice until all the sugar is moist and has a wet-sand
consistency. Make sure there are no sugar crystals along the inside of the pot and that all the sugar has
been hydrated.
4. Cook the sugar over high heat until it reaches a medium amber color, about 8 minutes (this time will vary
depending on the type of burner used: induction will be faster than gas or electric).
5. Place the bananas in the caramel. Put the sauté pan in the convection oven and turn each banana slice
over every 20 minutes. Do this a few times until the caramel has reached a dark amber color and the
bananas are cooked through and appear caramelized, about 1 hour.
6. Transfer the bananas to the prepared sheet pan, using a slotted spoon so that the excess sugar drips off
before putting the bananas on the sheet pan.
7. Let the bananas cool to room temperature. Reserve covered with plastic at room temperature during
service. Discard leftover bananas after service.
Banana Chips YIELD 200 G / 7.05 OZ (ABOUT 20 BANANA CHIPS)
1 kg / 2 lb 3.27 oz bananas
100 g / 3.53 oz simple syrup (65° Brix)
1. Freeze the bananas for 1 hour with the skin on, and slice as thinly as possible with an electric slicer. As they
are sliced, place them on a nonstick rubber mat.
2. Preheat an oven to 75°C / 170°F.
3. Brush the bananas with simple syrup on both sides. Handle very carefully in order not to break the delicate
slices. Once they have been brushed on both sides, remove the peel. The peel helps move the slices with
little damage to the banana.
4. Place the nonstick rubber mat on a sheet pan.
5. Bake until the banana slices are fi rm, about 2 hours. Remove them from the rubber mat while they are
hot and let them cool on a marble surface. If they cool on the rubber mat, it will be nearly impossible to
remove them without breaking them.
6. Reserve in an airtight container at room temperature. If they are kept in a very dry environment, they can
last for up to 1 week.
NOTES Be careful when making banana chips in a hot and/or humid environment. They will get tacky and soft.
There will be a lot of waste. Save the trimmings for other uses, such as ice cream or sorbet.
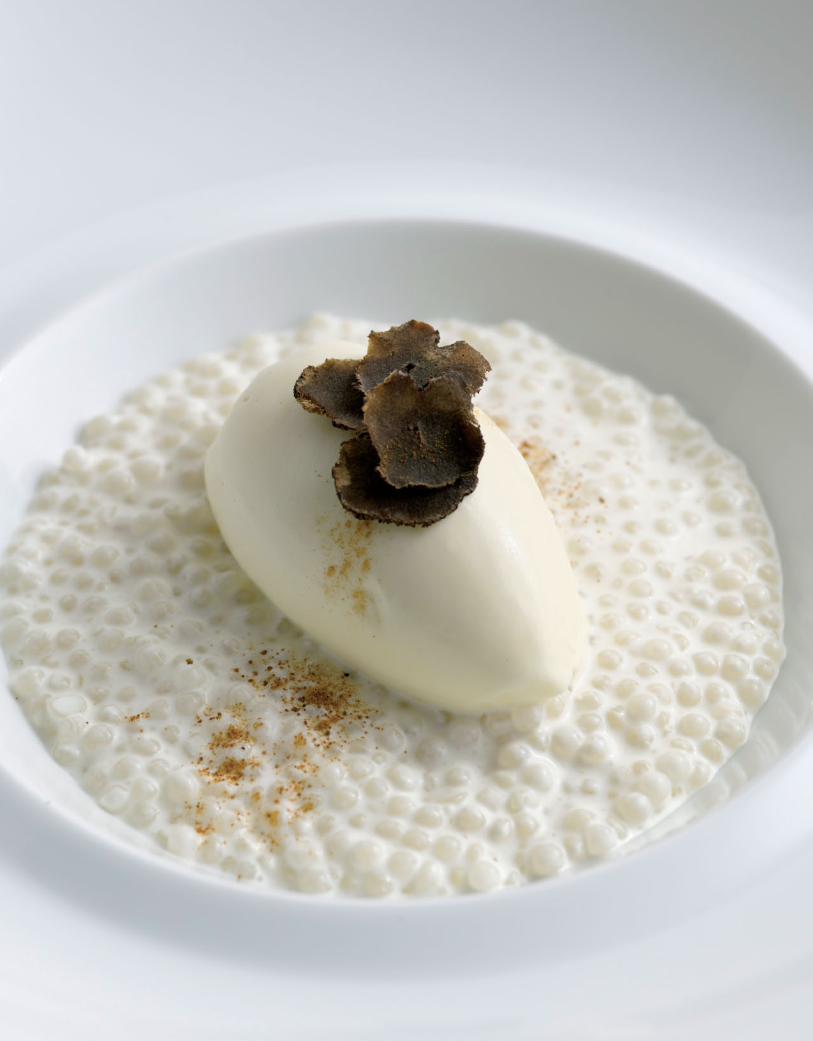
216 FROZEN DESSERTS

FINISHED ITEMS 217
White Truffl e Ice Cream with Truffl ed Tapioca and Shaved Black Truffl es YIELD 10 PORTIONS
COMPONENTS
900 g / 1 lb 15.75 oz TRUFFLED TAPIOCA
900 g / 1 lb 15.75 oz WHITE TRUFFLE ICE CREAM (page 358)
100 g / 3.53 oz black truffl e powder
10 g / .35 oz shaved black truffl es
ASSEMBLY
1. Spoon 90 g / 3.17 oz of truffl ed tapioca in the center of a bowl.
2. Scoop a large quenelle (90 g / 3.17 oz) of the ice cream on top of the tapioca.
3. Sprinkle 10 g / .35 oz of black truffl e powder on top of the ice cream.
4. Serve immediately. The black truffl es should be shaved tableside directly on top of the ice cream; 1 g / .03 oz per
serving is suffi cient.
NOTE This is a very specifi c fl avor that some consider to be an acquired taste, and many people who do like truffl es may
not be used to them served in a dessert. It is because of this that the ice cream was intentionally created to be
less sweet.
Truffl ed Tapioca YIELD APPROXIMATELY 650 G / 1 LB 6.93 OZ
TRUFFLED HEAVY CREAM
414 g / 14.6 oz heavy cream
87 g / 3.07 oz Alba white truffl es (trimmings)
10 g / .35 oz sugar, or as needed
5 g / .18 oz salt, or as needed
TAPIOCA
250 g / 8.82 oz small pearl tapioca
Approximately 3 kg / 6 lb 9.8 oz water, or as needed
Approximately 200 g 7.05 oz Truffl ed Heavy Cream, or as needed
1. FOR THE TRUFFLED CREAM: Heat the cream gently and steep white truffl e trimmings in it.
2. Season with sugar and salt to taste (not too sweet, not too salty). Strain through a fi ne-mesh strainer.
Reserve under refrigeration until needed.

218 FROZEN DESSERTS
3. FOR THE TAPIOCA: Soak the tapioca overnight in enough water so that the volume doubles. Drain the excess
water. In a pot, combine the tapioca with enough water to cover it. Bring the tapioca to a simmer. Cover
and simmer the tapioca 2 more times. Rinse in cold water, then soak in cold water for 5 minutes. Rinse
and soak again. Drain.
4. Adjust the consistency of the tapioca with the truffl ed heavy cream so that the tapioca is a spoonable
consistency and the tapioca balls aren’t stuck to each other. Store in the refrigerator until ready to use.
Do not keep longer than 24 hours, as it becomes crumbly. “Chewy” is the ideal consistency. Once it has
turned crumbly, it must be discarded.
NOTES Alba truffl es are from Northern Italy. This truffl ed cream formula will not yield 500 g / 1 lb 1.64 oz of fi nal product.
The white truffl es will not be included in the total weight amount because they will be discarded. Also, remem-
ber that the truffl es will absorb some of the heavy cream, so be sure to increase the recipe so that the heavy
cream amount is more than the total weight that is needed.
Even though the recipe calls for 250 g / 8.82 oz of small pearl tapioca, it will yield much more because of the ab-
sorption of water. When adjusting the consistency, be sure not to add too much liquid so that only some excess
liquid is visible.

FINISHED ITEMS 219
Frozen Praline Parfait with Hazelnut-Mascarpone Gâteau YIELD 10 PORTIONS
COMPONENTS
500 g / 1 lb 1.64 oz PRALINE PARFAIT (page 404)
300 g / 10.58 oz CHOCOLATE SHELL, melted
50 g / 1.76 oz chopped toasted hazelnuts
10 slices HAZELNUT-MASCARPONE GÂTEAU
5 g / .18 oz Maldon sea salt
ASSEMBLY
1. Transfer to a piping bag and portion into a 2.5-cm / 1-in diameter demi-sphere fl eximold mat, smoothing out the top
with an offset spatula. The molds should have at least 20 demi-spheres. Place in the freezer to harden.
2. Once hardened, fuse 2 sorbet demi-spheres together by rubbing the edges where they touch with your gloved hands.
Return to the freezer.
3. Once hardened, insert a toothpick into each sphere. Dip each sphere separately into the melted chocolate shell.
Keep inverted until all the excess chocolate has dripped off.
4. Insert the toothpick into a Styrofoam base to hold the spheres up while the chocolate sets.
5. Before the chocolate shell sets, sprinkle a small pinch of toasted hazelnuts on the chocolate.
6. Once the chocolate has set, remove the toothpick from the spheres and reserve them frozen, with the hazelnuts facing up.
7. Place a slice of the cake on the desired plate.
8. Sprinkle a pinch of Maldon sea salt on top of the cake.
9. Place a sphere next to the cake, with the hazelnuts facing up.
10. Temper the entire dessert for 4 to 5 minutes before serving.
NOTE This dessert intentionally has no sauce. There are enough smooth and sweet components that a sauce is redundant.
Chocolate Shell YIELD 500 G / 1 LB 1.64 OZ
350 g / 12.35 oz dark chocolate (64%)
150 g / 5.29 oz hazelnut oil
1. Melt the chocolate with the hazelnut oil over a hot water bath, stirring occasionally.
2. Cool the mixture to room temperature or reserve it hot enough that it will remain liquid. The top of a hot
oven is ideal for keeping the chocolate shell liquid and not too hot.
3. If it will be kept hot, it can last for up to 1 month. If it is kept solid at room temperature, it can last for up
to 6 months, until the hazelnut oil goes stale.
NOTE If desired, substitute another oil, such as walnut, for the hazelnut oil. Cocoa butter may also be substituted, but
the shell will have a fi rmer consistency.

220 FROZEN DESSERTS
Hazelnut-Mascarpone Gâteau YIELD ONE CAKE 40 CM / 15.75 IN BY 60 CM / 23.62 IN BY 2.5 CM / 1 IN
PRALINE
1 kg / 2 lb 3.27 oz sugar
250 g / 8.81 oz water
20 g / .71 oz lemon juice
500 g / 1 lb 1.64 oz almonds
500 g / 1 lb 1.64 oz hazelnuts
PRALINE CRUST
371 g / 13.08 oz praline paste
370 g / 13.05 oz almond paste
185 g / 6.53 oz milk chocolate (40%), melted and cooled to 40°C / 104°F
74 g / 2.61 oz butter, melted and cooled to 40°C / 104°F
FRANGIPANE
400 g / 14.11 oz almond paste (50% nuts)
400 g / 14.11 oz sugar
400 g / 14.11 oz butter, at room temperature
135 g / 4.76 oz eggs, at room temperature
110 g / 3.88 oz cake fl our
TO SOAK THE CAKE
75 g / 2.64 oz simple syrup (50° Brix)
5 g / .18 oz pure almond extract
PRALINE MASCARPONE CREAM
1.96 kg / 4 lb 5.14 oz mascarpone, soft
435 g / 15.34 oz praline paste (commercial smooth praline paste, 50% nuts)
435 g / 15.34 oz superfi ne sugar (or other small crystal sugar)
21 g / .74 oz gelatin sheets, bloomed
CARAMEL GLAZE
14 g / .49 oz salt
62 g / 2.19 oz water
43 g / 1.52 oz cornstarch
740 g / 1 lb 10.1 oz sugar
620 g / 1 lb 5.87 oz heavy cream
21 g / .74 oz gelatin sheets

FINISHED ITEMS 221
1. FOR THE PRALINE: In a saucepan, combine the sugar with the water to make a wet-sand consistency. Add the
lemon juice to prevent crystallization. Make sure there are no sugar crystals along the inside of the pot
and that all the sugar has been hydrated. Cook the sugar over high heat until it reaches 182°C / 360°F.
2. Meanwhile, toast the nuts in a 160°C / 325°F oven until they begin to have a toasted aroma and a light
brown color.
3. When the sugar has reached the required temperature, stir in the nuts while they are still hot (otherwise
the sugar will crystallize).
4. Turn the heat off and continue to stir until you hear a popping sound.
5. Pour the praline onto a sheet pan lined with parchment paper.
6. Once it has cooled, break it up into small pieces (approximately 2.5 cm / 1 in each) and grind in a robot
coupe until sandy in texture (do not grind to a paste).
7. Reserve in an airtight container. It can keep for up to 2 weeks.
8. FOR THE PRALINE CRUST: Combine the praline and almond paste in the bowl of an electric mixer fi tted with
the paddle attachment. Mix on medium speed until uniformly combined, about 3 minutes.
9. Pour in the chocolate and then the butter. It is crucial that they not be hotter than indicated, otherwise the
ingredients (especially the fat) will separate.
10. Shape into a square, wrap, and refrigerate.
11. Once cold and fi rm, roll out 3 mm / .11 in thick in a rectangle 40 cm / 15.75 in by 60 cm / 23.62 in. Transfer
to a sheet pan that is as fl at as possible.
12. Place a 40 cm / 15.75 in by 60 cm / 23.62 in by 2.5-cm / 1-in Plexiglas frame over the crust. Trim the crust
around the inside of the frame so that the crust is inside the frame and the frame is not laying on the
crust. The frame should fi t inside the sheet pan.
13. Refrigerate until needed.
14. FOR THE FRANGIPANE: Line a sheet pan with a nonstick rubber mat. Place a 40 cm / 15.75 in by 60 cm / 23.62
in by .5-cm / .19-in Plexiglas frame on top of the mat.
15. Preheat an oven to 160°C / 325°F.
16. Mix the almond paste and sugar with a paddle on medium speed until sandy, about 5 minutes. Add
the butter and beat on medium speed until the butter has softened and incorporated with the other
ingredients, about 5 minutes.
17. Slowly incorporate the eggs in 4 additions. Scrape the sides of the bowl after every addition.
18. Add the fl our and mix until just incorporated.
19. Pour the batter onto the prepared sheet pan. Spread the batter evenly inside the Plexiglas frame using an
offset spatula, smoothing it out to the top of the frame so that it is an even rectangle. Remove the frame
from the sheet pan.
20. Bake until slightly golden brown around the border, about 8 minutes.
21. Once cooled, trim the borders so it will fi t inside the 2.5-cm / 1-in frame, on top of the praline crust.
22. Combine the simple syrup and almond extract. Soak the frangipane with the mixture using a pastry brush.
Set aside.
23. FOR THE PRALINE MASCARPONE CREAM: Combine the mascarpone with the praline paste and the sugar. Mix
over a hot water bath until the sugar is dissolved and all of the ingredients are evenly incorporated and a
liquid consistency. Stir in the gelatin and mix until it has dissolved. It is important to use a good-quality
mascarpone because more economical ones tend to break when they get hot.

222 FROZEN DESSERTS
24. Pour the mixture into the 2.5-cm / 1-in frame lined with the frangipane and praline crust. Remove any
excess from the top so that it is even with the top of the frame. Let it set completely in the refrigerator
before glazing.
25. FOR THE CARAMEL GLAZE: Combine the salt, water, and cornstarch. Mix until the cornstarch and sugar
dissolve to make a slurry.
26. Make a dark caramel with the sugar and heavy cream. Combine the sugar with the equivalent of one-
quarter of its weight in water and bring to a boil. While it cooks, bring the heavy cream to a simmer and
reserve hot. Cook the sugar until it reaches 170°C / 338°F, or until it has a dark amber color. Turn the heat
off and slowly stir in the hot heavy cream in increments, using a long whisk. Once all of the heavy cream
has been incorporated, turn the heat up to high.
27. Stir in the slurry and return to a boil to cook the cornstarch and thicken the caramel. When the fi rst bubble
appears, it is ready to come off the heat (the bubble means that the starch is cooked through).
28. Remove from the heat and stir in the gelatin sheets.
29. Pass the glaze through a fi ne-mesh strainer and cool over an ice bath.
30. Refrigerate until needed.
31. To glaze the cake, melt the glaze over a hot water bath. If necessary, cool the glaze to 19°C / 66°F, pour it
over the entire surface of the cake and spread evenly with an offset spatula.
32. Tap the sheet pan gently to even out the glaze. If there are bubbles on the surface, torch them and they
will pop.
33. Refrigerate and let the glaze set.
34. Score the desired measurements on the cake (in this case, 1.5 cm / .6 in by 5 cm / 2 in slices), trimming a
horizontal border and a vertical border fi rst. Begin measuring at the trimmed borders.
35. To cut the cake, dip a slicing knife or any other thin knife in very hot water, dry it with a paper towel, then
cut, repeating this with every cut in order to get a clean cut. Make sure the knife is at a perfect 90-degree
angle to cut straight down. Bring the knife down, then pull toward you to get the cleanest cut.
36. Reserve refrigerated until needed. Do not cover, because this will cause condensation on the glaze. The
cake will last for 2 days.
NOTE The amount of caramel glaze is suffi cient for 1 full sheet pan cake.
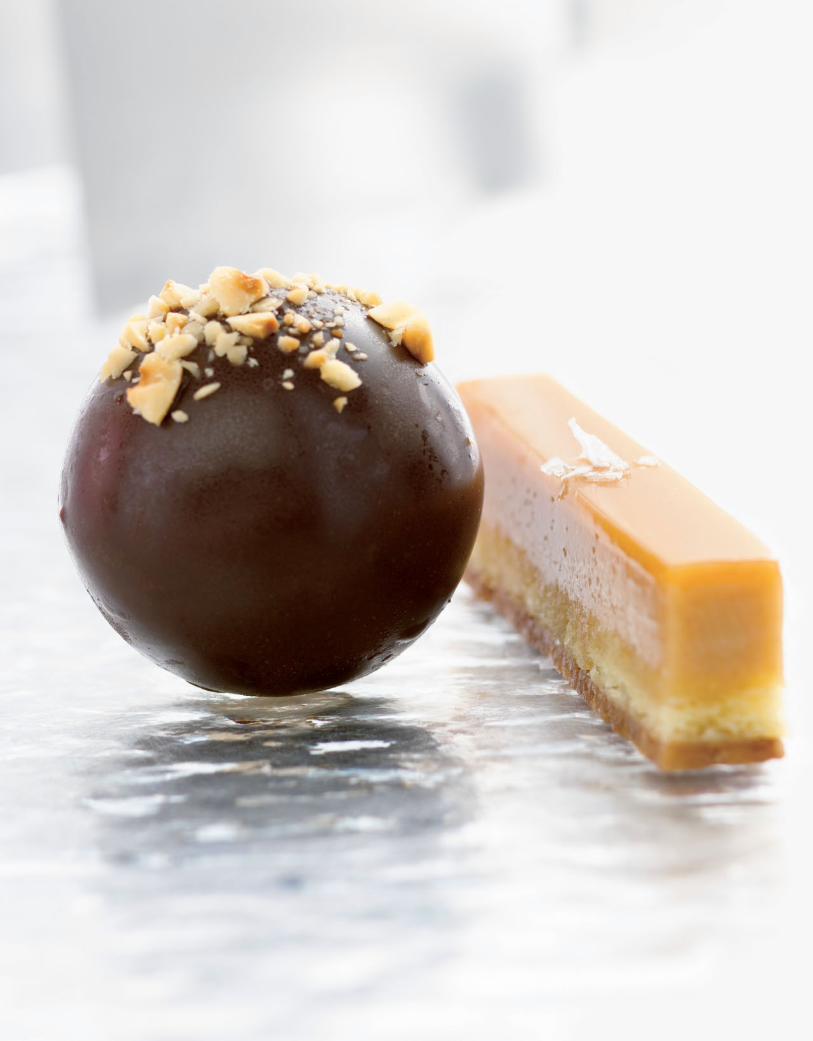
FINISHED ITEMS 223

224 FROZEN DESSERTS

FINISHED ITEMS 225
Apricot Sorbet with Vanilla Sablée, Candied Sicilian Pistachios, Apricot Paper, and Pistachio Dust YIELD 10 PORTIONS
COMPONENTS
10 VANILLA SABLÉE RECTANGLES
900 g / 1 lb 15.75 oz APRICOT SORBET (page 388)
100 g / 3.53 oz CANDIED SICILIAN PISTACHIOS
10 sheets APRICOT PAPER
10 g / .53 oz PISTACHIO DUST
ASSEMBLY
1. Place a sablée rectangle on the plate.
2. Scoop a large quenelle (90 g / 3.17 oz) of the sorbet on top of the sablée.
3. Sprinkle about 10 g / .53 oz of candied pistachios on the sorbet.
4. Lean 1 sheet of apricot paper on the quenelle.
5. Sprinkle about 1 g / .04 oz pistachio powder on the plate and serve immediately.
Vanilla Sablée Rectangles YIELD 750 G / 1 LB 10.46 OZ
52 g / 1.83 oz bread fl our
52 g / 1.83 oz pastry fl our
250 g / 8.82 oz cake fl our
171 g / 6.03 oz butter, soft
3 g / .11 oz salt
128 g / 4.5 oz confectioners’ sugar
1.5 Tahitian vanilla pods, split and scraped
25 g / .88 oz almond fl our
71 g / 2.5 oz eggs, at room temperature
1. Sift the bread, pastry, and cake fl ours.
2. Cream the butter, salt, sugar, vanilla beans, and almond fl our using a paddle until evenly mixed, about 3
minutes. Do not overmix or incorporate air.
3. Add the eggs in 4 stages, scraping the bowl after each addition.
4. Add the sifted fl ours in 4 stages on the lowest speed, scraping the sides and the bottom of the bowl after
each addition.
5. Shape the dough into a fl at rectangle. Wrap in plastic wrap and refrigerate for 1 to 2 hours, or until fi rm.

226 FROZEN DESSERTS
6. Preheat an oven to 160°C / 325°F.
7. Roll the dough to 3 mm / .11 in thick and refrigerate.
8. Cut the dough into rectangles 2.5 cm / 1 in by 5 cm / 2 in and refrigerate again.
9. Score the dough with a fork. Bake until golden brown on the dough’s border, about 6 minutes.
10. Cool to room temperature.
11. Reserve in an airtight container at room temperature. Discard any leftover sablée after 2 days.
Candied Sicilian Pistachios YIELD ABOUT 650 G / 1 LB 6.93 OZ
1.5 kg / 3 lb 4.91 oz sugar
15 g / .53 oz lemon juice
500 g / 1 lb 1.64 oz Sicilian pistachios
1. Line a full-size sheet pan with parchment paper. Place a wire cooling rack over the sheet pan and spray
it with nonstick cooking spray. Place the sheet pan near a marble surface. Have 3 pairs of latex gloves
available.
2. Place the sugar in a saucepan with about one-quarter of its weight in water or enough to obtain a wet-sand
texture. Add the lemon juice to prevent crystallization. Make sure there are no sugar crystals along the
inside of the pot and that all the sugar has been hydrated.
3. Toast the nuts until they have a toasted aroma and a light brown color. If the sugar has not caramelized
by this point, keep the nuts hot until it does. If desired, keep them in the oven, but turn it off and open the
oven door slightly. If cold nuts are added to the sugar, it will crystallize.
4. Cook the sugar over high heat until it reaches 170°C / 338°F. Turn the heat down to low and stir in the
toasted nuts. Make sure all the nuts are coated in sugar and continue to stir until you start hearing a
popping sound, then pour the contents of the pot over the greased wire rack.
5. Put on the 3 pairs of gloves and spray nonstick cooking spray on them. Working very quickly, separate the
nuts from each other and immediately place them on the marble to cool quickly.
6. Once they have cooled, reserve them in an airtight container at room temperature. If kept in dry
conditions, they can last for up to 5 days.
NOTE Be careful when making this recipe in humid conditions. The nuts can become tacky and soft.

FINISHED ITEMS 227
Apricot Paper YIELD 325 G / 11.46 OZ
500 g / 1 lb 1.64 oz apricot purée
150 g / 5.29 oz sugar, as needed
1. Preheat an oven to 80°C / 180°F.
2. Combine the apricot purée with sugar, as needed.
3. Line a sheet pan with a nonstick rubber mat. Pour some apricot purée on the rubber mat; spread it thinly
with an offset spatula.
4. Bake until the purée can be peeled off the rubber mat, about 20 minutes. Tear or cut out rectangles about
twice the size of the sablee. It is nearly impossible to get perfect rectangles, but try to get them as even as
possible. Let cool to room temperature.
5. Store the apricot paper pieces in an airtight container at room temperature with silica gel packs to absorb
moisture. If kept in dry conditions, they can last for up to 3 days.
NOTE Be careful when making this recipe in hot and/or humid conditions.
Pistachio Dust YIELD 110 G / 3.88 OZ
100 g / 3.53 oz Sicilian pistachios, toasted and cooled
10 g / .35 oz bread fl our
Grind the pistachios with the bread fl our in a spice grinder to help prevent them from clumping. Store
at room temperature in an airtight container. If kept under dry conditions, they can last for up to 1 week
before going stale.

228 FROZEN DESSERTS
Litchi Sorbet Wrapped in Caramelized Mango YIELD 10 PORTIONS
COMPONENTS
60 MANGO-WRAPPED LITCHI SORBET BÂTONS
100 g / 3.53 oz sugar
ASSEMBLY
1. Remove the bâtons from the freezer. Coat them (on top only) with sugar and caramelize them using a torch.
2. Place 6 bâtons on a plate in a straight line.
3. Let them sit at room temperature for 2 to 3 minutes before serving.
Mango-Wrapped Litchi Sorbet Bâtons YIELD 60
6.5 kg / 14 lb 5.28 oz ripe mangoes
1 kg / 2 lb 3.27 oz simple syrup (50° Brix)
1 kg / 2 lb 3.27 oz Litchi Sorbet base (page 394)
1. Peel and seed the mangoes. Slice them into 3-mm- / .13-in-thick slices with an electric slicer or a
mandoline, and place the slices gently in a hotel pan.
2. Bring the simple syrup to a boil and pour over the sliced mangoes. Reserve refrigerated.
3. Line 25 PVC pipes 19 cm / 7.5 in by .5 in diameter with acetate sheets, and place on a sheet pan in the
freezer.
4. Churn the sorbet and pipe into the lined PVC. Freeze until hardened.
5. Lay approximately 20 to 25 of the mango slices onto each of 25 sheets of acetate 19 cm / 7.5 in by 10 cm /
4 in, overlapping them slightly. Cover with parchment paper and reserve refrigerated.
6. Remove the sorbet from the cylinder and remove the acetate. Place on top of the sliced mangoes. Using
the acetate as a guide, roll the sliced mangoes over the sorbet to form a cylinder. Freeze to harden. Repeat
this with all the sorbet and mango slices until all 25 tubes are done.
7. Cut into 5-cm / 2-in-long pieces. Reserve wrapped in an airtight container in the freezer until needed.
Discard after 2 days.

FINISHED ITEMS 229

230 FROZEN DESSERTS

FINISHED ITEMS 231
Granny Smith Apple and Fennel Sorbet with Fennel Jam, Kataifi Bundles, and Sugared Fennel Fronds YIELD 10 PORTIONS
COMPONENTS
600 g / 1 lb 5.16 oz GRANNY SMITH APPLE AND FENNEL SORBET BASE (page 381)
300 g / 10.58 oz FENNEL JAM
300 g / 10.58 oz KATAIFI BUNDLES
10 SUGARED FENNEL FRONDS
ASSEMBLY
1. Line 10 PVC tubes 7.5 cm / 3 in by 2.5 cm / 1 in diameter with acetate.
2. Line a half sheet pan with acetate or a nonstick rubber mat; place the tubes on the sheet pan in a standing position
and freeze.
3. Churn or pacotize the sorbet. Pour into a piping bag and pipe into the prepared tubes. Even out the top with an
offset spatula.
4. Place in the freezer to harden and reserve until needed.
5. Place a baked kataifi bundle in the center of the plate.
6. Spoon 30 g / 1.06 oz of fennel jam on one end of the kataifi .
7. Remove the sorbet from the tube and cut it in half diagonally. Place 1 piece of sorbet on the kataifi , then place the
other piece of sorbet on top of the previous piece.
8. Place a sugared fennel frond on top of the sorbet and serve immediately.
Fennel Jam YIELD 500 G / 1 LB 1.64 OZ
249 g / 8.78 oz fennel bulb, coarsely diced
249 g / 8.78 oz sugar
2 g / .07 oz tartaric acid
1. Combine the fennel, sugar, and tartaric acid in a saucepan.
2. Cook the mixture over high heat. Once the mixture reaches 68° Brix and 129°C / 264°F, after about 20
minutes, remove the pan from the heat and immediately cool it over an ice bath.
3. Reserve at room temperature during service; otherwise, refrigerate. It can last for up to 4 days, but be
careful because it crystallizes easily.

232 FROZEN DESSERTS
Kataifi Bundles YIELD ABOUT 17 BUNDLES
100 g / 3.53 oz clarifi ed butter, as needed
500 g / 1 lb 1.64 oz kataifi
100 g / 3.53 oz sugar, as needed
1. Preheat a convection oven to 160°C / 325°F. Turn the fan off or to the lowest setting. Otherwise the kataifi
will blow around the oven because it is so light.
2. Melt the clarifi ed butter and let cool to room temperature.
3. Gently douse the kataifi with the clarifi ed butter. Hang it so that the excess butter drips off.
4. Toss the kataifi in the sugar and shake the excess off. Break it up into 30-g / 1.06-oz pieces.
5. Line a sheet pan with a nonstick rubber mat. Place the kataifi over the sheet pan. Fluff it to give it as much
height as possible.
6. Bake until golden brown, about 8 minutes.
7. Reserve in an airtight container at room temperature. Discard leftover bundles after 2 days.
Sugared Fennel Fronds YIELD ABOUT 20 SUGARED FENNEL FRONDS
50 g / 1.76 oz fennel fronds
10 g / .35 oz pasteurized egg whites
200 g / 7.05 oz bakers’ sugar
1. Using a smooth artist’s brush, brush both sides of the fronds with a thin layer of egg whites, then gently
toss them in the sugar. Pick the fronds up by the stems and let them dry on a sheet pan lined with
parchment paper at room temperature for at least 4 hours before using.
2. Reserve in an airtight container at room temperature. Discard leftover fronds after 3 days.

FINISHED ITEMS 233
Black and Tan Ice Cream with Espresso Génoise and Milk Chocolate Clouds YIELD 10 PORTIONS
COMPONENTS
50 g / 1.76 oz ESPRESSO SYRUP
10 ESPRESSO GÉNOISE RECTANGLES
10 MILK CHOCOLATE CLOUDS
300 g / 10.58 oz BLACK AND TAN ICE CREAM (page 359)
ASSEMBLY
1. Brush about 5 g / .18 oz espresso syrup on the plate in a cross pattern.
2. Place an espresso génoise on the plate on top of the espresso syrup.
3. Stand the chocolate cloud next to the génoise.
4. Scoop a medium quenelle (30 g / 1.06 oz) of the ice cream on top of the génoise and serve immediately.
Espresso Syrup YIELD 250 G / 8.81 OZ
200 g / 7.05 oz concentrated espresso
50 g / 1.76 oz simple syrup (50° Brix)
Stir together the espresso and simple syrup and reserve under refrigeration.
NOTE For the concentrated espresso, use 3 times the amount of espresso beans than would be used for regular
espresso, about 90 g / 3.17 oz espresso beans to 300 g / 10.58 oz water.
Espresso Génoise YIELD 1 KG / 2 LB 3.27 OZ
428 g / 15.1 oz eggs
240 g / 8.47 oz dark brown sugar
3 g / .11 oz salt
120 g / 4.23 oz bread fl our
120 g / 4.23 oz pastry fl our
50 g / 1.76 oz powdered coffee, water soluble
41 g / 1.45 oz butter, melted but cool

234 FROZEN DESSERTS
1. Combine the eggs, sugar, and salt in a 20-qt mixer bowl. Place over a hot water bath and bring the
contents of the bowl up to 48°C / 120°F while whisking slowly (don’t whisk too vigorously or else too
much air will be incorporated and it will take too long for the ingredients to warm up). The point of this
step is to dissolve the sugar and salt and to warm up the eggs so they will whip quickly.
2. Transfer the bowl to a mixer and whip on high speed for 5 minutes, then turn the speed down to medium
and whip for 15 more minutes.
3. Meanwhile, preheat a convection oven to 176°C / 350°F, open the vents, and turn the fan speed down
to low.
4. Grease a full-size sheet pan and line it with parchment paper or a nonstick rubber mat. If using the mat,
grease only the border of the pan.
5. Sift the bread fl our, pastry fl our, and coffee powder together twice.
6. After the eggs have whipped to full volume, take the bowl off the mixer and gently fold in the dry
ingredients.
7. Fold in the butter carefully so as not to defl ate the génoise.
8. Immediately after, pour the batter into the prepared sheet pan and spread out evenly with an offset
spatula. Bake until golden brown and the sponge springs back when gentle pressure is applied, about 12
minutes.
9. Cool to room temperature.
10. Freeze the génoise for 2 hours and then cut into rectangles 2.5 cm / 1 in by 7.5 cm / 3 in.
11. Reserve in an airtight container at room temperature. Discard any leftover génoise after service.
Milk Chocolate Clouds YIELD 600 G / 1 LB 5.16 OZ (ABOUT 25 PIECES)
500 g / 1 lb 1.63 oz melted milk chocolate
100 g / 3.53 oz canola oil
1. Line a fl at half sheet pan with an acetate sheet.
2. Melt the milk chocolate with the canola oil over a hot water bath.
3. Pour the chocolate into a 1-L /1.04-qt siphon canister and screw on the lid tightly.
4. Charge with 4 cartridges of gas. Shake vigorously for 1 minute after each charge.
5. Pour the contents onto the prepared sheet pan. Let the chocolate set in the refrigerator for 20 minutes.
6. Break apart into the desired size.
7. Reserve in an airtight container in a cool, dry place. If properly stored, they can last for up to one year.

FINISHED ITEMS 235

236 FROZEN DESSERTS

FINISHED ITEMS 237
Bitter Chocolate Sorbet and Ganache Napoleon YIELD 10 PORTIONS
COMPONENTS
40 g / 1.41 oz BITTER CHOCOLATE SAUCE (page 202; use 72% bitter chocolate)
20 BITTER GANACHE SQUARES
40 BITTER CHOCOLATE RECTANGLES
20 BITTER CHOCOLATE SORBET SQUARES
ASSEMBLY
1. Spoon 4 g / .14 oz of the chocolate sauce on the plate.
2. Place a square of ganache on the center of the plate. Place a chocolate rectangle off center on top of the ganache,
so there is about a 2.5-cm / 1-in overhang. Place a sorbet square on top of the chocolate rectangle, lined up with
the ganache, then another chocolate rectangle on top of the sorbet, lined up with the fi rst chocolate rectangle.
Repeat the layers with the remaining components (ganache square, chocolate rectangle, sorbet square, chocolate
rectangle). The top and fi nal layer should be a chocolate rectangle.
3. Temper for 2 or 3 minutes and serve immediately.
Bitter Ganache Squares YIELD 1 KG / 2 LB 3.27 OZ
476 g / 16.79 oz heavy cream
429 g / 15.13 oz dark chocolate (64%), fi nely chopped
95 g / 3.35 oz butter, soft
1. Bring the heavy cream to a boil and pour over the chocolate. Let the mixture sit without stirring for
1 minute. Stir with a rubber spatula until the chocolate has melted. Mix in the butter and stir until it has
melted. Cover and allow to fi rm for 45 minutes at room temperature.
2. Meanwhile, line a half sheet pan with a nonstick rubber mat. Place a 25 cm / 10 in by 38 cm / 15 in by
.5 cm / .25 in Plexiglas frame inside the sheet pan. Place the sheet pan in the freezer.
3. Pour the ganache into the prepared frozen frame and spread out evenly using an offset spatula. Harden
under refrigeration.
4. Line a half sheet pan with a nonstick rubber mat and refrigerate.
5. Once the ganache has hardened, fl ip the ganache onto another nonstick rubber mat before cutting it.
Place it back on the cold sheet pan and peel off the top rubber mat. This will make the process easier,
since the ganache won’t stick to the new rubber mat as much. Using a 5-cm / 2-in square cutter, cut the
ganache out, dipping the square cutter in warm (not hot) water each time to get a clean cut.
6. Once the ganache is cut, lift each square using a small offset spatula and transfer to the second chilled
sheet pan lined with a nonstick rubber mat. If the uncut ganache starts getting too soft, return it to
refrigeration. Cut it once it fi rms up again.
7. Transfer to an airtight container and reserve at room temperature. Discard any leftover ganache after 5 days.

238 FROZEN DESSERTS
Bitter Chocolate Rectangles YIELD 200 G / 7.05 OZ (45 TO 50 PIECES)
200 g / 7.05 oz tempered bitter chocolate (72%)
1. Place a sheet of acetate on a marble surface.
2. Pour the chocolate on the acetate sheet and spread it into a very thin layer using an offset spatula. Make
sure it is thin. Thick chocolate garnishes aren’t easy to cut through, and they don’t look very good.
3. Lift the acetate and move it elsewhere on the marble so that the acetate won’t stick to the marble from the
excess at the edges.
4. When the chocolate is almost set, use a ruler to cut rectangles 5 cm / 2 in by 7.5 cm / 3 in using the back of
a paring knife (using the blade side will cut through the acetate, making it diffi cult to handle the chocolate
rectangles). Transfer the acetate to a fl at sheet pan lined with parchment paper, chocolate side facing down.
Place another sheet pan or a few nonstick rubber mats on top of the acetate to weigh down the chocolate so
that the rectangles don’t bow too much once they have set. Leave them as they are until needed (the acetate will
protect them from getting scuffed). When ready to plate, simply peel the acetate away from the chocolate.
5. Reserve in a cool place at a temperature that does not exceed 21°C / 70°F.
Bitter Chocolate Sorbet Squares YIELD 750 G / 1 LB 10.46 OZ
750 g / 1 lb 10.46 oz Bitter Chocolate Sorbet base (page 394)
1. Line a half sheet pan with a nonstick rubber mat. Place a Plexiglas frame 25 cm / 10 in by 38 cm / 15 in by
.5 cm / .25 in inside the sheet pan. Place the sheet pan in the freezer.
2. Churn or pacotize the sorbet. Transfer the sorbet to the prepared frozen frame and spread out evenly
using an offset spatula. Place in the freezer to harden.
3. Line a half sheet pan with a nonstick rubber mat and freeze.
4. Once the sorbet has hardened, fl ip it onto another nonstick rubber mat before cutting it. Place it back on
the frozen sheet pan and peel off the top rubber mat. Using a 5-cm / 2-in square cutter, cut out the sorbet
squares, dipping the square cutter in warm (not hot) water each time to get a clean cut.
5. Once the sorbet is cut, lift each square using a small offset spatula and transfer to the second prepared
frozen sheet pan. If the uncut sorbet starts getting too soft, return it to the freezer. The sorbet is directly
exposed to the freezer ventilation, and this might cause excessive hardening and ice crystal formation, so
don’t let it sit in this condition for too long.
6. Wrap it after 20 minutes or transfer to an airtight container, which will make service much easier. Reserve
frozen until needed.

FINISHED ITEMS 239
Milk Chocolate Parfait Napoleons YIELD 10 PORTIONS
COMPONENTS
120 g / 4.23 oz SALTED CARAMEL SAUCE
10 PETIT BEURRE COOKIES
10 FROZEN MILK CHOCOLATE PARFAIT SQUARES
10 MILK CHOCOLATE SQUARE PLAQUES
5 g / .18 oz gray sea salt
ASSEMBLY
1. Place a dime-size amount of caramel sauce on the plate (about 2 g / .07 oz).
2. Place a cookie on top of the caramel.
3. Place a parfait square on top of the cookie, making sure they are both fl ush with each other.
4. Place a chocolate plaque on top of the parfait. It is intentionally slightly larger than the other 2 components.
5. Spoon 10 g / .35 oz of salted caramel sauce directly across the top of the chocolate plaque.
6. Sprinkle a few grains of gray sea salt on top of the caramel.
7. Let the parfait temper for 3 or 4 minutes before serving.
Salted Caramel Sauce YIELD 500 G / 1 LB 1.64 OZ
270 g / 9.52 oz sugar
140 g / 4.94 oz heavy cream
90 g / 3.17 oz salted butter, diced
1. Place the sugar in a saucepan with about one-quarter of its weight in water or enough to obtain a wet-sand
texture. Make sure there are no sugar crystals along the inside of the pot and that all the sugar has been
hydrated. Bring to a boil over high heat.
2. While the sugar cooks, bring the heavy cream to a simmer.
3. Cook the sugar to 170°C / 338°F or until it has a dark amber color. Turn the heat off and slowly stir in the
hot cream in increments, using a long whisk. Once all of the cream has been incorporated, turn the heat
up to high. Stir in the butter and turn off the heat.
5. Pour the caramel into an adequately sized container and let the contents cool to room temperature.
6. Reserve at room temperature during service (if refrigerated, it will get too hard to portion). It can last for
up to 1 month if it is kept covered and in a cool area.

240 FROZEN DESSERTS
Petit Beurre Cookies YIELD 1.06 KG / 2 LB 5.38 OZ (WITH THE SUGAR FOR SPRINKLING)
351 g / 12.36 oz salted butter, soft
175 g / 6.17 oz sugar
59 g / 2.06 oz rice fl our
409 g / 14.43 oz all-purpose fl our
7 g / .25 oz salt
50 g / 1.76 oz sugar for sprinkling, or as needed
1. Cream the butter and sugar together on medium speed until smooth, about 5 minutes.
2. Sift together the fl ours and salt. Add to the butter and mix on slow speed until incorporated.
3. Roll the dough out to 5 mm / .2 in thick and refrigerate until hardened, about 1 hour.
4. Preheat a convection oven to 160°C / 325°F.
5. Cut the shortbread into 6.25-cm / 2.3-in squares.
6. Sprinkle sugar on top and score with a fork. Freeze for 20 minutes.
7. Bake until golden brown on the borders, about 5 minutes. Cut the cookies again with the same cutter
while they are still warm in order to get a clean cut and uniform square shape.
8. Cool to room temperature.
9. Reserve in an airtight container in a cool dry place. Discard after 2 days.
Frozen Milk Chocolate Parfait Squares YIELD 1 KG / 2 LB 3.27 OZ
1 kg / 2 lb 3.27 oz Milk Chocolate Parfait base (page 404)
1. Line a half sheet pan with a nonstick rubber mat. Place a 25 cm / 10 in by 38 cm / 15 in by 5-cm / 2-in
Plexiglas frame inside the sheet pan. Place the sheet pan in the freezer.
2. Transfer the parfait base to the prepared frozen frame and spread out evenly using an offset spatula. Place
in the freezer to harden.
3. Line a half sheet pan with a nonstick rubber mat and freeze.
4. Once the parfait has hardened, fl ip the parfait onto another nonstick rubber mat. Place it back on the
frozen sheet pan and peel off the top rubber mat. Using a 6.25-cm / 2.5-in cutter, cut the parfait out,
dipping the square cutter in warm (not hot) water each time to get a clean cut.
5. Once the parfait is cut, lift each piece using a small offset spatula and transfer to the second prepared
frozen sheet pan. If the uncut parfait starts getting too soft, return it to the freezer. The parfait is directly
exposed to the freezer ventilation, and this might cause excessive hardening and ice crystal formation, so
don’t let it sit in this condition for too long.
6. Once the squares have hardened, transfer to an airtight container. Reserve frozen until needed. Discard
after 3 days.

FINISHED ITEMS 241
Milk Chocolate Square Plaques YIELD 250 G / 8.82 OZ (ABOUT 40 PLAQUES)
50 g / 1.76 oz tempered dark chocolate (64%)
200 g / 7.05 oz tempered milk chocolate (40%)
1. Place a sheet of acetate on a marble surface.
2. Brush the dark chocolate on the acetate sheet in a grid pattern.
3. Pour the milk chocolate on the acetate sheet and spread it into a very thin layer using an offset spatula.
Make sure it is thin. Thick chocolate garnishes aren’t easy to cut through, and they don’t look very good.
4. Lift the acetate and move it elsewhere on the marble so that the acetate won’t stick to the marble from the
excess on the borders.
5. When the chocolate is almost set, use a ruler to cut 6.75-cm / 2.75-in squares using the back of a paring
knife (using the blade side will cut through the acetate, making it diffi cult to handle the chocolate squares).
Transfer the acetate to a fl at sheet pan lined with parchment paper, chocolate side facing down. Place
another sheet pan or a few nonstick rubber mats on top of the chocolate to weigh it down so that the
squares don’t bow too much once they have set.
6. Reserve in a cool dry place at room temperature as they are (the acetate will protect them from getting scuffed).
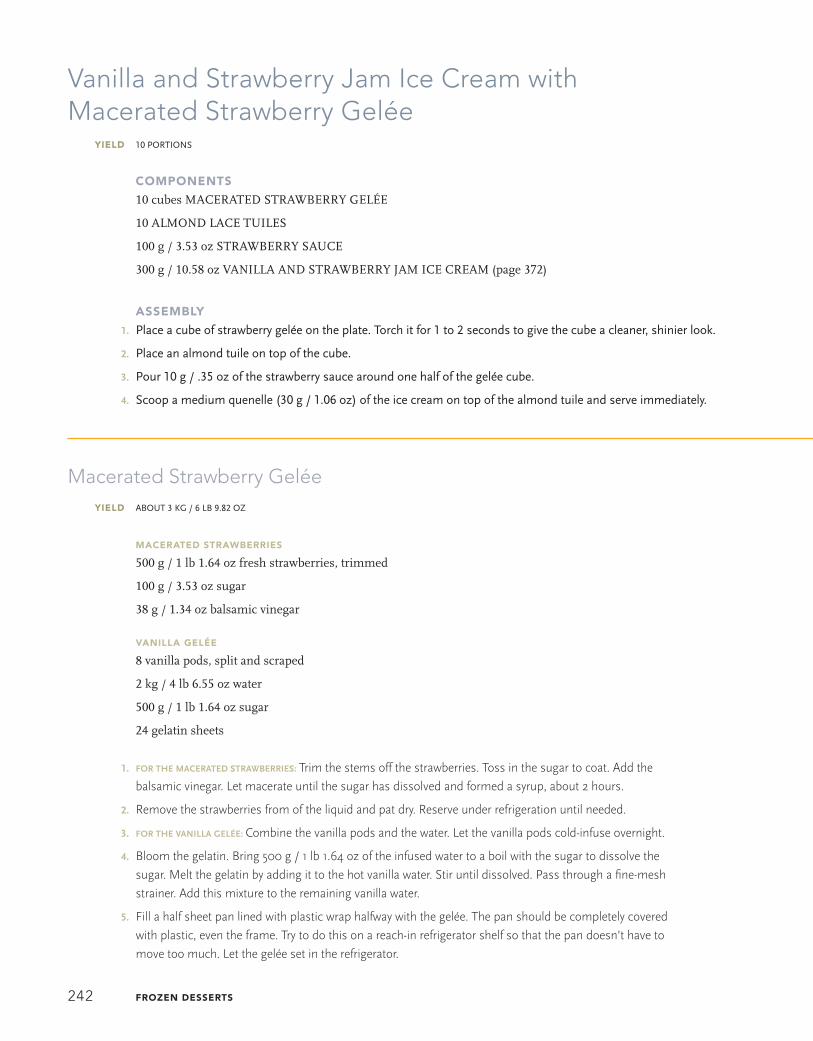
242 FROZEN DESSERTS
Vanilla and Strawberry Jam Ice Cream with Macerated Strawberry Gelée YIELD 10 PORTIONS
COMPONENTS
10 cubes MACERATED STRAWBERRY GELÉE
10 ALMOND LACE TUILES
100 g / 3.53 oz STRAWBERRY SAUCE
300 g / 10.58 oz VANILLA AND STRAWBERRY JAM ICE CREAM (page 372)
ASSEMBLY
1. Place a cube of strawberry gelée on the plate. Torch it for 1 to 2 seconds to give the cube a cleaner, shinier look.
2. Place an almond tuile on top of the cube.
3. Pour 10 g / .35 oz of the strawberry sauce around one half of the gelée cube.
4. Scoop a medium quenelle (30 g / 1.06 oz) of the ice cream on top of the almond tuile and serve immediately.
Macerated Strawberry Gelée YIELD ABOUT 3 KG / 6 LB 9.82 OZ
MACERATED STRAWBERRIES
500 g / 1 lb 1.64 oz fresh strawberries, trimmed
100 g / 3.53 oz sugar
38 g / 1.34 oz balsamic vinegar
VANILLA GELÉE
8 vanilla pods, split and scraped
2 kg / 4 lb 6.55 oz water
500 g / 1 lb 1.64 oz sugar
24 gelatin sheets
1. FOR THE MACERATED STRAWBERRIES: Trim the stems off the strawberries. Toss in the sugar to coat. Add the
balsamic vinegar. Let macerate until the sugar has dissolved and formed a syrup, about 2 hours.
2. Remove the strawberries from of the liquid and pat dry. Reserve under refrigeration until needed.
3. FOR THE VANILLA GELÉE: Combine the vanilla pods and the water. Let the vanilla pods cold-infuse overnight.
4. Bloom the gelatin. Bring 500 g / 1 lb 1.64 oz of the infused water to a boil with the sugar to dissolve the
sugar. Melt the gelatin by adding it to the hot vanilla water. Stir until dissolved. Pass through a fi ne-mesh
strainer. Add this mixture to the remaining vanilla water.
5. Fill a half sheet pan lined with plastic wrap halfway with the gelée. The pan should be completely covered
with plastic, even the frame. Try to do this on a reach-in refrigerator shelf so that the pan doesn’t have to
move too much. Let the gelée set in the refrigerator.

FINISHED ITEMS 243
6. Pat the macerated strawberries dry with paper towels. Place them on the set gelée. Keep the strawberries
5 cm / 2 in apart from each other. Pour the remaining gelée over the strawberries until it covers the
strawberries. If the gelee has set up while setting the strawberries in the pan, warm the mixture slightly to
melt the gelatin. Try to do this on a reach-in refrigerator shelf so that the pan doesn’t have to move too
much. Let the gelée set in the refrigerator.
7. Using a 3.75-cm / 1.5-in square cutter, cut out cubes that surround where the strawberries are set in the
gelée. Dip the cutter in hot water and pat it dry before cutting each time.
8. Place each cube on a sheet pan lined with an acetate sheet. Cover with plastic wrap and reserve
refrigerated.

244 FROZEN DESSERTS
9. Using a paring knife, cut the acetate sheets around the gelée cubes. This will make them easy to handle
during service, since it is easier to pick up a sheet of acetate than a slippery cube of gelée. Use an offset
spatula to pick up the acetate.
NOTE The entire 500 g / 1 lb 1.64 oz of macerated strawberry as listed above may not be needed; use extras to make the
sauce.
Almond Lace Tuiles YIELD 250 G / 8.81 OZ
106 g / 3.74 oz sugar
23 g / .81 oz all-purpose fl our
50 g / 1.76 oz almond fl our
50 g / 1.76 oz water
23 g / .81 oz butter, melted but cool
1. Combine all of the dry ingredients in the bowl of an electric mixer using the paddle attachment.
2. Slowly pour in the water, then the butter, while the mixer is on.
3. Refrigerate the batter, because once it fi rms up it is easier to spread.
4. Preheat a convection oven to 160°C / 325°F.
5. Spread a paper-thin layer of batter on a nonstick rubber mat.
6. Bake until the tuile is golden brown, about 6 minutes.
7. Remove it from the oven and slide the nonstick rubber mat onto a marble surface or stainless steel table.
Wait a few seconds for it cool down. Use a 3.75-cm / 1.5-in square cutter to cut squares out.
8. If the tuile becomes too hard and it cracks when it is being cut, return it to the oven to soften. This
procedure may need to be repeated a few times before the amount of tuiles that is needed is obtained.
9. Reserve in an airtight container at room temperature. Refresh daily in a hot oven for 2 minutes; discard
after 3 days.
Strawberry Sauce YIELD 200 G / 7.05 OZ
200 g / 7.05 oz macerated strawberries
1. Cook the strawberries down over medium-low heat until they thicken to a sauce consistency, about 20
minutes. Skim the sauce as it cooks.
2. Purée the strawberries and pass through a fi ne-mesh strainer.
3. Reserve refrigerated. Discard leftover sauce after 2 days.

FINISHED ITEMS 245
Marzipan Ice Cream with Warm Huckleberry Compote and Almond Financier YIELD 10 PORTIONS
COMPONENTS
1 kg / 2 lb 3.27 oz HUCKLEBERRY COMPOTE (page 163)
10 ALMOND FINANCIERS
300 g / 10.58 oz MARZIPAN ICE CREAM (page 374)
ASSEMBLY
1. Heat 100 g / 3.53 oz of the compote in a small saucepan. Pour it into a saucier and reserve hot.
2. Place an almond fi nancier at the center of the bowl.
3. Scoop a medium quenelle (30 g / 1.06 oz) of the ice cream on top of the fi nancier where the cake was cut out.
4. Serve immediately. The warmed huckleberries should be served tableside. Spoon them to one side of the fi nancier,
not on top of the ice cream.
Almond Financiers YIELD 512 G / 1 LB 2.05 OZ
61 g / 2.16 oz almond fl our
61 g / 2.16 oz all-purpose fl our
144 g / 5.06 oz confectioners’ sugar
144 g / 5.06 oz egg whites
103 g / 3.62 oz brown butter, cooled to room temperature
1. Prepare 10 rectangular fl eximolds that measure 7.5 cm / 3 in by 2.5 cm / 1 in by 2.5 cm / 1 in to bake the
fi nancier. These molds generally come in sets of 12. Place the fl eximolds on a half sheet pan and spray
lightly with nonstick cooking spray.
2. Preheat an oven to 160°C / 325°F.
3. Combine the dry ingredients in the bowl of an electric mixer on low speed using the paddle attachment.
Increase the speed to medium and add the egg whites in several additions, scraping the bowl between
additions. Mix until just combined. Scrape down the sides of the bowl. Slowly add the butter until thoroughly
incorporated.
4. Pour the batter into a piping bag.
5. Pipe the batter into the prepared molds, four-fi fths full (about 50 g / 1.76 oz batter per mold).
6. Bake until golden brown and the fi nancier is baked through all the way at its center, about 9 minutes.
7. Let the fi nanciers cool in the mold, then push the baked fi nanciers out of the mold.
8. Trim the crowns off so they form clean rectangles.
9. Lay a rectangle on its side. Using a 3.75-cm / 1.5-in round cutter, cut out a half-circle from the top half of
the fi nancier. This is for the quenelle to eventually sit on.

246 FROZEN DESSERTS
10. Reserve in an airtight container at room temperature. Discard leftover fi nanciers after service.

FINISHED ITEMS 247
Milk Chocolate Sorbet with “Perfect” Ganache Cocoa Pods YIELD 10 PORTIONS
COMPONENTS
120 g / 4.23 oz “PERFECT” GANACHE
50 g / 1.76 oz cocoa nibs
20 MILK CHOCOLATE PODS
300 g / 10.58 oz MILK CHOCOLATE SORBET (page 394)
ASSEMBLY
1. Place a small drop of ganache on the plate.
2. Place 5 g / .18 oz of cocoa nibs on the ganache.
3. Place the cocoa pod with the ganache on the plate, cocoa nibs facing up.
4. Place an empty pod diagonally on top of the fi rst pod.
5. Scoop a medium quenelle (30 g / 1.06 oz) of the sorbet on the cocoa nibs and serve immediately.
“Perfect” Ganache YIELD 500 G / 1 LB 1.63 OZ
91 g / 3.21 oz milk
91 g / 3.21 oz heavy cream
91 g / 3.21 oz trimoline
23 g / .79 oz water
205 g / 7.21 oz dark chocolate (64%), fi nely chopped
1. Heat the milk, cream, trimoline, and water to a boil. Pour over the chocolate. Mix with a beurre mixer until
smooth, about 1 minute.
2. Cool to room temperature.
3. Once cooled, pour into a piping bag if using immediately. Otherwise, refrigerate until needed. Discard
after 5 days.
NOTE This ganache is named “perfect” because it holds very well under refrigeration. (It stays smooth and shiny.)

248 FROZEN DESSERTS
Milk Chocolate Pods YIELD APPROXIMATELY 24 PODS
10 g / .35 oz tempered cocoa liqueur
200 g / 7.05 oz tempered milk chocolate
150 g / 5.3 oz “Perfect” Ganache (page 247)
50 g / 1.76 oz cocoa nibs
1. Brush the cocoa liqueur into the cocoa bean pod–shaped chocolate mold (the molds yield about 24 pods)
and allow it to set.
2. Pour in the milk chocolate. Let it sit for 30 seconds, and then gently tap the mold on a marble surface.
3. Turn the mold over and let the excess chocolate drip out into the bowl with the tempered milk chocolate.
Tap on the mold to get all of the excess chocolate out. Thin chocolate shells are critical to this dish. Thick
chocolate is hard to cut through with a spoon or fork and does not look good.
4. Place the mold on a wire rack, chocolate facing down.
5. When the chocolate is semi-set, scrape the excess off.
6. Let the chocolate set at room temperature.
7. Once the chocolate has set, unmold the pods by turning the mold over and tapping gently on its back.
8. Fill half of the pods to the top with the ganache.
9. Sprinkle cocoa nibs on top of the ganache before it sets.
10. Reserve in an airtight container at room temperature. Discard after 5 days.

FINISHED ITEMS 249
Thyme Ice Cream with Smooth Bitter Chocolate Ganache, Acacia Honey Cake, and Honeycomb YIELD 10 PORTIONS
COMPONENTS
10 ACACIA HONEY CAKES
50 g / 1.76 oz acacia honey
10 HONEYCOMB pieces
100 g / 3.53 oz SMOOTH BITTER CHOCOLATE GANACHE
10 CHOCOLATE GARNISHES
300 g / 10.58 oz THYME ICE CREAM (page 374)
ASSEMBLY
1. Place a honey cake on the plate. Drizzle about 5 g / .18 oz acacia honey on the cake.
2. Place a honeycomb next to the cake, towards the front end.
3. Spoon 30 g / 1.06 oz of the ganache on the opposite side of the honeycomb, on top of the honey cake. Try to get a
round dollop of ganache. Place the chocolate garnish on top of the ganache.
4. Scoop a medium quenelle (30 g / 1.06 oz) of the ice cream on top of the honey cake between the ganache and the
honeycomb, and serve immediately.
Acacia Honey Cakes YIELD 2 KG / 4 LB 6.55 OZ
170 g / 6 oz almond fl our
315 g / 11.11 oz sugar
478 g / 16.86 oz egg yolks
466 g / 16.43 oz egg whites
285 g / 10.05 oz cake fl our, sifted
143 g / 5.04 oz butter, melted but cool
143 g / 5.04 oz acacia honey
1. Line a half sheet pan with a nonstick rubber mat. Place a 25 cm / 10 in by 38 cm / 15 in by .5-cm / .2-in
Plexiglas frame on top of the nonstick rubber mat.
2. Preheat an oven to 160°C / 325°F.
3. Combine the almond fl our, 257 g / 9.07 oz of the sugar, and the egg yolks in the bowl of an electric mixer.
Whip to ribbon stage on high speed, about 8 minutes.
4. Whip the egg whites to medium peak and slowly pour in the remaining 58 g / 2.05 oz sugar. Whip to
medium-stiff peaks and fold into the whipped yolk mixture in 2 additions to prevent defl ation.
5. Carefully fold in the cake fl our. Combine the butter and honey and carefully fold the mixture into the batter.

250 FROZEN DESSERTS
6. Pour the batter onto the sheet pan and even it out with the frame. Carefully remove the frame.
7. Bake until slightly golden brown on the border, about 8 minutes.
8. Cool to room temperature. Freeze for 1 hour to get a clean cut out of the cake.
9. Cut into rectangles 2.5 cm / 1 in by 10 cm / 4 in by 1.25 cm / .5 in.
10. Reserve in an airtight container at room temperature during service. Discard any leftovers after service.
Honeycomb YIELD 300 G / 10.58 OZ
300 g / 10.58 oz honeycomb
1. Cut the honeycomb into pieces 2.5 cm / 1 in by 3.75 cm / 1.5 in.
2. Reserve in an airtight container at room temperature. It will last up to 1 month as long as it is not exposed
to heat.
Smooth Bitter Chocolate Ganache YIELD 500 G / 1 LB 1.64 OZ
91 g / 3.21 oz milk
91 g / 3.21 oz heavy cream
91 g / 3.21 oz trimoline
23 g / .81 oz water
205 g / 7.23 oz dark chocolate (60%), fi nely chopped
1. Bring the milk, cream, trimoline, and water to a boil. Pour over the chocolate. Mix with a beurre mixer until
smooth, about 1 minute.
2. Reserve in an airtight container under refrigeration. Discard after 5 days.

FINISHED ITEMS 251

252 FROZEN DESSERTS

FINISHED ITEMS 253
Rye Bread Ice Cream with Confi ture de Lait and Rye Paper YIELD 10 PORTIONS
COMPONENTS
350 g / 12.35 oz CONFITURE DE LAIT
40 sheets RYE BREAD PAPER
300 g / 10.58 oz RYE BREAD ICE CREAM (page 373)
ASSEMBLY
1. Spoon a small amount of confi ture on the plate (about 5 g / .18 oz).
2. Break a small piece of rye bread paper off of a large piece and place it on the confi ture (this will be the anchor for the
ice cream).
3. Scoop a medium quenelle (30 g / 1.06 oz) of the ice cream on top of the rye bread anchor. Lean a larger piece of rye
bread paper next to the quenelle.
4. Spoon 30 g / 1.06 oz of confi ture on top of the quenelle and the rye bread paper and serve immediately.
Confi ture de Lait YIELD 500 G / 1 LB 1.64 OZ
1 kg / 2 lb 3.27 oz milk
500 g / 1 lb 1.64 oz sugar
1.5 vanilla pods, split and scraped
1. Bring all of the ingredients to a boil, and then to a simmer over medium-low heat.
2. Cook until it thickens like a caramel sauce, 3 to 4 hours. Strain the mixture.
3. Reserve at room temperature for service, otherwise refrigerate. This sauce will keep for up to 4 months
under refrigeration.
Rye Bread Paper YIELD ABOUT 100 PIECES
One 350-g loaf / One 12.35-oz loaf rye bread bâtard, frozen
1. Trim the crust off the bread with a serrated knife.
2. While it is still frozen, slice it on an electric slicer as thinly as possible.
3. Place the slices in a dehydrator or very low temperature oven (60°C / 140°F). Dry until crisp, about 2 hours.
4. Reserve in an airtight container at room temperature. Discard after 2 days.

254 FROZEN DESSERTS
“Lemon Meringue Pie” YIELD 10 PORTIONS
COMPONENTS
300 g / 10.58 oz ITALIAN MERINGUE
30 SHORTBREAD COOKIES
600 g / 1 lb 5.16 oz LEMON CURD ICE CREAM (page 359)
ASSEMBLY
1. Pipe 3 small dots of meringue on the plate (about 3 g / .11 oz each), making sure they are evenly spaced and
lined up.
2. Place a cookie on top of each meringue dot.
3. Scoop a small quenelle (about 20 g / .71 oz) of the ice cream on top of each cookie.
4. Pipe the meringue on top of each quenelle so it envelops it completely.
5. Torch the meringue to give it an even golden brown color and serve immediately.
Italian Meringue YIELD 500 G / 1 LB 1.64 OZ
333 g / 11.75 oz sugar
167 g / 5.87 oz egg whites
1 g / .04 oz cream of tartar
1. Place the sugar in a saucepan with about one-quarter of its weight in water or enough to obtain a wet-sand
texture. Make sure there are no sugar crystals along the inside of the pot and that all the sugar has been
hydrated.
2. Begin whipping the egg whites and cream of tartar on medium speed at the same time that the sugar
begins cooking.
3. Cook the sugar to 121°C / 250°F (also known as the soft ball stage).
4. When the sugar has reached 115°C / 240°F, increase the speed of the mixer to high.
5. When the sugar reaches 121°C / 250°F, remove the pot from the heat and shock it in an ice bath.
6. Wait for the egg whites to reach stiff peak and, immediately after, pour the sugar down the side of the bowl
and whip until the foam has cooled to room temperature.
7. Reserve in a piping bag fi tted with a #4 plain piping tip in refrigeration. Discard any leftover meringue
after service.

FINISHED ITEMS 255
Shortbread Cookies YIELD 1.06 KG / 1 LB 5.39 OZ
351 g / 12.36 oz butter, soft
175 g / 6.17 oz sugar
7 g / .25 oz lemon zest
59 g / 2.08 oz rice fl our
7 g / .25 oz salt
409 g / 14.43 oz all-purpose fl our
50 g / 1.76 oz sugar for sprinkling, as needed
1. Cream the butter, sugar, and lemon zest together in the bowl of an electric mixer on medium speed until
smooth, about 5 minutes.
2. Sift together the fl ours and salt. Add to the butter mixture and mix on slow speed until incorporated.
3. Roll the dough out to 5 mm / .2 in thick and refrigerate until hardened, about 1 hour.
4. Preheat a convection oven to 160°C / 325°F.
5. Cut the shortbread into 2.5-cm / 1-in squares.
6. Sprinkle the sugar on top and score with a fork. Freeze for 20 minutes.
7. Bake until golden brown on the borders, about 5 minutes.
8. Cool to room temperature.
9. Reserve in an airtight container in a cool dry place. Discard after 2 days.

256 FROZEN DESSERTS

FINISHED ITEMS 257
Bosc Pear Sorbet with Brown Sugar Chiffon, Pear Pâte de Fruit, and Pear Compote YIELD 10 PORTIONS
COMPONENTS
600 g / 1 lb 5.16 oz BOSC PEAR SORBET BASE (page 382)
10 BROWN SUGAR CHIFFON RECTANGLES
10 strips PEAR PÂTE DE FRUIT
50 g / 1.76 oz PEAR COMPOTE
ASSEMBLY
1. Line 10 PVC tubes 7.5 cm / 3 in by 2.5 cm / 1 in diameter with acetate.
2. Line a half sheet pan with a nonstick rubber mat. Place the PVC tubes on the sheet pan in a standing
position and freeze.
3. Pacotize the sorbet and transfer to a piping bag. Pipe into the prepared PVC tubes and even out the
top with an offset spatula. Each tube should hold about 60 g / 2.11 oz of product. Place in the freezer to
harden.
4. Place the brown sugar cake on the plate.
5. Remove the sorbet from its mold and take off the acetate. Lay the sorbet on top of the cake.
6. Torch the sorbet for 1 or 2 seconds in order to take the dull, frozen look away and make it shine.
7. Lay a strip of pâte de fruit across the top of the sorbet.
8. Place 5 g / .18 oz of the compote on the portion of pâte de fruit that rests on the plate.
9. Temper the sorbet for 1 to 2 minutes and serve immediately.
Brown Sugar Chiffon YIELD 1 KG / 2 LB 3.27 OZ
186 g / 6.56 oz cake fl our
86 g / 3.03 oz almond fl our
14 g / .49 oz baking powder
214 g / 7.55 oz eggs
186 g / 6.56 oz brown sugar
143 g / 5.04 oz milk
171 g / 6.03 oz hazelnut oil
1. Preheat a convection oven to 160°C / 325°F.
2. Line a half sheet pan with a nonstick rubber mat. Place a 25 cm / 10 in by 38 cm / 15 in by .75-cm- / .3-in-
deep Plexiglas frame inside the sheet pan.

258 FROZEN DESSERTS
3. Sift all of the dry ingredients together.
4. Combine the eggs and sugar in the bowl of an electric mixer and whip on high speed until they have
quadrupled in size, about 10 minutes.
5. Turn the speed down to medium and slowly pour in the milk while the mixer is still running.
6. Pour the dry ingredients into the mix slowly, making sure to scrape the bottom and sides to prevent fl our
pockets.
7. Pour the oil into the batter in a thin stream.
8. Pour the batter into the prepared sheet pan; make the batter even with the top of the frame and remove
the frame.
9. Bake until golden brown, about 7 minutes.
10. Cool to room temperature. Cut into rectangles 2.5 cm / 1 in by 7.5 cm / 3 in.
11. Reserve in an airtight container at room temperature. Discard any leftover cake after service.
Pear Pâte de Fruit YIELD 2 KG / 4 LB 6.55 OZ
973 g / 2 lb 2.32 oz sugar
22 g / .78 oz pectin
106 g / 3.74 oz powdered glucose
885 g / 1 lb 15.22 oz Bosc pear purée
14 g / .49 oz citric acid
100 g / 3.52 oz sugar, for sprinkling
1. Place a full-size nonstick rubber mat on a marble slab; place a stainless steel frame 40 cm / 16 in by 60
cm / 24 in by 1.75 cm / .5 in on the rubber mat.
2. Combine one-third of the sugar with the pectin in a bowl using a whisk.
3. Combine the remaining sugar with the powdered glucose in a bowl using a whisk.
4. Place the fruit purée in a saucepan and pour in the pectin-sugar mixture slowly, whisking it in carefully to
avoid lumps. Bring to a boil.
5. Once it boils, whisk in the glucose-sugar mixture.
6. Cook until the mixture reaches 76° Brix.
7. Remove the pot from the heat and whisk in the citric acid.
8. Pour the mixture into the frame. Once the surface evens out, sprinkle some sugar on top and let it set at
room temperature.
9. Once it sets, cut into rectangles 2 mm / .08 in by 7.5 cm / 3 in and coat with more sugar.
10. Reserve in an airtight container at room temperature. Discard once the pâte de fruit begins to dry out.

FINISHED ITEMS 259
Pear Compote YIELD 375 G / 13.23 OZ
250 g / 8.82 oz Bosc pears
100 g / 3.53 oz sugar
1 Tahitian vanilla pod, split and scraped
1 cinnamon stick
25 g / .88 oz water
1. Cut the pears into small dice. In this case it is not necessary that they be completely ripe, but they should
not be too underripe either, since they will be cooked.
2. Line a sheet pan with parchment paper.
3. Combine the sugar, vanilla beans, cinnamon, and water in a small saucepan. Cook over high heat until the
sugar has turned a light amber color, about 6 minutes.
4. Add the pears and turn the heat down to low; cook until they are just tender.
5. Scoop the pears onto the prepared sheet pan with a slotted spoon and refrigerate immediately to cool.
6. Reserve in an airtight container under refrigeration. Discard after 3 days.
Demerara Sugar Ice Cream with Roasted Kadota Figs and Madeira Glaze YIELD 10 PORTIONS
COMPONENTS
20 ROASTED KADOTA FIGS
20 g / .71 oz Demerara sugar
600 g / 1 lb 5.12 oz DEMERARA SUGAR ICE CREAM (page 360)
100 g / 3.53 oz MADEIRA GLAZE, warm
ASSEMBLY
1. Cut the fi gs into quarters. Warm them in a 160°C / 325°F oven for 4 minutes. Place 4 quarters on a plate in a
standing position, facing in the same direction.
2. Spoon a small amount of sugar on the plate next to the fi gs.
3. Scoop a medium quenelle (30 g / 1.06 oz) of the ice cream on top of the sugar.
4. Spoon 10 g / .35 oz of warm glaze on top of the fi gs and serve immediately.

260 FROZEN DESSERTS
Roasted Kadota Figs YIELD 700 G / 1 LB 8.69 OZ
700 g / 1 lb 8.69 oz Kadota fi gs
400 g / 14.11 oz Demerara sugar
300 g / 10.58 oz Madeira, or as needed
1. Preheat a convection oven to 120°C / 250°F.
2. Cut an X on the top and the bottom of each fi g.
3. Place each fi g in a standing position in a hotel pan. Sprinkle sugar on top. Pour the wine on top of the fi gs
(add more if necessary to cover).
4. Roast until the fi gs are just tender, about 20 minutes.
5. Cool them in the pan. Remove the fi gs from the pan and place in an airtight container at room
temperature during service (otherwise refrigerate).
6. Reserve the liquid for the Madeira glaze. Discard the fi gs after 1 week.
NOTES Use very ripe fi gs.
It is possible to add spices and other fl avors to the fi gs before roasting if desired (cinnamon, cloves, vanilla
beans, orange zest, etc.).
Madeira Glaze YIELD 100 G / 3.52 OZ
300 g / 10.58 oz reserved roasting liquid
1. Reduce the liquid in a pot over medium heat until it thickens to a sauce consistency, about 45 minutes.
Skim the liquid as it reduces.
2. Pass through a fi ne-mesh strainer.
3. Reserve hot, covered, during service (in a hot water bath). This liquid can hold up to 1 month.

FINISHED ITEMS 261
Chestnut Ice Cream, Crisp Meringue, and Vanilla Sablée Tarts YIELD 10 PORTIONS
COMPONENTS
600 g / 1 lb 5.16 oz CHESTNUT ICE CREAM BASE (page 361)
2 g / .07 oz corn syrup, or as needed
10 VANILLA SABLÉE TART SHELLS (see next page)
90 CRISP MERINGUE DISKS
½ sheet gold leaf
ASSEMBLY
1. Prepare a piping bag by fi tting it with a #4 fl uted piping tip.
2. Churn or pacotize the ice cream. Pour into the prepared piping bag and freeze.
3. Place a small drop of corn syrup inside the serving bowl.
4. Place the tart shell on the dot of corn syrup (it will keep the tart shell from sliding).
5. Pipe about 60 g / 2.11 oz of the ice cream into the tart shell in a spiral mound.
6. Shingle 9 meringue disks around the ice cream, overlapping the disks slightly to cover the ice cream.
7. Place a small piece of gold leaf on the top of the tart and serve immediately.
NOTE This dessert is inspired by the classic French dessert “Mont Blanc.”
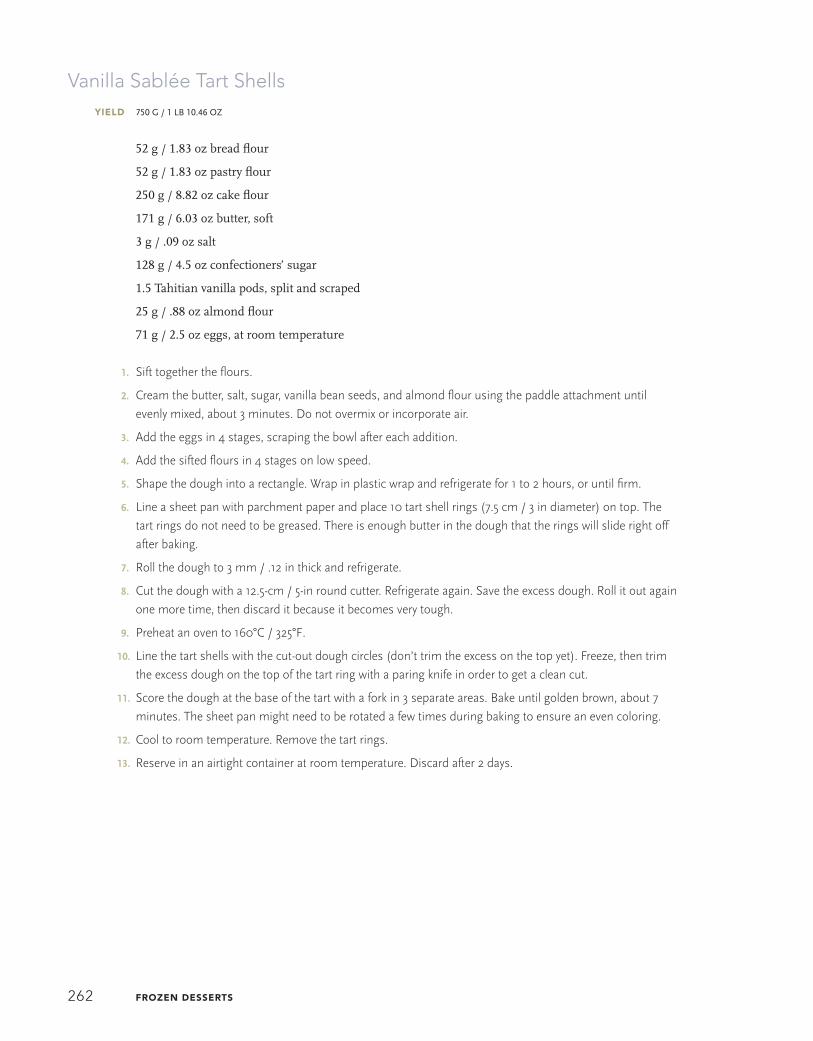
262 FROZEN DESSERTS
Vanilla Sablée Tart Shells YIELD 750 G / 1 LB 10.46 OZ
52 g / 1.83 oz bread fl our
52 g / 1.83 oz pastry fl our
250 g / 8.82 oz cake fl our
171 g / 6.03 oz butter, soft
3 g / .09 oz salt
128 g / 4.5 oz confectioners’ sugar
1.5 Tahitian vanilla pods, split and scraped
25 g / .88 oz almond fl our
71 g / 2.5 oz eggs, at room temperature
1. Sift together the fl ours.
2. Cream the butter, salt, sugar, vanilla bean seeds, and almond fl our using the paddle attachment until
evenly mixed, about 3 minutes. Do not overmix or incorporate air.
3. Add the eggs in 4 stages, scraping the bowl after each addition.
4. Add the sifted fl ours in 4 stages on low speed.
5. Shape the dough into a rectangle. Wrap in plastic wrap and refrigerate for 1 to 2 hours, or until fi rm.
6. Line a sheet pan with parchment paper and place 10 tart shell rings (7.5 cm / 3 in diameter) on top. The
tart rings do not need to be greased. There is enough butter in the dough that the rings will slide right off
after baking.
7. Roll the dough to 3 mm / .12 in thick and refrigerate.
8. Cut the dough with a 12.5-cm / 5-in round cutter. Refrigerate again. Save the excess dough. Roll it out again
one more time, then discard it because it becomes very tough.
9. Preheat an oven to 160°C / 325°F.
10. Line the tart shells with the cut-out dough circles (don’t trim the excess on the top yet). Freeze, then trim
the excess dough on the top of the tart ring with a paring knife in order to get a clean cut.
11. Score the dough at the base of the tart with a fork in 3 separate areas. Bake until golden brown, about 7
minutes. The sheet pan might need to be rotated a few times during baking to ensure an even coloring.
12. Cool to room temperature. Remove the tart rings.
13. Reserve in an airtight container at room temperature. Discard after 2 days.

FINISHED ITEMS 263
Crisp Meringue Disks YIELD 333 G / 11.75 OZ
111 g / 3.92 oz egg whites, at room temperature
111 g / 3.92 oz granulated sugar
111 g / 3.92 oz confectioners’ sugar, sifted
1. Preheat a convection oven to 100°C / 212°F.
2. Line a full-size sheet pan with a nonstick rubber mat; place a chablon that has rounds 3.75 cm / 1.5 in
diameter and is .3 cm / .11 in thick on top of it.
3. Whip the egg whites to medium peak; pour in the granulated sugar as the mixer whips and continue
whipping until the meringue has reached a stiff peak.
4. Remove the bowl from the mixer and fold in the confectioners’ sugar.
5. Using an offset spatula, spread the meringue over the chablon. Lift the chablon from the mat once the
meringue has been spread. Repeat this process until all the meringue has been used.
6. Bake with the vent open for 1 hour, or until the meringue is crisp. Reserve in an airtight container for
service. If kept in a dry environment, they will last up to 1 month.
NOTE A chablon is a rubber mat with round perforations; they vary in thickness and diameter.

264 FROZEN DESSERTS
Port Ice Cream with Brown Butter and Chocolate Pavé YIELD 10 PORTIONS
COMPONENTS
30 bâtons BROWN BUTTER AND CHOCOLATE PAVÉ
600 g / 1 lb 5.16 oz PORT ICE CREAM (page 361)
100 g / 3.53 oz PORT GLAZE (page 172)
ASSEMBLY
1. Place three pavé bâtons on the plate, evenly spaced with about 2.5 cm / 1 in between each one, lined up in the same
direction.
2. Scoop a small quenelle (20 g / .71 oz) of the ice cream onto each piece of pavé.
3. Pour about 5 g / .18 oz of glaze in a straight line across all the quenelles, then another 5 g / .18 oz of glaze in a
straight line across the pave. Serve immediately.
Brown Butter and Chocolate Pavé YIELD 1.65 KG / 3 LB 10.19 OZ
400 g / 14.11 oz dark chocolate (72%), fi nely chopped
400 g / 14.11 oz milk chocolate, fi nely chopped
250 g / 8.82 oz Brown Butter (page 214), melted but cool
400 g / 14.11 oz heavy cream
200 g / 7.05 oz fondant
500 g / 1 lb 1.64 oz cocoa powder
1. Place a nonstick rubber mat on a marble surface. Using caramel bars, make a square frame 30 cm / 12 in
by 30 cm / 12 in on the rubber mat.
2. Combine the chocolates and the brown butter. Bring the cream and fondant to a boil and pour over the
chocolate mixture. Stir with a rubber spatula until emulsifi ed. Try not to incorporate air by stirring too
vigorously.
3. Pour the mixture onto a marble surface. Using an offset spatula, agitate the ganache in a scraping/stirring
motion, up and down. This will help cool the mixture and will create the proper fat-crystal and sugar-
crystal alignment, which will result in a smooth, shiny ganache.
4. Transfer the ganache to the prepared frame. Even out the surface with an offset spatula so that it is fl ush
with the top border of the frame.
5. Let the ganache set at room temperature.
6. Once it is set, cut it with a guitar into rectangles (bâtons) 5 cm / .25 in by 5 cm / 2 in.
7. Toss them in cocoa powder. Tap off the excess and reserve in an airtight container in a cool, dry place.
Discard after 1 week.

FINISHED ITEMS 265

266 FROZEN DESSERTS

FINISHED ITEMS 267
Prune-Armagnac Ice Cream with Warm Brioche Pain Perdu and Maple Syrup YIELD 10 PORTIONS
COMPONENTS
1 PULLMAN BRIOCHE LOAF (see Note)
150 g / 5.29 oz clarifi ed butter
500 g / 1 lb 1.64 oz CUSTARD
50 g / 1.76 oz confectioners’ sugar
300 g / 10.58 oz PRUNE-ARMAGNAC ICE CREAM (page 362)
100 g / 3.53 oz maple syrup
3 g / .11 oz maple sugar
ASSEMBLY
1. Freeze the brioche loaf, about 2 hours. Trim off the crusts and cut the brioche into 4-cm / 1.5-in cubes.
2. Place a small nonstick pan over medium-high heat with enough clarifi ed butter to form an even fi lm at the base of
the pan (about 15 g / .53 oz).
3. Soak 3 brioche cubes generously in the custard, and let any excess drip off them.
4. When the butter is very hot, brown the cubes evenly, about 1 minute per side. Since the cubes are small, they will
cook quickly. Coat each cube with confectioners’ sugar and place 3 on a plate or in a bowl.
5. Scoop a medium quenelle (30 g / 1.06 oz) of the ice cream on top of one of the cubes.
6. Drizzle 10 g / .35 oz of maple syrup on top of the pain perdu and ice cream. Sprinkle maple sugar on top of the ice
cream and the pain perdu and serve immediately.
NOTES The older the bread, the better (because dry bread will absorb the custard better), within reason.
For the brioche loaf, follow the recipe for Toasted Brioche Croutons (page 169) through step 7.
Custard YIELD 500 G / 1 LB 1.64 OZ
232 g / 8.18 oz eggs
3 g / .11 oz salt
34 g / 1.2 oz sugar
231 g / 8.15 oz milk
.75 g / .03 oz ground cinnamon
.25 g / .01 oz vanilla powder
1. Mix all of the ingredients thoroughly in a bowl.
2. Pass through a fi ne-mesh strainer and reserve refrigerated until needed. Discard after 2 days.

268 FROZEN DESSERTS
Cinnamon Ice Cream with Crema Catalana and Cinnamon Anglaise YIELD 10 PORTIONS
COMPONENTS
80 g / 2.82 oz CINNAMON ANGLAISE (page 209)
10 CREMA CATALANA RECTANGLES
100 g / 3.53 oz superfi ne sugar
300 g / 10.58 oz CINNAMON ICE CREAM (page 363)
ASSEMBLY
1. Spoon about 8 g / .28 oz anglaise onto the plate.
2. Place a custard rectangle on a wire rack. Sprinkle the top with superfi ne sugar and caramelize with a torch. Place the
custard on the plate.
3. Scoop a medium quenelle (30 g / 1.06 oz) of the ice cream on top of the custard and serve immediately.
Crema Catalana YIELD 2 KG / 4 LB 6.55 OZ
1.42 kg / 3 lb 2.09 oz milk
2 cinnamon sticks
5 g / .18 oz lemon zest
381 g / 13.44 oz sugar
171 g / 6.03 oz egg yolks
15 g / .53 oz cornstarch
12 g / .42 oz gelatin sheets, bloomed
1. Line a fl at sheet pan with an acetate sheet. Place a 25 cm / 10 in by 38 cm / 15 in by 1.75 cm / 0.68 in
Plexiglas frame inside the sheet pan on top of the acetate.
2. Combine the milk with the cinnamon, lemon zest, and half of the sugar and bring to a boil.
3. Meanwhile, whisk together the egg yolks with the remaining sugar and the cornstarch.
4. Temper the yolk mixture with the boiled milk and cook over medium heat, stirring constantly, until it just
comes to a boil.
5. Remove the pot from the heat and stir in the bloomed gelatin.
6. Pour the custard into the prepared frame. Tap the sheet pan down to even out the custard.
7. Freeze until hardened, about 2 hours.
8. Cut the custard into rectangles 1.75 cm / .68 in by 12.5 cm / 5 in and refrigerate, covered with plastic wrap,
until needed. Discard after 4 days.

FINISHED ITEMS 269
Chocolate-Lemon Ice Cream with Lemon Pound Cake Croutons and Chocolate Tumbleweeds YIELD 10 PORTIONS
COMPONENTS
100 g / 3.53 oz LEMON SAUCE
140 LEMON POUND CAKE CROUTONS
300 g / 10.58 oz CHOCOLATE-LEMON ICE CREAM (page 375)
10 CHOCOLATE TUMBLEWEEDS
ASSEMBLY
1. Drizzle about 10 g / 3.53 oz lemon sauce at the center of the plate. Drizzle a few drops of sauce around the plate.
2. Place 9 pound cake cubes at the center of the plate (the sauce will keep the cubes in place). Place 5 more cubes
around the plate.
3. Scoop a medium quenelle (30 g / 1.06 oz) of the ice cream on top of the croutons at the center of the plate.
4. Place the chocolate tumbleweed on top of the quenelle and serve immediately.
Lemon Sauce YIELD 400 G / 14.1 OZ
300 g / 10.58 oz glucose syrup
100 g / 3.53 g lemon juice
1. Stir together the syrup and lemon juice. The texture should be that of a thick syrup. Adjust the consistency
if necessary.
2. Reserve under refrigeration until needed. Discard after 5 days.
Lemon Pound Cake Croutons YIELD 1 KG / 2 LB 3.27 OZ
241 g / 8.5 oz butter, at room temperature
196 g / 6.91 oz eggs, at room temperature
241 g / 8.5 oz pastry fl our
2 g / .06 oz baking powder
1 g / .04 oz salt
253 g / 8.92 oz granulated sugar
13 g / .46 oz lemon zest
54 g / 1.9 oz crème fraîche
25 g / .88 oz confectioners’ sugar, or as needed

270 FROZEN DESSERTS

FINISHED ITEMS 271
1. Preheat an oven to 160°C / 325°F.
2. Grease a half sheet pan and line it with parchment paper.
3. Ideally pull the butter out of refrigeration 3 hours before it is needed. The best butter temperature is
22°C / 72°F.
4. Warm the eggs up to 26°C / 80°F over a hot water bath.
5. Sift the pastry fl our, baking powder, and salt together twice.
6. In the bowl of a 12-qt electric mixer, cream the butter, granulated sugar, and lemon zest for 7 minutes on
medium speed using the paddle attachment.
7. Add the eggs slowly in 3 to 4 additions, scraping the sides and bottom of the bowl after each addition.
8. Stop the mixer and add the fl our mixture. Mix on low speed until just combined. Scrape the sides and
base of the bowl and mix for a few more seconds.
9. Add the crème fraîche and mix until just combined.
10. Spread onto the prepared sheet pan and bake until the center of the cake springs back when gentle
pressure is applied with a fi nger, about 15 minutes.
11. Cool to room temperature. Once cooled, freeze for 2 hours before cutting.
12. Cut into .5-cm / .2-in cubes and toss in confectioners’ sugar.
13. Toast in the oven until crispy (not completely dried out) and golden brown, about 10 minutes.
14. Cool the croutons and reserve in an airtight container at room temperature. Discard after 3 days.
Chocolate Tumbleweeds YIELD 300 G / 10.58 OZ
300 g / 10.58 oz dark chocolate (64%), fi nely chopped, or as needed
1. Freeze several half sheet pans and leave them in the freezer until needed.
2. Melt the chocolate over a double boiler.
3. Make a cornet out of parchment paper.
4. Cut a very small opening on the cornet tip (thin is better than thick).
5. Turn the frozen half sheet pan upside down and lengthwise in front of you.
6. Visually, divide the half sheet pan into 4 lengthwise sections. (There will be 4 tumbleweeds per half sheet
pan).
7. Using the cornet, pipe very straight lines along the sheet pan, as close together as possible (some overlap
is okay).
8. When the chocolate is semi-set, take one end of the chocolate strips and roll them away from you as you
pull them off the half sheet pan to form a nest. Handle with care and avoid touching them too much
(warm hands might damage their shape).
9. Store in an airtight container, nested between parchment paper, under refrigeration.
NOTE There is no need to temper the chocolate. It only needs to be melted.

272 FROZEN DESSERTS

FINISHED ITEMS 273
Espresso Cardamom Ice Cream with Warm Chocolate Beignets YIELD 10 PORTIONS
COMPONENTS
50 g / 1.76 oz ESPRESSO GLAZE
20 g / .71 oz cocoa nibs
50 WARM CHOCOLATE BEIGNETS
300 g / 10.58 oz ESPRESSO CARDAMOM ICE CREAM (page 362)
ASSEMBLY
1. Brush 5 g / .18 oz of espresso glaze in a straight line across the plate, from end to end.
2. Place a pinch of cocoa nibs on the right side of the glaze toward the middle, without them actually touching the
glaze. Place a line of coca nibs along one side of the glaze.
3. Place 5 warm beignets on the glaze in a straight line opposite the line of coca nibs near the glaze. If the beignets are
fried in advance, reheat them in a 160°C / 325°F oven for 3 to 4 minutes. Ideally, the beignets should be fried to order.
4. Scoop a medium quenelle (30 g / 1.06 oz) of the ice cream on top of the pinch of cocoa nibs and serve immediately.
NOTE If frying the beignets to order, proof them for 5 to 7 minutes in a warm place (next to a hot oven, for example), then
fry until golden brown. Toss them in sugar as soon as they come out of the fryer.
Espresso Glaze YIELD 110 G / 3.88 OZ
50 g / 1.76 oz concentrated espresso
60 g / 2.11 oz corn syrup
Mix the espresso and corn syrup together and reserve at room temperature. This will last up to 1 month.
NOTE For the concentrated espresso, use 3 times the amount of espresso beans than would be used for regular espres-
so, about 15 g / .53 oz espresso beans to 50 g / 1.76 oz water.

274 FROZEN DESSERTS
Warm Chocolate Beignets YIELD 1 KG / 2 LB 3.27 OZ
88 g / 3.1 oz eggs
7 g / .25 oz vanilla paste
243 g / 8.57 oz milk, at 16°C / 60°F
486 g / 1 lb 1.14 oz bread fl our
12 g / .42 oz instant dry yeast
59 g / 2.08 oz sugar
4 g / .14 oz salt
59 g / 2.08 oz butter
44 g / 1.55 oz egg yolks
50 g / 1.76 oz dark chocolate, fi nely chopped
2 kg / 4 lb 6.55 oz canola oil, for frying
50 g / 1.76 oz sugar, for tossing, or as needed
1. Mix using the straight dough method: Place the eggs, vanilla paste, and milk in the bowl of an electric
mixer fi rst, then the fl our, yeast, sugar, and salt, and fi nally the butter on top. Mix on medium speed using
a dough hook until full gluten development is achieved.
2. Let the dough bulk ferment at room temperature for 30 minutes.
3. Fold the dough onto itself and ferment for another 30 minutes.
4. Roll the dough to .5 cm / .25 in thick. Relax the dough for 30 minutes.
5. Score half of the dough using a 1.25-cm / .5-in round cutter. Egg wash the scored half with the egg yolks.
6. Place a small amount (about 1 g) of chocolate where the dough was scored.
7. Fold the clean half of the dough onto the chocolate half. Press down with your hands so you can see
where the chocolate sits.
8. Using the dull side of the same 1.25-cm / .5-in cutter, score the dough where the chocolate sits. This is just
to make sure that the dough has adhered. Using a 2.5-cm / 1-in cutter, cut around the chocolate.
9. Proof at 29°C / 84°F for 20 to 25 minutes, or until the dough has doubled in size.
10. While the beignets proof, heat the oil in a fryer to 180°C / 360°F.
11. Fry the beignets in the canola or peanut oil until they are golden brown, about 2 minutes, stirring constantly
as they fry to ensure proper coloring.
12. As soon as they come out of the fryer, toss them in the sugar. Serve immediately.

FINISHED ITEMS 275
Lemongrass Semifreddo with Coconut Bubbles and Black Sesame Seed Glass YIELD 10 PORTIONS
COMPONENTS
2 kg / 4 lb 6.55 oz LEMONGRASS SEMIFREDDO BASE (page 405)
10 COCONUT BUBBLES
10 pieces BLACK SESAME SEED GLASS
ASSEMBLY
1. Place a sheet of acetate on a cutting board and freeze.
2. Line a half sheet pan with a nonstick rubber mat. Place a 25 cm / 10 in by 38 cm / 15 in by 2.5-cm / 1-in Plexiglas
frame inside the sheet pan and freeze.
3. Pour the semifreddo base into the frozen sheet pan.
4. Line a half sheet pan with a nonstick rubber mat and freeze.
5. Once the semifreddo has hardened, fl ip it onto the frozen cutting board.
6. Dip a slicing knife into very hot water and cut into rectangles 3.75 cm / 1.5 in by 10 cm / 4 in.
7. Transfer the pieces to the frozen sheet pan as soon as they are cut.
8. Once all the semifreddo is cut and hardened, transfer to an airtight container. Reserve frozen until needed. Discard
after 3 days.
9. Place a semifreddo rectangle on the plate. Torch it for 2 or 3 seconds to smooth out the surface and evaporate any
frost accumulation.
10. Temper for 3 to 4 minutes.
11. Spoon a mound of coconut bubbles on top of the semifreddo.
12. Place the sesame glass on top of the bubbles and serve immediately.
Coconut Bubbles* YIELD 635 G / 1 LB 6.4 OZ
250 g / 8.82 oz unsweetened coconut milk
375 g / 13.23 oz water
100 g / 3.53 oz sugar
10 g / .35 oz soy lecithin powder
1. Pass the coconut milk through a fi ne-mesh strainer and weigh out the required amount. There should be
150 g / 5.29 oz after straining.

276 FROZEN DESSERTS
2. Combine the coconut milk with the water and sugar. Using a beurre mixer, pour in the soy lecithin powder
slowly as the blender mixes the ingredients. The intention is to incorporate and trap as much air as
possible to create bubbles; to do this, slightly tilt the bowl in which the coconut milk is being mixed and
expose the blender part of the beurre mixer slightly above the liquid’s surface.
3. The mixture will need to re-blend before each plating to re-incorporate air. Discard the liquid after service.
NOTES Be very gentle when handling the bubbles to avoid popping them.
Bubbles are formed thanks to the incorporation of soy lecithin, which is a protein that helps trap air in a liquid. If
handled carefully, the bubbles can last whole (without popping) for up to 10 minutes or more.
*This recipe was inspired by Ferran Adrià from El Bulli, in Spain.
Black Sesame Seed Glass YIELD 575 G / 1 LB 4.27 OZ
500 g / 1 lb 1.64 oz isomalt
50 g / 1.76 oz water
25 g / .88 oz black sesame seeds
1. Cook the isomalt with the water in a small saucepan to 145°C / 293°F.
2. Pour onto a nonstick rubber mat. Sprinkle the sesame seeds evenly over the surface and place another
nonstick rubber mat on top. Roll out as thinly as possible with a rolling pin. Heat in a 160°C / 325°F oven
for about 30 seconds so the seeds bind to the sugar.
3. Before the isomalt cools completely, start pulling it as thinly as you can with your fi ngers. Cut off 7.5-cm- /
3-in-long by 5-cm- / 2-in-wide pieces with a pair of scissors. If the isomalt is too hot and you can’t pull it
effectively, wait for it to cool until it is pliable.
4. Try to obtain similar-looking pieces (it will be impossible to make them identical). If it hardens too much,
it can be softened in the oven for a few seconds.
5. These pieces are very fragile. Reserve in a safe, airtight container and handle very carefully. If kept in a dry
environment, they can last up to 1 month.
NOTE Use 2 or 3 pairs of vinyl or latex gloves when you are handling the hot sugar with your hands.
For Coconut Glass, substitute 100 g / 3.53 oz toasted dessicated coconut for the black sesame seeds and reduce
the water amount to 25 g / .88 oz, then proceed with the recipe. For the entremet on page 275, cut the coconut
glass into 5-cm / 2-in squares using scissors.

FINISHED ITEMS 277

278 FROZEN DESSERTS

FINISHED ITEMS 279
Pumpkin Gelato with Gingerbread Sablée Breton, Candied Pepitas, and Caramel Paper YIELD 10 PORTIONS
COMPONENTS
10 GINGERBREAD SABLÉE BRETON SQUARES
10 PUMPKIN GELATO CUBES
200 g / 7.05 oz CANDIED PEPITAS
10 sheets CARAMEL PAPER
300 g / 10.58 oz CARAMELIZED PUMPKIN
5 g / .18 oz GINGERBREAD SPICE
ASSEMBLY
1. Place a gingerbread square on the plate.
2. Place an ice cream cube on the gingerbread. Torch the cube for 2 or 3 seconds to remove any frost.
3. Place 10 g / .35 oz of the candied pepitas in a mound on top of the cube.
4. Lean a piece of caramel paper on one side of the cube.
5. Place a small mound (about 30 g / 1.06 oz) of caramelized pumpkin next to the ice cream cube.
6. Place a thin straight line of gingerbread spice on the plate, in front of the cube, and serve immediately.
Gingerbread Sablée Breton YIELD 500 G / 1 LB 1.64 OZ
162 g / 5.71 oz all-purpose fl our
77 g / 2.72 oz confectioners’ sugar
94 g / 3.32 oz almond fl our
2 g / .07 oz ground ginger
.5 g / .02 oz ground cinnamon
1 g / .03 oz ground cloves
.5 g / .02 oz ground nutmeg
94 g / 3.32 oz butter
4 g / .14 oz salt
65 g / 2.29 oz butter, melted
1. Preheat a convection oven to 160°C / 325°F.
2. In the bowl of an electric mixer, mix the fl our, confectioners’ sugar, almond fl our, spices, the fi rst measure
of butter, and salt with the paddle attachment on medium speed until it comes together in a shaggy mass.
3. Roll the dough to 3 mm / .12 in thick. Bake until dry, about 8 minutes.

280 FROZEN DESSERTS
4. Line a half sheet pan with a nonstick rubber mat. Place a Plexiglas frame 25 cm / 10 in by 38 cm / 15 in by
3 mm / .12 in inside.
5. When the baked dough cools, grind in a robot coupe and add the melted butter as it grinds. It will form
a ball. Press into the prepared sheet pan. Place a sheet of parchment paper on top of the sablée and roll
down with a wooden dowel to even it out with the frame in place.
6. Return to the oven and bake for fi ve more minutes. Freeze.
6. Cut into 5-cm / 2-in squares while frozen.
7. Reserve refrigerated until needed.
Pumpkin Gelato Cubes YIELD 1 KG / 2 LB 3.27 OZ (500 G / 1 LB 1.63 OZ IN EACH BEAKER IF USING A PACOJET)
1 kg / 2 lb 3.27 oz Pumpkin Ice Cream base (page 363)
1. Before pacotizing or churning the ice cream, line a sheet pan with a nonstick rubber mat and a 25 cm / 10
in by 25 cm / 10 in by 5-cm / 2-in stainless steel or Plexiglas frame. Line another sheet pan with a nonstick
rubber mat and place both sheet pans in the freezer.
2. A 5-cm- / 2-in-deep frame will hold a little over 4 L /4 qt of liquid, but don’t forget to take overrun into
account. In this case, there should be an overrun of 20 percent.
3. Pacotize or churn the ice cream base. Pour into the prepared frame. Using an offset spatula, spread the
ice cream evenly so that it fi ts exactly into the frame and remove any excess. Freeze to harden.
4. Once the ice cream has hardened, use a 5-cm / 2-in square cutter to cut out cubes. Dip the cutter into
room temperature (not hot) water each time in order to get a clean cut.
5. Place the ice cream squares on the other frozen sheet pan. Let them harden again.
6. Transfer to an airtight container and reserve frozen until needed. Discard any leftover cubes after service.
Candied Pepitas YIELD 300 G / 10.58 OZ
500 g / 1 lb 1.64 oz sugar
5 g / .18 oz lemon juice
250 g / 8.82 oz pepitas
1. Line a full-size sheet pan with parchment paper. Place a wire cooling rack over the sheet pan and spray
it with nonstick cooking spray. Place the sheet pan near a marble surface. Have 3 pairs of latex gloves
available.
2. Place the sugar in a saucepan with about one-quarter of its weight in water or enough to obtain a wet-sand
texture. Add the lemon juice to prevent crystallization. Make sure there are no sugar crystals along the
inside of the pot and that all the sugar has been hydrated. Begin cooking the sugar over high heat.

FINISHED ITEMS 281
3. Toast the seeds until they begin to have a toasted aroma and a light brown color in a 160°C / 325°F oven
for about 6 minutes. If the sugar has not caramelized by this point, keep the seeds hot until it does. They
can be kept in the oven, but turn it off and open the oven door slightly. If cold seeds are added to the
sugar, it will crystallize.
4. Cook the sugar over high heat until it reaches 170°C / 338°F. Turn the heat down to low and stir in the
toasted seeds. Make sure all the seeds are coated in sugar and continue to stir until you start hearing a
popping sound, about 45 seconds, then pour the contents of the pot over the greased wire rack.
5. Put on the 3 pairs of gloves and spray nonstick cooking spray on them. Working very quickly, separate the
seeds from each other and immediately place them on the marble to cool quickly.
6. Reserve in an airtight container at room temperature. If kept in a dry environment, they will keep for
1 week.
NOTE Be careful when making this recipe in humid conditions. You need to be careful in humid conditions because the
sugar is hygroscopic and could absorb water.
Caramel Paper YIELD 620 G / 1 LB 5.86 OZ
500 g / 1 lb 1.64 oz sugar
100 g / 3.53 oz water
20 g / .71 oz lemon juice
1. Cook all of the ingredients together over high heat until they reach 176°C / 350°F.
2. Pour onto a nonstick rubber mat. Allow the mixture to cool to room temperature.
3. Grind the mixture in a robot coupe until it turns into powder.
4. Meanwhile, preheat an oven to 160°C / 325°F.
5. Spread the ground caramel on a nonstick rubber mat in an even, single layer. Bake until it fuses into a
solid sheet, about 3 minutes.
6. Let the caramel cool on the nonstick rubber mat.
7. Break into evenly sized pieces (about .25 cm / .5 in by 7.6 cm / 3 in).
8. Reserve in an airtight container at room temperature in a cool, dry place. If kept in a dry environment, the
caramel paper will last indefi nitely.

282 FROZEN DESSERTS
Caramelized Pumpkin YIELD 1 KG / 2 LB 3.27 OZ
1 kg / 2 lb 3.27 oz sugar
300 g / 10.58 oz water
30 g / 1.06 oz lemon juice
1 kg / 2 lb 3.27 oz pumpkin, skin and seeds removed, cut into 1.75-cm / .68-in wedges
1. Combine the sugar, water, and lemon juice in a medium saucepan. Cook over high heat until the sugar
has turned an amber-brown color.
2. Turn the heat down to medium low and add the pumpkin wedges.
3. Cook until the pumpkin has absorbed the sugar and is translucent.
4. Using a slotted spoon, remove the pumpkin from the sugar and place on a sheet pan lined with
parchment paper. Let cool to room temperature, then cover with plastic wrap.
5. Reserve at room temperature in an airtight container. Discard after 2 days.
Gingerbread Spice YIELD 26 G / .91 OZ
10 g / .35 oz ground cinnamon
8 g / .28 oz ground ginger
5 g / .18 oz ground cloves
3 g / .11 oz ground nutmeg
Combine all of the spices and reserve in an airtight container at room temperature.

FINISHED ITEMS 283
Vanilla Ice Cream Milk Shakes with Mini Craquelins YIELD 10 PORTIONS
COMPONENTS
10 MINI CRAQUELINS
700 g / 1 lb 8.69 oz VANILLA ICE CREAM (page 364)
200 g / 7.05 oz whole milk
5 g / .18 oz Tahitian vanilla powder
ASSEMBLY
1. Place 1 craquelin in a 160°C / 325°F convection oven until warm, about 2 minutes.
2. For the milk shake: Combine 70 g / 2.47 oz ice cream with 20 g / .71 oz whole milk and blend together. It needs to
be a powerful blender with enough horsepower (and rpm) to ensure a thorough blend.
3. Fill a 90 ml / 3 fl oz glass to the top with the milk shake. Sprinkle some vanilla powder on top of the milk shake.
4. Place the milk shake on a plate with the craquelin behind it and serve immediately.
NOTES Milk shakes in general should be served immediately after blending, because the milk is at a higher temperature
than the ice cream, and this will promote a very quick formation of large ice crystals that will compromise the
smoothness of the milk shake.
Use a long, thin spoon to serve.
Mini Craquelins YIELD 500 G / 1 LB 1.63 OZ
BRIOCHE DOUGH
398 g / 14.03 oz bread fl our
159 g / 5.61 oz eggs
10 g / .35 oz salt
59 g / 2.08 oz sugar
5 g / .18 oz instant dry yeast (Gold Label)
92 g / 3.25 oz milk
203 g / 7.16 oz butter, soft
CRAQUELINS
462 g / 16.29 oz Brioche Dough
6 g / .21 oz lemon zest
33 g / 1.16 oz sugar cubes
100 g / 3.53 oz egg wash
50 g / 1.76 oz sanding sugar

284 FROZEN DESSERTS
1. FOR THE BRIOCHE DOUGH: Combine the fl our, eggs, salt, sugar, yeast, milk, and 51 g / 1.8 oz of the butter on
low speed with a dough hook attachment for 4 minutes. Mix on high speed for 4 minutes.
2. Add the remaining butter in 4 stages, scraping down the sides of the bowl between each addition. The
dough should have full gluten development, which will be achieved during mixing. Wrap and place in the
refrigerator overnight.
3. FOR THE CRAQUELINS: Combine 289 g / 10.19 oz of the brioche dough with the lemon zest in a mixer using
a hook attachment on low speed for 10 seconds, then scale out to 30-g / 1.06-oz pieces. These will be the
middles of the craquelins.
4. Cut the sugar cubes into quarters and add 4 quarters to each middle by pushing them into the dough.
Make sure the sugar cubes are completely enclosed, with no exposed sugar on the sides, and are toward
the center of the dough. Chill the middles until fi rm.
5. Scale out the tops from the remaining 173 g / 6.1 oz brioche dough (15 g / .53 oz per top). Roll each piece
into a 6-mm- / .25-in-thick round disk. Brush egg wash lightly on the tops and middles. Place 1 middle
in the center of each top. Enclose the top around the middles, making sure there is no exposure and
everything is sealed.
6. Grease ten 57-g/2-oz aluminum cups with nonstick cooking spray. Place the craquelins into the cups,
making sure the seam side is down. Lightly fl atten the top and brush with egg wash. Proof at 29°C / 84°F
at 80 percent humidity until they reach the tops of the cups, about 45 minutes.
7. Preheat a convection oven to 182°C / 360°F with the fan on high speed.
8. Brush with egg wash again, sprinkle heavily with sanding sugar, and score the top of the dough with
scissors 6 mm / .25 in deep (only 1 cut).
9. Bake for 3 minutes. Rotate, turn the oven down to 148°C / 300°F, and reduce the fan speed to low. Bake
until golden brown or until the internal temperature reaches 88°C / 190°F to 93°C / 200°F, about 7
minutes. Rotate periodically.
10. Once they are baked, remove from the aluminum cups and let them cool at room temperature.
11. Reserve in an airtight container at room temperature. Discard any leftovers after service.

FINISHED ITEMS 285

286 FROZEN DESSERTS

FINISHED ITEMS 287
Raspberry Sorbet and Marzipan Ice Cream Terrine YIELD 10 PORTIONS
COMPONENTS
2 kg / 4 lb 6.55 oz RASPBERRY SORBET BASE (page 389)
3 kg / 6 lb 9.81 oz MARZIPAN ICE CREAM BASE (page 374)
100 g / 3.53 oz TOASTED MARCONA ALMONDS (page 120)
ASSEMBLY
1. For the terrine: Line 6 PVC tubes 25 cm / 10 in by 1.75 cm / .68 in diameter with acetate.
2. Churn the sorbet base and pour into a piping bag. Pipe into the prepared tubes and freeze to harden.
3. After the sorbet has hardened, line 2 PVC tubes 25 cm / 10 in by 7.5 cm / 3 in diameter with acetate.
4. Remove the sorbet from the PVC tubes and take the acetate off. Return to the freezer.
5. Churn the ice cream and pour into a piping bag. Pipe into the prepared PVC tubes. Insert 3 sorbet tubes into each
ice cream–fi lled tube. Keep the sorbet in a triangle pattern. Make sure the raspberry tubes don’t touch each other.
6. Place in the freezer to harden.
7. Line a sheet pan with a nonstick rubber mat and freeze.
8. Once the terrine has hardened, remove it from the PVC tube and take the acetate off. Cut 5-cm / 2-in-wide pieces
using a very hot slicing knife, dipping the knife in hot water each time and drying it with absorbent paper towels.
Place the slices on the frozen sheet pan and return to the freezer.
9. Once the terrine is cut and re-hardened in the freezer, transfer the slices to an airtight container and return to the
freezer until needed.
10. Place 10 g / .35 oz toasted almonds on each plate.
11. Place a terrine slice on the toasted almonds. Torch it for 2 to 3 seconds.
12. Let it temper for 3 to 4 minutes and serve.

288 FROZEN DESSERTS
Cajeta Ice Cream with Rice Paper YIELD 10 PORTIONS
COMPONENTS
100 g / 3.53 oz cajeta (as a sauce)
40 pieces rice paper
600 g / 1 lb 5.15 oz CAJETA ICE CREAM (page 375)
ASSEMBLY
1. Spoon 10 g / .35 oz of cajeta on the plate in a straight line.
2. Break the rice paper into random pieces, about 7.5 cm / 3 in long (reserve small pieces to anchor the ice cream).
Place 3 small pieces of rice paper on top of the cajeta, with a 1.75-cm / .5-in space between each one.
3. Scoop 3 small quenelles (20 g / .71 oz each) of the ice cream onto the rice paper pieces. Place one next to the other,
all pointing in the same direction.
4. Place a large piece of rice paper between each quenelle and at the ends (4 pieces total) and serve immediately.

FINISHED ITEMS 289
Spice Bombe with Jasmine Tea Ganache and Cocoa Croquant YIELD 10 PORTIONS
COMPONENTS
10 JASMINE TEA GANACHE SQUARES
10 SPICE BOMBE SPHERES
10 pieces COCOA CROQUANT
3 g / .11 oz JASMINE TEA POWDER
ASSEMBLY
1. Place a ganache square on the plate.
2. Place the spice bombe sphere next to the ganache.
3. Lean a piece of croquant on the sphere away from the ganache cube.
4. Sprinkle jasmine tea powder on the plate in a thin straight line.
5. Let the bombe temper for 4 to 5 minutes and serve. This will also help soften the ganache.
Jasmine Tea Ganache YIELD 1.04 KG / 2 LB 4.68 OZ
225 g / 7.94 oz milk
263 g / 9.28 oz heavy cream
3 g / .11 oz jasmine tea leaves
450 g / 15.87 oz bitter chocolate (64%), fi nely chopped
100 g / 3.53 oz butter, soft
250 g / 8.82 oz cocoa powder
1. Line a half sheet pan with a nonstick rubber mat. Place a stainless steel frame 25 cm / 10 in by
38 cm / 15 in by 3.5 cm / 1.5 in on top of the rubber mat.
2. Bring the milk and cream to a boil with the tea leaves. Let it steep for 5 minutes off the heat and strain the
mixture through a fi ne-mesh strainer.
3. Bring the infused liquid up to a rolling boil again and pour over the chocolate. Let it sit for 45 seconds. Stir
with a rubber spatula until the chocolate has melted. Try to not stir too hard or to stir air into the ganache
(to prevent bubble formation).
4. Add the butter and stir until it has melted.
5. Pour the contents into the prepared sheet pan and spread evenly. Refrigerate.
6. Once hardened, trim off the borders and cut into 3.75-cm / 1.5-in squares. Dust the top with cocoa powder,
reserve refrigerated. Discard after 5 days.

290 FROZEN DESSERTS
Spice Bombe Spheres YIELD 600 G / 1 LB 5.15 OZ
500 g / 1 lb 1.64 oz ASIAN SPICE BOMBE BASE (page 406)
200 g / 7.05 oz DARK CHOCOLATE SPRAY
1. Pipe (25 g / .88 oz) of the base into each of twenty 7.5-cm / 3-in diameter demi-sphere fl eximolds and freeze
until hardened.
2. Unmold the demi-spheres and fuse 2 to form a sphere by gently rubbing the seam where both demi-spheres
touch with your gloved hands.
3. Place in the freezer until hardened. Meanwhile, prepare a spraying area. Melt the chocolate spray to 38°C /
100°F and load the compressor.
4. Remove the spheres from the freezer and spray them immediately. Refreeze.
5. Reserve until needed in an airtight container. Discard any remaining spheres after 3 days.
Dark Chocolate Spray YIELD 500 G / 1 LB 1.63 OZ
250 g / 8.81 oz dark chocolate (64%), fi nely chopped
250 g / 8.81 oz cocoa butter, fi nely chopped
1. Heat the chocolate and cocoa butter together to 100°F / 38°C.
2. Reserve warm until needed.
Cocoa Croquant YIELD 1 KG / 2 LB 3.27 OZ
435 g / 15.34 oz sugar
435 g / 15.34 oz glucose syrup
131 g / 4.62 oz dark chocolate pâte à glacer
1. Place a nonstick rubber mat on a marble surface.
2. Cook the sugar and glucose syrup to 158°C / 316°F over high heat.
3. Remove the pan from the heat and add the pâte a glacer. Pour onto the nonstick rubber mat.
4. Put on 3 pairs of latex gloves and start pulling on the sugar when it has cooled down a little bit (if it’s too
hot, it won’t pull very well). Pull as thinly as you can into pieces 2.5 cm / 1 in by 10 cm / 4 in. It is crucial that
this sugar be as thin as possible; when it is thick it is unpleasant to eat.
5. If the sugar hardens, place the nonstick rubber mat on a sheet pan and warm it in a hot oven for a few
seconds until it is pliable. It is impossible to get identical shapes, but try to get them as uniform as possible.
6. Reserve in an airtight container with silica gel packets (to prevent the sugar from absorbing moisture) at
room temperature.

FINISHED ITEMS 291
Jasmine Tea Powder YIELD 10 G / .35 OZ
10 g / .35 oz jasmine tea
1. Grind the jasmine tea in a coffee grinder and sift through a fi ne-mesh strainer.
2. Reserve at room temperature.
Frozen Mexican Chocolate Souffl és with Warm Berliners YIELD 10 PORTIONS
COMPONENTS
1 kg / 2 lb 3.27 oz FROZEN MEXICAN CHOCOLATE SOUFFLÉ BASE (page 408)
300 g / 10.58 oz DARK CHOCOLATE SPRAY (page 290)
100 g / 3.53 oz melted dark chocolate
10 warm BERLINERS
10 CHOCOLATE GARNISHES
100 g / 3.53 oz superfi ne sugar
ASSEMBLY
1. Line 10 stainless steel tubes or PVC pipes 10 cm / 4 in by 3.75 cm / 1.5 in diameter with acetate.
2. Pipe the souffl é base into the prepared tubes. Even out the top with an offset spatula. Place in the freezer until
hardened.
3. Prepare a spraying area. Melt the chocolate spray to 38°C / 100°F and load the compressor.
4. Once hardened, remove the frozen souffl és from the tubes. Remove the acetate from each souffl é. Place them on a
sheet pan lying down and spray them immediately. Refreeze.
5. Pour the melted chocolate into a parchment paper cone (cornet).
6. Drizzle a very thin stream of chocolate on top of the frozen souffl és.
7. Reserve frozen in an airtight container until needed.
8. Heat the fryer to 185°C / 365°F.
9. Proof the Berliner pieces in a very warm place (on top of a hot oven, for example) for 7 minutes, or until doubled
in size.
10. Fry until golden brown, about 1 minute.
11. While the Berliner fries, remove a frozen souffl é from the freezer and put on a plate. Lean a chocolate garnish on
the souffl é.
12. Toss the fried Berliner in superfi ne sugar as soon as it comes out of the fryer.
13. Place the Berliner next to the frozen souffl é and serve immediately.

292 FROZEN DESSERTS
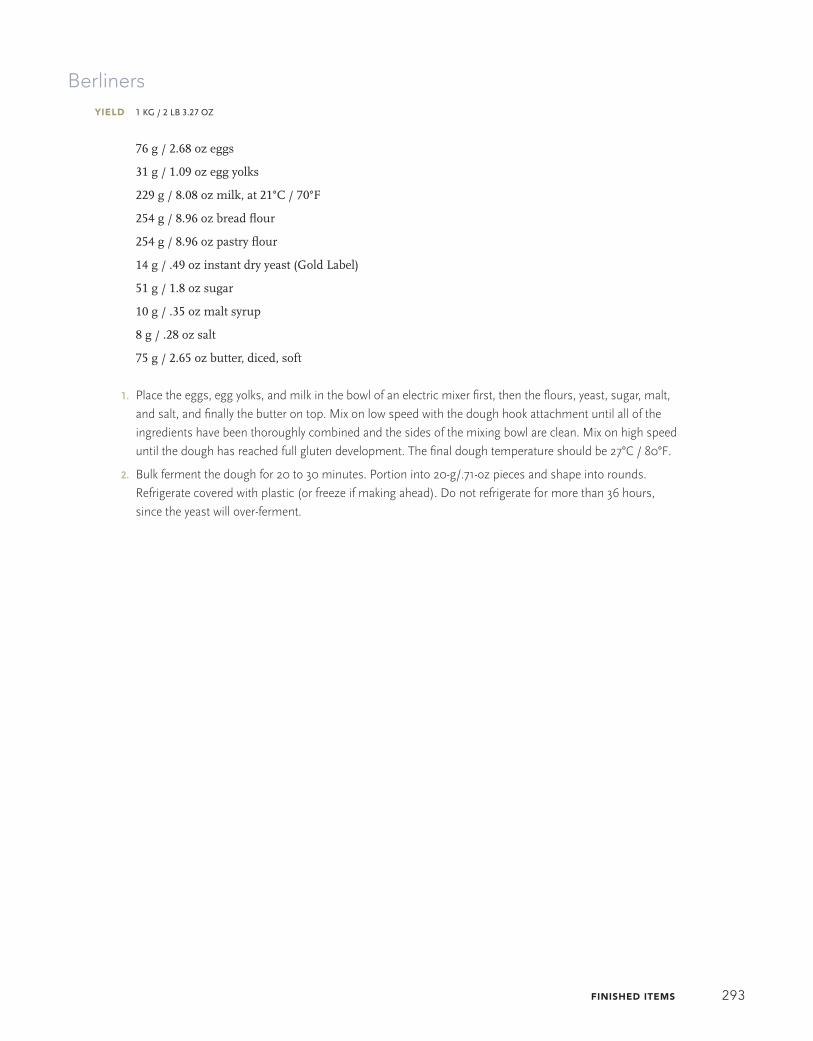
FINISHED ITEMS 293
Berliners YIELD 1 KG / 2 LB 3.27 OZ
76 g / 2.68 oz eggs
31 g / 1.09 oz egg yolks
229 g / 8.08 oz milk, at 21°C / 70°F
254 g / 8.96 oz bread fl our
254 g / 8.96 oz pastry fl our
14 g / .49 oz instant dry yeast (Gold Label)
51 g / 1.8 oz sugar
10 g / .35 oz malt syrup
8 g / .28 oz salt
75 g / 2.65 oz butter, diced, soft
1. Place the eggs, egg yolks, and milk in the bowl of an electric mixer fi rst, then the fl ours, yeast, sugar, malt,
and salt, and fi nally the butter on top. Mix on low speed with the dough hook attachment until all of the
ingredients have been thoroughly combined and the sides of the mixing bowl are clean. Mix on high speed
until the dough has reached full gluten development. The fi nal dough temperature should be 27°C / 80°F.
2. Bulk ferment the dough for 20 to 30 minutes. Portion into 20-g/.71-oz pieces and shape into rounds.
Refrigerate covered with plastic (or freeze if making ahead). Do not refrigerate for more than 36 hours,
since the yeast will over-ferment.

294 FROZEN DESSERTS
FINISHED ITEMS 295
Frozen Lemon Verbena Mousse with Orange Blossom Honey and Crème Fraîche Cake YIELD 10 PORTIONS
COMPONENTS
1 kg / 2 lb 3.27 oz LEMON VERBENA MOUSSE BASE (page 409)
10 CRÈME FRAÎCHE CAKE RECTANGLES
50 g / 1.76 oz orange blossom honey
5 g / .18 oz Madagascar vanilla powder
ASSEMBLY
1. Line 10 PVC tubes 18 cm / 7 in by 1.25 cm / .5 in diameter with acetate. Place the tubes on a sheet pan in a standing
position and freeze.
2. Transfer the mousse base to a piping bag and fi ll the PVC tubes. Freeze.
3. Once frozen, remove the mousse from the tubes. Using a sharp knife, trim the odd ends off, then cut the frozen
mousse (with the acetate still on) into 1.25-cm / .5-in pieces. There should be 13 pieces per tube. Reserve frozen in
an airtight container.
4. Place the cake on the plate.
5. Remove the acetate from the mousse cylinders. Place 13 mousse cylinders on the cake in a standing position. Offset
them so that they are at the far ends of the cake, to the left of center with one piece and then to the right with the
next piece, and so on, until all the pieces of mousse are on the cake.
6. Torch the mousse for 2 to 3 seconds in order to evaporate any frozen condensation.
7. Drizzle 5 g / .18 oz of the honey on top of the mousse in thin strands.
8. Sprinkle .5 g / .02 oz of the vanilla powder evenly on the top of the mousse.
9. Temper for 2 to 3 minutes and serve.
Crème Fraîche Cake YIELD 1 KG / 2 LB 3.27 OZ
184 g / 6.47 oz butter
160 g / 5.65 oz sugar
1.5 vanilla pods, split and scraped
5 g / .18 oz orange zest
136 g / 4.8 oz eggs, at room temperature
174 g / 6.14 oz all-purpose fl our
10 g / .35 oz baking powder
5 g / .18 oz salt
327 g / 11.52 oz crème fraîche
100 g / 3.53 oz melted bitter chocolate

296 FROZEN DESSERTS
1. Preheat a convection oven to 160°C / 325°F.
2. Line a full-size sheet pan with a nonstick rubber mat and fi t the inside of the pan with a frame .75 cm / .25
in by 53 cm / 21 in by 33 cm / 13 in.
3. Cream the butter, sugar, vanilla beans, and orange zest on medium speed using a paddle attachment for
6 minutes, or until soft and airy. Gradually add the eggs in 4 additions. Scrape the sides of the bowl after
each addition of eggs.
4. Sift the dry ingredients together and add to the bowl, mixing on low speed until just incorporated.
5. Fold in the crème fraîche. Spread onto the prepared sheet pan, evening out the batter with the top of the
frame. Remove the frame and bake until the cake springs back when touched and has a golden brown
color, 10 to 12 minutes.
6. Cool to room temperature. Freeze for 2 hours before cutting, in order get a clean cut.
7. Place the frame back over the cake and even out the top by cutting it fl ush with the frame with a serrated
knife.
8. Flip the cake over and spread the melted chocolate on it, thinly and evenly. Flip the cake back over and cut
into rectangles 2.5 cm / 1 in by 16.25 cm / 6 in.
9. Reserve frozen in an airtight container under refrigeration. This can also be held frozen for about 2
months.
NOTE When zesting any citrus, zest over the bowl in which the ingredients are being mixed so that you get not only the
zest, but also the oils from the fruit. The oils will be dispersed into the product, versus zesting on another sur-
face and losing the oils.
For the entremet on page 303, follow the recipe through Step 8 and then cut the cake into two 14.5-cm / 6-in
cakes.

FINISHED ITEMS 297
ENTREMETS
Frozen Peanut Butter Bombes YIELD 2 ENTREMETS
COMPONENTS
1.2 kg / 2 lb 10.33 oz PEANUT BUTTER ICE CREAM BASE (page 406)
800 g / 1 lb 12.22 oz MILK CHOCOLATE PARFAIT BASE (page 404)
400 g / 14.11 oz PEANUT CARAMEL
2 PEANUT DACQUOISE disks
1 kg / 2 lb 3.27 oz CARAMEL GLAZE (page 220)
200 g / 7.05 oz PEANUT BRITTLE
2 FRENCH MACARONS
ASSORTED CHOCOLATE GARNISHES
ASSEMBLY
1. Place 2 demi-sphere molds 15 cm / 6 in diameter, 2 demi-sphere molds 10 cm / 4 in diameter, and 2 demi-sphere
molds 5 cm / 2 in diameter on a sheet pan in the freezer. Place the 2 larger molds on 7.5-cm / 3-in stainless steel
rings to hold them up.
2. Churn the ice cream, extrude into a piping bag, and pipe it into the larger demi-sphere molds, fi lling them two-thirds
of the way full. Place the 10-cm / 4-in demi-sphere molds into the larger molds, pressing down into the center of the
ice cream. It will push the ice cream up. Stop pushing when both molds are at the same level. Even out the surface
with an offset spatula.
3. Place in the freezer to harden.
4. Once the ice cream has hardened, pour warm water into the middle demi-sphere. Wait a few seconds, pour the
water out, and remove the mold. Return the ice cream to the freezer.
5. Pipe the parfait into the ice cream’s hole, fi lling it two-thirds of the way. Place the 5-cm / 2-in demi-sphere molds into
the larger molds, pressing down the center of the parfait. It will push the parfait up. Stop pushing when this mold
and the largest one are at the same level. Even out the surface with an offset spatula.
6. Place in the freezer to harden.
7. Once the parfait has hardened, pour warm water into the demi-sphere. Wait a few seconds, pour the water out, and
remove the mold. Return to the freezer.
8. Pour the cooled peanut caramel into the parfait’s hole all the way to the top. Even it out with the ice cream and
parfait so they are all at the same level.
9. Place the peanut dacquoise on top and press down so it is even.
10. Freeze the entire bombe until hardened.
11. To unmold, place a 14.5-cm / 5.75-in cake board on the dacquoise. Dip the sphere in warm (not hot) water for 8 to
10 seconds. Make sure that the entire demi-sphere is submerged up to the rim, but also keep the water away from
the surface so it doesn’t wet any of the components. Remove the mold from the water, pat it dry with a paper towel,
and gently push on one side of the cake board, while holding the mold with your other hand on the opposite side of
where you are pushing, so that the mold turns as the bombe comes out (see page 106).

298 FROZEN DESSERTS
12. Place the unmolded bombe on a sheet pan. If the ice cream melted too much, it will have a wrinkled look. Smooth
the surface with a warm small offset spatula.
13. Return to the freezer for 10 minutes.
14. Bring the caramel glaze to 19°C / 66°F.
15. Glaze the bombe on top of a sheet pan lined with parchment paper fi tted with a wire rack. This may need to be
glazed twice (glaze-freeze-glaze again).
16. Garnish the cake with the peanut brittle, macarons, and chocolate decorations.
17. Temper for 10 to 15 minutes before serving.
Peanut Caramel YIELD 543 G / 1 LB 3.15 OZ
143 g / 5.05 oz sugar
43 g / 1.52 oz water
143 g / 5.05 oz heavy cream
214 g / 7.55 oz peanuts, lightly toasted and ground
1. Cook the sugar and water in a small pot over high heat until it becomes a medium-dark caramel, and
reaches 178°C / 355°F. In the meantime, bring the cream to a simmer.
2. Once the caramel has reached the desired temperature, slowly whisk in the cream. Stir in the peanuts and
continue to cook for a few more minutes.
3. Transfer to a stainless steel bowl and reserve at room temperature.
Peanut Dacquoise YIELD 500 G / 1 LB 1.64 OZ
156 g / 5.5 oz confectioners’ sugar
139 g / 4.9 oz peanut fl our (see Note)
156 g / 5.5 oz egg whites
52 g / 1.83 oz granulated sugar
120 g / 4.23 oz milk chocolate, melted
1. Preheat a convection oven to 160°C / 325°F.
2. Line a half sheet pan with a nonstick rubber mat. Spray the borders with nonstick cooking spray. Place a
25 cm / 10 in by 38 cm / 15 in by 3-mm / .13-in Plexiglas frame on the nonstick rubber mat.

FINISHED ITEMS 299
3. Sift together the confectioners’ sugar and peanut fl our. Make a French meringue with the egg whites and
granulated sugar by whipping the egg whites at high speed. Once the egg whites have quadrupled in
volume, pour the sugar in slowly down the side of the mixing bowl. Whip the meringue to medium-stiff
peaks and fold it into the dry ingredients.
4. Spread onto the prepared sheet pan. Even out the batter with the top of the frame. Carefully remove the
frame.
5. Bake until crispy and golden brown on the surface, about 6 minutes.
6. Cool to room temperature, then place in the freezer to harden.
7. Once frozen, fl ip the cake over onto a sheet of parchment paper. Cut it into two 14.5-cm / 5.75-in circles.
8. Pour a small amount (about 60 g / 2.12 oz) of melted milk chocolate on the smooth side of each cake.
Spread into a very thin and even layer.
9. Reserve covered, frozen.
NOTE To make peanut fl our, grind dry roasted, salted nuts until they are very fi ne. Sift the ground peanuts and discard
any large particles left in the sifter.
Peanut Brittle YIELD 500 G / 1 LB 1.64 OZ
132 g / 4.66 oz sugar
179 g / 6.31 oz light corn syrup
188 g / 6.63 oz roasted salted peanuts
2 g / .07 oz baking soda
1. Cook the sugar, corn syrup, and peanuts until the mixture starts to caramelize, around 325°F/160°C.
2. Add the baking soda, stirring quickly. Pour onto a nonstick rubber mat and spread out with an offset
spatula until it is about 1 cm / .4 in thick.
3. After it cools, break apart into desired pieces (about 5 cm / 2 in). Reserve in an airtight container with
silica gel packets to prevent the brittle from absorbing moisture.
NOTE Make sure to stir in the baking soda immediately after the brittle starts to caramelize, because it tends to burn
quickly.

300 FROZEN DESSERTS
French Macarons YIELD ABOUT 44 INDIVIDUAL PIECES (22 FINISHED MACARONS)
MACARONS
423 g / 14.92 oz confectioners’ sugar
232 g / 8.18 oz almond fl our
240 g / 8.47 oz egg whites
105 g / 3.7 oz granulated sugar
FILLING
200 g / 7.05 oz melted tempered dark chocolate (64%)
200 g / 7.05 oz peanut butter
1. FOR THE MACARONS: Mix the confectioners’ sugar and almond fl our together in a food processor and sift
into a large bowl. Make a French meringue with the egg whites and granulated sugar by adding about 10
percent of the sugar at the start of the mixing process and whipping the egg whites at high speed. Once
the egg whites have quadrupled in volume, pour the remaining sugar in slowly down the side of the
mixing bowl. Whip the meringue to just under stiff peaks.
2. Fold the meringue into the dry ingredients, making sure that the batter has no lumps and is smooth but
not runny. If under-mixed, the surface of the macarons will be lumpy. If overmixed, the macaron batter will
run too much after piping and will not hold a round shape.
3. Line 2 sheet pans with silicone paper or a nonstick rubber mat. Using a #5 straight tip, pipe the batter into
circles with a diameter of about 5 cm / 2 in. The batter should run slightly, just enough that the surface is
smooth.
4. Let the macarons dry for at least 30 minutes uncovered and at room temperature. This is what gives them
their characteristic look. While they dry, preheat a deck oven to 225°C / 440°F.
5. Bake in the back of the oven, where it is hottest, for about 6 minutes with the vent open. Pull to the front
of the oven for 1 to 2 minutes longer to keep a close eye on the macarons, to make sure that the structure
of the macarons sets. Make sure that the insides of the macarons are not too wet, otherwise they will
fall and lose their volume after being removed from the oven. They also may be underbaked to the point
where they do not lift off of the silicone paper.
6. Let the macarons cool completely on the sheet pan before removing and fi lling.
7. Reserve in an airtight container at room temperature.
8. FOR THE FILLING AND ASSEMBLY: Combine the chocolate and peanut butter in a bowl using a rubber spatula.
Transfer to a piping bag.
9. Place 10 macarons facing up and pipe about 5 g / .18 oz of the fi lling on them. Place another macaron on
top. Reserve in an airtight container at room temperature. If kept at room temperature, they can last for 2
days; if refrigerated, 5 days; if frozen, up to 1 month.
NOTE For Pistachio Macarons, add a couple of drops of green water-based food coloring to the egg whites in Step 1, just
before they reach maximum volume. Whip for about 15 seconds after adding the coloring. For the fi lling, mix
150 g / 5.29 oz pistachio paste, 75 g / 2.65 oz marzipan, and 50 g / 1.76 oz sugar with a paddle attachment until
combined, about 1 minute. Use the fi lling as directed in Step 9.

FINISHED ITEMS 301

302 FROZEN DESSERTS

FINISHED ITEMS 303
Grand Marnier Ice Cream, Chocolate Ice Cream, and Orange Crème Fraîche Cake YIELD 2 ENTREMETS
COMPONENTS
1.5 kg / 3 lb 4.91 oz CHOCOLATE ICE CREAM BASE (page 364)
2.5 kg / 5 lb 8.18 oz GRAND MARNIER ICE CREAM BASE (page 376)
2 squares CRÈME FRAÎCHE CAKE (page 295)
100 g / 3.53 oz tempered dark chocolate (to garnish)
500 g / 1 lb 1.64 oz WHITE COUVERTURE SPRAY (page 188)
250 g / 8.82 oz DARK CHOCOLATE SPRAY (page 290)
100 g / 3.53 oz CANDIED ORANGE ZEST (page 130)
ASSEMBLY
1. Before churning or pacotizing the chocolate ice cream base, line 1 half sheet pan with a nonstick rubber mat and a
25 cm / 10 in by 38 cm / 15 in by 2-cm / .75-in stainless steel or Plexiglas frame. Line another half sheet pan with a
nonstick rubber mat. Place both sheet pans in the freezer.
2. Line a cutting board with an acetate sheet and freeze.
3. Churn or pacotize the chocolate ice cream and pour it into the frozen pan with the frame. A 2-cm / .75-in-deep frame
will hold a little over 1.75 L / 1.8 qt of liquid, but don’t forget to take overrun into account. In this case, there should
be an overrun of 50 percent. Using an offset spatula, spread the ice cream evenly so that it fi ts exactly into the frame,
and remove any excess. Work fast to avoid any melting. Place the ice cream back in the freezer.
4. Once the ice cream has hardened, remove the Plexiglas frame by cutting around the inside border with a paring
knife (be careful not to cut through the nonstick rubber mat). Flip the ice cream onto the acetate-lined cutting board
and peel off the nonstick rubber mat. Cut two 12.5-cm / 5-in squares and transfer them to the other frozen sheet
pan lined with the nonstick rubber mat. Freeze to harden, then cover with plastic wrap.
5. Place 2 square stainless steel molds 15 cm / 6 in by 5 cm / 2 in deep in the freezer on a sheet pan lined with a
nonstick rubber mat.
6. Churn or pacotize the Grand Marnier ice cream and transfer it to a piping bag; reserve frozen until needed.
7. The entremets will be assembled upside down. Pipe the Grand Marnier ice cream into the frames set in the freezer.
Make sure to get into the corners to avoid air pockets. Fill up to 1.75 cm / .68 in high, using half of the mixture for
both frames. Use an offset spatula to even it out. Tap the sheet pan down gently to get any air pockets out. It’s okay
if some of the ice cream comes out the sides; it is a sign that there will be little, if any, air pockets.
8. Quickly place the chocolate ice cream squares on top of the Grand Marnier ice cream, making sure they are centered.
9. Pipe more Grand Marnier ice cream around the chocolate ice cream fi rst, making sure to pipe into the corners and into
the fi rst layer of Grand Marnier ice cream (also, to prevent air pockets). Fill to just under .4 cm / ¹⁄8 in from the top.
10. Place the crème fraîche cake at the center of the entremets and push down gently until the cake is fl ush with the rim
of the frame.
11. Put a sheet of parchment paper on the cakes, and 4 sheet pans on top of the cakes to weigh them down and even
them out. Freeze until hardened.
12. Place a square cake board on each of the cakes. It should be slightly smaller than the actual entremets. Make sure
the cake board is thin, so it doesn’t lift the cake up too high, which makes it look awkward.
304 FROZEN DESSERTS
13. Once hardened, fl ip the sheet pan over onto another sheet pan. Gently torch the cake molds and lift them up.
Return the entremets to the freezer.
14. Set up the couverture and chocolate spraying area.
15. Place a sheet pan lined with parchment paper and fi tted with a wire rack in the freezer.
16. Pour the tempered chocolate into a piping bag. Drizzle it on one side of the entremets.
17. Spray the entire cakes with the white couverture spray.
18. Spray dark chocolate spray on the opposite side where the chocolate was drizzled.
19. Place the candied orange zest in a thin straight line on the opposite side of the drizzled chocolate, from one side to
the other of the cake.
20. Temper for 10 to 15 minutes before serving.
FINISHED ITEMS 305
Crème Fraîche Ice Cream, Blackberry Sorbet, Pistachio Crème Brûlée, and Demerara Sugar Sponge Cake with Blackberry Glaze YIELD 2 ENTREMETS
COMPONENTS
1 DEMERARA SUGAR SPONGE CAKE
2 rectangles FROZEN PISTACHIO CRÈME BRÛLÉE
1 L /1.04 qt BLACKBERRY SORBET BASE (page 388)
1 L /1.04 qt CRÈME FRAÎCHE ICE CREAM BASE (page 355)
500 g /1 lb 1.64 oz BLACKBERRY GLAZE
6 PISTACHIO MACARONS (page 300)
10 g / .35 oz toasted Sicilian pistachios
6 BLACKBERRY RAISINS
ASSEMBLY
1. Place a Plexiglas frame of the same external dimensions as the one used for the Demerara sponge on top of that
frame. It should be .5 cm / .25 in deep.
2. Transfer the frozen crème brûlée into the frame on top of the sponge. Trim any excess from the top of the crème
brûlée with a hot slicing knife so that it is fl ush with the top of the frame. Place another Plexiglas frame on top of the
crème brûlée, of the exact dimensions throughout (width, length, and depth).
3. Place them in the freezer.
4. Churn or pacotize the blackberry sorbet and pour into the prepared frame. Even out the top so that it is fl ush with
the frame. Freeze to harden. Place another frame of the same dimensions as the ones used for the blackberry
sherbet on top. So far there should be 3 layers: sponge, brûlée, and blackberry sorbet, and there are 4 frames on the
sheet pan.
5. Churn or pacotize the crème fraîche ice cream and pour into the prepared frame. Even out the top so that it is fl ush
with the frame. Freeze to harden.
6. Once hardened, remove all of the frames from the cake by using a paring knife to cut around the inside border
(make sure not to cut through the nonstick rubber mat).
7. Place a cutting board lined with an acetate sheet in the freezer.
8. Transfer the cake carefully to the lined cutting board. Freeze.
9. Cut 2 entremets from this cake using a long thin slicing knife. Have a hot water bath on hand to dip the knife into
before each cut. Always dry the hot knife with a clean paper towel after dipping it in the water.
10. Trim one of the long borders of cake, then one of the short borders. Measure 17.5 cm / 7 in twice on the straight
long border. Score the cake where the measures are with the tip of the knife.
11. Measure 10 cm / 4 in on the straight, short border twice. Score the cake where the measures are with the tip of the
knife.
12. Using a knife, score the cake where it needs to be cut. Dip the knife and make the necessary cuts. There should be 2
rectangles 10 cm / 4 in by 17.5 cm / 7 in. Discard the trim and freeze the cutout cakes for 10 to 15 minutes.

306 FROZEN DESSERTS
13. Pour the glaze on the surface of both cakes. Only a small amount is needed, just enough to cover the surface. Be
careful not to let the glaze trickle down the sides of the cake. Use a small offset spatula to push the glaze across the
cake’s surface.
14. Garnish each cake with 3 macarons, 5 g / .18 oz of toasted Sicilian pistachios, and 3 blackberry raisins.
15. Return to the freezer or temper for 10 to 15 minutes before serving.
Demerara Sugar Sponge Cake YIELD 2 KG / 4 LB 6.55 OZ
372 g / 13.12 oz cake fl our
171 g / 6.03 oz almond fl our
28 g / 1 oz baking powder
428 g / 15.1 oz eggs
371 g / 13.09 oz Demerara sugar
285 g / 10.05 oz milk
343 g / 12.1 oz hazelnut oil
1. Preheat a convection oven to 160°C / 325°F.
2. Line a half sheet pan with a nonstick rubber mat. Place a 25 cm / 10 in by 38 cm / 15 in by 1.75-cm / .68-in
Plexiglas frame inside the sheet pan.
3. Sift the fl ours and baking powder together.
4. Whip the eggs and sugar together in the bowl of an electric mixer fi tted with a whip attachment on
medium-high speed until the mixture has quadrupled in size, about 5 minutes.
5. Slowly pour in the milk, whipping on medium speed.
6. Pour the dry ingredients into the bowl slowly while whipping on medium-low speed; make sure to scrape
the bottom and sides to prevent fl our pockets.
7. Pour in the oil in a thin stream.
8. Pour the batter into the prepared sheet pan; even out to the top of the frame and remove the frame.
9. Bake until golden brown, about 8 minutes.
10. Cool at room temperature.
11. Place the Plexiglas frame used to spread the batter on top of the baked sponge. Cut the excess from the
sides of the sponge so that the frame sits on the nonstick rubber mat, not the sponge.
12. Cut the excess from the top of the sponge using a serrated knife fl ush with the frame (this cake cuts very
well at room temperature). This is to get an even sheet of sponge.
13. Leave the sponge inside the frame to build the entremets on it. Reserve in an airtight container at room
temperature. Discard after 3 days.

FINISHED ITEMS 307
Frozen Pistachio Crème Brûlée YIELD 1 KG / 2 LB 3.27 OZ
555 g / 19.58 oz heavy cream
185 g / 6.53 oz Sicilian pistachio paste
148 g / 5.22 oz sugar
2 g / .07 oz salt
111 g / 3.92 oz egg yolks
1. Combine the cream with the pistachio paste, sugar, and salt in a saucepan. Bring to a boil while whisking
occasionally. Pass through a fi ne-mesh strainer and cool over an ice bath.
2. Once the liquid has cooled, pass the egg yolks through a fi ne-mesh strainer and combine with the
pistachio-cream mixture.
3. Preheat a convection oven to 120°C / 250°F with the fan on low speed.
4. Place a sheet of acetate on a cutting board and freeze.
5. Line a fl at half sheet pan with plastic wrap and drizzle some corn syrup on it, then cut out an acetate sheet
so that it fi ts inside the sheet pan. Press down so that the acetate adheres to the plastic wrap. Place this
sheet pan inside a large sheet pan and place them in the oven; pour the pistachio brûlée base inside the
smaller sheet pan, then pour hot water into the larger sheet pan to fi ll it three-quarters of the way. Gently
push both sheet pans into the oven.
6. Bake until the custard has a “gelatinous jiggle” when the sheet pan is gently tapped. Slide both sheet
pans out halfway. Lift the smaller sheet pan out of the larger sheet pan and let the custard set at room
temperature.
7. Once the brûlée has cooled, freeze it.
8. Once frozen, fl ip the brûlée onto a cutting board lined with acetate. Cut the borders of the brûlée so that it
fi ts inside the frame with the sponge cake. Do not assemble yet. Return to the freezer until needed.
Blackberry Glaze YIELD 700 G / 1 LB 8.69 OZ
500 g / 1 lb 1.64 oz neutral mirror glaze
200 g / 7.05 oz blackberry purée
1. Whisk together the neutral mirror glaze and blackberry purée until homogenous.
2. Reserve under refrigeration until needed. Discard after 4 days.
NOTE Be sure to taste the glaze to make sure it has enough blackberry fl avor. Add more purée if necessary.

308 FROZEN DESSERTS
Blackberry Raisins YIELD 6 TO 10 RAISINS
6 to 10 ripe blackberries
10 g / .35 oz pasteurized egg whites
100 g / 3.53 oz sugar
1. Dry the blackberries in a dehydrator or a very low oven (50°C / 122°F) until there is no moisture present,
about 12 hours.
2. Brush the blackberries lightly with the egg whites, then coat with the sugar.
3. Let them dry at room temperature for at least 2 hours before using, or until the sugar has crusted onto the
blackberry.
4. Reserve in an airtight container at room temperature. If they are kept in a dry environment, they can last
for up to 1 week.
Macadamia Nut Ice Cream, Rum Ice Cream, Coconut Ice Cream, and Coconut Dacquoise YIELD 2 ENTREMETS
COMPONENTS
1 kg / 2 lb 3.26 oz RUM ICE CREAM BASE (page 376)
1 L /1.04 qt COCONUT ICE CREAM BASE (page 365)
3 L /3.13 qt MACADAMIA NUT ICE CREAM BASE (page 364)
2 disks COCONUT DACQUOISE
16 COCONUT GIANDUJA PLAQUES
100 g / 3.53 oz melted coconut gianduja
2 PHYLLO SQUARES
2 pieces COCONUT GLASS (page 276)
10 g / .35 oz toasted macadamia nuts
10 g / .35 oz toasted desiccated coconut
ASSEMBLY
1. Place a nonstick rubber mat on a half sheet pan. Place 2 cake rings 2 cm / .75 in by 12.5 cm / 5 in diameter on the
pan. Place 2 more cake rings of the same size on another nonstick rubber mat–lined half sheet pan. Place in the
freezer.
2. Churn or pacotize the rum ice cream. Pour into a piping bag and pipe into 2 of the frozen cake rings all the way
to the top. Even out the top with a large offset spatula. Place in the freezer to harden. This cake will be assembled
upside down.
3. Repeat Step 2 with the coconut ice cream.

FINISHED ITEMS 309
4. Place a nonstick rubber mat on a sheet pan. Place 2 cake rings 10 cm / 4 in by 15 cm / 6 in diameter on the
pan. Freeze.
5. Using a blowtorch, gently remove the cake rings from the hardened ice cream disks. Reserve the disks frozen.
6. Churn or pacotize the macadamia nut ice cream. Pour into a piping bag and pipe into the frozen cake rings up to 2.5
cm / 1 in high. If necessary, pour the excess ice cream into another piping bag and freeze. Even out the surface with
an offset spatula. Put the piping bag in the freezer.
7. Place a rum ice cream disk inside each one of the cake rings, making sure they are centered. Push the disk down so
that the macadamia nut ice cream comes up the side of the disk.
8. Pipe another inch of macadamia nut ice cream and even out the surface with an offset spatula. Place a coconut
ice cream disk inside each one of the cake rings, making sure they are centered. Push the disk down so that the
macadamia nut ice cream comes up the side of the disk.
9. Pipe the remaining macadamia nut ice cream into the ring, almost all the way to the top. Discard any excess or
reserve for another use.
10. Place the dacquoise disk inside the cake ring (centered) and push down until it is fl ush with the border of the cake
ring. There will be some excess ice cream coming out the sides of the ring, which is actually a good thing because it
means that the chance of having air pockets is minimal.
11. Even out the surface of the cake one last time. Cover the cakes with plastic wrap or parchment paper and place 4 half
sheet pans on top of them (to weigh down and ensure an even shape). Freeze to harden.
12. Once hardened, place a thin cake board on the dacquoise. Flip the cake over and remove the cake rings using a
torch. Return the cakes to the freezer.
13. Garnish the entremets one at a time. Place 8 plaques of coconut gianduja symmetrically around the side of the
entremet, using some of the melted coconut gianduja to adhere the plaques to the cake. Place a phyllo square in a
standing position on the cake. Place the coconut glass next to it. Place 5 g / .18 oz of toasted macadamia nut halves
between the phyllo and the coconut glass. Place about 5 g / .18 of the toasted coconut on the cake in a thin straight
line across the top, in front of the phyllo, glass, and macadamia nuts.
14. Return to the freezer or temper for 10 to 15 minutes before serving.
NOTE Neither the phyllo, the coconut glass, nor the toasted macadamia nuts will last very long in the freezer (about 2
hours maximum) before they start losing their crunch. Garnish the entremets right before they are presented, if
possible. If this cake is in a display case, keep it there, and the cakes that are sold can be garnished before they
are served or packaged to take away.
Coconut Dacquoise YIELD 500 G / 1 LB 1.64 OZ
155 g / 5.48 oz confectioners’ sugar
139 g / 4.9 oz desiccated coconut
155 g / 5.48 oz egg whites
52 g / 1.83 oz granulated sugar
100 g / 3.53 oz white chocolate, melted
1. Preheat a convection oven to 160°C / 325°F.

310 FROZEN DESSERTS
2. Place a nonstick rubber mat on a half sheet pan. Place a 25 cm / 10 in by 38 cm / 15 in by .5-cm / .25-in
Plexiglas frame on top of the nonstick rubber mat.
3. Sift the confectioners’ sugar and the desiccated coconut with a drum sieve.
4. Make a French meringue with the egg whites and granulated sugar by adding about 10 percent of the
sugar at the start of the mixing process and whipping the egg whites at high speed. Once the egg whites
have quadrupled in volume, pour the remaining sugar in slowly down the side of the mixing bowl. Whip
the meringue to just under stiff peaks.
5. Fold the meringue into the dry ingredients.
6. Pour into the prepared frame and even out the batter using an offset spatula so that the batter is fl ush
with the frame. Remove the frame.
7. Bake until golden brown and crispy on the surface, about 6 minutes.
8. Cool to room temperature, and then freeze.
9. Flip the dacquoise over and spread it with a thin, even layer of white chocolate. Let it set.
10. Place the frame used earlier evenly on top of the cake. Trim the borders of the cake so that the cake is
inside the frame, not under it. Trim the top of the cake using a serrated knife so that it is fl ush with the
frame.
11. Cut the cake into two 14.5-cm / 5.75-in rings. Reserve frozen until needed.
Coconut Gianduja Plaques YIELD 250 G / 8.82 OZ
250 g / 8.82 oz coconut gianduja, melted
1. Pour the melted coconut gianduja on an acetate sheet set on a marble surface. Spread as thinly as possible.
2. When it begins to set, cut into 5-cm / 2-in squares (plaques).
3. Flip the acetate sheet on top of a parchment paper–lined sheet pan so that the gianduja is facing the
parchment paper.
4. Stack 5 sheet pans or a heavy cutting board on top of the acetate to prevent the gianduja from bowing
when it sets.
5. Reserve under refrigeration until needed. It can keep for up to 3 months or more in refrigeration.

FINISHED ITEMS 311
Phyllo Squares YIELD ABOUT 15 SQUARES
3 phyllo dough sheets (25 cm / 10 in by 38 cm / 15 in)
200 g / 7.05 oz clarifi ed butter, melted but cool
200 g / 7.05 oz sugar
1. Preheat a convection oven to 160°C / 325°F.
2. Place 1 sheet of phyllo dough on a cutting board. Brush with some of the butter and sprinkle with some of
the sugar. Cover with another layer of phyllo dough and repeat until there is a total of 3 layers. Cut into
7.5-cm / 3-in squares.
3. Line a half sheet pan with a nonstick rubber mat. Place the phyllo squares on the mat and bake until
golden brown, about 7 minutes.
4. Once cooled, reserve in an airtight container at room temperature. Discard after 2 days.
312 FROZEN DESSERTS
Gianduja Gelato, Frozen Tangerine Souffl é, and Hazelnut Financier Cake YIELD 2 ENTREMETS
COMPONENTS
1.5 kg / 3 lb 4.9 oz FROZEN TANGERINE SOUFFLÉ BASE (page 407)
3 kg / 6 lb 9.8 oz GIANDUJA GELATO BASE (page 368)
2 disks HAZELNUT FINANCIER
500 g / 1 lb 1.64 oz GIANDUJA SPRAY
100 g / 3.53 oz DARK CHOCOLATE GLAZE (page 200)
2 GIANDUJA RINGS
ASSORTED CHOCOLATE GARNISHES
ASSEMBLY
1. Line 2 PVC tubes or stainless steel rings 11.25 cm / 4.5 in by 5 cm / 2 in diameter with acetate. Place them on a
sheet pan and freeze.
2. Pipe the souffl é base into the prepared PVC tubes. Even out the top with an offset spatula. Place in the freezer to harden.
3. Line 2 PVC tubes or stainless steel rings 15 cm / 6 in by 10 cm / 4 in diameter with acetate. Place them on a sheet
pan lined with a nonstick rubber mat. Place an inverted 3.75-cm / 1.5-in stainless steel demi-sphere mold at the left-
center of the base of each PVC tube.
4. Take the tangerine souffl é out of the PVC tube.
5. Churn or pacotize the gianduja gelato. Pour into 2 piping bags. Freeze 1 piping bag.
6. Fill the PVC tubes with the gelato up to 3 cm / 1.2 in. Take the acetate off of the frozen tangerine souffl é and place
inside the larger PVC tube. Push it down so that the souffl é touches the demi-sphere mold and the gelato comes up
the sides of the souffl é 1.75 cm / .5 in. Pipe the gelato around the souffl é (make sure to pipe into the gelato and not
on top of it, to prevent air pockets) almost all the way to the top (leave 3 mm / .13 in). The gelato will surround the
souffl é completely.
7. Place the fi nancier disk at the center of the ring and push down so that it is level with the border of the ring. Even out
with an offset spatula.
8. Put plastic wrap or a sheet of parchment paper on top of the PVC tubes. Stack 5 half sheet pans on top of the tubes
(to ensure an even shape) and freeze to harden.
9. Place a parchment paper–lined sheet pan fi tted with a wire rack in the freezer.
10. Flip the tubes onto a thin cake board and take the PVC tubes off. Transfer to the frozen wire rack in the sheet pan.
Pour a small amount of warm water into the demi-spheres. Gently slide them off in a circular motion. Freeze.
11. Set up the spray area.
12. Spray the entremets in an even coat with the gianduja spray.
13. Return to the freezer.
14. Bring the chocolate glaze to 37°C / 100°F. Pour it into the space left by the demi-sphere mold. Make sure it domes
above the surface of the entremets.
15. Place the gianduja ring in the glaze (one-third of it will be submerged) in a standing position.

FINISHED ITEMS 313
16. Place the other chocolate garnishes on the cake.
17. Reserve frozen and let it temper for 10 to 15 minutes before serving.
Hazelnut Financier YIELD 500 G / 1 LB 1.64 OZ
61 g / 2.15 oz blanched hazelnut fl our
61 g / 2.15 oz all-purpose fl our
144 g / 5.08 oz confectioners’ sugar
132 g / 4.66 oz egg whites
103 g / 3.63 oz brown butter, cooled to room temperature
100 g / 3.53 oz melted gianduja
1. Line a half sheet pan with a nonstick rubber mat. Place a 25 cm / 10 in by 38 cm / 15 in by 5 cm / .25 in
Plexiglas frame inside the sheet pan.
2. Preheat a convection oven to 160°C / 325°F.
3. Combine the fl ours and confectioners’ sugar in the bowl of an electric mixer using the paddle. Add the egg
whites in 4 additions, scraping the bowl in between each addition. Mix until combined. Scrape down the
sides of the bowl. Slowly add the melted butter until incorporated.
4. Pour the batter into the prepared frame and even out with the frame using an offset spatula. Take the
frame off and wash.
5. Bake until fi rm to the touch at the center of the fi nancier, about 6 minutes.
6. Take out of the oven and cool to room temperature.
7. Once it has cooled, place the clean frame on top of the fi nancier and trim the borders so that the fi nancier is
inside the frame, not under it. Using a serrated knife, trim the crown of the fi nancier so it is even with the frame.
8. Take the frame off and freeze for 1 hour. Flip the fi nancier over onto a sheet of parchment paper and
spread about 100 g / 3.53 oz of melted gianduja on it. Spread in a thin, even layer, then cut into two 8.75-
cm / 3.5-in disks.
9. Reserve frozen until needed. If properly wrapped, it can last for up to 1 month.

314 FROZEN DESSERTS

FINISHED ITEMS 315
Gianduja Spray YIELD 500 G / 1 LB 1.64 OZ
300 g / 10.58 gianduja, fi nely chopped
200 g / 7.05 oz cocoa butter
1. Bring the gianduja and cocoa butter to 38°C / 100°F.
2. Pass through a fi ne-mesh strainer and reserve at the above temperature.
Gianduja Rings YIELD 20 G / .71 OZ
20 g / .71 oz gianduja, tempered
1. Spread the melted gianduja onto 2 acetate strips .5 cm / .25 in by 12.5 cm / 5 in.
2. Let it set halfway, then wrap the strips around a 5-cm / 2-in diameter PVC tube. Let them set on the tube.
3. Once set, take the acetate off.
4. Reserve at room temperature in an airtight container. If these garnishes are left in a cool, dry environment,
they will last for over 1 year, but that doesn’t necessarily mean they should be made a year ahead or made
in a quantity that will last you a year.

316 FROZEN DESSERTS

FINISHED ITEMS 317
Sicilian Pistachio Gelato, Cherry Sorbet, Vanilla Semifreddo, and Pistachio Génoise YIELD 2 ENTREMETS
COMPONENTS
300 g / 10.58 oz CHERRY SORBET BASE (page 388)
300 g / 10.58 oz VANILLA SEMIFREDDO BASE (page 405)
2.5 kg / 5 lb 8.18 oz SICILIAN PISTACHIO GELATO BASE (page 368)
2 squares PISTACHIO GÉNOISE
500 g / 1 lb 1.64 oz WHITE COUVERTURE SPRAY (page 188), warmed to 43° C / 110° F
10 g / .35 oz CHERRY GLAZE
10 g / .35 oz PISTACHIO DUST (page 227)
2 SQUARE CHOCOLATE PLAQUES
ASSEMBLY
1. Place two 3.75-cm / 1.5-in stainless steel cubes on a sheet pan lined with a nonstick rubber mat in the freezer.
2. Churn or pacotize the cherry sorbet base and pour into a piping bag.
3. Pipe into the cubes, making sure to get in the corners. Pipe into the sorbet, not on top of it, to prevent air pocket
formation.
4. Even out the top with an offset spatula and freeze to harden.
5. Once hardened, use a torch to gently remove the stainless steel cubes from the sorbet. Return to the freezer. Once
hardened throughout, cover with plastic wrap.
6. Repeat steps 1 through 5 with the vanilla semifreddo base.
7. Place two 10-cm / 4-in stainless steel cubes on a sheet pan lined with parchment paper in a freezer. These entremets
will be assembled upside down.
8. Churn or pacotize the pistachio gelato. Pour into 2 piping bags and reserve frozen.
9. Pipe 2.5 cm / 1 in of pistachio gelato into the cubes. Make sure to get into the corners and pipe with the piping bag
tip into the gelato, and not on it, to avoid air pockets. Even out the tops with an offset spatula. Place the piping bag
in a freezer.
10. Place the cherry sorbet cube in the gelato cube. Make sure it is centered. Push it down on the gelato about
.5 cm / .25 in.
11. Pipe gelato around the cherry sorbet cube and on top of it, about .5 cm / .25 in so that the sorbet is completely
enclosed by the gelato.
12. Place the vanilla semifreddo cube on the gelato. Make sure it is centered and push it in slightly. Pipe gelato to the
top of the cube. Always keep in mind to pipe into the gelato and not on top of it.
13. Place the génoise square on the gelato. Make sure it is centered. Push it down so that it is level with the top of the
cube. Repeat with the remaining gelato, frozen cubes, and génoise.
14. Put plastic wrap or a sheet of parchment paper on top of the cubes.
15. Stack 5 sheet pans on the cubes to weigh them down and ensure an even shape. Freeze to harden.
16. Place a sheet pan lined with parchment paper and fi tted with a wire rack in the freezer.
17. Place a thin square cake board on the génoise. Flip the cubes over.

318 FROZEN DESSERTS
18. Torch the cubes for a few seconds and carefully remove them from the frames.
19. Transfer the cubes to the frozen wire rack and freeze again.
20. Set up the spraying area and spray gun.
21. Spray the cakes evenly with the white couverture spray.
22. Place a 6.25 cm / 2.5 in ring on the bottom left corner of the top of the cake. Pour in the cherry glaze. Take the
ring off.
23. Sprinkle pistachio dust in a straight line across the center of the glaze.
24. Place a square chocolate plaque on the top right corner of each cake.
25. Reserve refrigerated or let it temper for 10 to 15 minutes before serving.
NOTES Garnish this entremet at the last minute, since the compote garnish won’t be very palatable if it is frozen hard, the
pistachio dust will absorb moisture from the freezer, and the glaze will turn dull.
It is okay to have one fi nished as a display, but for those that will be served or packaged, they should be
garnished right before serving.
Pistachio Génoise YIELD 500 G / 1 LB 1.64 OZ
83 g / 2.93 oz almond paste
21 g / .74 oz pistachio paste
94 g / 3.31 oz confectioners’ sugar
63 g / 2.2 oz egg yolks
31 g / 1.09 oz eggs
104 g / 3.67 oz egg whites
10 g / .35 oz granulated sugar
73 g / 2.57 oz all-purpose fl our
21 g / .74 oz clarifi ed butter, melted but cool
100 g / 3.53 oz white chocolate, melted
1. Line a half sheet pan with a nonstick rubber mat. Place a 25 cm / 10 in by 38 cm / 15 in by .5-cm / .25-in
Plexiglas frame on top of the mat.
2. Preheat a convection oven to 160°C / 325°F.
3. Combine the nut pastes and confectioners’ sugar in the bowl of an electric mixer using a paddle
attachment. Gradually add the egg yolks and eggs in 4 additions, scraping the bowl between additions.
4. Make a French meringue with the egg whites and granulated sugar by adding about 10 percent of the
sugar at the start of the mixing process and whipping the egg whites at high speed. Once the egg whites
have quadrupled in volume, pour the remaining sugar in slowly down the side of the mixing bowl. Whip
the meringue to medium-stiff peaks. Fold into the nut paste mixture in 2 additions. Fold in the fl our.
5. Pour in the clarifi ed butter in a stream as the mixer runs on low speed.

FINISHED ITEMS 319
6. Spread into the prepared sheet pan and bake until the cake springs back to the touch, about 7 minutes.
Cool to room temperature.
7. Place the previously used frame on the cooled sponge. Trim its borders so the sponge is inside the frame,
not underneath it.
8. Freeze the sponge to harden.
9. Once it has hardened, fl ip the cake over and peel off the nonstick rubber mat.
10. Spread an even, thin layer of melted chocolate on the sponge with an offset spatula.
11. Flip the cake back over. Cut out 9-cm / 3.5-in squares. Reserve frozen and covered in an airtight container.
NOTE When combining something very dense like nut paste and something very light such as meringue, stir a small por-
tion of the meringue into the nut paste mixture, but do not worry about defl ating the meringue. The purpose is
to try to lighten up the nut paste mixture. If the meringue is added all at once, it will be defl ated even more than
if a small amount is added at the beginning.
Cherry Glaze YIELD 240 G / 8.46 OZ
200 g / 7.05 oz neutral mirror glaze
40 g / 1.41 oz cherry purée
Whisk together the neutral mirror glaze and the cherry purée until a homogenous mass is achieved.
NOTE Be sure to taste the glaze to make sure it has enough cherry fl avor. Add more purée if necessary.

320 FROZEN DESSERTS

FINISHED ITEMS 321
Caramel and Banana Ice Cream Entremet YIELD 2 ENTREMETS
COMPONENTS
3 kg / 6 lb 9.82 oz CARAMEL ICE CREAM (see Note)
1 kg /2 lb 3.27 oz BANANA ICE CREAM (see Note)
2 BANANA BREAD RECTANGLES
200 g / 7.05 l oz elderfl ower syrup
500 g / 1 lb 1 .64 oz WHITE COUVERTURE SPRAY (page 188), warmed to 43° C / 110° F
100 g / 3.53 oz melted dark chocolate
ASSEMBLY
1. Line two 30 cm / 12 in by 2.5-cm / 1-in diameter PVC tubes with acetate. Place the tubes on a sheet pan in the freezer.
2. Churn or pacotize the banana ice cream, pour into a piping bag and pipe into the prepared tubes. Smooth out the
top of the tubes with an offset spatula. Place in the freezer to harden.
3. Once hardened, remove the frozen banana ice cream from the tubes and reserve frozen with the acetate on.
4. Line two 30 cm / 12 in by 6.25 cm / 2.5 in diameter PVC tubes with acetate. Place the tubes on a sheet pan lined
with a nonstick rubber mat in a standing position in the freezer.
5. Churn or pacotize the caramel ice cream, pour into a piping bag and pipe into the prepared tubes three-quarters up.
Take the acetate off the hardened banana ice cream inserts and insert into the soft caramel ice cream. Make sure
that the insert is centered. Smooth out the top of the PVC tube with an offset spatula. Freeze to harden in a standing
position and reserve until needed.
6. Place the banana bread rectangles on a 30 cm / 12 in long by 5-cm- / 2-in-wide Plexiglas.
7. Soak each cake with 100 g / 3.53 oz elderfl ower syrup.
8. Reserve refrigerated until needed.
8. Place a half sheet pan lined with parchment paper in a freezer.
9. Cut the frozen caramel ice cream and banana tube in four 2-in-wide pieces. Cut one 4-in-piece. Cut the 4-in-piece on
the diagonal. Cut one of the 2-in pieces in half. Leave the acetate on the ice cream while cutting it. Re-freeze the cut
pieces with the acetate still on.
10. Prepare a spraying area and bring the white chocolate spray to 37°C / 100°F.
11. Fill a compressor with the melted white chocolate spray.
12. Take the acetate off the cut pieces of ice cream and spray to coat completely.
13. Return to the freezer for 10 minutes.
14. Place the sprayed pieces of ice cream on the banana bread in a line. Return to the freezer.
11. Fill a cornet with melted dark chocolate. Pipe the desired design on the cake.
12. Reserve frozen in an airtight container until needed.
13. Temper 10 to 15 minutes before serving.
NOTES For the caramel ice cream: Make the caramel ice cream following the instructions for the Burnt Sugar Ice Cream
(page 355), but cook the sugar to 160°C / 320°F.
For the banana ice cream: Make the banana ice cream following the instructions for the Caramelized Ice Cream
(page 352), but use raw bananas instead of caramelized bananas.

322 FROZEN DESSERTS
Banana Bread Rectangles YIELD 1.05 KG / 2 LB 5.04 OZ
255 g / 9 oz sugar
68 g / 2.4 oz eggs
79 g / 2.8 oz vegetable oil
386 g / 13.6 oz banana purée
255 g / 9 oz pastry fl our
4 g / .15 oz baking soda
.5 g / .02 oz baking powder
1 g / .04 oz salt
1. Grease a 33 cm / 13 in x 7.5 cm / 3 in stainless steel rectangle mold. Place on a half sheet pan lined with a
nonstick rubber mat.
2. Preheat a convection oven to 160°C / 325°F.
3. Mix sugar, eggs, and oil until homogenous, about two minutes. Mix in the puréed bananas.
4. Sift all of the dry ingredients. Add to the liquid mixture and mix until a homogenous mass is obtained.
5. Pour into the prepared mold.
6. Bake until the sponge is dry at the center of the loaf and it springs back when gentle pressure is applied,
about 7 minutes.
7. Cool to room temperature in the mold.
8. Cut into a 30 cm / 12 in by 5 cm / 2 in by 1.75-cm / .68-in cake. Reserve refrigerated until needed. Freeze if
not using the day it was made.

FINISHED ITEMS 323
SAVORY DESSERTS
Extra-Virgin Olive Oil Sorbet with Black Olive Powder, Red Onion Marmalade, and Tomato Jelly YIELD 10 PORTIONS
COMPONENTS
100 g / 3.53 oz TOMATO JELLY
20 g / .71 oz RED ONION MARMALADE
5 g / .18 g BLACK OLIVE POWDER
30 g / 1.06 oz Coach Farms goat’s milk cheese
2 g / .07 oz freshly cracked pepper
5 g / .18 oz extra-virgin olive oil
200 g / 7.05 g EXTRA-VIRGIN OLIVE OIL SORBET (page 395)
ASSEMBLY
1. Slice the tomato jelly into 2-mm- / .08-in-thick pieces. This should always be done to order; if it is done too far ahead
the jelly will dry out. Place a rectangle of tomato jelly on the plate.
2. Place about 2 g / .07 oz of marmalade next to the tomato jelly in a tall and tight mound.
3. Sprinkle a pinch of black olive powder on the opposite side of the onion marmalade, directly on top of the tomato jelly.
4. Pry a small piece (about 3 g / .11 oz) off of the goat cheese; this will give it a crumbled look. Place next to the black
olive powder, leaning on the tomato jelly.
5. Sprinkle a pinch of pepper on top of the goat cheese.
6. Using an eyedropper, pour a few drops of olive oil on the plate.
7. Scoop a small quenelle (20 g / .71 oz) of the sorbet on top of the tomato jelly and serve immediately.
Tomato Jelly YIELD 500 G / 1 LB 1.64 OZ
TOMATO WATER
5 kg / 11 lb .37 oz beefsteak tomatoes
50 g / 1.76 oz salt
JELLY
491 g / 1 lb 1.31 oz Tomato Water
1.9 g / .07 oz agar-agar
7 g / .25 oz salt, or as needed

324 FROZEN DESSERTS
1. FOR THE TOMATO WATER: Blend the ripe beefsteak tomatoes with the salt until puréed, about 2 minutes. Place
the puréed tomatoes in a large fi ne-mesh strainer set over a stainless steel bowl or bain marie and let
gravity extract the water from the tomatoes overnight.
2. Place a 12.5 cm / 5 in square by 1.75 cm / .5 in mold on an acetate sheet on a fl at surface such as a sheet
pan or a sheet of Plexiglas.
3. FOR THE TOMATO JELLY: Over medium heat, boil 99 g / 3.49 oz of the tomato water with the agar-agar and
salt. Combine with rest of the liquid off the heat. Pour into the prepared mold. It may seep, so it is a good
idea to seal the mold by piping melted chocolate around it and letting it set before pouring in the jelly. Let
the jelly set in the refrigerator.
4. Take the chocolate off the tomato jelly mold with a paring knife. Wipe the surrounding surface clean of any
chocolate so none of it combines with the jelly.
5. Reserve chilled and covered in plastic wrap. Discard after 2 days.
Red Onion Marmalade YIELD 705 G / 1 LB 8.70 OZ
488 g / 1 lb 1.21 oz red onions, thinly sliced
175 g / 6.17 oz sugar
38 g / 1.34 oz white wine vinegar
3 g / .11 oz salt, or as needed
1 g / .035 ground cubeb pepper, or as needed
1. In a sauté pan, combine all of the ingredients and cook over low heat until caramelized, stirring
occasionally, about fi fteen minutes.
2. Reserve under refrigeration until needed. Discard after 1 week.
Black Olive Powder YIELD 50 G / 1.76 OZ
200 g / 7.05 oz Gaeta olives, pitted
Place the olives in a dehydrator set to 57°C / 135°F until dry. Grind in a spice grinder. Store in an airtight
container at room temperature.
NOTE Use any variety of black olives, if desired.

FINISHED ITEMS 325

326 FROZEN DESSERTS

FINISHED ITEMS 327
White Chocolate Ice Cream Cones with Osetra Caviar YIELD 10 PORTIONS
COMPONENTS
10 PLAIN CONES (page 158)
200 g / 7.05 oz WHITE CHOCOLATE ICE CREAM (page 365)
50 g / 1.76 oz Osetra caviar
ASSEMBLY
1. Place a cone in a stand.
2. Place a small scoop of ice cream, or pipe the ice cream (20 g / .71 g), in the cone.
3. Place a 5-g / .18-oz rounded spoonful of caviar on top of the ice cream and serve immediately.
NOTE This fl avor combination was inspired by Heston Blumenthal of the Fat Duck restaurant, near London.

328 FROZEN DESSERTS

FINISHED ITEMS 329
Quince Sorbet with Manchego Crisps and Serrano Ham Jerky YIELD 10 PORTIONS
COMPONENTS
500 g / 1 lb 1.64 oz QUINCE SORBET BASE (page 379)
10 MANCHEGO CRISPS
10 FRIED SAGE LEAVES
10 pieces SERRANO HAM JERKY
ASSEMBLY
1. Line 5 PVC tubes 7.5 cm / 3 in by 5 cm / 2 in diameter with acetate. Place them on a sheet pan and reserve frozen.
2. Churn or pacotize the sorbet; transfer to a piping bag and pipe into the prepared PVC tubes. Even out the top of the
tubes with an offset spatula. Place in the freezer to harden.
3. Once hardened, remove the sorbet from the tubes and cut them diagonally to obtain 2 equal-sized pieces. Do not
take the acetate off.
4. Reserve frozen in an airtight container until needed.
5. Place a manchego crisp on the plate.
6. Take the acetate off one of the quince sorbets and place on top of the manchego crisp.
7. Lean a fried sage leaf on the sorbet and serve immediately.
8. Lean a piece of jerky on the sorbet.
Manchego Crisps YIELD 175 G / 6.17 OZ
200 g / 7.05 oz manchego
1. Preheat a convection oven to 160°C / 325°F.
2. Line a sheet pan with a nonstick rubber mat. Thinly slice the cheese and cut into 5-cm / 2-in squares.
3. Place on sheet pan and bake until golden brown, about 8 minutes. Cool to room temperature.
4. Reserve in an airtight container at room temperature. Discard after 2 days (refresh in a hot oven on the
second day).

330 FROZEN DESSERTS
Fried Sage Leaves YIELD 10 LEAVES
200 g / 7.05 oz canola oil
10 sage leaves
1 g / .04 oz salt
1. Preheat the canola oil to 190°C / 375°F.
2. Fry the leaves until crisp, about 5 seconds.
3. Transfer to a sheet pan lined with a paper towel.
4. Season with salt.
5. Reserve in an airtight container at room temperature. Discard leftovers after service.
Serrano Ham Jerky YIELD 375 G / 13.23 OZ
500 g / 1 lb 1.64 oz Serrano ham
1. Thinly slice the ham on a meat slicer.
2. Place in a dehydrator at 135°F/57°C until dry, about 5 hours.
3. Reserve in an airtight container at room temperature. Discard after 4 days.

FINISHED ITEMS 331
Piquillo Pepper Sorbet with Parsley Oil and Saffron Cream YIELD 10 PORTIONS
COMPONENTS
10 BAGUETTE DISKS
200 g / 7.05 oz SAFFRON CREAM
75 g / 2.65 oz PARSLEY OIL
300 g / 10.58 oz PIQUILLO PEPPER SORBET (page 383)
10 saffron strands
10 Bull’s Blood leaves
ASSEMBLY
1. Place a baguette disk in a bowl or plate.
2. Spoon 20 g / .71 oz of saffron cream at the center of the bowl.
3. Spoon a few drops of parsley oil on the saffron cream.
4. Scoop a medium quenelle (30 g / 1.06 oz) of the sorbet on top of the baguette disk.
5. Place a strand of saffron on the saffron cream. Lean a Bull’s Blood leaf on the sorbet and serve immediately.
NOTE Bull’s Blood is a variety of micro-green herb. Other micro greens can be substituted.
Baguette Disks YIELD 20 G / .71 OZ
100 g / 3.53 oz baguette
1. Trim the crust off the baguette. Cut into 2-mm- / .08-in-thick slices.
2. Cut disks out of the slices using a 2.5-cm / 1-in ring cutter,.
3. Reserve in an airtight container at room temperature. Discard after 3 days (check daily and refresh in a hot
oven).
NOTE The baguette is used to anchor the sorbet; any other bread will do, as long as it is fresh.

332 FROZEN DESSERTS
Saffron Cream YIELD 250 G / 8.82 OZ
250 g / 8.82 oz heavy cream
.5 g / .02 oz saffron
3 g / .1 oz salt, or as needed
1. Bring the cream to a boil with the saffron. Season with salt to taste.
2. Steep covered for 30 minutes, stirring occasionally. Adjust the seasoning if necessary.
3. Chill over an ice bath and refrigerate until the cream is cold. Reserve under refrigeration. Discard after
2 days.
Parsley Oil YIELD 350 G / 12.35 OZ
300 g / 10.58 oz parsley (leaves only)
75 g / 2.65 oz extra-virgin olive oil, or as needed
1. Bring a large pot of water to a rolling boil. Add 100 g / 3.53 oz of salt for every liter of water.
2. Blanch the parsley leaves for 10 seconds, stirring them gently so that they get evenly blanched; they will all
look wilted once they are blanched.
3. Shock the leaves in an ice bath, stirring so that they chill quickly.
4. Strain the leaves out of the ice bath. Squeeze the excess water off with your hands and pat dry with paper
towels.
5. Place half of the leaves in a blender with the oil. The oil should cover the leaves. Add more oil if necessary.
6. Blend on medium speed for about 1 minute, or until smooth, then add the remaining parsley and blend
for 1 more minute. If the parsley is not blending properly, add a little more oil.
7. Once a smooth purée has been obtained, remove from the blender cup and let the purée sit in a fi ne-
mesh strainer lined with cheesecloth for 2 hours. Refrigerate the resulting oil. Discard after 2 days.

FINISHED ITEMS 333

334 FROZEN DESSERTS

FINISHED ITEMS 335
Green Zebra Tomato Sorbet with Fromage Blanc, Argan Oil, Garlic Chip, Cracked Tellicherry Pepper, Gray Sea Salt, and Basil YIELD 10 PORTIONS
COMPONENTS
100 g / 3.53 oz fromage blanc
10 g / .35 oz argan oil
3 g / .11 g Tellicherry peppercorns
3 g / .11 g gray sea salt
300 g / 10.58 oz GREEN ZEBRA TOMATO SORBET (page 382)
10 GARLIC CHIPS
2 basil leaves, cut into a fi ne chiffonade
ASSEMBLY
1. Scoop a small dollop of fromage blanc (about 10 g / .35 oz) into a bowl.
2. Drizzle 1 g / .04 oz of argan oil on top of the fromage blanc and drizzle a few drops on the bowl.
3. Crack the pepper directly on top of the cheese (turn the pepper mill twice).
4. Sprinkle a pinch (3 to 5 grains) of sea salt on top of the cheese.
5. Scoop a medium quenelle (30 g / 1.06 oz) of the sorbet next to the cheese. Place a garlic chip on top of the sorbet.
6. Place 3 strands of basil chiffonade on top of the garlic chip and serve immediately.
Garlic Chips YIELD 65 G / 2.3 OZ
100 g / 3.53 oz garlic cloves, peeled and very thinly sliced
4 g / .14 oz olive oil
2 g / .07 oz salt
1. Preheat a convection oven to 93°C / 200°F.
2. Line a sheet pan with a nonstick rubber mat.
3. Brush the garlic slices with olive oil and sprinkle salt on top.
4. Place another nonstick rubber mat on top. Bake in the oven until dry, about 20 minutes.
5. Reserve in an airtight container at room temperature.
NOTE These chips can also be made in a dehydrator set to 57°C / 135°F.

336 FROZEN DESSERTS
Cucumber and Wasabi Sorbet with Smoked Salmon, Crème Fraîche, Chives, and Salmon Roe YIELD 10 PORTIONS
COMPONENTS
300 g / 10.58 oz CUCUMBER AND WASABI SORBET BASE (page 384)
100 g / 3.53 oz thinly sliced smoked salmon
75 g / 2.65 oz crème fraîche
5 g / .18 oz salmon roe (or 4 eggs per serving)
2 chives cut into 2.5-cm- / 1-in-long pieces
ASSEMBLY
1. Place a fl eximold mat of 2.5 cm / 1 in by 3.75 cm / 1.5 in by .75-cm / .25-in rectangles on a sheet pan in the freezer.
These mats typically have 15 rectangles in them.
2. Churn or pacotize the sorbet; transfer it to a piping bag and pipe into the frozen fl eximold. Even out the surface with
an offset spatula. Place in the freezer to harden.
3. Once hardened, take the sorbet rectangles off the mat. Reserve frozen in an airtight container until needed.
4. Place a thin slice of smoked salmon on a plate, making sure it is fl at.
5. Place a rectangle of sorbet on top of the salmon, and fold one end on top of the sorbet.
6. Spoon about 2 g / .07 oz of crème fraîche toward the bottom of the sliced salmon.
7. Spoon 4 salmon eggs on top of the sorbet.
8. Place 3 pieces of chives on top of the roe and serve immediately.
NOTE Since this sorbet contains very little sugar, it tends to melt fast. Work quickly when plating and serving.

FINISHED ITEMS 337

338 FROZEN DESSERTS

FINISHED ITEMS 339
Red Beet Sorbet with Parsley Purée and Extra-Virgin Olive Oil YIELD 10 PORTIONS
COMPONENTS
300 g /10.58 oz RED BEET SORBET BASE (page 383)
150 g / 5.29 oz PARSLEY PURÉE
40 g / 1.41 oz extra-virgin olive oil
ASSEMBLY
1. Churn or pacotize the sorbet base. Transfer to a piping bag and portion into a 3.75-cm / 1.5-in diameter demi-sphere
fl eximold mat. The mat should contain at least 20 demi-spheres.Place in the freezer to harden.
2. Once hardened, fuse 2 sorbet demi-spheres together by rubbing the ends where they touch with your gloved fi ngers.
3. Return to the freezer. Once hardened, transfer to an airtight container and reserve frozen.
4. Spoon 15 g / .53 oz of parsley purée into a small bowl.
5. Place a sorbet sphere directly on top of the parsley purée.
6. Using an eyedropper, pour a few drops of olive oil around the parsley purée and serve immediately.
Parsley Purée YIELD 200 G / 7.05 OZ
240 g / 8.47 oz parsley leaves
60 g / 2.17 oz extra-virgin olive oil
1 g / .04 oz xanthan gum
1. Bring a large pot with water to a rolling boil. Add 100 g / 3.53 oz of salt for every liter of water.
2. Blanch the parsley leaves for 10 seconds, stirring them gently so that they all get evenly blanched; the
leaves will appear wilted once they are fully blanched but will still be bright green.
3. Shock the leaves in an ice bath, stirring so that they chill quickly.
4. Strain the leaves out of the ice bath. Squeeze the excess water off with your hands and pat dry with paper
towels.
5. Place half of the leaves in a blender with the oil. The oil should cover the leaves. Add more oil if necessary.
6. Blend on medium speed for about 1 minute or until smooth, then add the remaining parsley and the
xanthan gum and blend for 1 more minute. If the parsley is not blending properly, add a little more oil.
7. Once a smooth purée has been obtained, remove from the blender and strain through a fi ne-mesh
strainer. Reserve only the pulp that remains in the strainer; the remaining liquid will not be used.
Refrigerate until needed. Discard after 2 days.

340 FROZEN DESSERTS

FINISHED ITEMS 341
Sake and Lemon Sorbet with Flying Fish Roe and Shiso Leaf Jelly YIELD 10 PORTIONS
COMPONENTS
300 g / 10.58 oz SAKE AND LEMON SORBET BASE (page 385)
10 SHISO LEAF JELLY SQUARES
50 g / 1.76 oz tobiko wasabi (wasabi fl ying fi sh roe)
ASSEMBLY
1. Line 10 PVC tubes 2.5 cm / 1 in by 3.75 cm / 1.5 in diameter with acetate. Place on a sheet pan lined with acetate
and freeze.
2. Churn or pacotize the sorbet, pour into a piping bag, and pipe into the prepared tubes. Even out the top with an
offset spatula.
3. Freeze to harden. Cover with plastic wrap until needed.
4. Place a jelly square on the plate. Fold in one of the corners.
5. Place 5 g / .18 oz of fl ying fi sh roe on the jelly.
6. Take the sorbet out of the tube, take the acetate off, and place on the jelly in a standing position.
7. Serve immediately. Since this sorbet has alcohol in it, it tends to melt very quickly.
Shiso Leaf Jelly YIELD 1.262 KG / 2 LB 12.53 OZ
750 g / 1 lb 10.46 oz water
500 g / 1 lb 1.64 oz shiso leaves
10 g / .35 oz salt, or as needed
2.5 g / .09 oz agar-agar
10 g / .35 oz gelatin sheets, bloomed
1. Place a 25 cm / 10 in by 38 cm / 15 in by 2 mm / .08 in Plexiglas frame on a half sheet pan.
2. Heat the water to 80°C / 176°F. Take the water off the heat and add 238 g / 8.4 oz of the shiso leaves.
Cover and steep for 30 minutes, then strain out the leaves. Reserve the water and season with salt to taste.
3. Cut the remaining shiso leaves into a fi ne chiffonade.
4. Mix the shiso water with the agar-agar. Bring to a boil while stirring constantly with a whisk. Let boil for 10
seconds. Take the pot off the heat and add the gelatin. Stir until the gelatin is melted.
5. Pour the liquid into the prepared frame.
6. Sprinkle the shiso leaf chiffonade evenly throughout the entire surface of the liquid, working quickly so that
the water doesn’t set before the leaves are added. Let it set in the refrigerator.
7. Cut into 5-cm / 2-in squares using a metallic cutter or knife. Discard leftover jelly after 2 days.

342 FROZEN DESSERTS
Jalapeño Sorbet with Yellowtail Sashimi and Ponzu Sauce YIELD 10 PORTIONS
COMPONENTS
10 thinly sliced yellowtail sashimi fi llets (28 g / 1 oz per slice)
50 g / 1.76 oz ponzu sauce
200 g / 7.05 oz JALAPEÑO SORBET (page 385; reserve the seeds)
3 g / .11 oz TOASTED JALAPEÑO SEEDS
ASSEMBLY
1. Place 1 yellowtail fi llet on the plate.
2. Pour 5 g / .18 oz of the ponzu sauce on and around the yellowtail.
3. Scoop a small quenelle (20 g / .71 oz) of the sorbet on top of the yellowtail.
4. Sprinkle a pinch of toasted jalapeño seeds on the sorbet and serve immediately.
NOTE Use the highest-quality fi sh possible. Always slice to order, with a very sharp knife against the grain.
Toasted Jalapeño Seeds Toast the reserved seeds from the jalapeños used to make the sorbet in a sauté pan until brown and
aromatic, about 1 minute. Reserve at room temperature in an airtight container. If kept in a dry cool place,
they will last for 1 week.

FINISHED ITEMS 343
Carrot Sorbet with Watercress Purée and Pea Shoots YIELD 10 PORTIONS
COMPONENTS
150 g / 5.29 oz WATERCRESS PURÉE (see Note)
300 g / 10.58 oz CARROT SORBET (page 384)
30 pea shoots
ASSEMBLY
1. Spoon 15 g / 53 oz of watercress purée inside a small bowl.
2. Scoop a medium quenelle (30 g / 1.06 oz) of the sorbet on top of the watercress.
3. Trim the pea shoots to 5 cm / 2 in. Place 3 pea shoots leaning diagonally on the sorbet and serve immediately.
NOTE For the Watercress Purée, see the recipe for Parsley Purée (page 339); substitute watercress leaves for parsley.
Papaya Sorbet with Key Lime Juice and Black Sea Salt YIELD 10 PORTIONS
COMPONENTS
100 g / 3.53 oz Key lime juice
300 g / 10.58 oz PAPAYA SORBET (page 386)
5 g / .18 oz Hawaiian black sea salt
ASSEMBLY
1. Pour 10 g / 35 oz lime juice in a saucier. It will be served tableside.
2. Scoop a medium quenelle (30 g / 1.06 oz) of the sorbet into a small bowl.
3. Sprinkle a pinch (about .5 g) of salt on top of the quenelle.
4. Serve immediately. The lime juice should be spooned down the side of the sorbet.

344 FROZEN DESSERTS

FINISHED ITEMS 345
Lime Sorbet with Spider Crab, Aji Amarillo, and Cilantro Oil YIELD 10 PORTIONS
COMPONENTS
100 g / 3.53 oz AJI AMARILLO SAUCE
300 g / 10.58 oz spider crab meat from the legs; fully cooked
20 g / .71 oz CILANTRO OIL (see Notes)
300 g / 10.58 oz LIME SORBET (page 384)
30 FRIED CILANTRO LEAVES (see Notes)
30 micro-cilantro leaves
ASSEMBLY
1. Spoon 10 g / .35 oz of aji amarillo sauce into a small bowl.
2. Place 30 g / 1.06 oz of the crab next to the purée in a standing position.
3. Using an eyedropper, pour a few small drops of cilantro oil (about 2 g / .07 oz or 9 drops) throughout the aji
amarillo.
4. Spoon about 30 g / 1.06 oz of the sorbet next to the crab.
5. Place the fried cilantro and the micro-cilantro throughout the bowl and serve immediately.
NOTES For the Cilantro Oil, see the recipe for Parsley Oil (page 332); substitute cilantro leaves for the parsley.
For the Fried Cilantro Leaves, see the recipe for Fried Sage (page 330); substitute 30 cilantro leaves for the sage
leaves.
Aji Amarillo Sauce YIELD 204 G / 7.2 OZ
200 g / 7.05 oz canned aji amarillo
4 g / .14 oz salt, or as needed
1. Pat the aji amarillo dry with paper towels and purée in a blender until smooth, about 2 minutes. Season
with salt to taste.
2. Reserve under refrigeration until needed. Discard after 2 days.
NOTE Aji amarillo is a type of pepper widely used in South America, especially in Peru. It is mildly hot, with a unique
smoky fl avor and a bright yellow color. They are diffi cult to fi nd fresh in the United States, but they can be found
canned and are of very good quality.

346 FROZEN DESSERTS
Green Mango Sorbet with Paprika Bubbles YIELD 10 PORTIONS
COMPONENTS
300 g / 10.58 oz GREEN MANGO SORBET (page 386)
300 g /10.58 oz PAPRIKA BUBBLES
ASSEMBLY
1. Scoop a medium quenelle (30 g / 1.06 oz) of the sorbet into a bowl.
2. Carefully and gently place 30 g / 1.06 oz of the paprika bubbles next to the sorbet and serve immediately.
Paprika Bubbles YIELD 1 KG / 2 LB 3.27 OZ
886 g / 1 lb 15.25 oz water
100 g / 3.53 oz paprika
4 g / .14 oz soy lecithin powder
5 g / .18 oz salt, or as needed
10 g / .35 oz gelatin sheets, bloomed
1. Combine the water and paprika. Whisk in the soy lecithin until dissolved. Season with salt to taste.
2. Place 20 percent of the liquid in a saucepan and add the gelatin. Melt over low heat. Combine with the
remaining liquid.
3. Using a beurre mixer, blend air into the liquid. Ideally the liquid will be in a shallow pan, slightly tilted to
incorporate the largest amount of air into the liquid.
4. Once the bubbles have formed, spoon onto the plate. This will need to be re-mixed before each order.
Discard after service.
NOTE Be very gentle when handling the bubbles.

FINISHED ITEMS 347

348

349
chapter eight Base Recipes

350 FROZEN DESSERTS
Classic Method Base Recipe Framework
All of the recipes for the classic custard method are based on the formula below; it is the “mother” recipe
from which all other recipes are formulated. There is also a chart on the next page with the maximum and
minimum percentages recommended for each ingredient. In the formulation, if the fat, water and solids
are added, total amount for each ingredient is obtained; the serum solids are the result of adding the non-
fat solids and the fat. See the defi nition of serum solids in Chapter 2 for more information.
This recipe is made to yield 5 kg / 11 lb .37 oz liquid base, but just like all the other recipes in this chapter,
there is a percentage next to each amount so that the recipe can be formulated based on whatever yield is
desired. In addition, spreadsheets are included in the electronic ancillary materials that will calculate the
new recipe yields as well. The Pacojet is the recommended machine for this method, but the recipes are
formulated to work with a batch freezer as well.
IMPORTANT NOTE: Always add .5 g / .02 oz of salt per liter of base. This will enhance fl avors signifi cantly.
Do not consider it as part of the formula because the presence of this amount will not affect the structure
or balance of the recipe.
RECIPE FORMULATION COMPOSITION OF INGREDIENT (%)
INGREDIENT AMOUNT % OF TOTAL RECIPE
FAT WATER SERUM NONFAT SOLIDS
Whole milk 3288 g 65.76 118.37 g
(3.6%)
2893.44 g
(88%)
394.56 g
(12%)
276.19 g
(8.4%)
Heavy cream 581.5 g 11.63 232.6 g
(40%)
316.92 g
(54.5%)
264.58 g
(45.5%)
31.98 g
(5.5%)
Sugar 781.5 g 15.63 0 0 0 781.5 g
(100%)
Egg yolks 349 g 6.98 115.17 g
(33%)
174.5 g (50%) 0 59.33 g
(17%)
Flavor 0 0 0 0 0 0
Total 5000 g 100 466.14 g
(9.32%)
3384.89 g
(67.7%)
1615.14 g
(32.3%)
1149 g
(22.98%)
ICE CREAMS

INGREDIENT MIN MAX
Fat (from milk, heavy cream, butter, egg yolks, other dairy products, and
in some cases, the added fl avor)
2% 11%
Nonfat solids include all solids, even those found in dairy, minus the
fat. Remember, solids can be found in egg yolks (50% is considered
nonfat solids), sweeteners, garnishes, etc. Note: Nonfat solids are used
for formulation only; they aren’t an individual component of a recipe.
15% 30%
Total solids: Includes the above plus all fats, which can be found in all
forms of dairy and added ingredients (for example, the fat content in
milk chocolate).
25% 41%
Liquid: Refers to any and all ingredients minus all solids, including fats 100% minus solid% 100% minus solid%
Sugar (sweetening strength, is the addition of all sugars, solid and
liquid): Remember that a variety of sugars can be used in combination,
including those found in a fl avor, such as chocolate.
16% 23%
Egg yolks 7% 9%
Flavors: Flavor percentages can increase when they aren’t just a fl avor
per se (such as vanilla pods) and will contribute to other elements
in the recipe, such as fat, sugar, solids, and water. In those cases,
the fl avor percentage can go up as high as 20% (or more), and its
components will be part of the formulation.
2% 10%
BASE RECIPES 351
1. Place the milk or milk and heavy cream mixture in a sauce-
pot along with half the sugar. If there are any fl avors that
need to be steeped, such as vanilla pods, this is when they
are added. (For specifi c instructions on how to incorporate
other fl avors, see Flavors on page 25).
2. Place the saucepot over high heat and stir for about 1 min-
ute to dissolve some, but not all, of the sugar. The undis-
solved sugar will settle at the bottom of the pot to prevent
the milk and heavy cream from scorching.
3. While this mix comes to a boil, place the egg yolks and the
remainder of the sugar in a bowl. Whisk until it becomes a
uniform mass.
4. Once the liquid comes to a boil, slowly pour half of it into
the egg yolk–sugar mix while whisking constantly.
5. Once half of the liquid has been tempered with the egg
yolk–sugar mix, pour the contents of the bowl back into the
pot while whisking constantly and turn the heat down to
medium or medium-low.
6. Whisk constantly until the mixture reaches 76°C / 170°F. At
this temperature the mixture reaches a consistency called
nappe, or “coat.”
7. Turn the heat off and strain the base through a fi ne-mesh
strainer into an appropriate container and place over an ice
bath (see ice baths on page 36).
Classic Ice Cream Method
Minimum and Maximum Percentages Recommended for Formulation

352 FROZEN DESSERTS
Banana Ice CreamYIELD 5 KG / 11 LB .36 OZ BASE
CARAMELIZED BANANAS
500 g / 1 lb 1.64 oz sugar
50 g / 1.76 oz lemon juice
600 g / 1 lb 5.16 oz ripe bananas, split in half lengthwise
ICE CREAM BASE
2.88 kg / 6 lb 5.59 oz / 57.56% milk
382 g / 13.47 oz / 7.64% heavy cream
792 g / 1 lb 11.94 oz / 15.83% sugar
349 g / 12.31 oz / 6.98% egg yolks
600 g / 1 lb 5.16 oz 12% Caramelized Bananas
1. FOR THE CARAMELIZED BANANAS: In an adequately sized sauté
pan (one that will fi t the sugar and bananas comfortably),
combine the sugar and lemon juice with one-quarter of the
weight of the sugar in water to obtain a wet-sand consis-
tency.
2. Cook the sugar over high heat until the sugar has a dark
amber hue, at about 170°C / 338°F. Add the bananas and
turn the heat down to medium. Cook until the bananas are
tender and have a caramelized (amber-brown) color, about
20 minutes, fl ipping the bananas as needed.
3. Cool the bananas and purée in a blender until smooth;
pass through a fi ne-mesh strainer.
4. FOR THE ICE CREAM BASE: Make the ice cream base according
to the Classic Ice Cream Method.
5. Strain the base through a fi ne-mesh strainer and cool over
an ice bath.
6. Add the banana purée once the base has cooled. Age the
base under refrigeration overnight.
7. Once the base has aged, churn to the desired consistency.
8. Harden for at least 2 and up to 4 hours. Reserve until needed.
NOTES The bananas will absorb some of the sugar from the cara-
melizing process; this will contribute to the sweetness of the
recipe. This is why the added sugar amount is at a minimum.
If pacotizing the base, the ice cream can be scooped and
served immediately, but it is easier to work with if it hardens for
1 hour in the freezer.
Clotted Cream Ice CreamYIELD 5 KG / 11 LB .36 OZ BASE
2.02 kg / 4 lb 7.25 oz / 40.35% milk
418 g / 14.75 oz / 8.35% brown sugar
418 g / 14.75 oz / 8.35% granulated sugar
450 g / 15.87 oz / 8.99% egg yolks
1.7 kg / 3 lb 11.96 oz / 33.96% clotted cream
1. Make the ice cream base according to the Classic Ice
Cream Method, but add the clotted cream once the base
has been made and it is still hot. Whisk thoroughly to com-
pletely dissolve the clotted cream.
2. Strain the base through a fi ne-mesh strainer and cool over
an ice bath. Age the base under refrigeration overnight.
3. Once the base has aged, churn to the desired consistency.
4. Harden for at least 2 hours and up to 4 hours. Reserve until
needed.
NOTES The fat content is slightly higher (.5 percent) than the maxi-
mum recommended; this will have no negative effect on the
fi nal product if it is churned or pacotized carefully.
Clotted cream is a fl avor per se, but really is more of a solid
ingredient. This is why it is above the maximum percentage of
fl avor recommended, because it is also contributing to fat, sol-
ids, and water content.
Since clotted cream has a high fat content, it can affect the
initial emulsifying process (too many fat molecules present).
When it is added at the end, it will blend with the other ingre-
dients without disrupting the emulsion or the homogenization
process.
Brown sugar is added for fl avor, but it will also contribute to
total solids as well as add a small amount of water.
If pacotizing the base, the ice cream can be scooped and
served immediately, but it is easier to work with if it hardens for
1 hour in the freezer.

BASE RECIPES 353
Mascarpone Ice CreamYIELD 5 KG / 11 LB .36 OZ BASE
2.82 kg / 6 lb 3.47 oz / 56.33% skim milk
836 g / 1 lb 13.49 oz / 16.7% sugar
350 g / 12.35 oz / 7% egg yolks
1 kg / 2 lb 3.27 oz / 19.98% mascarpone
1. Make the ice cream base according to the Classic Ice
Cream Method, but add the mascarpone once the base
has been made and it is still hot. Whisk thoroughly to com-
pletely dissolve the mascarpone.
2. Strain the base through a fi ne-mesh strainer and cool over
an ice bath. Age the base under refrigeration overnight.
3. Once the base has aged, churn to the desired consistency.
4. Harden for at least 2 hours and up to 4 hours. Reserve until
needed.
NOTES The mascarpone is a fl avor, but it will contribute large
amounts of fats, water, and solids; this is why the recipe uses
skim milk. It is also why the percentage of fl avor is much higher
than the recommended maximum of 11 percent.
Take the same precautions as with the Clotted Cream Ice
Cream (page 352).
If pacotizing the base, the ice cream can be scooped and
served immediately, but it is easier to work with if it hardens for
1 hour in the freezer.
Cabrales Cheese Ice CreamYIELD 5 KG / 11 LB .36 OZ BASE
3.45 kg / 7 lb 9.69 oz / 69.01% milk
600 g / 1 lb 5.16 oz / 12% sugar
449 g / 15.84 oz / 8.98% egg yolks
500 g / 1 lb 1.64 oz / 10% Cabrales cheese, crumbled
1. Make the ice cream base according to the Classic Ice
Cream Method, but add the cheese once the base has been
made and it is still hot. Whisk thoroughly to completely dis-
solve the cheese.
2. Strain the base through a fi ne-mesh strainer and cool over
an ice bath. Age the base under refrigeration overnight.
3. Once the base has aged, churn to the desired consistency.
4. Harden for at least 2 hours and up to 4 hours. Reserve until
needed.
NOTES Don’t worry about the base turning gray or a light hue of
blue; the amount of cheese is small enough that this won’t be a
problem.
This ice cream has a signifi cant reduction in sugar because
it will be used in a savory preparation, and this has an impact on
solids percentage even though it has a solid (the cheese) added
to it, because the cheese is only partially solid. Total solids are
increased by adding more eggs.
Make sure to use Cabrales. If using another blue cheese,
make sure to correct the formulation (water and fat content may
differ); also, Cabrales is a somewhat mild blue cheese, com-
pared to Roquefort, for example.
If pacotizing the base, the ice cream can be scooped and
served immediately, but it is easier to work with if it hardens for
1 hour in the freezer.

354 FROZEN DESSERTS
Balsamic Vinegar Ice CreamYIELD 5 KG / 11 LB .36 OZ BASE
ICE CREAM BASE
2.7 kg / 5 lb 15.24 oz / 54% milk
800 g / 1 lb 12.22 oz / 16% heavy cream
850 g / 1 lb 13.98 oz / 17% sugar
350 g / 12.35 oz / 7% egg yolks
300 g / 10.58 oz / 6% balsamic vinegar
1. Make the ice cream base according to the Classic Ice
Cream Method.
2. Strain the base through a fi ne-mesh strainer and cool over
an ice bath. Age the base under refrigeration overnight.
3. Once the base has aged, add the balsamic vinegar to the
base right before freezing (in the case of a Pacojet) and
right before churning (in the case of a batch freezer). Oth-
erwise, its acidity will curdle the milk and heavy cream.
Churn to the desired consistency.
4. Harden for at least 2 hours and up to 4 hours. Reserve until
needed.
NOTES Use a high-quality balsamic vinegar aged up to 5 years.
Aged balsamic vinegars have very nuanced fl avors and char-
acteristics that will be lost in an ice cream base, so it would be
almost impossible to tell the difference between a 5-year-old
balsamic vinegar and a 25- or 50-year-old vinegar. Also, the older
the vinegar, the more expensive it will be.
If pacotizing the base, the ice cream can be scooped and
served immediately, but it is easier to work with if it hardens for
1 hour in the freezer.
Oatmeal Ice CreamYIELD 5 KG / 11 LB .36 OZ BASE
OATMEAL-INFUSED MILK
4.29 kg / 9 lb 7.32 oz milk
800 g / 1 lb 12.22 oz old-fashioned oats
ICE CREAM BASE
3.29 kg / 7 lb 4.05 oz / 65.79% Oatmeal-Infused Milk
581 g / 1 lb 4.51 oz / 11.62% heavy cream
781 g / 1 lb 11.57 oz / 15.62% sugar
349 g / 12.31 oz / 6.98% egg yolks
1. FOR THE OATMEAL-INFUSED MILK: Place the milk in a pot over
high heat and bring to a simmer.
2. Place the oats on a sheet pan lined with parchment paper
and lightly toast in the oven at 200°C / 392°F until they be-
gin to have a toasted aroma, about 5 minutes. They do not
need to change color.
3. Add the toasted oats to the warm milk. It is crucial that
the oats be added to the milk when both of them are hot
for optimum steeping. Take the pot off the heat and cover
with plastic wrap. Steep for only 5 minutes so that the milk
doesn’t thicken too much.
4. Weigh out the amount of milk for the ice cream base from
the steeped milk. There might be some left over, but it’s
better than not having enough.
5. FOR THE ICE CREAM BASE: Make the ice cream base according
to the Classic Ice Cream Method.
6. Strain the base through a fi ne-mesh strainer and cool over
an ice bath. Age the base under refrigeration overnight.
7. Once the base has aged, churn to the desired consistency.
8. Harden for at least 2 hours and up to 4 hours. Reserve until
needed.
NOTES Review steeping instructions on page 27; the oatmeal com-
ponent should not be part of the formulation (not a solid com-
ponent).
If desired, add spices, such as cinnamon, and it will not
affect the solids amount.
If pacotizing the base, the ice cream can be scooped and
served immediately, but it is easier to work with if it hardens for
1 hour in the freezer.

BASE RECIPES 355
Crème Fraîche Ice CreamYIELD 5 KG / 11 LB .36 OZ BASE
2.02 kg / 4 lb 7.25 oz / 40.35% milk
836 g / 1 lb 13.5 oz / 16.7% sugar
450 g / 15.87 oz / 8.99% egg yolks
1.7 kg / 3 lb 11.96 oz / 33.96% crème fraîche
1. Make the ice cream base according to the Classic Ice
Cream Method. Add the crème fraîche once the custard
is made and it is still hot. Whisk thoroughly to completely
dissolve the crème fraîche.
2. Strain the base through a fi ne-mesh strainer and cool over
an ice bath. Age the base under refrigeration overnight.
3. Once the base has aged, churn to the desired consistency.
4. Harden for at least 2 hours and up to 4 hours. Reserve until
needed.
NOTE If pacotizing the base, the ice cream can be scooped and
served immediately, but it is easier to work with if it hardens for
1 hour in the freezer.
“Burnt” Sugar Ice CreamYIELD 5 KG / 11 LB .36 OZ BASE
“BURNT” SUGAR CARAMEL
981 g / 2 lb 2.6 oz sugar
245 g / 8.64 oz water, or as needed
5 g / .18 oz lemon juice, or as needed
ICE CREAM BASE
3.09 kg / 6 lb 12.99 oz / 61.78% milk
581 g / 1 lb 4.51 oz / 11.62% heavy cream
982 g / 2 lb 2.61 oz / 19.63% “Burnt” Sugar Caramel
349 g / 12.31 oz / 6.98% egg yolks
1. FOR THE “BURNT” SUGAR CARAMEL: Weigh out the sugar for the
caramel along with the water and lemon juice.
2. Combine the milk and cream from the ice cream base in
a pot that can fi t the ingredients comfortably and that has
enough room to expand when the hot sugar is added (typi-
cally about twice the volume of the liquid); place over me-
dium-high heat.
3. In a separate pot, combine the sugar with the water and
lemon juice (to prevent crystallization) and cook over high
heat until the sugar begins to smoke but does not literally
burn (170°C / 338°F; do not confuse steam with smoke!).
4. Slowly pour the hot milk-cream mixture into the sugar while
whisking constantly. This will result in the “burnt” caramel
component. The liquid does not need to cool down; in fact,
it will make the process a lot faster if it is used as soon as
the caramel is made.
5. FOR THE ICE CREAM BASE: Make the ice cream base according
to the Classic Ice Cream Method.
6. Strain the base through a fi ne-mesh strainer and cool over
an ice bath. Age the base under refrigeration overnight.
7. Once the base has aged, churn to the desired consistency.
8. Harden for at least 2 hours and up to 4 hours. Reserve until
needed.
NOTE If pacotizing the base, the ice cream can be scooped and
served immediately, but it is easier to work with if it hardens for
1 hour in the freezer.
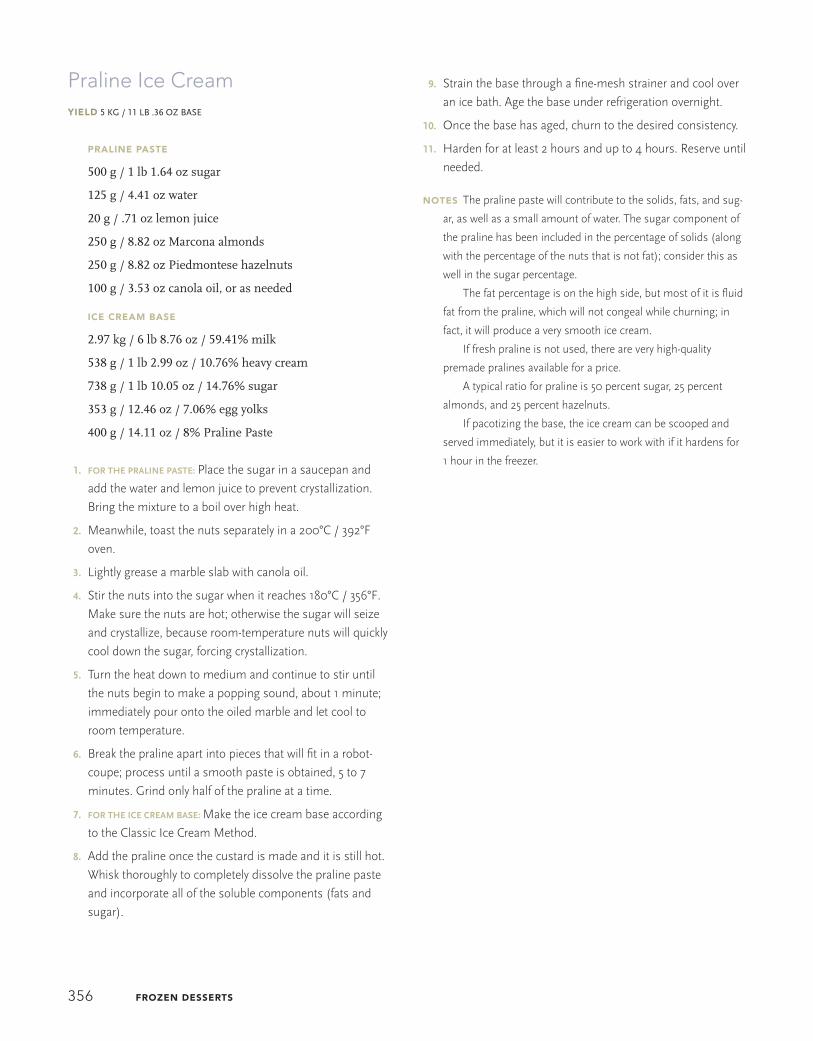
356 FROZEN DESSERTS
Praline Ice CreamYIELD 5 KG / 11 LB .36 OZ BASE
PRALINE PASTE
500 g / 1 lb 1.64 oz sugar
125 g / 4.41 oz water
20 g / .71 oz lemon juice
250 g / 8.82 oz Marcona almonds
250 g / 8.82 oz Piedmontese hazelnuts
100 g / 3.53 oz canola oil, or as needed
ICE CREAM BASE
2.97 kg / 6 lb 8.76 oz / 59.41% milk
538 g / 1 lb 2.99 oz / 10.76% heavy cream
738 g / 1 lb 10.05 oz / 14.76% sugar
353 g / 12.46 oz / 7.06% egg yolks
400 g / 14.11 oz / 8% Praline Paste
1. FOR THE PRALINE PASTE: Place the sugar in a saucepan and
add the water and lemon juice to prevent crystallization.
Bring the mixture to a boil over high heat.
2. Meanwhile, toast the nuts separately in a 200°C / 392°F
oven.
3. Lightly grease a marble slab with canola oil.
4. Stir the nuts into the sugar when it reaches 180°C / 356°F.
Make sure the nuts are hot; otherwise the sugar will seize
and crystallize, because room-temperature nuts will quickly
cool down the sugar, forcing crystallization.
5. Turn the heat down to medium and continue to stir until
the nuts begin to make a popping sound, about 1 minute;
immediately pour onto the oiled marble and let cool to
room temperature.
6. Break the praline apart into pieces that will fi t in a robot-
coupe; process until a smooth paste is obtained, 5 to 7
minutes. Grind only half of the praline at a time.
7. FOR THE ICE CREAM BASE: Make the ice cream base according
to the Classic Ice Cream Method.
8. Add the praline once the custard is made and it is still hot.
Whisk thoroughly to completely dissolve the praline paste
and incorporate all of the soluble components (fats and
sugar).
9. Strain the base through a fi ne-mesh strainer and cool over
an ice bath. Age the base under refrigeration overnight.
10. Once the base has aged, churn to the desired consistency.
11. Harden for at least 2 hours and up to 4 hours. Reserve until
needed.
NOTES The praline paste will contribute to the solids, fats, and sug-
ar, as well as a small amount of water. The sugar component of
the praline has been included in the percentage of solids (along
with the percentage of the nuts that is not fat); consider this as
well in the sugar percentage.
The fat percentage is on the high side, but most of it is fl uid
fat from the praline, which will not congeal while churning; in
fact, it will produce a very smooth ice cream.
If fresh praline is not used, there are very high-quality
premade pralines available for a price.
A typical ratio for praline is 50 percent sugar, 25 percent
almonds, and 25 percent hazelnuts.
If pacotizing the base, the ice cream can be scooped and
served immediately, but it is easier to work with if it hardens for
1 hour in the freezer.

BASE RECIPES 357
Apple Tatin Ice CreamYIELD 5 KG / 11 LB .36 OZ BASE
CANDIED APPLES
3 kg / 6 lb 9.82 oz sugar
50 g / 1.76 oz lemon juice
750 g / 1 lb 10.45 oz water, or as needed
1 kg / 2 lb 3.27 oz Granny Smith apples, peeled and
diced into 1.25-cm / .5-in cubes
ICE CREAM BASE
3.01 kg / 6 lb 10.17 oz / 60.22% milk
586 g / 1 lb 4.67 oz / 11.72% heavy cream
400 g / 14.11 oz / 8% sugar
452 g / 15.94 oz / 9.04% egg yolks
550 g / 1 lb 3.4 oz / 11% Candied Apples
1. FOR THE CANDIED APPLES: In a large sauté pan, combine the
sugar, lemon juice, and enough water to obtain a wet-sand
consistency; bring to a boil over high heat.
2. When the sugar begins to turn a pale yellow (130°C /
266°F), add the apples and continue to cook over medium
heat until the sugar is caramelized and the apples are
translucent, about 30 minutes.
3. Pour the contents into a large conical strainer to drain the ex-
cess moisture. Place the candied apples on a sheet pan lined
with parchment paper and let cool to room temperature.
4. FOR THE ICE CREAM BASE: Make the ice cream base according
to the Classic Ice Cream Method. If using a batch freezer,
purée 550 g / 1 lb 3.4 oz of the candied apples in a blender
and whisk thoroughly to completely incorporate them into
the fi nished custard base. If using a Pacojet, the whole
candied apples can be combined with the custard base in
the beaker (about 100 g / 3.53 oz per beaker). Cool the base
over an ice bath. Age under refrigeration overnight.
5. Once the base has aged, churn to the desired consistency.
6. Harden for at least 2 hours and up to 4 hours. Reserve until
needed.
NOTE Candied apples are very sweet, and 50 percent of their solid
weight is considered part of the sweetening component of the base.
If pacotizing the base, the ice cream can be scooped and
served immediately, but it is easier to work with if it hardens for
1 hour in the freezer.
Lemon and Buttermilk Ice CreamYIELD 5 KG / 11 LB .36 OZ BASE
ICE CREAM BASE
2.71 g / 5 lb 15.59 oz / 54.15% milk
517 g / 1 lb 2.26 oz / 10.33% heavy cream
917 g / 2 lb .36 oz / 18.32% sugar
12 lemons
311 g / 10.95 oz / 6.21% egg yolks
550 g / 1 lb 3.4 oz / 10.99% buttermilk
1. Combine the milk, cream, and half of the sugar in a pot.
Zest all 12 lemons directly into the pot using a rasp.
2. Make the ice cream base according to the Classic Ice
Cream Method. Add the buttermilk once the custard is
made and it is still hot. Whisk thoroughly to completely
dissolve the buttermilk.
3. Strain the base through a fi ne-mesh strainer and cool over
an ice bath. Age the base under refrigeration overnight.
4. Once the base has aged, churn to the desired consistency.
5. Harden for at least 2 hours and up to 4 hours. Reserve until
needed.
NOTE If pacotizing the base, the ice cream can be scooped and
served immediately, but it is easier to work with if it hardens for
1 hour in the freezer.

358 FROZEN DESSERTS
White Truffl e Ice CreamYIELD 5 KG / 11 LB .36 OZ BASE
TRUFFLE-INFUSED MILK
200 g / 7.05 oz white truffl e trimmings
3.5 kg / 7 lb 11.46 oz milk
ICE CREAM BASE
3.29 kg / 7 lb 4.05 oz / 65.79% Truffl e-Infused Milk
581 g / 1 lb 4.51 oz / 11.62% heavy cream
781 g / 1 lb 11.57 oz / 15.62% granulated sugar
349 g / 12.31 oz / 6.98% egg yolks
1. FOR THE TRUFFLE-INFUSED MILK: Steep the truffl es in the milk
for 30 minutes. Strain through a fi ne mesh sieve, then
weigh out the amount of milk needed for the recipe.
2. FOR THE ICE CREAM BASE: Make the ice cream base according
to the Classic Ice Cream Method.
3. Strain the base through a fi ne-mesh strainer and cool over
an ice bath. Age the base under refrigeration overnight.
4. Once the base has aged, churn to the desired consistency.
5. Harden for at least 2 hours and up to 4 hours. Reserve until
needed.
NOTES Typically restaurants that serve shaved white truffl es on their
savory items will have odds and ends from those shaved truffl es
that cannot be used, at least not for shaving. This is an opportu-
nity to use a high-cost ingredient with no cost to you.
This recipe has the minimum amount of sugar added be-
cause it will hinder the truffl e’s fl avor.
It is tempting to use white truffl e oil, but the results aren’t
very good. It feels like a greasy ice cream, if you can envision that.
If pacotizing the base, the ice cream can be scooped and
served immediately, but it is easier to work with if it hardens for
1 hour in the freezer.
Brown Butter Ice CreamYIELD 5 KG / 11 LB .36 OZ BASE
BROWN BUTTER
1 kg / 2 lb 3.27 oz butter, soft
ICE CREAM BASE
3.43 kg / 7 lb 8.99 oz / 68.56% skim milk
800 g / 1 lb 12.22 oz / 15.99% sugar
373 g / 13.17 oz / 7.46% egg yolks
400 g / 14.11 oz / 8% Brown Butter
1. FOR THE BROWN BUTTER: Place the butter in a saucepan over
high heat; melt and cook until the milk solids caramelize
(they will caramelize and will smell like toasted hazelnuts;
this is also known as beurre noisette).
2. Cool the butter to room temperature.
3. FOR THE ICE CREAM BASE: Make the ice cream base according
to the Classic Ice Cream Method. Add the brown butter to
the ice cream base when it is made and it is still hot. Add
the brown butter in liquid form, not when it is solid. Whisk
thoroughly to completely incorporate the brown butter.
4. Strain the base through a fi ne-mesh strainer and cool over
an ice bath. Age the base under refrigeration overnight.
5. Once the base has aged, churn to the desired consistency.
6. Harden for at least 2 hours and up to 4 hours. Reserve until
needed.
NOTE If pacotizing the base, the ice cream can be scooped and
served immediately, but it is easier to work with if it hardens for
1 hour in the freezer.
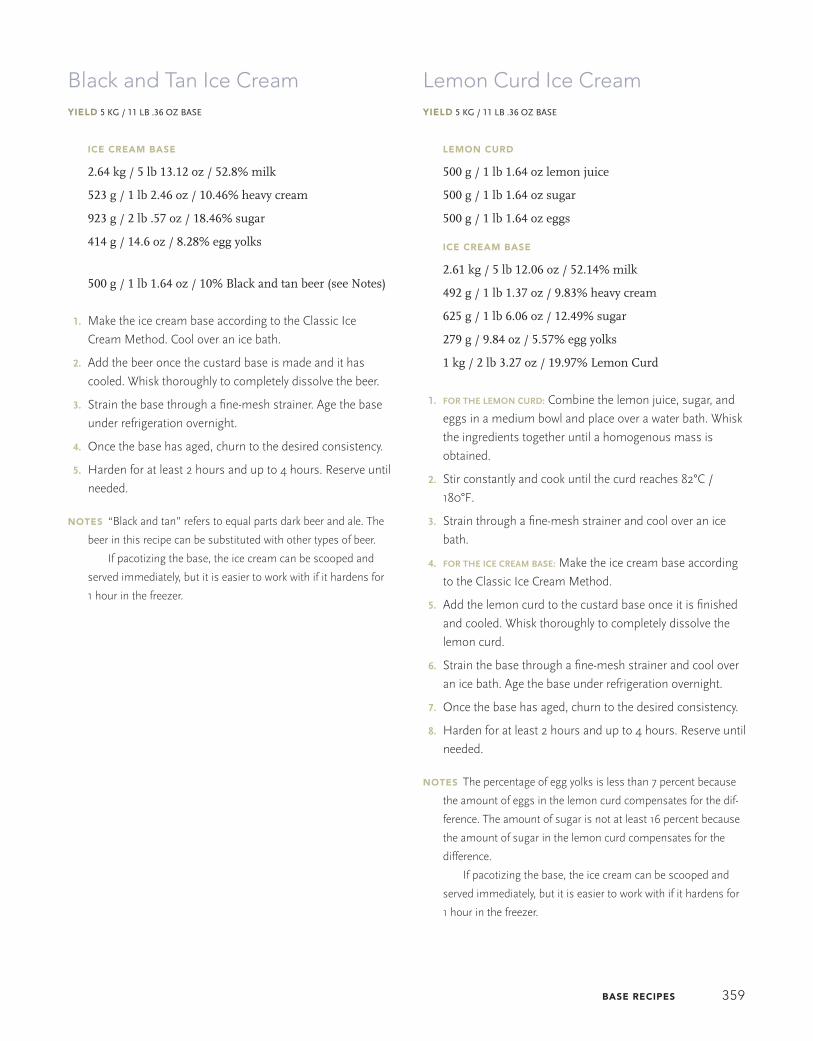
BASE RECIPES 359
Black and Tan Ice CreamYIELD 5 KG / 11 LB .36 OZ BASE
ICE CREAM BASE
2.64 kg / 5 lb 13.12 oz / 52.8% milk
523 g / 1 lb 2.46 oz / 10.46% heavy cream
923 g / 2 lb .57 oz / 18.46% sugar
414 g / 14.6 oz / 8.28% egg yolks
500 g / 1 lb 1.64 oz / 10% Black and tan beer (see Notes)
1. Make the ice cream base according to the Classic Ice
Cream Method. Cool over an ice bath.
2. Add the beer once the custard base is made and it has
cooled. Whisk thoroughly to completely dissolve the beer.
3. Strain the base through a fi ne-mesh strainer. Age the base
under refrigeration overnight.
4. Once the base has aged, churn to the desired consistency.
5. Harden for at least 2 hours and up to 4 hours. Reserve until
needed.
NOTES “Black and tan” refers to equal parts dark beer and ale. The
beer in this recipe can be substituted with other types of beer.
If pacotizing the base, the ice cream can be scooped and
served immediately, but it is easier to work with if it hardens for
1 hour in the freezer.
Lemon Curd Ice CreamYIELD 5 KG / 11 LB .36 OZ BASE
LEMON CURD
500 g / 1 lb 1.64 oz lemon juice
500 g / 1 lb 1.64 oz sugar
500 g / 1 lb 1.64 oz eggs
ICE CREAM BASE
2.61 kg / 5 lb 12.06 oz / 52.14% milk
492 g / 1 lb 1.37 oz / 9.83% heavy cream
625 g / 1 lb 6.06 oz / 12.49% sugar
279 g / 9.84 oz / 5.57% egg yolks
1 kg / 2 lb 3.27 oz / 19.97% Lemon Curd
1. FOR THE LEMON CURD: Combine the lemon juice, sugar, and
eggs in a medium bowl and place over a water bath. Whisk
the ingredients together until a homogenous mass is
obtained.
2. Stir constantly and cook until the curd reaches 82°C /
180°F.
3. Strain through a fi ne-mesh strainer and cool over an ice
bath.
4. FOR THE ICE CREAM BASE: Make the ice cream base according
to the Classic Ice Cream Method.
5. Add the lemon curd to the custard base once it is fi nished
and cooled. Whisk thoroughly to completely dissolve the
lemon curd.
6. Strain the base through a fi ne-mesh strainer and cool over
an ice bath. Age the base under refrigeration overnight.
7. Once the base has aged, churn to the desired consistency.
8. Harden for at least 2 hours and up to 4 hours. Reserve until
needed.
NOTES The percentage of egg yolks is less than 7 percent because
the amount of eggs in the lemon curd compensates for the dif-
ference. The amount of sugar is not at least 16 percent because
the amount of sugar in the lemon curd compensates for the
difference.
If pacotizing the base, the ice cream can be scooped and
served immediately, but it is easier to work with if it hardens for
1 hour in the freezer.

360 FROZEN DESSERTS
Burnt Orange Marmalade Ice CreamYIELD 5 KG / 11 LB .36 OZ BASE
BURNT ORANGE MARMALADE
4 kg / 8 lb 13.09 oz navel oranges sliced into 0.5-cm /
0.2-in slices, ends removed
4 kg / 8 lb 13.09 oz sugar
4 kg / 8 lb 13.09 oz milk
ICE CREAM BASE
3.09 kg / 6 lb 12.99 oz / 61.78% milk (infused with Burnt
Orange Marmalade)
631 g / 1 lb 6.26 oz / 12.63% heavy cream
200 g / 7.05 oz / 16% sugar
479 g / 1 lb 0.9 oz / 9.58% egg yolks
1.33 kg / 2 lb 14.91 oz / 26.6% Burnt Orange Marmalade
from infused milk
1. FOR THE MARMALADE: Blanch the oranges 3 times in boiling
water, changing the water each time.
2. Weigh out the blanched oranges, then weigh out the same
amount of sugar (approximately 4 kg / 8 lb 13.09 oz).
3. Place both in a large pot, and cook over low heat until the
marmalade reaches 190°C / 380°F. To prevent it from burn-
ing, pour it onto an oiled marble surface and spread it out.
4. Once the marmalade cools, it will harden. Since the sugar
was cooked further than for a regular marmalade, it won’t
be very smooth, but that doesn’t matter because it is going
to be steeped into the milk. The hardened sugar will dis-
solve into the milk.
5. Add the marmalade to the milk and steep for 45 minutes.
6. FOR THE ICE CREAM BASE: Strain the milk and measure 3.09
kg / 6 lb 12.99 oz of the milk. Reserve 1.33 kg / 2 lb 15.02 oz
of the marmalade. Make the ice cream base according to
the Classic Ice Cream Method.
7. Strain the base through a fi ne-mesh strainer and cool over
an ice bath. Age the base under refrigeration overnight.
8. Once the base has aged, churn to the desired consistency.
Stir in the reserved marmalade just after churning.
9. Harden for at least 2 hours and up to 4 hours. Reserve until
needed.
NOTES The recipe contains 800 g / 1 lb 12.22 oz of sugar, but only
200 g / 7.05 oz of it comes from raw granulated sugar. The oth-
er 600 g / 1 lb 5.16 oz come from the sugar in the marmalade.
If pacotizing the base, the ice cream can be scooped and
served immediately, but it is easier to work with if it hardens for
1 hour in the freezer.
Demerara Sugar Ice CreamYIELD 5 KG / 11 LB .36 OZ BASE
3.4 kg / 7 lb 7.93 oz / 67.92% milk
466 g / 16.43 oz / 9.31% heavy cream
800 g / 1 lb 12.22 oz / 15.98% Demerara sugar
340 g / 11.99 oz / 6.79% egg yolks
1. Make the ice cream base according to the Classic Ice
Cream Method.
2. Strain the base through a fi ne-mesh strainer and cool over
an ice bath. Age the base under refrigeration overnight.
3. Once the base has aged, churn to the desired consistency.
4. Harden for at least 2 hours and up to 4 hours. Reserve until
needed.
NOTES Using this type of sugar won’t make a difference in the Clas-
sic Ice Cream Method.
If pacotizing the base, the ice cream can be scooped and
served immediately, but it is easier to work with if it hardens for
1 hour in the freezer.

BASE RECIPES 361
Chestnut Ice CreamYIELD 5 KG / 11 LB .36 OZ BASE
CHESTNUT PURÉE
296 g / 10.44 oz unsweetened chestnut purée
195 g / 6.88 oz sugar
159 g / 5.61 oz water
ICE CREAM BASE
2.42 kg / 5 lb 5.36 oz / 48.35% milk
840 g / 1 lb 13.63 oz / 16.78% heavy cream
745 g / 1 lb 10.28 oz / 14.89% sugar
350 g / 12.35 oz / 6.99% egg yolks
650 g / 1 lb 6.93 oz / 12.99% Chestnut Purée (in syrup)
1. FOR THE CHESTNUT PURÉE: Whisk together the purée, sugar,
and water in a saucepan and cook over medium heat until
all the ingredients have mixed evenly.
2. FOR THE ICE CREAM BASE: Make the ice cream base according
to the Classic Ice Cream Method. Cool the ice cream base
before adding the chestnut purée. Add the purée to the ice
cream base and whisk thoroughly to completely dissolve
the purée.
3. Strain the base through a fi ne-mesh strainer and refriger-
ate. Age the base under refrigeration overnight.
4. Once the base has aged, churn to the desired consistency.
5. Harden for at least 2 hours and up to 4 hours. Reserve until
needed.
NOTES This formula is made with unsweetened chestnut purée
that has been blended with a sugar syrup made with 195 g /
6.88 oz sugar (or 30 percent of the total weight of the unsweet-
ened chestnut purée and syrup combined) and 159 g / 5.61 oz
water (or 24.4 percent of the total weight of the unsweetened
chestnut purée and syrup combined). Since the chestnut purée
used consisted of 80 percent chestnuts and 20 percent water,
296 g / 10.44 oz of purée was used, 49 g / 1.73 oz of which was
water. This amount accounts for 23.75 percent of the total water
weight. The other 76.25 percent of total water weight is added
to the 195g / 6.88 oz of sugar. Sweetened chestnut purée must
have at least 38 percent chestnuts, so its total solids amount of
68 percent is 38 percent chestnuts and 30 percent sugar.
The sugar is below 16 percent because of the sugar added
to the chestnut purée. The sugar syrup contributes to the total
sugar amount and compensates for the lack of sugar in this
percentage.
If pacotizing the base, the ice cream can be scooped and
served immediately, but it is easier to work with if it hardens for
1 hour in the freezer.
Port Ice CreamYIELD 5 KG / 11 LB .36 OZ BASE
ICE CREAM BASE
2.59 kg / 5 lb 11.36 oz / 51.77% milk
582 g / 1 lb 4.53 oz / 11.63% heavy cream
782 g / 1 lb 11.58 oz / 15.63% sugar
549 g / 1 lb 3.37 oz / 10.97% egg yolks
500 g / 1 lb 1.64 oz / 9.99% port
1. Make the ice cream base according to the Classic Ice
Cream Method. Cool over an ice bath.
2. Once the base is made and cooled, whisk in the port thor-
oughly to completely incorporate the port.
3. Age the base under refrigeration overnight.
4. Once the base has aged, churn to the desired consistency.
5. Harden for at least 2 hours and up to 4 hours. Reserve until
needed.
NOTES To cook out the alcohol fl avor, the port may be added while
the ice cream base is still warm.
If pacotizing the base, the ice cream can be scooped and
served immediately, but it is easier to work with if it hardens for
1 hour in the freezer.

362 FROZEN DESSERTS
Prune-Armagnac Ice CreamYIELD 5 KG / 11 LB .36 OZ BASE
PRUNE-ARMAGNAC PURÉE
500 g / 1 lb 1.64 oz prunes
200 g / 7.05 oz sugar
250 g / 8.82 oz Armagnac
ICE CREAM BASE
2.52 kg / 5 lb 8.88 oz / 50.38% milk
536 g / 1 lb 2.9 oz / 10.71% heavy cream
651 g / 1 lb 6.96 oz / 13.01% sugar
345 g / 12.17 oz / 6.9% egg yolks
950 g / 2 lb 1.51 oz / 18.99% Prune-Armagnac Purée
1. FOR THE PRUNE-ARMAGNAC PUREE: Purée all of the ingredients
in a blender.
2. FOR THE ICE CREAM BASE: Make the ice cream base according
to the Classic Ice Cream Method. Cool the base over an ice
bath.
3. Once the ice cream base is cooled, add the prune-Armag-
nac purée and whisk thoroughly to completely incorporate
the purée.
4. Strain the base through a fi ne-mesh strainer. Age the base
overnight under refrigeration.
5. Once the base has aged, churn to the desired consistency.
6. Harden for at least 2 hours and up to 4 hours. Reserve until
needed.
NOTES Prunes have a water content of 20 g / .71 oz per 500 g / 1 lb
1.64 oz (or 4%). 20 g / .71 oz + 250 g / 8.82 oz Armagnac liquid
equals 270 g / 9.52 oz liquid in 950 g / 2 lb 1.5 oz of fi nished
Prune-Armagnac purée. Therefore, the water content of the pu-
rée is 28.42%.
The percentage of sugar is below 16 percent because of the
sugar found in the garnish.
The garnish percentage exceeds the maximum recommend-
ed amount, but the prune-Armagnac purée is not just a fl avor in
itself; it is also contributing to solids and water, and it will give
the fi nished product a very smooth consistency.
If pacotizing the base, the ice cream can be scooped and
served immediately, but it is easier to work with if it hardens for
1 hour in the freezer.
Espresso-Cardamom Ice CreamYIELD 5 KG / 11 LB .36 OZ BASE
ESPRESSO–CARDAMOM-INFUSED MILK
71 g / 2.5 oz ground espresso
10 cardamom pods, toasted and cracked
2.71 kg / 5 lb 15.59 oz milk
ICE CREAM BASE
2.61 kg / 5 lb 12.06 oz / 52.23% Espresso–Cardamom-
Infused Milk
849 g / 1 lb 13.95 oz / 16.99% heavy cream
810 g / 1 lb 12.57 oz / 16.21% sugar
728 g / 1 lb 9.68 oz / 14.57% egg yolks
1. FOR THE INFUSED MILK: Grind the espresso right before add-
ing it to the milk. Steep the ground espresso and carda-
mom pods in the milk until the milk is infused, about 10
minutes. Strain the milk through a fi ne-mesh strainer.
2. FOR THE ICE CREAM BASE: Make the ice cream base according
to the Classic Ice Cream Method.
3. Strain the base through a fi ne-mesh strainer and cool over
an ice bath. Age the base under refrigeration overnight.
4. Once the base has aged, churn to the desired consistency.
5. Harden for at least 2 hours and up to 4 hours. Reserve until
needed.
NOTES There is an additional 100 g / 3.53 oz of milk to compensate
for the milk that the espresso and cardamom will absorb.
If pacotizing the base, the ice cream can be scooped and
served immediately, but it is easier to work with if it hardens for
1 hour in the freezer.
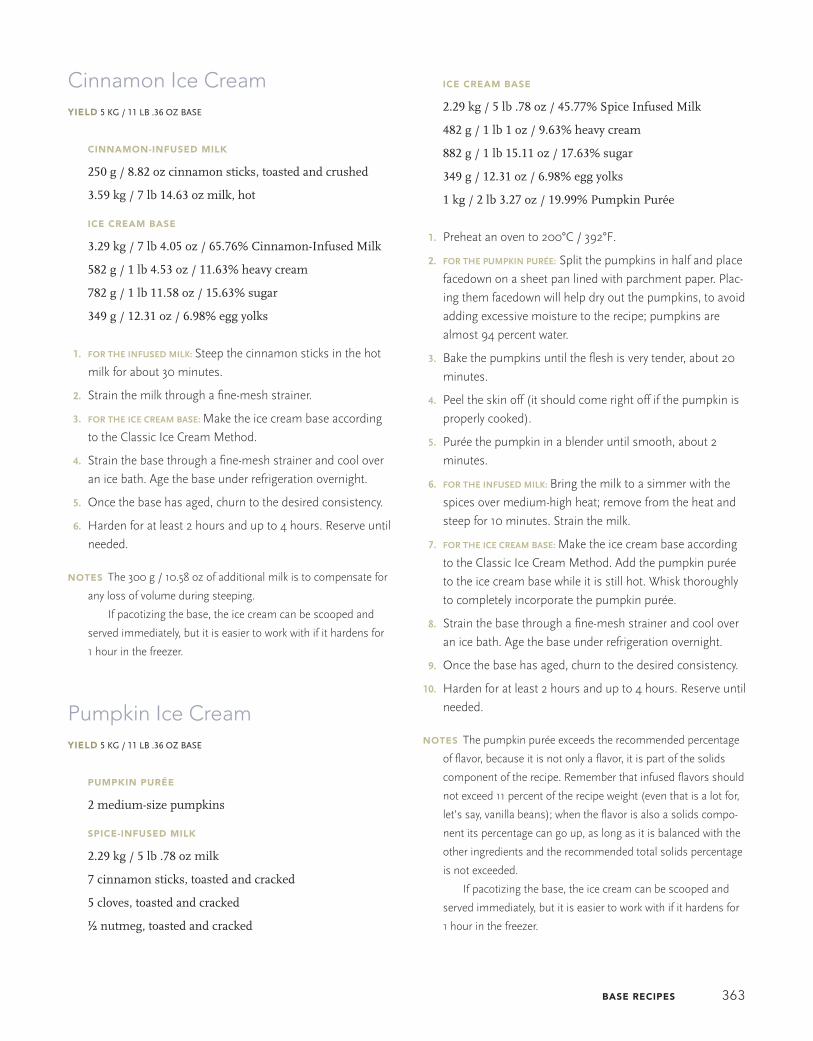
BASE RECIPES 363
Cinnamon Ice CreamYIELD 5 KG / 11 LB .36 OZ BASE
CINNAMON-INFUSED MILK
250 g / 8.82 oz cinnamon sticks, toasted and crushed
3.59 kg / 7 lb 14.63 oz milk, hot
ICE CREAM BASE
3.29 kg / 7 lb 4.05 oz / 65.76% Cinnamon-Infused Milk
582 g / 1 lb 4.53 oz / 11.63% heavy cream
782 g / 1 lb 11.58 oz / 15.63% sugar
349 g / 12.31 oz / 6.98% egg yolks
1. FOR THE INFUSED MILK: Steep the cinnamon sticks in the hot
milk for about 30 minutes.
2. Strain the milk through a fi ne-mesh strainer.
3. FOR THE ICE CREAM BASE: Make the ice cream base according
to the Classic Ice Cream Method.
4. Strain the base through a fi ne-mesh strainer and cool over
an ice bath. Age the base under refrigeration overnight.
5. Once the base has aged, churn to the desired consistency.
6. Harden for at least 2 hours and up to 4 hours. Reserve until
needed.
NOTES The 300 g / 10.58 oz of additional milk is to compensate for
any loss of volume during steeping.
If pacotizing the base, the ice cream can be scooped and
served immediately, but it is easier to work with if it hardens for
1 hour in the freezer.
Pumpkin Ice CreamYIELD 5 KG / 11 LB .36 OZ BASE
PUMPKIN PURÉE
2 medium-size pumpkins
SPICE-INFUSED MILK
2.29 kg / 5 lb .78 oz milk
7 cinnamon sticks, toasted and cracked
5 cloves, toasted and cracked
½ nutmeg, toasted and cracked
ICE CREAM BASE
2.29 kg / 5 lb .78 oz / 45.77% Spice Infused Milk
482 g / 1 lb 1 oz / 9.63% heavy cream
882 g / 1 lb 15.11 oz / 17.63% sugar
349 g / 12.31 oz / 6.98% egg yolks
1 kg / 2 lb 3.27 oz / 19.99% Pumpkin Purée
1. Preheat an oven to 200°C / 392°F.
2. FOR THE PUMPKIN PURÉE: Split the pumpkins in half and place
facedown on a sheet pan lined with parchment paper. Plac-
ing them facedown will help dry out the pumpkins, to avoid
adding excessive moisture to the recipe; pumpkins are
almost 94 percent water.
3. Bake the pumpkins until the fl esh is very tender, about 20
minutes.
4. Peel the skin off (it should come right off if the pumpkin is
properly cooked).
5. Purée the pumpkin in a blender until smooth, about 2
minutes.
6. FOR THE INFUSED MILK: Bring the milk to a simmer with the
spices over medium-high heat; remove from the heat and
steep for 10 minutes. Strain the milk.
7. FOR THE ICE CREAM BASE: Make the ice cream base according
to the Classic Ice Cream Method. Add the pumpkin purée
to the ice cream base while it is still hot. Whisk thoroughly
to completely incorporate the pumpkin purée.
8. Strain the base through a fi ne-mesh strainer and cool over
an ice bath. Age the base under refrigeration overnight.
9. Once the base has aged, churn to the desired consistency.
10. Harden for at least 2 hours and up to 4 hours. Reserve until
needed.
NOTES The pumpkin purée exceeds the recommended percentage
of fl avor, because it is not only a fl avor, it is part of the solids
component of the recipe. Remember that infused fl avors should
not exceed 11 percent of the recipe weight (even that is a lot for,
let’s say, vanilla beans); when the fl avor is also a solids compo-
nent its percentage can go up, as long as it is balanced with the
other ingredients and the recommended total solids percentage
is not exceeded.
If pacotizing the base, the ice cream can be scooped and
served immediately, but it is easier to work with if it hardens for
1 hour in the freezer.

364 FROZEN DESSERTS
Vanilla Ice CreamYIELD 5 KG / 11 LB .36 OZ BASE
ICE CREAM BASE
3.29 kg / 7 lb 4.05 oz / 65.76% milk
582 g / 1 lb 4.53 oz / 11.63% heavy cream
782 g / 1 lb 11.58 oz / 15.63% sugar
349 g / 12.31 oz / 6.98% egg yolks
150 g / 5.29 oz Tahitian vanilla beans
1. Make the ice cream base according to the Classic Ice
Cream Method.
2. Strain the base through a fi ne-mesh strainer and cool over
an ice bath. Age the base under refrigeration overnight.
3. Once the base has aged, churn to the desired consistency.
4. Harden for at least 2 hours and up to 4 hours. Reserve until
needed.
NOTES The 150 g / 5.29 oz of vanilla bean (preferably Tahitian) are
for fl avor only and are not part of the ice cream amount for for-
mulation.
If pacotizing the base, the ice cream can be scooped and
served immediately, but it is easier to work with if it hardens for
1 hour in the freezer.
Chocolate Ice CreamYIELD 5 KG / 11 LB .36 OZ BASE
ICE CREAM BASE
3.32 kg / 7 lb 5.11 oz / 66.39% milk
123 g / 4.34 oz / 2.46% heavy cream
703 g / 1 lb 8.8 oz / 14.06% sugar
355 g / 12.52 oz / 7.1% egg yolks
500 g / 1 lb 1.64 oz / 9.99% dark chocolate, melted (64%)
1. Make the ice cream base according to the Classic Ice
Cream Method. Add the melted chocolate to the ice cream
base while it is still hot. Whisk thoroughly to fully incorpo-
rate the chocolate.
2. Strain the base through a fi ne-mesh strainer and cool over
an ice bath. Age the base under refrigeration overnight.
3. Once the base has aged, churn to the desired consistency.
4. Harden for at least 2 hours and up to 4 hours. Reserve until
needed.
NOTES Always remember to use a high-quality chocolate. The
chocolate used in this formula has 64 percent chocolate liquor.
Other chocolates may be substituted; however, it would be nec-
essary to make sure that the level of fat in the recipe would be in
range. The sugar in this recipe is only 14 percent because of the
amount of sugar present in the chocolate used. For 64 percent
chocolate liquor chocolate, there is 36 percent sugar, which is
included in the total solid percentage of 60 percent.
If pacotizing the base, the ice cream can be scooped and
served immediately, but it is easier to work with if it hardens for
1 hour in the freezer.
Macadamia Nut Ice CreamYIELD 5 KG / 11 LB .36 OZ BASE
MACADAMIA NUT-INFUSED MILK
1 kg / 2 lb 3.27 oz macadamia nuts
4 kg / 8 lb 13.09 oz milk
ICE CREAM BASE
3.24 kg / 7 lb 2.29 oz / 64.76% Macadamia Nut-Infused
Milk
582 g / 1 lb 4.53 oz / 11.63% heavy cream
832 g / 1 lb 13.35 oz / 16.63% sugar
349 g / 12.31 oz / 6.98% egg yolks
1. FOR THE INFUSED MILK: Crush and toast the macadamia
nuts in a 176°C / 350°F oven until the nuts begin to have
a toasted aroma. Bring the milk to a simmer and add the
nuts to the hot milk when they come out of the oven. Steep
the milk for 30 minutes, strain the nuts out and weigh the
required amount of milk.
2. FOR THE ICE CREAM BASE: Make the ice cream base according
to the Classic Ice Cream Method.
3. Strain the base through a fi ne-mesh strainer and cool over
an ice bath. Age the base under refrigeration overnight.
4. Once the base has aged, churn to the desired consistency.
5. Harden for at least 2 hours and up to 4 hours. Reserve until
needed.

BASE RECIPES 365
NOTES Review the information on steeping on page 27.
If pacotizing the base, the ice cream can be scooped and
served immediately, but it is easier to work with if it hardens for
1 hour in the freezer.
Coconut Ice CreamYIELD 5 KG / 11 LB .36 OZ BASE
COCONUT-INFUSED MILK
1.5 kg / 3 lb 4.91 oz desiccated coconut
3.5 kg / 7 lb 11.46 oz skim milk
ICE CREAM BASE
2.62 g / 5 lb 12.42 oz / 52.39% Coconut-Infused Milk
682 g / 1 lb 8.06 oz / 13.64% sugar
349 g / 12.31 oz / 6.98% egg yolks
1.35 kg / 2 lb 15.62 oz / 26.99% coconut purée
1. FOR THE COCONUT-INFUSED MILK: Toast the coconut in a
176°C / 350°F oven until it begins to have a toasted aroma.
Bring the skim milk to a simmer over medium-high heat.
Steep toasted coconut while it is hot in the hot skim milk.
Strain through a fi ne-mesh strainer.
2. FOR THE ICE CREAM BASE: Make the ice cream base according
to the Classic Ice Cream Method.
3. Add the coconut purée once the custard is made and hot.
Whisk thoroughly to completely dissolve the coconut purée.
4. Strain the base through a fi ne-mesh strainer and cool over
an ice bath. Age the base under refrigeration overnight.
5. Once the base has aged, churn to the desired consistency.
6. Harden for at least 2 hours and up to 4 hours. Reserve until
needed.
NOTES The toasted coconut is used only to infuse its fl avor into the
recipe.
The coconut purée has a very high fat content, which is why
this recipe is made with skim milk and has no heavy cream.
The sugar percentage is low, but most of the solids percent-
age is sugar (factory-made purées contain an average of 10 per-
cent of their weight in sugar), which will impact the sweetness
of the recipe.
The fat is close to being high, but it is a fl uid fat that will not
congeal while churning or pacotizing.
If pacotizing the base, the ice cream can be scooped and
served immediately, but it is easier to work with if it hardens for
1 hour in the freezer.
White Chocolate Ice CreamYIELD 5 KG / 11 LB .36 OZ BASE
ICE CREAM BASE
2.19 kg / 4 lb 13.25 oz / 43.76% whole milk
1.04 kg / 2 lb 4.68 oz / 20.78% skim milk
534 g / 1 lb 2.84 oz / 10.67% sugar
341 g / 12.03 oz / 6.81% egg yolks
900 g / 1 lb 15.75 oz / 17.98% white chocolate, fi nely
chopped or pistoles
1. Make the ice cream base according to the Classic Ice
Cream Method. Add the white chocolate while the base is
still hot and whisk thoroughly to completely dissolve the
white chocolate.
2. Strain the base through a fi ne-mesh strainer and cool over
an ice bath. Age the base under refrigeration overnight.
3. Once the base has aged, churn to the desired consistency.
4. Harden for at least 2 hours and up to 4 hours. Reserve until
needed.
NOTES The sugar amount is considerably low because this ice
cream is for a savory application (served with caviar in a savory
tuile cone).
It has a very high solids percentage, but the fat percentage
is within a good range.
If pacotizing the base, the ice cream can be scooped and
served immediately, but it is easier to work with if it hardens for
1 hour in the freezer.

366 FROZEN DESSERTS
Don’t forget that the only real distinction between ice cream of any kind and gelato is the overrun (see overrun, page 63). The follow-
ing recipes are based on the classic custard formulas and their recommended maximum and minimum percentages of ingredients.
This means that all of the recipes for classic custard can also be gelatos, if they are churned in a batch freezer to control their overrun.
Add .5 g / .02 oz of salt per liter of base to further enhance fl avors; the formula does not need to be adjusted because the
amount of salt is minimal.
GELATOS
Burnt Milk GelatoYIELD 5 KG / 11 LB .36 OZ BASE
GELATO BASE
4.5 kg / 9 lb 14.73 oz / 74.98% milk
348 g / 12.28 oz / 6.96% heavy cream
801 g / 1 lb 12.25 oz / 16.02% sugar
352 g / 12.42 oz / 7.04% egg yolks
1. Cook the milk in a very tall pot until the milk solids and fat
burn on the bottom of the pot, thus infusing the milk with
its fl avor. Reserve 3.5 kg / 7 lb 11.46 oz of the burnt milk.
2. Make the gelato according to the Classic Ice Cream Method.
3. Strain the base through a fi ne-mesh strainer and cool over
an ice bath. Age the base under refrigeration overnight.
4. Once the base has aged, churn to the desired consistency.
5. Harden for at least 2 hours and up to 4 hours. Reserve until
needed.
NOTES There are no solids left in the milk because they are all
burned out and left on the bottom of the pot.
The fat is lower than that of whole milk because a portion of
the fat will sink to the bottom of the pot and burn while cooking.
If pacotizing the base, the gelato can be scooped and served
immediately, but it is easier to work with if it hardens for 1 hour
in the freezer.
I fi rst tasted this fl avor as an ice cream in Oaxaca, Mexico. It
was made by a man and his family who would hand crank close
to fi fteen different fl avors daily without the luxury of having a
freezer to keep them in once the bases were frozen. They would
simply keep the buckets containing the ice creams and sorbets in
the saltpeter that was used to freeze them. The saltpeter was re-
freshed throughout the day. They had an array of unusual fl avors,
like avocado and corn, which many people may not fi nd that
unusual, but I am talking about very humble people with very few
resources who I am willing to bet couldn’t care less about trends
and what the Adriàs are doing in Spain. Even more astounding
is the fact that this was in the early 1980s, when unusual fl avors
weren’t the trend. At fi rst I was hesitant to taste something
burned, but after the fi rst spoonful I was sold. It tasted just like
it was intended to: burnt milk, but when combined with the
other ingredients and in its frozen state, I fell in love with that
fl avor, which was smoky, sweet, cold, and rich at the same time.
This was where it all began for me, in a remote village where ice
cream and sorbet making is a craft that has remained unchanged
for decades. If you ever go to Oaxaca, make sure you visit the
ruins in Monte Alban. I don’t know the man’s name, but I’m sure
he’s still there, making wonderful ice cream with a whole lot of
elbow grease. I wonder what he’d think of this book?
Turrón GelatoYIELD 5 KG / 11 LB .36 OZ BASE
GELATO BASE
2.93 kg / 6 lb 7.35 oz / 58.52% milk
523 g / 2 lb 2.45 oz / 10.48% heavy cream
703 g / 1 lb 8.8 oz / 14.04% sugar
350 g / 1 lb 5.89 oz / 6.99% egg yolks
500 g / 1 lb 1.64 oz / 9.99% turrón, crumbled
1. Make the gelato base according to the Classic Ice Cream
Method. Add the turrón while the base is still hot; whisk
thoroughly to completely dissolve.
2. Strain the base through a fi ne-mesh strainer and cool over
an ice bath. Age the base under refrigeration overnight.
3. Once the base has aged, churn to the desired consistency.
Classic Method

BASE RECIPES 367
4. Harden for at least 2 hours and up to 4 hours. Reserve until
needed.
NOTES The percentage of sugar in this recipe is not 16 percent
due to the sweetness of the turrón, which compensates for the
smaller amount of sugar used.
If pacotizing the base, the gelato can be scooped and served
immediately, but it is easier to work with if it hardens for 1 hour
in the freezer.
Turrón is an almond confection made in Spain; do not con-
fuse it with Italian torrone, as they are two different items. Tur-
rón is crumbly and easily dissolves into the hot ice cream base,
leaving very few solids behind once strained.
Strawberry GelatoYIELD 5 KG / 11 LB .36 OZ BASE
GELATO BASE
2.85 kg / 6 lb 4.53 oz / 57% milk
400 g / 14.12 oz / 8% heavy cream
900 g / 1 lb 15.75 oz / 18% sugar
350 g / 12.35 oz / 7% egg yolks
500 g / 1 lb 1.64 oz / 10% strawberry purée
1. Make the gelato according to the Classic Ice Cream Meth-
od. Cool the base over an ice bath.
2. Add the strawberry purée once the gelato base has cooled;
whisk thoroughly to completely dissolve the purée.
3. Strain the base through a fi ne-mesh strainer. Age the base
under refrigeration overnight.
4. Once the base has aged, churn to the desired consistency.
5. Harden for at least 2 hours and up to 4 hours. Reserve until
needed.
NOTES Add the strawberry purée once the custard has cooled
down. If it is added while the base is hot, it will change the fl avor
of the strawberries.
Always use strawberries when they are in season for the
best fl avor; fraises des bois have an excellent fl avor, if available.
To enhance the strawberry fl avor further, macerate them with
30 g / 1.06 oz of balsamic vinegar (just enough to coat them) and
30 g / 1.06 oz of sugar for at least an hour. Purée them together.
Be sure to make the necessary adjustments in the recipe (because
of the addition of balsamic vinegar and sugar). The amounts
won’t change dramatically, but the fl avor will.
Another alternative is to roast the strawberries with 50 g /
1.06 oz of sugar until they are tender, then purée them. If desired,
roast the strawberries with spices, such as cinnamon, juniper ber-
ries, allspice, star anise, etc., to make Spiced Strawberry Gelato.
If pacotizing the base, the gelato can be scooped and served
immediately, but it is easier to work with if it hardens for 1 hour
in the freezer.
Roasted Black Mission Fig GelatoYIELD 5 KG / 11 LB .36 OZ BASE
MISSION FIG PURÉE
750 g / 1 lb 10.45 oz Mission fi gs
GELATO BASE
2.72 kg / 5 lb 15.94 oz / 54.32% milk
537 g / 1 lb 2.94 oz / 10.72% heavy cream
900 g / 1 lb 15.75 oz / 17.97% sugar
350 g / 12.35 oz / 6.99% egg yolks
500 g / 1 lb 1.64 oz / 9.99% Mission Fig Purée
1. FOR THE FIG PURÉE: Preheat an oven to 170°C / 338°F.
2. Split the fi gs in half and trim off the stems. Place them in a
hotel pan with the seed side up. Roast until tender, about
20 minutes, then purée in a blender.
3. FOR THE GELATO BASE: Make the gelato base according to the
Classic Ice Cream Method. Add the fi g purée to the base
while it is still hot; whisk thoroughly to completely dissolve
the purée.
4. Strain the base through a fi ne-mesh strainer. Do not strain the
base if you want to keep the seeds for texture. Cool the base
over an ice bath. Age the base under refrigeration overnight.
5. Once the base has aged, churn to the desired consistency.
6. Harden for at least 2 hours and up to 4 hours. Reserve until
needed.
NOTES If desired, add spices (such as cinnamon, star anise, and
clove) to the fi gs while they are roasting for additional fl avors.
Citrus peel is another nice addition. Adding sugar or other liq-
uids (such as port) is not recommended while roasting.
If pacotizing the base, the gelato can be scooped and served
immediately, but it is easier to work with if it hardens for 1 hour
in the freezer.

368 FROZEN DESSERTS
Gianduja GelatoYIELD 5 KG / 11 LB .36 OZ BASE
GELATO BASE
3.09 kg / 6 lb 13 oz / 61.76% milk
282 g / 9.95 oz / 5.63% heavy cream
782 g / 1 lb 11.58 oz / 15.63% sugar
349 g / 12.31 oz / 6.98% egg yolks
500 g / 1 lb 1.64 oz / 9.99% gianduja, fi nely chopped
1. Make the gelato base according to the Classic Ice Cream
Method. Add the gianduja while the base is still hot; whisk
thoroughly to completely dissolve the gianduja.
2. Strain the base through a fi ne-mesh strainer and cool the
base over an ice bath. Age the base under refrigeration
overnight.
3. Once the base has aged, churn to the desired consistency.
4. Harden for at least 2 hours and up to 4 hours. Reserve until
needed.
NOTES Most high-quality gianduja contains no less than 32 percent
cocoa solids, 8 percent nonfat solids, and between 20 and 40
percent hazelnuts (in paste form). As for fat, the average is be-
tween 22 and 40 percent.
The sugar percentage is under the minimum recommended
because of the sugar contained in the gianduja, which will affect
the sweetness.
If pacotizing the base, the gelato can be scooped and served
immediately, but it is easier to work with if it hardens for 1 hour
in the freezer.
Sicilian Pistachio GelatoYIELD 5 KG / 11 LB .36 OZ BASE
GELATO BASE
3.37 g / 7 lb 6.87 oz / 67.39% milk
782 g / 1 lb 11.55 oz / 15.64% sugar
349 g / 12.31 oz / 6.98% egg yolks
500 g / 1 lb 1.64 oz / 9.99% unsweetened pure pistachio
paste
1. Make the gelato base according to the Classic Ice Cream
Method. Add the pistachio paste while the custard is still
hot. Whisk thoroughly to completely dissolve the paste.
2. Strain the base through a fi ne-mesh strainer and cool the
base over an ice bath. Age the base under refrigeration
overnight.
3. Once the base has aged, churn to the desired consistency.
4. Harden for at least 2 hours and up to 4 hours. Reserve until
needed.
NOTES Sicilian pistachios are arguably the highest-quality pistachios
available, on account of their fl avor, texture, and intense green
color.
Pistachios contain 7.64 percent sugar by weight and they
are one of the fattier nuts, with 44.44 percent fat by weight.
If pacotizing the base, the gelato can be scooped and served
immediately, but it is easier to work with if it hardens for 1 hour
in the freezer.

BASE RECIPES 369
Modern Method Base Recipe Framework
All of the ice cream recipes made in the modern method are based on the formula below; it is the “mother” recipe
from which all other recipes are formulated. There is also a chart on the next page with the maximum and minimum
percentages recommended for each ingredient.
This recipe is made to yield 5 kg / 11 lb .37 oz liquid base, but just like all the other recipes in this chapter, there is a
percentage next to each amount so that the recipe can be formulated based on whatever yield is desired. In addition,
spreadsheets are included in the electronic ancillary materials that will calculate the new recipe yields as well.
Although there is the option of the non-custard ice cream base, it is a matter of personal preference that these recipes
contain eggs, because the alternative would be to increase the milk powder percentage in order to increase solids per-
centages, and while milk powder has its place, too much of it in a recipe imparts its characteristic fl avor, which can
overwhelm the principal fl avor(s).
The sugar percentage (16 percent) has been broken down to 66.66 percent granulated sugar, 25 percent glucose pow-
der, and 8.35 percent trimoline, which will give us enough sweetening power with the right proportion of solids, with
the added benefi t of the qualities of glucose powder and trimoline (see sugars on page 15).
If possible, churn these ice cream bases in a batch freezer, but they work just as well in a Pacojet if the precautions
mentioned in chapter 3 are followed (referring to machines, page 15).
When adding a fl avor to the recipe the necessary adjustments must be made in regard to fat content, water content, and
solids content in order to obtain the precise yield needed while still keeping the recipe properly balanced.
Try to respect the recommended maximum and minimum percentages in the fi rst chart. If the percentages over or
under by a fraction of a percent, the ice cream base will hardly suffer; it’s when they’re off by 3, 4, or 5 percent or more
that a dramatic impact on the result (visually and/or texturally) will be seen.
RECIPE FORMULATION COMPOSITION OF INGREDIENT (%)
INGREDIENT AMOUNT% OF TOTAL RECIPE FAT WATER SERUM
NONFAT SOLIDS
Whole milk 3679.64 g 73.59 132.47 g
(3.6%)
3238.08 g
(88%)
441.56 g
(12%)
309.09 g
(8%)
Milk powder 152.86 g 3.06 0 6.11 g (4%) 0 146.74 g
(96%)
Sugar 533.28 g 10.67 0 0 0 533.28 g
(100%)
Glucose powder 200 g 4 0 10 g (5%) 0 190 g
(95%)
Trimoline 66.72 g 1.33 0 14.68 g
(22%)
0 52.04 g
(78%)
Stabilizer-Emulsifi er Mix 17.5 g .35 0 0 0 17.5 g
(100%)
Egg yolks 350 g 7 115.50 g
(33%)
175 g (50%) 0 59.5 g
(17%)
Flavor 0 0 0 0 0 0
Total 5000 g 100 247.97 g
(4.96%)
3443.88 g
(68.88%)
1556.12
(31.12%)
1308.15 g
(26.16%)

370 FROZEN DESSERTS
ICE CREAM CUSTARD-BASE ICE CREAM
INGREDIENT MIN MAX MIN MAX
Fat (from milk, heavy cream, butter, egg yolks, and other dairy
products)
7% 11% 2% 11%
Stabilizers .30% 1% .30% 1%
Emulsifi ers .20% .30% .20% .30%
Nonfat solids include all solids, even those found in dairy, minus
the fat. Remember, solids can be found in egg yolks (50% is
considered nonfat solids), sweeteners, garnishes, etc. Note: nonfat
solids are used for formulation only; they aren’t an individual
component of a recipe.
24% 30 15% 30
Total solids: Includes the above plus all fats, which can be found
in all forms of dairy and added ingredients (for example, the fat
content in milk chocolate).
31% 41% 25% 41%
Liquid: refers to any and all ingredients minus all solids, including
fats
100%
minus
solid%
100%
minus
solid%
100%
minus
solid%
100%
minus
solid%
Sugar (sweetening strength, is the addition of all sugars, solid
and liquid). Remember that a variety of sugars can be used in
combination.
16% 23% 16% 23%
Egg yolks N/A N/A 7% 9%
Flavors 2% 10% 2% 10%
Minimum and Maximum Percentages
1. Scale all of the ingredients accurately.
2. Mix 10 percent of the sugar with the stabilizer, which can be
combined with the emulsifi er(s).
3. At 25°C / 77°F, add the milk powder and fl avoring. From
this point on, whisking should be constant to prevent any
of the ingredients from settling to the bottom of the pot.
4. At 35°C / 95°F, pour in and mix all of the sugars until dis-
solved. This refers to any type of sugar, either in solid (gran-
ulated) or liquid form (trimoline, for example). Some reci-
pes might contain egg yolks. If so, they should be whisked
in at this temperature.
5. At 45°C / 113°F, add the heavy cream, if applicable.
6. Before the mixture reaches 50°C / 122°F, add the stabilizer-
sugar mix in a slow pouring motion while whisking
constantly.
7. Bring the mixture up to 85°C / 185°F, take off the heat, and
cook for 2 more minutes while whisking constantly to pas-
teurize and homogenize the mixture.
8. Pass the mixture through a fi ne-mesh strainer and chill to
4°C / 39°F as quickly as possible, using an ice bath. If steep-
ing fl avors, chill over an ice bath, but do not pass through a
fi ne-mesh strainer until just before churning.
9. Let the mixture age under refrigeration for at least 4 hours
or ideally for 12 hours.
10. Before churning, give the base a good stir.
11. Churn to −8°C / 18°F.
12. Place the churned product in a −10°C / 14°F freezer. Re-
serve for service.
Modern Method

BASE RECIPES 371
Stabilizer-Emulsifi er Mix
200 g / 7.05 oz xanthan gum
250 g / 8.82 oz locust bean gum
250 g / 8.82 oz guar gum
100 g / 3.53 oz monoglycerides (emulsifi er)
100 g / 3.53 oz diglycerides (emulsifi er)
Mix all of the ingredients together thoroughly.
Almond Ice CreamYIELD 5 KG / 11 LB .36 OZ BASE
ALMOND-INFUSED MILK
1 kg / 2 lb 3.27 oz Marcona almonds, slivered and
toasted
4.3 kg / 9 lb 7.68 oz milk
ICE CREAM BASE
3.68 kg / 8 lb 1.81 oz / 73.59% Almond-Infused Milk
153 g / 5.39 oz / 3.06% milk powder
533 g / 1 lb 2.81 oz / 10.66% sugar
200 g / 7.05 oz / 4% glucose powder
67 g / 2.35 oz / 1.34% trimoline
18 g / .28 oz / .36% Stabilizer-Emulsifi er Mix (above)
350 g / 12.35 oz / 7% egg yolks
1. FOR THE ALMOND-INFUSED MILK: Keep the almonds warm
while the milk is brought to a simmer. Steep the hot
toasted almonds in the hot milk for at least 2 hours.
2. Strain the infused milk through a fi ne-mesh strainer.
3. FOR THE ICE CREAM BASE: Make the ice cream base according
to the Modern Ice Cream Method.
4. Strain the base through a fi ne-mesh strainer and cool the
base over an ice bath. Age the base under refrigeration
overnight.
5. Once the base has aged, churn to the desired consistency.
6. Harden for at least 2 hours and up to 4 hours. Reserve until
needed.
NOTES The almonds are only a fl avor, not a solids component, and
therefore are not part of the formula.
If pacotizing the base, the ice cream can be scooped and
served immediately, but it is easier to work with if it hardens for
1 hour in the freezer.
Spice Ice CreamYIELD 5 KG / 11 LB .36 OZ BASE
SPICE-INFUSED MILK
3.9 kg / 8 lb 9.57 oz milk
163 g / 5.75 oz cinnamon sticks, toasted and crushed
1 whole nutmeg, toasted and crushed
10 cloves, toasted and crushed
75 g / 2.65 oz ginger, peeled
ICE CREAM BASE
3.68 kg / 8 lb 1.81 oz / 73.61% Spice-Infused Milk
152 g / 5.39 oz / 3.04% milk powder
533 g / 1 lb 2.81 oz / 10.66% sugar
200 g / 7.05 oz / 4% glucose powder
66 g / 2.35 oz / 1.32% trimoline
18 g / .63 oz / .36% Stabilizer-Emulsifi er Mix (this page)
350 g / 12.35 oz / 7% egg yolks
1. FOR THE SPICE-INFUSED MILK: Bring the milk to a simmer and
add the cinnamon, nutmeg, and cloves to the hot milk.
Crush the ginger and add it to the milk. Steep for 2 hours.
2. Strain the infused milk through a fi ne-mesh strainer.
3. Make the ice cream base according to the Modern Ice
Cream Method.
4. Strain the base through a fi ne-mesh strainer and cool the
base over an ice bath. Age the base under refrigeration
overnight.
5. Once the base has aged, churn to the desired consistency.
6. Harden for at least 2 hours and up to 4 hours. Reserve until
needed.
NOTES The fl avors are for steeping only and do not contribute to
the balance of the recipe.
If pacotizing the base, the ice cream can be scooped and
served immediately, but it is easier to work with if it hardens for
1 hour in the freezer.

372 FROZEN DESSERTS
Vanilla and Strawberry Jam Ice CreamYIELD 5 KG / 11 LB .36 OZ BASE
STRAWBERRY JAM
1 kg / 2 lb 3.27 oz strawberries, washed and stems
trimmed
1 kg / 2 lb 3.27 oz sugar
ICE CREAM BASE
2.95 kg / 6 lb 8.06 oz / 73.64% milk
122 g / 4.31 oz / 3.05% milk powder
427 g / 15.05 oz / 10.66% sugar
160 g / 5.64 oz / 4% glucose powder
53 g / 1.88 oz / 1.32% trimoline
14 g / .49 oz / .35% Stabilizer-Emulsifi er Mix (page 371)
280 g / 9.88 oz / 7% egg yolks
150 g / 5.29 oz vanilla pods (Tahitian)
1 kg / 2 lb 3.27 oz Strawberry Jam
1. FOR THE STRAWBERRY JAM: Cook the strawberries with the sug-
ar over medium-high heat to 108°C / 226°F. If desired, add
vanilla pods and other spices to the strawberry jam while it
is cooking. Cool to room temperature.
2. FOR THE ICE CREAM BASE: Make the ice cream base according
to the Modern Ice Cream Method.
3. Strain the base through a fi ne-mesh strainer and cool the
base over an ice bath. Age the base under refrigeration
overnight.
4. Once the base has aged, churn to the desired consistency.
5. Layer the jam with the ice cream in alternating layers as the
ice cream is extruded from the batch freezer (see Notes).
Even out each layer of ice cream and jam with a small off-
set spatula.
6. Harden for at least 2 hours and up to 4 hours. Reserve until
needed.
NOTES The jam is not added to the ice cream base before churn-
ing. The jam is layered with the ice cream in alternating layers as
the ice cream is extruded from the batch freezer. For example, 3
layers of ice cream and 2 layers of jam (make sure the bottom,
middle, and top layer are ice cream, with 2 layers of strawberry
jam between them).
The formula has the same proportions of the framework
recipe base (with the exception of the vanilla pods) based on
4 kg / 8 lb 13.09 oz of base. The 1 kg / 2 lb 3.27 oz of jam makes
the formula yield a total desired yield of 5 kg / 11 lb .36 oz.
The vanilla pods are split and scraped and steeped into
the milk and cream, and, for maximum fl avor infusion, they are
removed once the base is fi nished. The amount was not added
to the total weight of the recipe because the vanilla pods will be
removed (they are a fl avor only, not a solid component).
If pacotizing the base, the ice cream can be scooped and
served immediately, but it is easier to work with if it hardens for
1 hour in the freezer.

BASE RECIPES 373
Stracciatella Ice Cream (Italian Chocolate Chip Ice Cream)YIELD 5 KG / 11 LB .36 OZ BASE
ICE CREAM BASE
3.31 kg / 7 lb 4.75 oz / 73.56% milk
138 g / 4.87 oz / 3.07% milk powder
480 g / 16.93 oz / 10.67% sugar
180 g / 6.35 oz / 4% glucose powder
60 g / 2.12 oz / 1.3% trimoline
16 g / .56 oz / .35% Stabilizer-Emulsifi er Mix (page 371)
315 g / 11.11 oz / 7% egg yolks
500 g / 1 lb 1.64 oz / 10% chocolate (74%), melted but
cooled
1. Make the ice cream base according to the Modern Ice
Cream Method.
2. Strain the base through a fi ne-mesh strainer and cool the
base over an ice bath. Age the base under refrigeration
overnight.
3. Once the base has aged, churn to the desired consistency.
Pour the chocolate into the base while it is still churning in
the batch freezer. The optimal temperature of the base at
this point is -5.55°C / 22° F.
4. Finish the ice cream base in the batch freezer.
5. Harden for at least 2 hours and up to 4 hours. Reserve until
needed.
NOTES Take the ice cream’s temperature while it is churning with a
laser thermometer so as to not interrupt the churning process.
This formula has the same proportions as the framework
recipe base, but this recipe was calculated for 4.5 kg / 9 lb 14.73
oz of base and with the melted chocolate added it will yield 5
kg / 11 lb .36 oz of ice cream.
Rye Bread Ice CreamYIELD 5 KG / 11 LB .36 OZ BASE
RYE-INFUSED MILK
5 kg / 11 lb .37 oz milk
1 kg / 2 lb 3.27 oz warm toasted rye bread
ICE CREAM BASE
3.68 kg / 8 lb 1.81 oz / 73.57% Rye-Infused Milk
153 g / 5.4 oz / 3.06% milk powder
534 g / 1 lb 2.84 oz / 10.68% sugar
200 g / 7.05 oz / 4% glucose powder
67 g / 2.36 oz / 1.34% trimoline
18 g / .64 oz / .36% Stabilizer-Emulsifi er Mix (page 371)
350 g / 12.35 oz / 7% egg yolks
1. FOR THE RYE INFUSED MILK: Bring the milk to a simmer. Steep
the rye bread in the milk for 10 minutes; strain the infused
milk through a fi ne-mesh strainer.
2. FOR THE ICE CREAM BASE: Make the ice cream base according
to the Modern Ice Cream Method.
3. Strain the base through a fi ne-mesh strainer and cool the
base over an ice bath. Age the base under refrigeration
overnight.
4. Once the base has aged, churn to the desired consistency.
5. Harden for at least 2 hours and up to 4 hours. Reserve until
needed.
NOTES If pacotizing the base, the ice cream can be scooped and
served immediately, but it is easier to work with if it hardens for
1 hour in the freezer.

374 FROZEN DESSERTS
Marzipan Ice CreamYIELD 5 KG / 11 LB .36 OZ BASE
ICE CREAM BASE
3.18 kg / 7 lb .17 oz / 63.59% milk
153 g / 5.39 oz / 3.06% milk powder
533 g / 18.81 oz / 10.67% sugar
200 g / 7.05 oz / 4% glucose powder
67 g / 2.35 oz / 1.33% trimoline
18 g / .64 oz / .35% Stabilizer-Emulsifi er Mix (page 371)
350 g / 12.35 oz / 7% egg yolks
500 g / 1 lb 1.64 oz / 10% almond paste (50% nuts)
1. Make the ice cream base according to the Modern Ice
Cream Method. Add the almond paste (broken up in piec-
es) while the ice cream base is still hot. Whisk thoroughly
to completely incorporate the almond paste solubles.
2. Strain the base through a fi ne-mesh strainer and cool the
base over an ice bath. Age the base under refrigeration
overnight.
3. Once the base has aged, churn to the desired consistency.
4. Harden for at least 2 hours and up to 4 hours. Reserve until
needed.
NOTES Use an almond paste that is 50 percent nuts. Higher per-
centages are good too, but the fat and solids content in the
recipe will have to be adjusted.
In this case, the almond paste used is 27.74 percent fat
and 14.08 percent water (all soluble and an integral part of the
recipe formulation); the solids percentage is 85.92 percent. 36.25
percent of the total weight is sugar (also soluble). 31 percent of
the total solids are almonds that will not be a part of the recipe,
since they will be left behind once the base is strained. It is be-
cause of this that the recipe has been formulated to exclude 31
percent from the 85.92 percent of the almond paste solids out of
the “total solids weight (without fat)” amount.
If pacotizing the base, the ice cream can be scooped and
served immediately, but it is easier to work with if it hardens for
1 hour in the freezer.
Thyme Ice CreamYIELD 5 KG / 11 LB .36 OZ BASE
THYME-INFUSED MILK
4 kg / 8 lb 13.09 oz milk
1.75 bunches thyme
ICE CREAM BASE
3.68 kg / 8 lb 1.81 oz / 73.59% Thyme-Infused Milk
153 g / 5.4 oz / 3.06% milk powder
533 g / 1 lb 2.81 oz / 10.67% sugar
200 g / 7.05 oz / 4% glucose powder
67 g / 2.36 oz / 1.33% trimoline
18 g / .64 oz / .35% Stabilizer-Emulsifi er Mix (page 371)
350 g / 12.35 oz / 7% egg yolks
1. FOR THE THYME INFUSED MILK: Bring the milk to a simmer.
Steep the thyme in the milk for 10 minutes (any longer will
make the base taste bitter).
2. Once the thyme has steeped in the milk, strain the infused
milk through a fi ne-mesh strainer.
3. FOR THE ICE CREAM BASE: Make the ice cream base according
to the Modern Ice Cream Method.
4. Strain the base through a fi ne-mesh strainer and cool the
base over an ice bath. Age the base under refrigeration
overnight.
5. Once the base has aged, churn to the desired consistency.
6. Harden for at least 2 hours and up to 4 hours. Reserve until
needed.
NOTE If pacotizing the base, the ice cream can be scooped and
served immediately, but it is easier to work with if it hardens for
1 hour in the freezer.

BASE RECIPES 375
Chocolate-Lemon Ice CreamYIELD 5 KG / 11 LB .36 OZ BASE
ICE CREAM BASE
10 lemons, zest only
3.29 kg / 7 lb 4.05 oz / 65.81% milk
138 g / 4.87 oz / 2.76% milk powder
463 g / 16.33 oz / 9.26% sugar
180 g / 6.35 oz / 3.6% glucose powder
60 g / 2.12 oz / 1.2% trimoline
18 g / .64 oz / .36% Stabilizer-Emulsifi er Mix (page 371)
350 g / 12.35 oz / 7% egg yolks
500 g / 1 lb 1.64 oz / 10% dark chocolate (66%), fi nely
chopped
1. Zest the lemons directly into the pot in which the base will
be cooked in order to trap all of their oils.
2. Make the ice cream base according to the Modern Ice
Cream Method. Whisk the chocolate thoroughly into the
base while the base is still hot so that it will melt completely.
3. Strain the base through a fi ne-mesh strainer and cool the
base over an ice bath. Age the base under refrigeration
overnight.
4. Once the base has aged, churn to the desired consistency.
5. Harden for at least 2 hours and up to 4 hours. Reserve until
needed.
NOTES The total amount of sugar equals 14.06 percent and not 16
percent because the chocolate added to the base makes up for
the lowered sugar in the formula.
If pacotizing the base, the ice cream can be scooped and
served immediately, but it is easier to work with if it hardens for
1 hour in the freezer.
Cajeta Ice CreamYIELD 5 KG / 11 LB .36 OZ BASE
ICE CREAM BASE
3.68 kg / 8 lb 1.81 oz / 73.59% goat’s milk
800 g / 1 lb 2.81 oz / 16% sugar
153 g / 5.4 oz / 3.06% milk powder
18 g / .64 oz / .36% Stabilizer-Emulsifi er Mix (page 371)
350 g / 12.35 oz / 7% egg yolks
1. Bring the goat’s milk up to a simmer.
2. Cook the sugar using the dry method over high heat until
dark amber in color, or about 170°C / 338°F. Turn off the
heat. Add the hot goat’s milk slowly while stirring with a
long whisk. Cool over an ice bath.
3. Make the ice cream base according to the Modern Ice
Cream Method.
4. Strain the base through a fi ne-mesh strainer and cool the
base over an ice bath. Age the base under refrigeration
overnight.
5. Once the base has aged, churn to the desired consistency.
6. Harden for at least 2 hours and up to 4 hours. Reserve until
needed.
NOTES Cajeta is the Mexican version of caramel, made with goat’s
milk instead of heavy cream.
For the purpose of this formula, the trimoline and powdered
glucose have been removed so that the granulated sugar may be
made into cajeta.
If pacotizing the base, the ice cream can be scooped and
served immediately, but it is easier to work with if it hardens for
1 hour in the freezer.

376 FROZEN DESSERTS
Grand Marnier Ice CreamYIELD 5 KG / 11 LB .36 OZ BASE
ICE CREAM BASE
3.3 kg / 7 lb 4.4 oz / 66% milk
153 g / 5.4 oz / 3.06% milk powder
535 g / 1 lb 2.87 oz / 10.72% sugar
200 g / 7.05 oz / 4% glucose powder
67 g / 2.36 oz / 1.34% trimoline
18 g / .64 oz / .36% Stabilizer-Emulsifi er Mix (page 371)
350 g / 12.35 oz / 7% egg yolks
375 g / 13.23 oz / 7.5% Grand Marnier
1. Make the ice cream base according to the Modern Ice
Cream Method.
2. Strain the base through a fi ne-mesh strainer. Cool over an
ice bath.
3. Add the Grand Marnier once the base has cooled. If de-
sired, it can be added when the base is hot, but this will
cause much of the alcohol to evaporate. Whisk thoroughly
to completely incorporate the Grand Marnier. Age the base
under refrigeration overnight.
4. Once the base has aged, churn to the desired consistency.
5. Harden for at least 2 hours and up to 4 hours. Reserve until
needed.
NOTE If pacotizing the base, the ice cream can be scooped and
served immediately, but it is easier to work with if it hardens for
1 hour in the freezer.
Rum Ice CreamYIELD 5 KG / 11 LB .36 OZ BASE
ICE CREAM BASE
3.3 kg / 7 lb 4.4 oz / 66% milk
153 g / 5.4 oz / 3.06% milk powder
535 g / 1 lb 2.87 oz / 10.72% sugar
200 g / 7.05 oz / 4% glucose powder
67 g / 2.36 oz / 1.34% trimoline
18 g / .64 oz / .36% Stabilizer-Emulsifi er Mix (page 371)
350 g / 12.35 oz / 7% egg yolks
375 g / 13.23 oz / 7.5% dark rum
1. Make the ice cream base according to the Modern Ice
Cream Method.
2. Strain the base through a fi ne-mesh strainer. Cool the base
over an ice bath.
3. Add the rum once the base has cooled. If desired, it can be
added when the base is hot, but this will cause much of the
alcohol to evaporate. Whisk thoroughly to completely incor-
porate the rum. Age the base under refrigeration overnight.
4. Once the base has aged, churn to the desired consistency.
5. Harden for at least 2 hours and up to 4 hours. Reserve until
needed.
NOTE If pacotizing the base, the ice cream can be scooped and
served immediately, but it is easier to work with if it hardens for
1 hour in the freezer.

BASE RECIPES 377
Classic Method Sorbets
The sorbets made with this method are perhaps the simplest in this book, since they contain very few ingredients. For this
reason, though, they need to be properly balanced. Always keep in mind the following recommended percentages:
INGREDIENT MINIMUM MAXIMUM
Fruit purée (sweet fruit) 40% total weight 60% total weight
Fruit purée or juice (acidic fruit) 25% total weight 40% total weight
Dry extracts (fruit solids plus sugar and powdered glucose) 31% 36%
Stabilizer (if used) 0% 1% total weight
Percentage of sugar (or Brix) 25% (or 25° Brix) 32% (or 32° Brix)
SORBETS
The recipes were made based on the average amount of sugar
(if applicable, as some ingredients contain no sugar) and sol-
ids found in the main fl avoring. This is important to remem-
ber especially for fruit (or vegetable) sorbets, since their sugar
and solids content can vary from fruit to fruit (or vegetable to
vegetable). Always check that the Brix degrees in the fi nished
base are within range by using a refractometer, and add or
subtract the simple syrup as necessary. The simple syrup
used for these recipes was based on a simple syrup at 50°
Brix (equal parts sugar and water by weight).
It is highly recommended that these sorbets be pacotized
to ensure a smooth texture. They are the simplest form of
sorbet, but also the most susceptible to damage and decay
during service, even if great care is taken. In many instances,
even though the recipe is properly balanced, there is some
syrup separation, which occurs in many sorbet bases that
contain very few solids. In sorbet bases that contain little sug-
ar, there will be large ice crystal formation as a result (remem-
ber that sugar depresses the freezing point of water, and the
smaller the amount of sugar, the more the water content is
susceptible to freezing). Many of these recipes are for savory
items, which translate to a lower sugar content that will affect
freezing temperatures and ice crystal formation. The Pacojet
is ideal for this method, since the bases can be pacotized to
order. If a Pacojet is not available, churn small amounts of
these savory bases during service, but plan accordingly since
time for hardening must be allowed. If the results are unsatis-
factory, or a Pacojet is unavailable, try making the sorbet with
Modern methods #2 or #3 (see pages 387 and 390).
Try adding .5 g / .02 oz of salt per liter of base to enhance
fl avors; do not include this amount in the formulation be-
cause it is minimal and it will impact only fl avor.

378 FROZEN DESSERTS
Matcha SorbetYIELD 5 KG / 11 LB .36 OZ BASE
SORBET BASE
2 kg / 4 lb 6.55 oz / 40% matcha tea
3 kg / 6 lb 9.82 oz / 60% simple syrup (50° Brix)
1. Make the sorbet base according to the Classic Sorbet
Method.
2. Whisk thoroughly before churning.
3. Pacotize or churn to the desired consistency. If using a
Pacojet, freeze the base in a beaker until hardened, and
then pacotize.
4. Harden for at least 2 hours and up to 4 hours. Reserve until
needed.
NOTES Matcha is a green tea powder made from green tea leaves
raised in the shade. The tea leaves are steamed, dried, and
ground into powder. The powder usually has a bright green
color.
To make the matcha tea, use 10 percent matcha powder
and 90 percent water. Simply dissolve the tea into the water. The
water should be hot, but not boiling.
If using a batch freezer, make sure to stir the sorbet base
well before churning. If using a Pacojet, pacotize the entire bea-
ker because the tea solids will settle at the bottom of the beaker.
If pacotizing the base, the sorbet can be scooped and
served immediately, but it is easier to work with if it hardens for
1 hour in the freezer.
Yuzu SorbetYIELD 5 KG / 11 LB .36 OZ BASE
SORBET BASE
1.95 kg / 4 lb 4.78 oz / 39% yuzu juice
3.05 kg / 6 lb 11.58 oz / 61% simple syrup (50° Brix)
1. Make the sorbet base according to the Classic Sorbet
Method.
2. Pacotize or churn to the desired consistency. If using a
Pacojet, freeze the base in a beaker until hardened, and
then pacotize.
3. Harden for at least 2 hours and up to 4 hours. Reserve until
needed.
NOTES Yuzu is an Asian citrus fruit with a very tart fl avor, as tart as
limes. Its fl avor is reminiscent of a very fl oral grapefruit and a
Meyer lemon.
Fresh Yuzu is very hard to get in the United States, but its
juice is easily available (expensive, but available).
If pacotizing the base, the sorbet can be scooped and
served immediately, but it is easier to work with if it hardens for
1 hour in the freezer.
Method #1 Classic Sorbet (Refractometer Method)
1. Place the juice, purée, infusion, or other liquid in a stainless
steel bowl. This main liquid should be free of solid particles
and previously strained through a fi ne-mesh strainer.
2. If the main liquid was refrigerated, remember to temper it
to 20°C / 68°F. To temper the main liquid, place the bowl
in a larger bowl that is fi lled halfway with warm water at
40°C / 104°F. Stir until the main liquid reaches 20°C / 68°F.
3. Pour in some simple syrup (at 20°C / 68°F as well) and
whisk together. The simple syrup amount should be the
equivalent of 20 percent of the weight of the main liquid.
4. Take a reading with the refractometer. If the refractometer
reads below 25, add more simple syrup. If the desired Brix
is exceeded, simply add more of the main liquid. Acidic or
bitter liquids will require more simple syrup than “sweeter”
ones, unless a more savory result is preferred.
5. Once the desired Brix is achieved, the sorbet base can be
refrigerated (for up to 3 days in most cases) or churned. If
using a Pacojet, freeze the base in a beaker until hardened,
and then pacotize.
6. Churn the sorbet base and transfer to a −10°C / 14°F freezer.
7. Let the sorbet harden in the freezer for 2 to 4 hours before
serving. Reserve for service.

BASE RECIPES 379
Kumquat SorbetYIELD 5 KG / 11 LB .36 OZ BASE
KUMQUAT PURÉE
2.63 kg / 5 lb 12.77 oz kumquats
3 kg / 6 lb 9.82 oz water
SORBET BASE
2 kg / 4 lb 6.55 oz / 40% Kumquat Purée
3 kg / 6 lb 9.82 oz / 60% simple syrup (50° Brix)
1. FOR THE KUMQUAT PURÉE: Cut the kumquats in half, trim the
tops and bottoms off, and take the seeds out; place in a
large pot and cover with the water. Bring the water up to a
boil, strain, and repeat 2 more times with fresh water. This
will get rid of any bitter fl avors.
2. Purée the blanched kumquats until smooth and pass
through a fi ne-mesh strainer.
3. FOR THE SORBET BASE: Combine the purée with the simple
syrup and cool over an ice bath.
4. Make the sorbet according to the Classic Sorbet Method.
5. Pacotize or churn to the desired consistency. If using a
Pacojet, freeze the base in a beaker until hardened, and
then pacotize.
6. Harden for at least 2 hours and up to 4 hours. Reserve until
needed.
NOTE If pacotizing the base, the sorbet can be scooped and
served immediately, but it is easier to work with if it hardens for
1 hour in the freezer.
Quince SorbetYIELD 5 KG / 11 LB .36 OZ BASE
QUINCE PURÉE
3.5 kg / 7 lb 11.46 oz quince, peeled and cored
3 kg / 6 lb 9.82 oz water
300 g / 10.58 oz Ruby Sippers tea
25 g / .88 oz orange peels
500 g / 1 lb 1.64 oz sugar
SORBET BASE
2.1 kg / 4 lb 10.07 oz / 42% Quince Purée
2.9 kg / 6 lb 6.29 oz / 58% simple syrup (50° Brix)
1. FOR THE QUINCE PURÉE: Place the quince in a pot and cover
with water. Add the tea, the orange peel, and the sugar.
2. Poach the quince until tender over medium heat (do not
boil), about 1 hour.
3. Drain the poached quince and purée thoroughly in a blend-
er. Do not strain the purée through a fi ne-mesh strainer.
4. FOR THE SORBET BASE: Make the sorbet base according to the
Classic Sorbet Method.
5. Pacotize or churn to the desired consistency. If using a
Pacojet, freeze the base in a beaker until hardened, and
then pacotize.
6. Harden for at least 2 hours and up to 4 hours. Reserve until
needed.
NOTE If pacotizing the base, the sorbet can be scooped and
served immediately, but it is easier to work with if it hardens for
1 hour in the freezer.
Verjus SorbetYIELD 5 KG / 11 LB .36 OZ BASE
1.95 kg / 4 lb 4.78 oz / 39% verjus
3.05 kg / 6 lb 11.58 oz / 61% simple syrup (50° Brix)
1. Make the sorbet base according to the Classic Sorbet
Method.
2. Once the base has aged, churn to the desired consistency.
If using a Pacojet, freeze the base in a beaker until hard-
ened, and then pacotize.
3. Harden for at least 2 hours and up to 4 hours. Reserve until
needed.
NOTES Verjus is the tart juice of unripe wine grapes. It is available
in red and white varieties. Its fl avor is reminiscent of vinegar.
If pacotizing the base, the sorbet can be scooped and
served immediately, but it is easier to work with if it hardens for
1 hour in the freezer.

380 FROZEN DESSERTS
Passion Fruit SorbetYIELD 5 KG / 11 LB .36 OZ BASE
2.35 kg / 5 lb 2.89 oz / 47% passion fruit juice
2.65 kg / 5 lb 13.47 oz / 53% simple syrup (50° Brix)
1. Make the sorbet base according to the Classic Sorbet
Method.
2. Pacotize or churn to the desired consistency. If pacotizing
the base, freeze in a beaker until hardened, and then
pacotize.
3. Harden for at least 2 hours and up to 4 hours. Reserve until
needed.
NOTES If using passion fruit concentrate, use equal parts passion
fruit purée and orange juice or water.
If pacotizing the base, the sorbet can be scooped and
served immediately, but it is easier to work with if it hardens for
1 hour in the freezer.
Cava SorbetYIELD 5 KG / 1 LB .36 OZ BASE
2 kg / 4 lb 6.55 oz / 40% cava
3 kg / 6 lb 9.82 oz / 60% simple syrup (50° Brix)
1. Make the sorbet base according to the Classic Sorbet
Method.
2. Pacotize or churn to the desired consistency. If using a
Pacojet, freeze the base in a beaker until hardened, and
then pacotize.
3. Harden for at least 2 hours and up to 4 hours. Reserve until
needed.
NOTES Cava is a Spanish sparkling white wine similar to
Champagne.
If pacotizing the base, the sorbet can be scooped and
served immediately, but it is easier to work with if it hardens for
1 hour in the freezer.
Concord Grape SorbetYIELD 5 KG / 11 LB .36 OZ BASE
CONCORD GRAPE JUICE
6 kg / 13 lb 3.64 oz Concord grapes
400 g / 14.11 oz water
SORBET BASE
2.8 kg / 6 lb 2.77 oz / 56% Concord Grape Juice
2.2 kg / 4 lb 13.6 oz / 44% simple syrup (50° Brix)
1. FOR THE CONCORD GRAPE JUICE: Separate the grapes from the
stems.
2. Place the grapes in a pot and add the water; cook until the
grapes burst and release their juice.
3. Push the grapes through a conical strainer so as to obtain
as much liquid and pulp as possible while leaving the
seeds and skin in the china cap.
4. FOR THE SORBET BASE: Make the sorbet base according to the
Classic Sorbet Method.
5. Pacotize or churn to the desired consistency. If using a
Pacojet, freeze the base in a beaker until hardened, and
then pacotize.
6. Harden for at least 2 hours and up to 4 hours. Reserve until
needed.
NOTE If pacotizing the base, the sorbet can be scooped and
served immediately, but it is easier to work with if it hardens for
1 hour in the freezer.

BASE RECIPES 381
Lemon Verbena SorbetYIELD 5 KG / 11 LB .36 OZ BASE
LEMON VERBENA INFUSION
2.4 kg / 5 lb 4.66 oz lemon juice
400 g / 14.11 oz lemon verbena
SORBET BASE
2 kg / 4 lb 6.55 oz / 40% Lemon Verbena Infusion
3 kg / 6 lb 8.82 oz / 60% simple syrup (50° Brix)
1. FOR THE LEMON VERBENA INFUSION: Warm the lemon juice
slightly and steep the lemon verbena in the lemon juice. Do
not let the juice get hotter than 65°C / 149°F, otherwise the
verbena’s fl avor will become bitter. Steep for 5 minutes.
2. Once the lemon verbena is steeped, strain it out and mea-
sure the amount of lemon juice needed.
3. FOR THE SORBET BASE: Make the sorbet base according to the
Classic Sorbet Method.
4. Pacotize or churn to the desired consistency. If using a
Pacojet, freeze the base in a beaker until hardened, and
then pacotize.
5. Harden for at least 2 hours and up to 4 hours. Reserve until
needed.
NOTE If pacotizing the base, the sorbet can be scooped and
served immediately, but it is easier to work with if it hardens for
1 hour in the freezer.
Granny Smith Apple and Fennel SorbetYIELD 5 KG / 11 LB .36 OZ BASE
GRANNY SMITH APPLE JUICE
10 kg / 22 lb 1.3 oz Granny Smith apples
20 g / .71 oz ascorbic acid
FENNEL JUICE
8 kg / 17 lb 10.18 oz fennel bulb and stems (without
fronds)
17 g / .6 oz ascorbic acid
SORBET BASE
1.35 kg / 2 lb 15.62 oz / 27% Granny Smith Apple Juice
950 g / 2 lb 1.51 oz / 19% Fennel Juice
2.7 kg / 5 lb 15.24 oz / 54% simple syrup (50° Brix)
1. FOR THE APPLE JUICE: Cut the apples in sixths and pass them
through a commercial-grade juicer. Use ascorbic acid (or
vitamin C crystals) to prevent oxidation. As the juice pours
out of the juicer, put some ascorbic acid (3 to 4 g / .11 to .14
oz per 1 L / 1.04 qt of juice) into the container into which
the juice is pouring. Mix thoroughly.
2. Strain the apple juice through a fi ne-mesh strainer.
3. FOR THE FENNEL JUICE: Proceed using the same instructions
as for the apples.
4. FOR THE SORBET BASE: Combine both juices with the simple
syrup.
5. Make the sorbet base according to the Classic Sorbet
Method.
6. Pacotize or churn to the desired consistency. If using a
Pacojet, freeze the base in a beaker until hardened, and
then pacotize.
7. Harden for at least 2 hours and up to 4 hours. Reserve until
needed.
NOTES It is important to work fast so that the apples don’t oxidize
and turn the sorbet brown. Ideally, the sorbet will be bright
green.
If pacotizing the base, the sorbet can be scooped and
served immediately, but it is easier to work with if it hardens for
1 hour in the freezer.

382 FROZEN DESSERTS
Bosc Pear SorbetYIELD 5 KG / 11 LB .36 OZ BASE
BOSC PEAR PURÉE
3 kg / 6 lb 9.82 oz water
3 kg / 6 lb 9.82 oz sugar
4 Madagascar vanilla beans
6 cinnamon sticks, toasted and crushed
3 kg / 6 lb 9.82 oz peeled and cored ripe Bosc pears
SORBET BASE
2.5 kg / 5 lb 8.18 oz / 50% Bosc Pear Purée
2.5 kg / 5 lb 8.18 oz / 50% simple syrup from the
poaching liquid (50° Brix)
1. FOR THE PEAR PURÉE: Combine the water, sugar, vanilla beans,
and cinnamon sticks. Bring to a boil (to dissolve the sugar
and steep the vanilla beans and cinnamon). Add the pears.
2. Turn the heat down to a simmer and poach the pears until
they are tender. Keep the pears covered with a clean kitchen
towel or cheesecloth for even cooking.
3. Take pears out of the poaching liquid and purée in a blend-
er; do not strain.
4. FOR THE SORBET BASE: Measure the simple syrup from the
poaching liquid; combine with the pear purée.
5. Make the sorbet base according to the Classic Sorbet
Method.
6. Pacotize or churn to the desired consistency. If using a
Pacojet, freeze the base in a beaker until hardened, and
then pacotize.
7. Harden for at least 2 hours and up to 4 hours. Reserve until
needed.
NOTE If pacotizing the base, the sorbet can be scooped and
served immediately, but it is easier to work with if it hardens for
1 hour in the freezer.
Raspberry Sorbet #1YIELD 5 KG / 11 LB .36 OZ BASE
SORBET BASE
3.7 kg / 8 lb 2.5 oz / 46% raspberries
2.7 kg / 5 lb 15.24 oz / 54% simple syrup (50° Brix)
1. FOR THE RASPBERRY PURÉE: Purée the raspberries in a blender
and pass through a fi ne-mesh strainer. Reserve 2.3 kg / 5 lb
1.13 oz of the puree.
2. FOR THE SORBET BASE: Make the sorbet base according to the
Classic Sorbet Method.
3. Pacotize or churn to the desired consistency. If using a Pa-
cojet, freeze the base in a beaker until hardened, and then
pacotize.
4. Harden for at least 2 hours and up to 4 hours. Reserve until
needed.
NOTES For the best fl avor, only use raspberries when they are in
season.
If pacotizing the base, the sorbet can be scooped and
served immediately, but it is easier to work with if it hardens for
1 hour in the freezer.
Green Zebra Tomato SorbetYIELD 5 KG / 11 LB .63 OZ BASE
GREEN ZEBRA TOMATO WATER
20 kg / 44 lb 4.47 oz ripe Green Zebra tomatoes
200 g / 7.05 oz salt
SORBET BASE
2.6 kg / 5 lb 11.71 oz / 52% Green Zebra Tomato Water
2.4 kg / 5 lb 4.66 oz / 48% simple syrup (50°Brix)
1. FOR THE TOMATO WATER: Blend the tomatoes with the salt.
2. Place the puréed tomatoes in a large fi ne-mesh strainer
set over a stainless steel bowl or bain marie and let gravity
extract the water from the tomatoes. Some chefs will place
cheesecloth inside the strainer to strain all of the solids out,
but in this case it is convenient to leave some solids in to
properly balance the recipe.
3. Make the sorbet base according to the Classic Sorbet
Method.

BASE RECIPES 383
4. Pacotize or churn to the desired consistency. If using a
Pacojet, freeze the base in a beaker until hardened, and
then pacotize.
5. Harden for at least 2 hours and up to 4 hours. Reserve until
needed.
NOTES This sorbet has the minimum recommended Brix, since it is
for savory purposes.
The solids percentage is slightly under the minimum rec-
ommended percentage. Therefore, it is recommended to use a
Pacojet and pacotize the frozen base to order (this will prevent
large ice crystals from forming). If using a batch freezer, churn
small amounts throughout service.
If pacotizing the base, the sorbet can be scooped and
served immediately, but it is easier to work with if it hardens for
1 hour in the freezer.
Interesting fact: Tomatoes contain the following sugars: 1.37
percent fructose and 1.25 percent glucose.
Piquillo Pepper SorbetYIELD 5 KG / 11 LB .36 OZ BASE
SORBET BASE
2.73 kg / 6 lb .30 oz / 54.5% piquillo peppers, roasted,
stems, skin, and seeds removed
2.27 kg / 5 lb .08 oz / 45.5% simple syrup (50° Brix)
1. Pat the peppers dry with paper towels and purée thorough-
ly in a blender.
2. Make the sorbet base according to the Classic Sorbet
Method.
3. Pacotize or churn to the desired consistency. If using a
Pacojet, freeze the base in a beaker until hardened, and
then pacotize.
4. Harden for at least 2 hours and up to 4 hours. Reserve until
needed.
NOTES Piquillo peppers are a Spanish variety of pepper that is
about one-third the size of regular bell peppers; they are not
available fresh in the United States. Canned Spanish piquillo
peppers are usually of very good quality. Most canned piquillo
peppers are in olive oil. Their fl avor is slightly smoky (since they
are charred in order to take their skins off) and sweet.
Padron peppers are another small variety of pepper from
Spain, but they are now available in the United States; substitute
them for piquillo peppers if desired. Cook them in very hot ex-
tra-virgin olive oil until their skin blisters and the fl esh is tender.
Once they cool, remove the skin and seeds, then purée and
pass through a fi ne-mesh strainer and combine with the simple
syrup.
Sugar is at a minimum because this sorbet is used as part
of a savory item.
If pacotizing the base, the sorbet can be scooped and
served immediately, but it is easier to work with if it hardens for
1 hour in the freezer.
Red Beet SorbetYIELD 5 KG / 11 LB .36 OZ BASE
BEET JUICE
15 kg / 33 lb 1.1 oz red beets
SORBET BASE
2.3 kg / 5 lb 1.13 oz / 46% Beet Juice
2.7 kg / 5 lb 15.24 oz / 54% simple syrup (50° Brix)
1. FOR THE BEET JUICE: Peel the beets and cut into eighths. Pass
them through a professional juicer; then pass the juice
through a fi ne-mesh strainer.
2. FOR THE SORBET BASE: Make the sorbet according to the Clas-
sic Sorbet Method.
3. Pacotize or churn to the desired consistency. If using a
Pacojet, freeze the base in a beaker until hardened, and
then pacotize.
4. Harden for at least 2 hours and up to 4 hours. Reserve until
needed.
NOTES The sugar and solids percentages of the beet are based on
its liquid form, not its puréed form.
Beet juice has very few solids, therefore to the formula must
be adjusted by adding more simple syrup to reach a percentage
slightly lower than the minimum recommended (31 percent).
Since beets are rather sweet, there is no real fl avor compromise
even though this sorbet is intended for a savory preparation.
If pacotizing the base, the sorbet can be scooped and
served immediately, but it is easier to work with if it hardens for
1 hour in the freezer.

384 FROZEN DESSERTS
Cucumber and Wasabi SorbetYIELD 5 KG / 11 LB .36 OZ BASE
CUCUMBER WATER
10 kg / 22 lb .73 oz cucumbers
SORBET BASE
2.55 kg / 5 lb 9.95 oz / 51% Cucumber Water
2.45 kg / 5 lb 6.42 oz / 49% simple syrup (50° Brix)
5 g / .18 oz fresh wasabi
1. FOR THE CUCUMBER WATER: Peel and seed the cucumbers,
then pass them through a professional juicer. Pass through
a fi ne-mesh strainer after juicing.
2. FOR THE SORBET BASE: Make the sorbet base according to the
Classic Sorbet Method.
3. Once the sorbet base is made, grate the wasabi (using a
rasp) directly into the base. It is not necessary to strain it.
If using powdered wasabi, add 10 g / .35 oz directly to the
base and whisk thoroughly to completely dissolve the wasa-
bi. In both cases, adjust the amount of wasabi to taste; just
keep the customers in mind.
4. Pacotize or churn to the desired consistency. If using a
Pacojet, freeze the base in a beaker until hardened, and
then pacotize.
5. Harden for at least 2 hours and up to 4 hours. Reserve until
needed.
NOTES The sugar and solids percentages of the cucumber are
based on its liquid form, not its puréed form.
The Brix is at the bare minimum, since this sorbet is intend-
ed for a savory item.
The solids percentage is slightly under the minimum rec-
ommended percentage. Therefore, it is recommended to use a
Pacojet and pacotize the frozen base to order (this will prevent
large ice crystals from forming). If using a batch freezer, churn
small amounts throughout service.
If pacotizing the base, the sorbet can be scooped and
served immediately, but it is easier to work with if it hardens for
1 hour in the freezer.
Carrot SorbetYIELD 5 KG / 11 LB .36 OZ BASE
2.65 kg / 5 lb 13.47 oz / 53% carrot juice
2.35 kg / 5 lb 2.89 oz / 47% simple syrup (50° Brix)
1. Make the sorbet base according to the Classic Sorbet
Method.
2. Pacotize or churn to the desired consistency. If using a
Pacojet, freeze the base in a beaker until hardened, and
then pacotize.
3. Harden for at least 2 hours and up to 4 hours. Reserve until
needed.
NOTES The solids percentage is slightly under the minimum rec-
ommended percentage. Therefore, it is recommended to use a
Pacojet and pacotize the frozen base to order (this will prevent
large ice crystals from forming). If using a batch freezer, churn
small amounts throughout service.
If pacotizing the base, the sorbet can be scooped and
served immediately, but it is easier to work with if it hardens for
1 hour in the freezer.
Lime SorbetYIELD 5 KG / 11 LB .36 OZ BASE
2.35 kg / 5 lb 2.89 oz / 47% lime juice
2.65 kg / 5 lb 13.47 oz / 53% simple syrup (50° Brix)
1. Make the sorbet base according to the Classic Sorbet
Method.
2. Pacotize or churn to the desired consistency. If using a
Pacojet, freeze the base in a beaker until hardened, and
then pacotize.
3. Harden for at least 2 hours and up to 4 hours. Reserve until
needed.
NOTES The solids percentage is slightly under the minimum rec-
ommended percentage. Therefore, it is recommended to use a
Pacojet and pacotize the frozen base to order (this will prevent
large ice crystals from forming). If using a batch freezer, churn
small amounts throughout service.

BASE RECIPES 385
If desired, substitute Key lime juice for the lime juice.
If pacotizing the base, the sorbet can be scooped and
served immediately, but it is easier to work with if it hardens for
1 hour in the freezer.
Sake and Lemon SorbetYIELD 5 KG / 11 LB .36 OZ BASE
SORBET BASE
1.75 kg / 3 lb 13.73 oz / 35% sake (unfi ltered)
500 g / 1 lb 1.64 oz / 10% lemon juice
2.75 kg / 6 lb 1 oz / 55% simple syrup (50° Brix)
1. Make the sorbet base according to the Classic Sorbet
Method.
2. Pacotize or churn to the desired consistency. If using a
Pacojet, freeze the base in a beaker until hardened, and
then pacotize.
3. Harden for at least 2 hours and up to 4 hours. Reserve until
needed.
NOTES If desired, zest the lemons used for the juice portion directly
into the sake, for fl avor and some texture.
Using unfi ltered sake is recommended because it contains
more solids than the fi ltered kind and will result in a smoother,
more uniform sorbet. Use a high-quality sake because other-
wise, once it is frozen, its fl avor can become too subtle.
If pacotizing the base, the sorbet can be scooped and
served immediately, but it is easier to work with if it hardens for
1 hour in the freezer.
Jalapeño SorbetYIELD 5 KG / 11 LB .36 OZ BASE
JALAPEÑO WATER
10 jalapeños
2.5 kg / 5 lb 8.18 oz bottled water
40 g / 1.41 oz salt
SORBET BASE
2 kg / 4 lb 6.55 oz / 40% Jalapeño Water
3 kg / 6 lb 9.82 oz / 60% simple syrup (50° Brix)
1. FOR THE JALAPEÑO WATER: Blend the jalapeños with the water
(trim the stems off fi rst, seeding is optional; remember
that the seeds are the hottest part of hot peppers) and salt.
Pass through a fi ne-mesh strainer.
2. FOR THE SORBET BASE: Make the sorbet base according to the
Classic Sorbet Method.
3. Pacotize or churn to the desired consistency. If using a
Pacojet, freeze the base in a beaker until hardened, and
then pacotize.
4. Harden for at least 2 hours and up to 4 hours. Reserve until
needed.
NOTES The solids percentage is slightly under the minimum rec-
ommended percentage. Therefore, it is recommended to use a
Pacojet and pacotize the frozen base to order (this will prevent
large ice crystals from forming). If using a batch freezer, churn
small amounts throughout service.
The Brix is right at 30°, which might make this sorbet on the
sweet side, even though it is intended for a savory preparation.
However, in that dish, the sorbet is served with raw yellowtail
and ponzu sauce, so it will make sense with the “sweetness” of
the fi sh and the pungency of ponzu.
If pacotizing the base, the sorbet can be scooped and
served immediately, but it is easier to work with if it hardens for
1 hour in the freezer.
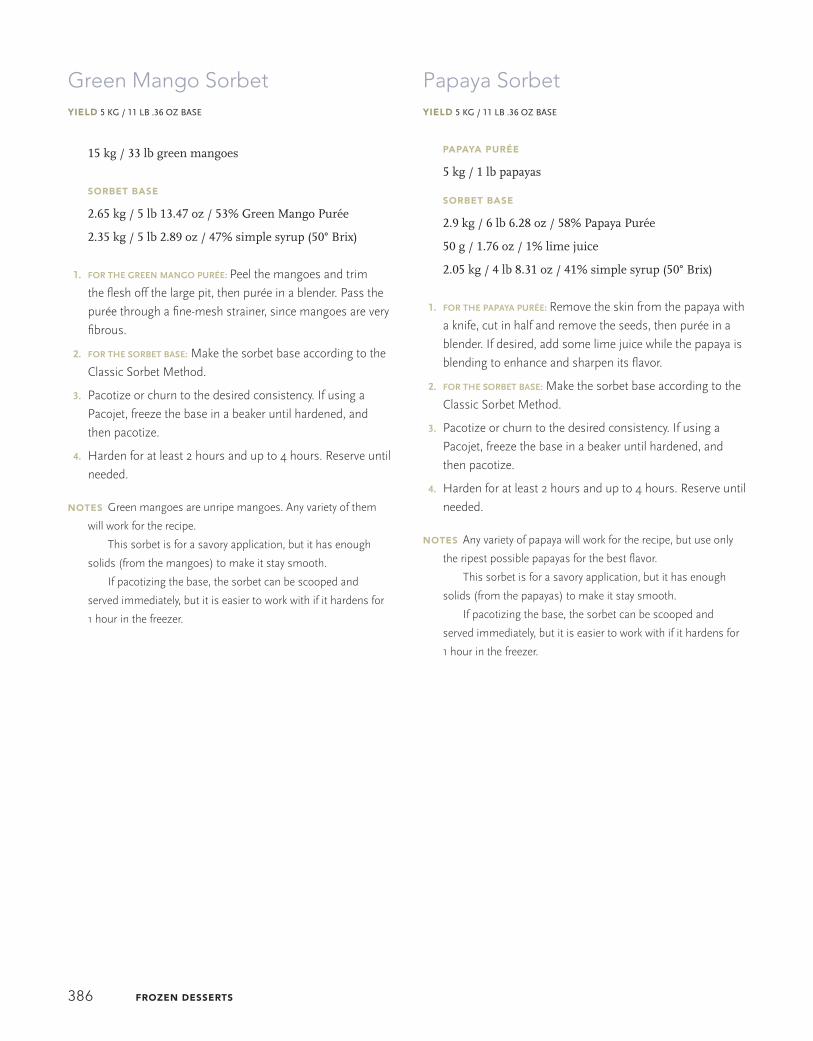
386 FROZEN DESSERTS
Green Mango SorbetYIELD 5 KG / 11 LB .36 OZ BASE
15 kg / 33 lb green mangoes
SORBET BASE
2.65 kg / 5 lb 13.47 oz / 53% Green Mango Purée
2.35 kg / 5 lb 2.89 oz / 47% simple syrup (50° Brix)
1. FOR THE GREEN MANGO PURÉE: Peel the mangoes and trim
the fl esh off the large pit, then purée in a blender. Pass the
purée through a fi ne-mesh strainer, since mangoes are very
fi brous.
2. FOR THE SORBET BASE: Make the sorbet base according to the
Classic Sorbet Method.
3. Pacotize or churn to the desired consistency. If using a
Pacojet, freeze the base in a beaker until hardened, and
then pacotize.
4. Harden for at least 2 hours and up to 4 hours. Reserve until
needed.
NOTES Green mangoes are unripe mangoes. Any variety of them
will work for the recipe.
This sorbet is for a savory application, but it has enough
solids (from the mangoes) to make it stay smooth.
If pacotizing the base, the sorbet can be scooped and
served immediately, but it is easier to work with if it hardens for
1 hour in the freezer.
Papaya SorbetYIELD 5 KG / 11 LB .36 OZ BASE
PAPAYA PURÉE
5 kg / 1 lb papayas
SORBET BASE
2.9 kg / 6 lb 6.28 oz / 58% Papaya Purée
50 g / 1.76 oz / 1% lime juice
2.05 kg / 4 lb 8.31 oz / 41% simple syrup (50° Brix)
1. FOR THE PAPAYA PURÉE: Remove the skin from the papaya with
a knife, cut in half and remove the seeds, then purée in a
blender. If desired, add some lime juice while the papaya is
blending to enhance and sharpen its fl avor.
2. FOR THE SORBET BASE: Make the sorbet base according to the
Classic Sorbet Method.
3. Pacotize or churn to the desired consistency. If using a
Pacojet, freeze the base in a beaker until hardened, and
then pacotize.
4. Harden for at least 2 hours and up to 4 hours. Reserve until
needed.
NOTES Any variety of papaya will work for the recipe, but use only
the ripest possible papayas for the best fl avor.
This sorbet is for a savory application, but it has enough
solids (from the papayas) to make it stay smooth.
If pacotizing the base, the sorbet can be scooped and
served immediately, but it is easier to work with if it hardens for
1 hour in the freezer.

BASE RECIPES 387
Sorbet Syrup
INGREDIENTAMOUNT(IN GRAMS)
% OF TOTAL RECIPE WATER SOLIDS
Sugar 4203 g 42.03% 0 4203 (100%)
Sorbet Stabilizer Mix
(see below)
69 g .69% 0 69 (100%)
Water 3910 g 39.1% 3910 (100%) 0
Glucose powder 1818 g 18.18% 90.9 (5%) 1727.1 (95%)
Total 10 kg 100% 4000.9 g (40.01%) 5999.1 g (59.99%)
1. Combine 10 percent of the sugar with the Sorbet Stabilizer
Mix and mix thoroughly.
2. Place the water, remaining sugar and glucose powder, in a
pot over high heat. Stir constantly using a whisk.
3. When the mix reaches 40°C / 104°F, slowly pour in the sor-
bet stabilizer and sugar mixture while stirring. If the mixture
is poured in too quickly, the stabilizer will clump up and will
not work.
4. Continue stirring until the mixture reaches 85°C / 185°F. At
this temperature the stabilizers will fully hydrate and the
sugars will dissolve completely.
5. Take the pot off the heat and transfer the liquid mix to an
ice bath. Let the mix cool down completely before it is
added to the main ingredient.
6. Once the sorbet mix has been combined with the main in-
gredient and water, let the mix “mature” or age for 2 hours
minimum, 6 hours being ideal. This will give the stabilizers
and sugars time to bind with the main ingredient and pro-
duce a high-quality sorbet.
7. Churn the sorbet base and transfer to a −10°C / 14°F freezer.
8. Let the sorbet harden for 2 to 4 hours before serving. Re-
serve for service.
If using this sorbet mix instead of simple syrup for
method #1, use a refractometer to determine the correct
amount of syrup (Brix between 25 and 32°).
The recommended machine to use is a batch freezer,
since there are stabilizers present. A Pacojet will also turn out
an excellent product, with the added benefi t of pacotizing as
many beakers as needed before service without having to do
so at different times during the day, because the stabilizers
will maintain the sorbet’s integrity.
Sorbet Stabilizer Mix
275 g / 9.7 oz gelatin powder
175 g / 6.17 oz CMC (carboxymethyl cellulose)
250 g / 8.82 oz locust bean gum
250 g / 8.82 oz guar gum
Mix all of the ingredients together thoroughly.
Method #2: Modern Sorbet Method (Sorbet Syrup Method)All of the following recipes are made with manufactured
purées. Keep in mind that these kinds of purées contain, on
average, an added 10 percent of sugar by weight. It is entirely
possible to make these sorbets with fresh fruit, by reducing
the sugar in the formula by 10 percent and adjusting the sol-
ids percentage and water percentage based on the fruit chart
on page 410.
Make sure to review the method before beginning. A
batch of Sorbet Syrup (below) will need to be made fi rst.
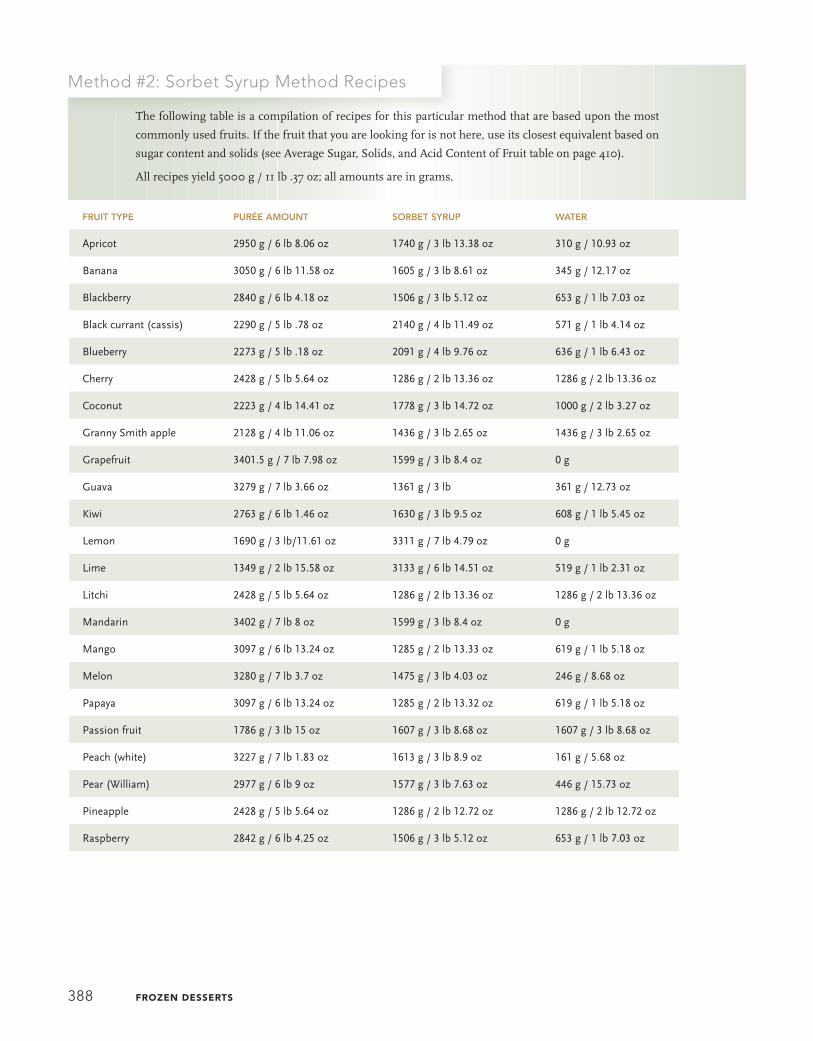
388 FROZEN DESSERTS
Method #2: Sorbet Syrup Method Recipes
The following table is a compilation of recipes for this particular method that are based upon the most
commonly used fruits. If the fruit that you are looking for is not here, use its closest equivalent based on
sugar content and solids (see Average Sugar, Solids, and Acid Content of Fruit table on page 410).
All recipes yield 5000 g / 11 lb .37 oz; all amounts are in grams.
FRUIT TYPE PURÉE AMOUNT SORBET SYRUP WATER
Apricot 2950 g / 6 lb 8.06 oz 1740 g / 3 lb 13.38 oz 310 g / 10.93 oz
Banana 3050 g / 6 lb 11.58 oz 1605 g / 3 lb 8.61 oz 345 g / 12.17 oz
Blackberry 2840 g / 6 lb 4.18 oz 1506 g / 3 lb 5.12 oz 653 g / 1 lb 7.03 oz
Black currant (cassis) 2290 g / 5 lb .78 oz 2140 g / 4 lb 11.49 oz 571 g / 1 lb 4.14 oz
Blueberry 2273 g / 5 lb .18 oz 2091 g / 4 lb 9.76 oz 636 g / 1 lb 6.43 oz
Cherry 2428 g / 5 lb 5.64 oz 1286 g / 2 lb 13.36 oz 1286 g / 2 lb 13.36 oz
Coconut 2223 g / 4 lb 14.41 oz 1778 g / 3 lb 14.72 oz 1000 g / 2 lb 3.27 oz
Granny Smith apple 2128 g / 4 lb 11.06 oz 1436 g / 3 lb 2.65 oz 1436 g / 3 lb 2.65 oz
Grapefruit 3401.5 g / 7 lb 7.98 oz 1599 g / 3 lb 8.4 oz 0 g
Guava 3279 g / 7 lb 3.66 oz 1361 g / 3 lb 361 g / 12.73 oz
Kiwi 2763 g / 6 lb 1.46 oz 1630 g / 3 lb 9.5 oz 608 g / 1 lb 5.45 oz
Lemon 1690 g / 3 lb/11.61 oz 3311 g / 7 lb 4.79 oz 0 g
Lime 1349 g / 2 lb 15.58 oz 3133 g / 6 lb 14.51 oz 519 g / 1 lb 2.31 oz
Litchi 2428 g / 5 lb 5.64 oz 1286 g / 2 lb 13.36 oz 1286 g / 2 lb 13.36 oz
Mandarin 3402 g / 7 lb 8 oz 1599 g / 3 lb 8.4 oz 0 g
Mango 3097 g / 6 lb 13.24 oz 1285 g / 2 lb 13.33 oz 619 g / 1 lb 5.18 oz
Melon 3280 g / 7 lb 3.7 oz 1475 g / 3 lb 4.03 oz 246 g / 8.68 oz
Papaya 3097 g / 6 lb 13.24 oz 1285 g / 2 lb 13.32 oz 619 g / 1 lb 5.18 oz
Passion fruit 1786 g / 3 lb 15 oz 1607 g / 3 lb 8.68 oz 1607 g / 3 lb 8.68 oz
Peach (white) 3227 g / 7 lb 1.83 oz 1613 g / 3 lb 8.9 oz 161 g / 5.68 oz
Pear (William) 2977 g / 6 lb 9 oz 1577 g / 3 lb 7.63 oz 446 g / 15.73 oz
Pineapple 2428 g / 5 lb 5.64 oz 1286 g / 2 lb 12.72 oz 1286 g / 2 lb 12.72 oz
Raspberry 2842 g / 6 lb 4.25 oz 1506 g / 3 lb 5.12 oz 653 g / 1 lb 7.03 oz

BASE RECIPES 389
Coconut-Lime SorbetYIELD 5 KG / 11 LB .36 OZ BASE
SORBET BASE
2.22 kg / 4 lb 14.3 oz / 44.4% coconut purée
5 limes, zest only
1 kg / 2 lb 3.27 oz / 20% water
1.78 kg / 3 lb 14.79 oz / 35.6% Sorbet Syrup (page 387)
1. Combine the coconut purée with the lime zest, then mix
with the other ingredients. Make sure to zest the limes di-
rectly into the coconut purée to obtain the most fl avor.
2. Make the sorbet base according to the Method #2 Modern
Sorbet Method. Age the base under refrigeration overnight.
3. Once the base has aged, churn to the desired consistency.
If using a Pacojet, freeze the base in a beaker until hard-
ened, and then pacotize.
4. Harden for at least 2 hours and up to 4 hours. Reserve until
needed.
NOTE If pacotizing the base, the sorbet can be scooped and
served immediately, but it is easier to work with if it hardens for
1 hour in the freezer.
Passion Fruit SorbetYIELD 5 KG / 11 LB .36 OZ BASE
1.77 kg / 3 lb 14.43 oz / 35.47% passion fruit purée
1.61 kg / 3 lb 8.79 oz / 32.26% water
1.61 kg / 3 lb 8.79 oz / 32.26% Sorbet Syrup (page 387)
1. Make the sorbet base according to the Method #2 Modern
Sorbet Method. Age the base under refrigeration overnight.
2. Once the base has aged, churn to the desired consistency.
If using a Pacojet, freeze the base in a beaker until hard-
ened, and then pacotize.
3. Harden for at least 2 hours and up to 4 hours. Reserve until
needed.
NOTES This recipe is used for the Hot Coconut Rum Colada and
Passion Fruit Shake (there is also a passion fruit sorbet recipe
using the Classic Sorbet Method on page 378).
Many manufactured passion fruit purées (juices, really) are
sold as concentrates. Make sure to check before making the
sorbet base. If in fact it is a concentrate, use equal parts pas-
sion fruit juice and orange juice for the total weight of required
passion fruit juice. This will not take away from its fl avor, it will
simply smooth out the tart fl avor of the passion fruit.
If pacotizing the base, the sorbet can be scooped and
served immediately, but it is easier to work with if it hardens for
1 hour in the freezer.
Raspberry Sorbet #2YIELD 5 KG / 11 LB .36 OZ BASE
2.84 kg / 6 lb 4.18 oz / 56.77% raspberry purée
653 g / 1 lb 7.03 oz / 13.05% water
1.51 kg / 3 lb 5.26 oz / 30.18% Sorbet Syrup (page 387)
1. Make the sorbet base according to the Method #2 Modern
Sorbet Method. Age the base under refrigeration overnight.
2. Once the base has aged, churn to the desired consistency.
If using a Pacojet, freeze the base in a beaker until hard-
ened, and then pacotize.
3. Harden for at least 2 hours and up to 4 hours. Reserve until
needed.
NOTES If pacotizing the base, the sorbet can be scooped and
served immediately, but it is easier to work with if it hardens for
1 hour in the freezer.

390 FROZEN DESSERTS
Method #3: Modern Sorbet Method(Mathematical Formulation Sorbet)
Review the formulation instructions on page 377.
The amount of sugar added does not always represent
Brix degrees, since the sugar present in the fruit (in the case
of fruit sorbets or others where the ingredient may contain
sugar) needs to be considered to determine the sorbet’s
sugar density.
A batch freezer is recommended for this method because
of the presence of stabilizers.
Always keep in mind the following recommended maxi-
mum and minimum percentages of ingredients in order to
have a well-balanced recipe (they apply to any sorbet base).
INGREDIENT MINIMUM MAXIMUM
Fruit purée (sweet fruit) 40% total weight 60% total weight
Fruit purée or juice (acidic fruit) 25% total weight 40% total weight
Dry extracts (fruit solids plus sugar and powdered glucose if used) 31% 36%
Stabilizer (if used; see below) 0% 1% of total weight
Sugar percentage (or Brix): When using powdered glucose,
4% of the total weight is the recommended amount.
25% (or 25° Brix) 32% (or 32° Brix)
1. Determine the formula (see page 377).
2. Scale all the ingredients accurately.
3. Combine all of the dry ingredients in a bowl.
4. Place the water in a pot over high heat and bring it up to
40°C / 104°F. If infusing a liquid, do so at this time. Steep
(according to the steeping instructions on page 27), strain,
and then bring it back to temperature (40°C / 104°F).
Proceed.
5. Once the liquid reaches 40°C / 104°F, pour in the dry ingre-
dients carefully but quickly while whisking constantly.
6. Bring the mixture up to 85°C / 185°F and maintain at this
temperature for 2 minutes (turn off the heat if necessary).
This will allow the stabilizers to fully hydrate and all the dry
ingredients to dissolve. Do not exceed heating time and/or
temperature in order to prevent too much liquid evapora-
tion, as that would alter the formula.
7. Chill the mixture down to 4°C / 39°F.
8. Mix in the main ingredient (fl avor).
9. Let the sorbet base mature for at least 2 hours and ideally 6
hours.
10. Churn the sorbet base and transfer to a -10°C / 14°F freezer.
The recommended machine to use is a batch freezer, since
there are stabilizers present. A Pacojet will also turn out an
excellent product, with the added benefi t of pacotizing as
many beakers as needed before service without having to
do so at different times during the day, because the stabiliz-
ers will maintain the sorbet’s integrity.
11. Let the sorbet harden for 2 to 4 hours before serving. Re-
serve for service.
Sorbet Stabilizer Mix
275 g / 9.7 oz gelatin powder
175 g / 6.17 oz CMC (carboxymethyl cellulose)
250 g / 8.82 oz locust bean gum
250 g / 8.82 oz guar gum
Mix all of the ingredients together thoroughly.
Minimum and Maximum Percentages

BASE RECIPES 391
Lemon SorbetYIELD 5 KG / 11 LB .36 OZ BASE
1.4 kg / 3 lb 1.38 oz / 27.96% lemon juice
250 g / 8.82 oz / 4.99% glucose powder
1.31 kg / 2 lb 14.21 oz / 26.16% granulated sugar
18 g / .64 oz / .36% Sorbet Stabilizer Mix (page 390)
2.03 kg / 4 lb 7.61 oz / 40.54% water
1. FOR THE SORBET BASE: Make the sorbet base according to the
Method #3 Modern Sorbet Method. Cool over an ice bath.
Age the base under refrigeration overnight.
2. Once the base has aged, churn to the desired consistency.
3. Harden for at least 2 hours and up to 4 hours. Reserve until
needed.
NOTE If pacotizing the base, the sorbet can be scooped and
served immediately, but it is easier to work with if it hardens for
1 hour in the freezer.
Raspberry Sorbet #3YIELD 5 KG / 11 LB .36 OZ BASE
2.65 kg / 5 lb 13.47 oz / 53.04% raspberry purée
250 g / 8.82 oz / 5% glucose powder
1.11 kg / 2 lb 7.15 oz / 22.21% sugar
15 g / .53 oz / .3% Sorbet Stabilizer Mix (page 390)
971 g / 2 lb 2.25 oz / 19.43% water
1. Make the sorbet base according to the Method #3 Modern
Sorbet Method.
2. Once the base has aged, churn to the desired consistency.
3. Harden for at least 2 hours and up to 4 hours. Reserve until
needed.
NOTES This particular recipe is to be used with the Raspberry Sor-
bet and Marzipan Ice Cream Terrine (page 287). Sorbets made
with this method are typically better suited for this type of freez-
ing (as a solid tube), since they won’t harden or crystallize as
much as a sorbet made using the Classic Method.
If pacotizing the base, the sorbet can be scooped and
served immediately, but it is easier to work with if it hardens for
1 hour in the freezer.
Blood Orange SorbetYIELD 5 KG / 11 LB .36 OZ BASE
SORBET BASE
1.75 kg / 3 lb 13.73 oz / 34.94% blood orange juice
250 g / 8.82 oz / 4.99% glucose powder
1.11 kg / 2 lb 7.15 oz / 22.16% sugar
18 g / .64 oz / .36% Sorbet Stabilizer Mix (page 390)
1.88 kg / 4 lb 2.31 oz / 37.54% water
1. Make the sorbet base according to the Method #3 Modern
Sorbet Method. Cool over an ice bath. Age the base under
refrigeration overnight.
2. Once the base has aged, churn to the desired consistency.
3. Harden for at least 2 hours and up to 4 hours. Reserve until
needed.
NOTES If desired, replace the blood orange juice with regular or-
ange juice.
If pacotizing the base, the sorbet can be scooped and
served immediately, but it is easier to work with if it hardens for
1 hour in the freezer.
Grapefruit SorbetYIELD 5 KG / 11 LB .36 OZ BASE
SORBET BASE
1.75 kg / 3 lb 13.73 oz / 34.94% grapefruit juice
250 g / 8.82 oz / 4.99% glucose powder
1.26 kg / 2 lb 12.44 oz / 25.16% sugar
18 g / .64 oz / .36% Sorbet Stabilizer Mix (page 390)
1.73 kg / 3 lb 13.02 oz / 34.54% water
1. Make the sorbet base according to the Method #3 Modern
Sorbet Method. Cool over an ice bath. Age the base under
refrigeration overnight.
2. Once the base has aged, churn to the desired consistency.
3. Harden for at least 2 hours and up to 4 hours. Reserve until
needed.
NOTES This recipe works with any kind of grapefruit.
If pacotizing the base, the sorbet can be scooped and
served immediately, but it is easier to work with if it hardens for
1 hour in the freezer.

392 FROZEN DESSERTS
Granny Smith Apple and Wasabi SorbetYIELD 5 KG / 11 LB .36 OZ BASE
GRANNY SMITH APPLE JUICE
8 kg / 17 lb 10.2 oz Granny Smith apples
16 g / .56 oz ascorbic acid
SORBET BASE
1.75 kg / 3 lb 13.73 oz / 34.93% Granny Smith Apple
Juice
250 g / 8.82 oz / 4.99% glucose powder
1.17 kg / 2 lb 9.27 oz / 23.35% sugar
25 g / .88 oz / .5% Sorbet Stabilizer Mix (page 390)
1.81 kg / 3 lb 15.84 oz / 36.12% water
5 g / .18 oz / .01% wasabi
1. FOR THE APPLE JUICE: It is important to work fast so that the
apples don’t oxidize and turn the sorbet brown. Ideally, the
sorbet will be a bright green. Cut the apples in sixths and
pass them through a professional juicer. As the juice pours
out of the juicer, put some ascorbic acid (3 to 4 g / .11 to .14
oz per 1 L / 1.04 qt of juice) into the container into which
the juice is pouring to prevent oxidation. Mix thoroughly.
2. Pass the juice through a fi ne-mesh strainer.
3. FOR THE SORBET BASE: Make the sorbet base according to the
Method #3 Modern Sorbet Method. Cool over an ice bath.
Age the base under refrigeration overnight.
4. Once the sorbet base is made, grate the wasabi (using a
rasp) directly into the base. It is not necessary to strain
it. If using powdered wasabi, add 10 g / .35 oz directly to
the base and stir well to dissolve. In both cases, adjust
the amount of wasabi to taste; just keep the customers in
mind.
5. Once the base has aged, churn to the desired consistency.
6. Harden for at least 2 hours and up to 4 hours. Reserve until
needed.
NOTES Unripened apple juice can be substituted for the Granny
Smith Apple Juice.
The sugar and solids percentages of the fruit were based on
its liquid form, not its purée form.
This fl avor was inspired by one of Paul Liebrandt’s appetizers
while he was the chef at Atlas (now closed) in NYC, in which he
served this sorbet with oysters.
If pacotizing the base, the sorbet can be scooped and
served immediately, but it is easier to work with if it hardens for
1 hour in the freezer.
Spiced Dolcetto SorbetYIELD 5 KG / 11 LB .36 OZ BASE
SPICED DOLCETTO WINE
2.5 kg / 5 lb 8.18 oz dolcetto wine
125 g / 4.41 oz cinnamon sticks, toasted and crushed
8 cloves, toasted and crushed
½ nutmeg, toasted and crushed
3 orange peels
SORBET BASE
2 kg / 4 lb 6.55 oz / 40% Spiced Dolcetto Wine
250 g / 8.82 oz / 5% glucose powder
1.32 kg / 2 lb 14.56 oz / 26.41% sugar
18 g / .64 oz / .36% Sorbet Stabilizer Mix (page 390)
1.41 kg / 3 lb 1.74 oz / 28.21% water
1. FOR THE SPICED WINE: Bring the wine to a simmer. Steep the
wine with the spices and orange peel for 45 minutes with
the heat turned off and the pot covered with plastic wrap
to prevent evaporation. Once the wine has been infused,
strain, weigh out the amount needed, and let it cool.
2. FOR THE SORBET BASE: Make the sorbet base according to the
Method #3 Modern Sorbet Method. Cool over an ice bath.
Age the base under refrigeration overnight.
3. Once the base has aged, churn to the desired consistency.
4. Harden for at least 2 hours and up to 4 hours. Reserve until
needed.
NOTE If pacotizing the base, the sorbet can be scooped and
served immediately, but it is easier to work with if it hardens for
1 hour in the freezer.

BASE RECIPES 393
Cranberry SorbetYIELD 5 KG / 11 LB .36 OZ BASE
2.75 kg / 6 lb 1 oz / 55% cranberry purée
50 g / 1.76 oz / 1% glucose powder
1.29 kg / 2 lb 13.5 oz / 25.81% sugar
18 g / .64 oz / .36% Sorbet Stabilizer Mix (page 390)
890 g / 1 lb 15.39 oz / 17.8% water
1. FOR THE SORBET BASE: Make the sorbet base according to the
Method #3 Modern Sorbet Method. Cool over an ice bath.
Age the base under refrigeration overnight.
2. Once the base has aged, churn to the desired consistency.
3. Harden for at least 2 hours and up to 4 hours. Reserve until
needed.
NOTES The Brix in this recipe is at 29°, which seems low, but cran-
berries contain a high amount of pectin that will help stabilize
the sorbet and also provide a smooth texture. Besides, cranber-
ries are naturally tart, and a cranberry sorbet that is too sweet
will not do the fruit justice.
If pacotizing the base, the sorbet can be scooped and
served immediately, but it is easier to work with if it hardens for
1 hour in the freezer.
Pomegranate SorbetYIELD 5 KG / 11 LB .36 OZ BASE
SORBET BASE
2 kg / 4 lb 6.55 oz / 40% pomegranate juice
250 g / 8.82 oz / 5% glucose powder
1.1 kg / 2 lb 6.8 oz / 22% sugar
18 g / .64 oz / .36% Sorbet Stabilizer Mix (page 390)
1.63 kg / 3 lb 9.5 oz / 32.61% water
1. FOR THE SORBET BASE: Make the sorbet base according to the
Method #3 Modern Sorbet Method. Cool over an ice bath.
Age the base under refrigeration overnight.
2. Once the base has aged, churn to the desired consistency.
3. Harden for at least 2 hours and up to 4 hours. Reserve until
needed.
NOTES To obtain the pomegranate’s juice without the seeds, crush
the seeds through a china cap. This will make the seeds burst.
Store-bought juice can also be substituted.
The solids and sugar percentages for the pomegranate were
based on the juice alone (the seeds were not considered).
If pacotizing the base, the sorbet can be scooped and
served immediately, but it is easier to work with if it hardens for
1 hour in the freezer.
Grapefruit and Mint SorbetYIELD 5 KG / 11 LB .36 OZ BASE
1.75 kg / 3 lb 13.73 oz / 34.94% grapefruit juice
250 g / 8.82 oz / 4.99% glucose powder
1.26 kg / 2 lb 12.44 oz / 25.16% sugar
18 g / .64 oz / .36% Sorbet Stabilizer Mix (page 390)
1.73 kg / 3 lb 13.02 oz / 34.54% water
30 mint leaves, cut into chiffonade
1. FOR THE SORBET BASE: Make the sorbet base according to the
Method #3 Modern Sorbet Method. Cool over an ice bath.
Age the base under refrigeration overnight.
2. Once the base has aged, churn to the desired consistency.
Add the mint to the base as it is churning and once it has
reached −5.5°C / 22°F.
3. Harden for at least 2 hours and up to 4 hours. Reserve until
needed.
NOTE If pacotizing the base, the sorbet can be scooped and
served immediately, but it is easier to work with if it hardens for
1 hour in the freezer. If pacotizing, stir the mint chiffonade into
the base after it has been shaved.

394 FROZEN DESSERTS
Litchi SorbetYIELD 5 KG / 11 LB .36 OZ BASE
2.85 kg / 6 lb 4.53 oz / 56.97% litchi purée
250 g / 8.82 oz / 4.99% glucose powder
855 g / 1 lb 14.16 oz / 17.09% sugar
18 g / .64 oz / .36% Sorbet Stabilizer Mix (page 390)
1.03 kg / 2 lb 4.33 oz / 20.59% water
1. FOR THE SORBET BASE: Make the sorbet base according to the
Method #3 Modern Sorbet Method. Cool over an ice bath.
Age the base under refrigeration overnight.
2. Once the base has aged, churn to the desired consistency.
3. Harden for at least 2 hours and up to 4 hours. Reserve until
needed.
NOTE If pacotizing the base, the sorbet can be scooped and
served immediately, but it is easier to work with if it hardens for
1 hour in the freezer.
UNIQUE SORBETS
The following recipes are categorized under “unique” sor-
bets because they use uncommon ingredients that make the
formulation a little more challenging (for example, there is a
sorbet with a liquid fat: olive oil); they are meant to show that
almost anything is possible if the formula is used properly.
The procedure and rules for the Method #3 Modern Sorbet
Method still apply.
Milk Chocolate SorbetYIELD 5 KG / 11 LB .36 OZ BASE
SORBET BASE
121 g / 4.27 oz / 2.42% sugar
20 g / .71 oz / .4% Sorbet Stabilizer Mix (page 390)
3.04 kg / 6 lb 11.23 oz / 60.7% water
607 g / 1 lb 5.41 oz / 12.12% trimoline
1.22 kg / 2 lb 11.03 oz / 24.36% milk chocolate (40%),
fi nely chopped
1. Combine the granulated sugar and stabilizer; mix well.
2. Combine the water and trimoline; heat to 40°C / 104°F.
3. Pour the sugar-stabilizer mix into the water-trimoline mix
while whisking vigorously.
4. Heat the liquid to 85°C / 185°F and pour over the chocolate;
blend together with a beurre mixer.
5. Cool down, then let mature for at least 2 hours before
churning.
6. Once the base has aged, churn to the desired consistency.
7. Harden for at least 2 hours and up to 4 hours. Reserve until
needed.
NOTES If desired, substitute any chocolate for the milk chocolate
above its percentage, including bitter chocolates.
A batch freezer is recommended for this recipe.

BASE RECIPES 395
Extra-Virgin Olive Oil SorbetYIELD 5 KG / 11 LB .36 OZ BASE
SORBET BASE
500 g / 1 lb 1.64 oz / 10% extra-virgin olive oil
250 g / 8.82 oz / 5% glucose powder
1.25 kg / 2 lb 12.09 oz / 24.97% sugar
25 g / .88 oz / .5% Stabilizer (80% Sorbet Stabilizer Mix
(page 390) + 20% xanthan gum)
2.98 kg / 6 lb 9.11 oz / 59.54% water
1. FOR THE SORBET BASE: Make the sorbet base according to the
Method #3 Modern Sorbet Method. Cool over an ice bath.
Age the base under refrigeration overnight.
2. Once the base has aged, churn to the desired consistency.
3. Harden for at least 2 hours and up to 4 hours. Reserve until
needed.
NOTES This sorbet is made using Method #3, but uses a Pacojet
because of low sugar and high fat content.
This sorbet is included as an example of an “exception to the
rule,” because this sorbet contains a high amount of fat (extra-
virgin olive oil) and will require the addition of an emulsifi er
(xanthan gum). The amount of stabilizer is a mixture of the nor-
mal sorbet stabilizers (80%) plus xanthan gum (20%). It is incor-
porated into the recipe as with other stabilizers.
Use a high-quality extra-virgin olive oil, preferably recently
pressed and on the fruity side.
If pacotizing the base, the sorbet can be scooped and
served immediately, but it is easier to work with if it hardens for
1 hour in the freezer.
Peppermint “Patty” SorbetYIELD 5 KG / 11 LB .36 OZ BASE
PEPPERMINT INFUSED WATER
3.6 kg / 7 lb 14.98 oz water
4 bunches fresh peppermint
SORBET BASE
3.4 kg / 7 lb 7.93 oz / 67.93% Peppermint Infused Water
250 g / 8.82 oz / 5% glucose powder
1.33 kg / 2 lb 14.91 oz / 26.57% sugar
25 g / .88 oz / .5% Sorbet Stabilizer Mix (page 390)
1 g / .035 oz / 0.02% natural peppermint extract, or as
needed
1. FOR THE PEPPERMINT INFUSED WATER: Bring the water to a boil,
add the peppermint, and turn off the heat. Let the leaves
steep for 3 minutes, stirring constantly. Don’t let the pep-
permint stay in the hot water too long, or the water will turn
brown (because the peppermint will oxidize) and the fl avor
will become bitter.
2. Strain the leaves out and cool the water to 40°C / 104°F.
3. FOR THE SORBET BASE: Make the sorbet base according to the
Method #3 Modern Sorbet Method. Cool over an ice bath.
Age the base under refrigeration overnight.
4. Add the peppermint extract once the base has aged. Add to
taste, keeping in mind that fl avors dim as they get colder.
5. Churn to the desired consistency.
6. Harden for at least 2 hours and up to 4 hours. Reserve until
needed.
NOTES This recipe has 2 characteristics that make it different: It has
no purée, juice, or other liquid added, and the water is infused
with peppermint with the addition of a small amount of pepper-
mint extract.
A batch freezer is recommended for this recipe.

396 FROZEN DESSERTS
SHERBETS
Sherbet Base Recipe
Make sure to review the Method #2 Sorbet Syrup Method (page 387) before beginning. A batch of Sorbet Syrup will
need to be made fi rst.
INGREDIENT AMOUNT % IN TOTAL RECIPE
FAT WATER SERUM NONFAT SOLIDS
Milk (2%) 3600 g 72 70.92 g
(1.97%)
3215.88 g
(89.33%)
384.12 g
(10.67%)
313.2 g (8.7%)
Sorbet Syrup 1400 g 28 0 g 560.14 g
(40.01%)
0 g 839.86 g (59.99%)
Flavor 0 g 0 0 g 0 g 0 g 0 g
NOTE: The formula is in range for sweetening strength because 839.86 g / 1 lb 13.63 oz of the sorbet syrup is consid-
ered sweetening strength, which is 16.79 percent of the total weight of the formula.
Buttermilk SherbetYIELD 5 KG / 11 LB .36 OZ BASE
SHERBET BASE
2.6 kg / 5 lb 11.71 oz / 52% buttermilk (1% milk
fat)
950 g / 2 lb 1.51 oz / 19% milk
1.45 kg / 3 lb 3.15 oz / 29% Sorbet Syrup
(page 387)
1. Make the sherbet according to the Method #2 Mod-
ern Sorbet Method. Age the base under refrigeration
overnight.
2. Once the base has aged, churn to the desired
consistency.
3. Harden for at least 2 hours and up to 4 hours. Re-
serve until needed.
NOTES The formula is in range for sweetening strength
because 869.86 g (1 lb 14.68 oz) of the sorbet syrup is
sweetening strength, which is 17.39 percent of the total
weight of the formula.
If pacotizing the base, the sherbet can be scooped
and served immediately, but it is easier to work with if it
hardens for 1 hour in the freezer.
BASE RECIPES 397
Popcorn SherbetYIELD 5 KG / 11 LB .36 OZ BASE
POPCORN-INFUSED MILK
1 kg / 2 lb 3.27 oz popcorn, freshly popped and hot
4.6 kg / 10 lb 2.26 oz 2% milk, hot
SHERBET BASE
3.6 kg / 7 lb 14.98 oz / 72% Popcorn-Infused Milk
1.4 kg / 3 lb 1.38 oz / 28% Sorbet Syrup (page 387)
1. FOR THE POPCORN INFUSED MILK: Steep the just popped
popcorn in the hot milk.
2. FOR THE SHERBET BASE: Make the sherbet according to the
Method #2 Modern Sorbet Method. Age the base under
refrigeration overnight.
3. Once the base has aged, churn to the desired consistency.
4. Harden for at least 2 hours and up to 4 hours. Reserve until
needed.
NOTES The popcorn used for this formula has no oil or butter
added.
If pacotizing the base, the sherbet can be scooped and
served immediately, but it is easier to work with if it hardens for
1 hour in the freezer.
Lemon-Mascarpone SherbetYIELD 5 KG / 11 LB .36 OZ BASE
2 kg / 4 lb 6.55 oz / 39.98% lemon juice
50 g / 1.76 oz lemon zest
2.78 kg / 6 lb 2.06 oz / 55.57% simple syrup (50° Brix)
222 g / 7.83 oz / 4.44% mascarpone
1. Make the sherbet base according to the Modern Sorbet
Method #2. Age the base under refrigeration overnight.
2. Once the base has aged, churn to the desired consistency.
3. Harden for at least 2 hours and up to 4 hours. Reserve until
needed.
NOTES This recipe uses regular simple syrup and not sorbet syrup
because with sorbet syrups the recipe is almost impossible to
balance properly.
Add the lemon zest to the lemon juice before making the
base.
The formula is in range for sweetening strength because
1109.82 g / 2 lb 7.15 oz of the sorbet syrup is sweetening
strength, which is 22.19 percent of the total weight of the for-
mula. This amount is signifi cantly higher than the 16.79 percent
of the base recipe, but additional sugar is added because of the
acidity of the lemon juice.
If pacotizing the base, the sherbet can be scooped and
served immediately, but it is easier to work with if it hardens for
1 hour in the freezer.

398 FROZEN DESSERTS
Rice Milk (Horchata) SherbetYIELD 5 KG / 11 LB .36 OZ BASE
3.5 kg / 7 lb 11.46 oz / 70% rice milk
150 g / 5.29 oz / 3% heavy cream
1.35 kg / 2 lb 15.62 oz / 27% Sorbet Syrup (page 387)
1. Make the sherbet according to the Method #2 Modern
Sorbet Method. Age the base under refrigeration overnight.
2. Once the base has aged, churn to the desired consistency.
3. Harden for at least 2 hours and up to 4 hours. Reserve until
needed.
NOTES The formula is in range for sweetening strength because
809.87 g / 1 lb 12.57 oz of the sorbet syrup is sweetening
strength, which is 16.19 percent of the total weight of the
formula.
This recipe was formulated using rice milk. Fresh rice milk
can be made by cooking 1 part rice to 5 parts 2-percent milk. In
this case, the heavy cream could be eliminated from the recipe.
If pacotizing the base, the sherbet can be scooped and
served immediately, but it is easier to work with if it hardens for
1 hour in the freezer.
Roasted McIntosh Apple SherbetYIELD 5 KG / 11 LB .36 OZ BASE
5 kg / 11 lb .36 oz McIntosh apples
SHERBET BASE
1.05 kg / 2 lb 5.04 oz / 21% milk
150 g / 5.29 oz / 3% heavy cream
1.4 kg / 3 lb 1.38 oz / 28% Sorbet Syrup (page 387)
2.4 kg / 5 lb 4.66 oz / 48% roasted McIntosh apple purée
1. Preheat a convection oven to 160°C /325°F.
2. Peel, quarter, and roast the apples in a hotel pan until ten-
der, about 20 minutes. Purée.
3. Make the sherbet according to the Method #2 Modern
Sorbet Method. Age the base under refrigeration overnight.
4. Once the base has aged, churn to the desired consistency.
5. Harden for at least 2 hours and up to 4 hours. Reserve until
needed.
NOTES Roast the apples before combining them with the milk and
heavy cream. The apples can be roasted or poached, but always
remember to adjust the sugar amount in the sherbet if they are
cooked with sugar.
The formula is in range for sweetening strength because
839.86 g / 1 lb 13.62 oz of the sorbet syrup is sweetening
strength, which is 16.79 percent of the total weight of the
formula.
If pacotizing the base, the sherbet can be scooped and
served immediately, but it is easier to work with if it hardens for
1 hour in the freezer.
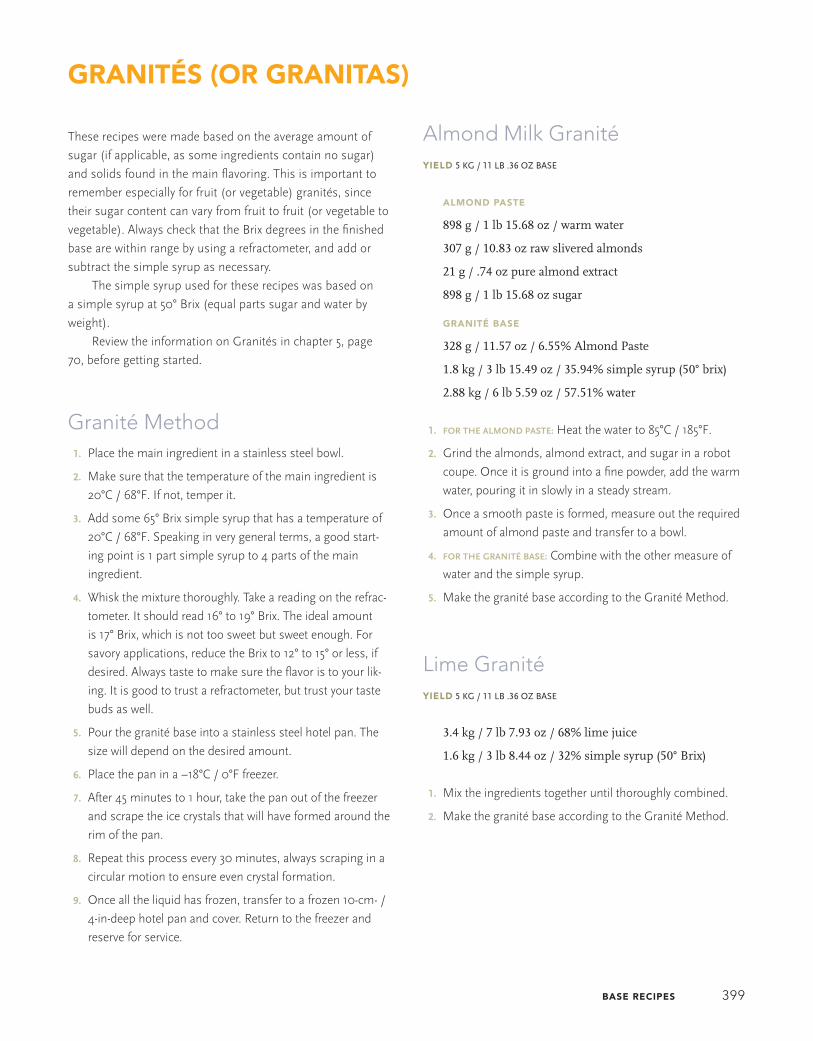
BASE RECIPES 399
These recipes were made based on the average amount of
sugar (if applicable, as some ingredients contain no sugar)
and solids found in the main fl avoring. This is important to
remember especially for fruit (or vegetable) granités, since
their sugar content can vary from fruit to fruit (or vegetable to
vegetable). Always check that the Brix degrees in the fi nished
base are within range by using a refractometer, and add or
subtract the simple syrup as necessary.
The simple syrup used for these recipes was based on
a simple syrup at 50° Brix (equal parts sugar and water by
weight).
Review the information on Granités in chapter 5, page
70, before getting started.
Granité Method 1. Place the main ingredient in a stainless steel bowl.
2. Make sure that the temperature of the main ingredient is
20°C / 68°F. If not, temper it.
3. Add some 65° Brix simple syrup that has a temperature of
20°C / 68°F. Speaking in very general terms, a good start-
ing point is 1 part simple syrup to 4 parts of the main
ingredient.
4. Whisk the mixture thoroughly. Take a reading on the refrac-
tometer. It should read 16° to 19° Brix. The ideal amount
is 17° Brix, which is not too sweet but sweet enough. For
savory applications, reduce the Brix to 12° to 15° or less, if
desired. Always taste to make sure the fl avor is to your lik-
ing. It is good to trust a refractometer, but trust your taste
buds as well.
5. Pour the granité base into a stainless steel hotel pan. The
size will depend on the desired amount.
6. Place the pan in a −18°C / 0°F freezer.
7. After 45 minutes to 1 hour, take the pan out of the freezer
and scrape the ice crystals that will have formed around the
rim of the pan.
8. Repeat this process every 30 minutes, always scraping in a
circular motion to ensure even crystal formation.
9. Once all the liquid has frozen, transfer to a frozen 10-cm- /
4-in-deep hotel pan and cover. Return to the freezer and
reserve for service.
Almond Milk GranitéYIELD 5 KG / 11 LB .36 OZ BASE
ALMOND PASTE
898 g / 1 lb 15.68 oz / warm water
307 g / 10.83 oz raw slivered almonds
21 g / .74 oz pure almond extract
898 g / 1 lb 15.68 oz sugar
GRANITÉ BASE
328 g / 11.57 oz / 6.55% Almond Paste
1.8 kg / 3 lb 15.49 oz / 35.94% simple syrup (50° brix)
2.88 kg / 6 lb 5.59 oz / 57.51% water
1. FOR THE ALMOND PASTE: Heat the water to 85°C / 185°F.
2. Grind the almonds, almond extract, and sugar in a robot
coupe. Once it is ground into a fi ne powder, add the warm
water, pouring it in slowly in a steady stream.
3. Once a smooth paste is formed, measure out the required
amount of almond paste and transfer to a bowl.
4. FOR THE GRANITÉ BASE: Combine with the other measure of
water and the simple syrup.
5. Make the granité base according to the Granité Method.
Lime GranitéYIELD 5 KG / 11 LB .36 OZ BASE
3.4 kg / 7 lb 7.93 oz / 68% lime juice
1.6 kg / 3 lb 8.44 oz / 32% simple syrup (50° Brix)
1. Mix the ingredients together until thoroughly combined.
2. Make the granité base according to the Granité Method.
GRANITÉS (OR GRANITAS)

400 FROZEN DESSERTS
Noilly Prat GranitéYIELD 5 KG / 11 LB .36 OZ BASE
3.4 kg / 7 lb 7.93 oz / 68% Noilly Prat
1.6 kg / 3 lb 8.44 oz / 32% simple syrup (50° Brix)
1. Mix the ingredients together until thoroughly combined.
2. Make the granité base according to the Granité Method.
NOTES Noilly Prat is a French dry vermouth. Vermouth is an aroma-
tized fortifi ed wine that is often fl avored with herbs, spices, bark,
and fl owers.
If desired, substitute Lillet Blanc or Lillet Rouge, other types
of fortifi ed and infused wine, for the Noilly Prat.
The alcohol content in these types of fortifi ed wines is still
low enough that the base will freeze completely.
Meyer Lemon GranitéYIELD 5 KG / 11 LB .36 OZ BASE
3.9 kg / 8 lb 9.57 oz / 78% Meyer lemon juice
1.1 kg / 2 lb 6.8 oz / 22% simple syrup (50° Brix)
1. Mix the ingredients together until thoroughly combined.
2. Make the granité base according to the Granité Method.
Campari and Orange GranitéYIELD 5 KG / 11 LB .36 OZ BASE
2.5 kg / 5 lb 8.18 oz / 50% Campari
1.3 kg / 2 lb 13.86 oz / 26% simple syrup (50° Brix)
1.2 kg / 2 lb 10.33 oz / 24% orange juice
1. Mix all of the ingredients together until thoroughly
combined.
2. Make the granité base according to the Granité Method.
NOTE Campari is an alcoholic apéritif (considered a “bitters”)
made by infusing bitter herbs, aromatic plants, fruit, and alcohol
in water.
Whole Milk IceYIELD 5 KG / 11 LB .36 OZ BASE
4.15 kg / 9 lb .38 oz / 83% whole milk reduction
850 g / 1 lb 13.98 oz / 17% brown sugar
1. For the milk reduction: Bring 16 liters (about 4 gallons) of
whole milk to a boil and then turn the heat down to me-
dium. Reduce the milk until there is 4.15 kg / 9 lb 2.38 oz.
2. Add the brown sugar while the milk is hot so that it dis-
solves completely. Mix thoroughly.
3. Make the base according to the Granité Method.
NOTE This recipe contains no simple syrup. The sweetener is
brown sugar.

BASE RECIPES 401
These recipes were made based on the average amount of
sugar (if applicable, as some ingredients contain no sugar)
and solids found in the main fl avoring. This is important to
remember especially for fruit (or vegetable) pops, since their
sugar content can vary from fruit to fruit (or vegetable to
vegetable). Always check that the Brix degrees in the fi nished
base are within range by using a refractometer, and add or
subtract the simple syrup as necessary.
The simple syrup used for these recipes was based on
a simple syrup at 50° Brix (equal parts sugar and water by
weight).
Review the information on ice pops in chapter 5, page 84,
before getting started.
Ice Pops Method 1. Place the juice, purée, infusion, or liqueur in a stainless
steel bowl.
2. Make sure that the temperature of the main ingredient is
20°C / 68°F. If not, temper it.
3. Add some 65° Brix simple syrup that has a temperature of
20°C / 68°F. Speaking in very general terms, a good start-
ing point is 1 part simple syrup to 4 parts of the main
ingredient.
4. Whisk the mixture thoroughly. Take a reading on the refrac-
tometer. It should read 16 to 19° Brix. My personal prefer-
ence is 17° Brix, which is not too sweet but sweet enough.
For savory applications, reduce the Brix to 12 to 15° or less,
if desired. Always taste to make sure the fl avor is to your
liking.
5. Once the ice mix is made, pour into the desired mold.
6. Let the ice freeze at -18°C / 0°F until solid. It will only take a
fraction of the time in a blast freezer than it takes in a regu-
lar freezer.
7. Once the ice has solidifi ed, it can be taken out of the mold,
but it should be done at the very last minute, to prevent
freezer burn on your ice. If keeping all of the ices out of
the mold, make sure they are properly covered so that they
don’t take on a “freezer taste.” If reserving them for longer
periods of time (more than 18 hours), make sure that they
are kept in the mold in which they are frozen.
8. TO UNMOLD: place the ice mold into a warm water bath and
let it sit in there for a few seconds to ensure that the pop
will be released in one piece.
Mimosa Ice PopsYIELD 5 KG / 11 LB .37 OZ BASE
CHAMPAGNE PORTION
1.73 kg / 3 lb 13.02 oz / 69.1% Champagne
775 g / 1 lb 11.34 oz / 30.9% simple syrup (50° Brix)
ORANGE PORTION
2.18 kg / 4 lb 12.9 oz / 87% orange juice
325 g / 11.46 oz / 13% simple syrup (50° Brix)
1. Put 3.75-cm/1.5-in diameter demi-sphere fl eximolds in the
freezer. Each mat has between 64 and 72 demi-spheres.
This recipe will yield about 200 fi nished popsicles.
2. Make both bases according to the Ice Pop Method on this
page. Pour the liquid into the spheres so that there are the
same amount of Champagne demi-spheres and orange
demi-spheres.
3. When they have hardened, unmold the demi-spheres and
fuse both halves by rubbing the seams where they connect
with your fi ngers (use gloves). Return to the freezer.
4. Once the spheres have hardened, make a small hole in the
Champagne portion with a skewer, then put in a lollipop
stick as far in as possible without breaking the sphere.
5. Reserve frozen in an airtight container.
ICE POPS

402 FROZEN DESSERTS
Gewürztraminer-Tamarind Ice PopsYIELD 5 KG / 11 LB .37 OZ BASE
GEWÜRZTRAMINER PORTION
1.73 kg / 3 lb 13.02 oz / 69.1% Gewürztraminer
775 g / 1 lb 11.34 oz / 30.9% simple syrup (50° Brix)
TAMARIND PORTION
500 g / 1 lb 1.64 oz / 20% tamarind purée
250 g / 8.82 oz / 10% simple syrup (50° Brix)
1.75 kg / 3 lb 13.73 oz / 70% water
1. Make both bases according to the Ice Pop Method (page
401). Fill an oval ice tray 12.5 cm / 5 in by .75 cm /.25 in (a
total of about 100 ovals will be needed; some trays contain
up to 10) halfway full with the tamarind portion. Freeze.
2. Once hardened, fi ll the ice tray to the top with the gewürz-
traminer portion. Freeze to harden.
3. Once hardened, pop the frozen tamarind-gewürztraminer
ovals out by dipping the tray in cold (not warm or hot) wa-
ter. Return to the freezer.
4. Fuse half of the frozen ovals with the other half of the
frozen ovals by rubbing the seams where they connect with
your fi ngers (use gloves). Freeze.
5. Make a small hole at the bottom end of the pop with a
skewer, then insert a lollipop stick as far in as possible with-
out cracking the pop.
6. Reserve frozen in an airtight container.
NOTES Tamarind purée contains close to 58 percent sugar and
many solids (69 percent, including sugar); for this reason it was
necessary to balance the recipe with water to thin it out so that
it could freeze in crystal form. When using purées instead of
juices, it is necessary to thin them out this way.
Pinot Grigio Ice PopsYIELD 5 KG / 11 LB .36 OZ BASE
POPSICLE BASE
3.45 kg / 7 lb 9.69 oz / 69% Pinot Grigio
1.55 kg / 3 lb 6.67 oz / 31% simple syrup (50° Brix)
1. Make the base according to the Ice Pop Method (page
401). Line 50 PVC tubes 10 cm / 4 in by 1.25-cm / .5-in di-
ameter with acetate. Place in the freezer in a standing posi-
tion on a sheet pan lined with acetate.
2. Fill to the top and freeze to harden.
3. Make a small hole on the exposed surface with a skewer.
Insert a lollipop stick halfway in (about 5 cm / 2 in).
4. Reserve frozen in an airtight container.
NOTE If desired, substitute with any other white wine.
Asti Spumanti and Apricot Ice PopsYIELD 5 KG / 11 LB .27 OZ BASE
ASTI SPUMANTI PORTION
1.73 kg / 3 lb 13.02 oz / 69.1% Asti Spumanti
775 g / 1 lb 11.34 oz / 30.9% simple syrup (50° Brix)
APRICOT PORTION
1.5 kg / 3 lb 4.91 oz / 60% apricot purée
538 g / 1 lb 2.98 oz / 21.5% simple syrup (50° Brix)
463 g / 16.33 oz / 18.5% water
1. Make both bases according to the Ice Pop Method (page
401).
2. Fill an ice pop mold (these molds are typically 10 cm / 4 in
long by 3.75 cm / 1.5 in wide at the base and they are about
1.25 cm / 0.5 in narrower at the top) 1 inch full with the Asti
Spumanti base and freeze; alternate layers with the apricot
base, freezing between each addition, until the mold is fi lled.
3. Reserve frozen in an airtight container.
NOTE Apricot purée contains 23 percent solids (9 percent sugar);
for this reason it was necessary to balance the recipe with water
to thin it out so that it could freeze in crystal form. When using
purées instead of juices, it is necessary to thin them out this way.

BASE RECIPES 403
Important reminders:
Review chapter 6 before making any of the following recipes.
The combination of sugar and egg whites will result in a
meringue, in which the typical ratio of sugar to egg whites is
2:1. Keep this in mind for these recipes, since the recipe will
simply ask for a certain amount of prepared meringue based
on this ratio. For example, if it asks for 1 kg / 2 lb 3.27 oz of
Italian meringue, it will mean that it was made with 666.66
g / 1 lb 7.52 oz sugar and 333.34 g / 11.76 oz whites.
Some frozen dessert recipes will contain what is known
as a pâte à bombe in French (“bombe base” in English). It is
basically foamed egg yolks with cooked sugar. The procedure
is as follows:
Begin whipping egg yolks on high speed; meanwhile,
combine sugar with enough water to form a wet-sand texture.
Cook the sugar to 115°C / 239° F and pour over the whipping
egg yolks once they have tripled in volume; once the hot sug-
ar has been added, the yolk’s volume will increase. Whip until
the mix has cooled down. The addition of the hot sugar will
stabilize the yolk foam because it helps coagulate the proteins
that trap the air bubbles. In this case, cooking the egg yolks
over a hot water bath is not necessary to obtain more volume
from the foam, since the hot sugar that is being added will
serve the same purpose. The ratio for pâte à bombe is 40
percent sugar, 60 percent egg yolks. Keep this in mind for the
recipes contained in this section, since the recipe will simply
ask for a certain amount of pâte à bombe based on this ra-
tio. For example, if it asks for 1000 g of pâte à bombe, it will
mean that it was made with 400 g / 14.11 oz sugar and 600
g / 1 lb 5.16 oz yolks.
All still-frozen desserts that contain heavy cream require
that it be foamed (whipped). Ideally, for still-frozen desserts
that require whipped heavy cream, it won’t be too stiff. An
adequate consistency would be semifi rm (medium-stiff), so
that it can be gently folded in to another semiliquid ingredi-
ent. When the heavy cream is too stiff, even if it has not been
over-whipped, it will crumble and break apart instead of mix-
ing uniformly.
Some recipes contain two or three foams, and many
pastry shops are not fortunate enough to own two, let alone
three, mixers. Ideally all of the foams would be made at the
same time and folded into each other as soon as they have
reached full volume (if it is timed correctly). However, if
there is only one mixer (or, perish the thought, none), start
by foaming the most stable foam, which is the heavy cream
foam, and refrigerate it immediately once the desired volume
is obtained, to maintain its volume. Next, whip the egg yolks
and, fi nally, the egg whites. Always fold the lightest ingredient
into the heaviest (egg whites into egg yolks, then heavy cream
into the previous mix or heavy cream into egg yolks).
Finally, portion the fi nished product into the desired
mold(s) and freeze.
Still-Frozen Desserts

404 FROZEN DESSERTS
Parfaits are composed of a cooked egg yolk and sugar foam
(pâte à bombe), cooled to room temperature or chilled, and a
heavy cream foam (which will be the dominant foam), sugar,
gelatin (as a stabilizer), and a fl avor base, usually a fruit pu-
rée, juice, or chocolate, melted but cool.
Blood Orange ParfaitYIELD 5 KG / 11 LB .36 OZ BASE
325 g / 11.46 oz / 5.8% blood orange juice
3 blood oranges, zest only
13 g / .46 oz / .23% gelatin sheets, bloomed
2.93 kg / 6 lb 7.35 oz / 52.34% heavy cream
600 g / 1 lb 5.16 oz / 10.72% sugar
1.73 kg / 3 lb 13.02 oz / 30.9% pâte à bombe
1. Combine the blood orange juice and zest. Melt the gelatin
with the juice and zest and mix over medium-low heat.
2. Whip the cream and sugar to medium-stiff peaks.
2. Mix the gelatin mixture into pâte à bombe.
3. Fold in the whipped heavy cream in 2 additions.
4. Portion and freeze. Work quickly so that the gelatin does
not set before all of the ingredients are combined.
Praline ParfaitYIELD 5 KG / 11 LB .36 OZ BASE
2.85 kg / 6 lb 4.35 oz / 50.86% heavy cream
23 g / .79 oz / .41% gelatin sheets, bloomed
600 g / 1 lb 5.16 oz / 10.71% sugar
1.13 kg / 2 lb 7.95 oz / 20.17% pâte à bombe
1 kg / 2 lb 3.27 oz / 17.85% praline paste (100% nuts,
no sugar)
1. Combine 10 percent of the cream (prior to whipping) with
the bloomed gelatin and melt together over medium-low
heat.
2. Whip the remaining cream and the sugar to medium-stiff
peaks.
3. Combine the melted gelatin and cream mixture with the
pâte à bombe, and then mix in the praline paste.
4. Fold in the whipped heavy cream in 2 additions.
5. Portion and freeze. Work quickly so that the gelatin does
not set before all of the ingredients are combined.
Milk Chocolate ParfaitYIELD 5 KG / 11 LB .36 OZ BASE
2.58 kg / 5 lb 11.01 oz / 46.07% heavy cream
20 g / .71 oz / .36% gelatin sheets, bloomed
600 g / 1 lb 5.16 oz / 10.71% sugar
1.2 kg / 2 lb 10.33 oz / 21.43% pâte à bombe
1.2 kg / 2 lb 10.33 oz / 21.43% milk chocolate (40%),
melted but cool
1. Combine 10 percent of the cream (prior to whipping) with
the bloomed gelatin and melt together over medium-low
heat.
2. Whip the remaining cream and the sugar to medium-stiff
peaks.
3. Combine the melted gelatin and cream mixture with the
pâte à bombe, and then mix in the milk chocolate.
4. Fold in the whipped heavy cream in 2 additions.
5. Portion and freeze. Work quickly so that the gelatin does
not set before all of the ingredients are combined.
NOTE Make sure the chocolate is melted but cool (around 37°C /
99°F). If the chocolate is too hot it will “melt” the heavy cream;
if it’s too cold it will seize when combined with the cold heavy
cream.
PARFAITS

BASE RECIPES 405
A semifreddo is a partially frozen dessert that is made from
all three foams (bombe base, Italian meringue, and heavy
cream, plus fl avor, typically added in a liquid form), which
makes it incredibly light. Even though it is frozen, it gives the
impression of not being completely frozen when it is eaten,
hence the name.
Lemongrass SemifreddoYIELD 5 KG / 11 LB .36 OZ BASE
SEMIFREDDO BASE
700 g / 1 lb 8.69 oz lemongrass
2.53 kg / 5 lb 9.24 oz / 50.6% heavy cream
1.45 kg / 3 lb 3.15 oz / 29% Italian meringue
1.02 kg / 2 lb 3.98 oz / 20.4% pâte à bombe
1. Crush the lemongrass and combine with 1 kg / 2 lb 3.27 oz
of the cream. Bring to a boil, cover, and steep for 2 hours,
stirring occasionally.
2. Strain out the lemongrass through a fi ne-mesh strainer and
chill. Once cold, combine with the remaining cream.
3. Whip the cream to medium-stiff peaks.
4. Fold the Italian meringue into the pâte à bombe, and then
fold the whipped cream into the mixture.
5. Portion and freeze.
NOTE The lemongrass amount is only to infuse the heavy cream;
it will not be an actual solid ingredient in the fi nished recipe.
Vanilla SemifreddoYIELD 5 KG / 11 LB .36 OZ BASE
200 g / 7.05 oz Tahitian vanilla pods
2.54 kg / 5 lb 9.59 oz / 50.8% heavy cream
1.01 kg / 2 lb 3.63 oz / 20.2% pâte à bombe
1.45 kg / 3 lb 3.15 oz / 29% Italian meringue
1. Split and scrape the vanilla pods and combine them with
1 kg / 2 lb 3.27 oz of the cream. Bring to a boil, cover, and
steep for 2 hours, stirring occasionally.
2. Strain out the vanilla pods through a fi ne-mesh strainer
and chill. Once cold, combine with the remaining cream.
3. Whip the cream to medium-stiff peaks.
4. Fold the Italian meringue into the pâte à bombe, and then
fold the whipped cream into the mixture.
5. Portion and freeze.
NOTE The vanilla pod amount is only to infuse the heavy cream; it
will not be an actual solid ingredient in the fi nished recipe.
Espresso SemifreddoYIELD 5 KG / 11 LB .36 OZ BASE
130 g / 1 lb 12.22 oz espresso beans, fi nely ground
2.54 kg / 5 lb 9.59 oz / 50.8% heavy cream
1.01 kg / 2 lb 3.62 oz / 20.2% pâte à bombe
1.45 kg / 3 lb 3.15 oz / 29% Italian meringue
1. Combine the espresso beans with 1 kg / 2 lb 3.27 oz of the
cream. Bring to a boil, cover, and steep for 2 hours, stirring
occasionally.
2. Strain out the espresso grounds through a fi ne-mesh
strainer and chill. Once cold, combine with the remaining
cream.
3. Whip the cream to medium-stiff peaks.
4. Fold the Italian meringue into the pâte à bombe, and then
fold the whipped cream into the mixture.
5. Portion and freeze.
NOTE The espresso beans amount is only to infuse the heavy
cream; it will not be an actual solid ingredient in the fi nished
recipe.
SEMIFREDDI (a.k.a. Biscuit Glacée)

406 FROZEN DESSERTS
Bombes have the same components as a frozen parfait, but
with more heavy cream (parfait: 1; bombe: 1.5) and a fl avor.
The fi nished base is traditionally poured into a dome-shaped
mold, which is how it got its name. Thanks to this term, many
desserts that have a dome shape are called bombes.
Peanut Butter BombeYIELD 5 KG / 11 LB .36 OZ BASE
50 g / 1.76 oz / .89% gelatin sheets, bloomed
2.03 kg / 4 lb 7.61 oz / 36.25% heavy cream
600 g / 1 lb 5.16 oz / 10.71% sugar
1 kg / 2 lb 3.27 oz / 17.85% peanut butter (natural, not
hydrogenated)
1.92 kg / 4 lb 3.72 oz / 34.29% pâte à bombe (see Notes)
1. Bloom the gelatin in cold water.
2. Whip 1 kg / 2 lb 3.27 oz of the cream and the sugar to
medium-stiff peaks. Refrigerate.
3. Meanwhile, combine 500 g / 1 lb 1.64 oz of the peanut
butter with the remaining cream and the bloomed gelatin
in a small saucepan. Place the pot over medium heat and
whisk until the mixture is evenly mixed and the gelatin has
dissolved. Do not get it too hot, otherwise the fat will
separate from the peanut butter.
4. Add this mix to the pâte à bombe while it is mixing; imme-
diately afterward, add the remaining peanut butter.
5. Fold in the whipped heavy cream in 2 additions. Work
quickly so that the gelatin doesn’t set until the product is
fi nished, otherwise there will be small chunks throughout
the bombe.
NOTES Due to the high fat content in the peanut butter, this recipe
needs to be made very carefully (follow the instructions ac-
curately). It is also why it has less heavy cream than a bombe
requires (the peanut butter is more responsible for the smooth-
ness of this recipe than the whipped cream).
This bombe is made with confectioners’ sugar (do not
cook!) and pasteurized egg yolks, whipped in the mixer until
they have quadrupled in volume.
Asian Spice BombeYIELD 5 KG / 11 LB .36 OZ BASE
ASIAN SPICE MIX
160 g / 5.64 oz Vietnamese cinnamon
100 g / 3.53 oz star anise
10 cloves
100 g / 3.53 oz ginger
70 g / 2.47 oz mandarin orange zest
BOMBE BASE
450 g / 15.87 oz Asian Spice Mix
3.4 kg / 7 lb 7.93 oz / 68% heavy cream
15 g / .53 oz / .3% gelatin sheets, bloomed
600 g / 1 lb 5.16 oz / 12% sugar
985 g / 2 lb 2.73 oz / 19.7% pâte à bombe
1. Crush and toast the cinnamon, star anise, and cloves.
Meanwhile, scald 1 kg / 2 lb 3.27 oz of the cream from the
base recipe. Once the dry spices are toasted and while they
are hot, add them to the hot cream.
2. Peel the skin off the ginger and crush it. Add to the hot cream
along with the zest. Cover and let steep for 30 minutes.
3. Strain the cream through a fi ne-mesh strainer and cool.
Once the cream is cold, combine it with the remaining
heavy cream.
4. Reserve 200 g / 7.05 oz of the infused heavy cream. In a
saucepan, combine the heavy cream and the gelatin. Melt
the gelatin over low heat, stirring constantly. Reserve warm
over low heat.
5. Whip the heavy cream and sugar to medium stiff. Reserve
under refrigeration.
6. Make the pâte à bombe. Once the pâte à bombe has qua-
drupled in volume, pour in the melted gelatin–heavy cream
mixture.
7. Fold in the whipped heavy cream into the pâte à bombe
in 2 additions. Work quickly so that the gelatin doesn’t set
until the product is fi nished, otherwise there will be small
chunks throughout the bombe.
NOTES The spice mix is only for steeping and is not a solid compo-
nent of the recipe.
BOMBES

BASE RECIPES 407
Kaffi r Lime Leaf BombeYIELD 5 KG / 11 LB .36 OZ BASE
3.4 kg / 7 lb 7.93 oz / 60.66% heavy cream
450 g / 15.87 oz / 0% kaffi r lime leaves, coarsely chopped
15 g / .53 oz / .27% gelatin sheets, bloomed
1.59 kg / 3 lb 8.08 oz / 28.37% pâte à bombe
600 g / 1 lb 5.16 oz / 10.7% sugar
1. Scald 1 kg / 2 lb 3.27 oz of the cream and add the lime
leaves to it. Cover and let steep for 20 minutes (any more
and its fl avor will turn bitter).
2. Once steeped, strain the leaves out through a fi ne-mesh
strainer and cool the cream over an ice bath.
3. Reserve 200 g / 7.05 oz of the infused heavy cream. In a
saucepan, combine the heavy cream and the gelatin. Melt
the gelatin over low heat, stirring constantly. Reserve warm
over low heat.
4. Make the pâte à bombe. Once the pâte à bombe has qua-
drupled in volume, pour in the melted gelatin–heavy cream
mixture.
5. Whip the heavy cream and sugar to medium stiff.
6. Fold in the whipped heavy cream into the pâte à bombe
in 2 additions. Work quickly so that the gelatin doesn’t set
until the product is fi nished, otherwise there will be small
chunks throughout the bombe.
7. Portion and freeze.
NOTE The lime leaves are for steeping only and are not a solids
component of the recipe.
FROZEN SOUFFLÉS
A frozen souffl é can be made with a combination of foams,
such as heavy cream and egg whites, or egg yolks and egg
whites (but never the three together), and a fl avor base, usually
a fruit purée or chocolate. A souffl é is distinguished by contain-
ing a large proportion of foamed egg whites (French, Swiss, or
Italian meringue) in relation to its other components, which
will give it a very light texture, even when frozen.
Frozen Tangerine Souffl éYIELD 5 KG / 11 LB .36 OZ BASE
TANGERINE JUICE REDUCTION
4 kg / 8 lb 13.09 oz tangerine juice
SOUFFLÉ BASE
1 kg / 2 lb 3.27 oz / 20% Tangerine Juice Reduction
1 kg / 2 lb 3.27 oz / 20% heavy cream, whipped to
medium-stiff peak
3 kg / 6 lb 9.82 oz / 60% Swiss meringue
1. FOR THE TANGERINE JUICE REDUCTION: Reduce the tangerine
juice to 1 kg / 2 lb 3.27 oz tangerine juice to concentrate the
fl avor.
2. FOR THE SOUFFLÉ: Combine the whipped heavy cream with
the juice reduction.
3. Fold in the Swiss meringue in 2 additions.
4. Portion and freeze.
NOTE There is no gelatin in this recipe and it has a large amount
of egg whites, therefore it is crucial to work quickly in order to
avoid foam defl ation.

408 FROZEN DESSERTS
Frozen Basil Souffl éYIELD 5 KG / 11 LB .36 OZ BASE
1 kg / 2 lb 3.27 oz basil leaves
1.5 kg / 3 lb 4.91 oz / 30% heavy cream
3.5 kg / 7 lb 11.46 oz / 70% Swiss meringue (page xxx)
1. Combine the basil leaves with the cream and let steep un-
der refrigeration for 24 hours. Strain the leaves out with a
fi ne-mesh strainer.
2. Whip the cream to medium-stiff peaks.
3. Fold in the Swiss meringue in 2 additions. If folding in the
basil leaf chiffonade (see Note), do so at the end of the
process.
4. Portion and freeze.
NOTE The basil leaves are only for infusing into the heavy cream;
they are not part of the solids content, although it is possible
to cut a few leaves in chiffonade to fold into the souffl é base for
added fl avor and color. If doing so, do not exceed 50 g / 1.76 oz of
basil leaves, and make sure the chiffonade is very fi ne (hair thin).
Frozen Mexican Chocolate Souffl éYIELD 5 KG / 11 LB .36 OZ BASE
1 kg / 2 lb 3.27 oz / 20% heavy cream
1 kg / 2 lb 3.27 oz / 20% Mexican chocolate, coarsely
chopped
3 kg / 6 lb 9.82 oz / 60% Swiss meringue
1. Bring the heavy cream to a boil and mix in the chocolate.
Use a beurre mixer to thoroughly combine both ingredi-
ents. Cool the mixture.
2. Once it is cool enough, it can be whipped as though it were
heavy cream, but it will be much denser.
3. Once the previous mix is whipped, fold in the Swiss
meringue in 2 additions.
4. Portion and freeze.
FROZEN MOUSSES
A frozen mousse is composed of two foams: either an egg yolk
foam and heavy cream, or an egg yolk foam and an egg white
foam, plus a fl avor base (fruit purée, chocolate, or infused heavy
cream). Typically a frozen mousse will contain equal parts of the
combined foams and the fl avor base (1:1 ratio), which makes it the
densest aerated frozen dessert.
Frozen Apricot MousseYIELD 5 KG / 11 LB .36 OZ BASE
APRICOT PURÉE
2 kg / 4 lb 6.55 oz apricots
15 g / .53 oz lime juice
MOUSSE BASE
1.41 kg / 3 lb 1.73 oz / 28.2% Apricot Purée
1.6 kg / 3 lb 8.43 oz / 32% heavy cream
450 g / 15.87 oz / 9% sugar
40 g / 1.41 oz / .8% gelatin sheets, bloomed in ice-cold
water
1.5 kg / 3 lb 4.9 oz / 30% pâte à bombe
1. FOR THE APRICOT PURÉE: Score the apricots with an X on their
top part, then blanch them in boiling water until the skins
can be easily removed. Shock the blanched apricots in ice
water. Remove their skin and the pits. Purée the fl esh with
a small amount of lime juice to prevent oxidation. Once
puréed, pass through a fi ne-mesh strainer.
2. Bring the apricot purée to room temperature.
3. Whip the cream to medium-stiff peaks with the sugar, and
then refrigerate.
4. Melt the gelatin sheets with a small amount of apricot
purée in a saucepan over low heat, then combine with the
remaining room-temperature purée (if the purée is cold,
the gelatin will set very quickly).
5. Mix the pâte à bombe with the purée-gelatin mix; then fold
in the whipped heavy cream in 2 additions.
6. Portion and freeze.

BASE RECIPES 409
Frozen Gingerbread-Spice MousseYIELD 5 KG / 11 LB .36 OZ BASE
GINGERBREAD-SPICE MIX
¹⁄³ nutmeg
13 g / .46 oz cinnamon sticks
4 g / .14 oz cloves
23 g / .81 oz ginger root
MOUSSE BASE
2.18 kg / 4 lb 12.9 oz / 43.6% heavy cream
40 g / 1.41 oz / .8% Gingerbread-Spice Mix
40 g / 1.41 oz / .8% gelatin sheets, bloomed
2.18 kg / 4 lb 12.9 oz / 43.6% pâte à bombe (see Notes)
560 g / 1 lb 3.74 oz / 11.2% sugar
1. FOR THE SPICE MIX: Crush and toast the nutmeg, cinnamon,
and cloves. Meanwhile, scald 1 kg / 2 lb 3.27 oz of the
cream. Once the dry spices are toasted and while they are
hot, add them to the hot cream.
2. Peel the ginger and crush it. Add to the hot cream. Cover
and let steep for 30 minutes.
3. Strain the cream through a fi ne-mesh strainer and cool. Once
the cream is cold, combine it with the remaining cream.
4. FOR THE MOUSSE BASE: Reserve 200 g / 7.05 oz of the infused
heavy cream. In a saucepan, combine the heavy cream and
the gelatin. Melt the gelatin over low heat, stirring constant-
ly. Reserve warm (over low heat).
5. Once the pâte à bombe has quadrupled in volume, pour in
the melted gelatin–heavy cream mixture.
6. Whip the heavy cream and sugar to medium-stiff.
7. Fold in the whipped heavy cream into the pâte à bombe in
2 additions.
8. Portion and freeze.
NOTE The spice mix is only for steeping and is not a solids com-
ponent of the recipe.
Instead of using sugar in the pâte à bombe, use molasses.
Bring the molasses up to 115° C / 239° F, then pour into the
whipping egg yolks.
Frozen Lemon Verbena MousseYIELD 5 KG / 11 LB .36 OZ BASE
500 g / 1 lb 1.64 oz lemon verbena leaves
1.9 kg / 4 lb 3 oz / 38% heavy cream
530 g / 1 lb 2.7 oz / 10.6% sugar
226 g / 7.97 oz / 4.52% lemon juice
13 g / .46 oz / .26% gelatin sheets, bloomed
2.33 kg / 5 lb 2.19 oz / 46.6% pâte à bombe
1. To infuse the lemon verbena, combine the leaves with the
cream and let steep in refrigeration for 24 hours. Strain the
leaves out with a fi ne-mesh strainer.
2. Whip the cream and sugar to medium-stiff peaks.
3. Melt the gelatin with the lemon juice and stir into the pâte
à bombe.
4. Fold in the whipped heavy cream in 2 additions.
5. Portion and freeze. Work quickly so that the gelatin does
not set before all of the ingredients are combined.
NOTE The lemon verbena leaves are only for infusing into the
heavy cream; they are not part of the solids content of the
recipe.

AppendicesAverage Sugar, Solids, and Acid Content of Fruit
The following table identifi es the most commonly used fruits’ sugar content, solids, and acid content per-
centage by weight. This table will be used when determining the formulas for developing sorbet recipes
(see page 377). If there is a fruit that does not appear on this table, use its closest equivalent; for example,
Asian pears and apples.
FRUIT *AVERAGE SUGAR CONTENT (%)
*SOLIDS (%) *ACID CONTENT (%)
Apple 13 14 .8
Apricot 9 14 1.7
Avocado 1 27 .2
Banana 17 25 3
Blackberry 8 16 1.5
Black currant 10 15 3.2
Blueberry 11 15 .3
Cactus pear (or prickly pear) 11 19 (without seeds) .1
Cherry 14 19 .5
Coconut - 56.2 -
Cranberry 4 16 3
Fig 15 23 .4
Gooseberry 11 15 1.8
Grape 16 21 .3
Grapefruit 6 10 2
Guava 7 15 .4
Honeydew 10 8 .2
Kiwi 14 16 3
Lemon 2 9 5
Lime 1 9 5
Litchi 17 15 .3
Mandarin 13 12 1
Mango 11 15 .5
410 APPENDICES

APPENDICES 411
FRUIT *AVERAGE SUGAR CONTENT (%)
*SOLIDS (%) *ACID CONTENT (%)
Melon (cantaloupe) 7 8 .2
Orange 11 10 1.2
Papaya 8 15 .1
Passion fruit 11 15 3
Peach 9 14 .4
Pear 10 17 .1
Persimmon 14 14 .2
Pineapple 13 14 1.1
Plum 11 19 .6
Pomegranate 13 20 1.2
Raspberry 7 14 1.6
Red currant 6 16 1.8
Strawberry 7 11 1.6
Tomato 3 16 .5
Watermelon 9 7 .2
Source: Harold McGee, On Food and Cooking, 2nd ed., New York: Scribner, 2004; and the USDA.

412 APPENDICES
Seasonal Availability of Fruit
The following seasonal availability chart is for the most commonly used fruits in the United States. It
provides general information on their seasonal availability and storage.
FRUIT PEAK MONTH(S) SPECIAL NOTES
APPLES: Some of the most
common varieties: Braeburn,
Cameo, Cortland, Empire, Fuji,
Gala, Ginger Gold, Golden
Delicious, Granny Smith,
Gravenstein, Honeycrisp,
Idared, Jonagold, Jonathan,
McIntosh, Newton Pippin,
Northern Spy, Pink Lady, Pink
Pearl, Red Delicious, Rome
Beauty
August–December; ideal quality
is in the fall (September to the
end of November)
Some varieties such as Granny Smiths are available year-round. Many varieties
only thrive during the fall. Have a 90- to 240-day shelf life under refrigeration. It
is not recommended to store with ethylene-sensitive items (such as bananas).
Peeled and cored, apples freeze well, but might become bloated and mealy and
are more suitable for cooking and baking. Purée freezes very well.
APRICOTS May–August Apricots are the fi rst of the stone fruits to appear in early summer. Apricots are
best ripened at room temperature in a single layer rather than piled up. Ripen
well in paper bags. Ethylene producer. Apricots become mealy if exposed to
high temperatures. Only wash just before using them, otherwise they will get
damaged. Shelf life: 7–14 days in refrigeration, 1–2 days once ripe. Freeze well if
they are to be puréed, cooked, or baked. Purée freezes well, whole fruit does not.
ASIAN PEARS July–October Odor sensitive (will absorb strong odors). Shelf life: 10–15 days in refrigeration.
Ethylene sensitive (do not store with ethylene-producing items). Purée freezes
well, whole fruit does not.
AVOCADOS (Hass)
Other varieties: Fuerte,
MacArthur, Bacon, Zutano,
Pinkerton, Gwen, and Reed
Hass: In California, April–
November (ideal in warmer
months: May–September).
Other varieties’ seasons will
vary.
Grown in warm climates, such as California, Florida, and Mexico. Fruit only ripens
once it is picked. Hass avocado skin will turn black once it ripens. Other varieties’
skin will remain green. The fruit produces ethylene gas, but is often treated with
additional ethylene gas to speed up the ripening process. Shelf life: 14–28 days,
stored between 4°C / 40°F and 13°C / 55°F, 85% humidity. Does not freeze well.
BANANAS (yellow)
Other varieties: Hawaiian
plantain, Burrow, Dominique,
Manzano/apple, Nino,
plantain/Macho, red, yellow
small
Year-round Grown in warm climates, mostly in other countries, such as Ecuador, Costa Rica,
Mexico, Colombia, Guatemala, and Honduras. Gray-yellow or dull bananas have
been improperly handled and must be rejected or disposed of. Produces large
amounts of ethylene gas, therefore the best method for ripening is to leave them in a
paper bag or a cardboard box. Bananas are often used to ripen other fruits by placing
them together in a semi-ventilated container. Shelf life once ripened: 3–7 days,
depending on environmental conditions. Storing temperature: 13°C / 56°F to 14°C /
58°F. Ripening temperature: 15°C / 60°F to 18°C / 65°F, 90 to 95% relative humidity.
Purée freezes well, whole fruit does not.
BLACK CURRANTS, PINK
CURRANTS, RED CURRANTS,
AND WHITE CURRANTS
Single growth in the spring Grow in warm climates that do not exceed 30°C / 85°F. Not recommended to
eat raw (highly acidic) and without the addition of sugar. Shelf life: 7–10 days in
refrigeration. All currants, whole or puréed, freeze very well.
BLACKBERRIES June–September Good-quality blackberries will be bright, clean, and fresh, with good color and
plumpness. Berries with caps attached may be immature. Overripe berries are
dull, soft, and may leak moisture. Shelf life: 2–3 days in refrigeration. Whole fruit
and purée freeze very well.

APPENDICES 413
BLUEBERRIES Mid July–early September
(Northeast and Northwest U.S.
coast mostly)
There are many varieties of blueberries, but the most common is the Bluecrop
variety. Other popular varieties are Berkeley, Elliot, and Jersey. This fruit is ideally
ripened on the plant. Off-season they are imported from South America, but they
are inferior in quality. Size does not denote quality of ripeness. Shelf life: 10–18
days in refrigeration. Whole fruit and purée freeze very well.
CACTUS PEAR (a.k.a. prickly
pear)
Late June–September Mostly imported from Mexico. It is the fruit of the nopal cactus. It is covered in
a prickly skin. The fl esh is very moist and contains many seeds. It is available in
a deep red and a bright green, with no signifi cant variations in fl avor. It ripens
best on the plant. Shelf life: 10–12 days in refrigeration. Flesh freezes well, but it
is recommended to crush the fruit and strain out the seeds before doing so. Not
recommended for cooking or baking.
CHERRIES (Bing, Rainier,
Lambert, and Van, among
others)
Mid May to late August Cherries with stems have a longer shelf life than those that don’t. They are also
odor sensitive and will absorb strong off-fl avors. Slight brown spotting indicates
high sugar content, not spoilage. Cherries that are mahogany or reddish-brown
are considered the best tasting. Shelf life: 10–21 days in refrigeration. Whole fruit,
purée, and juice freeze very well.
CITRUS FRUIT Citrus can last for a week at room temperature, and 14–28 days refrigerated. For
ideal fl avor extraction, it is recommended to not only use the juice of the fruit,
but the zest as well. A good idea is to scrape the skin of the citrus with a sugar
cube to absorb the oils, then make a simple syrup with this sugar, and fi nally
add this syrup to the fruit juice to make the sorbet base. Candied citrus zest also
provides another fl avor and textural dimension to a frozen dessert. Juice and fruit
supremes freeze very well.
BLOOD ORANGES Mid December–March
CLEMENTINES November–January
GRAPEFRUITS (pink and
white)
Available year-round with the
peak from January through
April. Florida and Texas provide
the bulk of the winter crop,
while Arizona and California
produce the bulk of the spring
and summer supply.
KEY LIMES Year-round
KUMQUATS Winter
LEMONS Year-round; peak is April–July
LIMES Year-round
MANDARINS (Kinnow, Royal) January–April
MEYER LEMONS November–March (varies,
depending on what coast they
grown on)
NAVEL ORANGES November–May; peak is
January, February, and March
POMELOS January–February
SATSUMAS Winter–spring
TANGELOS (a.k.a. Minneola) December–February

414 APPENDICES
TANGERINES (Fairchild,
Algerian, and Dancy)
November–January
VALENCIA ORANGES Year-round; peak is May, June,
and July
COCONUTS Year-round, since they are
grown around the world
Available from tropical areas around the world. Many pastry chefs opt for factory-
made purées because of the time-consuming task of extracting the fl esh from the
coconut, puréeing, and straining. Coconuts ripen best on the tree, and can take
anywhere from 2 months for small varieties to up to a year for larger varieties.
They are one of the few fruits that travel well (because of their hard shell). Shelf
life: 7–14 days after peak ripening in refrigeration. Purée and fl esh (no skin)
freeze very well.
CRANBERRIES October–December The majority of cranberries are grown in Massachusetts and Oregon. Shelf life:
3–4 months in refrigeration. Poorly colored fruit can pick up better coloring if
held for a few weeks at 7°C / 45°F to 10°C / 50°F. They contain a high amount of
pectin, a natural stabilizer, and therefore make for very smooth sorbets without
the addition of any other stabilizers. Freeze very well, whole or puréed.
FIGS (Black Mission,
Calimyrna, and Kadota, among
others)
June–October Very susceptible to odor absorption. Recommended to store in a single layer on
paper towel–lined sheet pans. Ripen well at room temperature. Shelf life: 10–12
days. Puréed and whole fruit freeze well.
GOOSEBERRIES (American:
Pixwell, Downing, and
Poorman; European: Fredonia)
June–August; peak is in July Related to currants. The Poorman variety (green in color) is the most
recommended for dessert. Not cultivated commercially on a large scale. Fruit is
very delicate, and some say it is an acquired taste because of its predominant tart
taste. Shelf life: 7–10 days refrigerated. Whole fruit and purée freeze well.
GRAPES
Common domestic varieties:
Ribier, Exotic, Niabell,
Fantasy, Maroo, Flame,
Ruby, Emperatriz, Crimson,
Majestic, Cardinal, Emperor,
Queen, Christmas Rose,
Red Globe, Perlette, Red
Flame, Thompson, Sugarone,
Autumn, and Concord
Most domestic varieties are
available from May to January.
Concord grapes, though,
are available from the end
of August to the beginning
of October. Wine-producing
grapes (Muscat, Shiraz, pinot
noir, etc.) are harvested in the
fall.
Ripening ends after harvest. A chalky bloom look is a sign of freshness. It is not
recommended to purée grapes in a blender because of their seeds and acidic
skin, but to crush them and then strain them through a fi ne-mesh strainer. For
grapes with intense fl avor, it is a good idea to place them in a pot with water
(enough to fi ll the pot one-quarter full), bring them to a boil, turn the heat
down, and simmer for 20 minutes, then turn the heat off and let them sit for
30 minutes, then pass through a fi ne-mesh strainer. Shelf life: 56–180 days in
refrigeration. They will absorb strong odors produced by leeks and onions. Whole
fruit and fruit juice freeze well.
GUAVAS In warmer regions guavas will
ripen all year. Mostly available
in California.
Varieties differ widely in fl avor and seediness. The better varieties are soft
when ripe, and creamy in texture with a rind that softens to be fully edible. The
fl esh may be white, pink, yellow, or red. The sweet, musky odor is pungent and
penetrating. The seeds are numerous but small and, in good varieties, fully
edible. There is a distinctive change in the color and aroma of the guava that
has ripened. For the best fl avor, allow fruit to ripen on the tree. They can also
be picked green-mature and allowed to ripen off the tree at room temperature.
Placing the fruit in a brown paper bag with a banana or apple will hasten
ripening. Mature green fruit can be stored for 2–5 weeks in refrigeration. Fruit
that has changed color cannot be stored for any extended periods. It bruises
easily and will quickly deteriorate or rot. Whole fruit and fruit purée freeze well.

APPENDICES 415
KIWIS (green and golden
varieties)
California kiwis are available
from November to the end of
May.
Ethylene sensitive when underripe, ethylene producer once ripe. Green kiwis
have a shelf life of 28 days refrigerated and 3–7 days at room temperature. Gold
kiwis last up to 14 days refrigerated and 3–4 days at room temperature. Fruit
ripens very well once picked from the plant. It is recommended to ripen at room
temperature and not in refrigeration. Fruit with wet spots must be discarded.
Purée freezes well, whole fruit does not.
LITCHIS From Asia: May–July
From Mexico: July–August
From Florida: late May–early
August
The best-quality litchi is from southern China, where it originated. Ideally, litchis
are sold in bundles, but loose ones are more economical. The skin should be
bright red, and the inside should yield to the touch. A telltale sign of a ripe litchi
is when the spiny skin “fl attens” and becomes smooth. Avoid litchis that leak.
Shelf life: 5–7 days refrigerated. Close relatives to the litchi include rambutans
and loganberries, similar in look and composition, but distinct in fl avor. Fruit
fl esh (no seeds or skin) and puréed fl esh will freeze well.
MANGOES (Varieties: Kent,
Tommy Atkins, Haden, Manila,
Ataulfo, and Keitt)
Tommy Atkins: Mid May–early
July
Keitt: July–September
Kent: July–August
Manila: June–August
Haden: July–September
Ataulfo: June–August
Close to 500 varieties exist worldwide. Most of the mangoes sold in the U.S. are
imported from Mexico. Florida is the largest producer in the country. Ripeness
of mangoes can be determined by either smelling or squeezing. A ripe mango
will have a full, fruity aroma emanating from the stem end. Mangoes can be
considered ready to eat when slightly soft to the touch and yielding to gentle
pressure. Shelf life: 1–2 weeks. Ideally stored at 12°C / 55°F. The best way to
ripen a mango is at room temperature. Purée freezes well; whole fruit does not.
MELONS: Ambrosia,
Canary, cantaloupe, Casaba,
Charentais, Crane, Crenshaw,
Galia, Honeydew, Juan Canary,
Persian, and Santa Claus
Summer Ethylene producers. It is recommended to ripen at room temperature and
process immediately once the melon has reached its peak. It is possible to
refrigerate melons, but if exposed to low temperatures for long periods of time,
they will suffer chilling injury. Ripeness is hard to determine without looking
inside the fruit, but there is a characteristic fl oral aroma and the blossom end
yields slightly to the touch. If stem end is rough with portions of the stem
remaining, the melon was harvested prematurely. Cut fruit absorbs odor and
fl avors quickly. It must be refrigerated at this point, because bacteria thrive in
melon fl esh netting. Purée freezes well; whole fruit does not.
PAPAYAS Available year-round Not a signifi cant crop grown in the continental United States. The majority are
grown in Hawaii and imported from Mexico and Brazil. Ethylene producer. They
ripen in 2–3 days when held at temperatures between 13°C / 55°F and 18°C /
65°F. Never store an under-ripe papaya below 7°C / 45°F/ because the ripening
process will stop. Once ripened, the fruit can be refrigerated. A papaya is ripe
when the skin is soft and the fl esh yields slightly to the touch. Purée freezes well;
whole fruit does not.
PASSION FRUITS Available year-round Grown in subtropical climates in the Caribbean and Mexico. Some growers in
California have been successful with this crop. The fruit ripens best off the plant.
A passion fruit is ripe when the skin is deeply wrinkled. Smooth-skinned fruits
should be left to ripen at room temperature. The taste is typically abrasively tart
and is combined with sugar or sweeter fruit juices, such as orange juice. The
seeds are edible and provide a pleasant texture. Juice freezes well; whole fruit
does not.

416 APPENDICES
PEACHES (There are close to
150 varieties.)
Subcategory: nectarines.
Similar yet smaller and
sweeter. Lack “fuzz” on the
skin.
May–August; peak is June–July From the stone fruit family. Best when ripened on the tree. Once picked, they will
soften as they mature, making them ideal at this point. They will be soft, plump,
and mildly fragrant at the stem end. This condition is not only ideal for eating, but
for blanching as well to remove the skin. When under-ripe, the skin will only come
off if peeled. Stone fruit, except cherries, should always be skinned to be puréed
and used in a frozen dessert. Any tone of green coloring on the skin is a sign of
under-ripeness, and the fruit will never ripen at this point if it has been picked from
the tree. To store, as with any stone fruit, lay on a sheet pan lined with paper towels
in a single layer. Shelf life: 3–4 days if ripe. Store between 10°C / 51°F and 25°C /
77°F. Ethylene producer. Purée freezes well, whole fruit does not.
PEARS (More than 250
varieties available.) Most
common: Anjou, Bartlett,
Bosc, Comice, Forelle,
Packham, Seckel and Williams
Late summer to mid–fall Ripen well off the tree. Ideal ripening temperature is 15°C / 60°F to 21°C /
70°F. Shelf life once ripened: 3–4 days. Once ripened can be refrigerated, but
it is recommended to either consume or process (purée, cook, or bake) when
peak ripeness occurs. Ethylene and odor producer. Ethylene and odor sensitive.
When ripe, skin will be soft and fl esh will yield to the touch. It will have a fl oral
aroma. Avoid pears with severe browning in the skin and fl esh. They will have a
fermented fl avor. Purée freezes well, but whole fruit will suffer freezer damage.
PERSIMMON VARIETIES:
ASTRINGENT: Eureka,
Hachiya, Honan Red, Saijo,
Tamopan, Tanenashi, and
Truimph
NON-ASTRINGENT: Fuyu,
Gosho, Imoto, Izu, Jiro,
Maekawajiro, Okugosho, and
Suruga
Late fall–early winter Persimmons can be classifi ed into two general categories: those that bear
astringent fruit until they are soft-ripe and those that bear non-astringent fruits.
Astringent varieties are harvested when they are hard but fully colored. They
will soften on the tree and improve in quality, but much will be lost to birds.
Astringent persimmons will ripen off the tree if stored at room temperature.
Non-astringent persimmons are ready to harvest when they are fully colored, but
for best fl avor, they should be allowed to soften slightly after harvest. Mature,
hard astringent persimmons can be stored in the refrigerator for at least 1
month. They can also be frozen for 6–8 months. Non-astringent persimmons can
be stored for a short period of time at room temperature. Whole fruit does not
freeze well, purée does.
PINEAPPLES Year-round Pineapples available in the U.S. are grown in Hawaii, Costa Rica, Honduras, and
Mexico. Fruit with deep yellow shell color has a higher sugar content because it
is picked when the fruit has almost completely grown. Can be ripened at 10°C /
50°F to 13°C / 56°F. Once ripe it is recommended to refrigerate or process. Shelf
life is 14–36 days refrigerated if under-ripe. Odor sensitive. Juice freezes well.
PLUMS (There are close to 50
cataloged varieties.)
Subcategory: Pluots. A hybrid
of plums and apricots.
Summer–early fall Part of the stone fruit family. Ripen well off the tree between 10°C / 51°F and
25°C / 77°F, but will not increase in sweetness, therefore it is best to let the
fruit ripen on the tree. Once ripened they should be consumed, processed, or
refrigerated. Shelf life: 10–14 days when under-ripe, 2–3 days once ripe. If the
fruit yields to gentle pressure, it is ripe. Purée freezes well, whole fruit does not.
POMEGRANATES
Wonderful is by far the most
commercially available variety.
Other varieties include:
Granada, Ruby Red, Foothill
Early, and Spanish Sweet.
Late summer (August)–early
fall
The best-quality fruit can be found in California, Arizona, and Northern Mexico.
Fruit should be harvested as it reaches full maturity. It will hold for 2–3 weeks in
refrigeration. To juice pomegranates, it is not recommended to use a blender, but
to crush them through a fi ne-mesh strainer. As labor intensive as it is, the result is
an extraordinary bright red juice. Juice and seeds freeze well.

APPENDICES 417
PUMPKINS (There are close
to 50 commercially available
varieties.)
Harvested from late August–
late October. Available until
December.
Although classifi ed as gourds, they are technically fruit, and are closely related to
cucumbers, squash, and watermelon. They are best harvested when the fruit is fully
colored. Smaller varieties have much more and better fl avor than larger varieties,
which are more suitable for jack-o-lanterns than for eating. Pumpkins need to be
cooked to be edible. The seeds are a valued by-product that can be dried, salted,
toasted, or candied. Whole pumpkins can be stored in a cool, dry place for up to 1
month. Temperatures above 15°C / 60°F will make the fl esh stringy. If space allows,
pumpkins can be refrigerated for up to 2 months, but relative moisture should be
below 70%. Canned pumpkin is convenient but not necessarily better than fresh.
Whole fruit does not freeze well, but purée does.
RASPBERRIES (There are more
than 24 commercially available
varieties of raspberries.)
Reveille is one of the most
popular varieties. Black
and yellow raspberries are
considered a subcategory, and
each one has its own number
of varieties, but most of them
are the result of botanical
engineering.
Late spring–summer Avoid unusually large raspberries. This is a telltale sign of growth hormones and
botanical engineering; while the fruit may look appealing, the taste is exceedingly
tart, with little to no raspberry fl avor. Smaller fruit will have a more pronounced
fl avor. Use raspberries that have been grown locally, because once they are
picked they start losing fl avor and have a very short shelf life (2–3 days), even in
refrigeration. Ripe berries are plump, fi rm, dry, and deeply colored. As with any
other berry, it is recommended to store raspberries on a paper towel–lined sheet
pan in a single layer in refrigeration. It is not recommended to wash raspberries
because they will get severely damaged. Purée and whole fruit freeze well.
STRAWBERRIES (There are
more than 30 commercially
available varieties.)
Late April–July As with raspberries, smaller fruit will have a better and more pronounced fl avor
than unnaturally large ones. They are available year-round, but this is not a good
thing. Since they have a short shelf life (5–7 days), they are often picked under-
ripe so they can travel for long periods of time with little to no damage. Berries
do not improve off the plant. Ripe berries are fi rm, well shaped, dry, have a
uniform deep red skin (no green), and should still have the green cap attached.
They are best left to ripen on the plant, then picked and processed as soon as
possible. Strawberries should be washed before using, preferably with the caps
still on. Once washed, the caps should be taken off. Purée and whole fruit freezes
well.
TOMATOES
(There are more than
250 varieties commercially
available.)
Midsummer in the West, late
summer in the East
It is imperative to use tomatoes only when they are in season. Off-season
tomatoes may look good, but fl avor is watered down and the texture will be
mealy. Heirloom tomatoes make for excellent savory sorbets and granités. To
extract the most fl avor from them, it is recommended to purée the fruit and then
place it in a cheesecloth over a fi ne-mesh strainer for 24 hours in refrigeration to
extract all the liquid. This is known as “tomato water.” Some chefs employ salt to
extract even more liquid from tomatoes, but this practice will be detrimental to
sorbet and granité. Tomatoes ripen well on and off the vine at room temperature
that does not exceed 27°C / 80°F. Refrigerating tomatoes is not recommended.
Purée and juice freeze well. Whole fruit does not.
WATERMELONS Summer Even though it is part of the melon family, it has so many varieties and such a
distinct fl avor it deserves to be explained on its own. If held at room temperature
for about a week after harvesting, fl avor and color can improve, but then they
should be stored between 10°C / 50°F and 16°C / 60°F, where they can last 2–3
weeks. Any lower and they lose color, any higher and they decay quickly. Once
the fruit has been picked, its sugar content will not increase. Ethylene sensitive.
The best clue to ripeness is the rind. It should be free of cracks or soft spots and
neither very shiny nor very dull. The bottom should be yellowish in color, not
greenish-white. If the stem is still attached, it should look dry and brown; if the
stem is green, the melon was picked too soon. Fruit juice and whole fruit minus
the rind freeze well.

Sorbet Mathematical Formulation
This chart explains the same mathematical formulation method found on page 77 in chapter 5, but in a
more visual way. Each piece of information that relates to each other is shaded the same way.
STEP 1: Determine the desired yield in grams 100% 5000
STEP 2: Determine the percentage of fruit to be used:
Percentage in weight (in relation to the desired yield): 35% 1750
STEP 3: Determine the desired percentage of solids (dry extracts): 31% 1550
STEP 4: Add the following standard solids: (These amounts
are solids that are part of the basic ingredients; they will
be used to determine how much granulated sugar the recipe will need.)
Fruit solids %: (input manually; see fruit chart on page
410 for the list of the most widely used fruits) 10% 175 175
Glucose powder (95% solids): (Glucose powder is
95% solids and 5% water; we are using 5% of the total
weight of the recipe for glucose powder, therefore,
95% of 5% is 4.75%. This amount [237.5 g] is used to
calculate these solids, but the whole amount, in this
case 250 g, is needed to calculate the recipe accurately.
This is why we have the column on the far right.) 5% 4.75% 237.5 250
Sorbet stabilizer (100% solids): (for this recipe we will
use .35% of the total recipe as the stabilizer weight;
stabilizers are 100% solids) .35% .35% 17.5 17.5
Weight of the above solids in grams: This is the
addition of the 3 ingredients above. We will use the
column on the far right (highlighted in gray-green) for
the formula. 15.1% 430 442.5
Amount required to complete the desired percentage of solids (this will be the amount of sugar to add
to the formula NOT THE RECIPE): 1550 (desired amount of solids) – 430 (standard recipe solids) =
1120 g; but since we have to use the highlighted column on the far right (because the whole weight of the
powdered glucose has been factored into it), the actual amount of sugar we have to add is the following
sum:
1550 (desired amount of solids)– 442.5 (standard recipe solids with the glucose powder water content
factored in) = 1107.5
1120 g of sugar to add
1107.5
418 APPENDICES

STEP 5: Determine the required water amount:
All ingredients – desired yield = water
1750 g fruit purée
237.5 g powdered glucose
17.5 g stabilizer
1120 g granulated sugar
1875 g water 1875 g of water to add
TOTAL WEIGHT: 5000
FINISHED RECIPE
INGREDIENT AMOUNT (IN GRAMS)
AMOUNT(IN POUNDS)
PERCENTAGE
Purée or juice: blood orange 1750 3.91 35%
Glucose powder: (remember that this amount is
from the far right column because we are using
the whole 5% of glucose powder; the 4.75% was to
calculate the basic solids in the recipe in order to
determine how much sugar to add)
250 .56 5%
Granulated sugar: 1107 2.47 22.15%
Stabilizer: 17.5 .04 .35%
Water: 1875 4.19 37.5%
TOTAL WEIGHT: 5000 11.16 100%
APPENDICES 419
Procedure 1. Determine the formula for the sorbet.
2. Scale all of the ingredients accurately.
3. Combine all of the dry ingredients in a bowl.
4. Place the water in a pot over high heat and heat
to 40°C / 104°F.
5. Once the liquid reaches 40°C / 104°F, pour in
the dry ingredients carefully but quickly while
whisking constantly.
6. Bring the mixture to 85°C / 185°F and maintain
this temperature for 2 minutes (turn the heat
off if necessary). This will allow the stabilizers
to fully hydrate and all of the dry ingredients to
dissolve. Do not exceed the heating time and/or
temperature in order to prevent excess liquid
evaporation, as that could alter the formula.
7. Chill the mixture to 4°C / 39°F.
8. Mix in the main ingredient.
9. Let the sorbet base mature for at least 2 hours
and up to 6 hours.
10. Churn the sorbet base and transfer to a –10°C /
14°F freezer.
11. Let the sorbet harden for 2 to 4 hours before
serving. Reserve for service.

ACID: A substance having a sour or sharp fl avor. Foods gener-ally referred to as acids include citrus juice, vinegar, and wine. A substance’s degree of acidity is measured on the pH scale; acids have a pH of less than 7.
AERATION: To incorporate air by beating or whipping ingredients.
AGAR-AGAR: A gelling substance derived from certain sea algae.
ALBUMIN: A water-soluble protein found in egg whites.
ALKALI: A substance that tests at higher than 7 on the pH scale. Baking soda is an example of an alkaline ingredient.
ALMOND PASTE: A mass of ground almonds and sugar.
BATCH FREEZER: A compact machine that churns frozen desserts and takes a product from room temperature to below freezing in a short amount of time.
BAUMÉ (BE): A scale for expressing the specifi c gravity of a liquid; or the method for measuring the density of sugar syrups. It is ex-pressed in degrees.
BAUMÉ HYDROMETER: Used to measure density of sugar in a liquid; the Brix hydrometer (refractometer) is used to measure the percentage of sugar in a liquid.
BLANCH: To remove the skins from nuts and fruit with skin such as peaches, tomatoes, etc. by scalding.
BLAST FREEZER: A freezer that can drop down to −38°C / −37°F in a short period of time.
BLEND: To fold or mix ingredients together.
BLOOMING: The process of allowing gelatin to soften in (sheet gelatin) or soak up (granulated gelatin) cold water or other liquids.
BOMBE: Has the same components as a frozen parfait, but with 50 percent more heavy cream. The fi nished base is poured into a dome-shaped mold, which is how it got its name.
BRIX SCALE: A scale of measurement (decimal system) used to determine the density and concentration of sugar in a solution.
BUTTER: A semisolid fat made by churning cream, which contains between 80 and 90 percent milk fat and a maximum of 16 percent water.
CARAMELIZATION: The process of cooking sugar in the presence of heat. The temperature range in which sugar caramelizes is ap-proximately 160 to 182°C / 320 to 360°F. The browning of sugar enhances the fl avor and appearance of food.
CARBOXYMETHYL CELLULOSE: A stabilizer that gels with heat. It must be mixed into a cold liquid by stirring vigorously, and then allowed to rest under refrigeration so it can hydrate and reach 4°C / 40°F, where its gelling properties are activated. Helps to reduce ice crystal growth and will never give the product a gummy texture, which occurs with some stabilizers when used in excess.
COCOA BUTTER: The fat extracted from the cacao bean.
COMMON MERINGUE: A mixture of stiffl y beaten egg whites and sugar. Also known as French meringue.
COUVERTURE: A type of chocolate specifi cally designed for coat-ing or incorporation with other ingredients. Extra cocoa butter is added to increase its smoothness, fl exibility, and gloss after tem-pering. The cocoa butter content of couverture should be at least 32 percent.
CRYSTALLIZATION: A process that occurs when sugar is deposited from a solution.
CUSTARD: Any liquid thickened by the coagulation of egg proteins. When referring to frozen custard, it is an ice cream that contains more egg yolks than traditional ice cream.
DEXTROSE: A simple sugar made by the hydrolysis of starch (water plus an acid); also known as corn syrup. It comes from glucose, which is categorized according to its Dextrose Equivalent (DE).
DEXTROSE EQUIVALENT: A percentage that indicates how much of the starches have been broken down into sugar.
DIGLYCERIDE: A diglyceride is a glyceride consisting of two fatty acid chains covalently bonded to a glycerol molecule through ester linkages.
DISACCHARIDE: A complex or double sugar. When fructose and dextrose are bonded together, this is called sucrose, or table sugar. Maltose is another example of a disaccharide.
DISSOLVING: The process of heating bloomed gelatin until it is transparent and liquid; also known as melting.
EMULSIFIER: A type of food additive used to help bind two unmix-able liquids into a uniform distribution.
EMULSION: The suspension of two ingredients that do not usually mix. Butter is an emulsion of water in fat.
FOAMING: The process of beating eggs (the yolks and/or whites) or heavy cream to incorporate air until they form a foam.
FORMULA: A recipe in which measurements for each ingredient are given as percentages of the weight for the main ingredient.
420 GLOSSARY
Glossary

FRAPPÉ: A combination of a fruit sorbet and a liquid or dairy prod-uct that is mixed in a blender until it obtains a slush-like consis-tency.
FRUCTOSE: A monosaccharide that occurs naturally in fruits and honey; also known as fruit sugar or levulose.
GANACHE: An emulsion of chocolate and cream. Ganache may also be made with butter or other liquids in place of the cream.
GELATIN: A protein derived from the skins and tendons of animals. Gelatin is used as a binder and stabilizer. It is available in granu-lated and sheet/leaf forms.
GELATINIZATION: The process in which starch granules, sus-pended in liquid, are heated; they begin to absorb liquid and swell in size.
GELATO: An Italian-style ice cream that is denser than American-style ice cream. It has an overrun of 20 percent.
GELLAN GUM: A stabilizer that is obtained from fermented bacte-ria. Gellan gum is characterized by high gel strength, ease of use, clarity, fl exibility, reliable supply, and ability to be used in a variety of combinations.
GLUCOSE: (1) A monosaccharide that occurs naturally in fruits, some vegetables, and honey; also known as dextrose. (2) A food additive used in confections. (3) Glucose syrup is obtained from starch, most commonly cornstarch. Glucose syrup is categorized according to its Dextrose Equivalent (DE). The DE stands for how much of the starches have been broken down into sugar.
GLUCOSE POWDER: Glucose powder or atomized glucose is glu-cose syrup that has had 95 percent of its water content removed. There is still 5 percent moisture in it. Dextrose powder is 8 percent water.
GRANITÉ (OR GRANITA): A frozen mixture made with water, sugar, and a fl avoring such as fruit juice or wine; stirred frequently while freezing, it has an icy texture.
GUAR GUM: A stabilizer often used in combination with locust bean gum and carrageenan, because if used alone it is not as quick to react to changes in the environment (heat shock).
GUM ARABIC: A water-soluble vegetable gum obtained from the stems and branches of various species of acacia trees. It is used to thicken, emulsify, and stabilize foods such as candy and ice cream.
HEAVY CREAM: A milk product composed of water and fat molecules that are protected by a membrane composed of phos-pholipids that are evenly dispersed in water. It usually contains between 32 and 40 percent milk fat.
HOMOGENIZE: To take ingredients and mix them together so they become the same in structure.
HYDRATE: To combine ingredients with water or to add water to dry ingredients.
ICE CREAM: An ice cream is an emulsion and then, after churning, is a foam in which the air bubbles are stabilized by freezing a large amount of the liquid around them. Can be made with or without eggs.
ICE CREAM CONE: A wafer rolled into a cone used to hold ice cream for eating; sometimes dipped in chocolate or other syrup and coated with nuts or the like.
INFUSE: To fl avor by allowing an aromatic to steep in the liquid to be fl avored. Infusions may be made either hot or cold.
INVERT SUGAR (ALSO KNOWN AS TRIMOLINE): Sucrose that has been broken down (inverted) into dextrose (glucose) and levulose (fructose). It is sweeter and more soluble than sucrose and does not crystallize as easily.
ITALIAN MERINGUE: A meringue made from whipped egg whites and sugar syrup that has been cooked to 121°C / 250°F. The syrup is poured slowly into the whipping egg whites when they have achieved stiff peak, and then the meringue is whipped to the de-sired peak.
LACTIC ACID: An acid produced when lactose is fermented. It oc-curs naturally when milk is soured.
LACTOSE: The simple sugar found in milk.
LOCUST BEAN GUM: A stabilizer that is not used so much for its gelling properties, but rather for its capacity to enhance aeration and for protecting the frozen product from frequent heat shock by insulating ice crystals.
MERINGUE: A mixture of stiffl y beaten egg whites and sugar; de-pending on the ratio of sugar to egg whites, a meringue may be soft or hard. See French, Swiss, and Italian meringue.
MISE EN PLACE: French for “put in place.” The preparation and as-sembly of ingredients, pans, utensils, and plates or serving pieces needed for a particular dish or service period.
MONOGLYCERIDE: A glyceride consisting of one fatty acid chain covalently bonded to a glycerol molecule through an ester linkage.
MONOSACCHARIDE: A single or simple sugar and the basic build-ing block of sugars and starches. Fructose, glucose, levulose, and dextrose are examples of monosaccharides.
MOUSSE: A French term that means “foam” or “froth;” also a soft, creamy food, either sweet or savory, lightened by adding whipped cream, beaten egg whites, or both, or a pâte à bombe.
NAPPE: The consistency of a liquid that will coat or cover the back of a spoon. In English it means “to coat.”
GLOSSARY 421

OVERRUN: The increase in volume of ice cream, sorbet, sherbet, or gelato caused by the incorporation of air during the freezing process.
PACOJET: A machine that does not churn but shaves frozen prod-ucts to a very smooth consistency without the need for a stabilizer or emulsifi er.
PACOTIZE: The act of shaving an item such as ice cream in a Pacojet.
PARFAIT: Composed of a cooked egg yolk foam (pâte à bombe),cooled to room temperature, or an Italian meringue), a whipped heavy cream foam (which will be the dominant foam), sugar, and a fl avor base, usually a fruit purée or chocolate that is melted but cool.
PASTEURIZATION: The process of heating milk to a high tempera-ture (usually 72°C / 161°F) for approximately 15 seconds to kill pathogenic bacteria and destroy enzymes that cause spoilage, thus increasing shelf life.
PATHOGEN: A disease-causing microorganism.
PECTIN: A gelling agent or thickener found in fruits, particularly in apples, quince, and the skins of citrus fruits.
PH SCALE: A scale with values from 0 to 14 representing degrees of acidity. A measurement of 7 is neutral, 0 is most acidic, and 14 is most alkaline. Chemically, pH measures the concentration and activity of the element hydrogen.
POPSICLE: The trademarked name for a colored, fl avored ice con-fection with one or two sticks for a handle.
POWDERED MILK: A common source of nonfat milk solids. Con-tains less than 1 percent fat. Equally composed of lactose and pro-teins (specifi cally, whey proteins and, to a lesser amount, casein), and minerals (calcium and phosphorus). Although dry in appear-ance, it contains 4 percent water.
REFRACTOMETRIC INDEX (RI): A measure of a fruit’s sugar content. A refractometer, also called a Brix hydrometer, is used to determine the precise sugar content in bases of frozen desserts.
RETROGRADATION: The process in which starches high in amy-lose revert back to their insoluble form after they are gelatinized and then undergo freezing, refrigeration, or ageing. This reaction causes changes in texture and appearance.
SACCHARIDE: A sugar molecule.
SEMIFREDDO: An Italian word for “semi-cold” or “half-cold.” It is a partially frozen dessert that is made from all three foams (pâte à bombe, egg whites (French meringue), and whipped heavy cream) plus the addition of fl avor, typically added in a liquid form, which makes it incredibly light.
SHERBET: An ice containing dairy in smaller amounts than another liquid, which can be water, fruit purée, or fruit juice, or a combina-tion of these three items.
SODIUM ALGINATE: Extracted from sea algae, it is considered a highly effective stabilizer because of the texture and body it adds to ice creams and sherbets, and because it can bind calcium better than other stabilizers.
SORBET: A sorbet is an aerated non-dairy frozen product that is churned in a batch freezer or Pacojet. Sorbets are made mainly of a fruit or vegetable juice, a fruit or vegetable purée, an infused or fl avored liquid, a wine, or a liqueur.
SOUFFLÉ: A sweet or savory French dish made with a custard base lightened with whipped egg whites and then baked. A frozen souf-fl é is not baked but contains egg whites to create a meringue. The word souffl é is the past participle of the French verb souffl er, which means “to blow up” or, more loosely, “to puff up.”
STABILIZER: An ingredient that helps to develop the solid structure or “framework” of a fi nished product. Gelatin and pectin can act as stabilizers in ice cream bases.
SUCROSE: A disaccharide extracted from sugarcane or sugar beets and consisting of glucose and fructose joined together in the molecule.
SWISS MERINGUE: A cooked French meringue in which egg whites and sugar are cooked to 60°C / 140°F over a water bath and then whipped to the desired peak.
UNSWEETENED CHOCOLATE: Chocolate liquor without added sugar or fl avorings.
WHITE COUVERTURE: True white couverture, like that found in Europe, is made from cocoa butter, milk, sugar, and fl avorings; it contains no chocolate liquor. In the United States, white confec-tionery coating, made with vegetable fat instead of cocoa butter, is more readily available.
XANTHAN GUM: A stabilizer that has great thickening power (it can thicken alcohol). It is hot- and cold-soluble, almost immedi-ately as it comes into contact with a liquid.
422 GLOSSARY
BIBLIOGRAPHY 423
Adrià, Ferran, Albert Adrià, and Juli Soler. El Bulli 1998–2002 (English edition). Barcelona, Spain: Elbullibooks, 2003.
Aimar, Joseph, Alain Berne, and Jacques Joubert. Frozen Des-serts. New York: Cicem and Wiley, 1997.
Arbuckle, W. S., and Robert T. Marshall. Ice Cream (Fifth Edi-tion). New York: Chapman and Hall, 1996.
Balaguer, Oriol. La Cocina de los Postres. Barcelona, Spain: Montagud, 2001.
Beckett, Stephen T. The Science of Chocolate. London: RSC Paperbacks, 2000.
Bellouet, G. J., J. M. Perruchon, E. Ryon. Apprenez l’Art de la Glace et des Sorbets (Learn the Art of Ice Cream and Sorbets). Paris: Belouet., 2001.
Caviezel, Luca. Scienza e Tecnologia del Gelato Artigianale (Sci-ence and Technology of Artisanal Gelato). Torino: Chiriotti, 1992.
Christian, Elizabeth W., and Vickie A. Vaclavik. Essentials of Food Science (Second Edition). London: Kluwer Academic/Plenum Publishers, 2003.
Corvitto, Angelo. Los Secretos del Helado (The Secrets of Ice Cream). Barcelona: Grupo Vilbo, 2004.
Coultate, T. P. Food: The Chemistry of Its Components (Fourth Edi-tion). London: The Royal Society of Chemistry, 2003.
The Culinary Institute of America. Baking and Pastry: Master-ing the Art and Craft. New York: John Wiley and Sons, Inc., 2004.
Davidson, Alan, Jane Davidson, Tom Jaine, and Helen Saberi. The Oxford Companion to Food (Second Edition). New York: Oxford University Press, 2006.
Damerow, Gail. Ice Cream! The Whole Scoop. Centennial, Colo.: Glenbridge Publishing Ltd., 1991.
Damme, Jeff. I Gelati del Pasticciere (The Pastry Chef’s Ice Cream). Torino: Chiriotti, 1992.
Ecole Lenôtre. Recettes Glaces de L’Ecole Lenôtre (Frozen Desserts from the Lenôtre School). Les Lille, France: Jeròme Villette, 1995.
Figoni, Paula. How Baking Works. New York: John Wiley and Sons, Inc., 2004.
Herbst, Sharon Tyler. The Food Lover’s Companion (Third Edi-tion). New York: Barron’s Educational Series, 2001.
Jackson, E. B. Sugar. Confectionery Manufacture. New York: Aspen Publications, 1995.
Lang, Jennifer Harvey, ed. Larousse Gastronomique. New York: Clarkson Potter Publishers, 2001.
McGee, Harold. The Curious Cook. New York: Collier Books/Macmillan Publishing Company, 1990.
———. On Food and Cooking (Second Edition). New York: Scrib-ner, 2004.
Matz, Samuel A. Bakery Technology and Engineering. New York: Van Nostrand Reinhold, 1992.
The Packer 2005 Produce Availability and Merchandising Guide. Vance Publishing Corp, 2005.
Steingarten, Jeffrey. The Man Who Ate Everything. New York: Vintage Books and Random House, 1997.
Stogo, Malcolm. Frozen Desserts: A Complete Retailer’s Guide. New York: Van Nostrand Reinhold, 1990.
Thuries, Yves. Glaces, Petit Fours Glacés, Chocolats et Confi sserie (Ice Creams, Frozen Petits Fours, Chocolates, and Confec-
tions). France: Societé Editar, 1982.
Bibliography

BATCH FREEZERS
http://www.taylor-company.com/
http://www2.carpigiani.com/eng/index.asp
http://www.emerythompson.com/
BAUMÉ AND BRIX INFORMATION
http://www.monashscientifi c.com.au/Baume.htm
CONVERSION TOOLS
http://www.onlineconversion.com/
http://www.epicurean.com/calc/
DAIRY CHEMISTRY AND PHYSICS
http://www.foodsci.uoguelph.ca/dairyedu/chem.html#protein2
THE EGG’S PH AND COMPOSITION
http://food.oregonstate.edu/learn/ph.html
http://food.oregonstate.edu/learn/egg.html
FRUIT/VEGETABLE AND PRODUCE FACTS
AND INFORMATION
http://www.crfg.org/pubs/frtfacts.html
http://www.noursefarms.com/Default.aspx?aspxerrorpath=/Defaul.aspx
HISTORY
http://www.historicfood.com/Ice%20Cream%20Cone.htm
http://www.procope.com/fr/menu.htm
http://www.foodtimeline.org/
INDUSTRIAL PRODUCTION OF ICE CREAM
http://www.foodsci.uoguelph.ca/dairyedu/icecream.html
INGREDIENT INFORMATION
http://www.omafra.gov.on.ca/english/food/industry/food_proc_guide_html/chapter_4.htm
MEASURING INSTRUMENTS
http://www.widdernet.de/instruments.html
PACOJETS
http://www.pacojet.com
REFRACTOMETERS
http://www.atago.net/
SANITATION GUIDELINES
http://www.hi-tm.com/PDG/Retail-VII.html
SUGAR
http://www.realbakingwithrose.com/2005/12/sugar.html
USDA FOOD COMPOSITION WEB SITE
(used to calculate solids, water, and sugar percentages of most foods); used extensively for formulation
http://www.nal.usda.gov/fnic/foodcomp/search/
Internet References
424 INTERNET REFERENCES

FRUIT PURÉES
www.perfectpuree.com
SPECIALTY PRODUCE
(unusual fruits and vegetables)
www.specialtyproduce.com
SPECIAL INGREDIENTS
(ice cream stabilizer, sorbet stabilizer, powdered dextrose,
powdered glucose, trimoline, gelling agents, emulsifi ers)
www.pastrychef.com
www.chefrubber.com
www.lepicerie.com
SPICES AND VANILLA
(pods and other derivatives)
Aaron Isaacson (a.k.a. Mr. Recipe)
(646) 261-4460
TOOLS AND EQUIPMENT
www.jbprince.com
www.pastrychef.com
www.chefrubber.com
HUDSON VALLEY PRODUCE
(Most of the fruits and vegetables used in this book were
sourced from the following farms.)
GREEN HORIZONS FARM
Bob Davidson
P.O. Box 141
6 South Dingle Road
Pawling, NY 12564
(845) 855-5555
MEADOW VIEW FARM
Bart and Doris Colucci
105 Phillies Bridge Road
New Paltz, NY 12561
(845) 255-6093
OLD SAWMILL FARM
Chuck and Kay Abraham
140 Old Sawmill Road
Germantown, NY 12526
(378) 929-5229
SORBELLO FARMS
Frank and Ann Sorbello
112 Martin Road
Highland, NY 12528
(845) 691-7828
TALIAFERRO FARMS
Pete and Robin Taliaferro
187 Plains Road
New Paltz, NY 12561
(845) 542-3379
www.taliaferrofarms.com
WIGSTEN FARM
Paul and Robin Wigsten
60 Wigsten Road
Pleasant Valley, NY 12569
(845) 235-7469
www.wigstenfarm.com
WONDERLAND FARM
Steve and Patty Lobotsky
191 White Schoolhouse Road
Rhinebeck, NY 12572
(845) 876-6760
DAIRY PRODUCTS
All the milk, heavy cream, crème fraîche, and butter used in this
book were from Ronnybrook Farm, in Ancramdale, New York
(Hudson Valley).
http://www.ronnybrook.com
Resources
RESOURCES 425

Recipe Index
426 INDEX
AAcacia Honey Cakes, 249–250Aji Amarillo Sauce, 345Almond(s)
Cones (variation), 158Financier, Marzipan Ice Cream with Warm
Huckleberry Compote and, 245Ice Cream, 371Ice Cream, French Macaron, and Cassis
Sorbet Sandwiches, 115–116Lace Squares, 203Lace Tuiles, 244Milk Granité, 399Milk Granités with Manzanilla Sherry
Gelée, Bing Cherry Compote, and Toasted Marcona Almonds, 119–120
Praline, 220, 221Praline Ice Cream, 356Toasted Marcona, 120Turrón Gelato, 366–367
Almond Flourin Almond Lace Squares, 203in French Macarons, 115, 300
Almond Pastein Almond Milk Granité, 399in Frangipane, 220, 221in Marzipan Ice Cream, 374in Praline Crust, 220, 221
Anglaise, Cinnamon, 209Cinnamon Ice Cream with Crema Catalana
and, 268Rice Milk Sherbet with Arroz con Leche
and, 208Apple(s)
Candied, 357Candied Honeycrisp, 182Chips, 175Frappé, Granny Smith, and Wasabi, 175Ice Cream, Tatin, 357Ice Cream, Tatin, with Cinnamon Arlettes
and Candied Honeycrisp Apples, 182–183
Peel Powder, 183Sherbet, Roasted McIntosh, 398Sherbet, Roasted McIntosh, with Candied
Pecans and Caramel Syrup, 212–213Sorbet, Granny Smith, 388
and Fennel, 381and Fennel, with Fennel Jam, Kataifi
Bundles, and Sugared Fennel Fronds, 231–232
and Wasabi, 392Apricot(s)
Ice Pops, and Asti Spumanti, 131, 402Mousse, Frozen, with Praline Croquant and
Pistachio Financier, 191–192Paper, 227Poached, 139, 192
Sorbet, 388Sorbet with Vanilla Sablée, Candied Sicilian
Pistachios, Apricot Paper, and Pistachio Dust, 225–227
Arlettes, Cinnamon, 183Armagnac. See Prune-Armagnac Ice CreamArroz con Leche, Rice Milk Sherbet with
Cinnamon Anglaise and, 208–209Asian Spice Bombe, 406Assorted Citrus Sorbet Sandwiches, 129–130Asti Spumanti and Apricot Ice Pops, 131, 402
BBaguette Disks, 331Balsamic (Vinegar)
Croquant, 14750-Year-Old, Strawberry Gelato with
Toasted Brioche Croutons and, 168–169
Glaze, 147Ice Cream, 354Ice Cream with Goat Cheese Bavarian,
Balsamic Croquant, Walnut Cake, and Candied Walnuts, 144–147
Banana(s)Bread Rectangles, 322Caramelized, 353Caramelized Disks, 214–215Chips, 215Ice Cream, 352Ice Cream, and Caramel Ice Cream
Entremets, 321–322Ice Cream, Caramelized, with Hot Malt
Shake, 110Sorbet, 388
BasilCrystallized Leaves, 189Jelly, 113Souffl é, Frozen, 408Souffl és, Frozen, with Crystallized Basil
Leaves, 188–189Tomato, Sorbet, Green Zebra, with
Fromage Blanc, Argan Oil, Garlic Chip, Cracked Tellicherry Pepper, Gray Sea Salt and, 335
Bavarian, Goat Cheese, Balsamic Vinegar Ice Cream with Walnut Cake, Balsamic Croquant, Candied Walnuts and, 144–147
Beer, in Black and Tan Ice Cream, 359Beet Sorbet, Red, 383
with Parsley Purée and Extra-Virgin Olive Oil, 339
Beignets, Chocolate, Warm, Espresso-Cardamom Ice Cream with, 273–274
Berliners, Warm, Frozen Mexican Chocolate Souffl és with, 291, 293
Bing Cherry Compote, 120
Biscotti, Chocolate, 185Bitter Chocolate
Ganache, Smooth, 250Ganache Squares, 237Mousse, 200–201Rectangles, 238Sauce, 202Sorbet and Ganache Napoleon, 237–238Sorbet Squares, 238
BlackberryGlaze, 307Raisins, 308Sorbet, 388Sorbet, Crème Fraîche Ice Cream, Pistachio
Crème Brûlée, and Demerara Sugar Sponge Cake with Blackberry Glaze, 305–308
Black Currants, Poached, 133–134Black Mission Fig Gelato with Grana Padano
Crisps and Roasted Black Mission Figs, 171–172
Black Olive(s)Crystallized, 180Powder, 324
Black Sesame Seed(s). See Sesame Seed(s), Black
Black and Tan Ice Cream, 359with Espresso Génoise and Milk Chocolate
Clouds, 233–234Blood Orange
Parfait, 404Parfait, Frozen, with Almond Lace Squares,
202–204Sorbet, 79, 391
Blueberry Sorbet, 388Bombe(s)
Asian Spice, 406Kaffi r Lime Leaf, 407Kaffi r Lime Leaf, with Bubble Tapioca and
Lime Zest Powder, 187–188Peanut Butter, 406Peanut Butter, Frozen, 297–300Spice, with Jasmine Tea Ganache and
Cocoa Croquant, 289–291Bosc Pear
Candied, Spiced Dolcetto Sorbet with Phyllo Crisps and, 154–155
Sorbet, 382Sorbet with Brown Sugar Chiffon, Pear
Pâte de Fruit, and Pear Compote, 257–259
Bread. See also Brioche; Rye BreadBaguette Disks, 331Banana Bread Rectangles, 322
BriocheCraquelins, Mini, 283–284Croutons, Toasted, 169

INDEX 427
Pain Perdu, Warm, and Maple Syrup, Prune-Armagnac Ice Cream with, 267
Brittle, Peanut, 299Brown Butter, 214, 358
and Chocolate Pavé, Port Ice Cream with, 264
Ice Cream, 358Ice Cream, with Caramelized Bananas,
Banana Chips, and Brown Butter, 214–215
Brown Sugar Chiffon, Bosc Pear Sorbet with Pear Pâte de Fruit, Pear Compote and, 257–259
BubblesCoconut, 275–276Paprika, 346
Bubble Tapioca, 187Burnt Milk Gelato, 366
with Mexican Hot Chocolate, 121Burnt Orange Marmalade Ice Cream, 360Burnt Sugar
Caramel, 355Ice Cream, 355Ice Cream Cones, 160
Butter. See Brown ButterButtermilk
and Lemon Ice Cream, 357and Lemon Ice Cream with Raspberry
Compote, 210–211Sherbet, 396Sherbet and Concord Grape Soup, 111
CCabrales Cheese Ice Cream, 353
with Sticky Date Pudding, 142–143Cajeta Ice Cream, 375
with Rice Paper, 288Cake(s). See also Gingerbread
Chiffon, Brown Sugar, Bosc Pear Sorbet with Pear Pâte de Fruit, Pear Compote and, 257–259
Crème Fraîche, Frozen Lemon Verbena Mousse with Orange Blossom Honey and, 295–296
Crème Fraîche, Orange, Grand Marnier Ice Cream, and Chocolate Ice Cream, 303–304
Dacquoise, Coconut, Macadamia Nut Ice Cream, Rum Ice Cream, and Coconut Ice Cream, 308–311
Dacquoise, Peanut, 298–299Devil’s Food, Peppermint Sorbet Cubes
with Whipped Crème Chantilly, Candy Cane Dust and, 151–152
FinancierAlmond, Marzipan Ice Cream with Warm
Huckleberry Compote and, 245Hazelnut, Gianduja Gelato, and Frozen
Tangerine Souffl é, 312–313, 315Pistachio, Frozen Apricot Mousse with
Praline Croquant and, 191–192
Génoise, Espresso, Black and Tan Ice Cream with Milk Chocolate Clouds and, 233–234
Génoise, Gingerbread, 199–200Génoise, Pistachio, Sicilian Pistachio
Gelato, Cherry Sorbet, and Vanilla Semifreddo, 317–319
Hazelnut-Mascarpone Gâteau, Frozen Praline Parfait with, 219–222
Honey, Acacia, Thyme Ice Cream with Smooth Bitter Chocolate Ganache, Honeycomb and, 249–250
Pound Cake Croutons, Lemon, 269, 271Savarins, Mini, Soaked in Lillet Blanc,
Lemon Verbena Sorbet with Peach Jam, Lemon Chips and, 133–135
Sponge, Demerara Suger, with Blackberry Glaze, Crème Fraîche Ice Cream, Blackberry Sorbet, and Pistachio Crème Brûlée, 305–308
Walnut, Balsamic Vinegar Ice Cream with Goat Cheese Bavarian, Balsamic Croquant, Candied Walnuts and, 144–147
Campari, and Orange Granité, 400Campari Granité, with Pomelo Confi t, 181Candied
Apples, 357Apples, Honeycrisp, 182Citrus Zest, 130Peanut Caramel, 298Pears, Bosc, 155Pecans, 212Pepitas, 280–281Pistachios, Sicilian, 226Walnuts, 146
CandyCotton, Yuzu Sorbet with Black Sesame
Seeds and, 176Peanut Brittle, 299
Candy Cane Dust, Peppermint Sorbet Cubes with Whipped Crème Chantilly, Devil’s Food Cake and, 151–152
Caramel“Burnt” Sugar, 355Glaze, 220, 222Ice Cream, and Banana Ice Cream
Entremets, 321–322Ice Cream, Cajeta, 375Paper, 281Peanut, 298Popcorn, 124Sauce, 123–124Sauce, Salted, 239Syrup, 213
Caramelized Banana Disks, 214–215Caramelized Banana Ice Cream with Hot Malt
Shake, 110Caramelized Bananas, 353Caramelized Pumpkin, 282Cardamom-Espresso Ice Cream, 362
with Warm Chocolate Beignets, 273–274Carrot Sorbet, 384
with Watercress Purée and Pea Shoots, 343
Cassis Sorbet, 388French Macaron, and Almond Ice Cream
Sandwiches, 115–116Cava Sorbet, 380
with Poached Apricots, 139Caviar, Osetra, White Chocolate Ice Cream
Cones with, 327Champagne, in Mimosa Ice Pops, 131, 401Cherry
Compote, Bing, Almond Milk Granités with Manzanilla Sherry Gelée, Toasted Marcona Almonds and, 119–120
Glaze, 319Sorbet, 388Sorbet, Sicilian Pistachio Gelato, Vanilla
Semifreddo, and Pistachio Génoise, 317–319
Chestnut Ice Cream, 361Crisp Meringue, and Vanilla Sablée Tarts,
261–263Chiffon, Brown Sugar, Bosc Pear Sorbet with
Pear Pâte de Fruit, Pear Compote and, 257–259
Chilled Hibiscus Soup, 150Chilled Peach Soup, 180Chips
Apple, 175Banana, 215Garlic, 335Lemon, 135
Chocolate. See also Ganache; GiandujaBeignets, Warm, Espresso-Cardamom Ice
Cream with, 273–274Biscotti, 185Boxes, 205–206Clouds, Milk Chocolate, 234Cones, 161Croquant, Cocoa, 290Glaze, Shiny, 200, 201Hot Chocolate, Mexican, with Burnt Milk
Gelato, 121Ice Cream, 364
Grand Marnier, and Orange Crème Fraîche Cake, 303–304
-Lemon, 375-Lemon, with Lemon Pound
Cake Croutons and Chocolate Tumbleweeds, 269, 271
White Chocolate, 365White Chocolate, Cones, 327
Mousse and Gingerbread Timbale, Spice Ice Cream with, 199–202
Mousse, Milk Chocolate, 205, 206Parfait, Milk Chocolate, 404
Napoleons, 239–241in Peanut Butter Bombes, Frozen, 297Squares, 240
Pavé, and Brown Butter, Port Ice Cream with, 264
Pods, Milk Chocolate, 248Puffed Rice, -Covered, 162Rectangles, Bitter Chocolate, 238Sandwich Cookies, 196–197Sauce, Bitter, 202

Shell, 219Shortbread, 126Sorbet
and Ganache Napoleon, Bitter, 237–238Milk Chocolate, 394Milk Chocolate, with “Perfect” Ganache
Cocoa Pods, 247Squares, Bitter, 238
Souffl é, Frozen Mexican Chocolate, 408Souffl és, Frozen Mexican Chocolate, with
Warm Berliners, 291, 293Square Plaques, Milk Chocolate, 240Triangles, 201Tumbleweeds, 271
Chocolate Chip Ice Cream, Italian (Stracciatella), 373
with Chocolate Box, 205–206Chocolate Spray
Dark, 151, 290Gianduja, 315White Couverture, 188
Cigars, Black Sesame, Toasted, 127Cilantro Oil, Lime Sorbet with Spider Crab, Aji
Amarillo and, 345Cinnamon
Anglaise, 209Cinnamon Ice Cream with Crema
Catalana and, 268Rice Milk Sherbet with Arroz con Leche
and, 208Arlettes, 183Ice Cream, 363Ice Cream with Crema Catalana and
Cinnamon Anglaise, 268Citrus
Sorbet Sandwiches, Assorted, 129–130Zest, Candied, 130
Clotted Cream Ice Cream, 352Sandwiches with Chocolate Shortbread,
125–126Cocoa Croquant, 290Cocoa Pods, “Perfect” Ganache, Milk
Chocolate Sorbet with, 247–248Coconut
Bubbles, 275–276Dacquoise, 309–310Gianduja Plaques, 310Glass (variation), 276Ice Cream, 365Ice Cream, Macadamia Nut Ice Cream,
Rum Ice Cream, and Coconut Dacquoise, 308–311
-Lime Frappé, 173-Rum Colada, Hot, with Passion Fruit
“Shake”, 165Sorbet, 388Sorbet, -Lime, 389Toasted Shredded, 165
Colada, Coconut-Rum, Hot, with Passion Fruit “Shake”, 165
CompoteBing Cherry, Almond Milk Granités with
Manzanilla Sherry Gelée, Toasted Marcona Almonds and, 119–120
Huckleberry, Meyer Lemon Granité with Crisp Meringues and, 163–164
Huckleberry, Warm, Marzipan Ice Cream with Almond Financier and, 245
Pear, Bosc Pear Sorbet with Brown Sugar Chiffon, Pear Pâte de Fruit and, 257–259
Raspberry, Lemon and Buttermilk Ice Cream with, 210–211
Concord GrapeSorbet, 380Soup, Buttermilk Sherbet and, 111
ConesAlmond (variation), 158Chocolate, 161Oatmeal (variation), 158Plain, 158
Confi tGrapefruit, 166Pomelo, 181
Confi ture de Lait, Rye Bread Ice Cream with Rye Paper and, 253
Cookies. See also ShortbreadAlmond Lace Squares, 203Almond Lace Tuiles, 244Biscotti, Chocolate, 185Chocolate Sandwich, 196–197Petit Beurre, 240
Cotton Candy, Yuzu Sorbet with Black Sesame Seeds and, 176
Crab, Spider, Lime Sorbet with Aji Amarillo, Cilantro Oil and, 345
Cranberry Sorbet, 393Craquelins, Mini, Vanilla Ice Cream Milk
Shakes with, 283–284Cream. See also Crème Fraîche
Anglaise, Cinnamon, 209Clotted Cream Ice Cream, 352Clotted Cream Ice Cream Sandwiches with
Chocolate Shortbread, 125–126Praline Mascarpone, 220Saffron, 332Truffl ed Heavy, 217Whipped Crème Chantilly, 152
Crema Catalana, Cinnamon Ice Cream with Cinnamon Anglaise and, 268
Crème Brûlée, PistachioCrème Fraîche Ice Cream, Blackberry
Sorbet, and Demerara Sugar Sponge Cake with Blackberry Glaze, 305–308
Frozen, 307Crème Fraîche
Cake, Frozen Lemon Verbena Mousse with Orange Blossom Honey and, 295–296
Cake, Orange, Grand Marnier Ice Cream, and Chocolate Ice Cream, 303–304
Cucumber and Wasabi Sorbet with Smoked Salmon, Chives, Salmon Roe and, 336
Ice Cream, 355Ice Cream, Blackberry Sorbet, Pistachio
Crème Brûlée, and Demerara Sugar Sponge Cake with Blackberry Glaze, 305–308
Crisp Meringue Disks, 263Crisp Meringues, 164Crisp Meringue Sticks, 149–150Crisps
Grana Padano, 172Manchego, 329Phyllo, 155
CroquantBalsamic, Balsamic Vinegar Ice Cream with
Walnut Cake, Goat Cheese Bavarian, Candied Walnuts and, 144–147
Cocoa, Spice Bombe with Jasmine Tea Ganache and, 289–291
Praline, Apricot Mousse, Frozen, with Pistachio Financier and, 191–192
CroutonsBrioche, Toasted, 169Lemon Pound Cake, 269, 271
Crystallized SugarBasil Leaves, 189Black Olives, 180Hibiscus Flowers, 150Orange Blossom Petals, 156Rose Petals (variation), 176
Cucumber and Wasabi Sorbet, 384with Smoked Salmon, Crème Fraîche,
Chives, and Salmon Roe, 336Curd. See also Lemon, Curd
Passion Fruit, Mascarpone Ice Cream with, 137–138
Custard, 267Crema Catalana, Cinnamon Ice Cream with
Cinnamon Anglaise and, 268Crème Brûlée, Pistachio, Frozen, 307
DDacquoise
Coconut, Macadamia Nut Ice Cream, Rum Ice Cream, and Coconut Ice Cream, 308–311
Peanut, 298–299Dark Chocolate Spray, 151, 290Date Pudding, Sticky, Cabrales Cheese Ice
Cream with, 142–143Demerara Sugar
Ice Cream, 360Ice Cream, with Roasted Kadota Figs and
Madeira Glaze, 259–260Sponge Cake, 306
Devil’s Food Cake, Peppermint Sorbet Cubes with Whipped Crème Chantilly, Candy Cane Dust and, 151–152
Dolcetto Sorbet, Spiced, 392with Candied Bosc Pears and Phyllo Crisps,
154–155
428 INDEX

EEntremets
Caramel and Banana Ice Cream, 321–322Crème Fraîche Ice Cream, Blackberry
Sorbet, Pistachio Crème Brûlée, and Demerara Sugar Sponge Cake with Blackberry Glaze, 305–308
Gianduja Gelato, Frozen Tangerine Souffl é, and Hazelnut Financier Cake, 312–313, 315
Grand Marnier Ice Cream, Chocolate Ice Cream, and Orange Crème Fraîche Cake, 303–304
Macadamia Nut Ice Cream, Rum Ice Cream, Coconut Ice Cream, and Coconut Dacquoise, 308–311
Peanut Butter Bombe, Frozen, 297–300Pistachio Gelato, Sicilian, Cherry Sorbet,
Vanilla Semifreddo, and Pistachio Génoise, 317–319
Espresso-Cardamom Ice Cream, 362-Cardamom Ice Cream with Warm
Chocolate Beignets, 273–274Génoise, Black and Tan Ice Cream with
Milk Chocolate Clouds and, 233–234Glaze, 273Semifreddo, 405Semifreddo with Lemon Curd Chiboust
and Chocolate Biscotti, 184–185Syrup, 233
Eve’s Temptation Tea-Infused Tapioca, 114Extra-Virgin Olive Oil Sorbet, 395Extra-Virgin Olive Oil Sorbet with Black Olive
Powder, Red Onion Marmalade, and Tomato Jelly, 323–324
FFennel
Fronds, Sugared, 232and Granny Smith Apple Sorbet, 381and Granny Smith Apple Sorbet with
Fennel Jam, Kataifi Bundles, and Sugared Fennel Fronds, 231–232
Jam, 231Fig(s)
Gelato, Black Mission, with Grana Padano Crisps and Roasted Black Mission Figs, 171–172
Gelato, Black Mission, Roasted, 367Roasted Black Mission, 171Roasted Kadota, Demerara Sugar Ice
Cream with Madeira Glaze and, 259–260
FinancierAlmond, Marzipan Ice Cream with Warm
Huckleberry Compote and, 245Hazelnut, Gianduja Gelato, and Frozen
Tangerine Souffl é, 312–313, 315Pistachio, Frozen Apricot Mousse with
Praline Croquant and, 191–192
Fish RoeFlying, Sake and Lemon Sorbet with Shiso
Leaf Jelly and, 341Salmon, Cucumber and Wasabi Sorbet
with Smoked Salmon, Crème Fraîche, Chives and, 336
FlourAlmond, in French Macarons, 300Peanut, in Peanut Dacquoise, 298–299
Flower Petals, CrystallizedHibiscus, 150Orange Blossom, 156Rose (variation), 176
Frangipane, 220, 221Frappé(s)
Coconut Lime, 173Granny Smith Apple and Wasabi, 175Raspberry, 173
French Meringuein French Macarons,, 300in French Macaron, Cassis Sorbet, and
Almond Ice Cream Sandwiches, 115–116
Fried Sage, 330Frozen Mousse. See Mousse(s), FrozenFrozen Parfait. See Parfait(s), FrozenFrozen Peanut Butter Bombes, 297–300Frozen Pistachio Crème Brûlée, 307Frozen Souffl é(s). See Souffl é(s), Frozen
GGanache
and Chocolate Sorbet Napoleon, Bitter, 237–238
Jasmine Tea, Spice Bombe with Cocoa Croquant and, 289–291
“Perfect”, 247“Perfect”, Cocoa Pods, Milk Chocolate
Sorbet with, 247–248Smooth, 205, 206Smooth Bitter Chocolate, 250Squares, Bitter, 237
Garlic Chips, 335Gâteau, Hazelnut-Mascarpone, Frozen Praline
Parfait with, 219–222Gelato
Burnt Milk, 366Burnt Milk, with Mexican Hot Chocolate,
121Fig, Black Mission, with Grana Padano
Crisps and Roasted Black Mission Figs, 171–172
Gianduja, 368Gianduja, Frozen Tangerine Souffl é, and
Hazelnut Financier Cake, 312–313,315
Pistachio, Sicilian, 368Pistachio, Sicilian, Cherry Sorbet, Vanilla
Semifreddo, and Pistachio Génoise, 317–319
Pumpkin, with Gingerbread Sablée Breton, Candied Pepitas, and Caramel Paper, 279–282
Strawberry, 367
Strawberry, with Toasted Brioche Croutons and 50-Year-Old Balsamic Vinegar, 168–169
Turrón, 366–367Turrón, Cones, 157
GeléeManzanilla Sherry, Almond Milk Granités
with Bing Cherry Compote, Toasted Marcona Almonds and, 119–120
Mint, Lime Granité with, 141–142Strawberry, Macerated, Vanilla and
Strawberry Jam Ice Cream with, 242–244
GénoiseEspresso, Black and Tan Ice Cream with
Milk Chocolate Clouds and, 233–234Gingerbread, 199–200Pistachio, Sicilian Pistachio Gelato, Cherry
Sorbet, and Vanilla Semifreddo, 317–319
Gewürztraminer-Tamarind Ice Pops, 131, 402Gianduja
Gelato, 368Gelato, Frozen Tangerine Souffl é, and
Hazelnut Financier Cake, 312–313,315
Plaques, Coconut, 310Rings, 315Spray, 315
Gingerbreadand Chocolate Mousse Timbales, 199–201Génoise, 199–200Mousse, Frozen Gingerbread Spice, with
Crystallized Ginger, Molasses and, 193–194
Sablée Breton, Pumpkin Gelato with Candied Pepitas, Caramel Paper and, 279–282
Gingerbread Spice, 282Mousse, Frozen, 409Mousse, Frozen, with Gingerbread,
Crystallized Ginger, and Molasses, 193–194
GlassBlack Sesame Seed, 276Coconut (variation), 276
GlazeBalsamic, 147Blackberry, 307Caramel, 220, 222Cherry, 319Chocolate, Shiny, 200, 201Espresso, 273Madeira, 260
Goat Cheese Bavarian, Balsamic Vinegar Ice Cream with Walnut Cake, Balsamic Croquant, Candied Walnuts and, 144–147
Grana Padano Crisps, 172Grand Marnier Ice Cream, 376
Chocolate Ice Cream, and Orange Crème Fraîche Cake, 303–304
Granité(s)Almond Milk, 399
INDEX 429

Almond Milk, with Manzanilla Sherry Gelée, Bing Cherry Compote, and Toasted Marcona Almonds, 119–120
Campari and Orange, 400Campari, with Pomelo Confi t, 181Lime, 399–400Lime, with Mint Gelée, 141–142Method, 399Meyer Lemon, with Huckleberry Compote
and Crisp Meringues, 163–164Noilly Prat, 400Noilly Prat, with Crystallized Orange
Blossom Petals, 156Granny Smith Apple
and Fennel Sorbet, 381and Fennel Sorbet with Fennel Jam, Kataifi
Bundles, and Sugared Fennel Fronds, 231–232
Sorbet, 388and Wasabi Frappé, 175and Wasabi Sorbet, 392
Grape(s)Concord Grape Sorbet, 380Concord Grape Soup and Buttermilk
Sherbet, 111Verjus Sorbet, 379
GrapefruitConfi t, 166and Mint Sorbet, 393and Mint Sorbet with Grapefruit Confi t,
166–167Sorbet, 388, 391
Green Mango Sorbet, 386with Paprika Bubbles, 346
Green Zebra Tomato Sorbet, 382–383with Fromage Blanc, Argan Oil, Garlic
Chip, Cracked Tellicherry Pepper, Gray Sea Salt, and Basil, 335
Guava Sorbet, 388in Chilled Hibiscus Soup with Crisp
Meringue Sticks, 149–150
HHam Jerky, Serrano, 330Hazelnut(s)
Financier Cake, Gianduja Gelato, and Frozen Tangerine Souffl é, 312–313, 315
Gianduja Gelato, 368-Mascarpone Gâteau, Frozen Praline
Parfait with, 219–222Praline Ice Cream, 356
Hibiscus (Flowers)Crystallized Sugar, 150Soup, Chilled, Guava Sorbet in, with Crisp
Meringue Sticks, 149–150Honey
Cake, Acacia, Thyme Ice Cream with Smooth Bitter Chocolate Ganache, Honeycomb and, 249–250
Orange Blossom, Frozen Lemon Verbena Mousse with Crème Fraîche Cake and, 295–296
Honeycomb, 250
Hot Chocolate, Mexican, with Burnt Milk Gelato, 121
Hot Coconut-Rum Colada with Passion Fruit “Shake”, 165
Hot Milk Shake, 110Huckleberry Compote
Meyer Lemon Granité with Crisp Meringues and, 163–164
Warm, Marzipan Ice Cream with Almond Financier and, 245
IIce. See Ice Pops; Milk, IceIce Cream. See also Gelato
Almond, 371Almond, French Macaron, and Cassis
Sorbet Sandwiches, 115–116Apple Tatin, 357Apple Tatin, with Cinnamon Arlettes and
Candied Honeycrisp Apples, 182–183Balsamic Vinegar, 354Balsamic Vinegar, with Goat Cheese
Bavarian, Balsamic Croquant, Walnut Cake, and Candied Walnuts, 144–147
Banana, 352Banana, and Caramel Ice Cream
Entremets, 321–322Banana, Caramelized, with Hot Malt
Shake, 110Black and Tan, 359Black and Tan, with Espresso Génoise and
Milk Chocolate Clouds, 233–234Brown Butter, with Caramelized Bananas,
Banana Chips, and Brown Butter, 214–215
Burnt Orange Marmalade, 360Burnt Sugar, 321, 355Burnt Sugar, Cones, 160Cabrales Cheese, 353Cabrales Cheese, with Sticky Date Pudding,
142–143Cajeta, 375Cajeta, with Rice Paper, 288Caramel, and Banana Ice Cream
Entremets, 321–322Chestnut, 361Chestnut, Crisp Meringue, and Vanilla
Sablée Tarts, 261–263Chocolate, 364
Grand Marnier Ice Cream, and Orange Crème Fraîche Cake, 303–304
-Lemon, 375-Lemon with Lemon Pound Cake
Croutons and Chocolate Tumbleweeds, 269, 271
White Chocolate, 365Chocolate Chip, Italian (Stracciatella), 373Chocolate Chip, Italian (Stracciatella), with
Chocolate Box, 205–206Cinnamon, 363Cinnamon, with Crema Catalana and
Cinnamon Anglaise, 268Clotted Cream, 352
Clotted Cream, Sandwiches, with Chocolate Shortbread, 125–126
Coconut, 365Coconut, Macadamia Nut Ice Cream, Rum
Ice Cream, and Coconut Dacquoise, 308–311
Crème Fraîche, 355Crème Fraîche, Blackberry Sorbet, Pistachio
Crème Brûlée, and Demerara Sugar Sponge Cake with Blackberry Glaze, 305–308
Custard Method, 350–351Demerara Sugar, 360Demerara Sugar, with Roasted Kadota Figs
and Madeira Glaze, 259–260Espresso-Cardamom, 362Espresso-Cardamom, with Warm
Chocolate Beignets, 273Grand Marnier, 376Grand Marnier, Chocolate Ice Cream,
and Orange Crème Fraîche Cake, 303–304
Lemonand Buttermilk, 357and Buttermilk, with Raspberry
Compote, 210–211-Chocolate, 375-Chocolate, with Lemon Pound
Cake Croutons and Chocolate Tumbleweeds, 269, 271
Curd, 359Curd, in “Lemon Meringue Pie”,
254–255Macadamia Nut, 364–365Macadamia Nut, Rum Ice Cream, Coconut
Ice Cream, and Coconut Dacquoise, 308–311
Marzipan, 374Marzipan, and Raspberry Sorbet Terrine, 287Marzipan, with Warm Huckleberry
Compote and Almond Financier, 245Mascarpone, 353Mascarpone, Passion Fruit Curd with,
137–138Method #2: Modern Sorbet Method
(Sorbet Syrup Method), 388Method #3: Modern Sorbet Method
(Mathematical Formulation Sorbet), 390
Modern Method, 369–370Oatmeal, 354Oatmeal, Cones (variation), 157Port, 361Port, with Brown Butter and Chocolate
Pavé, 264Praline, 356Praline, Cones (variation), 157Prune-Armagnac, 362Prune-Armagnac, with Warm Brioche Pain
Perdu and Maple Syrup, 267Pumpkin, 363Rum, 376
430 INDEX

Rum, Macadamia Nut Ice Cream, Coconut Ice Cream, and Coconut Dacquoise, 308–311
Rye Bread, 373Rye Bread, with Confi ture de Lait and Rye
Paper, 253Spice, 371Spice, with Gingerbread and Chocolate
Mousse Timbale, 199–202Stabilizer-Emulsifi er Mix, 371Thyme, 374Thyme, with Smooth Bitter Chocolate
Ganache, Acacia Honey Cake, and Honeycomb, 249–250, 251
Vanilla, 364Milk Shakes, with Mini Craquelins,
283–284and Strawberry Jam, 372and Strawberry Jam, with Macerated
Strawberry Gelée, 242–244White Truffl e, with Truffl ed Tapioca and
Shaved Black Truffl es, 216, 217–218Ice Cream Cones. See also Cones
Burnt Sugar, 160Oatmeal (variation), 157Praline (variation), 157Turrón Gelato, 157White Chocolate, with Osetra Caviar, 327
Ice PopsAsti Spumanti and Apricot, 131, 402Gewürztraminer-Tamarind, 131, 402Method, 401Mimosa, 131, 401Pinot Grigio, 131, 402
Italian Meringue, 254. See also Semifreddoin Lemon Curd Chiboust, 184–185
JJalapeño
Seeds, Toasted, 342Sorbet, 385Sorbet, with Yellowtail Sashimi and Ponzu
Sauce, 342Jam
Fennel, 231Peach, 135Strawberry, and Vanilla Ice Cream, 372Strawberry, and Vanilla Ice Cream with
Macerated Strawberry Gelée, 242–244Jasmine Tea
Ganache, Spice Bombe with Cocoa Croquant and, 289–291
Powder, 291Jelly
Basil, 113Mint, 141Shiso Leaf, 341Tomato, 323–324
Jerky, Serrano Ham, 330
KKaffi r Lime Leaf Bombe, 407
with Bubble Tapioca and Lime Zest Powder, 187–188
Kataifi Bundles, 232Kiwi Sorbet, 388Kumquat Sorbet, 379
LLemon
Chips, 135Curd, 359
Chiboust, Espresso Semifreddo with Chocolate Biscotti and, 184–185
Ice Cream, 359Ice Cream, in “Lemon Meringue Pie”,
254–255Granité, Meyer Lemon, 400Granité, Meyer Lemon, with Huckleberry
Compote and Crisp Meringues, 163–164
Ice Creamand Buttermilk, 357and Buttermilk, with Raspberry
Compote, 210–211-Chocolate, 375-Chocolate, with Lemon Pound
Cake Croutons and Chocolate Tumbleweeds, 269, 271
“Meringue Pie”, 254–255Pound Cake Croutons, 269, 271Sauce, 269Sherbet, -Mascarpone, 397Shortbread, 210–211Sorbet, 388, 391Sorbet, and Sake, 385Sorbet, and Sake, with Flying Fish Roe and
Shiso Leaf Jelly, 341Lemongrass Semifreddo, 405
with Coconut Bubbles and Black Sesame Seed Glass, 275–276
Lemon VerbenaMousse, Frozen, 409Mousse, Frozen, with Orange Blossom
Honey and Crème Fraîche Cake, 295–296
Sorbet, 381Sorbet with Peach Jam, Lemon Chips, and
Mini Savarins Soaked in Lillet Blanc, 133–135
Lillet Blanc Soaking Syrup, 133–134Lime
-Coconut Frappé, 173-Coconut Sorbet, 389Granité, 399–400Granité with Mint Gelée, 141–142Key Lime Juice, Papaya Sorbet with Black
Sea Salt and, 343Sorbet, 384–385, 388Sorbet with Spider Crab, Aji Amarillo, and
Cilantro Oil, 345Zest Powder, 142Zest Powder, Kaffi r Lime Leaf Bombe with
Bubble Tapioca and, 187–188Lime Leaf Bombe. See Kaffi r Lime Leaf BombeLitchi Sorbet, 388, 394
Wrapped in Caramelized Mango, 228
MMacadamia Nut Ice Cream, 364–365
Rum Ice Cream, Coconut Ice Cream, and Coconut Dacquoise, 308–311
Macaron(s)French, 300French, Cassis Sorbet, and Almond Ice
Cream Sandwiches, 115–116Pistachio (variation), 300
Macerated Strawberries, 168Macerated Strawberry Gelée, 242–244Madeira Glaze, 260Malt Shake, Hot, Caramelized Banana Ice
Cream with, 110Manchego Crisps, 329Mandarin Sorbet, 388Mango
Caramelized, Litchi Sorbet Wrapped in, 228Sorbet, Green, 386, 388Sorbet, Green, with Paprika Bubbles, 346
Manzanilla Sherry Gelée, 119Marmalade
Burnt Orange, Ice Cream, 360Red Onion, 324
Marzipan Ice Cream, 374with Huckleberry Compote, Warm, and
Almond Financier, 245 and Raspberry Sorbet Terrine, 287Mascarpone
-Hazelnut Gâteau, Frozen Praline Parfait with, 219–222
Ice Cream, 353Ice Cream, with Passion Fruit Curd,
137–138Praline Cream, 220, 221Sherbet Cones, 162Sherbet, Lemon-, 397
Matcha Sorbet, 378with Toasted Black Sesame Cigars, 127
Melon Sorbet, 388Meringue(s)
Crisp, 164Crisp, Chestnut Ice Cream, and Vanilla
Sablée Tarts, 261–262Disks, Crisp, 263Italian, 254. See also SemifreddoItalian, in Lemon Curd Chiboust, 184–185“Lemon Meringue Pie”, 254–255Macaron, French, Cassis Sorbet, and Almond
Ice Cream Sandwiches, 115–116Macarons, French, 300Macarons, Pistachio (variation), 300Sticks, Crisp, 149–150
Merlot Reduction, Spiced, 154Mexican Hot Chocolate, 121Meyer Lemon Granité, 400
with Huckleberry Compote and Crisp Meringues, 163–164
MilkBurnt Milk Gelato, 366Burnt Milk Gelato with Mexican Hot
Chocolate, 121
INDEX 431

Confi ture de Lait, Rye Bread Ice Cream with Rye Paper and, 253
Ice and Cookies, 196–197Ice, Whole, 400Rice with (Arroz con Leche Cubes), 208
Milk ChocolateClouds, 234Mousse, 205, 206Parfait, 404
Napoleons, 239–241in Peanut Butter Bombes, Frozen, 297Squares, Frozen, 240
Plaques, Square, 240Pods, 248Sorbet, 394Sorbet with “Perfect” Ganache Cocoa
Pods, 247–248Milk Shakes, Vanilla Ice Cream, with Mini
Craquelins, 283–284Mimosa Ice Pops, 131, 401Mint
Gelée, Lime Granité with, 141–142and Grapefruit Sorbet, 393and Grapefruit Sorbet with Grapefruit
Confi t, 166–167Jelly, 141Peppermint “Patty” Sorbet, 395Syrup, 167
Mousse(s), FrozenApricot, 408Apricot, with Praline Croquant and
Pistachio Financier, 191–192Chocolate, and Gingerbread Timbales,
199–201Chocolate, Milk, 205, 206Gingerbread-Spice, 409Gingerbread Spice, with Gingerbread,
Crystallized Ginger, and Molasses, 193–194
Lemon Verbena, 409Lemon Verbena, with Orange Blossom
Honey and Crème Fraîche Cake, 295–296
NNapoleon(s)
Bitter Chocolate Sorbet and Ganache, 237–238
Milk Chocolate Parfait, 239–241Noilly Prat Granité, 400
with Crystallized Orange Blossom Petals, 156
OOatmeal Cones (variation), 158Oatmeal Ice Cream, 354
Cones (variation), 157Oil. See also Olive Oil, Extra-Virgin
Cilantro (variation), 345Parsley, 332
Olive(s). See Black Olive(s)
Olive Oil, Extra-VirginRed Beet Sorbet with Parsley Purée and,
339Sorbet, 395Sorbet with Black Olive Powder, Red
Onion Marmalade, and Tomato Jelly, 323–325
Orange(s)Crème Fraîche Cake, Grand Marnier Ice
Cream, and Chocolate Ice Cream, 303–304
Granité, and Campari, 400Ice Cream, Burnt Orange Marmalade, 360Ice Pops, Mimosa, 131, 131, 401Parfait, Blood Orange, 404Parfait, Blood Orange, Frozen, with
Almond Lace Squares, 202–204Sorbet, Blood Orange, 79, 391Sorbet, Mandarin, 388Tangerine Souffl é, Frozen, 407Tangerine Souffl é, Frozen, Gianduja
Gelato, and Hazelnut Financier Cake, 312–313, 315
Zest Powder, 204Orange Blossom Petals, Crystallized, 156
PPain Perdu, Warm Brioche, Prune-Armagnac
Ice Cream with Maple Syrup and, 267Papaya Sorbet, 386, 388
with Key Lime Juice and Black Sea Salt, 343Paper
Apricot, 227Caramel, 281Rice, 288Rye Bread, 253
Paprika Bubbles, 346Parfait(s), Frozen
Blood Orange, 404Blood Orange, with Almond Lace Squares,
202–204Milk Chocolate, 404
Napoleons, 239–241in Peanut Butter Bombes, Frozen, 297Squares, 240
Praline, 404Praline, with Hazelnut-Mascarpone
Gâteau, 219–222Parsley
Oil, 332Purée, 339
Passion FruitCurd, Mascarpone Ice Cream with, 137–138Seeds, 138“Shake”, Hot Coconut-Rum Colada with,
165Sorbet, 380Sorbet #2, 388, 389Sorbet with Eve’s Temptation Tea-Infused
Tapioca and Basil Jelly, 113–114Pastry
Berliners, 293Phyllo Crisps, 155
Phyllo Squares, 311Puff, in Cinnamon Arlettes, 183Sablée Rectangles, Vanilla, 225–226Sablée Tart Shells, Vanilla, 262
Pâte de Fruit, Pear, 258Peach
Jam, 135Sorbet, 388Soup, Chilled, Verjus Sorbet in, with
Crystallized Black Olives, 179–180Peanut
Brittle, 299Caramel, 298Dacquoise, 298–299Flour, 299
Peanut Butter Bombe(s), 406Frozen, 297–300
Pear(s)Candied Bosc, Spiced Dolcetto Sorbet with
Phyllo Crisps and, 154–155Compote, 259Pâte de Fruit, 258Sorbet, Bosc, 382Sorbet, Bosc, with Brown Sugar Chiffon,
Pear Pâte de Fruit, and Pear Compote, 257–259
Pea Shoots, Carrot Sorbet with Watercress Purée and, 343
Pecans, Candied, 212Pepitas, Candied, 280–281Pepper(s)
Aji Amarillo Sauce, 345Jalapeño Seeds, Toasted, 342Jalapeño Sorbet, 385Jalapeño Sorbet with Yellowtail Sashimi
and Ponzu Sauce, 342Piquillo Pepper Sorbet, 383Piquillo Pepper Sorbet with Parsley Oil and
Saffron Cream, 331–332Peppermint Sorbet
Cubes with Whipped Crème Chantilly, Devil’s Food Cake, and Candy Cane Dust, 151–152
“Patty”, 395“Perfect” Ganache, 247Petit Beurre Cookies, 240Phyllo
Crisps, 155Squares, 311
Pineapple Sorbet, 388Pinot Grigio Ice Pops, 131, 402Piquillo Pepper Sorbet, 383
with Parsley Oil and Saffron Cream, 331–332
Pistachio(s)Candied Sicilian, 226Crème Brûlée, Crème Fraîche Ice Cream,
Blackberry Sorbet, and Demerara Sugar Sponge Cake with Blackberry Glaze, 305–308
Dust, 227Financier, Frozen Apricot Mousse with
Praline Croquant and, 191–192
432 INDEX

Gelato, Sicilian, 368Gelato, Sicilian, Cherry Sorbet, Vanilla
Semifreddo, and Pistachio Génoise, 317–319
Génoise, 318–319Macarons (variation), 300
Plain Cones, 158Poached Apricots, 139, 192Pomegranate Sorbet, 138, 393Pomelo Confi t, 181Popcorn, Caramel, 124Popcorn Sherbet, 397
with Caramel Popcorn and Caramel Sauce, 123–124
Popsicles. See Ice PopsPort Glaze, 172Port Ice Cream, 361
with Brown Butter and Chocolate Pavé, 264Pound Cake Croutons, Lemon, 269, 271Praline, 220, 221
Croquant, Frozen Apricot Mousse with Pistachio Financier and, 191–192
Crust, 220, 221Ice Cream, 356Ice Cream Cones (variation), 157Parfait, 404Parfait, Frozen, with Hazelnut-Mascarpone
Gâteau, 219–222Praline Paste, 356
Mascarpone Cream, 220, 221Praline Parfait, 404
Prune-Armagnac Ice Cream, 362with Warm Brioche Pain Perdu and Maple
Syrup, 267Pudding, Sticky Date, Cabrales Cheese Ice
Cream with, 142–143Puffed Rice, Chocolate-Covered, 162Puff Pastry, in Cinnamon Arlettes, 183Pumpkin
Caramelized, 282Gelato with Gingerbread Sablée Breton,
Candied Pepitas, and Caramel Paper, 279–282
Ice Cream, 363
QQuince Sorbet, 379
with Manchego Crisps and Serrano Ham Jerky, 329–330
RRaisins, Blackberry, 308Raspberry
Compote, Lemon and Buttermilk Ice Cream with, 210–211
Frappé, 173Sorbet, #1, 382
#2, 388, 389#3, 391and Marzipan Ice Cream Terrine, 287
Red Beet Sorbet, 383Red Beet Sorbet with Parsley Purée and Extra-
Virgin Olive Oil, 339
Red Onion Marmalade, 324Rice, with Milk (Arroz con Leche Cubes), 208Rice Milk (Horchata) Sherbet, 398
with Arroz con Leche and Cinnamon Anglaise, 208–209
Rice Paper, 288Roasted Black Mission Fig Gelato, 367Roasted Black Mission Figs, 171Roasted Kadota Figs, 260Roasted McIntosh Apple Sherbet, 398Roasted McIntosh Apple Sherbet with
Candied Pecans and Caramel Syrup, 212–213
Rum-Coconut Colada, Hot, with Passion Fruit
“Shake”, 165Ice Cream, 376Ice Cream, Macadamia Nut Ice Cream,
Coconut Ice Cream, and Coconut Dacquoise, 308–311
Rye BreadIce Cream, 373Ice Cream with Confi ture de Lait and Rye
Paper, 253Paper, 253
SSablée
Gingerbread Breton, Pumpkin Gelato with Candied Pepitas, Caramel Paper and, 279–282
Vanilla, Apricot Sorbet with Candied Sicilian Pistachios, Apricot Paper, Pistachio Dust and, 225–227
Vanilla, Tarts, Chestnut Ice Cream, and Crisp Meringue, 261–263
Saffron Cream, 332Sage, Fried, 330Sake and Lemon Sorbet, 385
with Flying Fish Roe and Shiso Leaf Jelly, 341
Salmon, Smoked, Cucumber and Wasabi Sorbet with Crème Fraîche, Chives, Salmon Roe and, 336
Salted Caramel Sauce, 239Sandwich Cookies, Chocolate, 196–197Sandwiches, Frozen
Citrus Sorbet, Assorted, 129–130Clotted Cream Ice Cream, with Chocolate
Shortbread, 125–126French Macaron, Cassis Sorbet, and
Almond Ice Cream, 115–116Milk and Cookies, 196
Sashimi, Yellowtail, Jalapeño Sorbet with Ponzu Sauce and, 342
Sauce(s)Aji Amarillo, 345Anglaise, Cinnamon, 209
Cinnamon Ice Cream with Crema Catalana and, 268
Rice Milk Sherbet with Arroz con Leche and, 208
Caramel, Popcorn Sherbet with Caramel Popcorn and, 123–124
Caramel, Salted, 239Chocolate, Bitter, 202Confi ture de Lait, Rye Bread Ice Cream with
Rye Paper and, 253Lemon, 269Strawberry, 244
Savarins, Mini, Soaked in Lillet Blanc, Lemon Verbena Sorbet, with Peach Jam, Lemon Chips and, 133–135
Savory DessertsBeet Sorbet, Red, with Parsley Purée and
Extra-Virgin Olive Oil, 339Carrot Sorbet with Watercress Purée and
Pea Shoots, 343Cucumber and Wasabi Sorbet with Smoked
Salmon, Crème Fraîche, Chives, and Salmon Roe, 336
Jalapeño Sorbet with Yellowtail Sashimi and Ponzu Sauce, 342
Lime Sorbet with Spider Crab, Aji Amarillo, and Cilantro Oil, 345
Mango Sorbet, Green, with Paprika Bubbles, 346
Olive Oil Sorbet, Extra-Virgin, with Black Olive Powder, Red Onion Marmalade, and Tomato Jelly, 323–325
Papaya Sorbet with Key Lime Juice and Black Sea Salt, 343
Piquillo Pepper Sorbet with Parsley Oil and Saffron Cream, 331–332
Quince Sorbet with Manchego Crisps and Serrano Ham Jerky, 329–330
Sake and Lemon Sorbet with Flying Fish Roe and Shiso Leaf Jelly, 341
Tomato Sorbet, Green Zebra, with Fromage Blanc, Argan Oil, Garlic Chip, Cracked Tellicherry Pepper, Gray Sea Salt, and Basil, 335
White Chocolate Ice Cream Cones with Osetra Caviar, 327
SemifreddoEspresso, 405Espresso, with Lemon Curd Chiboust and
Chocolate Biscotti, 184–185Lemongrass, 405Lemongrass, with Coconut Bubbles and
Black Sesame Seed Glass, 275–276Vanilla, 405Vanilla, Sicilian Pistachio Gelato, Cherry
Sorbet, and Pistachio Génoise, 317–319
Serrano Ham Jerky, 330Sesame Seed(s), Black
Cigars, Toasted, 127Glass, 276Yuzu Sorbet with Cotton Candy and, 176
Shake(s)Malt, Hot, Caramelized Banana Ice Cream
with, 110
INDEX 433

Milk, Vanilla Ice Cream, with Mini Craquelins, 283–284
Passion Fruit “Shake”, Hot Coconut-Rum Colada with, 165
SherbetApple, Roasted McIntosh, 398Apple, Roasted McIntosh, with Candied
Pecans and Caramel Syrup, 212–213Buttermilk, 396Buttermilk, and Concord Grape Soup, 111Lemon Mascarpone, 397Mascarpone, Cones, 162Popcorn, 397Popcorn, with Caramel Popcorn and
Caramel Sauce, 123–124Rice Milk (Horchata), 398Rice Milk (Horchata), with Arroz con Leche
and Cinnamon Anglaise, 208–209Sherry Gelée, Manzanilla, Almond Milk
Granités with Bing Cherry Compote, Toasted Marcona Almonds and, 119–120
Shiso Leaf Jelly, 341Shortbread
Chocolate, 126Cookies, 255Lemon, 210–211in “Lemon Meringue Pie”, 254–255Vanilla, 130
Sicilian Pistachio Gelato, 368Cherry Sorbet, Vanilla Semifreddo, and
Pistachio Génoise, 317–319Smooth Bitter Chocolate Ganache, 250Sorbet
Apple, Granny Smith, and Fennel, 381Apple, Granny Smith, and Wasabi, 392Apricot, 388Apricot, with Vanilla Sablée, Candied
Sicilian Pistachios, Apricot Paper, and Pistachio Dust, 225–227
Banana, 388Beet, Red, 383Beet, Red, with Parsley Purée and Extra-
Virgin Olive Oil, 339Blackberry, 388Blackberry, Crème Fraîche Ice Cream,
Pistachio Crème Brûlée, and Demerara Sugar Sponge Cake with Blackberry Glaze, 305–308
Blood Orange, 79, 391Blueberry, 388Carrot, 384Carrot, with Watercress Purée and Pea
Shoots, 343Cassis, 388Cassis, French Macaron, and Almond Ice
Cream Sandwiches, 115–116Cava, 380Cava, with Poached Apricots, 139Cherry, 388Cherry, Sicilian Pistachio Gelato, Vanilla
Semifreddo, and Pistachio Génoise, 317–319
Chocolateand Ganache Napoleon, Bitter
Chocolate, 237–238Milk Chocolate, 394Milk Chocolate, with “Perfect” Ganache
Cocoa Pods, 247–248Squares, Bitter Chocolate, 238
Coconut, 388Coconut-Lime, 389Concord Grape, 380Cranberry, 393Cucumber and Wasabi, 384Cucumber and Wasabi, with Smoked
Salmon, Crème Fraîche, Chives, and Salmon Roe, 336
Dolcetto, Spiced, 392Dolcetto, Spiced, with Candied Bosc Pears
and Phyllo Crisps, 154–155Grapefruit, 388, 391Grapefruit and Mint, 393Grapefruit and Mint, with Grapefruit
Confi t, 166–167Guava, 388Guava, in Chilled Hibiscus Soup with Crisp
Meringue Sticks, 149–150Jalapeño, 385Jalapeño, with Yellowtail Sashimi and
Ponzu Sauce, 342Kiwi, 388Kumquat, 379Lemon, 388, 391Lemon and Sake, 385Lemon and Sake, with Flying Fish Roe and
Shiso Leaf Jelly, 341Lemon Verbena, 381Lemon Verbena, with Peach Jam, Lemon
Chips, and Mini Savarins Soaked in Lillet Blanc, 133–135
Lime, 384–385, 388Lime, with Spider Crab, Aji Amarillo, and
Cilantro Oil, 345Litchi, 388, 394Litchi, Wrapped in Caramelized Mango, 228Mandarin, 388Mango, Green, 386, 388Mango, Green, with Paprika Bubbles, 346Matcha, 378Matcha, with Toasted Black Sesame Cigars,
127Melon, 388Methods
Classic, 377–378Method #2: Modern Sorbet Method,
388Method #3: Modern Sorbet Method
(Mathematical Formulation Sorbet), 390
Sorbet Syrup #2, 387, 388Mix, 76Olive Oil, Extra-Virgin, 395Olive Oil, Extra-Virgin, with Black Olive
Powder, Red Onion Marmalade, and Tomato Jelly, 323–325
Papaya, 386, 388Papaya, with Key Lime Juice and Black Sea
Salt, 343Passion Fruit, 380Passion Fruit #2, 388, 389Passion Fruit, with Eve’s Temptation
Tea-Infused Tapioca and Basil Jelly, 113–114
Passion Fruit “Shake”, Hot Coconut-Rum Colada with, 165
Peach, 388Pear, 388Pear, Bosc, 382Pear, Bosc, with Brown Sugar Chiffon, Pear
Pâte de Fruit, and Pear Compote, 257–259
Peppermint, Cubes with Whipped Crème Chantilly, Devil’s Food Cake, and Candy Cane Dust, 151–152
Peppermint “Patty”, 395Pineapple, 388Piquillo Pepper, 383Piquillo Pepper, with Parsley Oil and
Saffron Cream, 331–332Pomegranate, 138, 393Quince, 379Quince, with Manchego Crisps and
Serrano Ham Jerky, 329–330Raspberry, 382Raspberry #2, 388, 389Raspberry #3, 391Raspberry, and Marzipan Ice Cream
Terrine, 287Sake and Lemon, 385Sake and Lemon, with Flying Fish Roe and
Shiso Leaf Jelly, 341Sandwiches, Assorted Citrus, 129–130Stabilizer Mix, 387, 390Tomato, Green Zebra, 382–383Tomato, Green Zebra, with Fromage Blanc,
Argan Oil, Garlic Chip, Cracked Tellicherry Pepper, Gray Sea Salt, and Basil, 335
Verjus, 379Verjus, in Chilled Peach Soup with
Crystallized Black Olives, 179–180Yuzu, 378Yuzu, with Cotton Candy and Black Sesame
Seeds, 176Souffl é(s), Frozen
Basil, 408Basil, with Basil Leaves, Crystallized,
188–189Basil Bâtons, 189Chocolate, Mexican, 408Chocolate, Mexican, with Warm Berliners,
291, 293Tangerine, 407Tangerine, Gianduja Gelato, and Hazelnut
Financier Cake, 312–313, 315Soup(s)
Concord Grape, Buttermilk Sherbet and, 111
434 INDEX

Hibiscus, Chilled, Guava Sorbet in, with Crisp Meringue Sticks, 149–150
Peach, Chilled, Verjus Sorbet in, with Crystallized Black Olives, 179–180
SpiceBombe, Asian, 406Bombe with Jasmine Tea Ganache and
Cocoa Croquant, 289–291Gingerbread, 282Gingerbread-, Mousse, Frozen, 409Gingerbread, Mousse, Frozen, with
Gingerbread, Crystallized Ginger, and Molasses, 193–194
Ice Cream, 371Ice Cream with Gingerbread and Chocolate
Mousse Timbales, 199–202Spiced Dolcetto Sorbet, 392Spiced Dolcetto Sorbet with Candied Bosc
Pears and Phyllo Crisps, 154–155Spiced Merlot Reduction, 154Sponge Cake, Demerara Suger, with
Blackberry Glaze, Crème Fraîche Ice Cream, Blackberry Sorbet, and Pistachio Crème Brûlée, 305–308
Spray. See Chocolate SprayStabilizer-Emulsifi er Mix, Ice Cream, 371Stabilizer Mix, Sorbet, 387, 390Sticky Date Pudding, 143Stracciatella Ice Cream, 373
with Chocolate Box, 205–206Strawberry(ies)
Gelato, 367Gelato with Toasted Brioche Croutons
and 50-Year-Old Balsamic Vinegar, 168–169
Gelée, Macerated, 242–244Jam and Vanilla Ice Cream, 372Jam and Vanilla Ice Cream with Macerated
Strawberry Gelée, 242–244Macerated, 168Sauce, 244
Sugar. See Burnt Sugar; Crystallized Sugar; Demerara Sugar
Sugared Fennel Fronds, 232Syrup
Caramel, 213Espresso, 233Lillet Blanc Soaking, 133–134Merlot Reduction, Spiced, 154Mint, 167
Syrup Method (Method #2), Sorbet, 387, 399
TTamarind-Gewürztraminer Ice Pops, 131, 402Tangerine Souffl é, Frozen, 407
Gianduja Gelato, and Hazelnut Financier Cake, 312–313, 315
TapiocaBubble, Kaffi r Lime Leaf Bombe with Lime
Zest Powder and, 187–188Eve’s Temptation Tea-Infused, Passion Fruit
Sorbet with Basil Jelly and, 113–114
Truffl ed, White Truffl e Ice Cream with Shaved Black Truffl es and, 217–218
Tarts, Vanilla Sablée, Chestnut Ice Cream, and Crisp Meringue, 261–263
TeaJasmine Tea Ganache, Spice Bombe with
Cocoa Croquant and, 289–291Jasmine Tea Powder, 291Matcha Sorbet, 378Tapioca, Eve’s Temptation-Infused, Passion
Fruit Sorbet with Basil Jelly and, 113–114
Terrine, Raspberry Sorbet and Marzipan Ice Cream, 287
Thyme Ice Cream, 374with Smooth Bitter Chocolate Ganache,
Acacia Honey Cake, and Honeycomb, 249–250
Timbales, Gingerbread and Chocolate Mousse, 199–201
Toasted Black Sesame Cigars, 127Toasted Brioche Croutons, 169Toasted Jalapeño Seeds, 342Toasted Marcona Almonds, 120Toasted Shredded Coconut, 165Tomato
Jelly, 323–324Sorbet, Green Zebra, 382–383Sorbet, Green Zebra, with Fromage Blanc,
Argan Oil, Garlic Chip, Cracked Tellicherry Pepper, Gray Sea Salt, and Basil, 335
Truffl e(s)White Truffl e Ice Cream, 358White Truffl e Ice Cream with Truffl ed
Tapioca and Shaved Black Truffl es, 217–218
Truffl ed Tapioca, 217–218Tuiles. See also Cones
Almond Lace, 244Turrón Gelato, 366–367
Cones, 157
VVanilla
Ice Cream, 364Milk Shakes with Mini Craquelins,
283–284and Strawberry Jam, 372and Strawberry Jam, with Macerated
Strawberry Gelée, 242–244Sablée Rectangles, 225–226Sablée Tart Shells, 262Semifreddo, 405Semifreddo, Sicilian Pistachio Gelato,
Cherry Sorbet, and Pistachio Génoise, 317–319
Shortbread, 130Verjus Sorbet, 379
in Chilled Peach Soup with Crystallized Black Olives, 179–180
WWalnut(s)
Cake, Balsamic Vinegar Ice Cream with Goat Cheese Bavarian, Balsamic Croquant, Candied Walnuts and, 144–147
Candied, 146Warm Chocolate Beignets, 274Wasabi
and Cucumber Sorbet, 384and Cucumber Sorbet, with Smoked
Salmon, Crème Fraîche, Chives, and Salmon Roe, 336
and Granny Smith Apple Frappé, 175and Granny Smith Apple Sorbet, 392
Watercress Purée, Carrot Sorbet with Pea Shoots and, 343
Whipped Crème Chantilly, 152White Chocolate
Ice Cream, 365Ice Cream Cones with Osetra Caviar, 327
White Couverture Spray, 188White Truffl e Ice Cream, 358
with Truffl ed Tapioca and Shaved Black Truffl es, 217–218
Whole Milk Ice, 400
YYuzu Sorbet, 378
with Cotton Candy and Black Sesame Seeds, 176
ZZest
Candied Citrus, 130Powder, Lime, 142Powder, Lime, Kaffi r Lime Leaf Bombe with
Bubble Tapioca and, 187–188Powder, Orange, 204
INDEX 435

436 INDEX
Subject IndexAAchatz, Grant, 40Adrià, Albert, 102Adrià, Ferran, 6, 102Aerated still-frozen desserts, 87–99
bombe, 89, 406defects in, 98defi ned, 87, 89–91foamed ingredients, 88–91
egg whites, 13, 88, 90, 92–96, 403egg yolks, 89, 96–97, 403heavy cream, 11, 88, 91–92, 403
folding procedure, 97–98, 403freezer storage of, 43, 99mousse, frozen, 90–91, 408parfait, frozen, 89, 404semifreddo, 90, 405service, 99souffl é, frozen, 90, 407
Agar-agar, 19Ageing process, 48, 56Alcoholic beverages, fl avoring with, 29Almond paste, 29Anti-griddle, 5, 40–41Apples
seasonal availability/storage of, 412sorbet, Granny Smith (syrup method), 388sugar/solids/acid content of, 410
Apricotsseasonal availability/storage of, 412sorbet (syrup method), 388sugar/solids/acid content of, 410
Araucana hens, eggs from, 15Art of Cookery Made Easy, The (Glass), 3L’Art de Faire des Glaces, 3Ascorbic acid powder, 24–25Asian pears, seasonal availability/storage of, 412Avocado
seasonal availability/storage of, 412sugar/solids/acid content of, 410
BBacillus cereus, 49Bacteria, in food-borne illnesses, 49Baked Alaska, history of, 3–4Balance-beam scale, 32Balloon whisk, 33Banana
ripening of, 24seasonal availability/storage of, 412sorbet (syrup method), 388sugar/solids/acid content of, 410
Banana split, 4Base, of dairy-based frozen desserts, 54, 55Batch freezer machine
and fat content, 11homogenizer, 48ice bath with, 36invention of, 4
modern method, 59operation of, 37, 39–40sanitizing, 46, 47sorbet production in, 77
Baumé hydrometer (saccarometer), 35–36Biscuit glacé, 90
Blackberriesseasonal availability/storage of, 412sorbet (syrup method), 388sugar/solids/acid content of, 410
Black currantsseasonal availability/storage of, 412sorbet (syrup method), 388sugar/solids/acid content of, 410
Blast freezer, 6, 37, 41–42, 56, 73Blood orange
seasonal availability/storage of, 413sorbet, 79
Blueberriesseasonal availability/storage of, 413sorbet (syrup method), 388sugar/solids/acid content of, 410
Bombe, 89, 406Bombe base (pâte à bombe), 89, 96, 97, 403,
404, 405Bourbon vanilla beans, 26Brix hydrometer (refractometer), 5, 35–36
in granité production, 82in sorbet production, 74–75, 80, 378
Butter, 12, 14Butterfat, 12Butter making, 12Buttermilk, 12
CCactus pear
seasonal availability/storage of, 413sugar/solids/acid content of, 410
Cakes. See EntremetsCampylobacter jejuni, 49Carboxymethyl cellulose (CMC), 21Carême, Marie-Antoine, 6Carob bean (locust bean) gum, 19, 22Carrageenan, 19, 20–21Carré, Ferdinand, 4Chelated agar, 19Cherries
seasonal availability/storage of, 413sorbet (syrup method), 388sugar/solids/acid content of, 410
Chest freezers, 43Chlorine sanitizing solution, 47Chocolate
glaze, 106–107ingredients in, 27melted, folding cream into, 98, 99
Chunkiness defect, in dairy-based frozen desserts, 65
Churning (freezing) process, 56, 67Citrus fruit, seasonal availability/storage of,
413–414Citrus zest, steeped, 27–28Classic methods, 56–58
custard, 57–58, 350–351, 366eggless, 57sorbet, 74–75, 80, 377, 378
Clementine, seasonal availability/storage of, 413Coconut
seasonal availability/storage of, 414sorbet (syrup method), 388sugar/solids/acid content of, 410
Coffee, steeping, 27Coffee extract, 27Confectioners’ sugar, 94Conical strainer, 36Continuous phase of ice cream, 54Copper bowl, for whipping egg whites, 92–93Copper pots, 33Cranberries
seasonal availability/storage of, 414sugar/solids/acid content of, 410
Cream. See Heavy creamCream of tartar, in egg white foam, 93, 95Crumbly defect
in dairy-based frozen desserts, 65in sorbet, 80
Cryptosporidium parvum, 49Crystalline (granulated) sugar, 15, 16Currants. See also Black currants; Red
currantsseasonal availability/storage of, 412
Custard-base ice creamdefi nition of, 53ingredient percentages (modern method), 61mathematical formulation, 62–63USDA standard for, 52
Custard method, 57–58, 350–351, 366
DDairy-based frozen desserts, 51-67. See also
Custard-base ice cream; Ice cream; Sherbet
adjustments to recipe, 63and bacteria growth, 36classic methods, 57–58
custard, 57–58, 350–351, 366eggless, 57
defects and mistakes, 65defi nitions of, 53–54freezer storage of, 66homogenization of, 48, 56ingredient percentages (modern method), 61mathematical formulation method, 61–63modern method, 59–60, 61, 369–370overrun determination, 63–64pasteurization of, 48, 55production steps for, 55–56
shelf life of, 66–67USDA categories and defi nitions, 52–53
Dairy productsin frappés, 72, 81mail order sources for, 425types of, 10–15
Defectsin aerated still-frozen desserts, 98in dairy-based frozen desserts, 65in sorbet, 80
Dessert menu, 7Desserts. See Frozen dessertsDextrose, 17Dextrose Equivalent (DE), 16Dextrose powder, 15, 16Digital scale, 32Diglycerides, 22–23Dispersed phase of ice cream, 54–55Display freezers, 43Drawer freezers, 42
EE. coli, 6, 49Eggless production method, 57Eggs
from Araucana hens, 15custard method, 57–58quality/freshness, 13–14safety of, 13, 14, 57and sugar density measurement, 75tempering, 58uses of, 12–13
Egg whitesfailure to whip, 93–94foam. See also Meringues
in aerated still-frozen desserts, 13, 88, 90folding procedure, 98stabilizing, 93whipping, 92–94
powdered, 94quality of, 13in sorbet, 71
Egg yolkscolor of, 13in custard-base ice cream, 53as emulsifi er, 11, 14, 23, 57foam, 89, 96–97, 403folding procedure, 98
El Bulli, 102Emulsifi ers
in custard-base ice cream, 53egg yolks as, 11, 14, 23, 57insuffi cient, 65with modern method, 59, 61non-egg/powdered, 56and shelf life, 5, 66types of, 11, 22–23
Emulsion, fat, 11, 22, 54, 56Endothermic effect, 2, 4Entremets, frozen
aerated, 99assembly of, 46, 105–106coating of, 106–107cutting, 107
defi ned, 105garnishes for, 106, 107shape of, 46tempering, 107, 109unmolding, 106
Epperson, Frank, 4Equipment and tools, 31-49. See also Freezer
machines; Freezershistory of, 4–6hydrometers, 35–36ice bath, 36–37mail order sources for, 425molding, 46pasteurizers, 48, 55pots and pans, 33sanitizing, 46–47scales, 32for serving, 44–45spatulas, rubber, 34strainers, 36thermometers, 34for whipping egg whites, 92–93whisks, 33
Ethylene, in fruit ripening, 24Extracts
coffee, 27vanilla, 26–27
FFat content, of dairy products, 11, 12, 14Fat emulsion, 11, 22, 54, 56Figs
seasonal availability/storage of, 414sugar/solids/acid content of, 410
Flavorsinnovations, 102types of, 25–29
Fluffy defectin dairy-based frozen desserts, 65in sorbet, 80
Foamsin aerated still-frozen desserts, 88–91in anti-griddle, 40egg white, 13, 88, 90, 92–96, 403egg yolk, 89, 96–97, 403folding procedure, 97–98, 403heavy cream, 11, 88, 91–92, 403milk, 88in sorbet, 71
Folding foamed ingredients, 97–98, 403Food-borne illnesses, 49Food safety
of dairy-based desserts, 36of eggs, 13, 14, 57, 75and ice bath, 36–37information on, 6of meringues, 94, 95sanitation guidelines, 46sanitizing solution concentrations, 47
Food waste, reduction of, 66–67Formulas. See Mathematical formulationFrappé
defi ned, 69, 72
production method, 81service of, 72, 81
Freezer burn, 85, 99Freezer machines
anti-griddle, 5, 40–41batch. See Batch freezer machineheavy cream in, 53history and development of, 4, 6ice bath with, 36Pacojet. See Pacojet machine; Pacotized
frozen dessertssanitizing of, 46, 47small-batch production, 37
Freezersblast, 6, 37, 41–42, 56, 73care and maintenance of, 41chest, 43display, 43drawer, 42holding temperature of, 18, 41malfunctioning, 65roll-top, 43standing, 42–43
Freezer storageof aerated still-frozen desserts, 43, 99of dairy-based frozen desserts, 66–67guidelines, 108of sorbet, 80–81
“Freezer taste”, 85, 99Freezing (churning) process, 56French meringue (uncooked), 94French whisk, 33Frozen desserts. See also Ingredients;
Equipment and toolsaerated. See Aerated still-frozen dessertsdairy-based. See Dairy-based frozen
dessertsentremets. See Entremets, frozenguidelines for, 102–103history of, 2–5non-dairy. See Non-dairy frozen dessertsplated, 104–105role in dessert menu, 7savory, 71, 72–73, 108serving temperature for, 15small (pre-desserts), 103USDA defi nition of, 52–53
Fructose, 17Fruit
defi nition of, 23fresh vs factory, 25oxidation process in, 24–25ripening of, 23–24seasonal availability of, 412–417sorbet, 24, 71, 77, 78, 79, 388sources for, 425storage of, 24, 412–417sugar/solid/acid content of, 410–411
Fussell, Jacob, 4
INDEX 437

GGarnished bases, overrun determination for,
63, 64Garnishes
edible vs non-edible, 107for entremets, 106, 107solid, 29variegated/swirled, 29
Gaulin, August, 4Gelatin, 21, 22, 98Gelato. See also Dairy-based frozen desserts
classic method, 366defi nition of, 53overrun for, 53–54, 366
Gelato scoop, 45Gellan gum, 19Giardia duodenalis, 49Glass, Hannah, 3Glaze, poured, 106–107Glucose powder, 15, 16, 78, 79Glucose syrup, 16, 17Gooseberries
seasonal availability/storage of, 414sugar/solids/acid content of, 410
Grainy defect, in dairy-based frozen desserts, 65Granité
in blast freezer, 41, 73defi ned, 70, 72ice bath for, 36production of, 82–83, 399savory, 72–73scooping, 45service of, 83sugar content of, 35, 36, 399
Granny Smith apple sorbet (syrup method), 388Granulated sugar, 15, 16Grapefruit
seasonal availability/storage of, 413sorbet (syrup method), 388sugar/solids/acid content of, 410
Grapesseasonal availability/storage of, 414sugar/solids/acid content of, 410
Guar gum, 19, 22Guava
seasonal availability/storage of, 414sorbet (syrup method), 388sugar/solids/acid content of, 410
Gummy defectin dairy-based frozen desserts, 65in sorbet, 80
HHardening process, 56, 67Heat shock, 19, 66, 67, 70Heavy cream
content of, 14foamed
fat molecules in, 11folding procedure, 98stiffness, 91, 99, 403whipping procedure, 91–92
in ice cream and gelato, 53stabilizers, 92
Hepatovirus, 49Herbs, steeped, 28Herb water, 28Holding temperature, 18, 41Homogenization, 48, 56Honey, 15, 16, 17Honeydew, sugar/solids/acid content of, 410HTST (high temperature, short time)
pasteurization, 55Hydrometer
Baumé (saccarometer), 35Brix (refractometer), 5, 35–36, 74–75, 82
Hygiene. See Sanitation
IIce bath
components of, 36–37in custard method, 58whipping cream in, 91–92
Ice cream. See also Dairy-based frozen desserts
ageing process, 48, 56brands, 5custard-base. See Custard-base ice creamcustard method, 350–351defects and mistakes, 65defi ned, 53emulsifi ers, 22history of, 2–5ingredient percentages (classic custard
method), 351ingredient percentages (modern method),
61, 369–370low-fat, USDA standard for, 52modern method, 369, 370physical structure of, 54–55stabilizer mix, 22USDA standard for, 52
Ice cream cone, 4Ice cream spade, 45Ice crystal formation, 15, 18, 108Ices. See also Shaved ice
components of, 73pops, 84, 401production of, 84–85service of, 85shelf life of, 85
Ice-sponge, 90Icy defect
in aerated still-frozen desserts, 98in dairy-based frozen desserts, 65in sorbet, 80
Ingredient percentagesfor ice cream, 61, 350–351, 369–370for sherbet, 396for sorbet, 71, 78, 377
Ingredients, 9–29dairy products, 10–15eggs, 12–14emulsifi ers, 22–23fat percentages for, 12fl avors, 25–29
fruits, 23–25history of, 5mail order sources for, 425safety of, 6stabilizers, 18–22sugars, 15–18vegetables, 25water, 29
Invert sugar (trimoline), 15, 16, 17Iodine sanitizing solution, 47Iota carrageenan, 20Italian meringue (cooked), 71, 89, 94–95
JJefferson, Thomas, 3Johnson, Nancy, 4
KKappa-carrageenan, 19Key lime, seasonal availability/storage of, 413Kiwi
seasonal availability/storage of, 415sorbet (syrup method), 388sugar/solids/acid content of, 410
Kumquat, seasonal availability/storage of, 413
LLactose, 10, 15, 16, 17Lambda carrageenan, 20Lamella, 54–55Laser thermometers, 34Lecithin, 14, 23Lemon
seasonal availability/storage of, 413sorbet (syrup method), 388sugar/solids/acid content of, 410
Lenzi, Phillip, 3Light refraction, principle of, 35Lime
seasonal availability/storage of, 413sorbet (syrup method), 388sugar/solids/acid content of, 410
Liquors, fl avoring with, 29Litchi
seasonal availability/storage of, 415sorbet (syrup method), 388sugar/solids/acid content of, 410
Locust bean gum, 19, 22
MMachines. See Freezer machinesMandarin
seasonal availability/storage of, 413sorbet (syrup method), 388sugar/solids/acid content of, 410
Mangoseasonal availability/storage of, 415sorbet (syrup method), 388sugar/solids/acid content of, 410
Marchiony, Italo, 4Mathematical formulation, 5
for dairy-based frozen desserts, 61–63for overrun, 63–64, 71for sorbet, 77–79, 80, 390, 418–419
438 INDEX

Melonsseasonal availability/storage of, 415sorbet (syrup method), 388sugar/solids/acid content of, 410, 411
Melting defect, in dairy-based frozen desserts, 65
Meringuescrisp, 97French (uncooked), 94Italian (cooked), 71, 89, 94–95in spuma, 13, 71stiffness, 93sugar/egg white ratio, 403Swiss (cooked), 95weeping, 95–96
Meyer lemon, seasonal availability/storage, 413Milk
foamed, 88in ice cream and gelato, 53types of, 10–11
Milk fat, 11, 12Milk protein, 11Miller, H.H., 4Modern method, 59–60
ice cream, 369, 370ingredient percentages, 61, 369–370sorbet mathematical formulation, 77–80,
390, 418–419sorbet mix, 75–76, 80sorbet syrup, 387, 388
Molasses, in sugars, 18Molds. See also Entremets, frozen
bombes in, 89–90, 406ices in, 84–85materials/shapes, 46parfaits in, 89semifreddo in, 90souffl é, 90
Monoglycerides, 22–23Mousse, frozen, 90–91
NNappe consistency, 58Naval orange, seasonal availability/storage, 413Nero, 2Nitrogen, liquid, 41Non-dairy frozen desserts, 69-85. See also
Frappé; Granité; Ices; Shaved ice; Sorbet
defi ned, 69–70, 71machine-churned/pacotized, 70–72production techniques, 73–85scraped and shaved, 72–73
Nonfat dry milk, 10–11, 14Norovirus, 49Nouveau Confi turier, 3Nut pastes, 29Nuts, steeped, 28
OOranges. See also Blood orange; Mandarin
seasonal availability/storage of, 413–414sugar/solids/acid content of, 411
Organic foodseggs, 12fruit, 24
Overrunand defects, 65defi ned, 63formula for, 63–64, 71for gelato, 53–54, 366
PPacojet machine, 4, 6, 31
operation of, 37–38, 56pros and cons of, 38–39sanitizing, 46
Pacotized frozen dessertsdairy-based, 57, 59frappés, 81overrun determination, 64repacotizing, 67, 81sorbets, 38, 70–71, 75, 77, 80–81, 377
Papayaseasonal availability/storage of, 415sorbet (syrup method), 388sugar/solids/acid content of, 411
Parasites, in food-borne illnesses, 49Parfait, frozen, 4, 89, 404Parthenocarpic plants, 23Passion fruit
seasonal availability/storage of, 415sorbet (syrup method), 388sugar/solids/acid content of, 411
Pasteur, Louis, 48Pasteurization, 48, 55Pasteurizers, 48, 55Pâte à bombe, 89, 96, 97, 403, 404Pâte à glacer, 107Peaches
seasonal availability/storage of, 416sorbet (syrup method), 388sugar/solids/acid content of, 411
Pearsseasonal availability/storage of, 416sorbet (syrup method), 388sugar/solids/acid content of, 411
Pectin, 21Persimmon
seasonal availability/storage of, 416sugar/solids/acid content of, 411
Piano whisk, 33Pineapple
seasonal availability/storage of, 416sorbet (syrup method), 388sugar/solids/acid content of, 411
Plated desserts, 104–105Plates and vessels, 45Plating, 108–109Plums
seasonal availability/storage of, 416sugar/solids/acid content of, 411
Pocket thermometers, 34Polo, Marco, 2Polysorbate 80, 23Pomegranate
seasonal availability/storage of, 416sugar/solids/acid content of, 411
Pomelo, seasonal availability/storage of, 413Popsicle, origins of, 4Portion size, 104Pots and pans, 33Powdered fl avors, 29Powdered glucose, 15, 16–17Praline paste, 29, 64Precision scale, 32Preston, Philip, 5, 40Probe thermometers, 34Procope restaurant, 3Production equipment, 32–37Production techniques
aerated still-frozen desserts, 91–98dairy-based frozen desserts, 56–65non-dairy frozen desserts, 73–85
Pumpkin, seasonal availability/storage of, 417
QQuaternary ammonium compounds, in
sanitizing solution, 47Quenelle spoon, 44–45
RRanhofer, Charles, 3Raspberries
seasonal availability/storage of, 417sorbet (syrup method), 388sugar/solids/acid content of, 411
Red currantsseasonal availability/storage of, 412sugar/solids/acid content of, 411
Refractive index, 35Refractometer (Brix hydrometer), 5, 35–36
in granité production, 82in sorbet production, 74–75, 80, 378
Rickettsia Coxiella burnetii, 48Roll-top freezers, 43Rotavirus, 49
SSalmonella, 6, 13, 49, 75Salt
in egg white foam, 93in granité base, 73
Sandy defect, in dairy-based frozen desserts, 65Sanitation
guidelines, 46information on, 6of scoops and spoons, 66, 108solution concentrations, 47
Satsuma, seasonal availability/storage of, 413Savory preparations
granité, 72–73portion size, 108sorbet, 71, 377vegetables in, 25, 399
INDEX 439

Scales, 32Scoops, 45, 66, 108Seasonal availability, fruit, 412–417Semifreddo, 41, 90, 405Serum solids, 14, 350Service
aerated still-frozen desserts, 99equipment, 44–45estimating sales, 67frappé, 81freezer storage during, 66–67, 80–81, 99, 108granité, 83ices, 85plating, 108–109shaved ice, 73, 83–84
Shaved icedefi ned, 73production of, 83service of, 73, 83–84
Shelf lifeaerated still-frozen desserts, 99dairy-based frozen desserts, 66–67non-dairy frozen desserts, 71, 80, 85and stabilizers, 18
Sherbetbase recipe, 396defi nition of, 54ingredient percentages (modern method), 61origins of word, 3USDA standard for, 52yogurt, 54
Shiga toxin producing E. coli, 49Shigella, 49Simple syrup
in granités, 82, 399in ice pops, 401in sorbets, 74, 75
Single piece scoop, 45Skim milk, 10, 14Small-batch production, 37Small desserts, 103Sodium alginate, 21Soft ball stage, 94–95Sorbet
blood orange, 79defects, 80defi ned, 70in frappés, 72, 81freezer storage of, 80–81fruit in, 24, 71, 77, 78, 79, 388history of, 2, 3ingredient percentages for, 71, 78, 377instant, 41methods
classic (refractometer), 74–75, 80, 377, 378mathematical formulation, 77–79, 80,
390, 418–419modern (sorbet mix), 75–76, 80, 387modern (sorbet syrup), 387
in Pacojet, 38, 70–71, 75, 77, 80–81, 377savory, 71, 377shelf life of, 71, 80spuma (foam), 13, 71
stabilizer mix, 22, 387, 390stabilizers in, 70, 76, 78sugar content of, 35, 36, 38, 71, 74–75
Sorbet mix method, 75–76Sorbet syrup method, 387Sorbitan ester polysorbate 80, 11Souffl é, frozen, 90, 407Spatulas, rubber, 34Spices
mail order sources, 425steeped, 28
Spoonsquenelle, 44–45sanitation of, 66
Springform scale, 32Spring-loaded thumb release scoop, 45Spuma (foam), 13, 71Stabilizers
for egg white foam, 93, 94excessive/insuffi cient, 65, 80mixes
ice cream, 22powdered, 21, 56ready-made, 21sorbet, 22, 387, 390
with modern method, 59, 61role of, 18–19and shelf life, 5, 66types of, 19–21for whipping cream, 92
Stainless steel bowls, for whipping egg whites, 93
Stainless steel molds, 46Stainless steel pots and pans, 33Standing freezers, 42–43Staphylococcus aureus, 49Steeped fl avors, 27–29Sticky defect, in sorbet, 80Still-frozen desserts. See Aerated still-frozen
dessertsStorage. See also Freezer storage
of fruit, 24, 412–417Storage units. See FreezersStrainers, 36Strawberries
seasonal availability/storage of, 417sugar/solids/acid content of, 411
Streaks, in aerated still-frozen desserts, 98Sucrose, 17Sugar
density measurement, 5, 35–36, 74–75in fruit, 410–411and ice crystal formation, 15, 108role of, 15simple syrup, 74types of, 15–17wet cooking method, 94–95in whipping egg whites, 94
Sweep blade scoop, 45Sweeteners, 15–18Swiss meringue (cooked), 95Syrupy defect, in sorbet, 80
TTahitian vanilla beans, 26Tangelo, seasonal availability/storage, 413Tangerine, seasonal availability/storage, 414Tea, steeping, 28Tempering eggs, 58Tempering entremets, 107, 109Thermometers, 34Thompson, Benjamin, 3–4Tomatoes
seasonal availability/storage of, 417sugar/solids/acid content of, 411
Tools. See Equipment and toolsToxoplasmosis gondii, 49Trimoline (invert sugar), 15, 16, 17
UUSDA
on butterfat, 12on “free range” animals, 12frozen desserts defi ned by, 52–53
VValencia orange, seasonal availability/storage
of, 414Vanilla
bean paste, 27beans, 15, 26extract, 26–27mail order source, 425powder, 27
Vegetablesfrappés, 72granités, 72, 399ices, 73mail order sources, 425in savory preparations, 25sorbets, 70
Viruses, in food-borne illnesses, 49Vogt, Clarence, 4
WWater
herb, 28tap water, 29
Watermelonseasonal availability/storage of, 417sugar/solids/acid content of, 411
Whipped cream, 11, 88, 91–92, 98, 99, 403Whisks, 33Whole milk, 10, 11, 14
XXanthan gum, 19–20, 22
YYersinia enterocolitica, 49Yogurt, frozen, 52–53, 54Yogurt sherbet, 54
ZZester, 27–28
440 INDEX


