02C Make It Now Projects -...
5
Customizing a Make It Now ™ Project Section 2C Page 1 Use any Make It Now ™ project as inspiration for your project but feel free to customize the design to make it your own. Step 1. The projects screen of Cricut Design Space ™ has a variety of Make It Now ™ projects to choose from. When you hover over a project, the name of the project appears on the screen. Click on the project you would like to make. Section 2C Make It Now Projects
Transcript of 02C Make It Now Projects -...

Customizing a Make It Now™ Project
Section 2C Page 1
Use any Make It Now™ project as inspiration for your project but feel free to customize the design to make it your own.
Step 1. The projects screen of Cricut Design Space™ has a variety of Make It Now™ projects to choose from. When you hover over a project, the name of the project appears on the screen. Click on the project you would like to make.
Section 2CMake It Now Projects
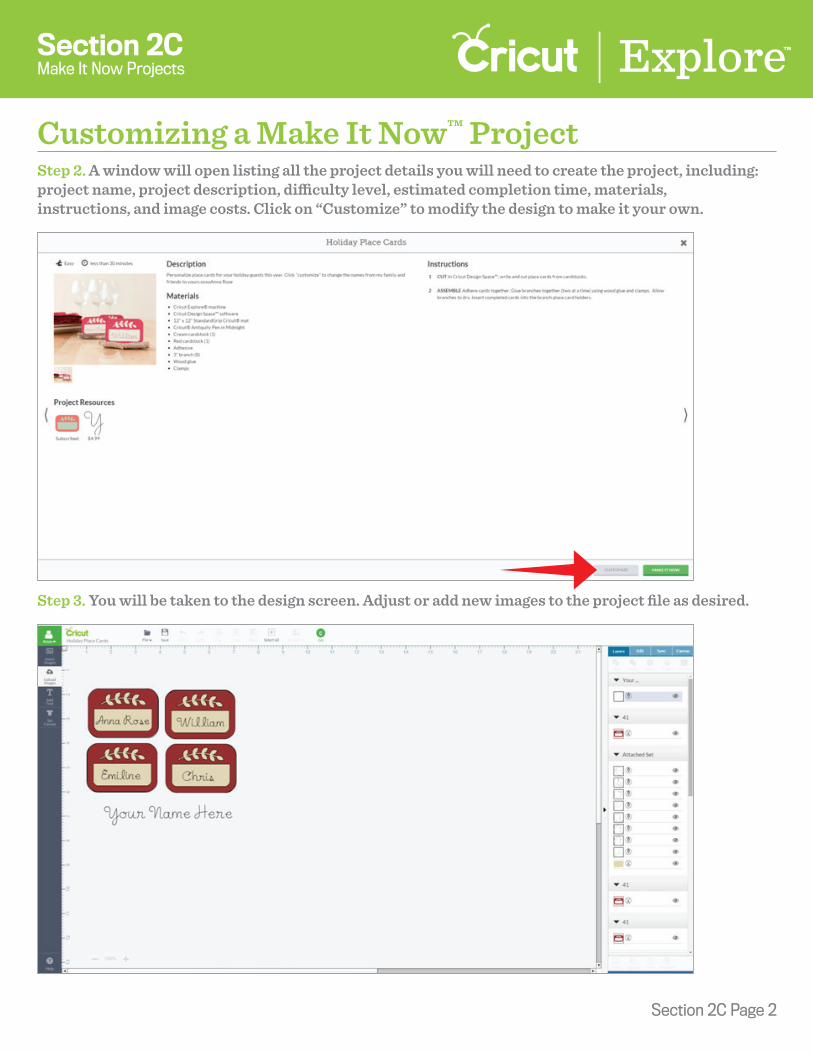
Step 2. A window will open listing all the project details you will need to create the project, including: project name, project description, di�culty level, estimated completion time, materials, instructions, and image costs. Click on “Customize” to modify the design to make it your own.
Step 3. You will be taken to the design screen. Adjust or add new images to the project file as desired.
Customizing a Make It Now™ Project
Section 2CMake It Now Projects
Section 2C Page 2

Tip: If you will be adjusting text, please keep in mind that you may have to ungroup as well as detach or un-flatten the image to make adjustments.
Step 4. Once your adjustments are complete, click “Save” to preserve the new design to your “My Project” files.
Tip: The Make It Now® project instructions may no longer apply to the project. However, if you would like to return to the project details, click on the project name in the upper left corner of the design screen.
Section 2CMake It Now Projects
Creating a Make It Now™ Project
Section 2C Page 3

Step 5. Enter a name for your project then click “Save.” You will be returned to the design screen.
Step 6. From the design screen, click “GO” to preview your project.
Section 2CMake It Now Projects
Creating a Make It Now™ Project
Section 2C Page 4

Step 7. You will be taken to the mat preview screen. All cuts will be separated by color onto di�erent mats. Click “GO” to start cutting your project.
Step 8. Follow the on-screen prompts to load your cutting mat, set your dial, and push “GO” on your machine for each of the mats shown.
Section 2CMake It Now Projects
Creating a Make It Now™ Project
Section 2C Page 5