blendtec.com/commercial | Stealth · To prevent blender ingredients from flying out of the jar and...
30
blendtec.com/commercial | Stealth Owner’s Manual
Transcript of blendtec.com/commercial | Stealth · To prevent blender ingredients from flying out of the jar and...

blendtec.com/commercial | Stealth
Owner’s Manual

Section 1: Important Safeguards 1
Section 2: Component Overview 3
Section 3: Unpacking 5
Section 4: Installation 6
Section 5: Operation 8
Section 6: Troubleshooting 17
Section 7: Cleaning 19
Section 8: Warranty and Service 21
Appendix: Countertop Hole Template 26
Table of Contents
1
Section 1: Important Safeguards
Read all instructions carefully before using your Blendtec® Stealth® machine.
1.1 Safety CertificationThe Stealth blender and accessories are certified by ETL to UL standard (ANSI/UL 763) Issue: 2012/01/31 and to CSA standard C22.2 #195 Issue: 1987/03/01.
1.2 Health CertificationThe Stealth blender and accessories are certified by NSF International.
1.3 Avoiding Contact with Moving PartsKeep hands, hair, and clothing away from all moving parts. Keep all utensils away from the drive socket and blender blades during operation. Never put your hands in the blender jar or add substances by hand when the blender is operating. Never place the jar in the drive socket if the blender motor is operating. Do not rock the blender when it is operating. Keep the blender jar straight up until operation is complete. These precautions will prevent personal injury and damage to the blender.
1.4 Power Cord PrecautionsDo not operate the machine if the plug or damaged power is damaged. If the cord is damaged, it must be replaced by Blendtec or one of its qualified service agents in order to avoid a hazard. Do not let the cord hang over the edge of the work surface. Never use an extension cord with the unit. Unplug the blender before removing the sound enclosure, changing the blender location, or cleaning.
1.5 Power Cord ReceptacleEnsure the electrical outlet that powers the blender is always accessible.
1.6 Electrical Circuit PrecautionsDo not use other electrical equipment on the same circuit as the blender; doing so may overload the circuit and damage the blender electronics or blow the circuit protection.
1.7 Water Damage and AbuseIt is critical to prevent liquids from entering the motor base. The motor base has been designed to deflect liquids from entering. However, in some instances of heavy spillage or a lack of appropriate cleaning procedures (see Section 7), liquids may enter the motor housing. It is important to promptly clean up all spills on the motor, around the counter, and under the sound enclosure base (if used). Failure to do so may result in liquids being pulled into the motor, which will lead to premature

2
failure. This cause of failure is considered abuse and is not covered under the warranty.
1.8 Blender Blade The blender blade is sharp—handle it carefully.
1.9 Materials Not Appropriate for Use in the Blender JarNever put metal (for example, utensils), rocks, or other hard materials in the blender jar. Such materials can cause injury and damage. Damage caused by such items is not covered under the warranty.
1.10 Use of the Blender LidTo prevent blender ingredients from flying out of the jar and making a mess, always secure the lid on the blender jar before blending.
1.11 Attachments Not Sold by BlendtecDo not operate the blender with any attachments not sold by Blendtec. Using such attachments with the blender will void the warranty and may cause fire, electric shock, or injury.
1.12 Caution about Touching the Metal Base After Extensive UseThe metal base of the blender may become hot after numerous cycles. Avoid touching the base after extensive use.
1.13 Cleaning the Motor Base Never clean the motor base with a water jet or submerge the base in water. Doing so will void the warranty.
1.14 Service and Adjustments of MotorThe blender motor does not contain user-adjustable or user-serviceable parts. All service and adjustments must be made by a Blendtec qualified service agent. Removing the motor base cover or servicing the blender will void the warranty.
1.15 Unit Malfunction and DamageIf the blender malfunctions, stop using the blender. Call Blendtec customer service at 1-800-BLENDTEC (US customers) or one of Blendtec’s qualified service agents (international customers). If the blender is dropped or damaged in any way, return the blender to Blendtec customer service (US customers) or a Blendtec qualified service agent (international customers) immediately for examination, repair, electrical or mechanical adjustment, or possible replacement.
Save these instructions for future reference.

3
Section 2: Component Overview
2.1 Blender Motor Base
2.2 Control SurfaceThe illuminated, capacitive-touch control surface features an intuitive, simple-to-use interface and fine-tuned blending controls.
Motor Housing Houses all components and optimizes sound and airflow for cooler, quieter operation. Never remove the motor housing.
Blender Motor Contains the machinery that runs the blender, including the electric motor and drive train.
Control Surface Capacitive-touch LED interface with intuitive control icons and information screen.
Drive Socket Direct drive coupling with the jar blade shaft. The socket has a lifetime warranty.
Scroll (visible in programming mode)
Power
Mode
Slider Control Bar
Preprogrammed Cycle Buttons
Cancel/Exit
Pulse
Select (visible in programming mode)
USB Port Connects to a flash memory device for quick, easy programming.
Figure 1. Motor Base
Figure 2. Control Surface

4
2.3 Blender Jar Assembly
2.4 Sound EnclosureThe sound enclosure has been engineered to reduce the noise of blender operation, giving you the quietest blending experience available.
2.5 Power SpecificationsThe Blendtec Stealth has the power specifications listed below.
Model (110/120 Volts) Amps WattsStealth above counter (CQB) 15 1800Stealth in counter (IQB) 15 1800
Blendtec 110/120-volt blenders must be protected by a dedicated 20-amp circuit breaker or fuse.
Jar Made from safe, durable, BPA-free Eastman Tritan™ copolyester for maximum performance, safety, and clear visibility.
Blade Assembly Stainless steel, engineered for fast and consistent blending.
Lid Allows ease of handling and quick removal for high-speed operations.
Figure 3. Blender Jar Assembly
Figure 4. Sound Enclosure

5
Model (220/240 Volts) Amps WattsStealth above counter (CQB) 8 1800Stealth in counter (IQB) 8 1800
Blendtec 220/240-volt blenders must be protected by a dedicated 10-amp circuit breaker or fuse.
Section 3: Unpacking
3.1 Items in PackageYou should have received the following items:• Stealth blender base• Blender jar(s) with lid(s)• Sound enclosure
3.2 Unpacking Your Blender • Remove the blender motor base, sound enclosure components, jar(s), and
lid(s) from the carton.• Unwind the power cord.• Check for and remove any packaging material blocking ventilation holes in the
blender motor base.• Inspect all items to ensure no damage occurred during shipping.• If any damage has occurred, immediately contact Blendtec customer service
at 1-800-BLENDTEC (US customers) or one of Blendtec’s qualified service agents (international customers).
Note: Save all packaging for future storage or shipping.
3.2 Recording the Serial Number and Date of ShipmentRecord the blender’s serial number (located on the blender base) and date of purchase in the spaces below.
Blender Serial #: _________________________________________________________
Date of Purchase: __________________________________________________________
Refer to this information whenever contacting Blendtec or a Blendtec qualified
service agent.

6
Section 4: Installation
4.1 Above-Counter Installation• Select a location for the blender that is near an electrical outlet. Also consider
proximity to ingredients, how close you want the blender to patrons, and available counter space.
• Place the blender on the counter in a spot where the air intake vents on the sides and exhaust on the back of the blender are unobstructed.
• Ensure there is enough room above and around the unit to allow for unhampered movement of the sound enclosure (see Figure 5 for measurements).
• Plug the unit into an outlet with appropriate electrical protection.
4.2 Preparation for In-Counter InstallationNote: You may locate your Blendtec Stealth in the same space as your previous Blendtec in-counter blender. Just remember to ensure proper spacing for the sound enclosure (see Figure 5 for measurements).• Identify the desired blender location. Consider proximity to ingredients, how
close you want the blender to patrons, and available counter space. Also ensure that an electrical outlet is readily accessible.
• Ensure the location meets all dimensional requirements (see Figures 5 and 6).
Figure 5. Blender Dimensions
7
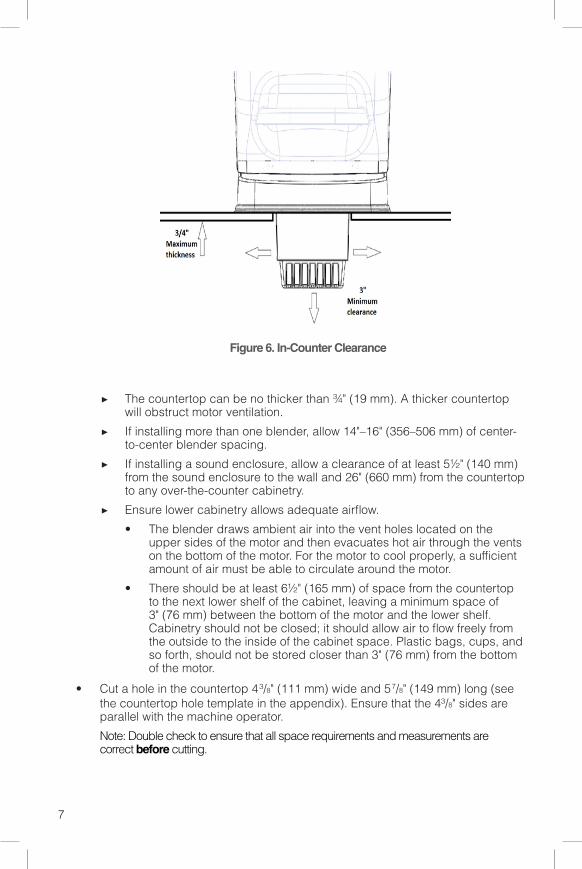
▶ The countertop can be no thicker than ¾" (19 mm). A thicker countertop will obstruct motor ventilation.
▶ If installing more than one blender, allow 14"–16" (356–506 mm) of center-to-center blender spacing.
▶ If installing a sound enclosure, allow a clearance of at least 5½" (140 mm) from the sound enclosure to the wall and 26" (660 mm) from the countertop to any over-the-counter cabinetry.
▶ Ensure lower cabinetry allows adequate airflow. • The blender draws ambient air into the vent holes located on the
upper sides of the motor and then evacuates hot air through the vents on the bottom of the motor. For the motor to cool properly, a sufficient amount of air must be able to circulate around the motor.
• There should be at least 6½" (165 mm) of space from the countertop to the next lower shelf of the cabinet, leaving a minimum space of 3" (76 mm) between the bottom of the motor and the lower shelf. Cabinetry should not be closed; it should allow air to flow freely from the outside to the inside of the cabinet space. Plastic bags, cups, and so forth, should not be stored closer than 3" (76 mm) from the bottom of the motor.
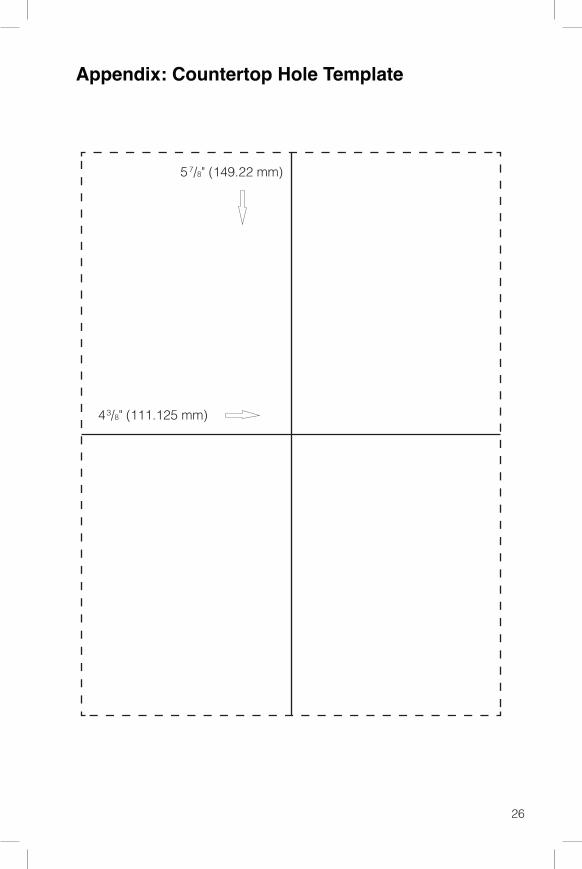
• Cut a hole in the countertop 4³/8" (111 mm) wide and 57/8" (149 mm) long (see the countertop hole template in the appendix). Ensure that the 4³/8" sides are parallel with the machine operator. Note: Double check to ensure that all space requirements and measurements are correct before cutting.
Figure 6. In-Counter Clearance
8
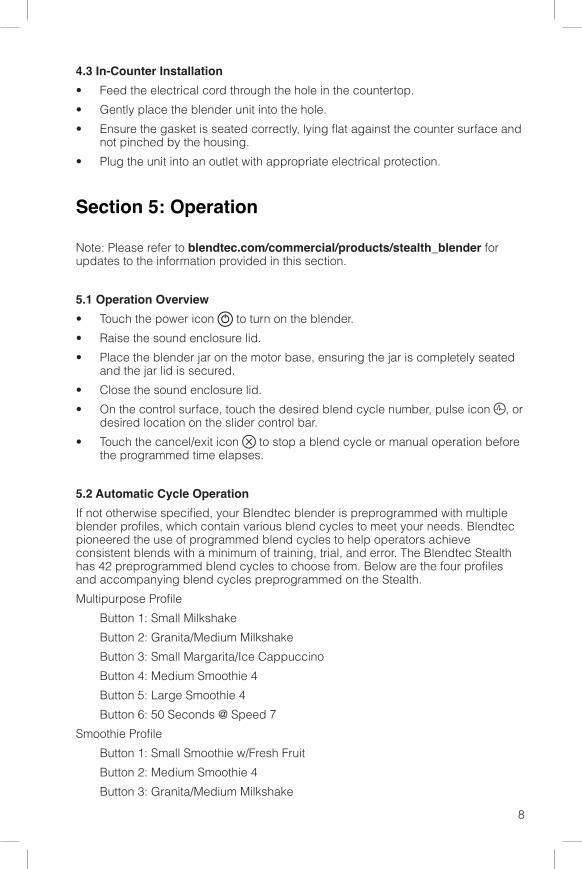
4.3 In-Counter Installation• Feed the electrical cord through the hole in the countertop.• Gently place the blender unit into the hole.• Ensure the gasket is seated correctly, lying flat against the counter surface and
not pinched by the housing.• Plug the unit into an outlet with appropriate electrical protection.
Section 5: Operation
Note: Please refer to blendtec.com/commercial/products/stealth_blender for updates to the information provided in this section.
5.1 Operation Overview• Touch the power icon to turn on the blender.• Raise the sound enclosure lid.• Place the blender jar on the motor base, ensuring the jar is completely seated
and the jar lid is secured.• Close the sound enclosure lid. • On the control surface, touch the desired blend cycle number, pulse icon , or
desired location on the slider control bar.• Touch the cancel/exit icon to stop a blend cycle or manual operation before
the programmed time elapses.
5.2 Automatic Cycle OperationIf not otherwise specified, your Blendtec blender is preprogrammed with multiple blender profiles, which contain various blend cycles to meet your needs. Blendtec pioneered the use of programmed blend cycles to help operators achieve consistent blends with a minimum of training, trial, and error. The Blendtec Stealth has 42 preprogrammed blend cycles to choose from. Below are the four profiles and accompanying blend cycles preprogrammed on the Stealth. Multipurpose Profile
Button 1: Small MilkshakeButton 2: Granita/Medium MilkshakeButton 3: Small Margarita/Ice CappuccinoButton 4: Medium Smoothie 4Button 5: Large Smoothie 4Button 6: 50 Seconds @ Speed 7
Smoothie ProfileButton 1: Small Smoothie w/Fresh FruitButton 2: Medium Smoothie 4Button 3: Granita/Medium Milkshake
9
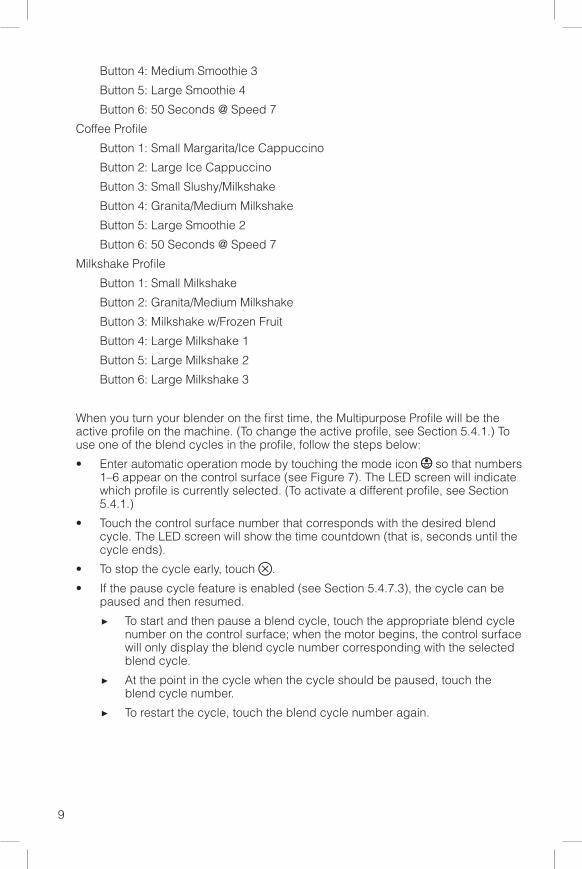
Button 4: Medium Smoothie 3Button 5: Large Smoothie 4Button 6: 50 Seconds @ Speed 7
Coffee ProfileButton 1: Small Margarita/Ice CappuccinoButton 2: Large Ice CappuccinoButton 3: Small Slushy/MilkshakeButton 4: Granita/Medium MilkshakeButton 5: Large Smoothie 2Button 6: 50 Seconds @ Speed 7
Milkshake ProfileButton 1: Small MilkshakeButton 2: Granita/Medium MilkshakeButton 3: Milkshake w/Frozen FruitButton 4: Large Milkshake 1Button 5: Large Milkshake 2Button 6: Large Milkshake 3
When you turn your blender on the first time, the Multipurpose Profile will be the active profile on the machine. (To change the active profile, see Section 5.4.1.) To use one of the blend cycles in the profile, follow the steps below:• Enter automatic operation mode by touching the mode icon so that numbers
1–6 appear on the control surface (see Figure 7). The LED screen will indicate which profile is currently selected. (To activate a different profile, see Section 5.4.1.)
• Touch the control surface number that corresponds with the desired blend cycle. The LED screen will show the time countdown (that is, seconds until the cycle ends).
• To stop the cycle early, touch . • If the pause cycle feature is enabled (see Section 5.4.7.3), the cycle can be
paused and then resumed. ▶ To start and then pause a blend cycle, touch the appropriate blend cycle
number on the control surface; when the motor begins, the control surface will only display the blend cycle number corresponding with the selected blend cycle.
▶ At the point in the cycle when the cycle should be paused, touch the blend cycle number.
▶ To restart the cycle, touch the blend cycle number again.

10
5.3 Manual OperationTouch to switch from automatic operation mode to manual operation mode. In manual operation mode, the number buttons on the control surface are replaced with a slider control bar. With the slider control bar, you can achieve the desired speed simply by touching the bar or moving your finger along the bar (the lowest speed is the farthest left; the highest speed is the farthest right). The blender will run for 90 seconds. To pulse while in manual operation mode, touch ; the screen will display ~Pulse @ Speed 7. Then, touch and hold to begin pulsing.
5.4 Advanced Programming and DiagnosticsThe programming mode can be used to do the following:• Select a profile• Change preprogrammed cycle numbers• Check blend cycle counts• Check the diagnostic error log• Use a custom profile designed via the Blend Wizard™ (Blendtec’s online
programming tool)
To enter programming mode, touch and hold for 3 seconds. The scroll arrow icon and the select icon will appear on the control surface, and the LED screen will show the main menu. Use and to scroll to and select the desired function. The options available from the main menu are listed below (numbered as displayed in the blender):1. Profile
(1.) Standard Profiles1. Smoothie2. Coffee3. Multipurpose4. Milkshake
(2.) Custom Profiles
Power
Mode
Slider Control Bar
Preprogrammed Cycle Buttons
Cancel/Exit
Pulse
Figure 7. Control Surface
Select (Visible in Programming Mode)Scroll (Visible in Programming Mode)

11
2. Blend Cycles(1.) Standard Blend Cycles
(2.) Custom Blend Cycles3. Cycle Counts4. Diagnostic Counts5. USB Flash Drive
(1.) Import Profile(2.) Export Active Profile(3.) Export Counts
6. Settings(1.) Enclosure Safety Mode(2.) Screen Standby(3.) Blend Cycle Pause(4.) Slider Lockout
7. Blender Info
1. Salsa2. Batter3. Whole Juice4. Soup5. Ice Cream6. Small Margarita / Ice
Cappuccino7. Large Ice Cappuccino8. Ice Crush / Milkshake9. Small Slushy / Milkshake
10. Small Milkshake11. Granita / Medium Milkshake12. Milkshake with Frozen Fruit13. Large Milkshake 114. Large Milkshake 215. Large Milkshake 316. Small Smoothie with Fresh
Fruit17. Medium Smoothie 118. Medium Smoothie 219. Medium Smoothie 320. Medium Smoothie 421. Large Smoothie 1
22. Large Smoothie 223. Large Smoothie 324. Large Smoothie 425. Large Smoothie 526. Large Smoothie 627. Ultrathick Smoothie 128. Ultrathick Smoothie 229. Ultrathick Smoothie 330. Ultrathick Smoothie 431. 50 Seconds @ Speed 132. 50 Seconds @ Speed 233. 50 Seconds @ Speed 334. 50 Seconds @ Speed 535. 50 Seconds @ Speed 736. 50 Seconds @ Speed 937. Pulse @ Speed 138. Pulse @ Speed 239. Pulse @ Speed 340. Pulse @ Speed 541. Pulse @ Speed 742. Pulse @ Speed 943. Disable Button
12
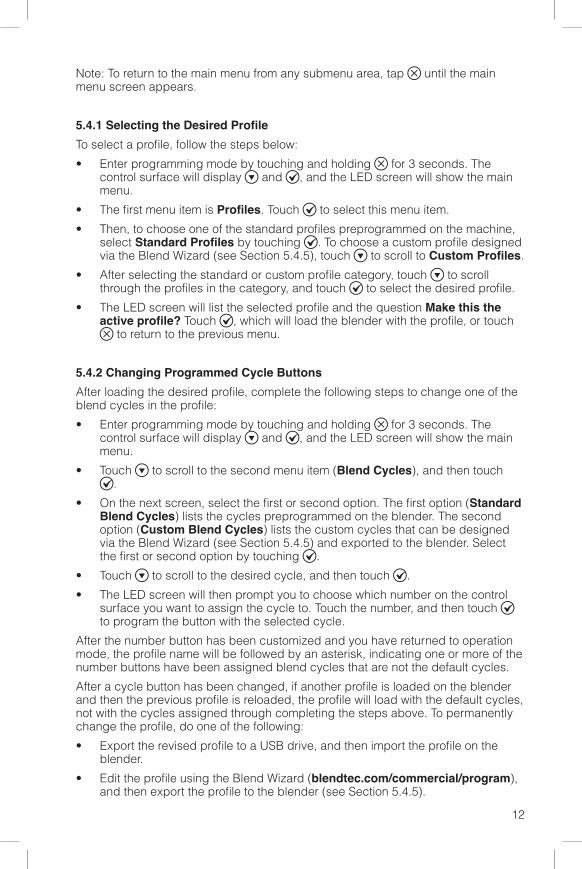
Note: To return to the main menu from any submenu area, tap until the main menu screen appears.
5.4.1 Selecting the Desired ProfileTo select a profile, follow the steps below:• Enter programming mode by touching and holding for 3 seconds. The
control surface will display and , and the LED screen will show the main menu.
• The first menu item is Profiles. Touch to select this menu item. • Then, to choose one of the standard profiles preprogrammed on the machine,
select Standard Profiles by touching . To choose a custom profile designed via the Blend Wizard (see Section 5.4.5), touch to scroll to Custom Profiles.
• After selecting the standard or custom profile category, touch to scroll through the profiles in the category, and touch to select the desired profile.
• The LED screen will list the selected profile and the question Make this the active profile? Touch , which will load the blender with the profile, or touch
to return to the previous menu.
5.4.2 Changing Programmed Cycle ButtonsAfter loading the desired profile, complete the following steps to change one of the blend cycles in the profile:• Enter programming mode by touching and holding for 3 seconds. The
control surface will display and , and the LED screen will show the main menu.
• Touch to scroll to the second menu item (Blend Cycles), and then touch .
• On the next screen, select the first or second option. The first option (Standard Blend Cycles) lists the cycles preprogrammed on the blender. The second option (Custom Blend Cycles) lists the custom cycles that can be designed via the Blend Wizard (see Section 5.4.5) and exported to the blender. Select the first or second option by touching .
• Touch to scroll to the desired cycle, and then touch . • The LED screen will then prompt you to choose which number on the control
surface you want to assign the cycle to. Touch the number, and then touch to program the button with the selected cycle.
After the number button has been customized and you have returned to operation mode, the profile name will be followed by an asterisk, indicating one or more of the number buttons have been assigned blend cycles that are not the default cycles. After a cycle button has been changed, if another profile is loaded on the blender and then the previous profile is reloaded, the profile will load with the default cycles, not with the cycles assigned through completing the steps above. To permanently change the profile, do one of the following:• Export the revised profile to a USB drive, and then import the profile on the
blender. • Edit the profile using the Blend Wizard (blendtec.com/commercial/program),
and then export the profile to the blender (see Section 5.4.5).

13
You can also use this method to disable a number button for a profile: • Enter programming mode by touching and holding for 3 seconds. The
control surface will display and , and the LED screen will show the main menu.
• Touch to scroll to the second menu item (Blend Cycles), and then touch .
• On the next screen, select the first option (Standard Blend Cycles). Then, touch to scroll to the last item in the standard blend cycles menu (Disable Button) and touch .
• The LED screen will then prompt you to choose which number on the control surface you want to disable. Touch the number, and then touch to disable the selected number.
When you return to automatic operation mode, the profile name will be followed by an asterisk, indicating one or more of the number buttons have been disabled. Additionally, the disabled button(s) will not appear on the control surface. After a cycle button has been changed, if another profile is loaded on the blender and then the previous profile is reloaded, the profile will load with all numbers enabled. To permanently disable a number button for a profile, do one of the following: • Export the revised profile to a USB drive, and then import the profile on the
blender. • Disable the number button by using the Blend Wizard app, located at
blendtec.com/commercial/program, and then export the revised profile to the blender. (See Section 5.4.5.)
5.4.3 Checking Blend Cycle CountsYou can review the total number of cycles run, the number of cycles run for each control surface number, the number of times the pulse button has been used and the number of times the slider control bar has been used. (Note: The pulse count refers to pulse sets. For example, touching 5 times in a row will register as 1 pulse count. Touching , then a cycle number and then will register as 2 pulse counts.) To review these numbers, enter programming mode by touching and holding for 3 seconds. The control surface will display and , and the LED screen will show the main menu. Touch to scroll to the third option (Cycle Counts), and then touch . Touch to see the number of cycles run in each category. Touch
to return to the previous menu.
5.4.4 Checking the Diagnostic Error LogYou can review the diagnostic errors that have been logged on the blender. To do so, enter programming mode by touching and holding for 3 seconds. The control surface will display and , and the LED screen will show the main menu. Touch to scroll to menu item 4 (Diagnostic Counts), and then touch
. Touch to scroll through the error categories to see how many errors have occurred in each category. Touch to return to the previous menu.
14
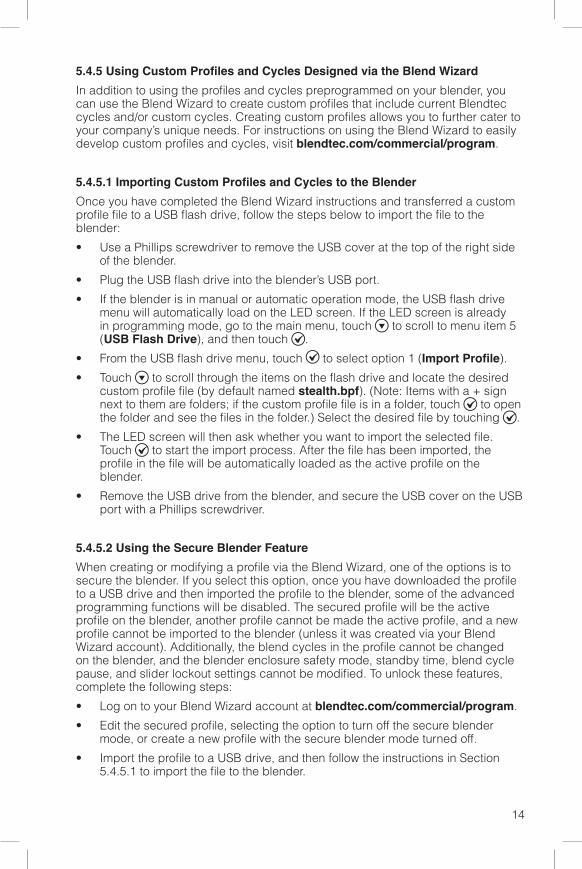
5.4.5 Using Custom Profiles and Cycles Designed via the Blend WizardIn addition to using the profiles and cycles preprogrammed on your blender, you can use the Blend Wizard to create custom profiles that include current Blendtec cycles and/or custom cycles. Creating custom profiles allows you to further cater to your company’s unique needs. For instructions on using the Blend Wizard to easily develop custom profiles and cycles, visit blendtec.com/commercial/program.
5.4.5.1 Importing Custom Profiles and Cycles to the BlenderOnce you have completed the Blend Wizard instructions and transferred a custom profile file to a USB flash drive, follow the steps below to import the file to the blender: • Use a Phillips screwdriver to remove the USB cover at the top of the right side
of the blender.• Plug the USB flash drive into the blender’s USB port. • If the blender is in manual or automatic operation mode, the USB flash drive
menu will automatically load on the LED screen. If the LED screen is already in programming mode, go to the main menu, touch to scroll to menu item 5 (USB Flash Drive), and then touch .
• From the USB flash drive menu, touch to select option 1 (Import Profile). • Touch to scroll through the items on the flash drive and locate the desired
custom profile file (by default named stealth.bpf). (Note: Items with a + sign next to them are folders; if the custom profile file is in a folder, touch to open the folder and see the files in the folder.) Select the desired file by touching .
• The LED screen will then ask whether you want to import the selected file. Touch to start the import process. After the file has been imported, the profile in the file will be automatically loaded as the active profile on the blender.
• Remove the USB drive from the blender, and secure the USB cover on the USB port with a Phillips screwdriver.
5.4.5.2 Using the Secure Blender FeatureWhen creating or modifying a profile via the Blend Wizard, one of the options is to secure the blender. If you select this option, once you have downloaded the profile to a USB drive and then imported the profile to the blender, some of the advanced programming functions will be disabled. The secured profile will be the active profile on the blender, another profile cannot be made the active profile, and a new profile cannot be imported to the blender (unless it was created via your Blend Wizard account). Additionally, the blend cycles in the profile cannot be changed on the blender, and the blender enclosure safety mode, standby time, blend cycle pause, and slider lockout settings cannot be modified. To unlock these features, complete the following steps:• Log on to your Blend Wizard account at blendtec.com/commercial/program. • Edit the secured profile, selecting the option to turn off the secure blender
mode, or create a new profile with the secure blender mode turned off. • Import the profile to a USB drive, and then follow the instructions in Section
5.4.5.1 to import the file to the blender.

15
5.4.6 Exporting Profiles and Blender StatisticsYou can also export profiles and blender statistics to a USB flash drive. After exporting profiles to a USB drive, you can transfer them to your Blend Wizard account (blendtec.com/commercial/program). By transferring profiles to your Blend Wizard account, the profiles can be accessed by your company’s personnel at other locations. These individuals can then export the profiles to USB flash drives and import the profiles on Stealth blenders at their locations.
Exporting blender statistics (cycle counts, errors, settings, and firmware versions) is a way to save diagnostic information, which Blendtec’s customer service and repair experts will use if problems arise with your blender.
5.4.6.1 Exporting and Transferring ProfilesTo export profiles and transfer them to the Blend Wizard, complete the following steps:• Ensure the profile you want to export is the active profile on the blender.• Use a Phillips screwdriver to remove the USB cover at the top of the right side
of the blender.• Plug the USB flash drive into the blender’s USB port. • If the blender is in manual or automatic operation mode, the USB flash drive
menu will automatically load on the LED screen. If the LED screen is already in programming mode, go to the main menu, touch to scroll to menu item 5 (USB Flash Drive), and then touch .
• From the USB flash drive menu, touch to scroll to option 2 (Export Active Profile) and then touch to select the option.
▶ If the USB flash drive the file is being exported to does not already contain the sth-prof.bpf file, the LED screen will display the question Export profile to the sth-prof.bpf file? Touch to start the export process. Touch to return to the previous menu.
▶ If the USB flash drive the file is being exported to already contains the sth-prof.bpf file (because a profile has already been exported to the USB flash drive), the LED screen will display the question Export profile and overwrite the sth-prof.bpf file? If you want to overwrite the file on the USB flash drive, touch to start the export process. If you do not want to overwrite the file on the USB flash drive, touch .
• After the export process completes, remove the USB flash drive from the blender and secure the USB cover on the USB port with a Phillips screwdriver.
• Insert the USB flash drive in a computer USB port, and log in to the Blend Wizard (blendtec.com/commercial/program). Follow the instructions on the site to transfer the profile to your account.
5.4.6.2 Exporting Blender StatisticsTo export blender statistics to a USB drive, complete the following steps:• Use a Phillips screwdriver to remove the USB cover at the top of the right side
of the blender.

16
• Plug the USB flash drive into the blender’s USB port. • If the blender is in manual or automatic operation mode, the USB flash drive
menu will automatically load on the LED screen. If the LED screen is already in programming mode, go to the main menu, touch to scroll to menu item 5 (USB Flash Drive), and then touch .
• From the USB flash drive menu, touch to scroll to option 3 (Export Counts) and then touch to select the option. The LED screen will then display the question Export counts to the sth-cnts.csv file? Touch to start the export process.
• After the export process completes, remove the USB drive from the blender and secure the USB cover on the USB port with a Phillips screwdriver.
5.4.7 Blender Settings: Enclosure Safety Mode, Standby Time, Blend Cycle Pause, and Slider LockoutYou also have the option to change various blender settings, including enabling and disabling the enclosure safety feature, changing the time before the blender switches to standby mode, enabling and disabling the blend cycle pause function, and enabling and disabling the slider lockout. These features are discussed below.
5.4.7.1 Enclosure Safety ModeThe enclosure safety feature prompts you to ensure the sound enclosure lid is closed during motor operation. When the enclosure safety mode is enabled, if you touch a control surface button to begin motor operation and the sound enclosure lid is not closed, the LED screen will show the message The lid is open. Start blender? Close the lid to begin motor operation; or, to start the blender with the lid open, touch . When you begin motor operation with the sound enclosure lid closed, if you then raise the lid during operation, the motor will turn off. To enable or disable the enclosure safety feature, complete the following steps: • Enter programming mode by touching and holding for 3 seconds. The
control surface will display and , and the LED screen will show the main menu.
• Touch to scroll to menu item 6 (Settings), and then touch . • Select option 1 (Enclosure Safety Mode) by touching . • Touch to toggle between disabling and enabling the enclosure safety
feature. • Touch to return to the previous menu.
5.4.7.2 Screen Standby TimeYou can change the length of time before the blender switches to standby mode (15 minutes, 1 hour, 6 hours, or 12 hours). To select a new standby time, complete the following steps:• Enter programming mode by touching and holding for 3 seconds. The
control surface will display and , and the LED screen will show the main menu.
• Touch to scroll to menu item 6 (Settings), and then touch .

17
• Touch to scroll to option 2 (Screen Standby), and then touch . • Touch to scroll to the desired standby time. Touch to select the desired
option. • Touch to return to the previous menu.
5.4.7.3 Blend Cycle PauseThe blend cycle pause feature allows you to begin a blend cycle in automatic mode, pause the cycle (to add more ingredients, for example), and then resume the cycle at the cycle time and speed the cycle was paused at. For example, if you begin the Small Milkshake blend cycle and then pause the cycle with 30 seconds remaining in the cycle, when you resume the cycle, the cycle will restart at 30 seconds remaining and at the corresponding blend speed. If the blend cycle pause feature is disabled, a blend cycle cannot be paused; the cycle can only be stopped (by touching ). To enable or disable the blend cycle pause feature, complete the following steps: • Enter programming mode by touching and holding for 3 seconds. The
control surface will display and , and the LED screen will show the main menu.
• Touch to scroll to menu item 6 (Settings), and then touch . • Touch to scroll to option 3 (Blend Cycle Pause), and then touch . • Touch to toggle between enabling and disabling the blend cycle pause
feature. • Touch to return to the previous menu.
5.4.7.4 Slider LockoutThe slider lockout feature allows you to disable manual operation (that is, the slider bar on the control surface). When this feature is enabled, only profiles on the blender can be used to operate the blender. To enable or disable this feature, complete the following steps:• Enter programming mode by touching and holding for 3 seconds. The
control surface will display and , and the LED screen will show the main menu.
• Touch to scroll to menu item 6 (Settings), and then touch . • Touch to scroll to option 3 (Slider Lockout), and then touch . • Touch to toggle between enabling and disabling the slider lockout feature. • Touch to return to the previous menu.
Section 6: Troubleshooting
Refer to the following to troubleshoot problems with your Stealth. If following the instructions below does not resolve the problem, contact Blendtec customer service at 1-800-BLENDTEC (US customers) or a Blendtec qualified service agent (international customers).
18
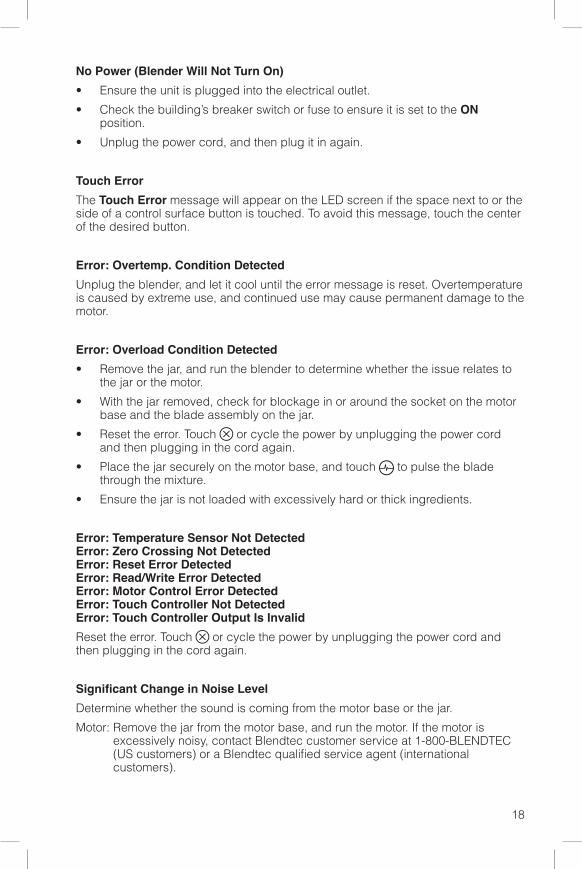
No Power (Blender Will Not Turn On)• Ensure the unit is plugged into the electrical outlet.• Check the building’s breaker switch or fuse to ensure it is set to the ON
position.• Unplug the power cord, and then plug it in again.
Touch ErrorThe Touch Error message will appear on the LED screen if the space next to or the side of a control surface button is touched. To avoid this message, touch the center of the desired button.
Error: Overtemp. Condition DetectedUnplug the blender, and let it cool until the error message is reset. Overtemperature is caused by extreme use, and continued use may cause permanent damage to the motor.
Error: Overload Condition Detected• Remove the jar, and run the blender to determine whether the issue relates to
the jar or the motor.• With the jar removed, check for blockage in or around the socket on the motor
base and the blade assembly on the jar.• Reset the error. Touch or cycle the power by unplugging the power cord
and then plugging in the cord again.• Place the jar securely on the motor base, and touch to pulse the blade
through the mixture.• Ensure the jar is not loaded with excessively hard or thick ingredients.
Error: Temperature Sensor Not Detected Error: Zero Crossing Not Detected Error: Reset Error Detected Error: Read/Write Error Detected Error: Motor Control Error Detected Error: Touch Controller Not Detected Error: Touch Controller Output Is InvalidReset the error. Touch or cycle the power by unplugging the power cord and then plugging in the cord again.
Significant Change in Noise LevelDetermine whether the sound is coming from the motor base or the jar.Motor: Remove the jar from the motor base, and run the motor. If the motor is
excessively noisy, contact Blendtec customer service at 1-800-BLENDTEC (US customers) or a Blendtec qualified service agent (international customers).

19
Jar: Place the jar on the base with about 16 oz (475 ml) of water in the jar. Run the motor for a few seconds using . Switch out the jar with another jar to determine whether the sound changes with a specific jar. If a jar is excessively noisy or if the blade assembly seems loose or sounds gravelly when turned by hand, contact Blendtec customer service at 1-800-BLENDTEC (US customers) or a Blendtec qualified service agent (international customers).
Not Blending or Unsatisfactory Blended Texture• If your ingredients are too cold or too thick, the blender blade may spin freely in
an air pocket, which is called cavitation. Correct this problem by reducing the amount of ice, increasing the liquid, and/or ensuring that ingredients are never colder than 10°F (-12°C).
• Increase the cycle time. If the ingredients are mixing well but have not had enough time to complete blending, try a longer cycle or use for extra blending time.
• Ensure the jar is fully seated on the blender base.• Ensure the blade is firmly affixed to the drive shaft. Hold the drive shaft in one
hand, and try to spin the blade with the other hand. If the blade turns without turning the drive shaft, contact Blendtec customer service at 1-800-BLENDTEC (US customers) or a Blendtec qualified service agent (international customers).
Unresponsive Control Surface• Wipe down the control surface with a damp rag to remove any liquids or
particle buildup.• Unplug the power cord and then plug in the cord again.
Section 7: Cleaning
7.1 Daily Blender Jar Cleaning• Add hot tap water and 1–2 drops of liquid dish soap to the jar. • Place the lid tightly on the jar, place the jar on the motor base, and touch for
13 seconds. • Rinse all soap from the jar and lid with water.• If the jar is stored upside down, shake excess water from the jar after cleaning. Note: WildSide™ and FourSide™ jars can be stacked to save space.
7.2 Long-Term Blender Jar Sanitization• Sanitize the jar per local code by filling the blender jar with a sanitizer diluted to
the manufacturer’s specifications. Bleach, properly diluted, can be used. • Leave the diluted sanitizer in the jar for 5 minutes.• Empty the sanitizer from the jar. • If the jar is stored upside down, shake excess water from the jar after cleaning.

20
7.3 Motor Base and Sound Enclosure Cleaning• Ensure the blender is unplugged before cleaning.• If necessary, the sound enclosure can be removed for cleaning as follows:
Open the sound enclosure lid, and use both hands to pull outward on the lid at the pivot joints (see Figure 8). This step will flex the plastic enough for it to spread and clear its mounting tabs.
The sound enclosure base can be removed in a similar fashion by pulling outward at the base of the sound enclosure and flexing the outer walls enough to clear the mounting tabs (see Figure 8).
• Wipe down the plastic housing of the motor base, gaskets, metal top, and sound enclosure with a clean, damp rag. A mild all-purpose, nonabrasive cleaner may be used.
• The drive socket can be cleaned by using a cotton swab or a toothpick.
7.4 Cleaning Tips and Precautions• Do not use abrasives to clean the blender motor base, jar, or sound enclosure;
doing so will dull and scratch the surface.• Do not use a water jet of any kind to clean the motor base.• Never submerge the motor base in water; doing so will void the warranty.• Avoid submerging blender jars for more than 5 minutes. If water penetrates the
jar’s lower seals, the life of the jar will decrease. If the jar is stored upside down, shake excess water from the jar after cleaning.
• For long-term jar storage, apply a small amount of food-grade oil (such as vegetable oil) to the seals around the blade assembly, both inside and outside of the jar.
Figure 8. Removing Sound Enclosure
21
Section 8: Warranty and Service
8.1 Warranty Description (United States)Blendtec warrants the Stealth blender against defects in materials and workmanship under normal use, maintenance, and service, for three years on parts and labor required to repair or replace components that, in the sole opinion of Blendtec, are defective. The following items are not included in the Stealth blender warranty coverage:• Normal maintenance, adjustments, and cleaning as outlined in this manual.• Repairs due to unauthorized service or modifications to the blender, product
tampering, or use of non-standard parts or accessories without prior written approval from Blendtec.
• Damage cause by: improper installation or ventilation of the blender; electrical supply (e.g., electrical power failure, improper electrical connections, the use of extension cords, low voltage, or voltage drops to the unit); water supply; drainage; exposure to water; or floods, storms, or other acts of God.
• Cost of premium labor rates due to holidays, overtime, shipping, etc.• Parts or assemblies subjected to misuse, abuse, neglect, or accidents, or lack
of specified maintenance or operational procedures.• Damage or problems caused by installation, relocation of unit, cleaning and/or
maintenance procedures inconsistent with the technical instructions provided in this manual.
• Claims for personal injuries, incidental or consequential damages, or economic loss (profit or revenue), however caused.
8.11 A Note About Water Damage and AbuseIt is critical to prevent liquids from entering the motor base. The motor base has been designed to deflect liquids from entering. However, in some instances of heavy spillage or a lack of appropriate cleaning procedures (see Section 7), liquids may enter the motor housing. It is important to promptly clean up all spills on the motor, around the counter, and under the sound enclosure base (if used). Failure to do so may result in liquids being pulled into the motor, which will lead to premature failure. This cause of failure is considered abuse and is not covered under the warranty.
8.12 Country of PurchaseWarranty is provided only in the country in which the equipment was purchased from an authorized sales representative. Use of the equipment outside the country of purchase voids all warranties, expressed or implied. If a customer chooses to utilize a local service center outside of the country of original sale, he or she can reasonably expect to pay for parts, labor, shipping, duties, taxes, etc., necessary to make the repair and return the equipment.

22
8.13 Service ProcedureIf you experience any difficulty in using your Blendtec blender and following the troubleshooting steps in Section 7 does not resolve the problem, immediately contact Blendtec customer service at 1-800-BLENDTEC (US customers) or a Blendtec qualified service agent (international customers) to diagnose the problem. Please have your Stealth’s serial number ready and be prepared to describe the problem. Do not attempt to do your own repairs. The warranty will be voided if repairs are made by individuals other than Blendtec qualified service agents. Many issues can be resolved simply and quickly over the phone. If the problem cannot be resolved over the phone, your unit may require replacement.If your machine is under warranty, Blendtec will repair or replace the blender at no cost. Cosmetic damage and abuse are not included.If your machine is out of warranty and you wish to have it repaired, contact Blendtec customer service at 1-800-BLENDTEC (US customers) or a Blendtec qualified service agent (international customers) for instructions. You will be billed for services rendered.When shipping your blender to Blendtec customer service or a qualified service agent (either in warranty or out of warranty), please include the form on the following page.
THIS WARRANTY IS IN LIEU OF ALL OTHER WARRANTIES OR GUARANTEES OF ANY KIND, EXPRESSED OR IMPLIED, INCLUDING ANY IMPLIED WARRANTY OR MERCHANTABILITY OR FITNESS FOR A PARTICULAR PURPOSE. In no event shall Blendtec be liable for any special, indirect, incidental or consequential damages. Upon the expiration of the warranty period, Blendtec’s liability under this warranty shall terminate. The foregoing warranty shall constitute the sole liability of Blendtec and the exclusive remedy of the customer or user.

23
8.2 Warranty Description (Outside the United States)Blendtec warrants the Stealth blender against defects in materials and workmanship under normal use, maintenance, and service, for three years on parts and one year on labor required to repair or replace components that, in the sole opinion of Blendtec, are defective. The following items are not included in the Stealth blender warranty coverage:• Normal maintenance, adjustments, and cleaning as outlined in this manual.• Repairs due to unauthorized service or modifications to the blender, product
tampering, or use of non-standard parts or accessories without prior written approval from Blendtec.
• Damage cause by: improper installation or ventilation of the blender; electrical supply (e.g., electrical power failure, improper electrical connections, the use of extension cords, low voltage, or voltage drops to the unit); water supply; drainage; exposure to water; or floods, storms, or other acts of God.
• Cost of premium labor rates due to holidays, overtime, shipping, etc.• Parts or assemblies subjected to misuse, abuse, neglect, or accidents, or lack
of specified maintenance or operational procedures.• Damage or problems caused by installation, relocation of unit, cleaning and/or
maintenance procedures inconsistent with the technical instructions provided in this manual.
• Claims for personal injuries, incidental or consequential damages, or economic loss (profit or revenue), however caused.
8.21 A Note About Water Damage and AbuseIt is critical to prevent liquids from entering the motor base. The motor base has been designed to deflect liquids from entering. However, in some instances of heavy spillage or a lack of appropriate cleaning procedures (see Section 7), liquids may enter the motor housing. It is important to promptly clean up all spills on the motor, around the counter, and under the sound enclosure base (if used). Failure to do so may result in liquids being pulled into the motor, which will lead to premature failure. This cause of failure is considered abuse and is not covered under the warranty.
8.22 Country of PurchaseWarranty is provided only in the country in which the equipment was purchased from an authorized sales representative. Use of the equipment outside the country of purchase voids all warranties, expressed or implied. If a customer chooses to utilize a local service center outside of the country of original sale, he or she can reasonably expect to pay for parts, labor, shipping, duties, taxes, etc., necessary to make the repair and return the equipment.

24
8.23 Service ProcedureIf you experience any difficulty in using your Blendtec blender and following the troubleshooting steps in Section 7 does not resolve the problem, immediately contact Blendtec customer service at 1-800-BLENDTEC (US customers) or a Blendtec qualified service agent (international customers) to diagnose the problem. Please have your Stealth’s serial number ready and be prepared to describe the problem. Do not attempt to do your own repairs. The warranty will be voided if repairs are made by individuals other than Blendtec qualified service agents. Many issues can be resolved simply and quickly over the phone. If the problem cannot be resolved over the phone, your unit may require replacement.If your machine is under warranty, Blendtec will repair or replace the blender at no cost. Cosmetic damage and abuse are not included.If your machine is out of warranty and you wish to have it repaired, contact Blendtec customer service at 1-800-BLENDTEC (US customers) or a Blendtec qualified service agent (international customers) for instructions. You will be billed for services rendered.When shipping your blender to Blendtec customer service or a qualified service agent (either in warranty or out of warranty), please include the form on the following page.
THIS WARRANTY IS IN LIEU OF ALL OTHER WARRANTIES OR GUARANTEES OF ANY KIND, EXPRESSED OR IMPLIED, INCLUDING ANY IMPLIED WARRANTY OR MERCHANTABILITY OR FITNESS FOR A PARTICULAR PURPOSE. In no event shall Blendtec be liable for any special, indirect, incidental or consequential damages. Upon the expiration of the warranty period, Blendtec’s liability under this warranty shall terminate. The foregoing warranty shall constitute the sole liability of Blendtec and the exclusive remedy of the customer or user.
25
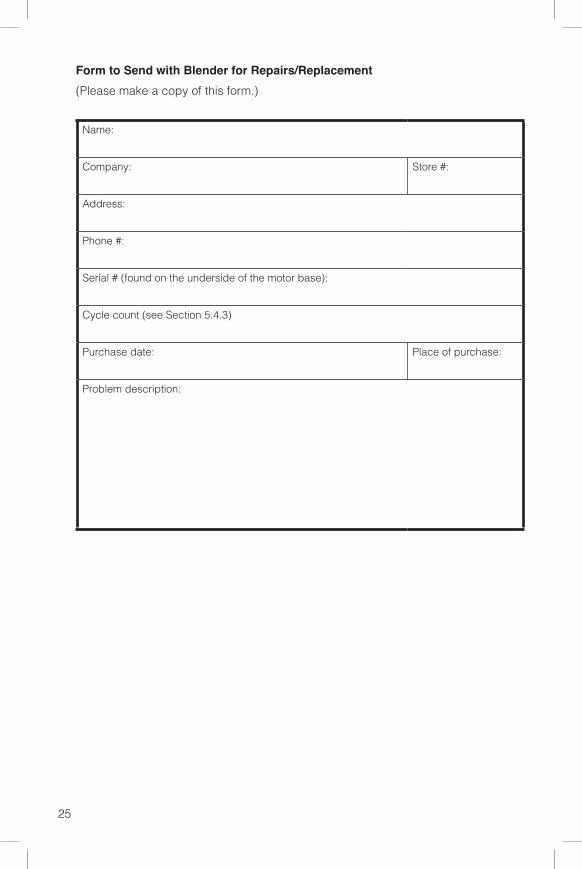
Name:
Company: Store #:
Address:
Phone #:
Serial # (found on the underside of the motor base):
Cycle count (see Section 5.4.3)
Purchase date: Place of purchase:
Problem description:
Form to Send with Blender for Repairs/Replacement(Please make a copy of this form.)
26
Appendix: Countertop Hole Template
5 7/8" (149.22 mm)
4³/8" (111.125 mm)

1206 S. 1680 W.Orem, UT 84058 USA
1-800-BLENDTECblendtec.com/commercial
©2013 K-TEC Inc., All Rights Reserved. Blendtec is a registered trademark of K-TEC Inc.
OWN-CD-085, Manual, Owners, Stealth Rev D August 13