National Carousel Association - Welcome!National Carousel Association - Welcome!

Discover your phone
Philips continuously strives to improve its products.Therefore, Philips reserves the rights to revise this userguide or withdraw it at any time without prior notice.Philips provides this user guide «as is» and does notaccept, except as required by applicable law, liabilityfor any error, omission or discrepancy between thisuser guide and the product described. The device ismeant to be connected to GSM/GPRS network.
Keypad
Microphone
Navigationand , keys
65 000 coloursmain screen
C camera key
c key(Pick up key
Hang up and) on/off keys
Side keys(volume)
Back of the phone: camera lens and 4 000 colours external screen
How to...
Switch phone On/Off Press ) to switch on, longpress to switch off.
Enter PIN codeEnter your PIN code usingthe keypad and press , or# to confirm.
Set the ringer volume
Press and hold either side keywhen in idle mode and whenthe phone is opened.
A short press on the lowerside key will mute the ringerwhen you receive a call.
Make a callEnter the phone number onthe keypad and press ( todial.
Answer a call Press ( when your phonerings.
Set conversationvolume
Press either side key duringthe call.
End a call Press ).
Philips855_00_APMEA_DiscoverYourPhone_GB.fm Page 0 Friday, July 9, 2004 1:22 PM

1
A carousel is a circular loop of icons displayed on thescreen. Each icon represents a feature or operation ofyour phone.
All icons don’t fit within the screen; the hidden onesappear when scrolling < or >.
You access the main carousel by pressing , whenin idle mode. Move < (anti clockwise) or >(clockwise) and press , when the feature or optionof your choice is selected, or c to cancel. Anothersub-carousel or list will then appear.
Reject a callPress ) or press and holdeither side key (in this case,the phone must be closed).
Access the main menu Press , in idle mode.
Access the Contacts Press - in idle mode.
Use the ContactsBrowse the list by moving+ or - and press (to call the selected name.
Access the Call list Press + in idle mode.
Go to previous menu Press c.
Quickly returnto idle when browsing menus
Press and hold c, or press).
View the last call made Press ( in idle mode.
Access a functionin the menu
Press ,, move < or> to select a function,then press , to enter thesub-menu. Repeat to reachthe desired function.
Activate a programmedVoice command
Press and hold the , key.
Quickly open the MMS menu Press < in idle mode.
Quickly send an SMSPress > in idle mode(opens the names list for youto select the recipient).
Activate Camera Press C in idle mode.
Launch WAP Press and hold #.
The carousel
Philips855_APMEA.book Page 1 Friday, July 9, 2004 1:05 PM

2
Pressing + or - will alternate between twooptions, such as Activate/Deactivate, On/Off,Increase/Decrease a value, etc.
Browse carousels and lists until you reach the desiredfeature or option. When navigating in a list, a scroll barlocated on the right hand side of the screen shows youractual position in the list. With the navigation key, youcan then select or adjust all the functions of your phoneas described in the relevant chapter of this user guide.
Some events may modify the idle screen (missed call,new message, etc.). Press , to access thecorresponding menu or press c to go back to theidle screen.
Events
Philips855_APMEA.book Page 2 Friday, July 9, 2004 1:05 PM
3
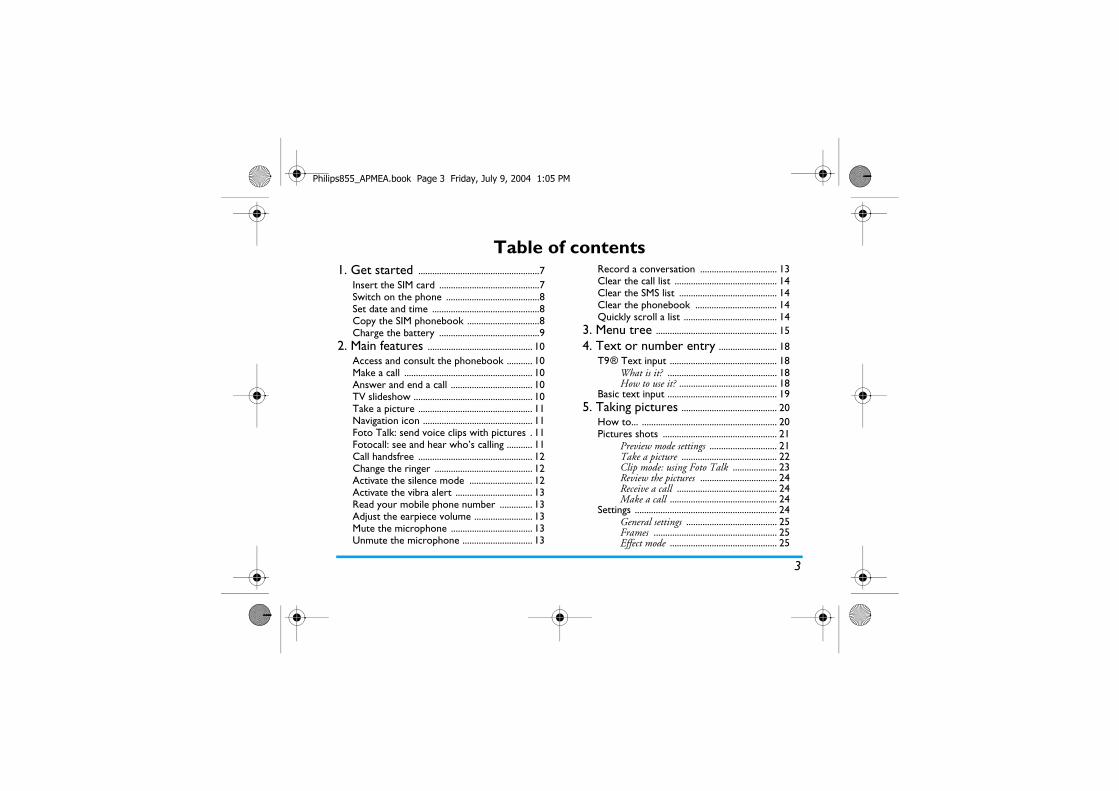
Table of contents1. Get started ....................................................7
Insert the SIM card ...........................................7Switch on the phone ........................................8Set date and time ..............................................8Copy the SIM phonebook ...............................8Charge the battery ...........................................9
2. Main features ............................................. 10Access and consult the phonebook ........... 10Make a call ....................................................... 10Answer and end a call ................................... 10TV slideshow ................................................... 10Take a picture ................................................. 11Navigation icon ............................................... 11Foto Talk: send voice clips with pictures . 11Fotocall: see and hear who’s calling ........... 11Call handsfree ................................................. 12Change the ringer .......................................... 12Activate the silence mode ........................... 12Activate the vibra alert ................................. 13Read your mobile phone number .............. 13Adjust the earpiece volume ......................... 13Mute the microphone ................................... 13Unmute the microphone .............................. 13
Record a conversation ................................. 13Clear the call list ............................................ 14Clear the SMS list .......................................... 14Clear the phonebook ................................... 14Quickly scroll a list ........................................ 14
3. Menu tree .................................................... 15
4. Text or number entry ......................... 18T9® Text input .............................................. 18
What is it? ............................................... 18How to use it? .......................................... 18
Basic text input ............................................... 195. Taking pictures ......................................... 20
How to... .......................................................... 20Pictures shots ................................................. 21
Preview mode settings ............................. 21Take a picture ......................................... 22Clip mode: using Foto Talk ................... 23Review the pictures ................................. 24Receive a call ........................................... 24Make a call .............................................. 24
Settings ............................................................. 24General settings ....................................... 25Frames ..................................................... 25Effect mode .............................................. 25
Philips855_APMEA.book Page 3 Friday, July 9, 2004 1:05 PM

4
Vision mode ............................................. 25Self-portrait & Self-timer ....................... 25
6. Contacts ....................................................... 26SIM card phonebook ..................................... 26Phone’s phonebook ....................................... 27Add names in the phonebook ..................... 27
In the SIM card ....................................... 27In the phone ............................................. 27Add a record in the phone’s phonebook . 28Own numbers .......................................... 28
Fotocall: see & hear who’s calling .............. 28Edit and manage names ................................. 29
In the SIM card ....................................... 29In the phone ............................................. 30
Make calls ......................................................... 31Emergency number .................................. 31Other number .......................................... 31
7. Settings .......................................................... 33Sounds .............................................................. 33
Silent ........................................................ 33Ringer volume .......................................... 33Ringer ....................................................... 33Messages Ringer ....................................... 33Equaliser .................................................. 33Key tones .................................................. 33Sounds Alerts ........................................... 34Vibra alert ............................................... 34
Display .............................................................. 34
Animation ............................................... 34Subdisplay contrast ................................. 34Backlight .................................................. 34Wallpaper ................................................ 35Sub wallpaper ......................................... 35
Short cuts ........................................................ 35Hotkeys ..................................................... 35Voice command ....................................... 38Voice dial ................................................. 38Navigation icon ...................................... 39
Security ............................................................ 39Public names ........................................... 39Call barring ............................................. 39Change codes ........................................... 40PIN protection ........................................ 40
Network .......................................................... 40GPRS attach ............................................ 40Register again .......................................... 41Preferred list ............................................ 41Access settings ........................................... 41
Time and date ................................................. 42Clock display ........................................... 42Set date .................................................... 43Date format ............................................. 43Time zone ................................................ 43Daylight saving ....................................... 43Set time .................................................... 43
Language ........................................................... 43Profiles .............................................................. 44
Philips855_APMEA.book Page 4 Friday, July 9, 2004 1:05 PM

5
8. Messages ....................................................... 46SMS .................................................................... 46
Send a SMS ............................................. 46Read SMS ................................................ 47SMS settings ............................................ 49SMS Archive ............................................ 49
E-Mail ................................................................ 50Settings ..................................................... 50Write and send an e-mail ....................... 52Receive and read e-mails ........................ 54
Broadcast message ........................................ 57Instant message .............................................. 58MMS .................................................................. 58
Create an MMS ...................................... 58Receive an MMS ..................................... 61Manage folders ........................................ 62Settings ..................................................... 63
9. Infrared .......................................................... 66Position of devices ......................................... 66Send data .......................................................... 66
Select an item .......................................... 66Send the selected item .............................. 67
Receive data .................................................... 67Activate IrDA .......................................... 67Save the data received ............................. 67
Use the phone as a modem ......................... 68
10. Multimedia ................................................ 69Sound album ................................................... 69Picture album .................................................. 69TV Slideshow .................................................. 72Demo mode .................................................... 73Memory status ................................................ 73Sound recording ............................................. 73
11. Games & Appli. ..................................... 74Calculator ........................................................ 74Alarm clock ..................................................... 74Organiser ......................................................... 75
Create a new event .................................. 75Modify an event ...................................... 75
Brick game ....................................................... 77JAVA ................................................................. 77
Settings ..................................................... 7712. Call information .................................... 79
Call settings ..................................................... 79Active flip ................................................ 79Call forward ............................................ 79Mailboxes ................................................ 79Auto redial ............................................... 80Any key answer ........................................ 80Call waiting ............................................ 80Caller ID ................................................. 80
Philips855_APMEA.book Page 5 Friday, July 9, 2004 1:05 PM

6
Call list .............................................................. 80Call list ..................................................... 81Reset .......................................................... 81
Call counters ................................................... 8113. WAP ............................................................. 83
Internet services ............................................. 83Launch a WAP session ............................ 83End a WAP session .................................. 83Homepage ................................................ 83Bookmarks ............................................... 84Enter address ............................................ 84Settings ..................................................... 84Push inbox ............................................... 86
Options ............................................................ 86Homepage ................................................ 87Back .......................................................... 87Forward ................................................... 87Refresh ...................................................... 87Save as homepage .................................... 87Save as... .................................................. 87Exit ........................................................... 87Receive a call ............................................ 87
14. Operator services ............................... 88GSM strings ..................................................... 88DTMF tones .................................................... 88
Pause and wait characters ...................... 88For example: access your answering machine .................................................... 89
Make a second call ......................................... 89Answer a second call .................................... 89Answer a third call ........................................ 90Conference call .............................................. 90Explicit call transfer ....................................... 91
Precautions .......................................... 92Troubleshooting ................................. 96Icons & symbols ................................ 100Philips authentic accessories ..........101Limited warranty .............................. 103
Philips855_APMEA.book Page 6 Friday, July 9, 2004 1:05 PM

Get started 7
1 • Get started
Read the safety instructions in the «Precautions» sectionbefore use.
To use your phone, you must insert a valid SIM cardsupplied by your GSM operator or retailer. The SIMcard contains your subscription, your mobile number,and memory in which you can store phone numbersand messages (see “Contacts” page 26).
1. Press on the back cover of your phone as shownbelow and slide it downwards to remove it.
2. Remove the SIM card from its holder and insertit under the metal clip holder, until it stops. Becareful that the clipped corner of the card is inthe correct corner.
3. Place the battery in its slots as shown below: firstplace its right side against the right edge of thephone and press until it clips.
Insert the SIM card
Philips855_APMEA.book Page 7 Friday, July 9, 2004 1:05 PM

8 Get started
4. Replace the back cover of your phone: hook thefront housing onto the hinges on the top of thephone, then press the bottom down until thelatch catches.
Remove the protective film covering the screens andthe camera lens before using the phone.
1. To switch on the phone, press the ) key.2. When you switch on the phone, you may be
prompted to enter the PIN code, which is the 4 to8-digit secret code of your SIM card to protect itfrom unauthorised use. It is preconfigured andcommunicated to you by your operator or retailer.To personalise the PIN code, see page 40.
If you enter a wrong PIN code 3 times, your SIM cardis blocked. To unblock it, you must request the PUKcode from your operator.
Enter your PIN code. If you make a mistake, pressc. Then press , or # to confirm.
As prompted by the phone at first switch on, set thedate by pressing the appropriate numeric keys (pressc to erase a number), then press , to validate.Proceed in the same way to set the time.
For complete date and time options, see page 42.
If you do not copy the SIM phonebook at very firstswitch, you will be able to do it directly from theContacts menu (see page 26).
If you had a mobile phone before and are using thesame SIM card, the card might contain all or part ofyour current phonebook. The mobile phone detectsthis and a message asks you if you want to copy yourSIM phonebook onto the built-in phonebook. Pressc to cancel or , to accept. Whether youaccepted, aborted or cancelled the copy, the phonebooklocated on your phone is always automatically set asyour default phonebook. To switch back to the SIMphonebook, press , and select Contacts > Settings >Contacts select > In SIM card.
Switch on the phone
Set date and time
Copy the SIM phonebook
Philips855_APMEA.book Page 8 Friday, July 9, 2004 1:05 PM

Get started 9
Your phone is powered by a rechargeable battery. Anew battery is partially charged and an alarm will warnyou when the battery reaches low.
We recommend that you do not remove the batterywhen the phone is switched on: you may lose all yourpersonal settings (see information on battery safety,page 94). If you do remove it, date and time settingsare memorized for around 2 minutes.
1. Once the battery and battery cover are clippedon the phone, plug the connector of the charger(supplied with the phone, in the box) into theBOTTOM hand socket at the base of the phoneon one end, then plug it into a main AC powersocket with easy access on the other end.
2. The battery symbol indicates the state of charge:• During charging the 4 charge indicators change;
Each bar represents around 25% of charge and ittakes around 1.45 hours to fully recharge yourmobile phone.
• When all 4 bars are steady the battery is fullycharged, you can disconnect the charger.Depending on the network and condition of use,talk time goes from 2 to 4 hrs and stand-by timefrom 200 to 400 hrs.
Keeping the charger plugged to the mobile when thebattery is fully charged doesn’t damage the battery.The only way to turn off the charger is to unplug it, souse an easily accessible AC power socket. You canconnect the charger to an IT supply (Belgium only).
3. If you don’t intend to use your phone for severaldays, we recommend you disconnect the battery.
You can use the phone while it is on charge (note thatthe vibra alert goes Off when plugging the charger). Ifthe battery is completely flat, the battery icon will onlyreappear after 2 or 3 minutes of charging.
Charge the battery
Philips855_APMEA.book Page 9 Friday, July 9, 2004 1:05 PM

10 Main features
2 • Main features
In idle mode, press -. Dependingon the selected phonebook (in SIM orin phone), the content that appears on
the screen may vary: see “Contacts” page 26 for detailson this subject.To consult the phonebook during a call, press ,,select View Names List, press , and scroll throughthe entries by pressing + or -. Then press ctwice to return to the in-call screen.
Press #, enter the first letters of the name you aresearching, and press , to jump directly to that name.
1. In idle mode, enter the phone number using thekeypad. To correct an error, press c.
2. Press ( to dial the number and press ) tohang up.
For an international call, enter the «+» sign instead ofthe usual international prefix by pressing and holding*. To learn how to make a call from thephonebook, see “Make calls” page 31.
When receiving a call, depending on yoursubscription and if the caller has permitted thisinformation to be transmitted, his number may bedisplayed. If the number is stored in the selectedphonebook (see page 26), the corresponding name isdisplayed instead of the number.1. To answer the call, press (, or open the phone
if the option Active Flip is On (see page 79).2. To reject a call, press ). If you have activated
“Call forward” (see page 79), the call is divertedto a number or voice mail.
3. To hang up, press ).
The phone will not ring if in Silence mode (seepage 12). If you have selected Any Key Answer (seepage 80), you can accept a call by pressing any key(except )).
This feature allows you to display yourpictures listed in the Picture album(automatically in a slideshow, or
manually, one-by-one) on a TV screen via the TVLink accessory, or on the main (internal) screen ofyour phone.
Access and consult the phonebook
Make a call
Answer and end a call
TV slideshow
Philips855_APMEA.book Page 10 Friday, July 9, 2004 1:05 PM

Main features 11
1. Connect the TV Link to the TV video yellow(RCA) jack and to your mobile’s audio jack, thenselect a video (CBVS) channel.
2. A default picture will automatically appear onthe TV screen , while the TV slideshow menuwill be displayed on the screen of your phone.
3. Use the menu of your phone to set an automaticslideshow, or display the pictures manually bypressing + or -.
TV Link only support JPEG pictures, up to VGA size(640 x 480 pixels). See “TV Slideshow” page 72 fordetails about this feature.
Your mobile phone features a camera, allowing you totake pictures and send them to your friends andrelatives. See “Taking pictures” page 20 for completeinformation on this subject.
A Navigation icon appears in idle mode, and allowsyou to spot the menus that can be accessed via thephone’s navigation key. See page 39 for details onhow to activate/deactivate it.
This feature, which is available when using the cameraand also from the Picture album, allows you toquickly send a message made of a picture and a sound.1. When in idle mode, press C to activate the
camera. In needed, press # to switch to theClip mode.
2. Press C to take a picture;the Record soundwindow will then open automatically.
3. Record the sound or message of your choice,press c to cancel or , to stop the recording(you can also wait for the maximum recordingtime of 30 seconds to be reached).
4. Then send your message via MMS (see “MMS”page 58 for details).
This feature is available only when selecting thephonebook in the phone (not the one in the SIM card).
This feature allows you to link one or several names toa group. When a name in that group calls, it willappear along with the corresponding picture, and themelody defined for that group will ring.
Take a picture
Navigation icon
Foto Talk: send voice clips with pictures
Fotocall: see and hear who’s calling
Philips855_APMEA.book Page 11 Friday, July 9, 2004 1:05 PM
12 Main features
1. When in idle mode, press C to activate thecamera, and press C to take a picture of yourfriend.
2. Select Contacts > Settings > Group settings >Groups. Rename a group and select the Ringerof your choice, then your friend’s picture.
When making a group of only one person, you can alsoselect Multimedia > Sound recording > New, recordhim/her saying something, then select the recording asthe Ringer.
3. Press -, select a name in your phonebook andpress ,. Press , and choose Select groupto link it to the group that you renamed.
For your own comfort and safety, ensure you move thephone away from your ear when calling handsfree,especially when increasing the volume.
1. If you selected the phonebook in your SIM card,select a record, press , twice to access the nextcarousel, then select Call handsfree and press, to dial the number.
2. If you selected the phonebook in your phone,proceed the same way to call the default number,or press < or >, select another number inthe list, then press , and select Callhandsfree.
If already on the phone, press , twice to switch tohandsfree mode and back.
1. Press ,, select Settings > Sounds > Ringerand press , again.
2. Move + or - to select a ringer in the list,then press , to confirm your choice.
If you don’t want your phone to ringwhen you receive a call, you candeactivate the ringer as follows:
Press , and select Settings > Sounds > Silent andpress - until the volume is set to On.
You can also press the side key while in idle screenuntil the volume is set to silence.
You can also mute the ringer when receiving a call bypressing the side key down.
Call handsfree
Change the ringer
Activate the silence mode
Philips855_APMEA.book Page 12 Friday, July 9, 2004 1:05 PM

Main features 13
If you want your phone to vibrate whenyou receive a call, you can activate thevibra alert as follows:
1. Press ,, select Settings > Sounds > Vibraalert and press ,.
2. Move + or - to select On or Off and press, to confirm.
Activating the vibra doesn’t mute the ringer. If youwant to mute it and keep the vibra function on,activate the Silent mode as described above.The vibra alert is automatically deactivated when youplug the charger.
To read your own mobile phone number, press -when in idle mode and select Own numbers, thenpress ,, select Show and press , again. Yourphone number is displayed if present on your SIMcard. If not, select New, then follow the instructions.
If your own number has been stored in the Phonebook,you can read it during a call. See “Access and consultthe phonebook” page 10.
During a call, move the side key up or down toincrease/decrease the volume.
You can mute the microphone so thatyour caller cannot hear you. During acall, press ,, select Mute andconfirm by pressing ,.
To unmute the microphone during acall, press ,, select Unmute andconfirm by pressing ,. Themicrophone is unmuted.
In most countries, conversationrecording is subject to law regulation.We advise you to notify the caller if you
intend to record the conversation you have with themand only record if they agree. You should also keep anyrecording private. 1 min. is the maximum recordingtime available (see “Sound recording” page 73).
Activate the vibra alert
Read your mobile phone number
Adjust the earpiece volume
Mute the microphone
Unmute the microphone
Record a conversation
Philips855_APMEA.book Page 13 Friday, July 9, 2004 1:05 PM

14 Main features
To record a conversation during a call:1. While one or several simultaneous calls are in
progress, press , to access the call contextcarousel.
2. Select Record dialogue and press ,. Pressc, , or hang up to end the recording.
3. In all cases, and when hanging up, an editwindow allows you to name the recording.
Press , to save the recording, which is thenavailable in the menu Multimedia > Sound album.
To clear your call list, press , andselect Call Info > Call list > Reset. Press, twice to reset the call list.
To clear the whole messages list at once, press ,and select Messages > SMS > Read SMS > Delete allSMS. Press , twice to reset the SMS list.
You can also delete all the SMS messages from the SMSArchive menu. Deleting your SMS list is useful to freememory space in order to receive new messages.
To clear the content of your phonebook at once, press, and select Contacts > Settings > Delete all.Press , to reset the phonebook content.
This option only applies to the phonebook in yourphone, NOT to the SIM phonebook.
When browsing a list, long press + or - to scrollpage per page instead of item by item.
This doesn’t apply to the list of ringers.
Clear the call list
Clear the SMS list
Clear the phonebook
Quickly scroll a list
Philips855_APMEA.book Page 14 Friday, July 9, 2004 1:05 PM

Menu tree 15
3 • Menu treeThe table below describe the complete menu tree (firstto third levels) of your mobile phone, as well as thepage reference you should refer to for moreinformation concerning each feature or setting.
Settings p33
Sounds p33Silent / Ringer volume / Ringer / Messages Ringer / Equaliser / Key tones /Sounds Alerts / Vibra alert
Display p34Animation / Subdisplay contrast / Backlight /Wallpaper / Sub wallpaper
Short cuts p35Hotkeys / Voice command / Voice dial /Navigation icon
Security p39Public names / Call barring / Change codes /PIN protection
Network p40GPRS attach / Register again / Preferred list /Access settings
Time and date p42Clock display / Set date / Date format / Time zone / Daylight saving / Set time
Language p43List of available languages
Profiles p44
Messages p46
SMS p46Send a SMS / Read SMS / SMS settings /SMS Archive
E-Mail p50For each available mail boxSettings / Open mailbox / Send mail
Broadcast message p57Reception / Topics / District codes
Philips855_APMEA.book Page 15 Friday, July 9, 2004 1:05 PM
16 Menu tree
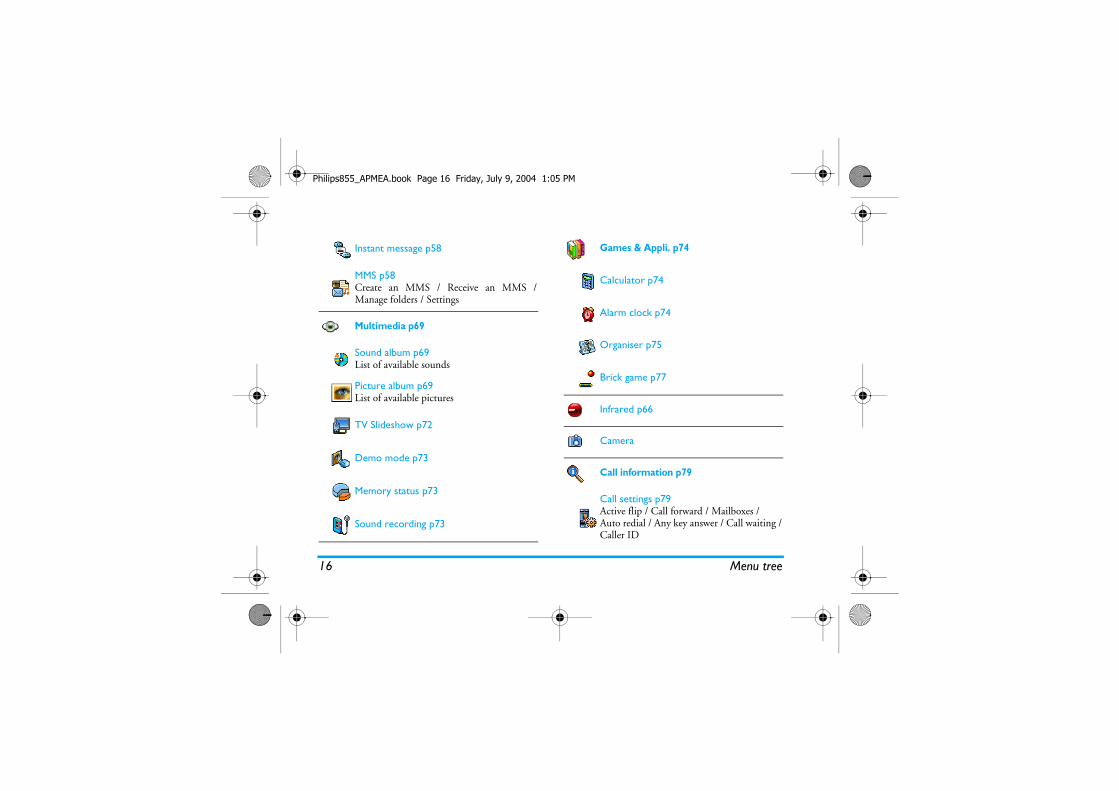
Instant message p58
MMS p58Create an MMS / Receive an MMS /Manage folders / Settings
Multimedia p69
Sound album p69List of available sounds
Picture album p69List of available pictures
TV Slideshow p72
Demo mode p73
Memory status p73
Sound recording p73
Games & Appli. p74
Calculator p74
Alarm clock p74
Organiser p75
Brick game p77
Infrared p66
Camera
Call information p79
Call settings p79Active flip / Call forward / Mailboxes / Auto redial / Any key answer / Call waiting /Caller ID
Philips855_APMEA.book Page 16 Friday, July 9, 2004 1:05 PM

Menu tree 17
Call list p80Call list / Reset
Call counters p81
Contacts p26
View names list
SettingsDelete all / Contacts select. /Group settings / Copy to phone
Operator services p88
Service numbersThe numbers available in this menu areoperator and subscription-dependent, pleasecheck with your operator.
WAP p83
Services +This menu is operator and subscription-dependent, please check with your operator.
Philips855_APMEA.book Page 17 Friday, July 9, 2004 1:05 PM

18 Text or number entry
4 • Text or number entryText can be entered in editing screens in two differentways: by using T9® predictive Text Input, or basictext input. Two other modes for numbers andpunctuation marks, are also available. Icons appearingon the screen show the active text mode.
What is it?T9® predictive Text Input is anintelligent editing mode for messages,including a comprehensive dictionary.It allows you to quickly enter text. Pressonly once on the key corresponding toeach letter needed to spell a word:
keystrokes input are analysed and the word suggestedby T9® is displayed in the edit screen. If several wordsare available according to the keys used, the word youentered is highlighted: press < or > to browsethe list and to choose from those proposed by the T9®
built-in dictionary (see example below).
How to use it?Alphabets and symbols represented by each key are asfollows:
Example: how to enter the word «home»:1. Press 4 6 6 3. The screen displays
the first word of a list: Good.2. Press > to scroll and select Home.3. Press , to confirm selection of the word
Home.
T9® Text input
!"!#$
2 to 9 To key in letters.
< or > To browse the list of candidate words.
,or 1 To confirm entry.
c Short press to clear one entry, longpress to clear all text.
0 Shift from standard, to lower, toupper case.
* Shift from T9® to basic, to numericmode.
# Shift to symbols and punctuationmode.
Philips855_APMEA.book Page 18 Friday, July 9, 2004 1:05 PM

Text or number entry 19
If you wish to access the basic text input, select «Abc»basic text input using * key. This method requiresmultiple key presses to reach the desired character: theletter «h» is the second letter on the 4 key, so youmust press it twice to enter «h». Using this moderequires you press a key as many times as is equal tothe order of the letter.To enter the word «Home» in basic text input mode,you should therefore key in 4, 4 (GHI) 6,6, 6 (MNO), 6 (MNO), 3, 3 (DEF).Press , when the message is completed.
Letters, numbers and symbols are located on each keyas follows:
Basic text input
1 space 1 @ _ # = < > ( ) & £ $ ¥
2 a b c 2 à ä å æ ç
3 d e f 3 é è ∆ Φ
4 g h i 4 Γ ì
5 j k l 5 Λ
6 m n o 6 ñ ò ö
7 p q r s 7 β Π Θ Σ
8 t u v 8 ü ù
9 w x y z 9 ø Ω Ξ Ψ
0 Shift from standard, to lower, to upper caseor long press to input 0
Philips855_APMEA.book Page 19 Friday, July 9, 2004 1:05 PM

20 Taking pictures
5 • Taking picturesYour mobile phone features a digital camera thatallows you to take pictures, store them in your phone,use them as wallpaper or send them to your friendsand relatives.
Within any menu related to the camera, a long presson the c key will cancel any current action andbring you back to idle mode.
How to...
Activate/deactivatethe camera
Press the C key to activate,OR press , and select themenu Camera.Long press c to deactivate.
Zoom in/out
In all modes except VGA(see “Camera mode” and“Zoom mode” below), pressthe navigation key + (up)or - (down).
Change thevision mode
Press * to toggle betweenNight and Normal mode.
Change thecamera mode
Press # to switch fromVGA (640*480 pixels) toWallPaper (128*160 pixels)to Clip (128*160 pixels) toFotocall (96 x 64 pixels).
Change thespecial effect
Press the navigation key <(left) or > (right) to switchfrom a special effect (sepia,embossed, etc.) to another.
Access thecamera settings
Press , when the camerais active.
Take a picturePress C when the camerais active.
Save the picturePress C right after theshot.
Delete the picturePress c right after theshot.
Access theshot options
Press , right after theshot.
Activate/deactivatethe self-timer
Press 0.
Philips855_APMEA.book Page 20 Friday, July 9, 2004 1:05 PM

Taking pictures 21
Preview mode settingsPress C to display the camera preview screen: thelens of the camera is automatically focused and iconsare displayed in the bottom (Zoom, Effects, Cameramode, Shot) and eventually, if set on, on top (Self-timer, Vision) of the screen.
All options and key presses described in the presentsection are applicable only when the camera mode isactive, i.e. when the preview is displayed on the screen.You can also press , to access any of them (see“Settings” page 24).
Camera modeThe default picture size of the standard format is VGA640 x 480 pixels. Turn the mobile phone of 90° to theleft and hold it horizontally to obtain a full-screenpreview.
In this mode, the VGA icon will appear in the bottomright corner of the screen.
For all other photo modes, hold the mobile verticallyand press # to switch to Wallpaper (128 x 160pixels), to Clip (128 x 160 pixels) to Fotocall (96 x 64pixels). The Camera mode you select is displayed inthe bottom right corner of the screen.
The Clip mode also allows you to record a voicemessage right after you shot the picture. See “Clipmode: using Foto Talk” page 23 for details concerningthis camera mode.
Zoom modeThis option is available in all modes: one-level zoom(x2) in Clip and Wallpaper modes, two-levels zoom (x2and x4) in VGA mode.
Pictures shots
!"#$
Philips855_APMEA.book Page 21 Friday, July 9, 2004 1:05 PM

22 Taking pictures
In the first two modes, press the navigation key + or- to zoom in or out. In the VGA mode, as you holdthe phone horizontally, also press + or - (thatactually are the < and > arrows of the navigationkey when you hold the phone vertically).
The zoom icon is highlighted when the zoom isactivated. Zoom out is available only after a zoom in.
EffectsAllows you to choose one of the available effects (e.g.,Sepia), see “Effect mode” page 25 for details.Self-timerThis option allows you to set the Self-timer option Onor Off (see “With the self-timer” below for details).Press 0 to activate this option when in preview.Vision modeTwo vision modes are available: Normal and Nightmode. According to ambiant light level, press * totoggle between modes. The night mode is reflected bythe moon icon at the top of the screen.
Take a pictureWith the C key1. If the self-timer option is Off, and once the
camera was activated, press the C key to take aVGA, Wallpaper or Fotocall picture, which is thenautomatically displayed on the screen.
2. The number in the upper black bar of the screenshows its row. The pictures will be named«img_1.jpg», etc., up to 9999.
This does not mean you can take up to 9999 pictures(see “Number of pictures” below), but that pictures,including the ones you delete, are numbered up to9999. Numbering will then restart from 1 on.
You can then choose to:
With the self-timer1. Set the self-timer option On (see above), then
press c.
Press c To Delete the picture youhave taken.
Press C To Save it.
Press , To access the list of availableoptions, which are:Save the picture in the PictureAlbum, Modify it, Send it viaMMS, Infrared or E-mail, Takea new picture, which willbring you back to thepreview window.
Press c or C To go back to preview mode.
Philips855_APMEA.book Page 22 Friday, July 9, 2004 1:05 PM

Taking pictures 23
2. A message will inform you when the camerapreview swaps from the main (internal) screen tothe external one: close the phone, put it down onits hinges and orient it properly for the picture tobe correctly framed.
3. Press either side key to launch the count-down.4. The count-down starts at -10 seconds (this value
cannot be changed). A beep is played 3 secondsbefore the picture is taken, then again when it’sactually shot.
Beep alarms can be customized via the camerasettings. At any time, press c to stop the timer andgo back to preview mode or press 0 to just stop thetimer.
5. Once the picture is shot, follow the instructionsstarting at point 2 of the previous section.
With the self-portrait modeThis mode allows you to take a picture of yourself byholding the phone opened in front of you.1. Set the self-timer option On (see page 22), pressC.
2. Place your finger on the C key, then hold thephone opened at arms length, camera towardyour face.
3. Press the C key to take the picture.
Number of picturesThe number of pictures you can save in the phone willvary according to the settings you have configured:the higher the resolution, the bigger the file size.
A message will warn you if there isn’t enough memoryto store the picture you have just taken. In this case,you must delete data (sounds, images, etc.) beforestoring a new picture. Select Multimedia > Memorystatus to check the memory available in your phone.
Clip mode: using Foto TalkCreate a clipSelecting the Clip mode before taking a picture allowsyou to use the Foto Talk feature: a quick way to makea picture + sound clip to send to your friends andrelatives.1. When in idle mode, press C to activate the
camera.2. Press C again to take the picture; the Record
sound window will then open automatically.3. Record the sound or message of your choice,
press c to cancel or , to stop the recording(you can also wait for the maximum recordingtime of 30 seconds to be reached).
Philips855_APMEA.book Page 23 Friday, July 9, 2004 1:05 PM

24 Taking pictures
OptionsPress , to access the Clip mode options, which are:
Review the picturesThe pictures you save are automatically stored in theMultimedia > Picture album menu. Select a picture in thelist and press > to access the graphical display. Thenpress + or - to go to the next or previous picture,or , to Send, Delete, Modify, Rotate or Rename thepicture. Press < to go back to the text list.
See “Picture album” page 69 for detailed informationon how to retouch your pictures.
Receive a callWhen receiving a call while using the camera:1. Answering the call will quit any action linked to
the camera: picture preview, picture shot, self-timer, options browsing, etc. Your phone willreturn to idle when you hang up. If you had takena picture that was not yet saved, it will be lost.
2. Rejecting the call will also quit any action linkedto the camera, and will bring you back to thepreview screen.
Make a callTo make a call, you must first long press c to goback to the idle screen. Then enter the number orselect a name of your phonebook, press ( to dialand press ) to hang up.
Further to the settings that are available directlywithin the preview screen as described above, severalmenus also allow you to set other options. Press ,while the camera mode is active to access them.In all cases, select an option, and press , for thenext picture to be taken using this mode, or c tocancel.
Save clip
To Save the clip you havecreated: the picture in Picturealbum and the recorded soundin Sound album.
Change clip To Change the clip you made.
Play clip To Play it.
MMS orSend via E-mail
To Send your clip via MMS orE-mail: selecting one of theseoptions will automaticallylaunch the correspondingapplication.
Settings
Philips855_APMEA.book Page 24 Friday, July 9, 2004 1:05 PM

Taking pictures 25
When quitting the camera application, settings youhave defined will be saved and available when reusingthe camera or until you change them again.
General settingsTime & dateAllows you to select what will be displayed on thepictures you take: Time & date, Date only or nothing.Camera mode
This setting is also available directly within thepreview mode, when the camera is first activated.
Allows you to switch from VGA (640 x 480 pixels) toWallpaper (128 x 160 pixels), to Clip (128 x 160 pixels)to Fotocall (96 x 64). The Camera mode you select isdisplayed in the bottom right corner of the screen.Picture qualityAllows you to choose an image quality availableamong the following: Low, Medium, High.SoundsBoth Alert and Shoot sounds can be set from this menu.The first one occurs 3 seconds before the picture istaken, the second one when it’s shot. In both cases,select On, and press , to access the list of availablesounds. Select one of the sounds, then press , toactivate it.
ResetAllows you to reset all values to the default ones. Press, to confirm.
FramesAllows you to choose a frame from the ones availablein the list, and that will be applied to the picture youtake. Selecting a Frame automatically sets the mode to128 x 160 pixels. Press , to confirm your choice.
Effect modeAllows you to choose a mode available from thefollowing: Normal, Black & white, Sepia, Digital,Embossed, Negative color, Edge and Edge 2. The effectwill be applied to the picture according to the modeyou chose (e.g., Sepia will take a brown and beigepicture, giving the impression of an old-timespicture). The default mode is Normal.
Vision modeAllows you to choose one of the two modes available:Normal and Night. The default mode is Normal.
Self-portrait & Self-timerSet these options to On to activate them and pressc to go back to camera preview and take pictures(see page 22 and page 23).
Philips855_APMEA.book Page 25 Friday, July 9, 2004 1:05 PM

26 Contacts
6 • Contacts
All operations described in this chapter require therelevant Phonebook, whether in the SIM or in thephone, to be selected.
Your mobile phone has two phonebooks. The SIMphonebook is located on the SIM card and thenumber of entries depends on the card capacity.Thesecond phonebook is built into the mobile’s memoryand can hold up to 499 names.
The SIM card capacity depends on the type of card youhave. Please check with your local dealer for fullinformation on this subject.The phonebook located on your phone shares the mobilecapacity and memory with other features. As such, theyare inter-dependent: the more names you create, the lessevents you can store and vice-versa. 499 is themaximum number of names and events cards, providedthat other features (memos, sounds, pictures, etc.) arenot using a significant amount of the phone’s memory.
The Contacts menu allows you to select one of the twoavailable phonebooks: the one on your SIM card orthe one in your phone. When entering new names inone of the Contacts, they will only be added to the oneyou have selected.
The Delete all option does NOT apply to the SIMphonebook.Copy to phone will copy the content of your SIM cardinto your phone. Selecting this option twice willduplicate all the names.
If you are using a SIM card for the first time, followthe standard SIM card installation procedure asdescribed page 7, then go to the section titled “Addnames in the phonebook” below.
Press , and select Contacts, Settings,Contacts select. Then press + or- to select the phonebook located in
your SIM card. Names added to this phonebook canthen be copied into the phonebook located in yourphone.
If you cancelled or aborted the automatic copy of yourSIM phonebook at very first switch, you can do itmanually: press , and select Contacts, Settings,then Copy to phone.
When you copy the contents of yourSIM phonebook into your phone, youcan still use the phonebook of your SIM
card, even though it features less fields of information.
SIM card phonebook
%%
Philips855_APMEA.book Page 26 Friday, July 9, 2004 1:05 PM
Contacts 27
Your mobile phone only manages one phonebook at atime and will ignore the information relative to theother one: e.g., if «Smith» is present in bothphonebooks and if you delete it in the phone, itremains unchanged in the SIM.
The default selected phonebook is theone located in your phone. It can holdup to 499 names and can be reset at
once using the Reset phonebook option. Dependingon SIM card capacity, names added to thisphonebook can then be copied into the SIMphonebook (see “Copy to SIM” page 31).
In the SIM cardTo add a name in the SIM phonebook:1. Press - to enter the phonebook, select New,
then press ,.2. Enter the name, then the number of your choice
and press ,.
A number can contain a maximum of 40 digits,depending on your SIM card.Entering all numbers, including local ones withinternational prefix, country code and area code willallow you to dial them from any location.
3. Select the type of number allocated to the name:Phone, Fax or Data and press , to confirmand store this name in your phonebook.
In the phoneThe phonebook in your phone can holds moreinformation fields than the SIM card phonebook.Including (in latin characters):
You can create up to 499 records, holding up to amaximum of 7 information fields for each, with amaximum of 5 numeric fields. For example, you cansave 2 mobile numbers, 3 work numbers, an e-mailaddress and a text note, all for the same person.
Phone’s phonebook
Add names in the phonebook
%
First and last names up to 20 characters
Numbers fields(Mobile, Work, etc.)
up to 40 digits and 1 «+»
Extra fields(e-mail and note)
up to 50 characters
Group selection 20 groups available
Philips855_APMEA.book Page 27 Friday, July 9, 2004 1:05 PM

28 Contacts
Add a record in the phone’s phonebookAdd a name field1. Press - to enter the Contacts, select <New>,
and then press ,.2. Enter the last name of your contact and confirm
by pressing ,, then enter their first name andconfirm by pressing ,.
One of the two name fields can be empty, but not both.To go back to the previous field, press c.
Add a number/text field1. After entering the name of your contact, you will
be in the Number type menu. You can choosefrom numerical fields (Mobile, Fax, Data, Pager,Home, Work) or alphanumeric fields (Note, e-mail). Make your selection and enter the relevantnumber or text. Then press , to save this newrecord.
2. The phone will then prompt you the Group:choose the group you want this name to belongto and press , to confirm. The record is thensaved in your phone’s phonebook.
3. You can associate a specific Melody and Picture toeach group, as well as Rename groups. SelectContacts > Settings > Group settings, then refer to“Fotocall: see & hear who’s calling” page 28 for
complete information). When receiving a callfrom a contact associated to a group, the melodyand/or picture defined for this group willautomatically ring and/or appear on the screen.
Own numbersThe Own numbers option that appears in yourphonebook should contain your own phone number.If not, we advise that you enter your mobile numberas well as any other relevant information.
Although all its fields can be empty, the «Ownnumbers» item cannot be deleted.
This feature is only available when you select thephonebook of your phone, NOT the SIM phonebook.
The Fotocall feature allows you to personalize thegroups available with their own name («Friends»,«Office», etc.), a given picture (from the Picture album)and a given melody (from the Ringers list).You can link one or several contacts from yourphonebook to a group. When a name in that groupcalls, the contact’s name will appear along with thedefined picture of that group. The melody defined forthat group will also ring.
Fotocall: see & hear who’s calling
Philips855_APMEA.book Page 28 Friday, July 9, 2004 1:05 PM

Contacts 29
For that important person, why not set up a group justfor them. Use the camera to save their picture in thePicture album and Sound recording to save their voiceas a ringer. When they call, you will truly be able tosee and hear them (for camera, see page 20 and forsound recording, see page 69).
1. To use Fotocall, you need to be using thephonebook in the phone; if you are not alreadydoing so, see “Copy the SIM phonebook” page 8.
2. Then select Groups setting, press , and selectthe group of your choice.
3. Rename the group to be identified («Friends»,«Kids», etc.) and select the Melody and thePicture to be associated to this group.
4. Long press c to go back to idle, then - todisplay the content of your Phonebook. Select acontact you wish to link to this group and press,. Then choose Select group and select thegroup of your choice.
When this contact calls you, the Melody and Pictureassociated to his group will ring/appear on the screen.
Once you have stored names in your phonebook,press - when in idle mode to access the Contacts.You can search for a name in the phonebook bypressing the corresponding key for the letter that youwant to go to in the list (e.g., press 8 twice toaccess the letter «U»). The first record starting withthis letter is selected in the list. Depending on thephonebook menu you have selected, you will haveaccess to part or all of the following options:
In the SIM cardSelect a name in the SIM card phonebook, then press, to access one of the following options:
- Delete to delete the selected name and number,- Change to change the selected name and all
related information,
Edit and manage names
• Delete• Show• Copy to SIM• Flash dial• Change type• Call• Change name• Include in a group
• Delete all• Send an SMS• Send an MMS• Make default• Copy to phone• Call handsfree• Associate a voice dial• Send via IrDA
Philips855_APMEA.book Page 29 Friday, July 9, 2004 1:05 PM

30 Contacts
- Copy to phone to copy the selected name and allrelated information into the phonebook locatedin your phone. If you cancelled the automaticcopy of the SIM phonebook at the very firstswitch of your phone, you need to do it manually.
In the phoneAdd a field1. To add a new field to an existing record, select the
name of your choice, select Show and press ,.2. Select <New> and press ,. Choose the type
of field to be added and press ,. Enter thenumber or text, then press , to save changes.
3. Repeat steps 1 and 2 to add up to 6 fields to thesame record. Make a short press on c to goback to the previous menu, or a long press to goback to the idle mode.
Numbers or text will appear in order of creation date.The first fax or phone number you enter becomes thedefault number. As such, it appears in first positionin the list. To make another number default, see“Make default” page 31. Alphanumeric fields (noteand e-mail) can only be changed or deleted.
Change a field content1. To change the content of a field in an existing
record, select the name of your choice, press,, select Show and press , again.
2. Select the field to be changed in the list and press,.
3. In the carousel that appears, select Change andpress ,. Make the changes wanted and press, to save them.
Change a field typeTo change a field type of an existingrecord, repeat steps 1 to 3 of the “Changea field content” paragraph. Then select
Change type in the carousel menu, select the new typeof number and press , to confirm your choice.
If you copied your SIM phonebook into your phone,some numbers might appear as being of «No type» anddon’t have any icon. «No type» numbers can bechanged: follow the procedure described previously todefine a type for these numbers.
Delete a fieldTo delete a field of an existing record,repeat steps 1 to 3 of the “Change a fieldcontent”paragraph. Then select Delete
in the carousel menu, and press , to confirm.
&
'
Philips855_APMEA.book Page 30 Friday, July 9, 2004 1:05 PM

Contacts 31
Make defaultThe first number you enter when creatinga new record becomes the defaultnumber: it will appear first on the fields
list and is automatically called when pressing the pick-upkey or when pressing , and selecting the Call, Callhandsfree or Send SMS option. To change the defaultnumber (e.g. make the «Work» number default insteadof the «Home» number), repeat steps 1 to 3 of the“Change a field content” paragraph. Then select Makedefault in the carousel menu, and press , to confirm.Copy to SIM
As mentioned earlier, entering names inthe SIM phonebook can be useful if youchange phones frequently. If you copy
phone numbers into the SIM card, your phonebook isalways updated when switching phonebooks or whenusing another phone.To copy a number into the SIM card phonebook, repeatsteps 1 to 3 of the “Change a field content”paragraph.Then select Copy to SIM and press ,.
For your own comfort and safety, ensure you move thephone away from your ear when calling handsfree,especially when increasing the volume.
Emergency numberThe emergency number will call theemergency services number in yourcountry. In most cases, you can call this
number even if you haven’t yet entered your PIN.
Depending on the network operator, the emergencynumber can be dialled without the SIM card beinginserted. In Europe the standard emergency number is112, in the UK it is 999.
1. To call this number, enter it in idle mode bypressing the corresponding keys, or press ,and select Contacts > View Names List >Emergency number.
2. Press ( to dial and press ) to hang up.Other numberEnter a number
In idle mode, enter a number bypressing the corresponding keys. Press( to dial and press ) to hang up.
Pressing , will let you access a carousel allowingyou to call this number, store it or send a SMS.
Select a name1. Press - and select the record of your choice.2. If you selected the phonebook in your SIM card:
Make calls
()
&%
*
Philips855_APMEA.book Page 31 Friday, July 9, 2004 1:05 PM

32 Contacts
- once the record is selected, simply press (to call, or
- press , twice to access the next carousel,then select Call or Call handsfree and press ,to dial the number.
3. If you selected the phonebook in your phone:• To call the default number:
- once the record selected, simply press ( todial, or
- press , to access the record carousel, thenselect Call or Call handsfree.
• To call any other number, choose Show once therecord is selected and choose a number type in the list(Mobile, Home, etc.). Press , to access the nextcarousel and select Call or Call handsfree.
4. In all cases, press ) to hang up.
You can also switch to handsfree while a standard callis in progress: press ,, select Activ.h/free and press, to confirm.
Use Flash dialIn idle mode, press and hold a keybetween 2 and 9 to dial theassociated entry (see “Hotkeys”
page 35): connection is established. Press ) tohang up.
Use Voice dialIn idle mode, press and hold ,, thenpronounce the saved voice tag (see“Voice dial” page 38). If the phone
recognizes the voice tag, it dials the number associatedwith it. Press ) to hang up.
+
'
Philips855_APMEA.book Page 32 Friday, July 9, 2004 1:05 PM

Settings 33
7 • SettingsThe Settings menu allows you to customise your phoneand change the settings related to each availableoption (sounds, time and date, security, etc.). TheProfiles menu allows you to change several settings atonce (see page 44).
SilentAllows you to set the Silence mode On orOff. When this setting is On, all alerts aredeactivated and the vibra alert is active.
The Silent mode also applies to key tones.
Ringer volume By default the ringer volume can be setto Medium. Press + or - to setthe volume of your ringer from Silent toIncreasing.
RingerAllows you to select the ringer tone fromthe choices available. The list also includesrecorded sounds and melodies attached to
messages you receive (from e-mail, MMS, etc.).
Scroll through the list by pressing + or - andwait to hear the selected melody being played. Press, to select this melody as ringer, c to cancel, ormove to the next melody.
You will not hear the melody if the volume ringer is setto Off or if the Silence mode was activated (seepage 12).
Messages RingerAllows you to set an alert beep On orOff, for each time you receive a newmessage. When On, this option also
allows you to select the alert of your choice from theringers list.
EqualiserThis option allows you to choose fromdifferent audio settings, also availablewhile a call is in progress. In this case,
press ,, select Equaliser, scroll through the list andwait a few seconds to hear the difference. Press ,to confirm your choice.
Key tonesAllows you to set the key tones On orOff. Even when set Off, DTMF areplayed during calls (see page 88).
Sounds
,
-
.&
Philips855_APMEA.book Page 33 Friday, July 9, 2004 1:05 PM

34 Settings
Sounds AlertsAllows you to set alert beeps On or Offfor the following items:
- when an Event you programmed in yourorganiser is due,
- when you have missed a call,- when the Battery is low and requires charging,- to manage the duration of your calls, first after 45
seconds, then every minute of an ongoing call(the beep cannot be heard by the caller).
This menu only allows you to activate/deactivate thealert sounds, NOT the alerts themselves. E.g. settingthe event alert Off will not prevent your phone fromdisplaying the Reminder screen (if you programmedone), but the corresponding sound will not be played.
Vibra alertAllows you to set the vibra alert On orOff when receiving a call, when an eventset in the organiser is due, when you
receive a message and when the alarm rings.
The vibra alert is always Off when you connect thecharger or the Cigarette Lighter Adapter.
AnimationAllows you to set the animation of thecarousel menus On or Off. When On,this option will also scroll texts, such amessage selected in the Read SMS menu.
Deactivating this function increases the autonomy ofyour phone.
Subdisplay contrastAllows you to choose among severallevels of contrast that will apply to thesubdisplay.
BacklightThe backlight is activated whenreceiving incoming calls or messages,browsing lists and menus, etc. Press+ or - to set the backlight Duration by selectingone of the available values and press , to confirm.
Deactivating this function increases the autonomy ofyour phone.
Display
&
/(
Philips855_APMEA.book Page 34 Friday, July 9, 2004 1:05 PM

Settings 35
WallpaperAllows you to set the Wallpaper of themain screen On or Off. When On, thepicture you selected is displayed in
Normal mode when in idle mode and in Fade mode inother contexts.
Only JPEG type pictures can be used as Wallpapers.
Sub wallpaperAllows you to set the Wallpaper of theexternal screen On or Off. The behavioris then the same as the Wallpaperdescribed above.
HotkeysInstead of entering the various menusand browsing the lists, you can set updirect access to a specific function by
linking it to a Hotkey. A long press on the key will thenautomatically activate the function or call theassociated number (Flash dial).
You can only program keys 2 to 9, as the othersare predefined and locked, preventing you fromreprogramming them. Depending on your serviceprovider, other hotkeys may be predefined and locked.
1. Select a key from 2 to 9 and press ,.2. Browse the list to select the function you wish to
associate with this key (see list following). Press, to confirm your choice.
If the selected key is already set, you can reprogram it:select Settings > Hotkeys > a hotkey in the list. Press, twice, select Change and press ,. This willbring you to the list of available functions.
3. To use the hotkeys, simply press and hold thekey corresponding to the function you want tolaunch or to the number you want to dial whilein idle mode.
You can associate hotkeys 2 to 9 to thefunctions of the following table:
Short cuts
0
1(&
Dials the associated number of thephonebook.
Opens the Send Messages menu.
+'
Philips855_APMEA.book Page 35 Friday, July 9, 2004 1:05 PM

36 Settings
Opens the Read Messages menu.
Activates the Instant message feature, toquickly Reply to the sender of thereceived message.
Launches MMS for you to send amultimedia message.
Activates the Silence profile (vibra on,ringer volume off).
Activates the Headset profile (ringervolume medium, any key answer on).
Activates the Meeting profile (vibra on,ringer and all keys set to silent).
Activates the Outdoors profile (ringervolume high).
Activates the Personal profile.
%
,
,1
,*
,
Activates the Autonomy profile, whichextends the battery autonomy(animation off, vibra off, backlightoff, ringer volume medium).
Direct access to the Calculator.
Redials the number of the last callreceived.
Dials the emergency call number.
Launches the Demo mode.
Opens the E-mail menu for access tothe mail boxes.
Displays the remaining credit balance.Subscription dependent
,&
&
*
'
2
Philips855_APMEA.book Page 36 Friday, July 9, 2004 1:05 PM

Settings 37
Displays the Accumulated cost ofoutgoing calls.Subscription dependent
Opens the Add event menu of theOrganiser.
Displays the Events list of theOrganiser menu.
Opens the Alarm menu.
Allows to record a new sound.
Open the list of sounds (includingyour own recordings) for you tochoose from. Press > to play.
Launches a WAP session.Subscription dependent
,
,
(
&
0
Opens the Sound album.
Opens the Picture album.
Forwards ALL calls to the voicemailbox.
Direct access to the Brick Game.
Opens the Games menu.
Subscription dependent.
Automatically swaps phonebooks.
Launches Java.
Launches an infrared connection.
,
/ (3
3
4
%)
Philips855_APMEA.book Page 37 Friday, July 9, 2004 1:05 PM
38 Settings
Voice commandInstead of entering the various menusand browsing the lists, you can also set avoice tag that will activate a feature(e.g., launch the Calculator).
You can associate a Voice command to all thefunctions supported by the Hotkeys (see page 35),except for «Get mail» and «Alarm clock».
1. Select Settings > Voice Command > <New> andpress ,, then browse the list to select thefunction to be set with a voice tag. Press , toconfirm your choice.
2. When Press OK and speak appears, follow theinstructions displayed on the screen. Whenprompted to record your voice tag, make sureyou are in a quiet environment, choose a shortand simple word and clearly pronounce it.
3. Press c and repeat the steps described aboveto add more voice commands.
To use the voice command, press and hold , whenin idle mode, then say the recorded voice tag. Wordsrecorded as voice tags can be played, changed ordeleted at any time.
Voice dialVoice dial allows you to quickly call aname from your phonebook: set a voicetag by recording a word that will call thecorresponding name when pronounced.
1. Select Settings > Voice dial > <New> and press ,.2. Browse the list to select the call number to be set
with a voice tag. Depending on the selectedphonebook (see “Contacts” page 26):- SIM phonebook: select a name in the list and
press ,,- Phone’s phonebook: select a name in the list,
then the phone number of your choice ifseveral numbers were stored for this name andpress ,.
3. When Add voice tag? appears, press , andfollow the instructions displayed on the screen.When prompted to record your voice tag, makesure you are in a quiet environment, choose ashort and simple word and clearly pronounce it.
To use the voice command, press and hold , whenin idle mode, then say the voice tag corresponding tothe number you want to dial.To display the list of voice dials you have defined,select Settings > Voice Commands or Voice dial and press,. Words recorded as voice tags can be played,changed or deleted at any time.
'
Philips855_APMEA.book Page 38 Friday, July 9, 2004 1:05 PM
Settings 39
Up to 15 voice tags can be defined and shared betweenvoice dial and voice command.
Navigation iconAllows you to set the Navigation iconOn or Off. When On, it appears in idlemode, and allows you to spot the menus
that can be access via the phone’s navigation key.
Menus can always be accessed this way, even when theoption is set to Off.
Public namesAllows you to manage a specific nameslist, called Public Names list, and restrictcalls to this list via the Call restrictionoption.
This feature is subscription dependent and requires aPIN2 code (see page 40).
Call restrictionAllows you restrict the calls to the PublicNames list. In this case, you can onlyaccess the names of the Public names list,
as opposed to the Contacts of the main menu.
This function is subscription dependent and requiresa PIN2 code (see page 40). Please note that whenactivating this option, it might also apply to WAP ande-mail connections over GPRS.
Public namesAllows you to consult and modify yourPublic Names list. You can enter a newname, modify or delete a name in the
list via PIN2 code. Use the <New> option to enter thename and phone number, then select the numbertype: Phone, Fax or Data. Names in this list can bechanged or deleted.
Call barringThis menu allows you to limit the use ofyour phone to specific calls by lettingyou bar both outgoing and incoming
calls. This function is network dependent and requiresa specific call barring password supplied by yourservice provider. Outgoing calls
The Outgoing menu allows you to selectbetween All calls, International calls andIntl. Exc. Home calls (the latter allowing
you to call your home country when you are abroad).You can also Deactivate the bar on outgoing calls.
Security
5,
*
Philips855_APMEA.book Page 39 Friday, July 9, 2004 1:05 PM

40 Settings
These menus then allow you to bar, within each availableoption, All calls, Voice calls, Data calls or Fax calls.Incoming calls
The Incoming menu allows you to selectAll calls or When roaming. It alsoprovides access to the Cancel menu toremove bar on incoming calls.
These menus then allow you to bar, within each availableoption, All calls, Voice calls, Data calls or Fax calls.Status
In each sub-menu (All calls, Whenroaming, etc.), the Status option allowsyou to know whether a type of call isbarred or not.
Change codesAllows you to change your PIN andPIN 2 codes, as well as the call Barringcode.
Depending on your SIM card, some features oroptions may require a PIN2 secret code. This is asecond secret 4 to 8-digit code given to you by youroperator.
If you enter a wrong PIN2 code 3 times, your SIMcard is blocked. To unblock it, request the PUK2 codefrom your operator or retailer.
If you enter an incorrect PUK code 10 times in a row,the SIM card will be blocked and unusable. If thishappens, contact your operator or retailer.
PIN protectionThis allows you to set the PINprotection On or Off. When On, youwill be asked to enter your PIN codewhen switching your phone on.
You cannot change your PIN code if this option is Off.
This menu allows you to handle the connectionbetween the phone and the network, registermanually the available networks and manage yourpreferred networks.
GPRS attachYour mobile integrates features thatsupport GPRS (Global Packet RadioService), a service allowing you to
exchange data with high speed rates and to stay alwayson-line (i.e. have a permanent connection to theInternet and WAP).
%
Network
%5
3
Philips855_APMEA.book Page 40 Friday, July 9, 2004 1:05 PM
Settings 41
Contact your phone operator to have full informationabout GPRS availability over their network and for anappropriate subscription. You might also need to configureyour phone with the GPRS settings supplied by youroperator, by using the menus described in this section.
This menu allows you to define the attach mode ofyour mobile phone to the GPRS service:Always onYour phone will always register to the GPRS service.This option allows faster GPRS connection. Howeverit will increase energy consumption.For data callsYour phone will automatically register to the GPRSservice only when required. This option reducesenergy consumption, however it will increase theconnection delay.
In spite of these settings, you must still select the bearer(GSM or GPRS) in the menus of each application tobe used (e.g., WAP, MMS, e-mail, etc.).
Register againProvides you with a list of the networksavailable in the area when the Manualmode is selected. Select the network you
want to register with and press , to confirm.
Preferred listAllows you to build a network list inorder of preference. Once defined, thephone will try to register on a network,according to your preferences.
Access settingsThis menu allows you to create severaldata profiles: when using WAP or whensending a multimedia message (MMS),
the selected profile will be used to connect to theGSM or GPRS network.
All options described below are operator and/orsubscription dependent.With some operators, you mayreceive a SMS which contains access parameters that willbe stored automatically. Please contact your networkoperator for detailed information on this subject.
Change nameAllows you to enter or change the nameof the selected profile. Press ,, enterthe name of your choice and press ,to confirm.
Some pre-configured profiles might be locked,preventing re-programming and renaming.
)
Philips855_APMEA.book Page 41 Friday, July 9, 2004 1:05 PM

42 Settings
ShowAllows you to visualise all parameters ofthe selected profile (ISP number, APN,etc.), either GSM or GPRS.
GSM settingsAllows you to enter or change the GSMsettings and gives you access to thefollowing items:
Login and Password allow you to enter the login andpassword needed. In both cases, enter the informationand press , to confirm.Phone Number allows you to enter the phone numberneeded to establish a connection. Select Phone numbersand press ,, then press + or - to select:
- ISDN No. to enter an ISDN ISP number, OR - Analogic No. to enter an analogic number.
In both cases, enter the «+» sign followed by thenumber provided by your operator and press ,.
Contact your operator to know what type of numberyou should select.
Inactivity time allows you to enter an inactivity timeperiod after which the phone automaticallydisconnects (if a connection was in progress) andreturns to idle screen. Select Inactivity time and press,, then enter a value (in seconds) of over 30 s. andpress ,.
GPRS settingsThis allows you to change the GPRSsettings, Login, Password and Inactivitytime (the same fields and the same
instructions as for GSM settings, please refer to theprevious section).APN allows you to enter the address of the externaldata network you want to connect to, a text string (orIP address, e.g., wap.operatorname.fr) used toestablish the connection. Select APN and press ,,then enter the appropriate address and press ,.
Error messages during connections are mainly due toincorrect parameters: you should contact your operatorbefore first use, in order to have the appropriate settings.With some operators, the access parameters can be setremotely. Please check with your operator.
This menu allows you to set the time and date, time zone,daylight savings, and change the clock display mode.
Clock displayAllows you to select Analogue, Digital orTiny time formats when shown in idlemode, by pressing + or -. In allcases, press , to confirm.
3
Time and date
3
( &
Philips855_APMEA.book Page 42 Friday, July 9, 2004 1:05 PM

Settings 43
Set dateAllows you to set the date by pressingthe appropriate numeric keys. You canalso set the date by moving + or-). Press , to confirm.
Date formatAllows you to select one of the twoavailable date formats, either Western orThai. Press , to confirm.
Time zone
The time zone and daylight savings are to be set first.You should then double-check date and time ifpreviously set. To know which time zone you are in,we recommend you to check in an atlas or anencyclopedia.
The Time zone option allows you to setthe time zone you belong to, accordingto GMT (Greenwich Meridian Time).
Move + or - to select the settingcorresponding to your area.
Daylight saving
This setting only concerns countries in which time isset according to summer/winter time (e.g. GreenwichMeridian Time / British Summer Time).
This option allows you to set the daylightsavings to On (in summer time) or Off (inwinter time) by moving + or -.
As this setting impacts the date and time option, itshould be set first. If daylight saving is On and you setthe time to 12:00, it will automatically switch to 13:00when turning the option to Off.
Set timeAllows you to set the time by pressingthe appropriate keys or moving + or- to increase or decrease the timeminute by minute.
This menu allows you to select a language for all menutext. Press + or - to select the language of yourchoice, then press , to confirm.
')
6Language
'& ,
Philips855_APMEA.book Page 43 Friday, July 9, 2004 1:05 PM

44 Settings
This menu allows you to access a group of predefinedsettings, which let you quickly adapt your phone toyour environment by changing several settings atonce. For example, selecting Meeting will set yourringer volume to silent, activate vibra and deactivatethe key tones (the other items are set according to thesettings you configured). When your meeting is over,selecting Personal will reactivate all your usual settings.
When you associate a hotkey to a profile (e.g. long presskey 3 activates Meeting, see “Hotkeys” page 35),also long press this key to deactivate it and go back tothe Personal settings.
The settings listed in the column Personal, in thefollowing table, are default settings preset duringproduction. As you can change them, the personalsettings in your phone may differ from the table.
Each box of the table refers to the settings asstored in the Personal menu (whether you havechanged the settings or not).
Profiles
Profiles
Vibra alert On Off OnRinger volume Medium Medium High SilentKey tones On OffOrganiser alerts OnBattery low alert OnMessage alert OnBacklight 10 sec OffZoom OffAny key answers OffAnimation On Off
& *
Philips855_APMEA.book Page 44 Friday, July 9, 2004 1:05 PM

Settings 45
When connecting an accessory, the settings describedin the table below also become available. Whendisconnecting the accessory, the phone goes back tothe Personal profile.
AccessoriesProfiles
Vibra alert OffRinger volume Medium MediumKey tonesOrganiser alertsBattery low alertMessage alertBacklight OffAny key answers OnAnimation Off
1 ,
Philips855_APMEA.book Page 45 Friday, July 9, 2004 1:05 PM
46 Messages
8 • Messages
The Send SMS item of the Messagesmenu allows you to:
• send a standard or customised short text messageto someone,
• edit the last message sent and send it again,• add an iMelody, pre-defined sounds, an
animation or a picture to your message.
The features above are not available from the idle modewhen the Instant message feature is On (see page 58). Inthis case, you can only access the Answer option.
The Standard SMS messages are displayed in a list. Press+ or - to browse: for example Can you ring meback at this number... allows you to select a pre-configuredmessage including your number, if this number is thefirst one of the Own num. option (see page 28).
Send a SMSTo a name in the listTo the default number if several (phonebook in phone) or to the unique phone number (phonebook in SIM)1. Press -, select the name of your choice and
press ,.2. Select Send SMS and press ,, then select the
type of message to be sent and press ,. Enteryour message, attach a graphic or a sound if youwish, then select Send now or Save (see below).
To the number of your choice (phone name list only)1. Press - and select the record of your choice,
then press ,, select Show and press ,.2. Select the number of your choice and press ,.3. Proceed as described in step 2 of the previous
paragraph.To any other nameTo send a short message to someone whose numberisn’t stored in the phonebook, press , and selectMessages, SMS then Send SMS and New. Enter thephone number to which the message should be sent toand press ,. Then follow the instructions detailedabove to send a message.
SMS
Philips855_APMEA.book Page 46 Friday, July 9, 2004 1:05 PM

Messages 47
Together with an attachmentThis option allows you to attach a sound, picture oranimation to your message and press , to confirmand attach it to your message. Depending on the type offile you want to attach, select Add graphic to attach abitmap image or an animation, and/or Add sound toattach a melody. Select the sub-menu of your choice,then one of the available items in the list that appears,and press , to confirm and attach it to your message.
You can send up to 2 attachments of 2 different typestogether with your SMS. Animations and pictures areexclusive: if you first select an animation, then a picture,only the picture will be taken into account and vice-versa.
Some pictures, animations and sounds are pre-definedand supplied as standard with your mobile phone.Personal pictures and sounds, e.g., that you havereceived via SMS or e-mail and then stored in therelevant menus, will automatically appear in the«Own» sub-menus (Own melodies, Own animations,etc.). You cannot send «Own» items via SMS whenthey are copyright-protected.
Send nowThis allows you to send the currentmessage you have entered (to learn howto enter text and numbers, see “Text or
number entry” page 18). Press , to confirm.Save
Allows you to store the current messageand its associated icon and melody ifany. Press , to confirm.
Read SMSThe Read SMS option in the Messagesmenu allows you to consult the list ofSMS you have saved and received, and
that are first stored on your SIM card. Several optionsallow you to then manage them directly on yourmobile phone.Received MessagesThe messages you have received and already read arelabelled with . Messages received but not yet readare labelled with a sealed envelope icon. Select amessage and press , to read it. When displayed,press , to access the following options:
,
Philips855_APMEA.book Page 47 Friday, July 9, 2004 1:05 PM

48 Messages
Saved MessagesThe messages you sent are labelled with in normalmode or with a mail box icon in auto save SMS mode(see page 49). Select the message you want and press, to read it. When displayed, press , to accessthe same options, including storing the caller’s number.
Reply to the sender,
Forward the selected message (choose therecipient in the phonebook or enter aphone number manually),
Delete the selected message,
Storenumber
of the sender if it is attached to themessage,
Storemelody
if a melody was sent together with theSMS,
Storegraphic(s)
if one or several graphics and/oranimations were sent together withthe message,
Extract a number included in the messageitself, if this number is included indouble quotes (several numbers canbe included and extracted),
Call the sender of the message (operator-dependent),
Edit a message in the Read or Archive folder,modifiy it and resend it to someone(you can add a picture or a sound).
If a picture or a sound was attached tothe message you edit, you must firstdetach it and store it in the Picturealbum or in the Own melodies menu ofthe ringers list. Then re-attach it toyour message (see page 47).
Move toarchive
allows you to store read messages inthe phone memory. Saved messagescan then be consulted by pressing, and selecting Messages, SMSArchive,
Moving a message to the archive listdeletes it from the read SMS list.
Philips855_APMEA.book Page 48 Friday, July 9, 2004 1:05 PM

Messages 49
Delete all SMSAllows you to delete all the messages of either the ReadSMS (messages on SIM card) or SMS Archive (messagesin phone) lists of the Messages menu.
SMS settingsThis menu allows you to customise yourSMS via the options described below.
SMS centreAllows you to select your default SMScentre. If not available on your SIM card,you must enter your SMS centre number.
SignatureAllows you to sign your SMS. Bydefault, your signature is you phonenumber, added at the end of your
message (which length is consequently reduced). Youcan Edit the signature, Change and Save it.Validity period
This feature is subscription dependent.
Allows you to select the length of timeyour message is to be stored in yourSMS centre. This is useful when the
recipient is not connected to the network (and thuscannot receive your message immediately).
Reply path
This feature is subscription dependent.
Allows you to set the Reply path option Onor Off. When On, it allows you to transmitthe number of your SMS message
centre together with the message. Your correspondentcan then reply using your own SMS centre and nottheirs. This speeds up the rate of transmission.Delivery report
This feature is subscription dependent.
Informs you via an SMS whether yourSMS was received or not. This optioncan be set On or Off.
Auto save SMS Allows you to set On or Off the optionof automatically saving messages sent inthe Archive menu.
SMS ArchiveAllows you to consult all read messagesyou saved and to Reset all archivedmessages at once. You save a message by
activating the Auto save SMS option (see above), or byselecting a received message, pressing , twice andselecting Move to Archive.
&
&
' ,&
,
,
Philips855_APMEA.book Page 49 Friday, July 9, 2004 1:05 PM
50 Messages
If not included in your phone subscription, you mustsubscribe to an e-mail account (over the phone or viaInternet from a computer) and have received thesettings information from your provider. In this case,all parameters are communicated to you by yourprovider and/or operator as described below and mustbe entered as given.If included in your subscription, you simply have toenter the login, password and e-mail address of youre-mail account. In some cases, your operator mightalso be your e-mail service provider.
Your phone might have been pre-configured. In this case,most parameters are already set and you don’t have to changethem (except for Login, Password and E-mail addresswhich are up to you when creating an e-mail account).
To enter text and numbers, including specific signs suchas @ or %, see the characters table described page 19.
SettingsNetwork accessThis menu allows you to configure your phone and tohandle the connection to the network, whether GSMor GPRS, in order to then connect to the appropriateserver that will let you send and receive e-mails.
All options described below are operator and/orsubscription dependent.
1. Press ,, select Messages > E-mail > E-mail 1 >Settings and press ,.
2. Select Network Access and press ,.Bearer
This menu allows you to select the typeof network used when launching aconnection.
GSM or GPRS: your mobile will only use the GSM orthe GPRS network for e-mail connections.GPRS first: your mobile will first try to connect to theGPRS network, then to the GSM network if theGPRS network isn’t available when connecting.
Selecting this option you need to have both GSM andGPRS settings configured.
/
Philips855_APMEA.book Page 50 Friday, July 9, 2004 1:05 PM

Messages 51
GPRS settingsThis menu allows you to enter orchange the GPRS settingscommunicated to you by your operator,
which are: APN, Login and Password. All settings mustbe entered as given to you by your operator.
Error messages during connections are mainly due toincorrect parameters: you should contact youroperator before first use, in order to have theappropriate GPRS parameters.
GSM settingsThis menu allows you to enter orchange the GSM settingscommunicated to you by your operator,
which are: Phone number, Auto disconnection, Loginand Password. Enter them as defined.Phone Number: allows you to enter the phone numberprovided by your ISP and needed to establish aconnection. Press + or - to select:
- ISDN number to enter an ISDN ISP number,OR
- Analogic No. to enter an analogic number, thenpress ,.
Contact your ISP to know what type of number youshould select.
Auto disconnection: allows you to select an inactivitytime period after which the phone automaticallydisconnects (if a connection was is progress) from thenetwork. Press + or - to select a value from 3to 10min. and press , to validate.
The lack of exchanges with the network (connecting,sending an e-mail, disconnecting) defines theinactivity time period leading to auto disconnection.
Login and Password were up to you when yousubscribed to your account. Enter them also asdefined.E-mail server accessThe menus described in this section feature settingsneeded to connect to the e-mail server of your InternetService Provider (ISP) via your mobile phone. Mostparameters are communicated to you by your serviceprovider and must be entered as given.1. Press ,, select Messages > E-mail > E-mail 1 >
Settings and press ,.2. Select E-Mail server and press ,. The fields to
be completed are the following: POP3 address,SMTP address, Login, Password and E-Mailaddress.
• POP3 address: allows you to enter the IP or DNSaddress of the POP3 server, which is used toreceive e-mails.
3
3
Philips855_APMEA.book Page 51 Friday, July 9, 2004 1:05 PM

52 Messages
• SMTP address: allows you to enter the IP or DNSaddress of the SMTP server, which is used tosend e-mails.
WARNING ! Network-dependent! For an e-mail connectionvia GPRS, if your phone operator is not your e-mailprovider, contact your operator to get the correct address ofthe SMTP server and enter it in this field.
In some cases, Login, Password and E-mail address areup to you when you subscribe to your account. Enterthem as defined.Account nameThis menu allows you to rename the available e-mailaccounts.
An e-mail account might be preconfigured with thename of your operator. In this case, its name cannot bechanged.
1. Press ,, select Messages > E-mail > E-mail 1 >Settings > Account name and press ,.
2. Enter the new name in the edition window thatappears and press ,.
AdvancedThe menus described in this section feature advancedsettings that may have been pre-configured, so youshouldn’t have to change any of them.
If the fields of these menus are empty, or if youencounter connection problems, contact your ISP.
Port POP3: allows you to enter the POP3 portnumber, which is used to receive e-mails.Port SMTP: allows you to enter the SMTP portnumber, which is used to send e-mails.DNS address: allows you to enter the DNS address ofthe external data network you want to connect to.SMTP authenticat.: allows you to activate/deactivatethe authentication process with the SMTP server.
In most European countries, this menu should be set toOff: your e-mails will NOT be sent if set to On.Contact your provider for complete information.
Write and send an e-mailThe Send mail menu allows you to sende-mails to one or several recipients at atime, including with an attachment
such as a jpeg picture. Once received, your messagescan be forwarded and the attachments visualised withthe appropriate software.To one or several recipients1. Press ,, select Messages > E-mail, then E-mail 1
or E-mail 2 depending on the one you wish touse. Select Send mail and press ,.
Philips855_APMEA.book Page 52 Friday, July 9, 2004 1:05 PM

Messages 53
2. Move-to select Add addressee and press ,to access the list.
If you select the phonebook «On SIM card», you willnot be able to access any e-mail address, but an editwindow will allow you to enter one. See “Contacts”page 26 for information on phonebook selection.
3. Select a name in the list and press , to add itto your mailing list or press c to cancel andgo back to the previous sub-menu.
4. Back to the Addressees list, press , to Change thee-mail address or to Remove it from the list, or selectAdd addressee, press , to access the phonebookagain and add new names to the mailing list.
5. Repeat steps 2 to 4 to add as many recipients asrequired.
6. Select Validate list and press ,. Then enter thesubject of your e-mail (you can leave this fieldempty) and press ,.
7. In the next window, enter the text of your e-mail(you can also leave this field empty). Press ,when you are ready to send your e-mail.
To learn how to enter text, see “Text or number entry”page 18. If you exit the Send e-mail menu before sendingyour e-mail, its content is deleted without being stored.
8. Select Modify mail and press , if you want tochange the content of your e-mail. This takesyou back to step 2: follow the instructions fromthere to complete the list of recipients and sendyour e-mail.
9. Select Send now and press , to send youre-mail. Your mobile phone connects to theInternet server, sends your e-mail to the namespresent in your mailing list, then disconnects.
You can cancel this operation by pressing and holdingthe c key. Your mobile will then disconnect fromthe server, exit the e-mail menu and go back to idle.Disconnection also occurs each time you enter theSettings menu while a connection is in progress. In thiscase, your e-mail is lost.
Depending on the call settings you configured (see“Call waiting” page 80), you can receive calls duringan e-mail connection. In this case, and if you acceptthe incoming call, your phone switches to the callscreen context and the e-mail menu is closed; thephone goes back to idle when you hang up.With a sound or a picture1. Repeat steps 1 to 7 described above. Select Add
sound or Add graphic and press ,.
Philips855_APMEA.book Page 53 Friday, July 9, 2004 1:05 PM

54 Messages
2. In both cases, a list appears, showing theavailable JPEG, BMP, GIF or MIDI files. Selectthe picture and/or sound of your choice andpress ,.
You can only attach one JPEG file at a time. If youexit the Send e-mail menu before sending your e-mail,its content (including attachment) is deleted withoutbeing stored.
3. Select Modify mail or Send now and press , toconfirm.
Receive and read e-mailsE-mails are received on a server, whichyou must connect to in order to retrieveyour e-mails on your mobile phone
(some operators send you a SMS when you receive anew e-mail). You must first download the headersfrom the server before retrieving the correspondinge-mails.Connect to the serverConnection process1. Press , and select Messages > E-mail, then E-
mail 1 or E-mail 2 depending on the one you wishto use. Select Open mailbox and press ,.
Mailboxes 1 and 2 feature the same settings andoptions. Configuring them differently will allow youto have two different e-mail addresses from yourphone.
2. Your mobile phone automatically connects tothe e-mail server and downloads the e-mailheaders. If you didn’t receive any e-mail, Listempty is displayed on the screen. Otherwise, thee-mail headers are displayed in the form of a list.
3. The total number of mails received and pendingon the server is displayed on the top of thescreen, as well as the number of pages needed todisplay all headers.
4. Your mobile phone retrieves five e-mail headersat a time. If Next (respectively Previous) appearsat the end (respectively beginning) of the list,other e-mail headers are pending: select one ofthe available options and press , to retrievethem.
An e-mail without any attachment may beautomatically displayed in the details screen.
* 7
Philips855_APMEA.book Page 54 Friday, July 9, 2004 1:05 PM

Messages 55
Headers informationSelect a header, press ,, select Details and press, again to see the address it was sent from, the dateand time at which it was sent, its subject and the sizeof the attachment if any. The following status iconsmay appear in regards to each header:
Download e-mailsSimply select one of the retrieved e-mailheaders and press ,. Then select Getmail and press , to download the
e-mail. Repeat this operation to download each e-mailcorresponding to each selected header.
You can also press , to access the e-mail headers’carousel and select Get mail from the available options.If the e-mail is too big (over 50 KB), it is rejected andthe download is cancelled.
Get and store attachmentsIf the e-mail you have received contains attachments(JPEG picture, text file or another e-mail), they arecharacterised by a specific icon:
[Noicon]
The e-mail can be downloaded.
The e-mail size is too large, it cannot bedownloaded.
The e-mail is marked to be deleted (seepage 56).
3
Contains the details of the e-mail header(date and time, sender’s e-mail address, etc.),press , to display these details.
The text of the e-mail itself can be viewed asan attachment, press , to read it. Thereisn’t any advanced options in this situation:it can be read, but not stored nor forwarded.
A text file (text only, «.txt» format) isattached to the e-mail, press , to read it.There isn’t any advanced options in thissituation either.
The application needed to manage thisattachment isn’t available in your phone, orthe e-mail is too large to be uploaded.
Another e-mail is attached to the one youreceived (up to five e-mails can be attachedone after the other). There isn’t anyadvanced options for an attached e-mail: itcan be read, but not stored nor forwarded.
Philips855_APMEA.book Page 55 Friday, July 9, 2004 1:05 PM

56 Messages
You must have stored a picture before being able toview it via the Picture album menu. See “Picturealbum” page 69 for more details. If there isn’t enoughmemory to store the new picture, you must delete otheritems (name, event or picture) to release enoughmemory to be able to save the new picture.
A picture may not be accepted by your mobile phoneif it is too large, or if it doesn’t have the right fileformat. When receiving a picture via e-mail, proceedas follows to obtain optimal results:• The picture received must have been saved in
JPEG, BMP or GIF format.• The size of the picture file should not exceed
50 KB.• The optimal size is 128 x 160 pixels, in order to
be displayed correctly. We recommend you use astandard picture editing software to create thesize of the picture you want.
• Use a file name, a maximum of 10 characters.You can then add an extension such as «.jpg».
Add an e-mail address to the phonebook
You must have selected the phonebook in your phoneto be able to add an e-mail address; this menu itemwill NOT appear if you selected the SIM phonebook.
You can add the sender’s e-mail addressto your phonebook, even when youhaven’t yet downloaded his e-mail
(retrieving the header only is sufficient to access thee-mail address).1. Select an e-mail header, then press , to access
the carousel options.2. Select Add to names and press ,. Then select:
- <new> to create a new name, enter first andlast name then add the associated e-mailaddress, or
- a name in the list and press , to add thee-mail address to this name card. If it alreadycontains an e-mail address, you will beprompted to press , to replace it.
Delete e-mails1. Select the e-mail to be deleted and press , to
access the options.2. Select Delete, and press , to confirm and
mark the e-mail to be deleted. A small iconallows you to spot the header(s) of the listcorresponding to the e-mail(s) to be deleted.
A picture in JPEG, BMP or GIF format isattached to this e-mail. Select the attachedpicture in the list and press , twice tostore it in your mobile phone (you canrename it if you wish).
Philips855_APMEA.book Page 56 Friday, July 9, 2004 1:05 PM

Messages 57
To unmark the e-mail to be deleted, select this optionagain.
3. When you exit the E-mail menu, you will beasked to confirm deletion of the selected item(s)from the e-mail server. Press , to confirm orc to cancel (in this case, the marked e-mailsremain in the list and aren’t marked to be deletedany more).
Reply to an e-mail1. Select the header of the e-mail you want to reply
to, press , to access the options menu, thenselect Reply and press ,.
2. The address of the sender, which you can modify(see “To one or several recipients” page 52), isautomatically added to the Addressees list. SelectValidate list and press ,.
3. A new screen appears, that contains the subjectof the received e-mail preceded with Re: standingfor «Reply». Press ,.
4. Enter the text of your mail, then press , tosend it: select Send now and press , to sendyour reply.
Forward an e-mailIn order to forward an e-mail to another recipient,you must first have downloaded it (see “Download e-mails” page 55). From the Forward to option, proceedas described above in “Reply to an e-mail”.
In both cases (reply to an e-mail or forward it), yourphone will disconnect from the server when reachingthe network inactivity time out set in the Autodisconnection menu (see “Bearer” page 50). It willreconnect to this server when sending the e-mail.
The Broadcast SMS feature is network-dependent.
You can Activate or Deactivate thereception of SMS broadcast regularlytransmitted to all subscribers on thenetwork.
ReceptionAllows you to set the reception of cellbroadcast messages On or Off. When On,you must define one or several topics asdescribed below.
Broadcast message
/
Philips855_APMEA.book Page 57 Friday, July 9, 2004 1:05 PM
58 Messages
TopicsAllows you to define the type ofmessages you want to receive. To definea new type, select <New>, enter the
code provided by the operator, and, if desired,associate a name. If you select an existing type in thelist, you can change or delete it. You can enter up to15 different types in the list. To obtain the codescorresponding to the different types, contact youroperator.District codes
Allows you to select the type ofmessages you would like to bepermanently displayed on the idle
screen. As a result, for this special treatment of themessage, you must enter the type in both the Districtcode and the Topics menu.
Allows you to set the Instant message feature On or Off.When On, any short message (SMS) you receive isautomatically displayed in idle mode.Scroll down to read it, and quickly reply by pressing, twice: first to enter the edition screen, then tosend your message. The phone will automatically goback to the idle screen.
If you receive a second SMS while you are reading one,press c to exit the first one or reply to it. Themobile phone will then display the second message.
Your mobile phone allows you to sendand receive MMS (multimedia messages),featuring texts, pictures and sounds.
A multimedia message can be made of one slide(including text, sound and image), or of several: inthis case, the message is played in a slide show,whether you send it to an e-mail address or to anothermobile phone.
If “Memory full” appears, you must delete messages(e.g., template, draft, received message, etc.).
Create an MMSSelect the addressees1. Select Messages > MMS > New MMS and press,.
2. Select a name in the list and press , to add itto your mailing list, ORSelect <New> and enter the phone number ore-mail address you wish to send your message to.Then press ,.
Instant message
'
MMS
Philips855_APMEA.book Page 58 Friday, July 9, 2004 1:05 PM

Messages 59
You must have selected the phonebook «In phone» toaccess an e-mail address. See “Contacts” page 26 forinformation on phonebook selection.
3. If you wish to send your message to this persononly, select Validate list and press ,.If you want to send it to several people, selectInsert name, press , to access the phonebookagain and to add new names to the mailing list(up to 20 names).
4. Add as many recipients as required, then selectValidate list and press ,.
You can select one of the items and press , to Editthe e-mail address or phone number, or to Remove itfrom the list.
Design your message1. On the left hand side of the screen, 5 icons allow
you to add a Picture, add Text, add a Sound, Sendthe message or access the Options menu. Move+ or - to go to the previous or next icon.
2. Press , to access the Picture Album list, selecta picture and press , to add it to your MMS.The first window of your message is displayed,showing the selected picture, which is resized ifneeded, in order to fit the screen.
Although the picture preview when creating the MMSis (W)105 x (H)55 pixels, the maximum size of apicture you can send is (W)640 x (H)640 pixels.Warning! The bigger the picture size, the longer it willtake to send it.A copyright-protected picture cannot be sent. SelectNone if you don’t want to insert any picture.
3. The Text icon is automatically selected: press, to access the text editing screen, enter thetext of your message (see “Text or number entry”page 18 for help).
4. The Sound icon is then selected: press , toaccess the Sound Album list, select a sound andpress , to add it to your MMS.
Sounds can be one of the files available in the Album,or a sound memo that you record when creating theMMS: in this case, select <Records>, then <New> andfollow the procedure that appears on the screen.Youcannot attach an existing voice memo.The icon of the item you have added (picture or sound)changes colour to indicate its insertion.
5. Press , to send your message, or move -to access the options.
Philips855_APMEA.book Page 59 Friday, July 9, 2004 1:05 PM

60 Messages
Access the optionsMove - to go to the Options icon and press ,.The following options are available:
Send your MessageAs described above, you can either:• Send your message as soon as it is completed:
select Send MMS and press ,.• Save it as a Draft to complete it and send it later:
to send, select the message in Drafts, select SendMMS and press ,. Once it has been sent, theMMS is removed from the drafts list.
Add slide To create a new slide and add it toyour slide show.
You can also press > when thelast page of the message you arecurrently designing is selected.
Once you have created severalpages, move < or > tobrowse slides.
Delete slide To delete the selected page.
This option is only available ifthere is more than one slide in themessage.
Next slidePrevious slide
To move to the next or to theprevious slide.
Slideduration
To change the value of slideduration that you have set inSettings > Application settings (seepage 65), and to set a delaybetween each slide.
Save MMSas draft
To save your message as a draft,that you can edit, complete andsend later on. MMS saved as draftsare stored in MMS > Drafts (see“Manage folders” page 62).
Saveas template
To save your message as a template,that you can use as a basis for otherMMS (e.g., «Happy birthday» typeof message). MMS saved astemplates are listed in MMS >Templates (see “Manage folders”below).
Preview MMS To preview the slide show you havecreated from the first to the lastslide, including sounds & pictures.
Add subject To edit and change or enter thesubject of your message.
Philips855_APMEA.book Page 60 Friday, July 9, 2004 1:05 PM
Messages 61
If the sending of a draft message fails, the message will bemoved to the Outbox menu, and identified as Not sent.
• Select it from the Outbox menu and send it:select the message to be sent from this menu,select Re-send MMS and press ,. Once it hasbeen sent, the MMS is identified as a sentmessage in the list.
In the two last cases, select the message to be sent inthe relevant folder. In all cases, select Send MMS andpress ,: a progress bar allows you to follow thesending of your message. Press c to cancel thesending of your message.
Receive an MMSDownload and play an MMSWhen you receive an MMS, an alert message appearson the screen to inform you.1. If you activated the Automatic retrieval mode (see
page 64), the message is automaticallydownloaded and placed in the Inbox. Select it inthe Inbox list and press > to play it.
2. If the Manual mode is activated:- Press c to go back to idle mode and to save
the notification in the Inbox, OR
- Press , to display the details of thenotification, then select Download and press, to download the message itself. As forsending, a progress bar allows you to follow thedownload of the message.
A notification isn’t the MMS itself, but aninformation window gathering the details about thesender’s identity, date and time of reception, subject,etc. DO NOT DELETE NOTIFICATIONSBEFORE YOU HAVE RETRIEVED THEMESSAGE, or you will never be able to do so.In both automatic and manual modes, a message willinform you if the size of the MMS you wish to downloadis bigger than the memory available in your phone. Inthis case, you must free memory by deleting data(picture, sounds, etc.). See “Memory status” page 73.
- If the sender of the message has asked for aRead report, a prompt will ask you to press, to send it or to press c to refuse thesending of the report.
3. Once the MMS is downloaded, select it in theInbox list and press > to play it.
Pressing < or > will switch the player modefrom automatic to manual. In manual mode, press< or > to display the previous or the next slide.
Philips855_APMEA.book Page 61 Friday, July 9, 2004 1:05 PM
62 Messages
Get and store attachmentsWhen playing an MMS as described in the previoussection, press , to access the following Playeroptions:
Manage foldersThe MMS menu allows you to manage your messagesin 4 different folders. The default (active) folder is thelast one you selected. To change the active folder,press c to return to the main MMS menu andselect the folder of your choice:
Playmessage
To switch back to automaticmode: the MMS is then playedas a continuous slide show.
Next /previousslide
To move to the next or previousslide. You can also press < or> when viewing the MMS inmanual mode.
This item is not available whenyou have selected the last (orfirst) slide.
Rewind To rewind the MMS back to thefirst slide.
Detach picture To detach the picture of thecurrent slide and save it in thePicture album.
Detach sound To detach the sound of thecurrent slide and save it in theSound album.
AMR sounds cannot be saved.
Templates Lists all messages saved as templatesafter their creation.You can Play, Edit and Deletetemplates.
Drafts Lists all messages saved as drafts aftertheir creation, or automatically savedif you quit the MMS menu beforesaving or sending your message.You can Play, Edit, Send and Deletedrafts.
Philips855_APMEA.book Page 62 Friday, July 9, 2004 1:05 PM

Messages 63
Messages you have saved can only be sent from theDraft or Outbox folders. You can NOT recover an item(whether message, notification or report) that youhave deleted. Press c to cancel deletion.
Settings
Your phone may have been pre-configured to directlyaccess the services offered. If not, you must have receivedfrom your operator the information items described inthe present section and enter them as given.With some operators, access parameters can be set«over the air». Please check directly by your operator.
Network accountAllows you to choose a data profile from the ones youhave set (see “Access settings” page 41 for completeinformation on how to configure or modify a dataprofile). This profile and the parameters it featureswill then be used for connection.BearerThis menu allows you to select the type of networkused when launching a connection.
Outbox Lists the messages you have Sent orcreated but Not sent yet (e.g., if youhave cancelled the sending procedureby pressing the c key).- You can Open, Delete or view the
Details of all these messages.- In addition, an MMS not yet sent
can also be Re-sent to someone,and you can Forward an MMSalready sent.
Inbox Lists all the Notifications, Delivery andRead reports, Read and Unread MMS.• You can Read or Delete
notifications and reports.• You can Play, Forward or Reply to
an MMS, display its Details orDelete it.
Notifications are automaticallydeleted once you have received the fullMMS. Do NOT delete notificationsbefore you have retrieved the MMS,or you will never be able to do so.
Philips855_APMEA.book Page 63 Friday, July 9, 2004 1:05 PM

64 Messages
If selecting GPRS first, you must have configured boththe GSM and GPRS settings (see “Access settings”page 41).
MMS CentreAllows you to enter or change the MMS address of theserver your phone will connect to.Gateway addressAllows you to enter or change the IP address of theserver’s gateway.Gateway portAllows you to enter or change the Port number of theserver’s gateway.
You must have the information relating to the threepoints above, supplied by your operator, and mustenter them exactly as given.
Application settingsRetrieval mode
GSM Your mobile will only use the GSMnetwork for connections.
GPRS Your mobile will only use the GPRSnetwork for connections.
GPRS first Your mobile will first try to connectto the GPRS network, then to theGSM network if the GPRS networkisn’t available when connecting.
Manual Messages are stored on the MMSserver, and you must connectmanually to retrieve them:1. Press , to access the Inbox.2. Select the notification item
corresponding to this messageand press ,.
3. Select Play message.4. When the Details of the message
are displayed, press , tolaunch the connection anddownload it.
Once the message is in your phone,press ,, select Play message andpress ,.
Automatic(defaultmode)
Any new MMS you receive isautomatically downloaded from theserver and placed in the Inbox, withoutyou having to launch a connection.Select the message you have receivedin the Inbox and press >.
This mode is deactivated when roaming.
Philips855_APMEA.book Page 64 Friday, July 9, 2004 1:05 PM

Messages 65
Delivery reportThis option can be set On or Off and informs you (viaan SMS) whether your MMS was received or rejected.The delivery report will display the sender’s identity,date and time of receipt, and status of delivery.
Read reportThis option can be set On or Off and informs you (viaan SMS) when the status the MMS you have sent haschanged, i.e., whether it was read or deleted withoutbeing read.
Auto saveThis option can be set On or Off and allows you toautomatically save of the messages sent from theOutbox menu. Messages saved will then appear in theOutbox folder.
Validity periodAllows you to select the length of time your messageis to be stored on the server, from 1 hour to 1 week(maximum). This is useful when the recipient is notconnected to the network (and thus cannot receiveyour message immediately).
Slide durationAllows you to select the duration between each slideincluded in your MMS, from 1 sec. to 60 secs.
Philips855_APMEA.book Page 65 Friday, July 9, 2004 1:05 PM

66 Infrared
9 • InfraredYour mobile phone integrates the infrared technology(also called IrDA), that allows you to send or receivedata to and from other IrDA-compliant devicesthrough a wireless link (e.g., another mobile phone, aPC or PDA, a printer etc.). Instead of sending amessage, you can decide to use IrDA to quickly senda sound you just mixed to a friend’s mobile phone, orto receive pictures from their PDA.
Files that are copyright-protected cannot be sent.When connecting with a PC, make sure you haveactivated its infrared option.
Before sending or receiving data to and from anotherdevice, they must be correctly positioned in relation toyour mobile phone. Make sure that the respectiveIrDA ports are facing each other and are a maximumof 50 cm away from each other (see diagram). Alsomake sure that nothing obstructs the IrDA beam.
Select an itemTo send data via IrDA from your mobile phone, youmust first select the item to be sent: for each category, asub-menu then gives you access to the Send option;press , to send the selected data to the other device.
Position of devices
Send data
Data youcan send
Where to find itin the phone menus
Pictures (BMP, GIF, JPEG)
Multimedia > Picture album
Sounds (MIDI files & ringers)
Multimedia > Sound album
Philips855_APMEA.book Page 66 Friday, July 9, 2004 1:05 PM

Infrared 67
Send the selected itemAs soon as your phone finds another IrDA-compliantdevice to communicate with, the sendingautomatically takes place. Messages are displayed onthe screen, for you to follow the process.If the phone finds several IrDA devices, a list isdisplayed on the screen, for you to choose from. Press, to confirm and to send the selected data.
Sending is cancelled in the following cases:- the phone cannot find another device and the timeout is reached before any data is sent,- the infrared link is broken,- you press the c key to cancel the process.
Activate IrDATo receive data, press , and selectInfrared > Receive and press ,. Yourmobile phone is then ready to receive an
item and waits for the other IrDA device to send it. Aswhen sending, messages are displayed on the screenand allow you to follow up the process.
Receiving is cancelled in the following cases:- the phone isn’t contacted by another device and thetime out is reached before data is received,- the infrared link is broken,- the size of the file sent is too large for your phone tomanage it,- you press the c key to cancel the process.
Save the data receivedSeveral options are available when receiving data fromanother IrDA device:Press cCancels the process: if you confirm your choice bypressing ,, the phone goes back to idle and thedata you have received isn’t saved.
Names Contacts > View names list(or press-when in idle mode).
Events Games & Appli. > Organiser >Events
Receive data
%)
Philips855_APMEA.book Page 67 Friday, July 9, 2004 1:05 PM

68 Infrared
Press ,Gives you access to the options menu, from which thefollowing options are available: You can also use your mobile phone
together with a PC or a PDA, e.g. tosurf the Internet or send faxes.
To fully benefit from the services available via IrDA(send and receive SMS, e-mail and fax, uploadpictures and MIDI sounds in your phone, phonebooksynchronization, GPRS Wizard, etc.), you mustinstall Mobile Phone Tools on your PC. This softwareapplication is available on the CD-Rom shipped withyour phone.
The software supplied on the CD-Rom is notcompatible with Apple® Macintosh® computers. Itonly supports Windows® 98 SE, ME, 2000 and XP.
Specific software modules for Lotus Notes, LotusOrganizer and Microsoft Outlook are designed toallow synchronisation from your Philips mobilephone to these applications: refer to their respectiveuser guides for detailed information concerninginstallation and configuration.
Save Saves the data in the appropriate menu(Name cards in the Contacts, Event cards inthe Organiser, etc.), then goes back to idle.In the case of a Name card, a <New> screenwill be opened, for you to save this newrecord.The files default names are used, and youcan freely rename each of them via theappropriate menu (i.e. in Multimedia >Sounds when you have saved a ringer youwould like to rename).
Show Displays the details of the data you havereceived: press c to go back one screen.
You must save the data to modify it.
If you have received a Picture, it will bedisplayed in full screen.If you have received a Sound, it will beplayed once. Press c or , to stopplaying it.
Use the phone as a modem
'
Philips855_APMEA.book Page 68 Friday, July 9, 2004 1:05 PM

Multimedia 69
10 • Multimedia
This menu allows you to manage andlisten to the sounds stored in yourmobile phone. When entering one of
the available sub-menus, the sounds are displayed as atext list. Press + or - to go to the next orprevious sound and wait for a few seconds for thesound to be played. Select a sound and press , toaccess the following options:
You will not be able to send sounds that are protectedby a copyright. Sounds in the Standard melodiesfolder cannot be deleted.
JPEG pictures must have the correct size and formatfor your mobile phone to store and display themcorrectly. Please check “Get and store attachments”page 62 for complete information on this subject.
This menu allows you to manage anddisplay the pictures stored in yourmobile phone.
Sound album
Rename To Rename it: press ,, enter aname and press , again.
Delete To Delete the selected sound.
Send byE-mail
To send the selected sound viaE-mail (see “E-Mail” page 50 fordetails).
Send byIrDA
To send the selected sound via IrDAto another infrared device (see“Infrared” page 66 for details).
Send byMMS
To send the selected sound via anMMS (see “MMS” page 58 fordetails).
Set as ringer To set the selected sound as Ringer.
Set asmessages ringer
To set the selected sound asMessages ringer (this option mustbe set On in Settings > Sounds, seepage 33).
Picture album
Philips855_APMEA.book Page 69 Friday, July 9, 2004 1:05 PM

70 Multimedia
When entering one of the available sub-menus, thepictures stored in your phone are displayed as a text list.To access the graphical display, select a picture in thelist and press >. Then press + or - to go tothe next or previous picture, or < to go back to thetext list. Press , to access the following options:
Modifypicture
You can also access this menu andrelated features when using thecamera, i.e., when pressing the ,button to access the options after youhave taken a picture.When selecting this option, thepicture you have chosen is displayedand automatically resized to128 x 160 pixels.
On the left hand side of the screenthat appears, 6 icons allow you toperform the tasks described below.The prompt bar at the bottom of thescreen describes the selected icon; fora maximum visibility of the picturepreview, you can hide this bar: press+ or - to select the on / offprompt bar icon, then press , toset in On (show) or Off (hide).
• Addtext
To add some text to the selectedpicture (the text will centered).When done, a 4-arrows icon in theupper left side of the screen allowsyou to move the text up, down, leftand right.
A short press will move the text1 pixel at a time, a long press willmove it 5 pixels at a time.
Press c to go back to the texteditor, or , to validate and go tothe next option.
• Addgraphic
To add a Frame or an Icon to thepicture: browse each list (press <or > to access the graphicaldisplay) and press , to validateyour choice. When done, a 4-arrowsicon in the upper left side of thescreen also allows you to move theIcon up, down, left and right.
Back to the Modify picture preview,the left part of a selected frame will behidden by the icons menu.
Philips855_APMEA.book Page 70 Friday, July 9, 2004 1:05 PM
Multimedia 71
• Eraser To Undo the last modification madeon the picture, or to Reset, i.e.,cancel all changes at once. Press cto cancel or , to validate.
• Send To send the picture via IrDA, E-Mailor MMS (see relevant chapters in thepresent user guide for detailesinformation).
• Save To save the picture including all thechanges you have applied to it: enterthe name of your choice and press, to validate.
If you don’t rename the picture, theoriginal file you selected from thealbum will be overwritten. You cansave a picture at any time, even if youare not done modifying it.
Delete To Delete the selected picture.
Pictures in the Standard Picturesfolder cannot be deleted. If there isn’tenough space to store a new picture,you must delete some other pictures torelease memory.
Rename To Rename it: press ,, enter aname and press , again.
Send byE-mail
To send the selected picture via E-mail(see “E-Mail” page 50 for details).
Send byIrDA
To send the selected picture via IrDAto another infrared device (see“Infrared” page 66 for details).
Send byMMS
To send the selected picture via anMMS (see “MMS” page 58 fordetails).
Rotate To rotate the picture of 90° or 180°:press , to confirm your choice.
Set asWallpaper
To set the selected picture asWallpaper (this option must be setOn in Settings > Display, seepage 35).
Philips855_APMEA.book Page 71 Friday, July 9, 2004 1:05 PM

72 Multimedia
This feature allows you to display yourpictures listed in the Picture album(automatically in a slideshow, or
manually, one-by-one) on a TV screen via the TVLink accessory, or on the main (internal) screen ofyour phone.
TV Link may not be supplied with your product. Inthis case, you must purchase it separately: see “Philipsauthentic accessories” page 101 for details.
The last selection / slideshow made is automaticallysaved and can be played several times in a row, evenwhen you quite the TV Slideshow menu.
TV Slideshow
Manual Select TV Slideshow, then Manual,and press , and browse thecomplete list of pictures by pressing+ or - .
Press > to activate the graphicalfull-screen display and send it to theTV, press < to go back to the list.
Automatic 1. Select TV Slideshow and press,, then select the value thatwill be applied between eachpicture of the slideshow (5, 7 or10 seconds) and press ,.
2. In the list that appears:• Choose (Un)Check all by
pressing < or > to selectall pictures at once, or
• Browse the list and select/deselect the pictures of yourchoice by pressing < or >(selected pictures featurechecked boxes).
• In both cases, press , tostart the slideshow and c tostop it.
3. Select (Un)Check all to deselectall pictures at once.
Philips855_APMEA.book Page 72 Friday, July 9, 2004 1:05 PM

Multimedia 73
When browsing manually, press , to open therotation options (90°, 180° or 270°), select the optionof your choice and press ,. Changes areautomatically stored.
THE PHONE BATTERY MUST BE AT LEAST ATHALF CHARGED TO RUN A TV SLIDESHOW.
Press , to launch the Demo movie.
If you turned the phone on without having inserted aSIM card, this menu is available in the first menu level.
This menu allows you to display thepercentage of memory available in yourphone. Several features share the mobile
capacity: pictures and sound album, recorded memosand voice tags for voice commands, messages you havestored in the phone, phonebook and organiser entries,games, etc.
Your mobile phone is supplied with many sounds andpictures. You can only delete sounds or pictures in the
Picture or Sound albums, e.g., to free memory spacefor your own sounds and pictures.
Press , to check the memory status. The displayshows you the percentage of memory free and thephone’s total memory in KB. Press , again andaccess the detailed list of memory used by eachfeature.
If «List full» appears when saving a new item or to freememory space, you must delete an item to be able tocreate or add a new one.
This menu allows you to record a soundof 1 min. maximum, and up to 20different sounds, depending on theMemory status.
Press , and select Multimedia > Sound recording,then press ,again. Select <New> to record a newsound. Follow the instructions on the screen and press, once your sound is recorded. You can thenDelete or Rename it.
Memos can then be used as alarm or incoming callringers, etc. Voice memos previously saved cannot besent by MMS.
Demo mode
Memory status
'
&
Sound recording
Philips855_APMEA.book Page 73 Friday, July 9, 2004 1:05 PM

74 Games & Appli.
11 • Games & Appli.
This menu provides the followingfunctions:
Enter the figures using the keypad. Calculatoraccuracy is to 2 decimal places and is rounded up tothe higher decimal figure. Press c to correct thenumbers. Press and hold 0 to get the dot. Pressand hold c twice to return to idle mode.
This menu allows you to set the alarmclock. Press , and select Games &Appli. > Alarm clock, then press + or- to activate it. Enter the time, then press ,and select:
- Once activates the alarm at a set hour on a setday,
- Every day activates the alarm at a set hour everyday of the week,
- On weekdays activates the alarm at a set houron weekdays only.
Then select one of the alarm alerts: the buzzer, amelody or a sound recording (the latter being playedonly once). Select an item in the list if required, andpress , to confirm your choice.
The alarm clock will ring even if you turned off yourphone, and even if the Ringer volume is set to Off (seepage 33). Press any key to stop the alarm ringing.
Calculator
Addition By pressing the * key.
Substraction By pressing the * key twice.
Multiplication By pressing the * key 3 times.
Division By pressing the * key 4 times.
Equals By pressing the # key.
Alarm clock
(
Philips855_APMEA.book Page 74 Friday, July 9, 2004 1:05 PM

Games & Appli. 75
Create a new eventThe Events menu allows to create eventsand store them in your organiser.Events can be Meetings, Holidays or
ToDos. When the organiser alert is On (see page 34),a beep alerts you when an event is due.1. Select Organiser > Events > <New> and press,.
2. Select the type of event to create (Holiday,Meeting, ToDo) and press ,.
3. Enter the starting and ending date & time of theevent and press ,, enter the text concerningthe event (e.g. «Meeting with Smith») and press,.
4. The Set Reminder menu reminds you of eventsvia alerts triggered at the chosen time. Move< or >, set the Reminder for this eventand press ,.
This menu only applies to Meeting and ToDo events.Note that the reminder depends on the time set anddisplayed on the screen. As such, it will be updatedwhen changing time zones (see “Time and date”page 42).
5. Move < or > to set the Repeat Eventoption for this event and press ,.
6. The events will be listed using start time anddate. From the events list,- press and hold c to go back to the idle
screen,- repeat steps 2 to 5 to create more events.
The organiser shares the mobile capacity and memorywith other features (phonebook, picture album, sound,etc.). As a consequence, all features are inter-dependent: the more events you create, the less names,memos or pictures you can store, and vice-versa. If«List full» appears, delete an event (or name) to beable to create a new one. To check the memoryavailable in your phone, press , and selectMultimedia > Memory status.
Modify an eventChange an event
When creating an event, not all fieldsare available, this is designed so makecreating a new event quicker. When
changing an event, these further options becomeavailable.
Organiser
*
Philips855_APMEA.book Page 75 Friday, July 9, 2004 1:05 PM
76 Games & Appli.
1. To change an event, select the event of yourchoice and press ,.
2. When your phone displays the details of theselected event, press ,, select Change andpress , again.
Changing a repeated event will also modify allinstances of this event: in this case, press , toconfirm.
3. Change any information as needed and asdescribed above.
Deleting an eventDeleting a single eventSelect the event of your choice and press , twice.Then select Delete and press , to confirm.
Deleting a repeated event• By selecting a past occurrence: select a past
occurrences of an event and press ,. Whenthe event details appear, press ,, then selectDelete and press , to confirm: only the pastoccurrences of the selected event are deleted.
• By selecting a future occurrence: select a futureoccurrence of an event and press ,. Whenthe event details appear, press ,, then selectDelete and press , to confirm: alloccurrences of the selected event are deleted.
Deleting past eventsYou can also delete past events byselecting Delete past at the first level ofthe Organiser menu. In this case, enter
the starting date (past or future) from which allprevious events will be deleted and press , twice todelete all events preceding this date.
To delete all events set in your organiser, enter astarting date several years ahead (e.g., 3st ofDecember, 2010). This way, you make sure all eventspreceding this date are deleted at once.
Views of eventsThe Day view, Week view and Month view display inthe respective format all events stored in yourorganiser. To display events in these views, proceed asfollows:1. Select the view of your choice and press ,.2. Once you entered the selected view, move <
or > to display the previous or next day, weekor month.
3. Press , to display the list of correspondingevents or to create a new one.
'
Philips855_APMEA.book Page 76 Friday, July 9, 2004 1:05 PM

Games & Appli. 77
Time zoneAlthough changing time zones isnecessary when travelling a lot, be awarethat it will impact all organiser
reminders: the event alarms will be updateddepending on the time displayed on the screen (see“Time and date” page 42).
This menu can be subscription dependent. As such itsicon and content may vary.
This menu gives you access to the brickgame. The object of the game is todestroy the bricks by hitting them withthe ball.
When you have destroyed the last brick, you accessthe next level. Keys used are the following:
Your mobile phone features JAVA,which allows you to run JAVA-compatible applications such as gamesdownloaded on the network.
SettingsNetworkBearerAllows you to select the type of network used by theselected profile when launching a connection.GSM or GPRS: your mobile will only use the GSM orthe GPRS network for WAP connections.GPRS first: your mobile will first try to connect to theGPRS network, then to the GSM network if theGPRS network isn’t available when connecting.
Selecting this option requires you to have configuredboth GSM and GPRS settings. See page 41 for details.
DNS addressAllows you to enter the DNS address of the externaldata network you want to connect to. Press , toconfirm.
Brick game
4 and 6 To move the racket left or right.
* and # To throw the ball left or right.Press either of these keys tostart the game.
0 To pause the game; pause timeis limited to 2 min. after whichthe screen returns to idle modeand the game is lost.
6
/ (3
JAVA
4
Philips855_APMEA.book Page 77 Friday, July 9, 2004 1:05 PM
78 Games & Appli.
Network accountAllows you to select one of the data profiles you havedefined in Settings > Access settings (see page 41 fordetailed information on this subject).In the list that appears, select the connection setting ofyour choice and press , to confirm. Auto-LaunchAllows you to set the automatic launch of JAVA On orOff. When On, a JAVA application will beautomatically launched right after it was installed.
Philips855_APMEA.book Page 78 Friday, July 9, 2004 1:05 PM

Call information 79
12 • Call information
This menu allows you to set all the calloptions (call forward, waiting, etc.).
Active flipWhen activated, this option allows you to pick up anincoming call by simply opening the phone. A beepalso indicates the end of the communication whenhanging up.
To reject a call, press and hold the lower side key.
Call forwardAllows you to divert incoming callseither to your mailbox or to a number(whether in your Contacts or not) and
applies to: Data calls, Voice calls and Fax calls.
Before activating this option, you must enter yourvoice mailboxes’ numbers (see “Mailboxes” page 79).This feature is subscription dependent, and differentfrom the call transfer, which takes place when one/several calls are in progress.
UnconditionalThe unconditional option will divert all the incomingcalls.
Warning! When selecting this option, you will notreceive any calls at all until you deactivate it.
ConditionalThis option allows you to choose in whichcircumstance(s) you want to divert incoming calls.Three options are available: If no reply (you haven’treplied to the call), If not reachable (your network isn’tavailable) or If busy (you are already on the phone andyour subscription doesn’t include the call waitingoption or you haven’t activated it). Each option canbe set independently.Once you have selected either Conditional orUnconditional, choose whether you want to divert callsto your voice mailbox or to another phone number, orcancel the call forward.Status
Allows you to display the status of allcall forwarding.
MailboxesThis menu allows you to enter yourvoice mailbox numbers (if not availableon your SIM card).
Call settings
)
7
Philips855_APMEA.book Page 79 Friday, July 9, 2004 1:05 PM

80 Call information
In some cases, you might have to enter two numbers:one to listen to your mailbox, the other one to forwardcalls. Contact your operator for more information onthis subject.
Auto redialAllows you to set the auto redial On orOff. When On and if the person you arecalling is busy, your phone
automatically redials this number until a successfulconnection is made, or until the maximum number ofattempts is reached (10). The phone emits one beep atthe beginning of each attempt and one special beep ifthe connection is successful.
The time between redials increases with each attempt.
Any key answerAllows you to accept a call by pressingany key, except ), used to reject acall.
Call waitingCall waiting is managed differentlydepending on the type of network(GSM or GPRS) you have selected.
With GSM call Allows you to Activate or Deactivate thecall waiting and applies to: All calls,Voice calls, Fax calls and Data calls.
When this option is active, you hear a beep if someonetries to call you while already on a call. Select theStatus option to find out whether the GSM callwaiting is active or not.
This function is subscription-dependent. Contact youroperator.
With GPRS callAllows you to Activate or Deactivate thecall waiting for voice incoming callswhile a GPRS connection in ongoing.
Caller IDAllows you to Show or Hide youridentity to your correspondent. TheStatus option will inform you if thisfunction is activated or not.
This menu provides you with the list ofoutgoing and incoming calls, as well asattempts at auto redialling and calldetails. The calls (made, missed and
&(&
Call list
0 3
0 3
%'
8
Philips855_APMEA.book Page 80 Friday, July 9, 2004 1:05 PM
Call information 81
received) are displayed in chronological order with themost recent on top of the list. When the Call list isempty the screen displays List empty.
Call listFrom the main carousel, press , thenselect Call Info > Call list > Call list todisplay the call list. Use + and -
arrows to scroll the list and press , again to consultthe date, time, number, call status of any selected calland to know if it was sent or received. Press , foraccess to a carousel which allows you to Call or Callhandsfree this correspondent, Send a SMS, Delete theselected call or Store the associated number.
ResetPress ,, select Call Info > Call list,then Reset. Press,twice to reset.
The phone stores the last 30 numbers in the Call list,the most recent number being displayed first. You canredial directly any of these numbers. In idle screen,move + to access the Call list. If a number listed isalso in your Contacts, the corresponding name isdisplayed. Move + or - to select the number toredial and press (. Press ) to hang up.
This menu features the GSM counterssubmenu, which gives you access to theoptions described below and allows you
to handle the cost and duration of your calls.
The GSM Call Counters do not include WAPconnections. Most options mentioned below aresubscription-dependent.
Total durationSelect this option and press , toShow or Reset the time duration ofOutgoing or Incoming calls.
Last call information
This feature is subscription dependent.
This menu allows you to display theduration and/or cost of your last call.
Info at call end
This feature is subscription dependent.
Allows you to activate or deactivate thesystematic display of the length and/orcost of each call when hanging up.
Call counters
8 )
%)
Philips855_APMEA.book Page 81 Friday, July 9, 2004 1:05 PM

82 Call information
Total cost
This feature is subscription dependent.
Allows you to display theaccumulated cost and to set thecounter to zero. It may be protectedby PIN or PIN2 codes.
Shows how much has been spent,having established the charge rate.
Allows you to reset the current Totalcost to 0; requires your PIN2 code.
Allows you to check the remainingcredit (compared with previouslyset limit).
Allows you to cancel the cost limit.It may be protected by PIN orPIN2 codes (depending on yoursubscription).
Allows you to enter the cost limitused in the Show balance menu.
Allows you to set or change therate per unit. First enter thecurrency used (three charactersmaximum) then enter the cost perunit.
Philips855_APMEA.book Page 82 Friday, July 9, 2004 1:05 PM

WAP 83
13 • WAPYour mobile phone supports servicesbased on the Wireless ApplicationProtocol (WAP). The built-in WAP
browser allows you to access services supplied withyour network, such as news, sports, weather, etc.
Your mobile phone readily supports the WAP functionif it is included in your subscription; if your phone waspre-configured, it shouldn’t be necessary for you tochange the settings described in this section.With some operators, WAP parameters can be setremotely. Please check directly with your operator fordetailed information.
This main menu of the WAP browser allows you toconfigure the settings related to WAP, connect toyour operator’s homepage, define bookmarks fordirect and faster connections, etc.
Launch a WAP session1. To launch a WAP session, select Operator
Services > WAP > Homepage.
2. Your mobile phone will connect to the networkand according to the Access settings you havedefined in the menu Settings > Network (seepage 41).
3. The browser is launched and your phoneconnects to your operator’s homepage.
4. Move + or - to navigate the on-line pages,and press , to select a highlighted item.
5. Press c to return to the previous page.
End a WAP sessionTo end a WAP session, press and hold #, OR selectOptions > Exit and press , to confirm.
HomepageThe Homepage is the link to the first WAP site youwill access when launching WAP from the idle screen.In most cases, this menu item of the WAP servicesmenu is preconfigured and will connect directly toyour operator’s WAP homepage.You can change this default homepage by specifyingthe name and URL address of another homepage,which will then replace the current one (see “Save ashomepage” page 87).
Internet services
0
Philips855_APMEA.book Page 83 Friday, July 9, 2004 1:05 PM

84 WAP
BookmarksThis menu allows you to store your favourite WAPsite addresses, rename them if desired and access themquickly from the list.
This can also be done while browsing: press @toaccess the Options, then select Bookmarks. In this case,the Name and URL fields will be automatically filledin with the information contained in the page you arebrowsing.
Add bookmarks1. Select WAP > Bookmarks > Add bookmark and
press ,.2. Start entering the new name: an edit screen
automatically appears.3. Press , to save the name you entered.4. Press - to move to the address field and
proceed the same way to enter the WAP address.Manage bookmarksThis menu allows you to Delete the stored bookmarks,or to Edit them in order to change their name and/oraddress. In both cases, press , to confirm.Use bookmarksTo connect to a WAP site you have stored as abookmark, simply select it in the list and press ,to launch the connection.
Enter addressThis menu allows you to enter a WAP site address, towhich you can connect directly when selecting it andpressing ,. This is a quick way to access WAPaddresses without saving them as bookmarks.1. Press , and enter the URL address of the
desired homepage.2. Press , to connect to this page.
All the addresses you enter in this menu and connectto at least once, will appear in a list: select one of theitems and press , to reconnect to the correspondingpage, without having to enter the complete addressagain.
SettingsEdit HomepageAllows you to change the Homepage name andaddress:1. Press , and start entering the new name. An
edit screen automatically appears.2. Press , to save the name you entered.3. Back to the Edit Homepage menu, press - to
move to the address field and proceed the sameway to change the address.
Philips855_APMEA.book Page 84 Friday, July 9, 2004 1:05 PM

WAP 85
Select ProfileThis menu allows you to select one of the availableprofiles, and to then define the connection settings foreach of them: scroll + or - to choose the profileof your choice, then press < or > to select /deselect it and press , to confirm.
All connection settings described below will apply tothe selected profile, which you can then rename foreasier identification.
ConnectionSelect connectionAllows you to select one of the data profiles you havedefined in Settings > Access settings (see page 41 fordetailed information on this subject).In the list that appears, select the connection setting ofyour choice and press , to confirm. BearerAllows you to select the type of network used by theselected profile when launching a connection.GSM or GPRS: your mobile will only use the GSM orthe GPRS network for WAP connections.GPRS first: your mobile will first try to connect to theGPRS network, then to the GSM network if theGPRS network isn’t available when connecting.
Selecting this option requires you to have configuredboth GSM and GPRS settings. See page 41 for details.
Proxy addressAllows you to specify a proxy gateway address to beused when launching a WAP connection using theselected profile. Press , and enter the address ofyour choice, then press , to confirm.
Press and hold 0 to enter a dot «.»
Proxy portAllows you to specify a proxy port number, in case theproxy you are using requires a different port number.Press , and enter the number of your choice, thenpress , to confirm.SecurityCertificatesSelect this menu and press , to display the list ofinstalled security certificates. Select one of the items inthe list and press , to display its details or delete it.
Session infoAllows you to display information about the currentWAP session: security type, class, etc. Press c to goback one page.
Philips855_APMEA.book Page 85 Friday, July 9, 2004 1:05 PM

86 WAP
Current certificateAllows you to display the currently used securitycertificate. Press c to go back one page.Rename ProfileThis menu allows you to rename the currentlyselected profile: enter the new name (an edit screenautomatically appears), then press , to save thename you entered.Browser OptionsThis menu allows you to activate/deactivate thedownloading of images attached to WAP pages. SelectNever or Always and press , to confirm yourchoice.
Selecting Never will speed up the global downloadingtime of the pages browsed.
CacheThis menu allows you to empty an area of the phone’smemory where the pages browsed during a WAPsession are stored. Select Clear cache and press , toconfirm your choice.
Push inboxThis menu allows you to read and manage messagesautomatically sent to you by the network and / or byyour operator.
1. If you have been informed that you received apush message, press , to read it.
2. Otherwise, select Operator Services. > WAP >Internet services > Push Inbox and press , toaccess the list of messages.
Messages with high priority feature an exclamationmark together with the read / unread icon.
3. Press + or - to browse the list and selectthe message of your choice, press , to read it.
4. If the message contains a WAP address (orURL), press , to connect to thecorresponding WAP site.
5. To delete one of the push messages, select PushInbox > Manage messages and press ,.
6. Select the message to be deleted and press ,to confirm.
While browsing Internet pages, press the , key toaccess the options described below.
The menus that are common to both Internet servicesand Options menus are described in the above section.
Options
Philips855_APMEA.book Page 86 Friday, July 9, 2004 1:05 PM

WAP 87
HomepageGives you direct access to the Homepage of the WAPsite you are currently browsing.
BackBrings you back to the previously browsed page.
You must have browsed at least 2 pages for this optionto be available.
ForwardTakes you to the next browsed page (e.g., when youhave previously selected Back).
RefreshWill reload the currently browsed page from itsoriginal server.
Save as homepageThis menu option allows you to save the currentlybrowsed WAP page as the default homepage. 1. Select Save as homepage and press ,. The
URL address of the page you are browsingautomatically appears in the Address field.
2. Enter a name for this homepage and press ,.3. Back on the Internet services menu, the
homepage name will be the first item on the list.
Press the @ key while in idle mode to connectautomatically to this page.
Save as...When browsing WAP sites, this menu option allowsyou to save images embedded in the pages that aredisplayed.1. While browsing, scroll + or - to select
the picture.2. Once the picture is highlighted, press @ to
access the Options. Select Save as... and press,.
3. Rename the picture if desired and press , tosave it in the Picture Album.
ExitAllows you to end a WAP session: press , toconfirm and to quit WAP.
Receive a callWhen receiving a call whilst connected to WAP:1. Answering the call will quit the WAP application
and disconnect the current session. Your phonewill return to the last browsed page when youhang up, but the connection itself will be lost.
2. Rejecting the call will bring you back to thepreview screen.
Philips855_APMEA.book Page 87 Friday, July 9, 2004 1:05 PM

88 Operator services
14 • Operator servicesMost items of the Operator Services menu (e.g. Servicenumbers, Services +) are subscription-dependent andspecific to operators: your mobile phone readilysupports them if they are included in your subscription.Consequently, the menus shown following may or maynot be available. Contact your network operator fordetailed information on availability and rates.
The services provided may involve making a phonecall or sending a SMS for which you may be charged.
The phone supports standard GSM strings that can besent from the keypad to the network and used toactivate services provided by the network.• Example n° 1Press * 4 3 #, then (, to activatethe Call Waiting service.• Example n° 2Press * # 3 1 #, then (, toknow if the mobile identification has been sent.• Example n° 3Press * 6 1 #, then (, to activatethe feature call forward if no reply.
• Example n° 4Press * 6 2 #, then (, to activatethe feature call forward if unreachable.
Contact your network operator for detailedinformation on GSM strings.
Some phone services (such as phone answeringmachines and pagers) require your phone to transmitDTMF tones (Dual Tone Multi Frequency), alsoknown as “touch tones”. These are used tocommunicate passwords, callback numbers, callerchoices, and so on.You can send DTMF tones at any time during a callby pressing any of the keys 0 to 9, * and#. You can also attach a DTMF sequence to aphone number before dialling it (or storing it in theContacts). The phone number and the DTMF partmust be separated by a wait character.
Pause and wait charactersTo obtain a pause or wait character, press and hold#. The display shows w for a wait and p for apause. The phone always interprets the first pausecharacter as a wait character. When you dial a numbercontaining a wait character, your phone dials the first
GSM strings
DTMF tones
Philips855_APMEA.book Page 88 Friday, July 9, 2004 1:05 PM
Operator services 89
part (the phone number) and then waits for the call tobe connected before sending the rest of the digits asDTMF tones. Any subsequent pause character is anordinary pause that generates a delay of 2.5 seconds.
For example: access your answering machineTo hear all messages (e.g. code 3) on your answeringmachine (password 8421) at phone number12345678, you could call: 12345678w8421p3.The phone dials 12345678 and waits for the call to beconnected. When connected, the phone transmits8421 (the password), pauses 2.5 seconds, and thensends the last digit. If you find that 2.5 seconds is notlong enough for your needs, you can enter several pausecharacters one after the other to increase the pause time.
You can make a second call during an active call orduring a call on hold. You can switch between the twocalls (the cost displayed on the screen depends on localcharge rate).1. While already on the phone, dial a number then
press (. The first call is put on hold and thenumber is displayed at the bottom of the screen.The second number is then dialled.
2. To toggle between the two calls, press , thenselect Switch calls. Each time that you togglefrom one call to another, the active call is placedon hold and the call which was on hold isactivated.
3. To hang up the active line, press ). Theactive line is hung up and the call on holdremains as such.
4. To end the call on hold, use Switch calls to reachit, then press ).
Notes:The second number can be dialled either from thekeypad or from:- the phonebook, by pressing -, then selecting thename to be called,- the Call list, by pressing +, then selecting thenumber to be called.
You are able to receive another call when already incommunication (if this feature is available with yoursubscription). When you receive a second call thephone emits an alert beep and the screen displays Callwaiting.
Make a second call
Answer a second call
Philips855_APMEA.book Page 89 Friday, July 9, 2004 1:05 PM

90 Operator services
To receive a second call, you must have:- subscribed to this feature,- deactivated the Call forward option for voice calls(see page 79),- activated the Call waiting option (see page 80).
If you receive a second call, press ,, then you can:• accept the second call: the first one is put on
hold, the second one is active. If you want totoggle between the two calls, press , thenselect Switch calls. Each time you toggle from onecall to another, the active call is put on hold andthe call which was on hold is then activated. Tointroduce the new caller into a conference press, and select Conference.
• reject the second call• end the active call, then your incoming call is
ringing.
Notes:- If you also wish to answer the incoming call, press(; to reject it, press ).- If you have activated call forwarding ‘If Busy’ (see“Call forward” page 79), you will never receive secondcalls since they are always forwarded when the line isbusy.
Subscription dependent
While in communication and one call being on hold, youmay receive a third call. The phone emits an alert beep.You can either end one of the calls before being able toanswer the third one or introduce the calling party into aconference (see below). This service is limited to twocurrent communications (one active and one on hold).
Subscription dependent
You can activate the conference call bymaking consecutive outgoing calls, orcreate it from a multiparty call context.
You may have up to five members at the same timeand end the conference with ). At this point allcalls are disconnected.In order to make consecutive outgoing calls, firstinitiate a normal call with the first number of theconference. When the first member is on line, initiatea second call as described in “Make a second call”above. When the second call is engaged, press ,and select Conference. Repeat the above process untilfive members are connected.
Answer a third call
Conference call
)
Philips855_APMEA.book Page 90 Friday, July 9, 2004 1:05 PM

Operator services 91
If there is an incoming call during the conference calland there are less than five members, you can acceptthis new call by pressing ,. Press , again andthen select Conference to add this member to theconference call. If there is an incoming call during aconference with five members already connected, youcan answer this new incoming call, but not add it tothe conference.While a conference call is in progress, press , toaccess the Conf. members options. Disconnect amember of the conference by selecting Remove partyand pressing , to confirm, or select Private call tohave a private call with this member only (othermembers are put on hold).
Subscription dependent
You can connect an active call and a call on hold. Youare disconnected when the transfer is completed.During a call press ,, select Transfer and press ,.
This feature is different from the Call forward, whichtakes place before you pick up the call (see page 79).
Explicit call transfer
Philips855_APMEA.book Page 91 Friday, July 9, 2004 1:05 PM

92 Precautions
Precautions
Your cellular mobile phone is a low powerradio transmitter and receiver. When it isoperating, it sends and receives radio waves.The radio waves carry your voice or datasignal to a base station that is connected to
the telephone network. The network controls thepower at which the phone transmits.• Your phone transmits/receives radio waves in the
GSM frequency (900 / 1800 / 1900MHz).• The GSM network controls transmission power
(0.01 to 2 watts).• Your phone complies with all relevant safety
standards.• The CE mark on your phone shows compliancy
with European electromagnetic compatibility(Ref. 89/336/EEC) and low voltage directives(Ref. 73/23/EEC).
Your cellular mobile phone is your responsibility. Toavoid damage to yourself, to others or to the phoneitself, read and follow all the safety instructions andmake them known to anyone borrowing your phone.Furthermore to prevent unauthorised use of yourphone:
Keep your phone in a safe place and keep itout of small children's reach.Avoid writing down your PIN code. Try toremember it instead.
Switch off the phone and remove the battery if you aregoing to leave it unused for a long time.Use the Security menu to change the PIN code afterpurchasing the phone and to activate call restrictionoptions.
The design of your phone complies with allapplicable laws and regulations. Howeveryour phone may cause interference withother electronic devices. Consequently you
should follow all local recommendations andregulations when using your cellular phone both athome and when away. Regulations on the use ofcellular phones in vehicles and aircraft areparticularly stringent.Public concern has been focused for some time on thepossible health risks for users of cellular phones. Thecurrent research on radio wave technology, includingthe GSM technology, has been reviewed and safetystandards have been drawn up to ensure protectionfrom exposure to radio wave energy. Your cellulartelephone complies with all applicable safetystandards and the Radio Equipment andTelecommunications Terminal Equipment Directive1999/5/EC.
Radio waves
Philips855_Precautions_GB.fm Page 92 Friday, July 16, 2004 7:35 PM

Precautions 93
Inadequately protected or sensitive electronicequipment may be affected by radio energy. Thisinterference can lead to accidents.
Before boarding an aircraft and/or whenpacking the phone in your luggage: the useof mobile phones in an aircraft may be
dangerous for the operation of the aircraft, disrupt themobile phones network and may be illegal.
In hospitals, clinics, other health carecentres and anywhere else where you may bein the close vicinity of medical equipment.
In areas with a potentially explosiveatmosphere (e.g. petrol stations and alsoareas where the air contains dust particles,such as metal powders).
In a vehicle transporting flammable products (even ifthe vehicle is parked) or a vehicle powered by liquefiedpetroleum gas (LPG), check first that the vehiclecomplies with the applicable safety rules.In areas where you are requested to turn off radiotransmitting devices, such as quarries or other areaswhere blasting operations are in progress.
Check with the vehicle manufacturer thatelectronic equipment used in your vehiclewill not be affected by radio energy.
If you are a user of a pacemaker:• Always keep the phone more than 15 cm from
your pacemaker when the phone is switched on,in order to avoid potential interference.
• Do not carry the phone in a breastpocket.• Use the ear opposite to the pacemaker to
minimise the potential interference.• Switch off your phone if you suspect that
interference is taking place.
If you are a user of a hearing aid, consult yourphysician and hearing aid manufacturer to learnwhether your particular device is susceptible tocellular phone interference.
In order to improve the performance of your phone,reduce radio energy emission, reduce batteryconsumption and ensure safe operation adhere to thefollowing guidelines:
For the optimal and satisfactory operation ofthe phone you are recommended to use thephone in the normal operating position(when not using in hands-free mode or witha hands-free accessory).
Always switch off your phone Users of pacemakers
Users of hearing aids
Performance improvement
Philips855_APMEA.book Page 93 Friday, July 9, 2004 1:05 PM
94 Precautions
• Do not expose your phone to extremetemperatures.
• Treat the phone with care. Any misuse will voidthe International Guarantee.
• Do not immerse the phone in any liquid; if yourphone is damp, switch it off, remove the batteryand let them dry for 24hrs before using themagain.
• To clean the phone, wipe it with a soft cloth.• Placing and receiving calls consumes the same
amount of battery energy. However, the mobileconsumes less energy in idle screen when kept inthe same place. When in idle screen and whileyou are moving, your phone consumes energy totransmit updated location information to thenetwork. Setting the backlight for a shorterperiod of time as well as avoiding unnecessarynavigating in the menus will also help to save thebattery’s energy for longer phoning and stand-byperformances.
• Your phone is powered by a rechargeable battery.• Use specified charger only.• Do not incinerate.• Do not deform or open the battery.
• Do not allow metal objects (such as keys in yourpocket) to short circuit the battery contacts.
• Avoid exposure to excessive heat (>60°C or140°F), moisture or caustic environments.
You should only use Philips AuthenticAccessories, as the use of any otheraccessories may damage your phone and willmake all guarantees for your Philips phonenull and void.
Make sure damaged parts are replaced immediately bya qualified technician and that they are replaced withgenuine Philips replacement parts.
It lowers concentration, which can bedangerous. Adhere to the followingguidelines:Give your full attention to driving. Pull offthe road and park before using the phone.
Respect the local regulations in countries where youdrive and use your GSM phone.If you want to use your phone in a vehicle, install thehands-free car kit which is designed for that purpose,still ensuring you give full attention to driving.Ensure that your phone and car kit do not block anyair bags or other security devices fitted in your car.
Information displayed on battery
Do not use your phone while driving
Philips855_APMEA.book Page 94 Friday, July 9, 2004 1:05 PM
Precautions 95
The use of an alarm system to operate a vehicle's lightor horn to indicate incoming phone calls is prohibitedon public roads in some countries. Check localregulations.
In case of hot weather or after a prolonged exposure tothe sun (e.g., behind a window or a windscreen), thetemperature of your phone's casing might increase,especially when featuring a metallic finish. Be verycareful in this case when picking up your phone andalso avoid using it with an ambient temperature over40°C.
Remember to observe the local regulationsregarding the disposal of your packagingmaterials, exhausted batteries and old phoneand please promote their recycling.
Philips has marked the battery and packaging withstandard symbols designed to promote the recyclingand appropriate disposal of your eventual waste.
EN 60950 Norm
Environmental care
The crossed-out dustbin signifies that thebattery should not be disposed of withgeneral household waste.
The mobius loop symbol signifies the la-belled packaging material is recyclable.
The green point symbol signifies that a fi-nancial contribution has been made tothe associated national packaging recov-ery and recycling system (e.g. EcoEmbal-lage in France).
The chasing arrows symbol on the plastictray and plastic bag indicate that thematerials are recyclable and also identifiesthe plastic material.
Philips855_APMEA.book Page 95 Friday, July 9, 2004 1:05 PM

96 Troubleshooting
Troubleshooting
The phone does not switch on
Remove and reinstall thebattery (see page 7). Make sureyou plugged the jack of thecharger into the correctconnector (see “Charge thebattery” page 9). Then chargethe phone until the batteryicon has stopped scrolling.Finally, unplug from thecharger and try to switch themobile on.
The display shows BLOCKED when you switch on
Somebody tried to use yourphone but didn’t know thePIN code nor the unblockingcode (PUK). Contact yourservice provider.
The display shows IMSI failure
This problem is related to yoursubscription. Contact youroperator.
The symbol is not displayed
The network connection islost. Either you are in a radioshadow (in a tunnel or betweentall buildings) or you areoutside the network coveragearea. Try from another place,try to reconnect to the network(especially when abroad),check that the antenna is inplace if your mobile has anexternal antenna, or contactyour network operator forassistance/information aboutthe network.
The display doesn’t respond (or the display responds slowly) to key presses
The display responds moreslowly at very lowtemperatures. This is normaland does not affect theoperation of the phone. Takethe phone to a warmer placeand try again. In other cases please contactyour phone supplier.
Philips855_APMEA.book Page 96 Friday, July 9, 2004 1:05 PM
Troubleshooting 97
Your phone doesn’t return to the idle screen
Press and hold c, or switchoff the phone, check that theSIM card and the battery areinstalled correctly, and switchit on again.
Your phone doesn’t display the phone numbers of incoming calls
This feature is network andsubscription dependent. If thenetwork doesn’t send thecaller’s number, the phone willdisplay Call 1 or Witheldinstead. Contact your operatorfor detailed information onthis subject.
You can’t send text messages
Some networks don’t allowmessage exchanges with othernetworks. First check that youentered the number of yourSMS center, or contact youroperator for detailedinformation on this subject.
You can’t start a TV slideshow
This feature needs your batteryto be at least half-charged.Recharge your handphone orplug the charger during theslideshow.
You can’t receive and/or store JPEG pictures
A picture may not be acceptedby your mobile phone if it istoo large, if its name is toolong, or if it doesn’t have thecorrect file format. See page 62for complete information onthis subject.
During battery charge, the battery icon shows no bar and the outline is flashing
Only charge the battery in anenvironment where thetemperature does not go below0°C (32°F) or above 50°C(113°F). In other cases pleasecontact your phone supplier.
The display shows SIM failure
Check that the SIM card hasbeen inserted in the rightposition (see page 7). If theproblem remains, your SIMcard may be damaged. Contactyour operator.
Philips855_APMEA.book Page 97 Friday, July 9, 2004 1:05 PM

98 Troubleshooting
You have the feeling that you missed some calls
To receive all calls, make surethat none of the features«Conditional call forward» or«unconditional call forward» isactivated (see page 79).
When attempting to use a feature in the menu, the mobile displays NOT ALLOWED
Some features are networkdependent. They are onlyavailable, therefore, if thenetwork or your subscriptionsupports them. Contact youroperator for detailedinformation on this subject.
The display shows INSERT YOUR SIM CARD
Check that the SIM card hasbeen inserted in the rightposition (see page 7). If theproblem remains, your SIMcard might be damaged.Contact your operator.
The autonomy of your phone seems lower than indicated in the user guide
The autonomy is linked toyour settings (e.g., ringervolume, backlight duration)and the features you use(WAP, IrDA, Bluetooth, etc.).To increase the autonomy, andwhenever possible, you mustdeactivate features you do notuse.
Your phone doesn’t work well in your car
A car contains many metallicparts that absorbelectromagnetic waves whichcan affect the phone’sperformances. A car kit isavailable to provide you withan external antenna andenables you to make andreceive phone calls withouthandling the handset.You should check with localauthorities if you are allowedto phone while driving.
Philips855_APMEA.book Page 98 Friday, July 9, 2004 1:05 PM
Troubleshooting 99
Your phone is not charging
Make sure you plugged thejack of the charger into thecorrect connector (see “Chargethe battery” page 9). If yourbattery is completely flat, itmight take several minutes ofpre-charge (up to 5 in somecases) before the charging iconis displayed on the screen.
Philips855_APMEA.book Page 99 Friday, July 9, 2004 1:05 PM

100 Icons & symbols
Icons & symbolsIn idle mode, several symbols can be displayedsimultaneously either on external screen or main screen.
If the network symbol isn’t displayed, the network isnot currently available. You may be in a bad receptionarea: move to a different location.
Silent - Your phone will not ring whenreceiving a call.
Vibra - Your phone will vibrate whenreceiving a call.
GPRS attach - Your mobile phone isconnected to the GPRS network.
SMS message - You have received a newmessage.
Voice mail - You have received a new voicemail.
Battery - The bars indicate the battery level(4 bars = full, 1 bar = low).
Alarm clock activated.
Roaming - Displayed when your phone isregistered to a network other than your own(especially when you’re abroad).
SMS full - Memory for messages is full.Delete old messages to receive new ones.
Call Forward Unconditional to number -All your incoming voice calls are beingforwarded to a number other than voice mail.
Call Forward to voice mailbox - All yourcalls are being forwarded to voice mail.
Home zone - A zone designated by yournetwork operator. Subscription dependent,contact your service provider for details.
GSM Network: your phone is connected toa GSM networkReception quality: the more bars are shownthe better the reception is.
Instant message - option is set to On.
Memory full - The phone’s memory is full.Delete items to store new ones.
MMS message - You have received a newmultimedia message.
Philips855_APMEA.book Page 100 Friday, July 9, 2004 1:05 PM

Philips authentic accessories 101
Philips authentic accessories
Some accessories can be included in the package ofyour mobile phone. Others might be added by youroperator, when you purchase the product. As aconsequence, the package contents may vary. Pleasecheck with your local dealer for price and availabilityof the items decribed below.
To maximise the performance of your Philips phoneand not to void the warranty, always purchase PhilipsAuthentic Accessories that are specially designed foruse with your phone. Philips Consumer Electronicscannot be held liable for any damage due to use withnon authorised accessories. Ask for Philips AuthenticAccessories where you purchased your Philips Phone.
Charges your battery in any AC outlet. Small enoughto carry in a briefcase/handbag.
Designed to operate your Philips mobile phonehands-free and easy to use, this compact hands-free
solution offers a high audio quality. Simply plug thekit into the vehicle auxiliary outlet.
In-line answer button offers you a simplifiedalternative to searching for the phone. Simply answeran incoming call by pressing the button. In idle mode,press to activate voice dial.
In certain countries, telephoning while driving isprohibited. For safe and trouble free installation, werecommend that specialized technicians install hands-free car kits.
A black leather carry case protects your phone fromnicks and scratches. Supplied with necklace.
This data cable allows you to display a slide show onyour TV. Simply connect the data end of the cable tothe headset (top) connector on the right handside ofyour phone, then connect the video end to the videoIN connector of your TV or VCR.See “TV Slideshow” page 72 for detailed informationon how to select pictures and display them in aslideshow.
Charger
Universal car kit
XTra deluxe headset
Carry case
TV Link
Philips855_APMEA.book Page 101 Friday, July 9, 2004 1:05 PM

102 Philips authentic accessories
This software is based in part on the work of theIndependent JPEG group.
Easy data connection to your Philips mobile phone:the USB cable enable high speed connection betweenyour phone and your computer. Just connect yourphone to the cable for an automatic organiser andphonebook synchronization within a few seconds.The provided software allows you to send faxes andSMS, access data communication facilities on mobilenetworks and connect to the Internet.
Your mobile phone is shipped with a CD Romcontaining Mobile Phone Tools, a software thatallows you to fully benefit from all the servicesavailable via Infrared. See “Use the phone as amodem” page 68 for information and also refer to thedocumentation available on the CD Rom.
Data connect kit
Mobile Phone Tools
Philips855_APMEA.book Page 102 Friday, July 9, 2004 1:05 PM

103
Limited warranty1. What Does This Limited Warranty Cover?
Philips warrants to the original retail purchaser(“Consumer” or “You”) that this Philips cellularproduct and all accessories originally provided byPhilips in the sales package (“Product”) are freefrom defects in materials, design andworkmanship under normal use in accordancewith the operating instructions and pursuant tothe following terms and conditions. This limitedwarranty extends only to the Consumer forProducts purchased and used in the originalcountry of purchase. The limited warranty is validonly in Philips’ intended country of sales of theproduct.
2. How Long is The Limited Warranty Period?
The limited warranty period for the Productextends for ONE (1) YEAR from the date ofpurchase of the Product, documented by validproof of purchase. The limited warranty fororiginal Philips rechargeable battery extends forsix (6) months from the date of purchase.
3. What Will Philips Do if The Product is Not FreeFrom Material Defects in Materials and
Workmanship During The Limited WarrantyPeriod?
During the limited warranty period, Philips or itsauthorized service representative will, at its optioneither repair or replace, without charge for parts orlabour, a materially defective Product with new orrefurbished parts or Product and return suchrepaired or replaced Product to the Consumer inworking condition. Philips will retain defectiveparts, modules or equipment.
Repaired or replaced Product will be covered bythis limited warranty for the balance of theoriginal limited warranty period or ninety (90)days from the date of repair or replacementwhichever is longer. Repair or replacement ofProduct, at Philips’ option is your exclusiveremedy.
4. What is Not Covered By This Limited Warranty?
This limited warranty does not cover::
a) Product that has been subjected to misuse,accident, shipping or other physical damage,improper installation, abnormal operationhandling, neglect, inundation, fire, water orother liquid intrusion; or
Philips855_APMEA.book Page 103 Friday, July 9, 2004 1:05 PM

104
b) Product that has been damaged due to repair,alteration, or modification by anyone notauthorized by Philips; or
c) Product that has reception or operationproblems caused by signal conditions,network reliability or cable or antennasystems; or
d) Product defects or problems caused by useswith non-Philips products or accessories; or
e) Product which warranty/quality stickers,product serial number or electronic serialnumber has been removed, altered orrendered illegible; or
f) Product purchased, used, serviced, or shippedfor repair from outside the original country ofpurchase, or used for commercial orinstitutional purposes (including but notlimited to Products used for rental purposes);or
g) Product returned without valid proof ofpurchase or which proof of purchase has beenaltered or is illegible.
h) Normal wear and tear or Force Majeure.
5. How Do You Get Warranty Service?
a) Return the Product to an authorized servicecenter of Philips. You may contact the localPhilips office for the location of the nearestauthorized service center.
b) The SIM card must be removed from theProduct before it is given to Philips. Philipsassumes no liability for damaged or loss of theSIM card or the data contained therein.
c) If the Product failure is not covered by thislimited warranty, or this limited warranty isinapplicable, void or invalid due to any termsand conditions stated herein, the Consumerwill be charged for the cost of repair orreplacement of the Product and all otherrelated cost incurred in repairing or replacingthe Product.
d) IMPORTANT - you are required to returnthe Product together with a valid proof ofpurchase which must identify the point ofpurchase, date of purchase, Product modeland Product serial number clearly.
6. Other Limitation: This Warranty is The EntireAgreement.
EXCEPT FOR THE EXPRESS WARRANTIESSET FORTH ABOVE AND THOSE IMPLIEDBY LAW AND WHICH CANNOT BEEXCLUDED OR MODIFIED BYAGREEMENT, PHILIPS PROVIDES NOOTHER WARRANTY WHETHER EXPRESSOR IMPLIED (WHETHER BY STATUTE,UNDER THE OPERATION OF LAW OROTHERWISE) AND SPECIALLY DISCLAIMS
Philips855_APMEA.book Page 104 Friday, July 9, 2004 1:05 PM
105
ANY WARRANTY OF SATISFACTORYQUALITY MERCHANTABILITY ORFITNESS FOR A PARTICULAR PURPOSE.PHILIPS’ TOTAL LIABILITY FORDAMAGES RELATING TO OR ARISINGOUT OF THE PURCHASE OR USE OF THEPRODUCT, REGARDLESS OF THE TYPEOR CAUSE OF SUCH DAMAGE OR THEFORM OR CHARACTERISATION OF THECLAIM ASSERTED (E.G. CONTRACT ORTOPIT), SHALL NOT EXCEED THEORIGINAL PURCHASE PRICE PAID FORTHE PRODUCT.
HOWEVER IN NO EVENT SHALL PHILIPSBE LIABLE FOR ANY PUNITIVE, SPECIAL,INCIDENTAL, INDIRECT ORCONSEQUENTIAL DAMAGES(INCLUDING BUT NOT LIMITED TO THELOSS OF USE, LOSS OF TIME,INCONVENIENCE, COMMERIAL LOSS,LOST PROFITS, LOST BUSINESSOPPORTUNITIES, COST OFSUBSTITUTION OF GOODS OR SERVICES,INVESTMENTS, DAMAGE TO GOODWILLOR REPUTATION, OR LOSS OF DATA ANDCLAIMS BY THIRD PARTIES) RESULTINGFROM PURCHASE OR USE OF THEPRODUCT, TO THE FULLEST EXTENTALLOWED BY LAW, WHETHER OR NOT
PHILIPS HAS BEEN ADVISED OF THEPOSSIBILTY OF SUCH DAMAGES. THESELIMITATIONS SHALL APPLYNOTWITHSTANDING THE FAILURE OFTHE ESSENTIAL PURPOSE OF ANYLIMITED REMEDY.This limited warranty represents the complete andexclusive agreement between the Consumer andPhilips with respect to this cellular Product and itsupercedes all prior agreements between theparties, oral or written, and all othercommunications between the parties relating tothe subject matter of this limited warranty. Nocarrier, retailer, agent, dealer, employee, thereof,or employee of Philips is authorized to makemodifications to this limited warranty and youshould not rely on any such representation.
This limited warranty does not affect theConsumer’s statutory rights under applicablenational laws in force.
Philips855_APMEA.book Page 105 Friday, July 9, 2004 1:05 PM